

DAY 6 Bicycle Owner's Manual

Owner’s Manual
At Day 6, we hope you will enjoy riding our bicycles as much as we enjoy
designing them. We have truly combined the best features of a recumbent (feet
on the ground; wide, comfortable seat and back; upright head position; no wrist
stress; easy on and off) with the best features of a traditional bike (dual 26”
wheels, positive steering, classic styling, easy to find replacement parts) to give
you one exceptional biking experience!
If you have any questions about your bicycle, please call the dealer you
purchased the bicycle from or call Day 6 at 888/789-DAY6 (3296).
To activate you warranty, simply call us at 888/789-DAY6 (3296). We will
need the serial number on the bottom of your bike along with your name,
address, phone number, name of dealer you purchased the bike from, and e-mail
address if available. Thank you!
2

Table of Contents
Day 6 Bicycles - Assembly Instructions..................................................................4
Step 1: Install Fork and Stem .................................................................................4
Step 2: Install handlebars........................................................................................5
Step 3: Install front brake cable to lever................................................................5
Step 4: Install front tire...........................................................................................6
Step 5: Adjust brakes...............................................................................................7
Step 6: Adjust handlebars.......................................................................................8
Step 7: Install pedals................................................................................................8
Step 8: Install reflectors...........................................................................................8
The Seat.....................................................................................................................9
Bicycle Inspection...................................................................................................11
Bicycle Cleaning.....................................................................................................13
Lubrication.............................................................................................................13
Riding Rules............................................................................................................14
Riding Tips..............................................................................................................14
Day 6 Bicycles Limited Warranty.........................................................................15
3
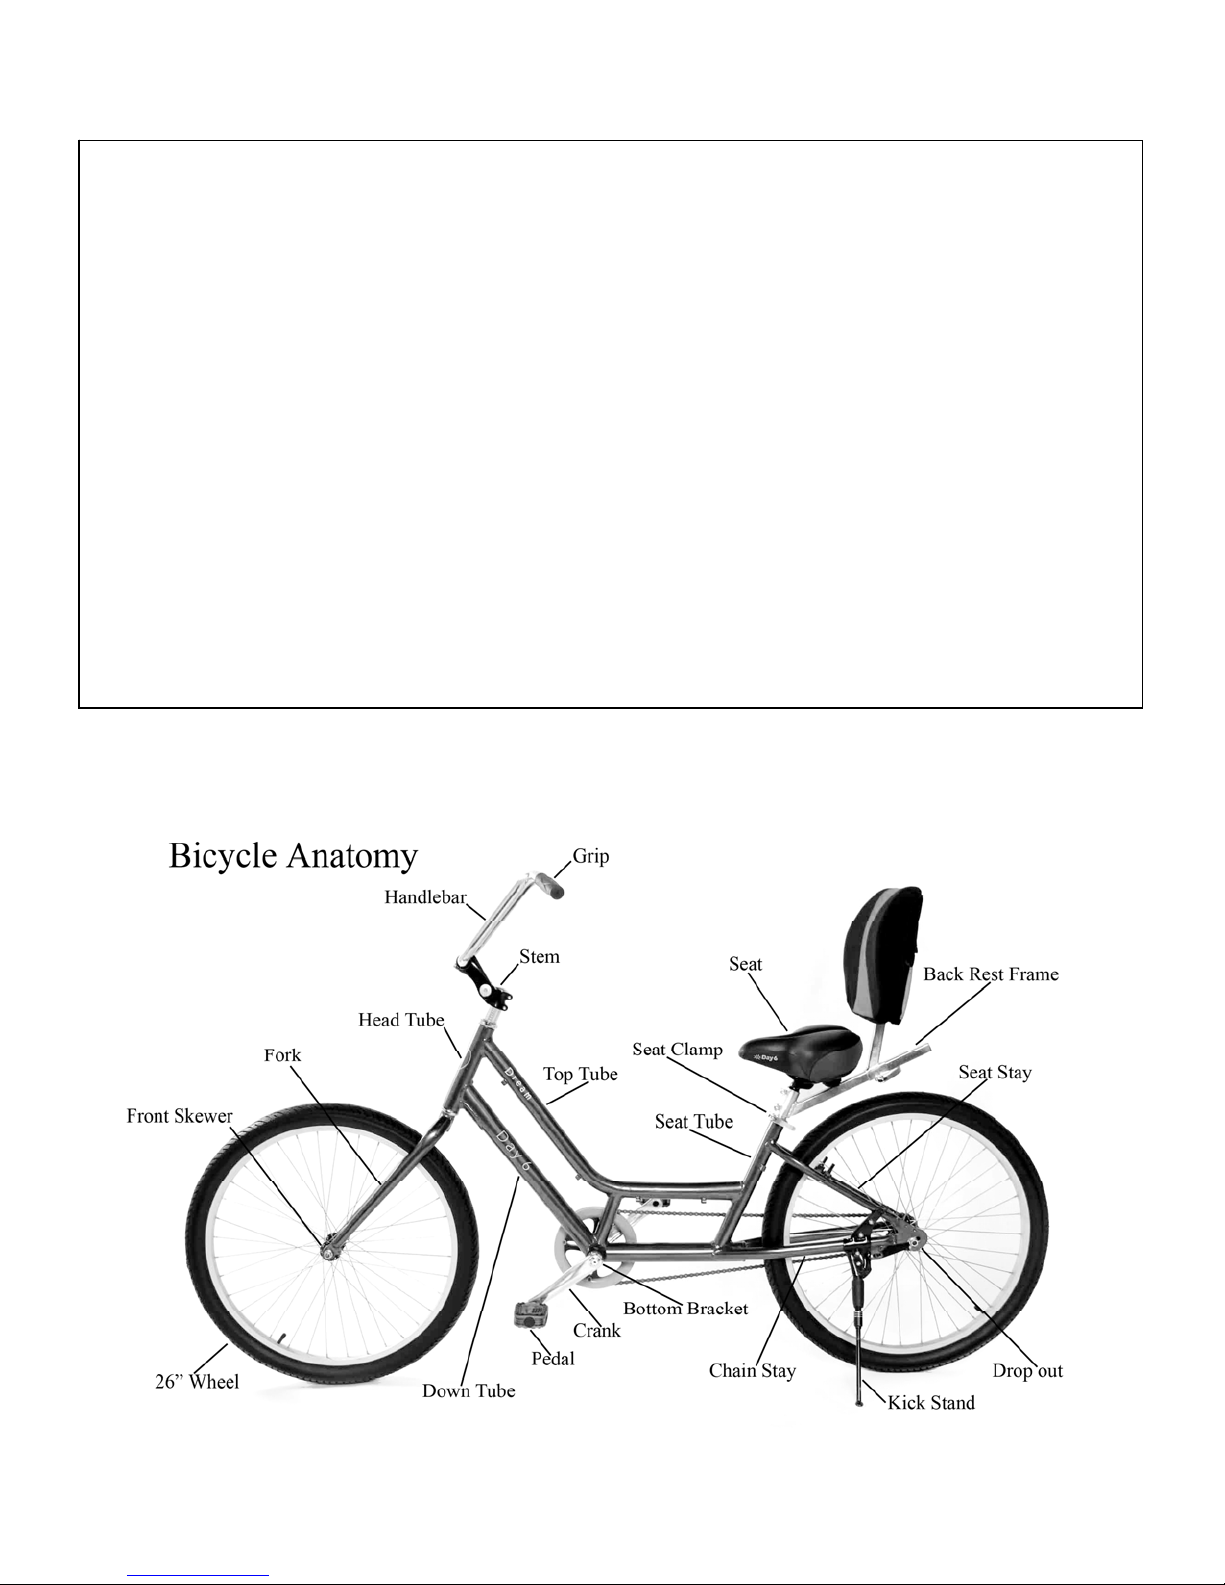
Day 6 Bicycles - Assembly Instructions
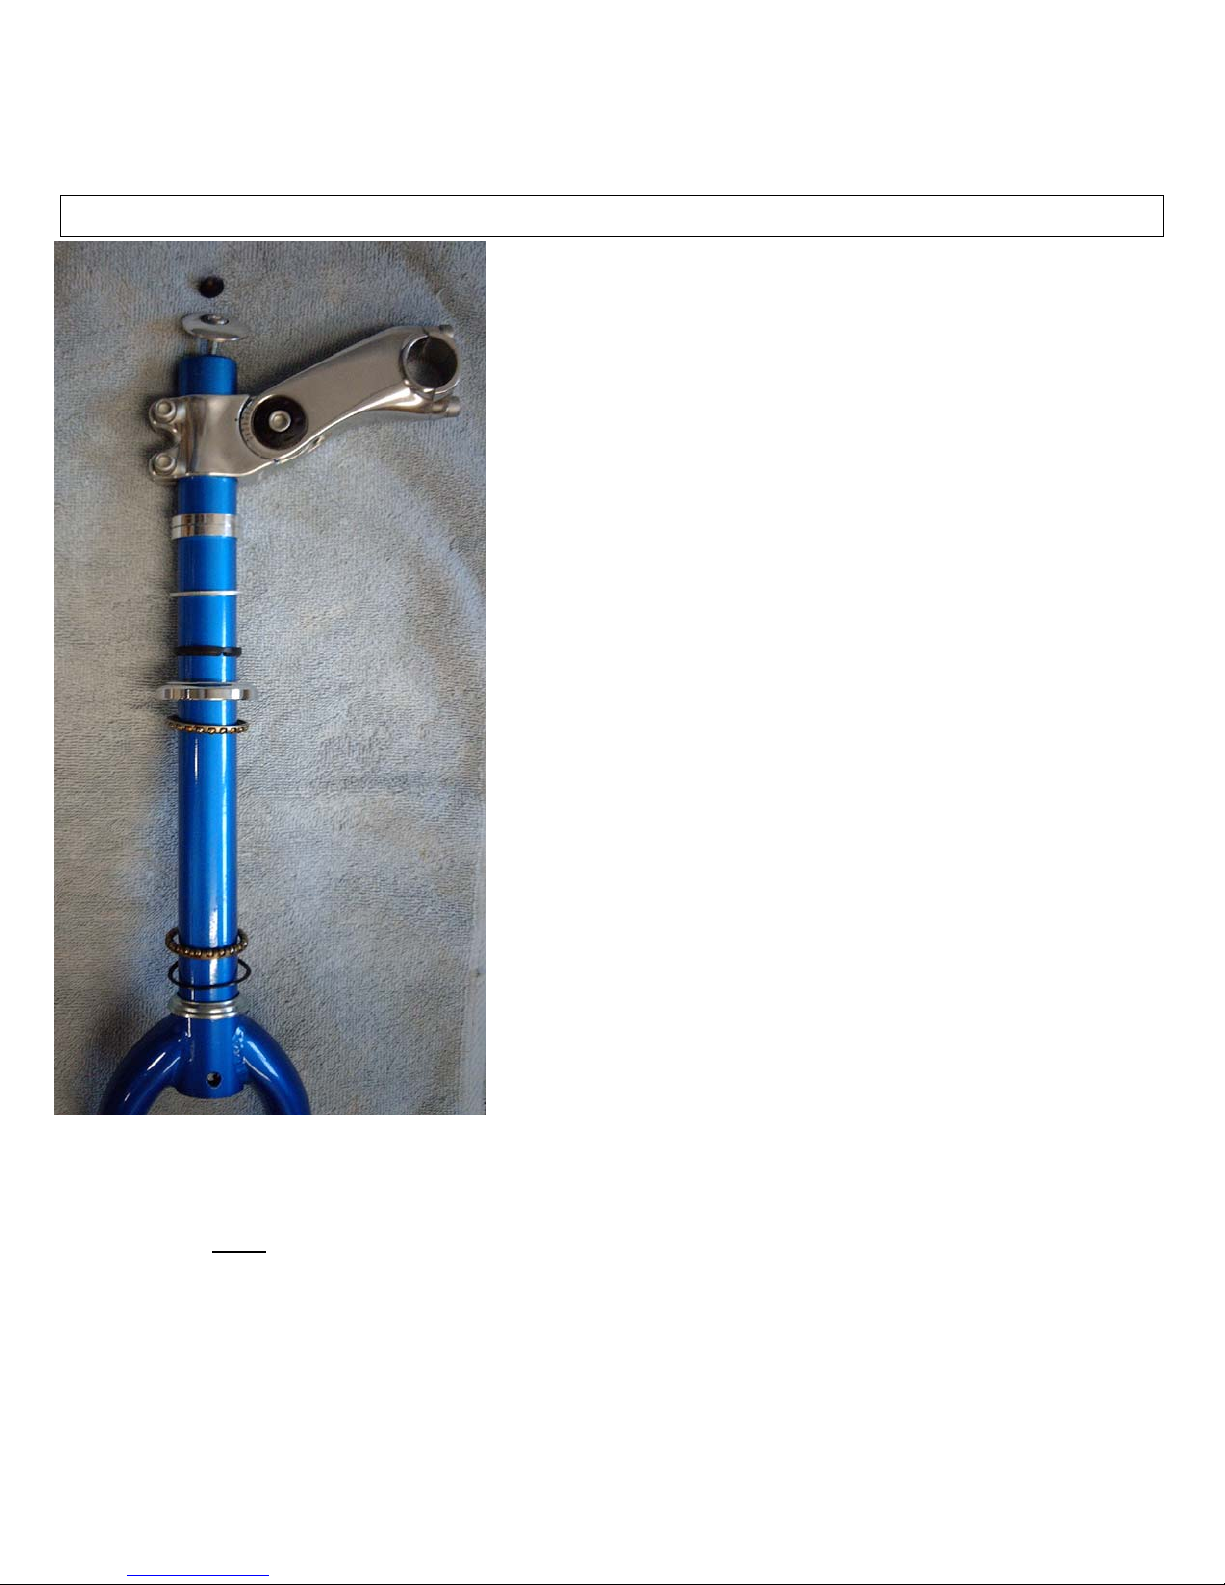
Step 1: Install Fork and Stem
Parts are shown in order they are placed on fork.
1. Slide thin rubber washer over fork so it sits
on chrome ring at base.
2. Place bearing on thin rubber washer –
round balls pointing up.
3. Slide fork with just the bearing and thin
rubber washer through head tube.
4. Place other bearing over fork –
round balls facing down
5. Place heavy chrome ring over bearing
6. Place thicker rubber washer over chrome
ring – flat side up (pointed side down)
7. Place thin steel washer over rubber washer
8. Place two 5mm spacers over steel washer
9. Place stem on top of spacer(s)
10. Place cap with hole on top of stem
11. Place bolt through hole in the cap and
thread into the (starfangled) nut inside the fork.
1:1
12.Tighten bolt firmly until the front wheel, bearings, and fork are secure.
NOTE: DO
This could pull the nut out of the fork. (You don’t want that to happen) Be arings should be loose
enough to allow the front wh eel to turn but not so loose that you can feel and/or hear them if you
dropped the bike on its tires from 6”.
13. Place rubber cap inside of bolt head.
NOT
OVERTIGHTEN the bolt.
4
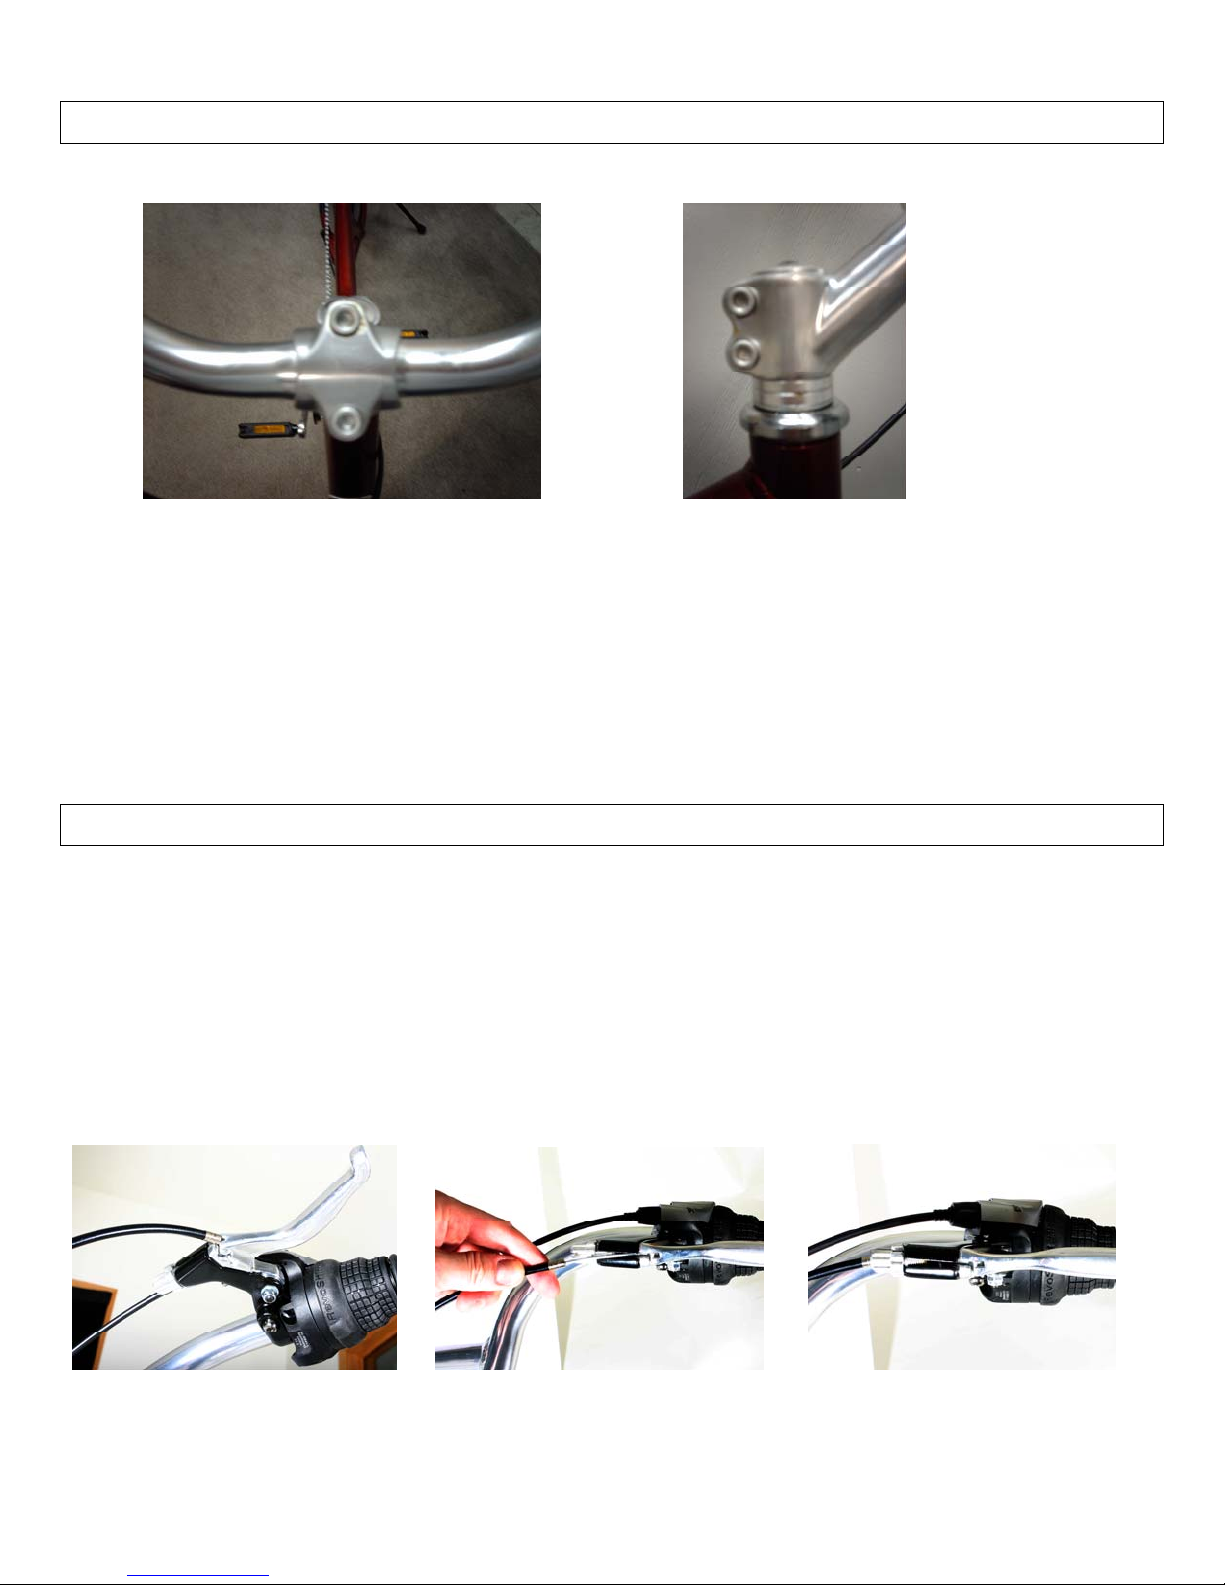
Step 2: Install handlebars
2:1 2:2
1. Center handlebars in stem and tighten both bolts enough to keep handlebars from rotating down.
(2:1)
2. Be sure cables are not tangled and that they remain on the same side of the bike that they are found
on the frame.
3. Tighten bolts on the side of the stem just enough to keep front wheel from flopping. (2:2) (They
will be firmly tightened later, after installing the front wheel)
Step 3: Install front brake cable to lever
1. Place the cylinder (on the end of the brake cable) into the corresponding ho le in the brake lever.
(3:1)
2. Turn the brake barrel and threaded nut so the slots line up.
3. Pull the brake cable through the slot and push brake cable housing into end of brake lever. (3:2)
4. Turn brake barrel and threaded nut so cable will not fall out. (3:3)
3:1 3:2 3:3
5
 Loading...