

Page 1
S
OLAR
FOR
W
IRELESS
I
NSTALLATION
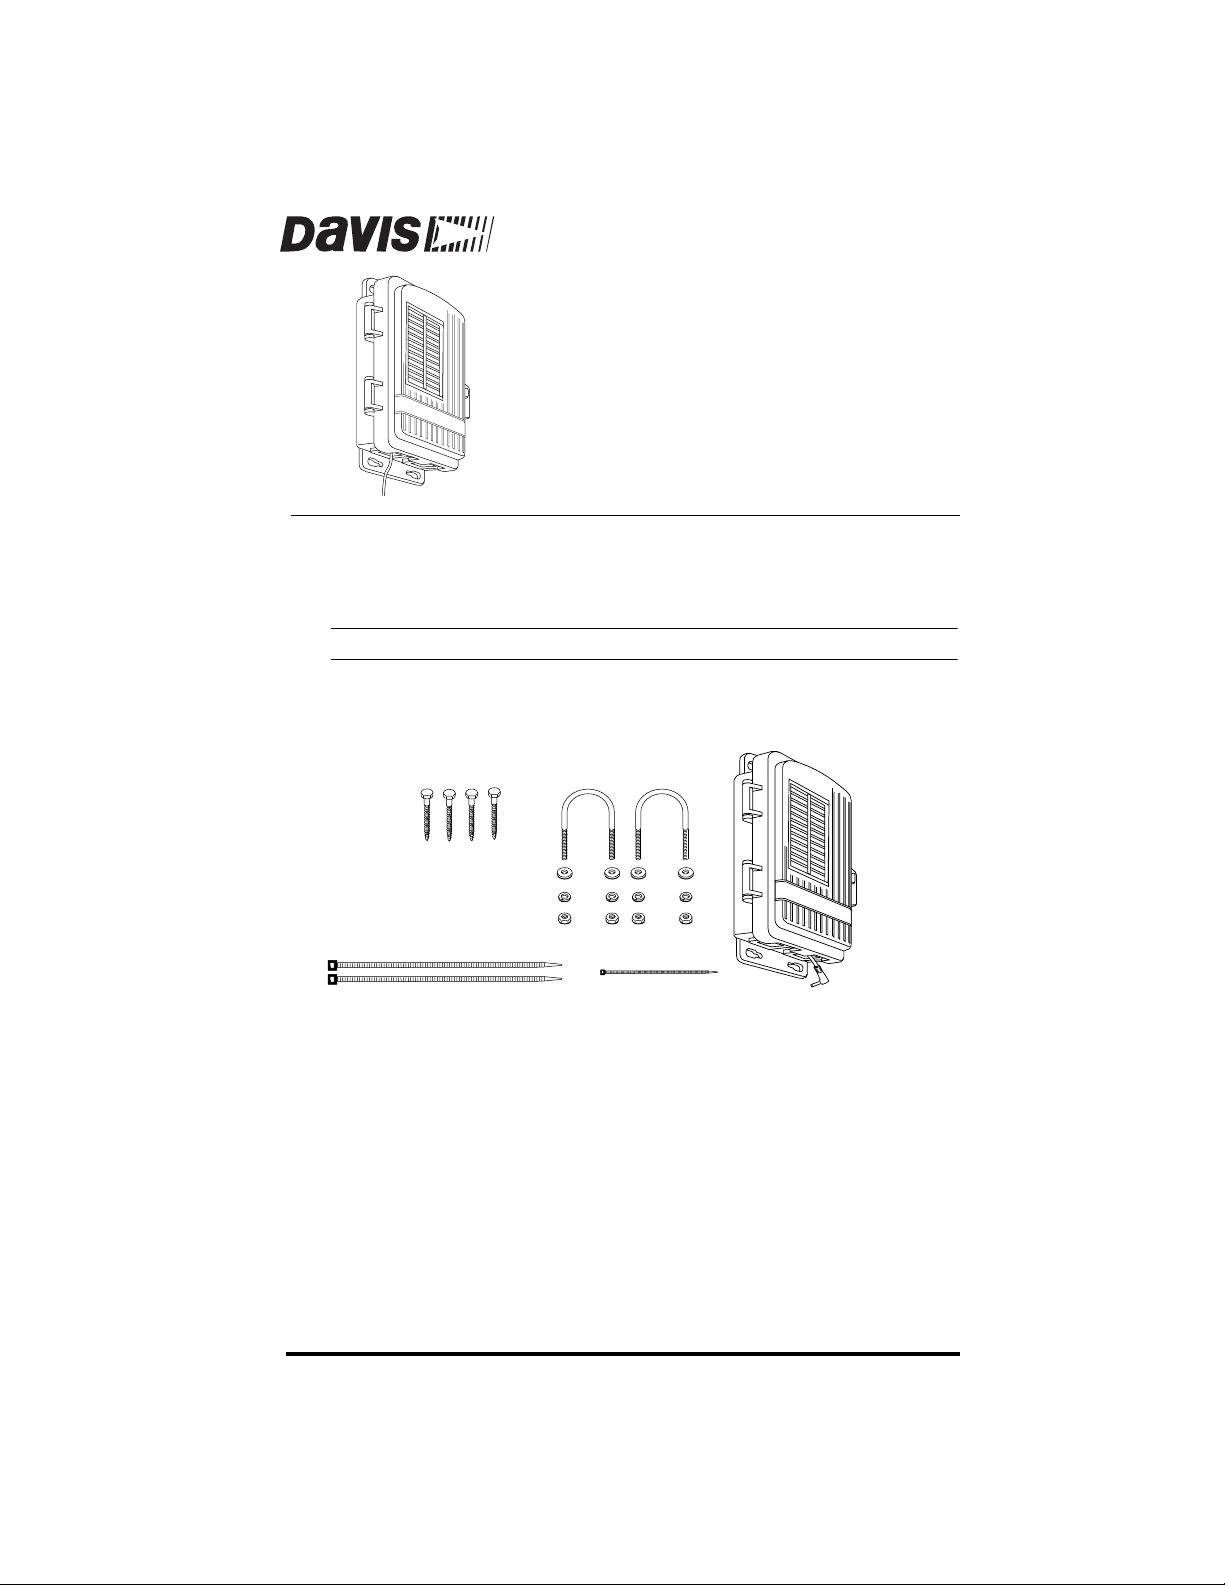
The Solar Power Kit (#6610) provides power to a Wireless Vantage Pro console
when mounted in a remote location or in a field station. The kit consists of
three key elements – a solar panel, a 6-Volt battery, and a regulator circuit –
mounted in a protective housing:
Note: Use Solar Power Kit #7707 with Cabled Vantage Pro consoles.
P
OWER
V
M
K
ANTAGE
ANUAL
P
Components
The Solar Power Kit includes the following components and hardware:
1/4" x 1-1/2" Lag Screws
1/4" Flat Washers
1/4" Lock Washers
1/4" Hex Nuts
8" Cable Ties
U-Bolts
4" Cable Tie
Shelter
Power Cable
IT
RO
Tools for Setup
Adjustable wrench or 7/16” wrench
✦
✦
Drill and 3/16” (5 mm) drill bit (if mounting on a vertical surface)
Location Tips
The following tips should help you find the best possible location and position
for your Solar Power Kit.
✦
The panel should be mounted facing South in the Northern Hemisphere
and North in the Southern Hemisphere.
✦
Position the solar panel to have maximum exposure to the sun
panel works best when the surface of the panel receives full sunlight.
Mount the panel away from fences, buildings, trees or other equipment
or obstructions that may cast a shadow over the panel.
.
The solar
Product # 6610
Page 2
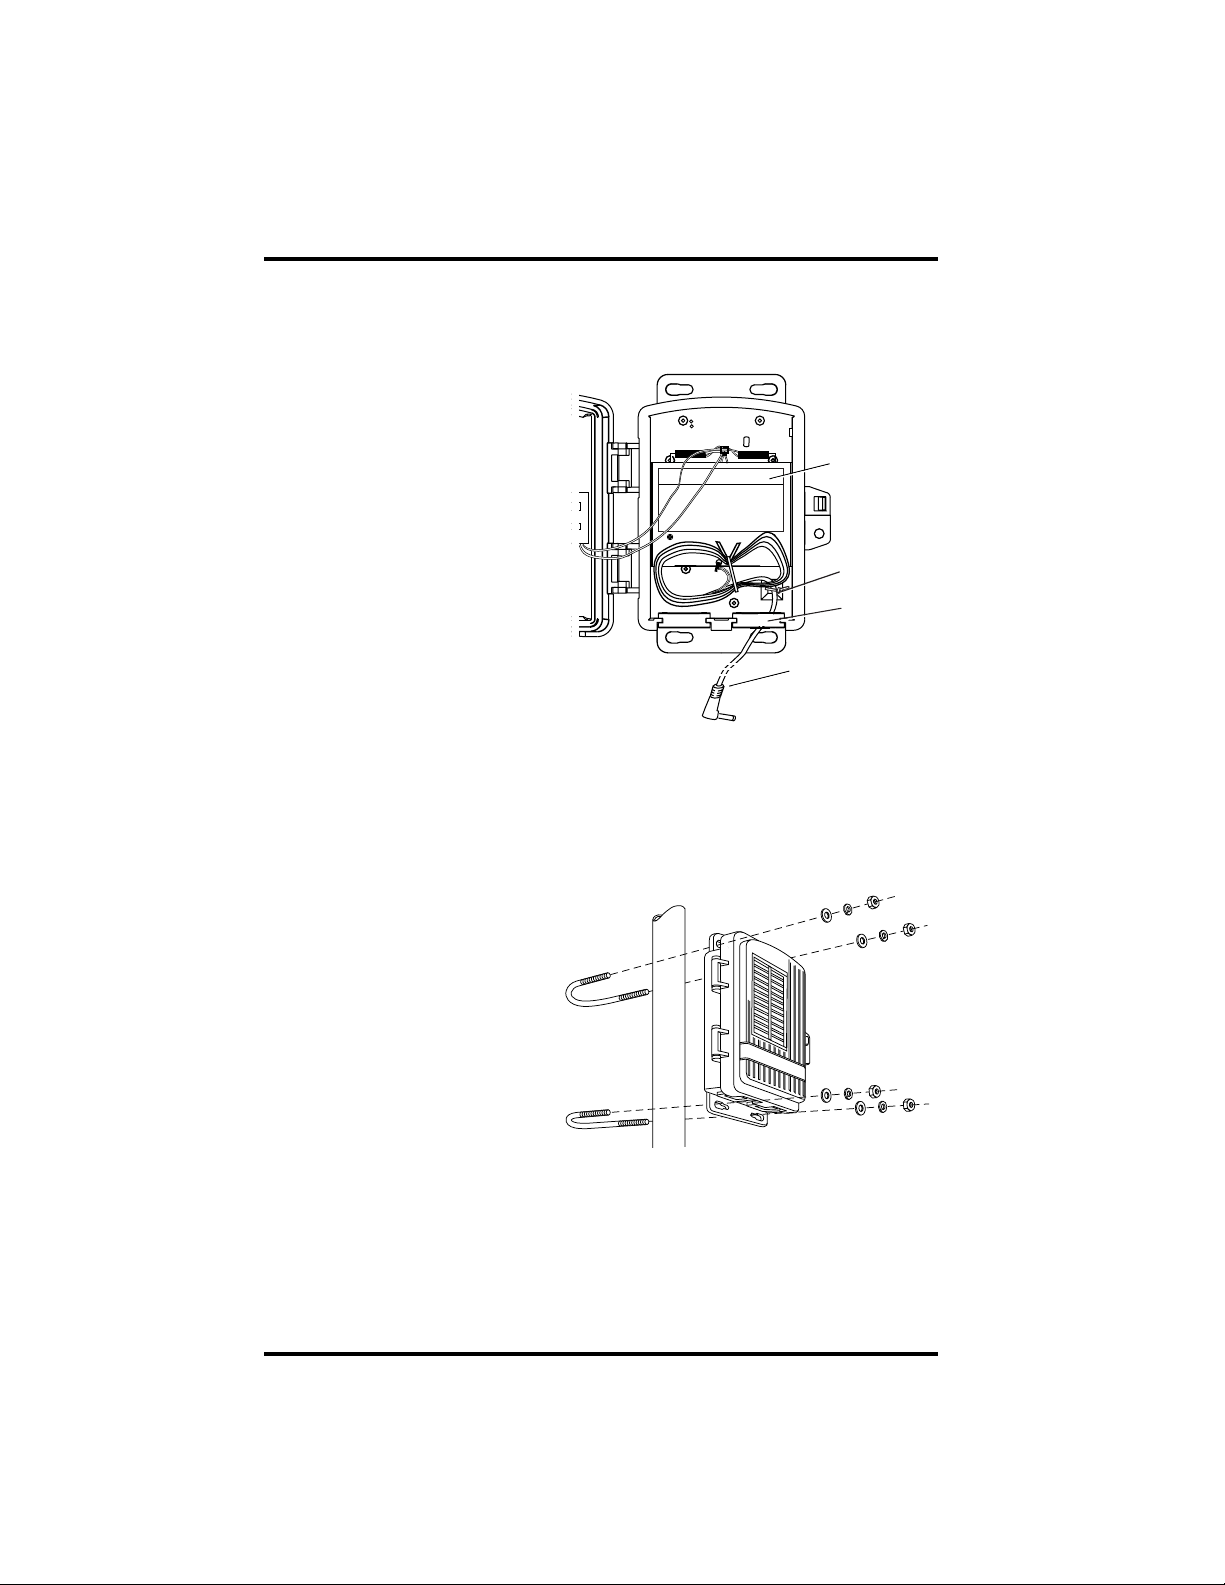
Securing the Power Cable
Secure the power cable to prepare the Solar Power Kit for installation.
1. Determine how much of
the 20’ (6 m) power cable is
needed to reach your Wireless Vantage Pro console.
2. Pull that length of cable
through the rubber grommet located in the bottom
of the shelter.
3. Secure the cable inside the
shelter with a 4” Cable Tie
fastened to the cable tie
mount.
The cable tie provides
strain relief for the power
cable.
Battery
Secure Cable
Using
Cable Tie Mount
Grommet
Power Cable
Securing the Power Cable
Mounting the Solar Power Kit on a Pole
The U-bolts included with the Solar Power Kit fit poles from 3/4” to 1 1/4”
(19mm to 31mm) in diameter.
1. While holding the shelter against the pole, place
a U-bolt around the pole
and through the two
holes at the top of the
shelter.
2. Place a flat washer , a lock
washer and a hex nut on
each of the bolt ends.
3. Tighten the nuts using an
adjustable wrench or 7/
16” wrench, .
4. Place the second U-bolt
around the pole and
through the two holes at the bottom of the shelter.
Put a flat washer, a lock washer, and a hex nut on each bolt end, and
tighten the hex nuts.
U-Bolt
Mounting Solar Power Kit on a Pole
Hex
Nut
Lock
Washer
Flat
Washer
Page 2 Solar Power Kit for Wireless Vantage Pro
Page 3

Mounting the Solar Power Kit on a Post
1. With a 3/16” (5 mm) drill bit, drill two holes approximately 2" (50 mm)
apart. Use a carpenter’s level to ensure the holes will be level.
2. Drill two more holes 7-1/32”
below the upper holes.
3. Insert the 1/4” x 1-1/2” lag
screws through the flat washers, and through the holes at
the top of the shelter into the
post.
Using an adjustable wrench
or 7/16” wrench, tighten the
lag screws.
4. Insert the 1/4” x 1-1/2” lag
screws through the flat washers, and through the holes at
the bottom of the shelter into the post.
Using an adjustable wrench or 7/16” wrench, tighten the lag screws.
Mounting Solar Power Kit on a Post
Flat
Washer
Lag
Screw
Connecting Power to the Vantage Pro Console
1. The Solar Power Kit’s connector plugs directly into the power jack located
on the bottom of the Vantage Pro Console. See your Vantage Pro Console
Manual for details.
2. Secure the power cable run using the included 8” cable ties.
Troubleshooting
While the Solar Power Kit is designed to provide years of trouble-free operation, occasional problems may arise. If you experience a problem, please check
the troubleshooting tips below before calling technical support.
Solar panel fails to power station and battery is over 5 years old
✦
As the battery ages, it will lose capacity and may completely discharge.
If this is the case, simply replace the battery.
CAUTION: Do not incinerate the used battery; it may burst. Arrange for proper recycling in your
locality.
✦
Solar panel fails to power station and battery is less than 5 years old
If the solar kit fails to power the station, try the following:
1. Make sure the panel is not being shaded from the sun.
2. Open the solar panel shelter and check that the wire connections
are secure and that battery is free from corrosion and excessive
deposits on the terminal.
Mounting the Solar Power Kit on a Post Page 3
Page 4

3. Clean the solar panel using a water spray, or a soft cloth and
soapy water followed by a clean water rinse.
4. Check the battery’s voltage with a voltmeter; the battery must
have at least 5.5 V to power the station. More than 6 V indicates
an adequately-charged battery.
5. Try exposing the kit (with console unplugged) to ample sunlight
for a week, or, use a charger designed to recharge a 6 V gel cell
battery. If you are unable to charge the battery above 6 V, replace
the battery.
If, after checking this troubleshooting guide you are unable to solve the problem, please call our technical support team at (510) 732-7814 for assistance
(M-F, 7 am–5:30 pm PST).
Note: Please do not return your unit for repair without prior authorization.
Specifications
Operating Temperature. . . . . . . . . . . . . . . . . . . . . . . . . . . . –4° to 120° F (–20° to 50° C)
Non-operating Temperature . . . . . . . . . . . . . . . . . . . . . . . . –50° to 158° F (–45° to 70° C)
Battery . . . . . . . . . . . . . . . . . . . . . . . . . . . . . . . . . . . . . . . 6 Volt 1.3 Amp Hour Lead-Acid
Solar Panel . . . . . . . . . . . . . . . . . . . . . . . . . . . . . . . . . . . . 0.5 watts
Power Cable Length . . . . . . . . . . . . . . . . . . . . . . . . . . . . . . 20’ (6 m)
Dimensions . . . . . . . . . . . . . . . . . . . . . . . . . . . . . . . . . . . . 6.25” x 2.25” x 7.88” (158 x 57 x 200 mm)
Weight . . . . . . . . . . . . . . . . . . . . . . . . . . . . . . . . . . . . . . . 1 lb. 13.50 oz. (.836 kg)
Product Numbers: 6610
Davis Instruments Part Number: 7395.306
Solar Power Kit for Wireless Vantage Pro
Rev A. Manual (7/27/01)
This product complies with the essential protection requirements of the EC EMC Directive 89/336/EC.
Copyright © 2001 Davis Instruments Corp. All rights reserved.
(Powersonic PS-612 or equivalent)
3465 Diablo Avenue, Hayward, CA 94545-2778
510-732-9229 • Fax: 510-732-9188
E-mail: info@davisnet.com • www.davisnet.com
 Loading...