

Page 1
Installation Instructions
This manual provides installation instructions for CarChip Fleet Pro(# 8246).
Refer to the DriveRight Fleet Management Software’s (FMS) Getting Started
Guide, User’s Manual, and the software’s online help for the additional information necessary to set up and use your CarChip Fleet Pro.
Note: The DriveRight FMS User’s Manual is in the Adobe Acrobat file “User’s Manual.pdf”
located in the program folder.
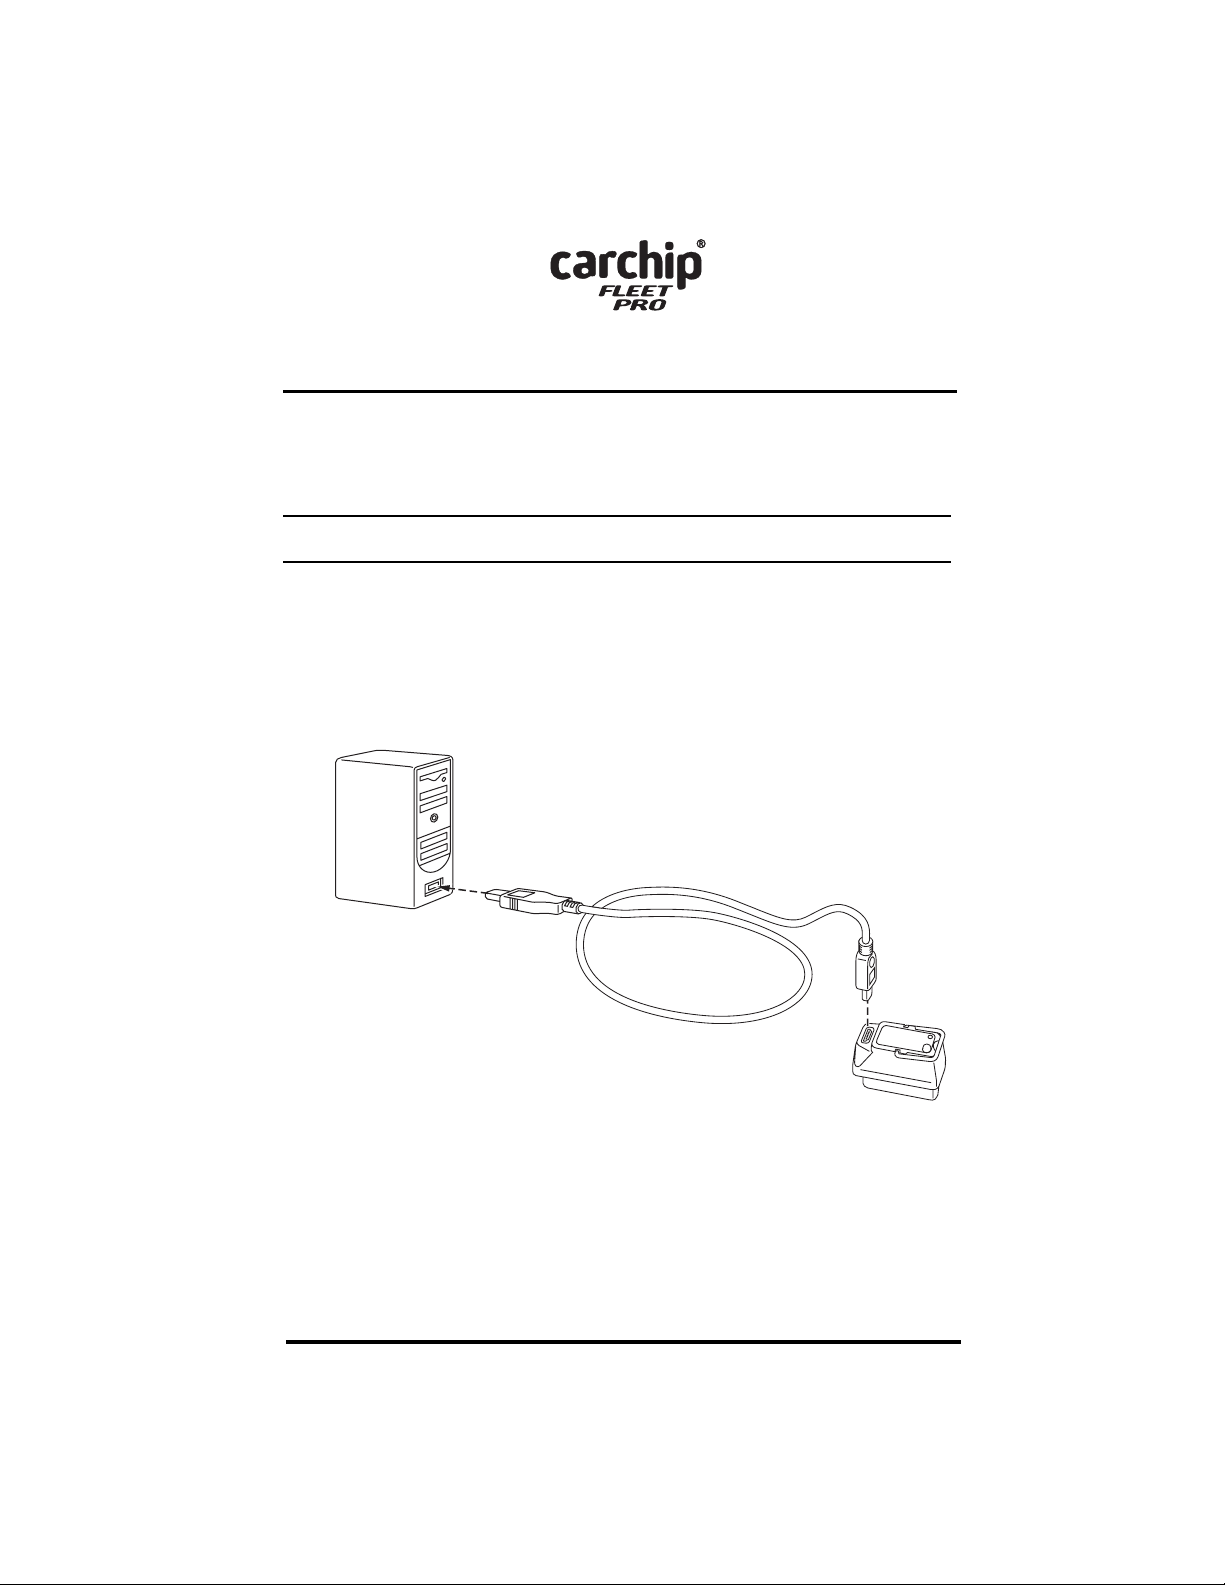
Connecting CarChip to Your Computer
To connect the CarChip Fleet Pro data logger to your computer using
a USB connector:
1. Insert the USB connector of the download cable into a USB port.
2. Plug the smaller connector into the CarChip Fleet Pro data logger port.
USB Cable
4' (1.2 m)
USB Port
CarChip
Fleet Pro
Data Logger
Before Installing CarChip Fleet Pro in a Vehicle
Before installing CarChip Fleet Pro in your vehicle, we recommend that you
add the device to the database in the DriveRight Fleet Management Software
(FMS) and check the CarChip settings.
1. Add the CarChip to your DriveRight FMS database.
1
Page 2

Installing CarChip in a Vehicle
Note: Refer to the DriveRight FMS Help or User’s Manual for instructions on using
DriveRight FMS.
2. In DriveRight FMS, verify these CarChip settings and change if necessary:
• Time and date
• Engine performance data parameters
• Speed bands
• Acceleration limits and deceleration limits
• LED State (Enabled/Disabled)
• Alarm State (High/Medium/Low/Disabled)
3. Use the Clear CarChip Memory command in the CarChip menu to clear
the device’s memory. This step ensures that none of the manufacturing test
data remains when you put your CarChip into service.
4. Select the Set CarChip LED State command in CarChip menu. Select
Enabled to turn ON the LED, or select Disabled to turn OFF the LED.
5. Select the Set CarChip Alarm command in the CarChip menu. Select
High for a high-volume alarm, Medium for medium-volume alarm, Low
for a low-volume alarm, or select Disabled to turn OFF the alarm.
The alarm functions in the following manner:
• One beep when initially connected to the vehicle’s OBDII port.
• Two beeps when the vehicle’s OBDII protocol is identified.
• Five beeps for each acceleration & deceleration violation.
• Continuous beeps when violating the speed limit.
Installing CarChip in a Vehicle
Use these instructions to install CarChip in your vehicle’s OBDII port.
1. Find the OBDII port on your vehicle.
2
Page 3

Installing CarChip in a Vehicle
The OBDII port will be located within 3 feet of the steering wheel within or
near the general area indicated by the dotted line in the illustration below. The
port should be easily accessible to a person in the driver's seat.
OBD II Port
If you have trouble finding the OBDII port, check the following areas:
• Under the dash
• In front of the passenger seat
• Behind the ash tray
• Behind a small access panel in the dash
• In or around the center console
2. Plug CarChip into the OBDII port checking to make sure the indicator light
blinks when first connected.
Note: If the indicator light is enabled, which is its default setting, it continuously blinks when
connected to a vehicle. If the indicator is disabled, it stops blinking once is has
established communication with the OBDII computer.
CarChip
Fleet Pro
Data Logger
OBD II
Connector
3
Page 4

Contacting Davis Technical Support
If you have questions, or encounter problems installing or operating your CarChip Fleet Pro data logger, first check the troubleshooting information in the
DriveRight FMS Help and User’s Manual. If you are unable to resolve the
problem or if you have questions about CarChip, please contact Davis Technical Support.
Note: Please do not return items to the factory for repair without prior authorization.
Phone Support:
(510) 732-7814 – Monday – Friday, 7:00 a.m. – 5:30 p.m. Pacific Time.
(510) 670-0589 – Fax to Technical Support.
Email Support:
support@davisnet.com – E-mail to Technical Support.
info@davisnet.com – E-mail to Davis Instruments.
Web Support:
www.davisnet.com – Copies of this and other manual are available on the
“Support” page. Watch for FAQs and other updates.
CarChip Fleet Pro Installation Manual
Rev. A, April 19, 2007
Document Part Number: 07395.228
For CarChip Fleet Pro # 8246
®
CarChip
© Davis Instruments Corp. 2007. All rights reserved.
Information in this document subject to change without notice.
is a registered trademark of Davis Instruments Corp., Hayward, CA.
3465 Diablo Avenue, Hayward, CA 94545-2778 U.S.A.
510-732-9229 • Fax: 510-732-9188
E-mail: info@davisnet.com • www.davisnet.com
 Loading...