

Davis 7846, 7848 Installation Manual
EAF
L
S
TANDARD
NSTALLATION MANUAL
I
The leaf wetness sensor enables the GroWeather™ to detect the presence of
surface moisture on foliage and calculate the duration of wetness. When moisture is present, the sensor detects an electrical resistance change between the
gold-plated elements of the grid. This is displayed by the GroWeather console
as a value between 0 (dry) and 15 (wet). Using the GroWeatherLink
you may select your own wetness threshold; the software will then calculate
leaf-wet hours.
C
OMPONENTS
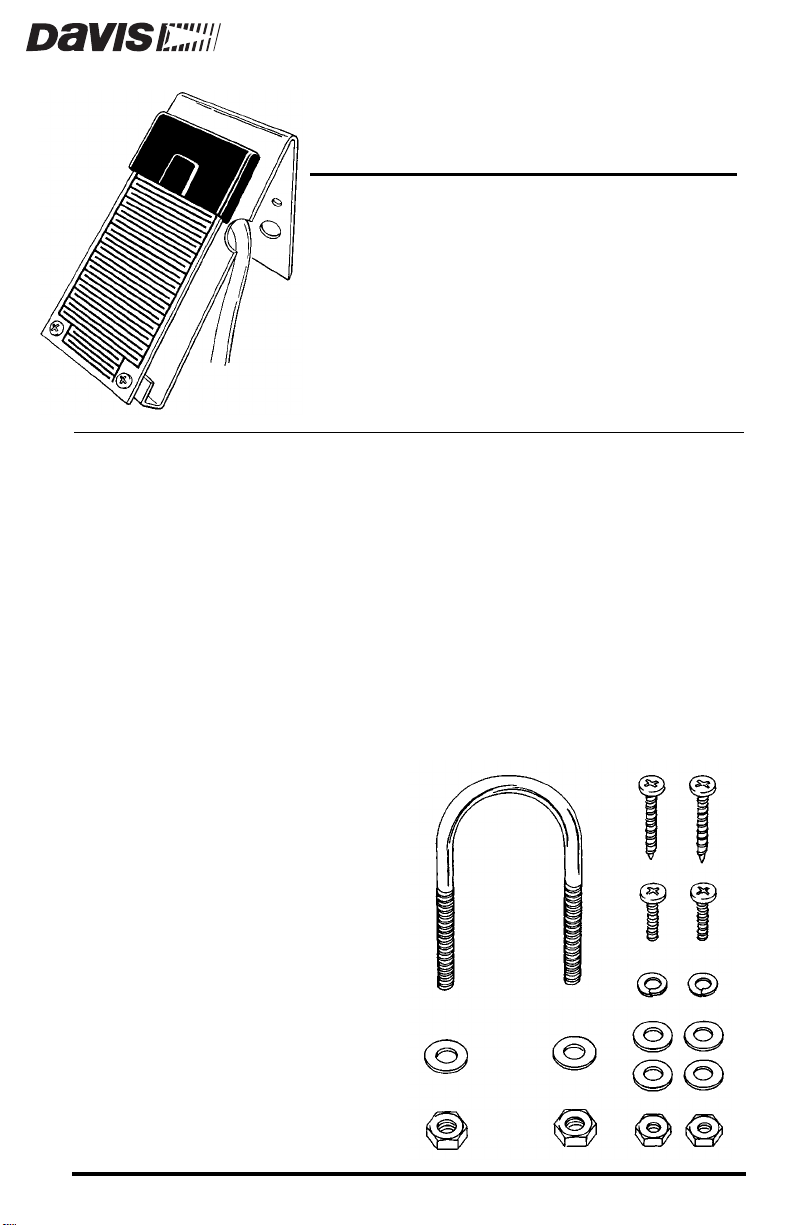
The leaf wetness sensor includes the following components. Please make sure
you have all listed components before continuing.
✦
Leaf Wetness Sensor with
attached mounting bracket
The standard version of
the sensor includes an
attached 40’ (12 m) cable.
The industrial version
includes a 16’ (5 m) cable.
✦
Installation Hardware Kit
✦
One 1-1/2" U-Bolt
✦
T wo 1/4" Flat Washers
✦
Two 1/4" Hex Nuts
Two #8 Wood Screws
✦
Two #8 x 3/4"
✦
Machine Screws
✦
Four # 8 Flat Washers
✦
Two # 8 Lock Washers
✦
Two # 8 Hex Nuts
ETNESS SENSOR
W
& I
NDUSTRIAL
®
software,
Product # 7846 & 7848

OOLS
T
AND
You may need some of the following tools and materials in order to complete
your installation. Please be sure you have everything you need before beginning.
✦
✦
✦
✦
ATERIALS
M
Medium Phillips Screwdriver
Wrench
Drill with 7/32" (5.5 mm) Drill Bit
To drill holes in the Sensor Mounting Arm (SMA) if installing on an
older version of the SMA.
7/16" Wrench or Adjustable Wrench
To tighten hex nuts if installing on a pipe.
N
EEDED
T
ESTING
S
THE
ENSOR
Y ou may test the sensor befor e you install it or you may test it after installing it.
The instructions below provide a quick description of the suggested test procedure.
1. Attach the sensor cable to the connector S3 on the sensor interface module (SIM).
Consult the installation manual for instructions
2. Press the appropriate key(s) to make sure you are getting a leaf wetness reading on
the console.
Consult the GroWeather manual for instructions on displaying leaf wetness.
3. Drop or spray water onto the sensor and make sure the reading changes.
Page 2 Leaf Wetness Sensor
NSTALLING
I
Follow the instructions in this section to install your sensor. Before you begin,
consult the System Installation manual for instructions on labeling the leaf wetness sensor cable.
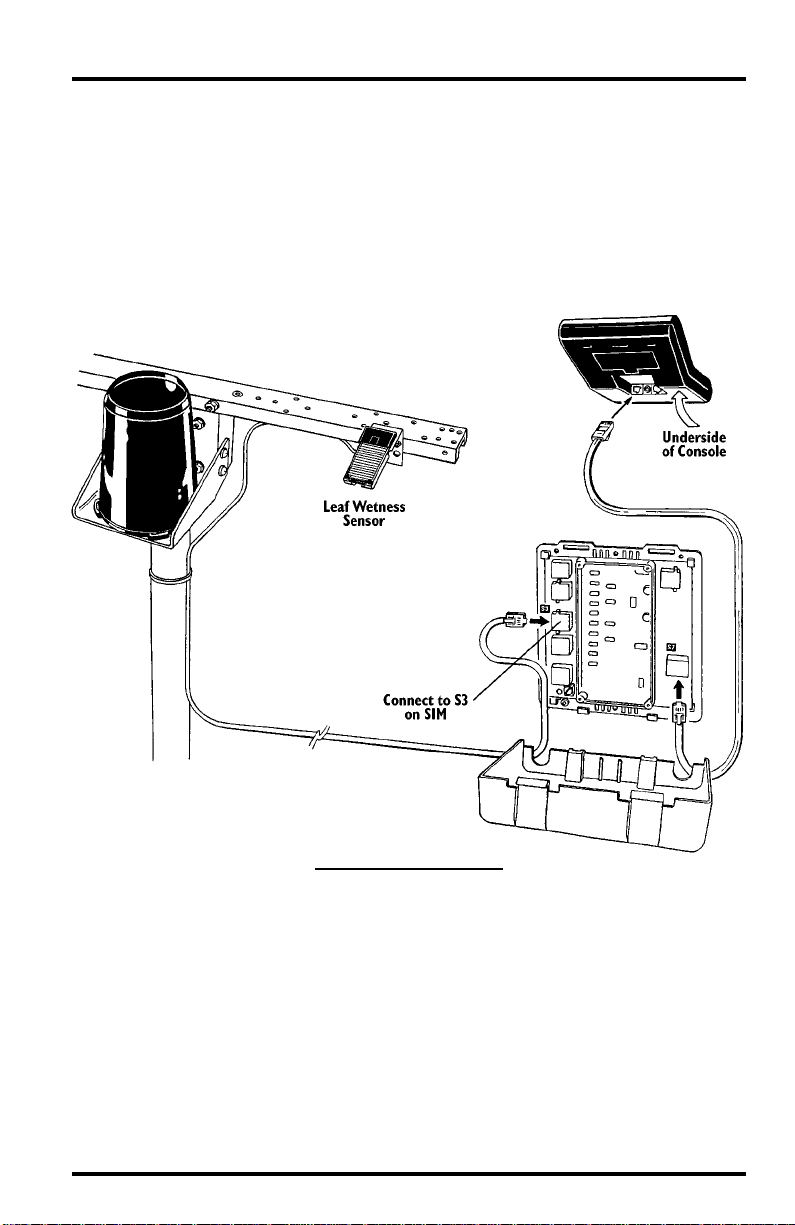
Typical Standard Installation
The illustration below shows typical standard leaf wetness installation. The
sensor cable attaches to connector S3 on the sensor interface module (SIM).
THE
ENSOR
S
T
S
YPICAL
Installing the Sensor Page 3
TANDARD
I
NSTALLATION
 Loading...