

Davis 6930 Installation Manual
Vantage Pro2™ Temperature/Humidity Sensor
r
Replacement Kit
The following instructions are for replacing the Temperature/Humidity sensor
on Vantage Pro2
after January 2006.
Components
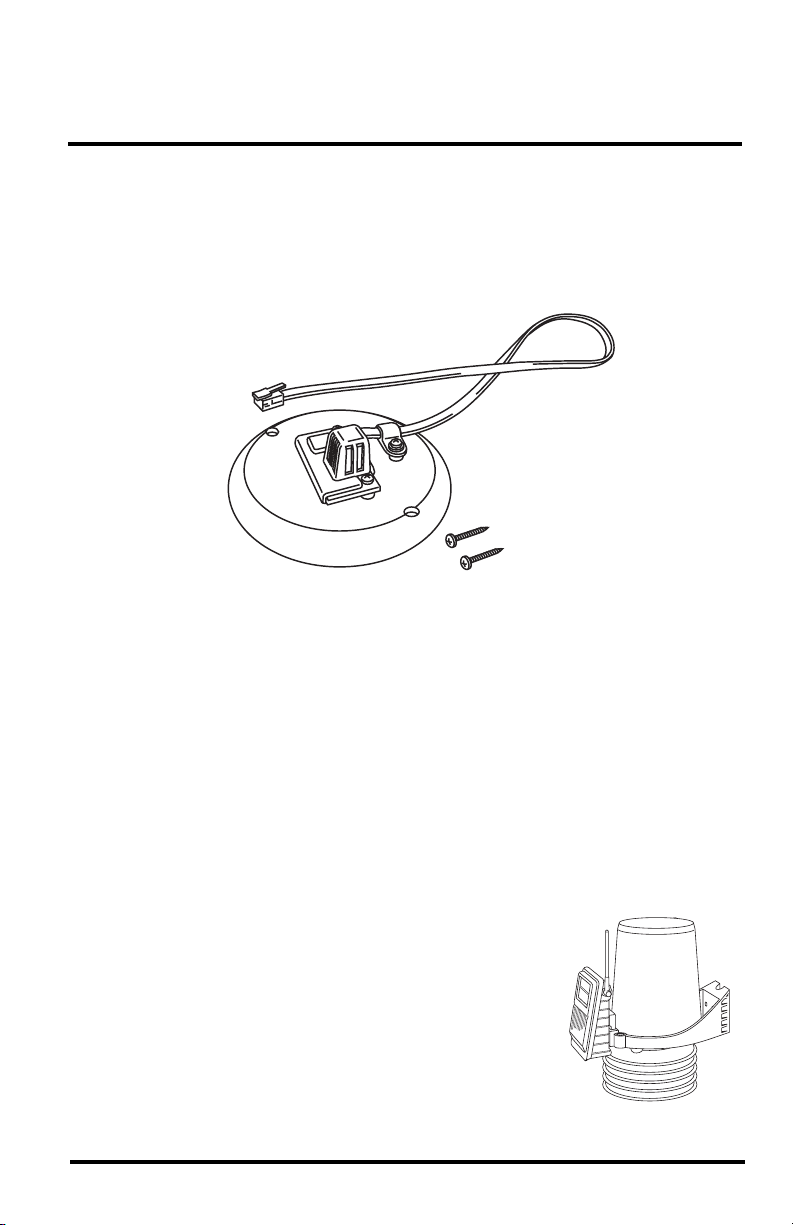
The replacement kit includes the following components:
Tools Needed
You may need some or all of the following tools and other items to install the
Temperature/Humidity Sensor Replacement Kit:
• A medium Phillips-Head screwdriver
• Other tools as required to remove and re-mount the Integrated Sensor Suite
(ISS) or Temperature/Humidity Station.
• Optional — Adjustable crescent wrench
™
stations (# 6152, 6152C, 6162, 6162C, 6382) manufactured
Insulated disk with mounted
Temperature/Humidity senso
#6 screws (2)
Installing the Temperature/Humidity Sensor
Replacement Kit
The Temperature/Humidity Sensor Replacement Kit works with both the ISS
and Temperature/Humidity stations.
The ISS assembly for Vantage Pro2 stations (# 6152,
6152C, 6162 and 6162C) contains the rain cone,
Sensor Interface Module (SIM) housing, and the
radiation shield plating which houses the
Temperature/Humidity sensor. The ISS is also
available with extra optional components like the
UV and Solar Radiation sensors and mounting
bracket if you have purchased a Vantage Pro2 Plus
(# 6162, 6162C) unit or have purchased these items
separately.
ISS
1
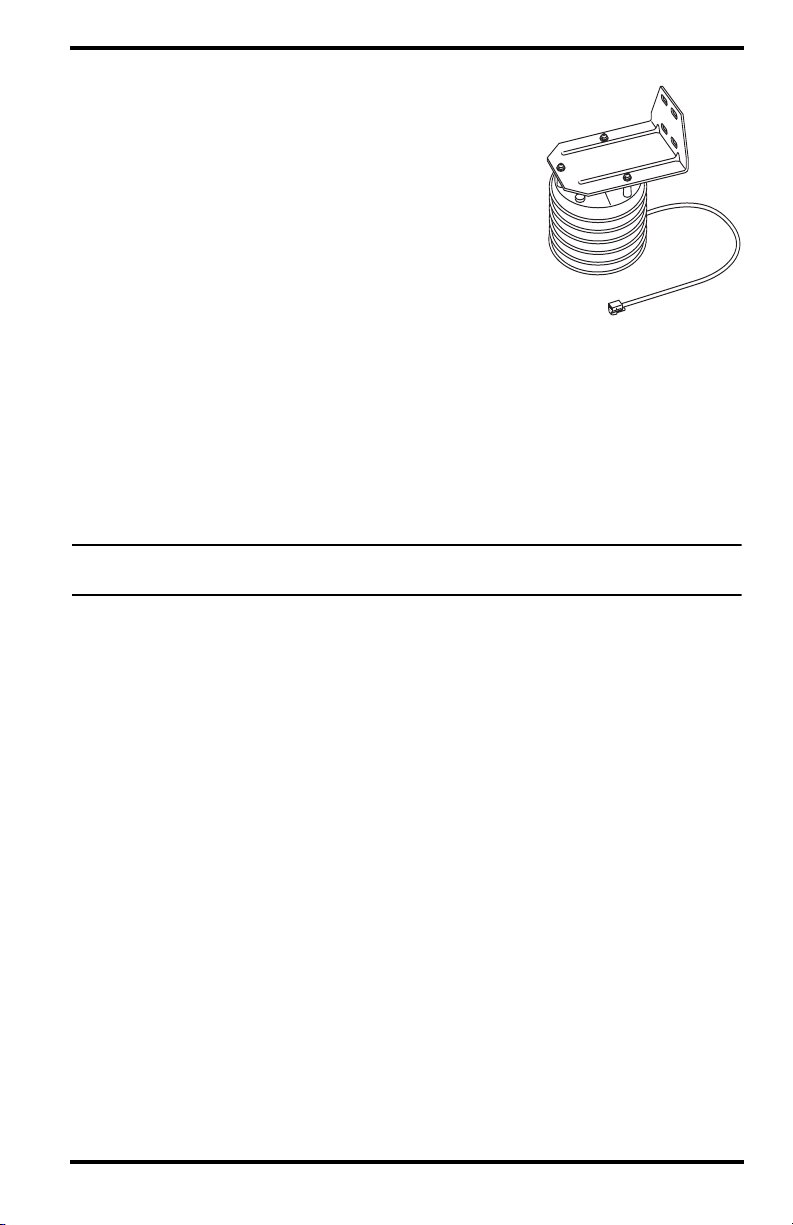
The Temperature/Humidity Station (# 6382)
contains a Temperature/Humidity sensor in a
radiation shield and connects to a provided SIM
shelter.
Temperature/Humidity Station
Optional — Put Console in Setup Mode
If you have a console, you need to put it in Setup Mode. This prevents the
reception of erroneous data while you are removing the ISS. To put your
console in Setup Mode:
• At your Vantage Pro2 console, press and hold DONE and then press the
down arrow ( - ) to put the console in Setup Mode. The “Receiving from...”
screen will display.
Note: Additional information on clearing and setting console data can be found in the
Vantage Pro2 Console Manual.
If you have an Envoy and are concerned with erroneous data, you may edit the
data via the WeatherLink software. See the WeatherLink Online Help for more
information.
Take Down the ISS
Please work on your Vantage Pro2 ISS in a safe place. We strongly
recommend that you take the station down from its sited location before
replacing the sensor.
To take down the ISS:
1. Locate the SIM housing cover on the side of the ISS and open it.
2. Disconnect the Solar Panel wire on the SIM cover from the SIM board by
pulling the Solar Panel connector.
3. Pull the foam insert out of the cable access port in between the cables and
set the foam insert aside.
4. Disconnect the anemometer cable from the sensor connector labeled
WIND and slide the cable out of the cable access port.
5.
Cabled ISS Only: Disconnect the console cable from the SIM.
6. You can now remove the ISS from its mounted position. Move it to a safe
place to install the sensor.
2
Disassemble the Standard Radiation Shield — ISS
Note: We recommend using a workbench or table to perform the following procedures.
1. Open and remove the SIM cover if you have not done so already.
2. Disconnect the TEMP/HUM cable from the SIM
and slide the cable out of the cable access port.
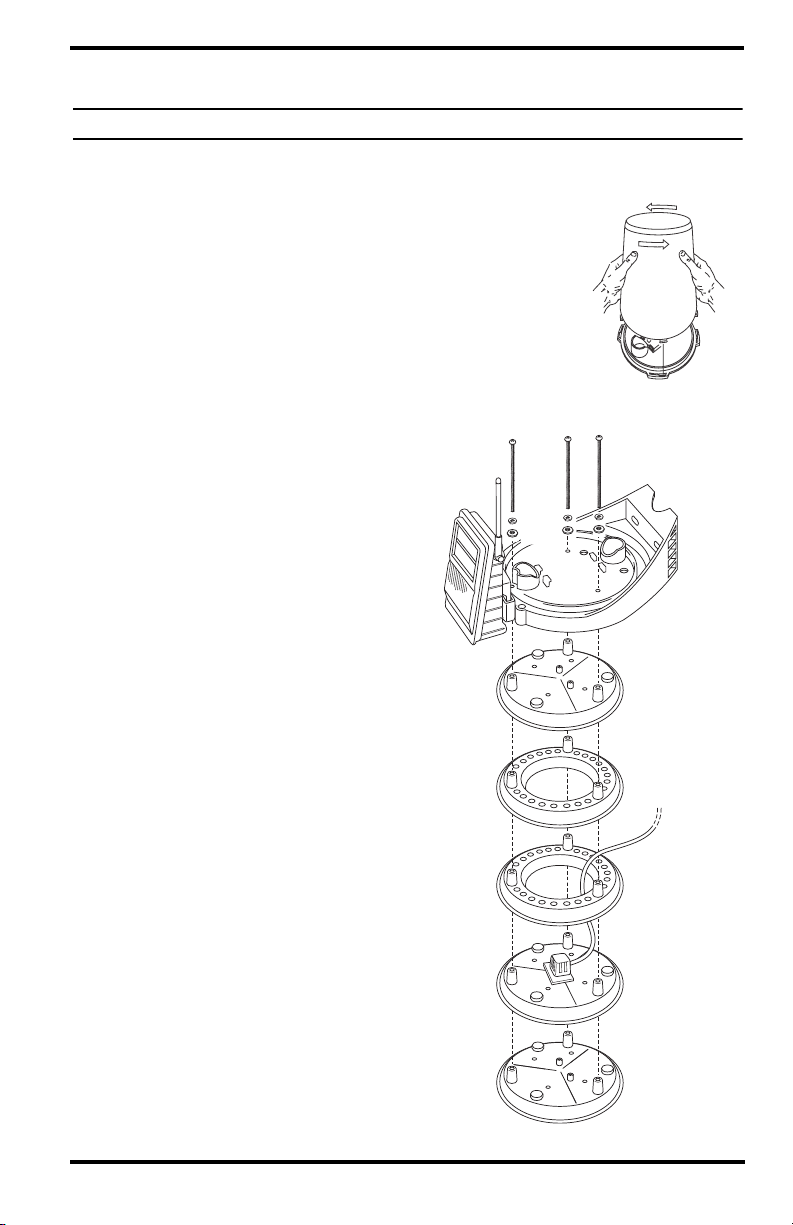
3. Remove the rain collector cone from the ISS base
by rotating the cone counter-clockwise. When the
cone’s latches line up with openings in the base,
you can lift the cone off. The cone fits in the base
Twist to Open
tightly and may require extra pressure to remove.
Steady the ISS base between your knees when
removing the cone.
4. Remove the three 8-32 x 4
screws holding the radiation
shield plates together from the
top of the rain collector base.
5. Separate out the radiation
shielding plates to locate the
Temperature/Humidity sensor
in the plating. See “Remove the
Previous Temperature/
Humidity Sensor” on page 4 for
instructions on removing the
previous sensor.
''
4" Screw
Lock
Washer
Flat
Washe r
Rain Collector Base
Plates
Temp/Humidity
Sensor
3
 Loading...