

Page 1
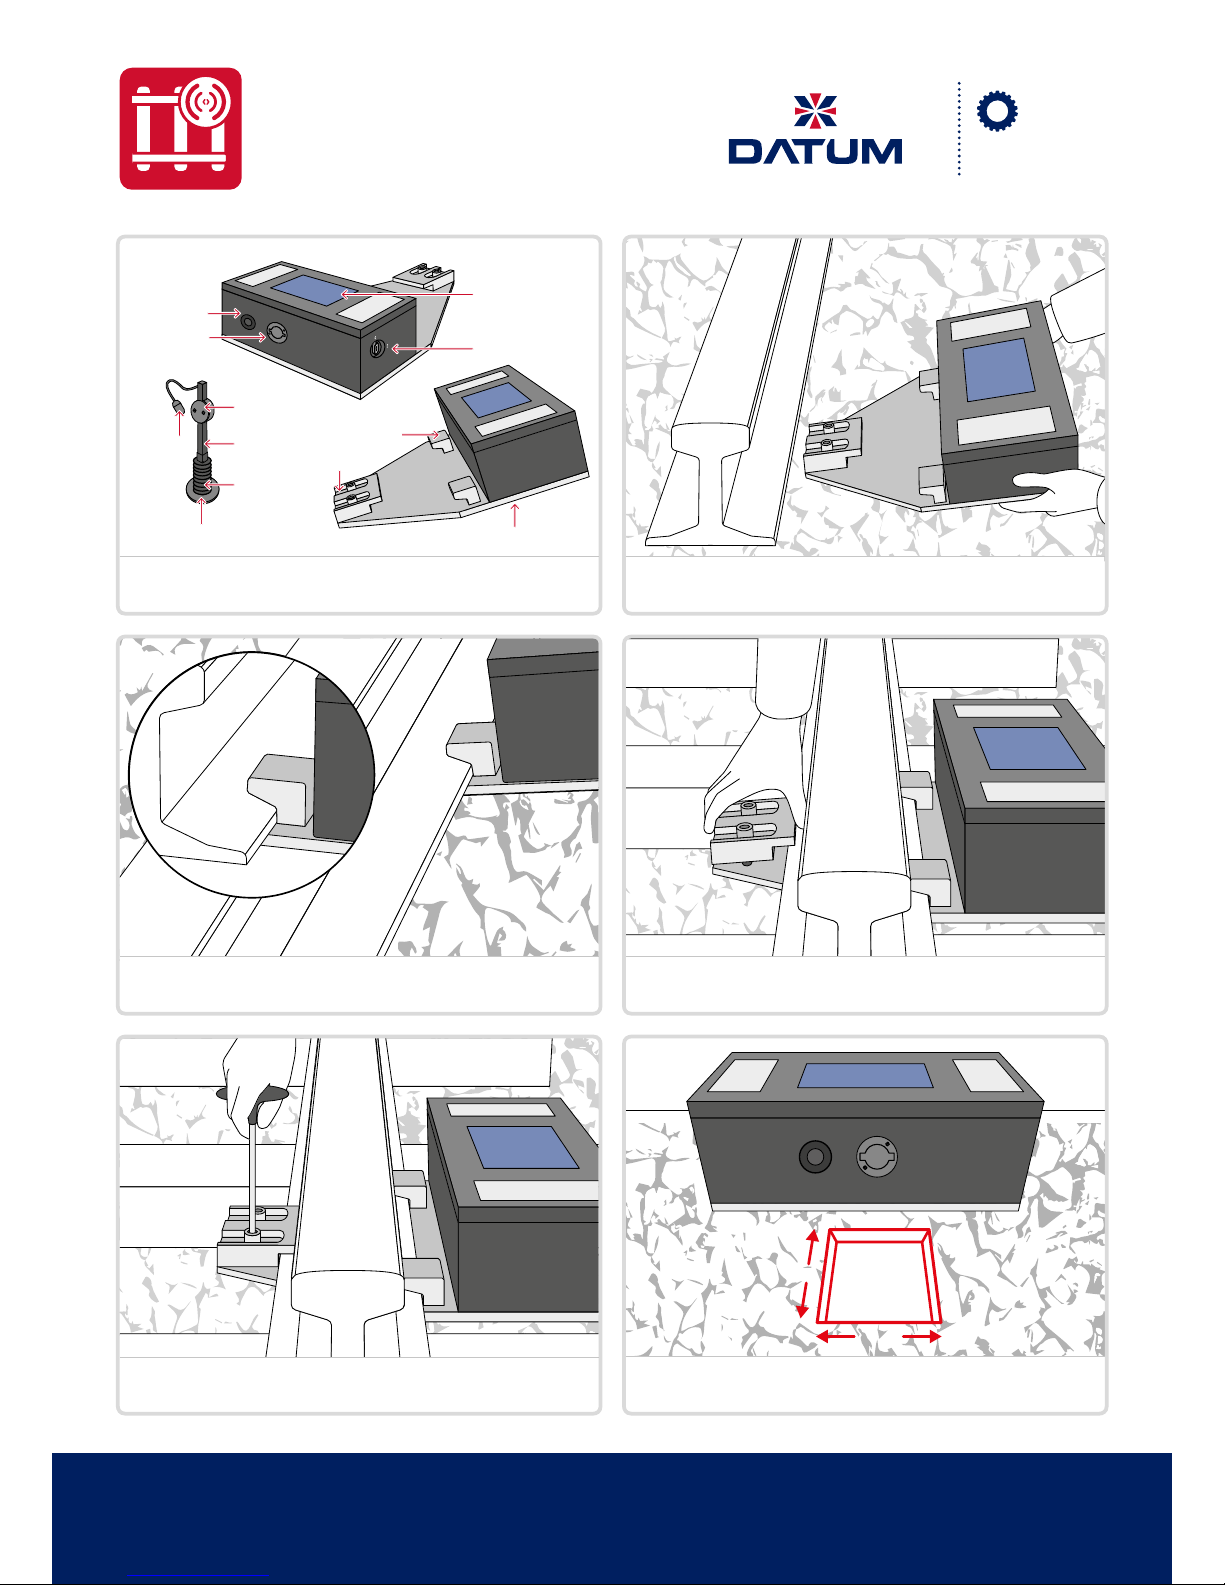
Base Plate
End Clamp
Sensor
Socket
Sensor
Plug
Socket
Sensor
Plug
On / O Switch
Solar Panel
Shoulder
Sensor
Clamp
Gaiter
Sensor
Foot
20cm
20cm
1. VoidMate Glossary.
24/7 Customer Support: 0161 765 3447
www.datum-group.com/about-datum-group/customer-support
2. Create a small void in the ballast between sleepers and slide
the VoidMate under the rail.
4. Slide end clamp over the foot of the rail.
6. Once the unit has been secured to rail, remove an area of
approx 20cm x 20cm in the ballast below the VoidMate box.
3. Ensure the VoidMate base plate is flush under the rail.
The shoulder should sit on the foot of the rail as shown.
5. Tighten the bolts on the end clamp repeatedly and
alternately using the M10 Allen key until secure.
Systems
VoidMate
TRACK VOID MONITOR
Page 2
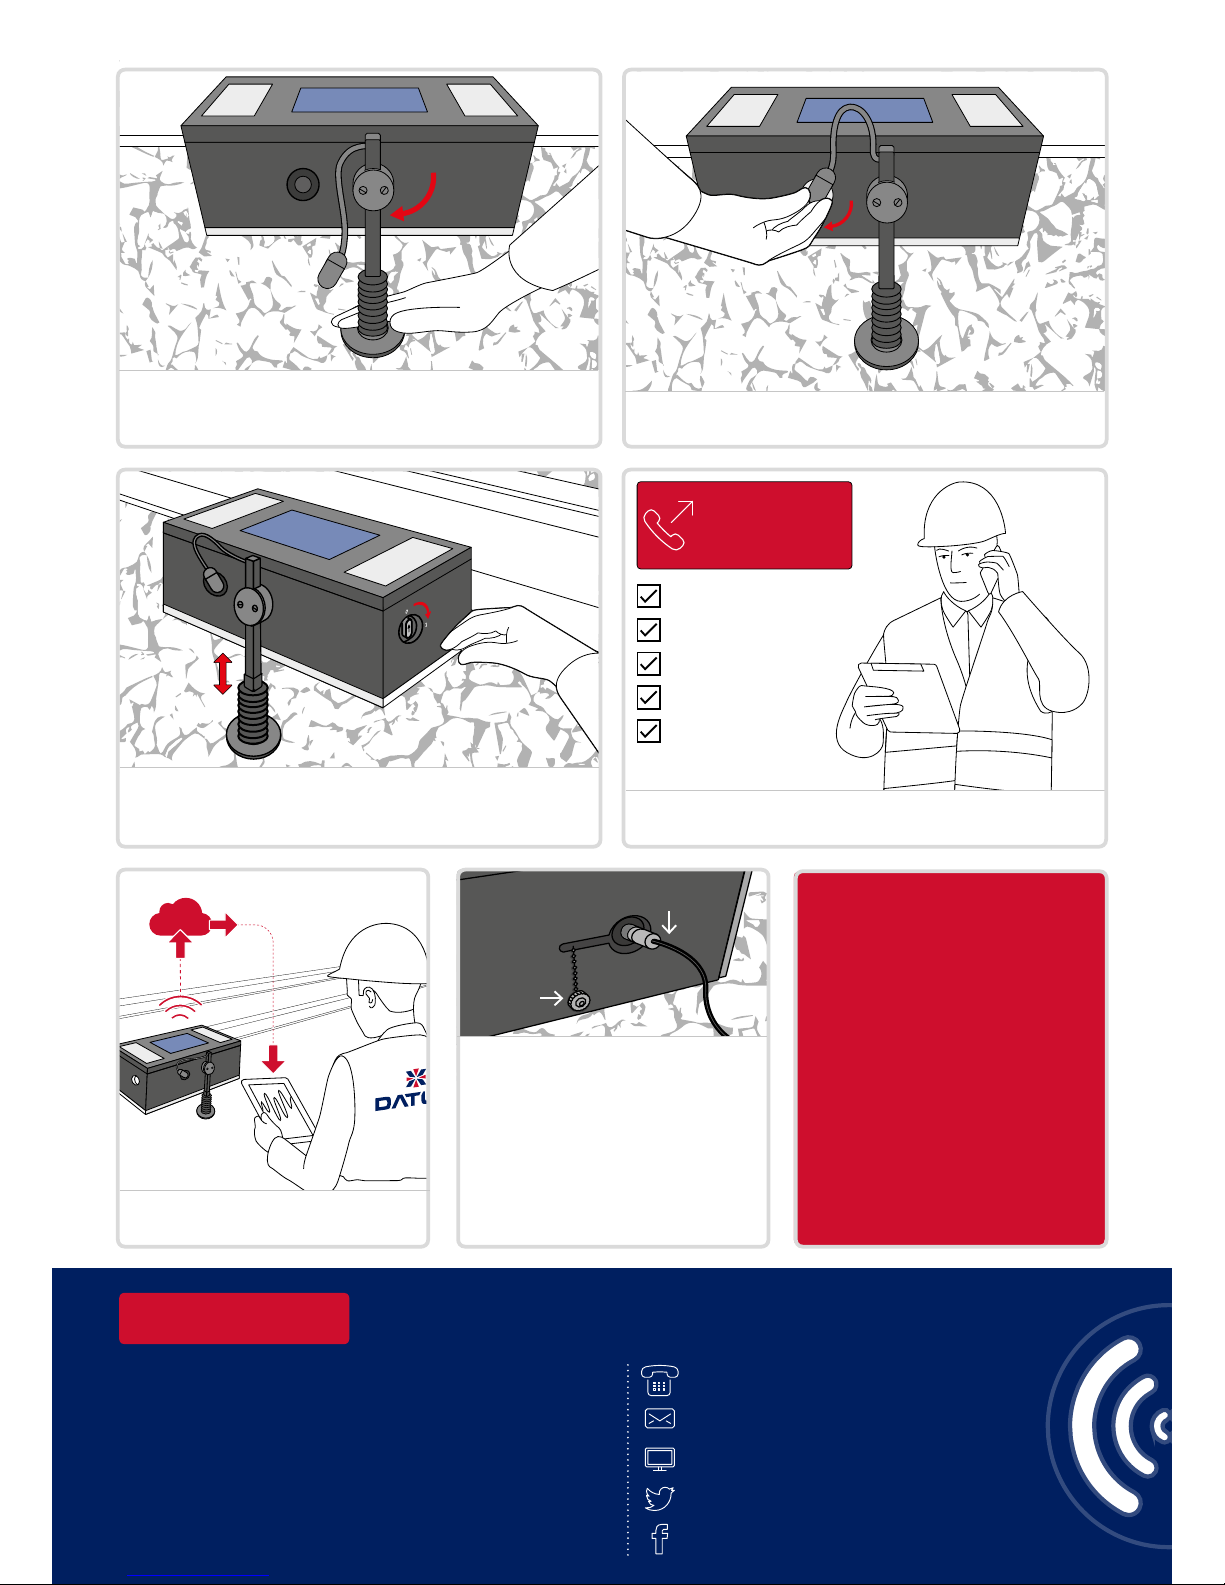
CLOUD STORAGE
Call Datum 24/7
Customer Support:
0161 765 3447
11. The VoidMate will continuously stream
information via Platform Interactive.
12. Charging the VoidMate
1. Remove VoidMate from track.
2. Unscrew the cap at the bottom of the
VoidMate.
3. Insert charging cable and charge for a
minimum of 4 hours, ideally overnight.
4. Remove charging cable and ensure
cap is screwed finger tight back onto
the unit.
9. Once fitted, check sensor is moving freely with no ballast
around it. To turn the unit on, turn on/o switch clockwise so
the arrow points to ‘1’.
10. Call Datum 24/7 Customer Support to ensure device is
connected. Provide them with the information listed.
Head Oce
Datum House
The Pavilions
Bridge Hall Lane
Bury, Lancashire
United Kingdom
BL9 7NX
+44 (0) 161 797 5511
www.datum-group.com
@TheDATUMGroup
@TheDatumGroup
8. Insert the sensor plug and twist it clockwise to establish
connection.
7. Place sensor into the slot on the unit, push in and turn
clockwise. The sensor should now stand vertical with the foot
resting firmly on the ballast below.
CONTACT DETAILS
Removing the VoidMate
1. Switch o the VoidMate.
2. Fully unscrew
sensor plug.
3. Push sensor clamp
into sensor socket and
turn anti-clockwise to
detach it from the unit.
4. Unscrew the bolts on the
end clamp and remove
VoidMate from track.
Serial Number
Company Name
Site Location
Alarm Limit
Alarm Recipients
Cap
Charging Cable
 Loading...