

UBISLATE 7CZ
USER
MANUAL
1

Contents
Getting ready to use the device
●What’s inside the box?
●Product Appearance
Technical Specifications
Quick Start Guide
●Charging the Battery
●Power on
●Power save mode and Lock Screen
●Power off
●Using the UbiSlate7CZ as a phone
●Inserting a SIM Card
●Bluetooth Pairing
●Orientation Sensor Setting
●Using the Touch Screen
●Using MicroSD Cards
The Status Bar & Icons
●Shortcut Menu
●WIFI Settings
The UbiSurfer Browser
●UbiSurfer Dual Browser Comparison Chart
APK Installation
●Uninstalling APK applications
E-mail
Camera
File Manager
Multimedia Players
●Music
●Super HD Player
Set Language
Set Date and Time
About Phone
Troubleshooting
Important Safety Information
Safely disposing of the Device
2
Getting ready to use the
device
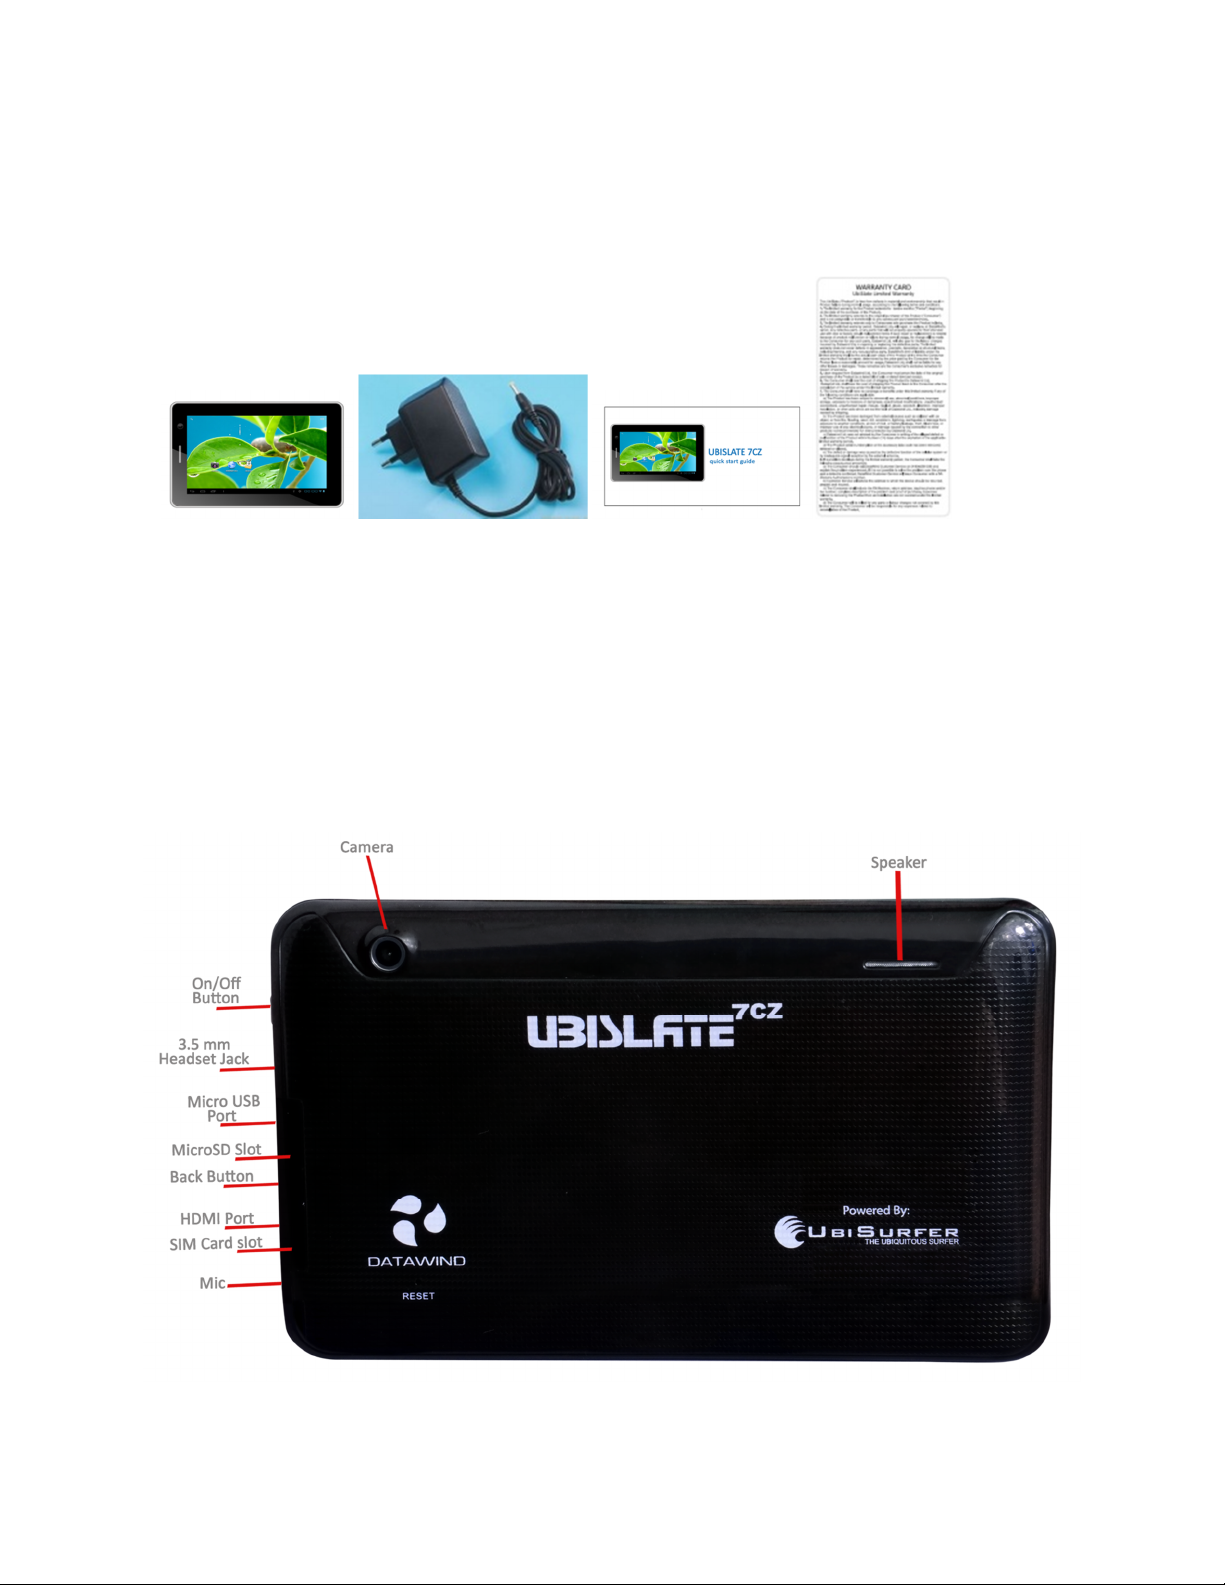
What’s inside the
box?
A: Mobile Internet Device B: AC Adaptor
C: Quick Start Guide D: Warranty Card
The use of non-approved hardware accessory items or unapproved software may cause
damage to the product or malfunctions not covered by the manufacturer’s warranty.
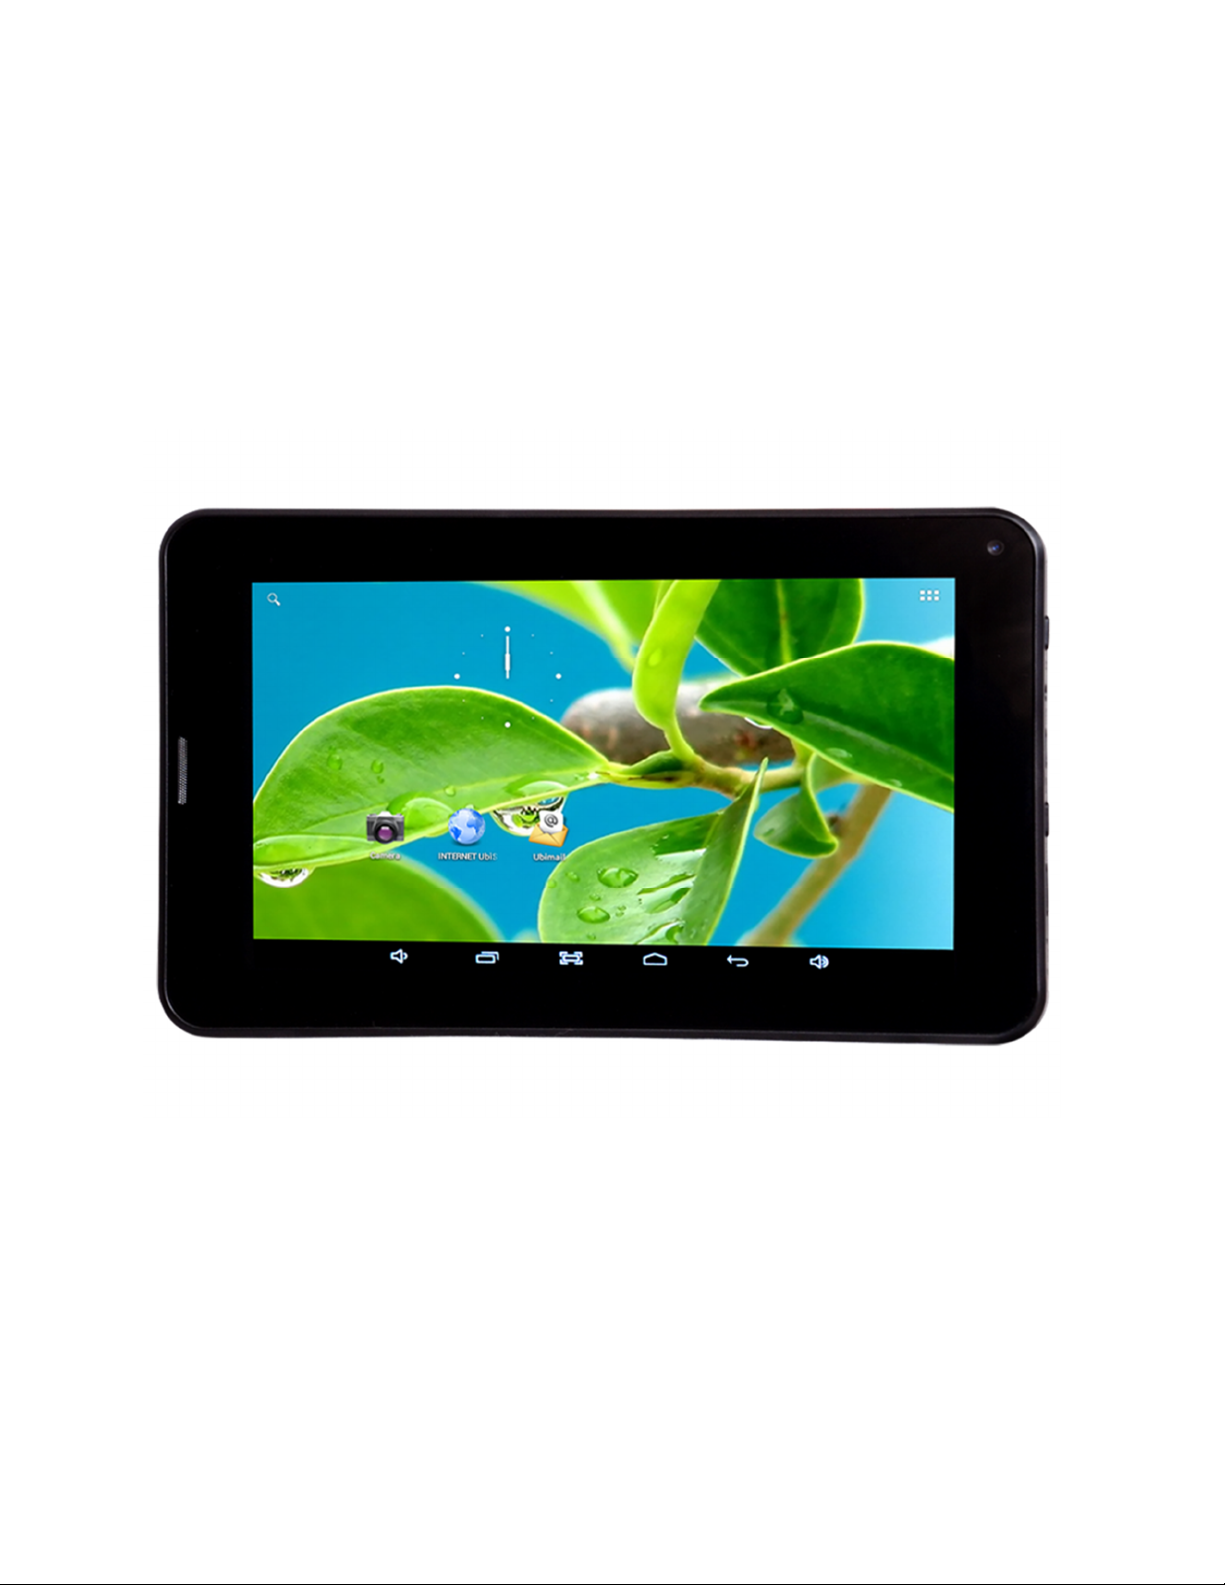
Product Appearance
3

Technical Specifications
LCD Display 7” TFT Capacitive Multi-touch LCD – 800*480 pixels
OS Android 4.2.2
Processor Cortex A7; Dual Core 1.2 GHz Processor
Memory 1GB RAM
Storage 4GB on board, expandable to 32GB via MicroSD
PC Interface MicroUSB
Power 3.7V Li-Polymer rechargeable battery
Audio External speakers, 3.5mm headset jack
Video GPU w/ HD video supported
Camera Front Facing VGA Camera & Rear facing 2MP camera
Sensor G-Sensor (Orientation Sensor)
Connectivity Wi-Fi 802.11 b/g/n, GPRS & Bluetooth
Software Over 30 languages supported, full office suite, 2 mobile browsers, social
networking, games, educational content, etc…
Quick Start Guide
Charging the Battery
Your device has a built-in battery. Before using the device for the first time, you must charge
the battery for at least 6-8 hours. Use only Datawind approved chargers. Unauthorized
chargers may cause damage to your device and/or may lead to overcharging and/or explosion.
When your battery is low, the battery level indicator will be very thin. If the battery level
reaches a critical level, the device will automatically turn off. Recharge the battery to continue
use. Recharge the battery by first inserting the cable into the charging head and then plugging
the head into a standard AC power outlet. After the charging is complete, unplug the charging
head. Note that it is best to charge the device at room temperature. It is not necessary to wait
until the battery is completely drained before recharging, you may charge at any time. Also,
the battery will maintain its lifespan longer if it is not left uncharged for periods of more than 2
weeks at a time.
Power on
Press and hold “ ” button for 3 seconds to power on the
and half to boot the system. After system
Slide the lock icon “ ” to the right
Power Save mode and
You can turn off the screen to save power
screen will turn to Lock Screen
to unlock the screen to start to use
Lock Screen
mode.
Repeat the process to reactivate the device.
boot
is completed, it will enter Android desktop.
by quickly
pressing the power “ ” button. The
device.
It can take up to a minute
the
device.
Note: The device will remain operational as will any applications when
saving
mode,
only the screen is turned off.
4
the device is in power

Power off
Press and hold “ ” button for 3 seconds. A menu will appear confirming that you would
like to power off.
Choose your desired option by tapping the corresponding item on
to exit to previous
Note: When
automatically when the battery is empty. If the device fails to power on, please plug it into
an outlet to first check if the
minute before attempting to restart the
the device’s battery is low, it will send continuous alerts and will shut down
operation.
battery
is empty. Please recharge the
device.
the
screen or Tap Cancel
battery for
at least one
Using the UbiSlate7CZ as a phone
Your UbiSlate7CZ is also a phone which works on quad band GSM 850/900/1800/1900Mhz
frequency spectrums. It comes with Bluetooth connectivity to pair with headsets and/or
also will work through speakerphone or headset connections. You must insert your valid
GSM SIM card into the SIM card slot while the device is powered off in order for it to
function correctly. Dialing, disconnecting and contact lists function like your standard
mobile phone.
Inserting a SIM Card
SIM cards would be supplied by your local phone operator and it is the use of these SIM cards
that allows you access to the network for surfing the web and to use the UbiSlate7CZ as a Phone.
There is a SIM card slot at the top of the device beside the MicroSD Card Slot. Insert the SIM
Card so that the notch enters the device first and the gold contacts are facing the back of the
device and the UbiSlate7CZ logo.
5
Bluetooth Pairing
Pairing your UbiSlate7CZ to your Bluetooth headset may differ for every headset; however the
premise of searching for Bluetooth devices by the UbiSlate7CZ is fairly universal. A pairing system
will then usually require passwords entered on both devices to finalize the pairing. Usually this
pairing will only have to be performed once.
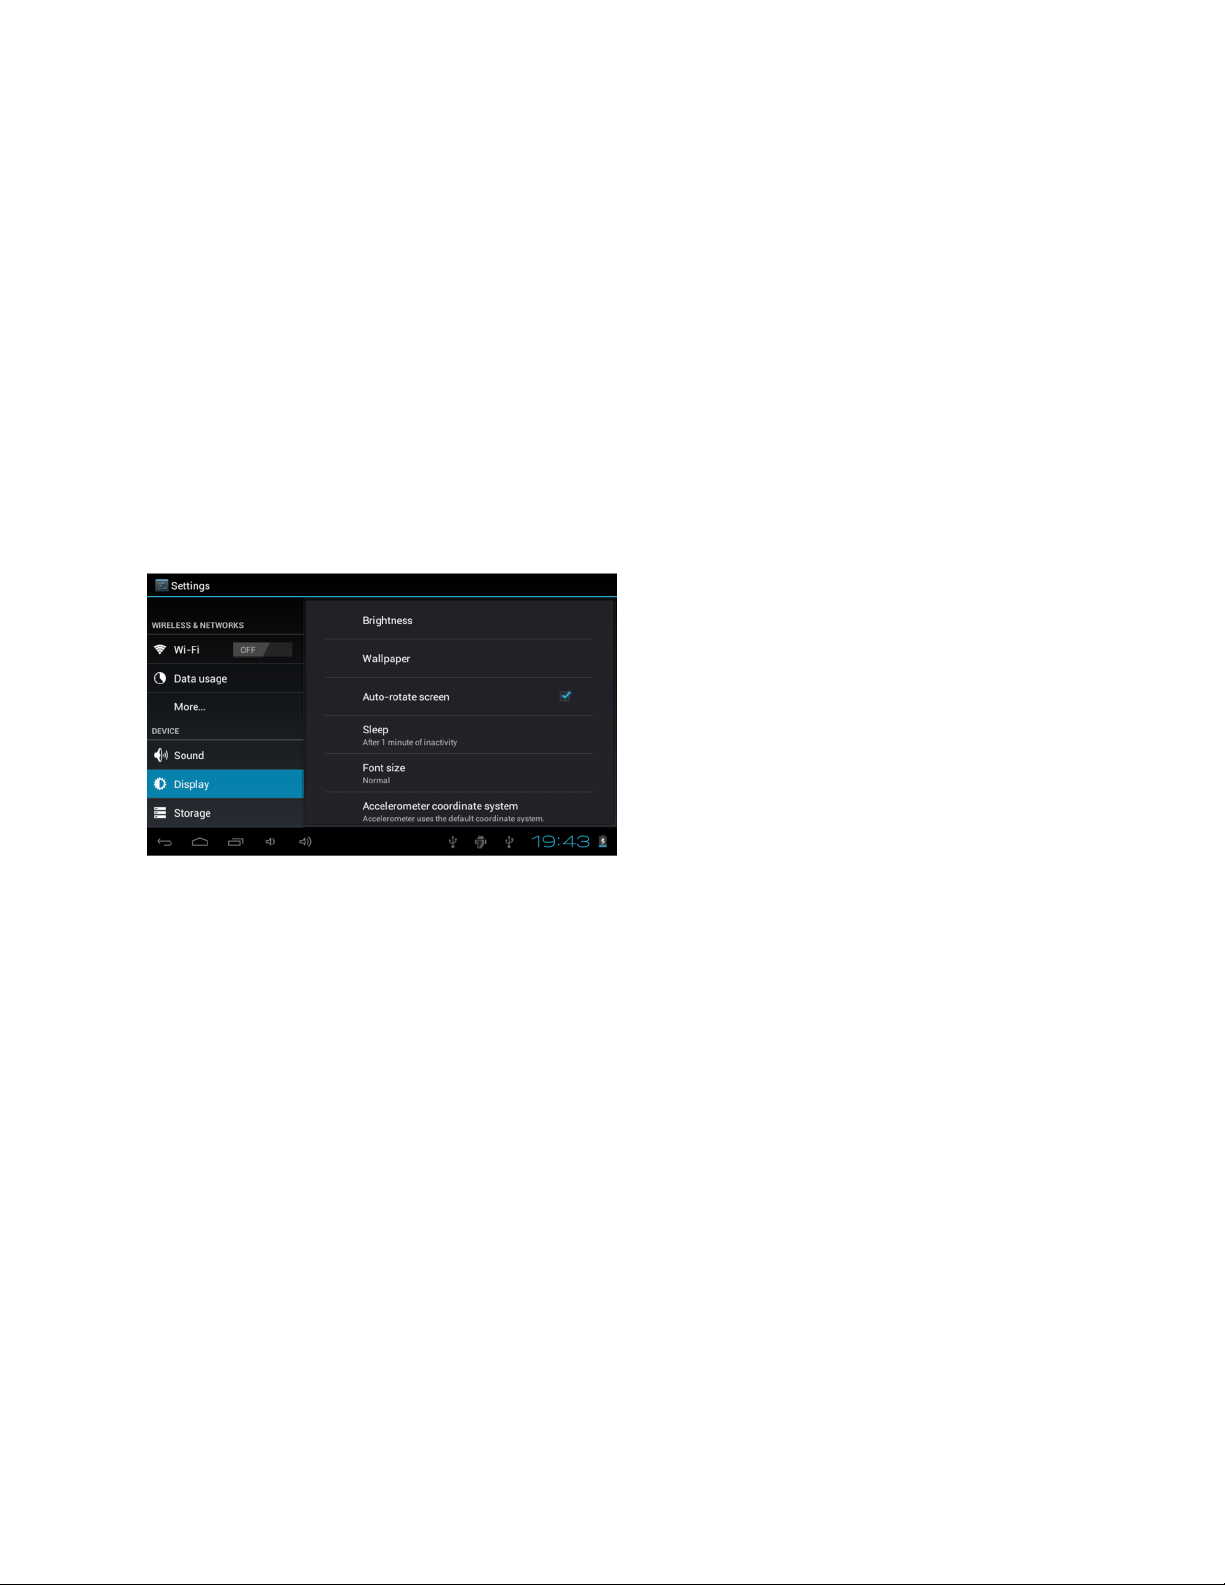
Orientation Sensor
The device contains a sensor that will automatically change
as you rotate the device. The sensor
the ground. i.e.:
sensor can be activated or deactivated in the
screen. Check the box if
(See picture below)
when
Setting
the device is held upright and not flat on its
you
want to activate the sensor or uncheck the box to deactivate
works
the
orientation of most screens
best when the device is rotated perpendicular to
back.
The Orientation
Setting
menu: Setting >Display >Auto-rotate
it.
Using the Touch screen
Your device comes with a responsive touch screen which works as follows:
●Tap: To acvate an on-screen item (e.g., application icons, buttons, menu items, and the
letter/symbols of the on-screen keyboard), simply tap them with your fingertip or compatible
stylus.
●Double Tap: Quickly tap the screen twice on a webpage or other application screen to zoom
(the application must support the double-tap/zoom function). Within the browser, doubletapping a webpage section will cause the browser to zoom and fit that section to the width of
the screen.
●Drag and drop: Drag an on-screen item to change its position (e.g., an application icon on the
home screen). To drag an item, touch and hold it for a moment, then without lifting your
fingertip/stylus, move your fingertip/stylus on the screen until the item reaches its target
destination.
●Swipe: Swipe up/down on the screen to scroll through a list. On some screens, you may be
able to swipe left/right to change the view. To swipe, touch the screen and then quickly move
6
 Loading...