

1
UBISLATE
7C+
USER MANUAL

Contents
Getting ready to use the device
•What’s inside the box?
•
Product
Technical Specifications
Quick Start Guide
•Charging the Battery
•
Power
•
Power
•
Power
•Orientation Sensor Setting
•
Using
•
Using
•
Using
•
Inserting
The Status Bar & Icons
•Shortcut Menu
•Wi-Fi Sett i ngs
The UbiSurfer Browser
•
UbiSurfer
APK
•
Uninstalling
E-mail Camera
File
Multimedia
•
Music
•
Super HD Player
Set
Set Date and Time about
Troubleshooting
Information safely Information
Safely disposing of the Device
Appearance
on
saves mode and Lock Screen
off
the Touch Screen
MicroSD Cards
the UbiSlate7C+ as a phone
a SIM card
Dual Browser Comparison Chart
Installation
Manager
APK applications
Players
Language
Phone
2
3
Getting r e a d y to use the
device
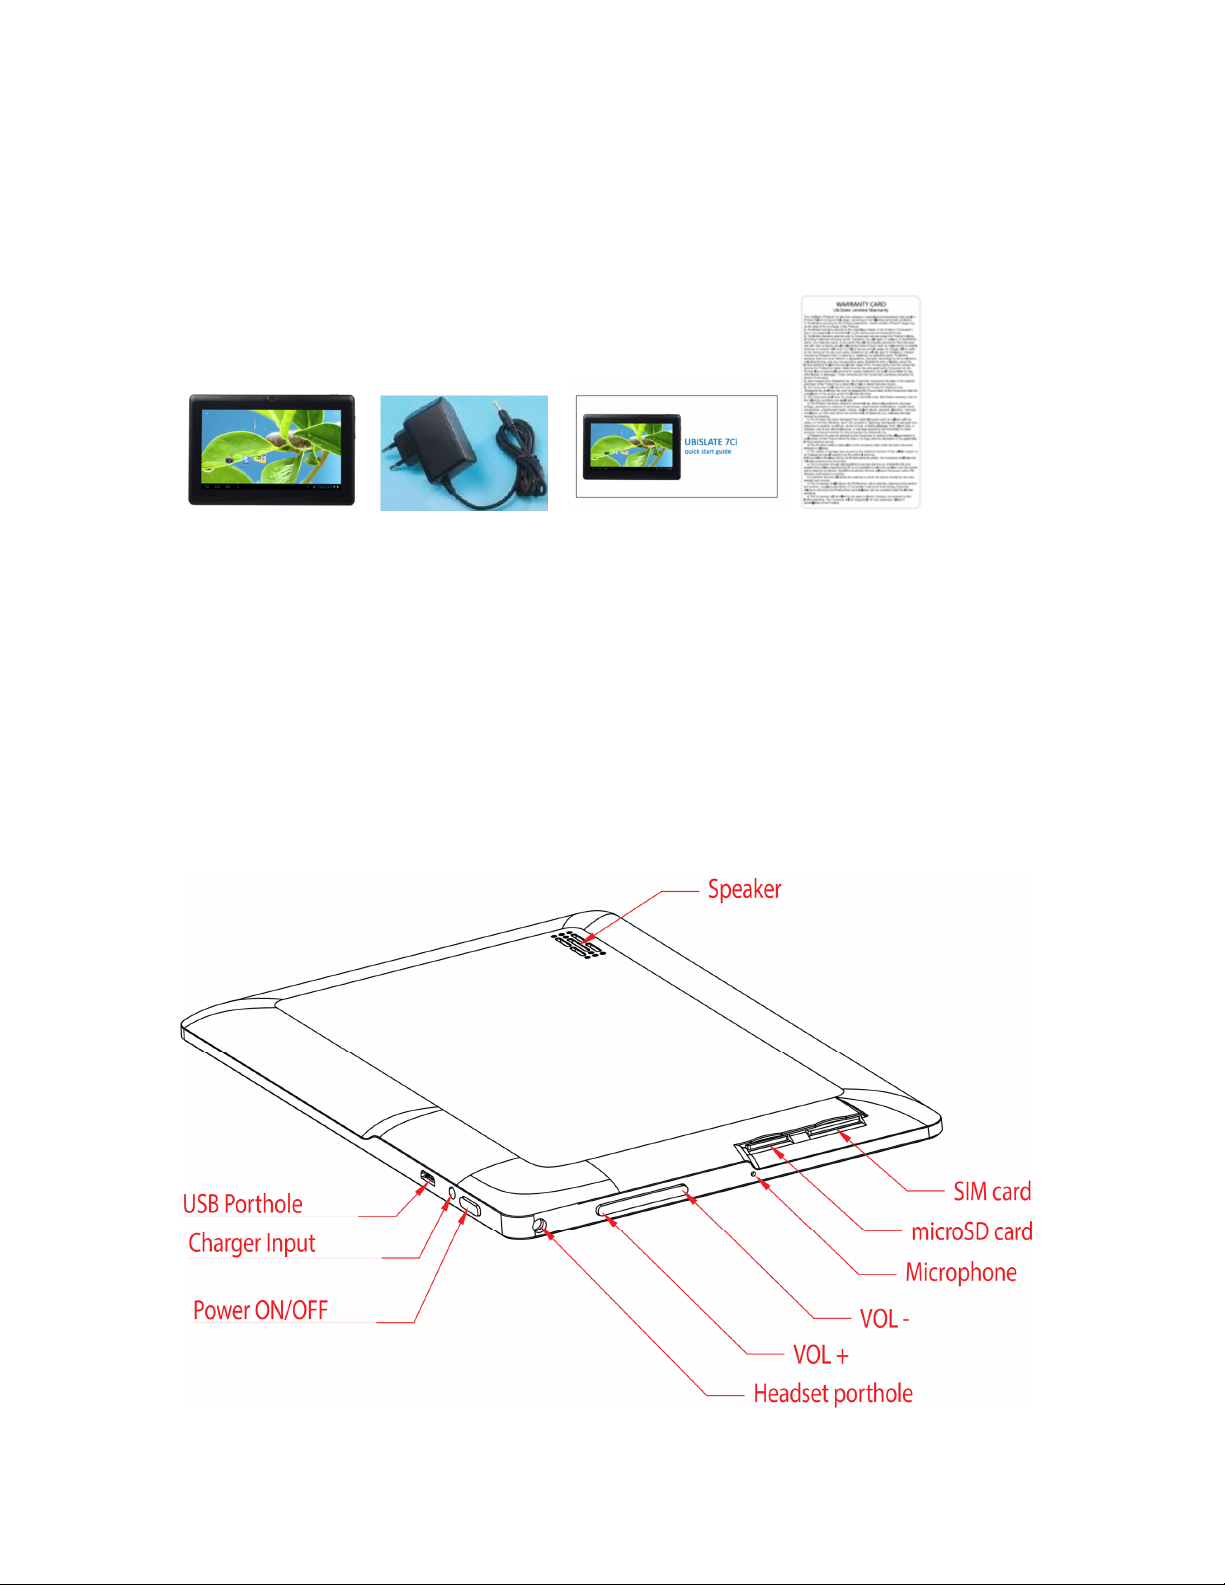
What’s inside the box?
Check your product box for the following items:
A: Mobile Internet Device B: AC Adapter
C: Quick Start Guide D: Warranty Card
The use of non-approved hardware accessory items or unapproved software may cause damage to
the product or malfunctions not covered by the manufactures warranty.
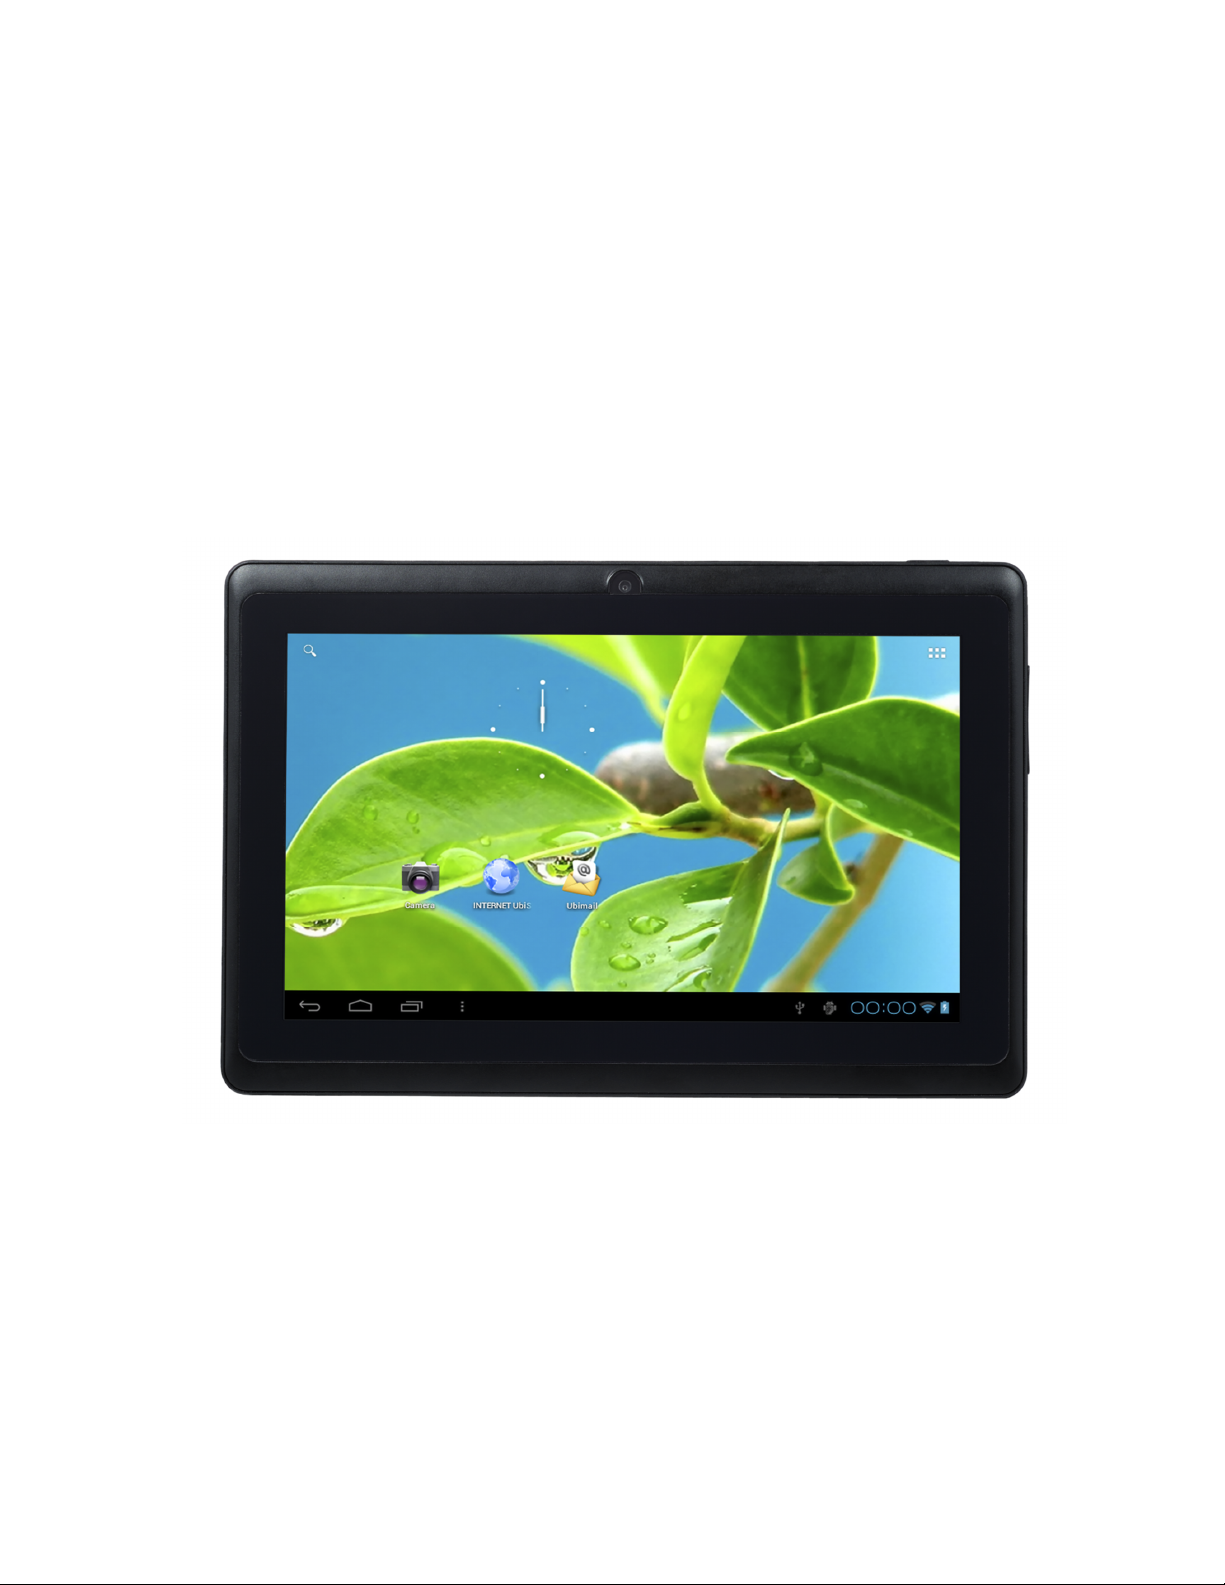
Product Appearance

4
Technical Spe c ific a t i ons
LCD Display 7" TFT Capacitive Multi-touch LCD – 800 x 480 pixels
OS
Processor
Memory
Storage
PC Interface Micro USB
Power
Audio
Video
Camera
Sensor
Connectivity
Software
Quick Start
Charging
Your device has a built-in battery. Before using the device for the first time, you must charge the battery
for at least 6-8 hours. Use only Datawind approved chargers. Unauthorized chargers may cause damage
to your device and/or may lead to overcharging and/or explosion. When your battery is low, the battery
level indicator will be very thin. If the battery level reaches a critical level, the device will automatically
turn off. Recharge the battery to continue use. Recharge the battery by first inserting the cable into the
charging head and then plugging the head into a standard AC power outlet. After the charging is
complete, unplug the charging head. Note that it is best to charge the device at room temperature. It is
not necessary to wait until the battery is completely drained before recharging, you may charge at any
time. Also, the battery will maintain its lifespan longer if it is not left uncharged for periods of more than
2 weeks at a time.
Wi-Fi
the
Guide
Battery
Android 4.0.4
Cortex A8; 1Ghz 512MB RAM
4GB on board, expandable to 32GB via Micro SD
3.7V Li-Polymer rechargeable battery
External speakers, 3.5mm headset jack
GPU w/ HD video supported
Front Facing VGA Camera
G-Sensor (Orientation Sensor)
802.1
1 b/g/n, GPRS
Over 30 languages supported, full office suite, 2 mobile browsers, social
networking, games, educational content, etc.
Power on
Press and hold “ ” button for 3 seconds to power on the
boot the system. After system
to the right
to unlock the screen to start to use
Power Save mode and
You can turn off the screen to save power
turn to Lock Screen
Note: The device will remain operational as will any applications when
mode,
only the screen is turned off
mode.
boot
is completed, it will enter Android desktop. Slide the lock icon “ ”
the
Lock Screen
Repeat the process to reactivate the device.
by quickly
.
device.
device.
pressing the power “ ” button. The screen will
It can take up to a minute and half to
the device is in power saving
5
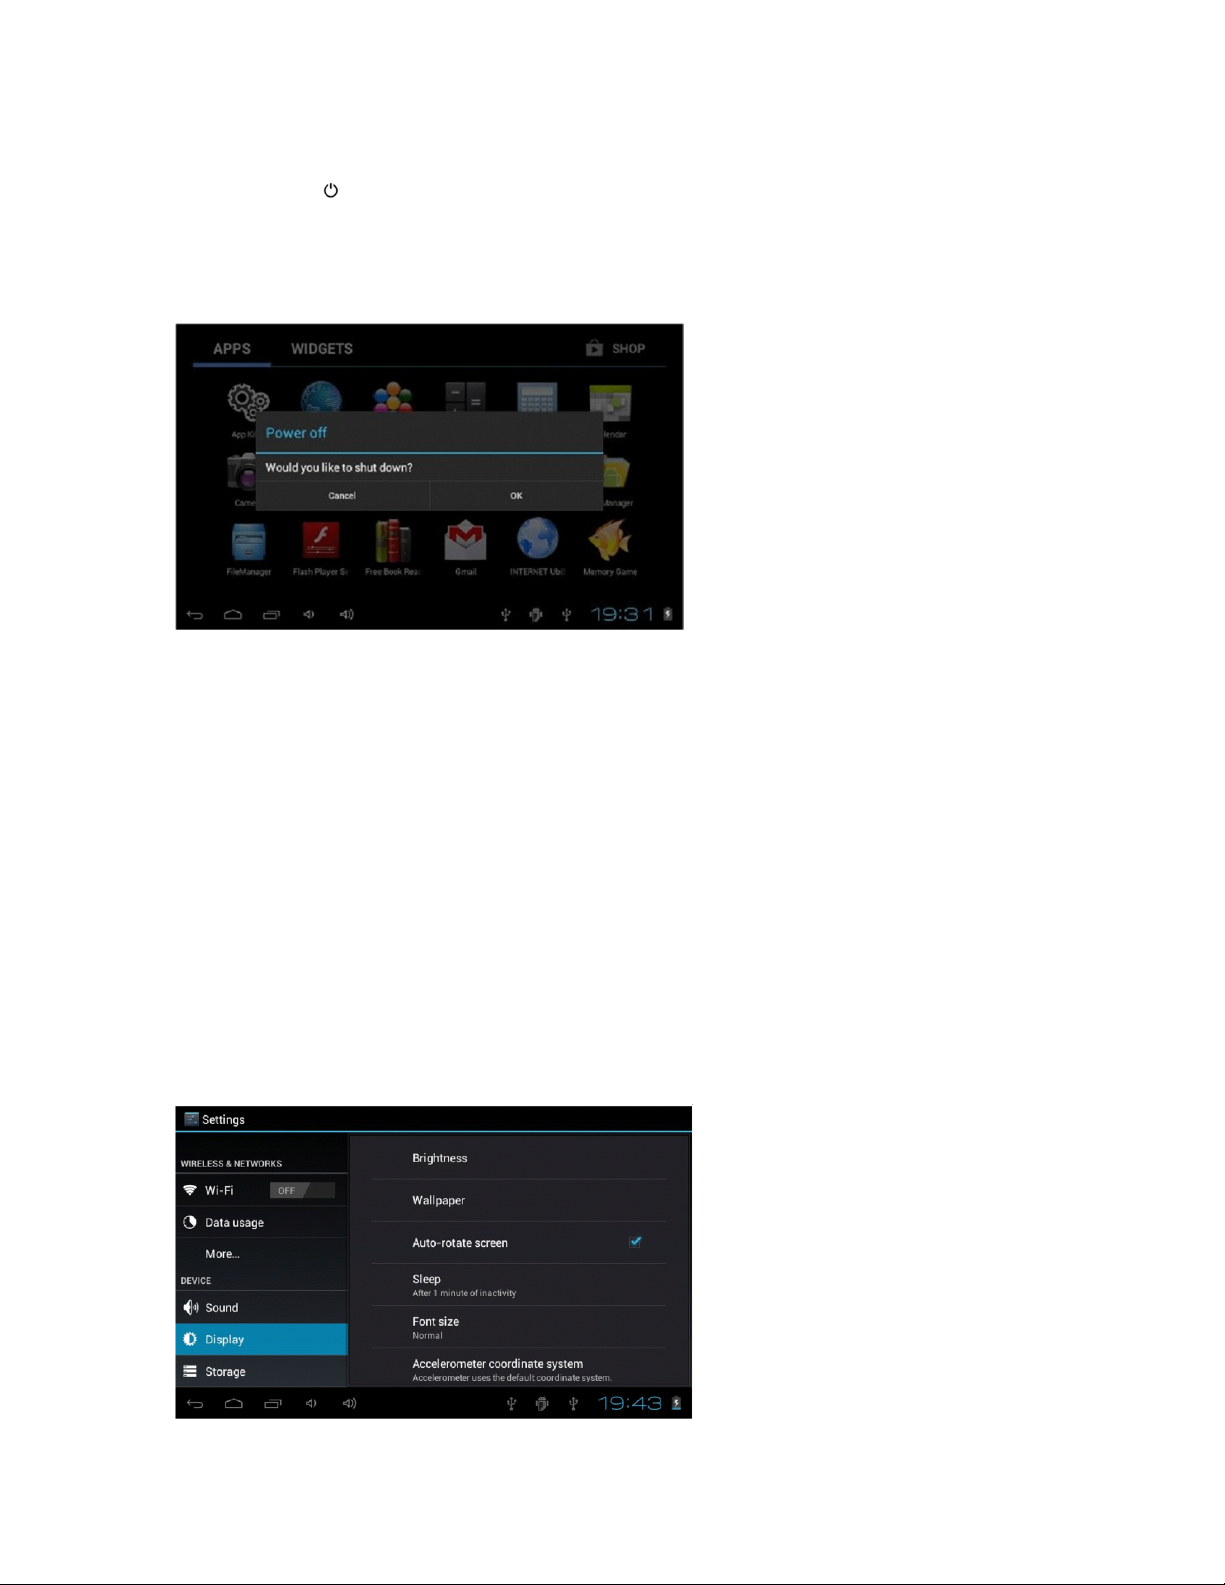
Power off
Press and hold “ ” button for 3 seconds. A menu will appear confirming that you would like to
power off.
Choose your desired option by tapping the corresponding item on the screen or Tap Cancel to exit
to previous operation.
Note:
when the battery is empty. If the device fails to power on, please plug it into an outlet to first
check if the battery is empty. Please recharge the battery for at least one minute before attempting
to restart the device.
Orientation
The device contains a sensor that will automatically change the orientation of most screens as you
rotate the device. The sensor works best when the device is rotated perpendicular to the ground.
i.e.: when the device is held upright and not flat on its back.
The Orientation sensor can be activated or deactivated in the Setting menu: Setting
>Display >Auto-rotate screen. Check the b o x i f you want to activate the sensor or uncheck the box
to deactivate it. (See picture below)
When the device’s battery is low, it will send continuous alerts and will shut down automatically
Sensor
Setting

Using the Touch
Your device comes with a responsive touch screen which works as follows:
•Tap: To activate an on-screen item (e.g., application icons, buttons, menu items, and the
letter/symbols of the on-screen keyboard), simply tap them with your fingertip
stylus.
•
Double
application must support the double-tap/zoom function). Within the browser, double-tapping a
webpage section will cause the browser to zoom and fit that section to the width of the screen.
•
Drag
Icon on the home screen). To drag an item, touch and hold it for a moment, then without lifting
your fingertip/stylus, move your fingertip/stylus on the screen until the item reaches its target
destination.
•Swipe: Swipe up/down on the screen to scroll through a list. On some screens, you may be able to
swipe left/right to change the view. To swipe, touch the screen and then quickly move your
fingertip/stylus across the screen without lifting your fingertip/stylus. Do not pause on the screen
with your fingertip/stylus at the initial point of contact or you may accidentally drag an item instead.
•Tap and hold: Some on-screen items have an alternate action
(e.g., opening an alternate menu, or to activate the drag function). To touch and hold an item, touch
the item and do not lift your fingertip/stylus until the action occurs. Tapping and holding an icon
will allow you to move it once it appears large.
Note: It is very important that you do not touch the screen with a body part or any foreign
object while switching on the device as this may interfere with the proper functioning of the device.
To avoid damage to the touch screen, do not use sharp tools. Do not allow the touch screen to come
into contact with other electrical devices, or water. For optimal use, remove the screen protection
film before using your device.
Tap: Quickly tap the screen twice on a webpage or other application screen to zoom (the
a n d drop: Drag an on-screen item to change its position (e.g., an application
screen
or
compatible
if
you touch and hold it
Using Micro SD
Micro SD Cards are storage spaces used to transport files from one device to another. This device
supports many different types of cards up to 32GB in size, however not every Micro SD card will
work in the device.
To insert the Micro SD card, simply push it into the device (it can only fit in one way, with the gold
contacts facing up towards the side with the touch screen). To remove the Micro SD card, you must
first go into System Settings (by tapping “t" shortcut, then tap “Storage" and scroll down on the
right hand side until you see Unmounts SD card. Accept the unmounts and then push down on
the top of the Micro SD card and it will pop back up to be removed.
To access files on the Micro SD card, use the “File Managed’ application described below.
Cards
6

Using the Ubislate7C+ as a
phone
Your Ubislate7C+ i s also a phone which works on quad band GSM 850/900/1800/1900Mhz
frequency spectrums. You can speak either through speakerphone or headset connections.
You must insert your valid GSM SIM
in order for i t to
function
correctly. Dialing, disconnecting and contact lists function like your
card
into the SIM card slot while the device i s powered off
standard mobile phone.
Inserting
a SIM
Card
SIM cards would be supplied by your local phone operator and
allows you access to the network for surfing the web and to use the UbiSlate7C+ as a Phone. There
is a SIM card slot on the side of the device. Insert the SIM Card so that the notch enters the device
first and the gold contacts are facing the front of the device. You should see the contacts if you can
also see the screen. Ensure that you device is OFF when insert or removing SIM cards.
it is
the use of these SIM cards that
The Status Bar &
Icons
'Status
Bar
7

The status bar is located on the bottom of the desktop.
Home Page - Tap to return to the desktop.
Back - Tap to return to the last screen
Recent Apps - Tap here for a list of recently opened applications.
Volume - Tap here to decrease the volume of audio output
Volume + - Tap here to increase the volume of audio output
Shortcut - Tap here to enter the shortcuts menu (wallpaper/apps/settings)
Applications - Tap here to go to the application menu.
Micro SD - This icon appears when a Micro SD card is inserted into the device
USB - This icon appears when a USB device is connected to the device
Android - This icon appears when the device is connected to a PC
Wi-Fi - This icon appears when the device is connected to a Wi-Fi network
Time - The current time is listed at the bottom right of the main screen
Battery - This icon displays the level of battery power remaining
Search - This icon will launch a search engine
Internet - This icon will launch the UbiSurfer Internet Browser
Shortcut menu
Tap
t
on the status bar, and the main screen menu bar will pop up.
Tap
“Wallpaper’
to select new wallpaper for the home screen.
Tap “Manage apps" to go the list of installed applications where you can modify, add or remove them
•Tap “System settings" to go to settings interface
Wi-Fi
Settings
From the desktop, tap the main screen icon “t" and tap on “System Settings" followed by “Wireless &
networks" to enter the wireless settings page.
8

Tap or slide the box at end of the Wi-Fi bar to the right to turn on Wi-Fi or do the reverse to
turn it off. Go to Wi-Fi settings to select the appropriate Wi-Fi network from the list of Wi-Fi
networks and follow the instructions to enter the password assigned by the Wi-Fi network provider.
Enter the assigned IP address information if the chosen network requires such information in
order to obtain their Wi-Fi network (please contact the Wi-Fi network provider if a password or IP
address is required for Wi-Fi access).
The UbiSurfer B r owser
The UbiSurfer Browser is the main browser on this device. Using this browser will speed up your
surfing experience and can be used anywhere there is a Wi-Fi connection. To view the
differences between the UbiSurfer browser and the Android browser, view the chart below.
9

o
UbiSurfer Dual Browser Comparison Chart
Featu res
Email
Web Surfing
Instant Mess enger
Social Networking
Onli ne Banki ng
News/Weather/Sports
Graphics
Attachments
Audi
Video
Web Accel eration
PDF
MS-Office
UbiSurfe r B rowse r Androi d Brow ser
√
(Online)
√
√
√
√
√
√
√
√
√
(Online)
(Online)
√
(Local )
√
√
√
√
√
√
√
(Local )
√
(Local )
√
√
To connect to the Internet via the UbiSurfer browser, click on the Internet UbiSurfer icon on the
Home Screen or via the menu system.
To en t er URL’s, simply cli c k o n the
if you wanted to visit a site like the Google UK web page, s i m pl y type www.google.co.
click GO. The Google UK
homepage w i l l
.com are defaults so if you want to visit the web
in
Facebook
and then click GO.
address
bar and type it in and click on enter.
a p p e a r
page
o n
the
screen.
Note that www and
www.facebook.com y
ou just have to type
For
example,
uk a n d
On occasion, you may find multiple windows open. The number of open windows is written in a box
at the top of the screen. If the number is greater than 1, you can close ALL extra windows by clicking
Menu / Stop.
To add the website which you are currently on to your
button at the top right side of the screen next to the
address
bookmarks,
click on the favorites
bar. Then c l i c k on Add and give
it a name. From this menu system, you can also organize your
Favorites, access My Account from which you can add extra surfing time and roaming time (may not
be applicable in all countries), but also My Settings from which you
can
adjust things like image
resolution. Other Functionality can be found in the menu system.
This includes:
•Exit: To close the program
•Back: To revert back to the last web page you were on
•
Forward:
•
Refresh:
To go to the next website
To refresh the page that you are currently on
•Stop: To stop loading the web page and to close all Pop-ups
•
Home:
To revert back to the UbiSurfer Browser Home Page
•More: To toggle between windows, show browser history, and access system settings Note: If you are
inactive for several minutes, the browser will give you a 60 second warning before disconnecting your
session. Minimizing the application DOES NOT close it. To exit, you must click Exit.
10

APK
Installation
This device supports third party Application Program .APK files. There are hundreds of thousands of
applications (programs) that can be downloaded from the internet. Some are free and some cost
money. Download the APK file from the internet and copy it into the device directly or store it
inside a Micro SD card and insert it into the device. Use the File Manager application in the SD card
folder (or wherever you have saved it) and tap on the file. Follow the instructions to install any
compatible application to the device.
Uninstalling
From the application menu, tap on “Settings" and select “Applications" from the lis t. Tap on
“Manage applications" and you can see a list of installed applications (including factory
It
applications).
Tap on the application that you want to uninstall and follow the instruction to uninstall the
applications.
E-mail
This device has an application called UbiMail which can be used to send and receive
E-mails from almost any POP or IMAP e-mail address. Following the instructions when you open the
application will allow you set up and use this program easily. Note that
message as per below, click the check box at the bottom to use the Ubimail application by default for
this action.
(Ubimail)
APK
Applications
default
if
you ever received a pop-up
Camera
This device has a built-in 0.3Mega PlXEL front camera for photo or video.
In the application menu, tap the camera icon to enter the camera interface.
Select
a photo.
either photo or video mode by tapping the preferred icon in photo mode, tap on to take
11

In video mode, tap on to start a recording and Tap on to stop recording.
You may exit the Camera interface by pressing the back button to return to the application menu.
File
Manager
From the application menu, tap “File Manager” to enter the list of files saved on the device
including the file you just recorded and saved using Voice Recorder or pictures or videos from
Camera.
Note:
You can also open, rename, move, install, delete and e-mail all files stored on the Micro SD card
or USB device or by category in File Manager.
Multimedia Players
There are some preinstalled multimedia applications on the device as follows:
12

MUSIC
-
Go to application menu, tap on “MUSIC" to enter the music playback interface. Only music files
that are stored inside the device will be shown in the file list. You can classify the music file list
by: RECENT, ALBUMS, ARTISTS, SONGS, PLAYLISTS or GENRES by selecting the appropriate option.
Tap the song for 1 second, the option menu will pop up.You can select
Play,
Add to playlist, and Shop
for Artist, Delete or Search.
Tap “Play" to enter the playback interface and start music playback or you may also tap the song
name directly. On the playback interface, you can tap on the function
bar
to adjust the playback time,
backward, forward, play, pause, shuffle, or repeat.
13

Super-HD Player:
Go to application menu, tap on “Super-HD P l a yer" to enter the Super-HD Player interface and it
will show how many image and/or video files are available inside the device.
Tap on video, it will show the list of the video files in a small icon. Tap the file that you want to view
to start playback. You can adjust the volume, play/pause, ba c k w ard, forward, go back or go to
submenu for more setting options by tapping the appropriate icon on the function bar.
Function
Tap on camera,
that you want to view to start. For photo viewing, the function bar provides options such as enlarge
photo, reduce photo, slideshow, share, delete, crop,
Rotate left, rotate right, etc. for your selection.
it
will show the list of the recorded videos and image files in a small icon. Tap the file
bar
14

Set
Language
From the application menu, tap on “Settings" and select “Language & input" from the list. Tap on
“Language" and you can see a list of compatible languages. Tap on the language that you want and
it will be set instantly. I n the same area, you can also set the language of the keyboard that you
would like to use when you need to input language on screen.
Set Date and
Time
From application menu, tap on “Settings" and select “Date & time" from the list. Tick on
“Automatic" and the date and time will be set automatically by using network- provided values
or unstick “Automatic" to set the date and time manually. You
can
also adjust the time zone, set
it to 24-hour time format and/or adjust the date format by tapping the appropriate options
provided.
About Phone
From the application menu, tap on “Settings" and select “About Phone" to check the device status
such as the firmware version, battery consumption status, model no., and Android OS version.
Troubleshooting
•This U b i s l at e7 C + is a capacitive touch screen device. It requires a simple connection between
your finger and the screen in order for the touch to be registered. At times instead of using your
finger, a stylus made for capacitive touch screen devices may be used. Do not use a pointy object
or one that could scratch the surface of the device.
•Should you find that the software on the Ubislate7C+ does not respond to any commands,
refuses to turn off or on, or any hardware component is not functioning properly, you may have
to do hardware reset. This is accomplished (after turning off the device if possible) by inserting a
pin into the reset key on the underside of the Ubislate7C+ and pressing the pin until the reset pin
clicks.
•If your device is not powering on try following things:
-Depress the power button until you feel a slight click then hold for 2 -3 seconds. Do not force the
15

button beyond the click, as you risk damaging it.
-Plug in a charger, keep it charged at least 20minutes and try again.
-Execute a hard reset of the unit (using a pin through the reset hole)
•If the powering on process does not complete, reset the unit and try again.
•At very low battery charge, the Wi-Fi module may stop working before the device. To continue
using the Wi-Fi module, the device should be plugged in to a charger. If the Wi-Fi has stopped
responding, you may need to power cycle the unit and keep it on the charger for an hour.
•If there is no sound coming from the speakers, check to see that the volume level is
Not set to 0, or check whether or not the audio file that you are listening to is not damaged by
using it on another device or trying other files on this one.
•If you are having trouble copying files, check to see if your PC connection is set up properly, if the
USB cable is properly attached, or whether there is enough available memory capacity on the drive
in question.
•If your device ever requires a hard RESET, please press and hold the ON/OFF button for at least 5
seconds. This will not delete saved information, only reset the device.
For troubles that are not be resolved by reading this manual, please do not hesitate to contact our
customer service team.
Important
Safety
Information
•Please remember to follow regulations governing the use of your UbiSlate7C+.
Always turn off your device whenever its use is forbidden or when it may cause interference or
danger (i.e.) hospitals/ aircraft/ petrol stations, etc.
•All s a f et y laws and regulations pertaining to the use of cell phones and two-way
Radios will apply to your use of the UbiSlate7C+. We advise you to follow these Laws and Regulations
when using the device.
•If at all possible, use a wireless hands-free system (headphone, headset) with a low
Power Bluetooth emitter.
•Make sure that the UbiSlate7C+ has a low SAR
•Keep your calls short or send e text message (SMS) instead. This advice applies
Especially to children, adolescents and pregnant women.
•
Telecommunications standards prevent the sale of mobile phones that exceed a
Maximum exposure level known as SAR of 1.6W/kg. To find the maximum SAR value
during testing of this model, dial *#*#727#*#*.
_Keep your calls short or send e text message (SMS)
•
Use
the phone feature when the signal quality is good.
•
Keep
•Do not let the device fall or rub or
the device away from strong magnetic fields to avoid damaging the product
in a ha
rd co n ta c t with any solid objects at any time. It
may cause surface scratches, displacement of the battery, and loss of data or damage to the
hardware inside.
16

•
Never
leave this product exposed to a humid environment or rain as the water
can
cause
permanent damage to the hardware inside.
•
Never
clean the device with any chemicals or detergents which could cause permanent
damages to the device surface.
•It is recommended no t to use the headset continuously at high volume. Volume levels should
be adjusted to an appropriate level to avoid permanent
hearing
damage.
•Do not cut off the power abruptly during software updates or during download or it may result in
data loss and/or system errors.
•Over-voltage, p o we r cable strain, bending or squeezing by heavy objects is not recommended to
avoid overheating or risk of fire.
•To eliminate the risk of electric shock, do not connect the cable power plug with wet hands.
•Some movies, music and pictur es are under copyri ght protec tion, u nauth orized usage is
deemed as infringements to copyright laws.
•The p e r f o rm an c e of the wireless reception of the device could be influenced by the wireless
equipment’s and networks.
•Do not use the device at gas stations, nearby fuel and/or chemicals.
•
Please
c o m p l y with any related restrictions and rules. Do not use the device where blasting
operations are in progress.
•Only qualified maintenance personnel are allowed to install or repair the device.
•
Please
use the original accessories and battery. Do n o t use i n c o m p a t i b l e
accessories on the device.
•
For
the sake of data safety, please back up any important information on the device or keep a
handwritten record.
•When connecting with other devices, please read the user manual for detailed safety
instructions, please do not connect it with any incompatible products.
•The UbiSlate7C+ an d its accessories m a y contain sm all parts. For safety purpose please keep
them out of the reach of small
children.
•Some p a r t s of the device may be magnetic in nature. Metallic materials may be attracted t o
the device. As a precaution, p e r s o n s w i t h a hearing a i d or impla nt
should not hold the device close to the implant or the ear with the hearing
(<1Scan)
•Avoid placing credit cards or other magnetic storage media near the
information stored on them may be
erased.
•This device contains glass components that upon breaking may splinter,
pose a safety risk until such a point that
at I
glass shards are disposed of.
aid.
device
because
crack
or shatter and
Safely
Disposing
of the
Device
The UbiSlate7C+ shoul d not be placed in household w a st e bins. Please check local regulations
for information on the disposal of electronics.
17
 Loading...