

Page 1

TP-650
PROMPTER KIT FOR ENG CAMERAS TP-650
PROMPTER KIT FOR ENG CAMERAS
Instruction Manual
www.datavideo.com
Jun-16.2016
P/N: TP-650 B1
Page 2

PROMPTER KIT FOR ENG CAMERAS TP-650
Contents
Contents ........................................................................................................................ 1
Warnings and Precautions .......................................................................................... 2
GLASS – Handle with care ........................................................................................ 2
Disclaimer of Product and Services ........................................................................... 3
Warranty ........................................................................................................................ 3
Standard Warranty ..................................................................................................... 3
Register for 2 year Warranty ..................................................................................... 3
Disposal ..................................................................................................................... 3
Packing List ............................................................................................................... 4
Product Overview ......................................................................................................... 5
Features ..................................................................................................................... 5
Assembly – TP-650 ....................................................................................................... 6
Camera Exposure and the 60/40 Glass .................................................................... 9
Cleaning the 60/40 Glass ........................................................................................10
Free app download from the App Store™ ................................................................11
Free Android App download from Google play™ ...................................................11
Optional remote control and DV Prompter manual .................................................11
Optional HC-600 Hard Case .......................................................................................12
HC-600 Features .....................................................................................................12
HC-600 specifications ..............................................................................................12
Adjustable tablet holder rail – Item B .......................................................................13
Specifications TP-650 .................................................................................................13
Service and Support ...................................................................................................14
Page 3
PROMPTER KIT FOR ENG CAMERAS TP-650
Warnings and Precautions
1. Read all of these warnings and save them for later reference.
2. Follow all warnings and instructions marked on this unit.
3. Unplug this unit from the wall outlet before cleaning. Do not use liquid or aerosol cleaners. Use a damp cloth
for cleaning.
4. Do not use this unit in or near water .
5. Do not place this unit on an unstable cart, stand, or table. The unit may fall, causing serious damage.
6. Slots and openings on the cabi net top, ba ck, and bot tom are p rovided for ventilation. To ensure s afe and r eliable
operation of this unit, and to pr otect it from ov erheat ing, do not blo ck or cover these o penin gs. Do not plac e thi s
unit on a bed, sofa, rug, or similar surface, as the ventilation openings on the bottom of the cabinet will be
blocked. This unit should never be placed near or over a h eat regis ter or radi ator. This un it should not be plac ed
in a built-in installation unless proper ventilation is provided.
7. This product should only be operated from the type of power source indicated on the marking label of the AC
adapter. If you are not sure of the type of power available, consult your Datavideo dealer or your local power
company.
8. Do not allow anything to rest on the power cord. Do not l ocat e this unit w here the pow er cor d w ill be w alked on,
rolled over, or otherwise stressed.
9. If an extension cord must be used with this unit, make sure that the total of the ampere ratings on the products
plugged into the extension cord do not exceed the ex tension cord ratin g.
10. Make sure that the total amperes of all the units that are plugged into a single wall outlet do not exceed 15
amperes.
11. Never push objects of any k ind into this unit through the cabinet venti lati on slots, as they may touch dangerous
voltage points or short out parts that could result in risk of fire or electric shock. Never spill liquid of any kind
onto or into this unit.
12. Except as specifically explained elsewhere in this manual, do not attempt to service this product yourself.
Opening or removing covers that are marked “Do Not Remove” may expose you to dangerous voltage points
or other risks, and will void your warranty. Refer all service issues to qualified service personnel.
13. Unplug this product from the wall outlet and refer to qualified service personnel under the following conditions:
a. When the power cord is damaged or frayed;
b. When liquid has spill ed int o th e unit;
c. When the product has been exposed to rain or water;
d. When the product does not operate normally under normal operating conditions. Adjust only
those controls that are covered by the operating instructions in this manual; improper
adjustment of other contr ols may result in da mage to t he unit and may often req uire ex tensive
work by a qualified techni cian to restore the unit to normal operation;
e. When the product has been dropped or the cabinet has been damaged;
f. When the product exhibits a distinct change in performance, indicating a need for service.
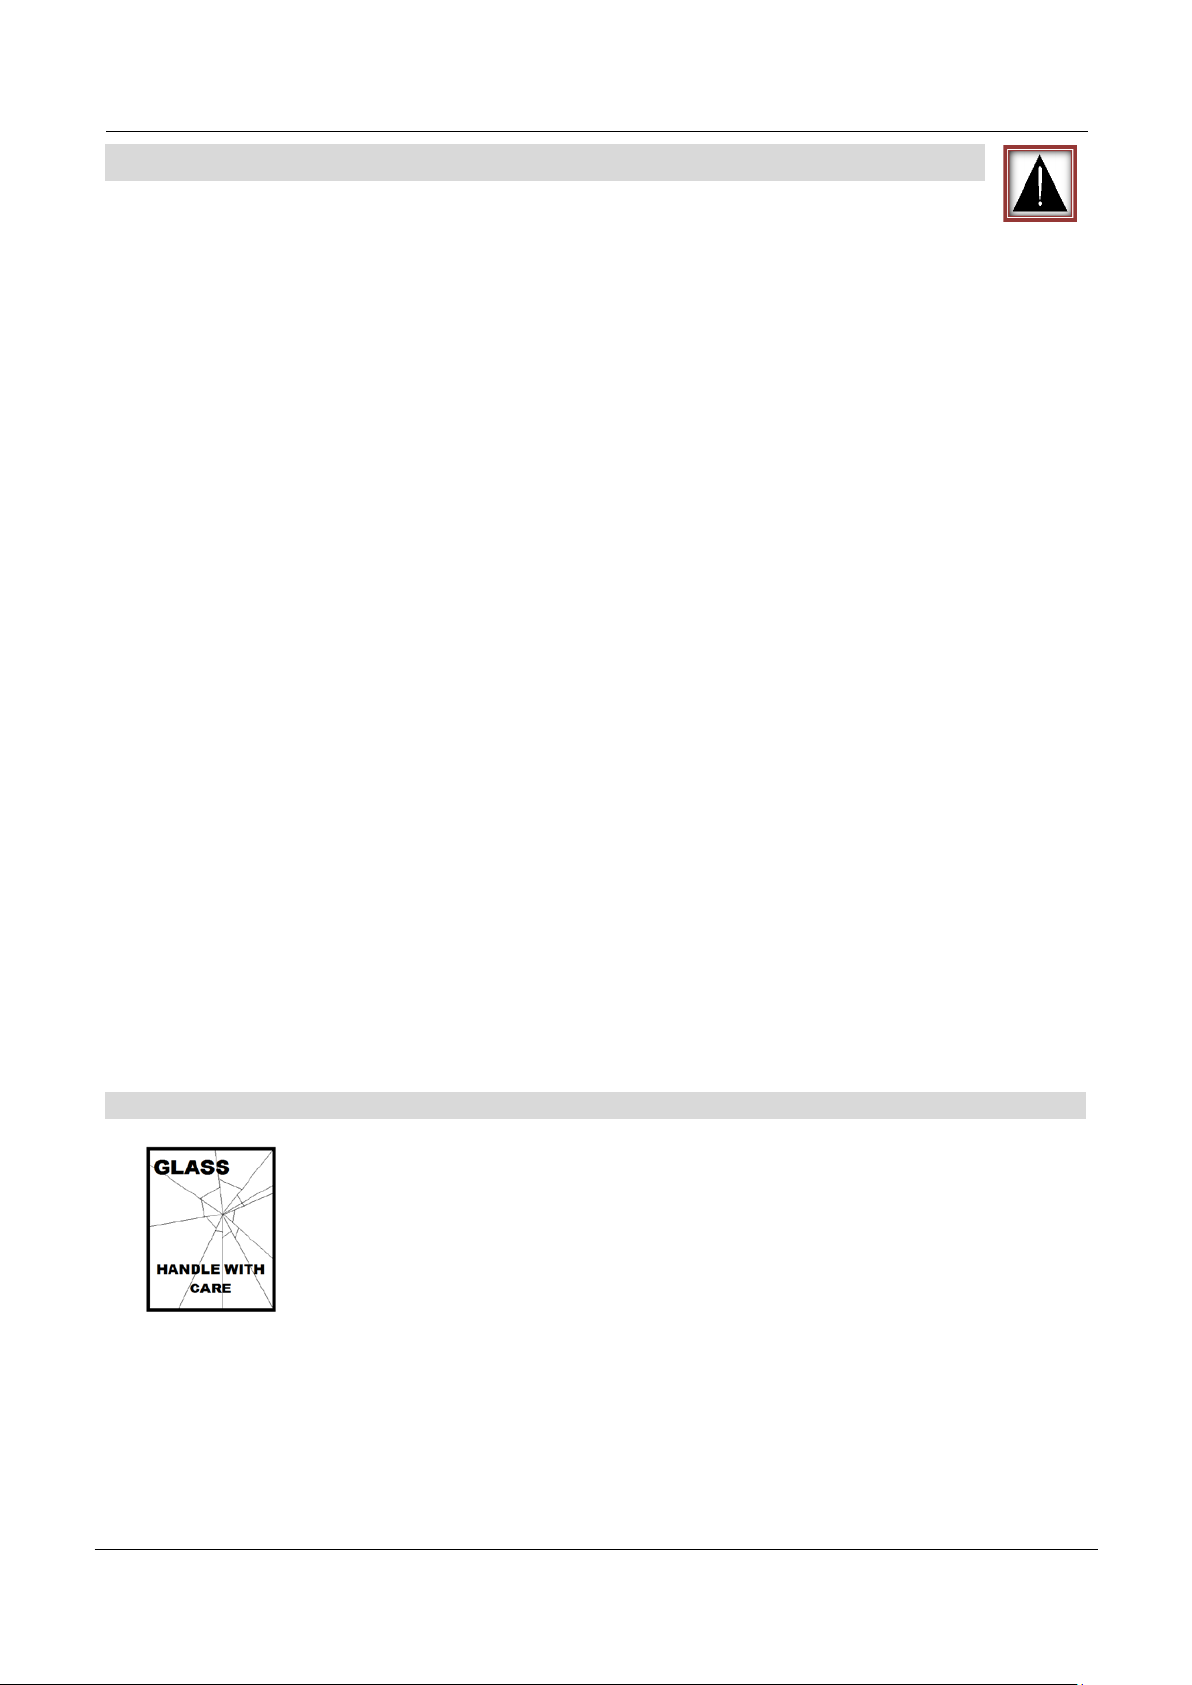
GLASS – Handle with care
This product contains a sheet of 60/40 mirror glass please handle it with care.
To avoid a risk of damage or injury please follow this instruction manual and use caution
when transporting, un-pac king, cleaning, assem bling or dis-assembling this part of the
product.
2
Page 4

PROMPTER KIT FOR ENG CAMERAS TP-650
•
•
•
•
•
•
•
•
•
Disclaimer of Product and Services
The information offered in this instruction manual is intended as a guide only. At all times, Datavideo Technologies will try
to give correct, complete a nd suitab le inf ormati on. How ever , Datavideo T echnol ogi es cannot ex clude that so me infor matio n
in this manual, fro m time to ti me, may not be corre ct or may b e incomplete. T his manual m ay contain typi ng errors, omission s
or incorrect information. Dat avideo Technolog ies always reco mmend that you doub le check the informa tion in this docum ent
for accuracy before making any purchase decision or using the product. Datavideo Technologies is not responsible for any
omissions or errors, or for any subsequent loss or damage caused by using the information contained within this manual.
Further advice on the content of this man ual or o n t he pro du ct can be obtained by contacting your local Datavideo Office or
dealer.
Warranty
Standard Warranty
Datavideo equipment is guaranteed against any
manufacturing defects for one year from the date of
purchase.
The original purchase invoice or other documentary
evidence should be supplied at the time of any request
for repair under warranty.
Damage caused by accident, misuse, unauthorized
repairs, sand, grit or water is not covered by this
warranty.
All mail or transportation costs including insurance are
at the expense of the owner.
All other claims of any nature are not covered.
Cables & batteries are not covered under warranty.
Warranty only valid within the country or region of
purchase.
• Your statutory rights are not affected.
Disposal
For EU Customers only – WEEE Marking
This symbol on the product indicates that it should not be treated as household was te. It must be
handed over to the applicable take-back scheme for the recycling of Waste Electrical and Electronic
Equipment. For more detail ed informatio n about the re cycling of t his product, p lease conta ct your loca l
Datavideo office.
Register for 2 year Warranty
All Datavideo products purchased after 01-Oct.-2008
qualify for a free one year extension to the standard
Warranty, providing the product is registered with
Datavideo within 30 days of purchas e. Fo r infor mati on
on how to register please visit
contact your local Datavideo office or authorized
Distributors.
Certain parts with limited lifetime expectancy such as
LCD Panels, DVD Drives, Hard Drives are only
covered for the first 10,000 hours, or one year
(whichever comes first).
Any second year warranty claims must be mad e to your
local Datavideo office or one of its authorized
Distributors before the extended warranty expires.
www.datavideo.com or
3
Page 5
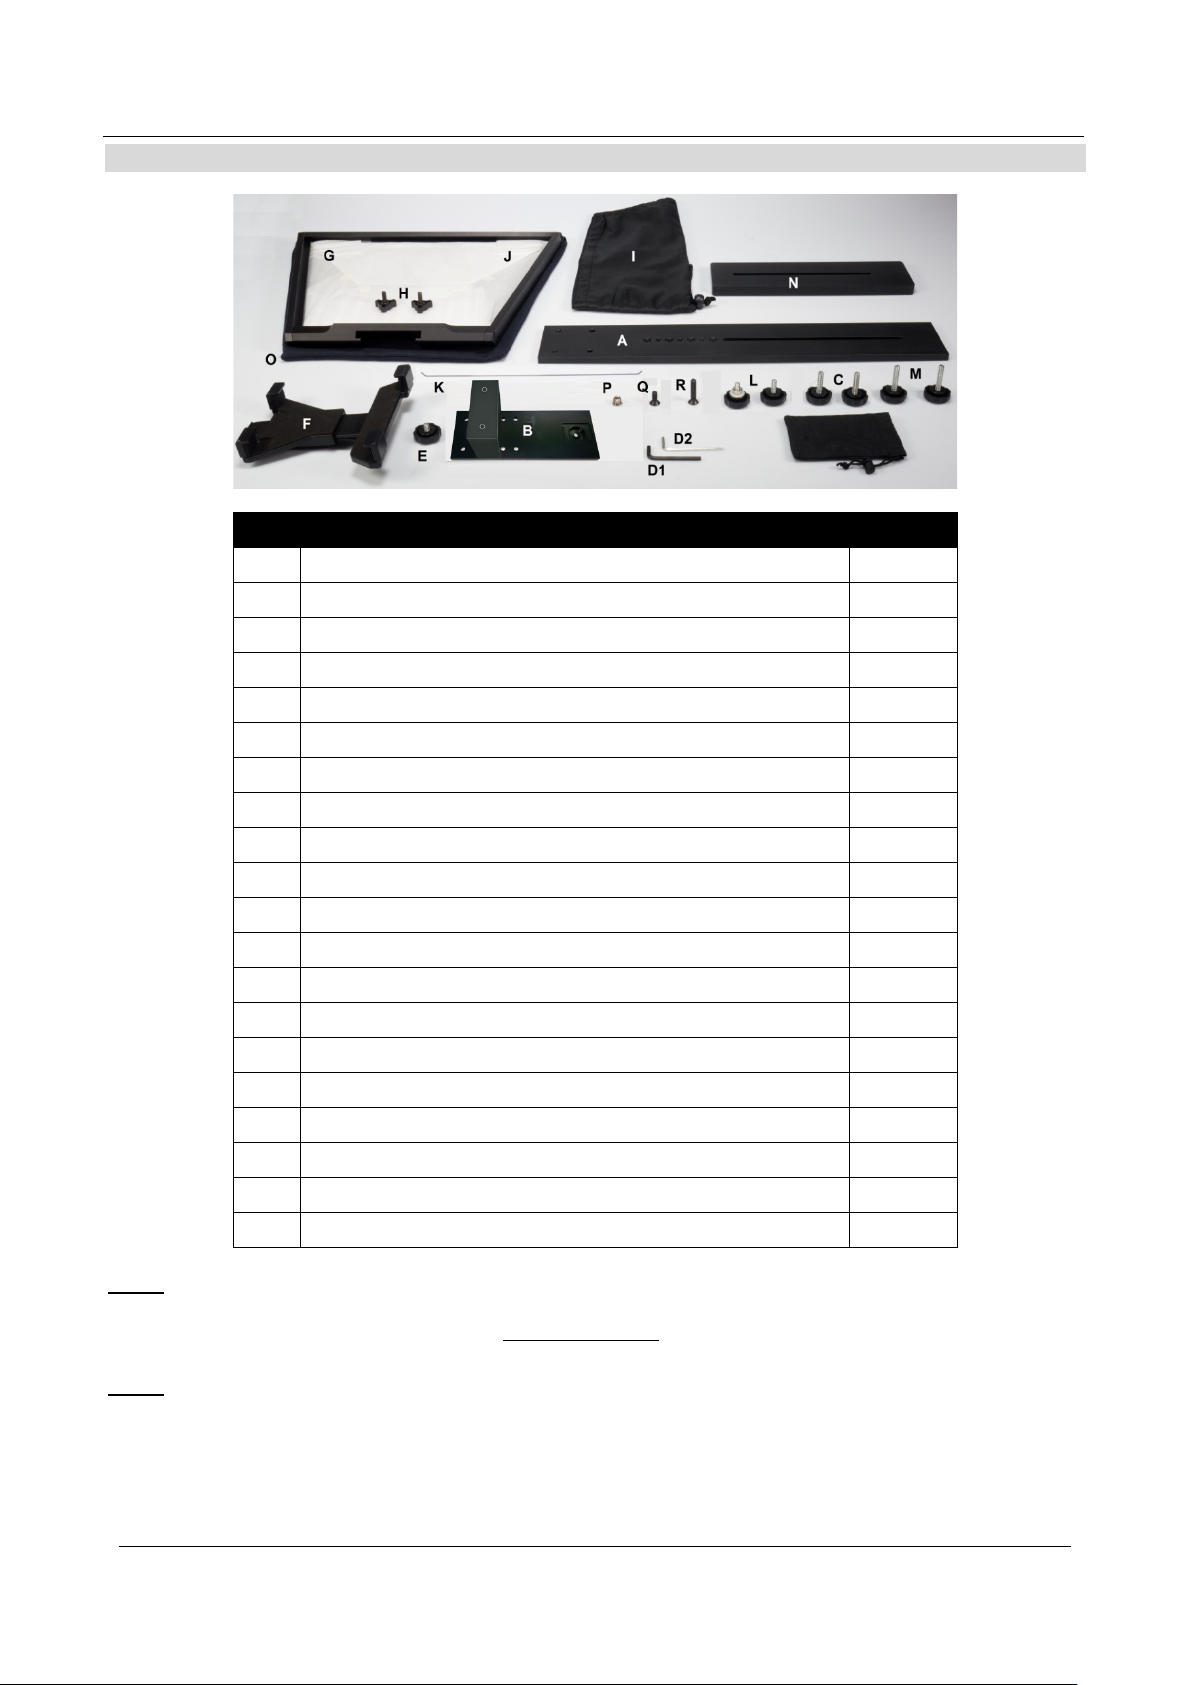
Wing nut screws ¼” Length 16mm secures item G to A
Camera riser block 15mm thick
Packing List
PROMPTER KIT FOR ENG CAMERAS TP-650
Item Description Quantity
A
Main TP-650 ENG prompter rail
B
Smaller rail with spacer block for mounting bracket
C
¼” Screws Length 27mm secures item B to A
D1
Hex Tool (Black) for counter sunk Hex head screws
D2
Hex Tool (Silver) for Glass Frame Hex screw s
E
¼” Screw Length 8mm secures item F to B
F
Adjustable Mounting Bracket with locking lever
G
Glass frame with 4 Velcro straps
H
I
Cloth Snood/Hood with Velcro straps
J
60/40 Glass sheet with Green and Red stickers
K
Snood/Hood support wire
L
¼” Camera securing screws length 16mm
1
1
2
1
1
1
1
1
2
1
1
1
2
M ¼” Camera securing screws length 31mm 2
N
1
O
Cloth case for Snood, Mirror Glass and Glass frame
P
Adapter screw to convert 3/8” hole to ¼” hole
Q
¼” Counter sunk hex head screw length 16mm
R
¼” Counter sunk hex head screw length 31mm
plus
Retail carton with protective foam packing
NOTE: Depending on your order, your TP-650 kit could have been supplied with one of a range of wired or
Bluetooth remote controls – for more information on the remote controls please speak with your local
Datavideo supplier or check our website
NOTE: The foam packing within this products retail carton has been designed so that it can be easily transferred to
an optional hard case, called HC-600, for this kit. See page 12 for more information.
Please speak with your s upplier if you wish to purchase an optional remote control or hard case for your
prompter kit.
1
1
1
1
1 set
www.datavideo.info for details.
Page 6

PROMPTER KIT FOR ENG CAMERAS TP-650
takes, on stage talent
designed to help you overcome these problems by
sheets can be easily copied and pasted into the DV
Shown with Panasonic AG-HPX371E and SHAN-TM700
Product Overview
Why struggle with expensive redrifting off script or a presenters’ loss of eye contact with
the viewing audience? This Datavideo Prompter Kit is
converting a tablet computer (not supplied) into a low cost
and effective prompter.
The Datavideo Prompter Kit, TP-650, can be used in either
a theatre setting, or a vi deo st udio. P r epar e d s crip ts or cue
prompter app software from email and scrolled at a set
automatic rate or controlled by a user with the optional
wired / wireless remote for a more natura l r e sul t. A nu mber
of clear fonts, colours and text sizes are available making
reading comfortable from a variety of distances.
That’s Datavideo, sharing the value !
Features
• Simple software and rem ot e al low users to
produce professional results at low cost.
• Special 60/40 Glass allows the presenter to read
the script and the camera to see the subject.
• Strong and rigid prompter frame fixes securely to
any standard tripod quick release plate.
• The prompter frame is designed to allow in front
of camera lens prompting.
• The black camera snood/hood is adjustable to
adapt for a wide variety of cameras.
• Quick and simple assembly that requires no
special tooling.
• Expandable mounting bracket system allows
simple but secure installation of tablet.
• An optional remote control is available.
5
Page 7

Now slide and secure the tripod plate, with
4. There are four adhesive Velcro straps packed
Apply the two long Velcro strips to the Glass
Assembly – TP-650
PROMPTER KIT FOR ENG CAMERAS TP-650
1. Attach/screw the tripod’s own quick release plate
to the screw holes on t he b ase of the TP-650 ENG
Prompter rail, item A.
The long slot will be to the rear of the camera
position and the four holes in the rai l will be toward s
the lens of the camera.
Tip: Add a second screw (not supplied) through
the quick release plate. This to stop the Prompter
Frame from being able to spin on top of t he quick
release plate.
2.
prompter rail, item A, ont o the head of the tri pod or
dolly.
3. Use the hand screws item C , to secure the lower
part of the ENG Prompter Frame item B in place
using the counter sunk holes in the main part of
the frame item A.
Note: There should be two holes left free in front
of this mounting position for the Glass frame.
inside the Snood/Hood, item I. Peel off the white
paper backing before applying these straps to the
Glass Frame, item G.
Frame edges on the Left side and Right side. Then
apply the two smaller Velcro strips to the Bottom
Left and Right sides of the Glass Frame edge.
Be careful not to cover any screws and keep
them straight.
6
Page 8

PROMPTER KIT FOR ENG CAMERAS TP-650
Ideally you want the lens of your camera
5. Slide the Glass frame, item G, on to the front of
the TP-650 EN G prompter r ail, i tem A. Ensure t he
upper part of the Glass Frame, Item G, is leaning
away from the camera position and secure with
the two wing nut screws, item H.
6. There are two slots on the inside left and right of
the Glass Frame, Item G. Guide/slide 60/40
Mirror Glass sheet, item J , into these slots from
above.
The Red circle sticker on the Mirror Glass, item
J, should be facing camera position / lens.
The Green circle sticker on item J should be
facing toward the on screen talent /
commentator.
7. Secure the glass sheet within the frame using the
cross head screws at the top of each frame slot.
8. Fit the adjustable mounting bracket with locking lever, item F, to the lower prompter rail item B.
Marry the mounting hooks in item B in the holes in the bottom of item F to secure item F to B.
It should slide and click into place.
9. Decide if you need to use t he TP-650 ENG camera
riser block or not.
positioned as close to the centre of the 60/40
mirror glass as possible.
In some cases depending on your camera and its
ENG camera plate the camera lens may already
be high enough.
7
Page 9

PROMPTER KIT FOR ENG CAMERAS TP-650
Secure the ENG tripod adapter plate (not
through the long slot on the riser block and
prompter rail and into the base of the tripod
adapter plate and riser block need to be
11. You can now mount t he ENG camera to the tri pod
12. Fit the Snood / Hood support wire, item K.. This
. The
SHAN-TM700 tripod adapter plate shown
without riser block
10.
supplied) and riser block item N (if required) to
the prompter rail item A using two of the riser
screws provided, items L or M . These scr ew s go
adapter plate.
Two screw sets are provided, the long s et (Item
M 31mm long) is for when using the riser bloc k.
The short set (Item L 16mm long) when just using
the camera plate on its own.
Items Q and R are provided in case the tripod
positioned over the tripod head.
adapter plate. Take care to protect the camera
lens and the 60/40 mirror g lass. If necessary slide
everything further along the prompter frame.
The tip of the lens should be ab out 1 to 2 cm away
from the centre of the 60/40 Mirror Glass.
It may be a good idea to remove the lens
sun hood if this is possible.
stops the cloth Snood / H ood from dippi ng in front
of the camera lens. T here are t wo sets o f hole s in
the glass frame for this Snood / Hood support
wire.
13. Fit the cloth Snood / Hood, item I, around the lens
and to the Glass Frame edges, item G
Velcro strips marry the Snood/Hood to the Glass
Frame.
8
Page 10

PROMPTER KIT FOR ENG CAMERAS TP-650
19. Adjust the camera exposure settings as necessary. See Camera Exposure below.
20. Read the section regarding your chosen remote control.
14. Pull the draw cord to secure the cloth Snood /
Hood, item I, around the camera len s and to shut
out light from the camera s ide.
15. Turn on the tablet being used, install and launch the DV Prompter software then prepare the prompting text
to be used. Then set up for the optional remote control. A separate manual is available for DV Prompter and
the chosen remote control.
16. Put the configured tablet into the mounting
bracket and ensure it is held securely by
adjusting the size of the bracket holders for a
snug fit and locking them in plac e. Use locking
lever on the bottom of item F.
17. If required adjust the position o f the tablet ho lder
using the information on page 13.
18. Adjust the prompting settings where necessary.
Camera Exposure and the 60/40 Mirror Glass
After setting up the camera with the 60/40 glass in front of the lens adjust the camera set up and white balance. This is
because the 60/40 Glass affects the camera exposure by approximately 1 stop almost like the effect of a neutral density
filter. Consult your camera manual for further help and advice with its exposure and white balance settings.
9
Page 11

PROMPTER KIT FOR ENG CAMERAS TP-650
Cleaning the 60/40 Glass
This product contains a sheet of 60/40 glass please handle it with care.
To avoid a risk of dam age or inj ury please f ollow this instr uction m anual and use cautio n
when transporting, un-packing, cleaning, assembling or dis-assembling this part of the
product.
Datavideo recommend cleaning the glass regularly to remove dust and finger print marks.
This will ensure the best image quality is recorded when the camera is looking through the glass.
Never attempt to clean the glass whilst it is mounted in the prompter instead remove it c arefull y from the
prompter, clean th e glass and then re-i nstall it into the prom pter frame. Handle the glass carefull y using the
cloth covered edges of the glass at all times.
To retain the required qualities of the glass and to avoid scratching the glass during cleaning.
• Never use abrasive cloths, pads or abrasive based cleaning fluids on the glass.
• Never use cleaning fluids based on an acid or vinegar solution.
Place the glass on a s oft, stable, dirt and lint free w ork
surface such as a tab le wit h a c l ean c loth already laid out
on it. Then use a second clean, lint free, soft cloth to clean
the glass.
Do not apply clean ing fluids to t he glass direc tly, instead
apply or spray a sm all amount of the cleaning f luid onto
the cloth. Proceed to clean the glass a nd work in a light
circular motion with the clot h. Ensure all finger marks and streak s are gone before tur ning the glass over and
repeating with the other side.
Once finished re-install the glass back into the prompter hood, again using the cloth covered edges only. Ensure
the green circle sticker on the glass is facing you and the red c ircle sticker is facing the c amera lens.
Reseat/secure the camera hood if necessary.
10
Page 12

PROMPTER KIT FOR ENG CAMERAS TP-650
Free app download from the
Free Android App download
App Store™
Ensure your tablet has internet access via your cellular
service provider or a secure wireless connection.
Tap the App Store™ icon on the device Home Screen
to download apps wherever you are.
Browse the section of the store that
features apps designed specifically for
these devices or tap on the Search bar at
the top/bottom of the screen and type in Datavideo or DV
Prompter. Then execute the search by tapping on the
Search icon to the right. You will see this software as a
result listed, simp ly ta p o n the Free icon and then Install.
The App Store icon on your de vice will show you w hen an
update is available for any app that you
already have. Install the updates with a
tap, and you’ll always have the latest
version of your favourite apps like DV
Prompter.
from Google play™
Ensure your tablet has internet access via your cellular
service provider or a se cur e w ireles s conn ect ion.
Tap on the Google play
Screen to see the latest or popular App downloads.
Browse for Apps or tap on the magnifying glass icon to
show the Search bar.
When sear ching type in DV Prompter then execute the
search by tapping on the search icon again. You will see
our app as a result listed, si mply tap on DV Prompter and
choose install.
Android and Google play are trademarks of Google Inc.
™ icon on the device Home
Optional remote control a nd DV Prompter manual
There is another manual which covers how to use the remote control and also the DV Prompter application. It is su ppl ied
with the remote control and can also be downloaded as a PDF document from your local Datavideo office website.
11
Page 13

PROMPTER KIT FOR ENG CAMERAS TP-650
Optional HC-600 Hard Case
The foam packaging of the TP-650 kit has been designed so that customers who buy the optional hard case can simply lift
the foam out from the retail carton and insert it directly into the optional HC-600 hard cas e.
As standard, the HC-600 hard case is supplied with the usual diced, pick & pluck foam so these cases can also be used as
optional carrying cases for a variety of equipm ent – not just the TP-650 kit.
HC-600 Features
• Press & pull latches
• Secure impact resistant hinges with integrated feet
• Case can stand upright and level on hinge spine
• Solid core handle is both comfortable and durable
• Shock proof, vibration proof, dust proof and rust proof
• Low temperature (-25C / -13F) resista nce tes ted
• Sealable for moisture protection
• Pressure release valve
• Stackable
Please speak with your supplier or dealer if you wish to purchase an optional HC-600 hard case.
HC-600 specifications
Dimensions: External H 410mm x W 515mm x D 200mm
Dimensions: Internal base H 352mm x W 481mm x D 100mm without foam
Dimensions: Internal lid H 352mm x W 481mm x D 70mm without foam
Weight: 4.15 Kg ( 9.15 lbs ) with pick and pluck foam only
Weight: 7.70 Kg ( 16.98 lbs ) Including TP-650 kit and foam
12
Page 14

PROMPTER KIT FOR ENG CAMERAS TP-650
Normal Position
Adjusted
Adjustable tablet holder rail – Item B
Item B in this kit has two counter sunk hex head screws. If these screws are removed the horizontal rail can be
moved and re-secur ed to the vert ical b lock using diff erent holes. T his w ill chan ge positi on of the tablet ho lder
and where the text is r ef lected on the 60/40 Mirr or g las s . In this way you can adjust the reflected re ad posit ion
(up or down) for your preferred tablet.
Specifications TP-650
Prompter Size (Max)
Width: 415 mm (16.34 inches)
Height: 290 mm (11.42 inches)
Length: 750 mm (29.53 inches)
Expandable Mounting Bracket
Sizes: 145 mm (Minimum tablet width)
265 mm (Maximum tablet width)
Nett Weight: Kit: 3.28 Kg (7.23 lbs)
Packed weight: (Gross) Kit: 4.45 Kg (9.81 lbs)
13
Page 15

PROMPTER KIT FOR ENG CAMERAS TP-650
Datavideo Corporation
Datavideo Technologies Europe
Datavideo UK Limited
Datavideo Technologies Co. Ltd
Datavideo Technologies China Co
Datavideo Technologies (S) PTE
Datavideo Hong Kong Ltd
Datavideo France s.a.r.l
Datavideo Technologies India
Service and Support
It is our goal to make your products ownership a satisfying experience. Our support staff are available to assist
you in setting up and operating your system . Please ref er to our we b site www.d atavideo.com for answers to
common questions, support requests or contact your local office below.
Datavideo Global Website: www.datavideo.com
7048 Elmer Avenue.
Whittier, CA 90602
Tel: +1-562-696 2324
Fax:+1-562-698 6930
E-mail: techsupport@datavideo.us
10F. No. 176, Jian 1st Rd. Chung Ho
District, New Taipei City 235,
Taiwan, R.O.C.
Tel: +886-2-8227-2888
Fax: +886-2-8227-2777
E-mail: service@datavideo.com.tw
G/F.,26 Cross Lane
Wanchai, Hong Kong
Tel: +852-2833-1981
Fax: +852-2833-9916
E-mail: info@datavideo.com.hk
BV
Floridadreef 106
3565 AM Utrecht,
The Netherlands
Tel: +31-30-261-96-56
Fax:+31-30-261-96-57
E-mail: info@datavideo.nl
101,NO.618,LiuYing Rd,
Zhabei District,
Shanghai, China
Tel: +86 21-5603 6599
Fax: +86 21-5603 6770
E-mail: service@datavideo.cn
Cité Descartes 1, rue Albert Ein stein
Champs sur Marne
774477-Marne la Vallée cedex 2
Tel: +33-1-60370246
E-mail: info@datavideo.fr
Units1 & 2 Waterside Business Park
Hadfield, Glossop, Derbyshire
SK13 1BE, UK
Tel: +44-1457 851 000
Fax:+44-1457 850 964
E-mail: sales@datavideo.co.uk
Ltd
No. 178 Paya Lebar Road #06-03
Singapore 409030
Tel: +65-6749 6866
Fax: +65-6749 3266
E-mail: sales@datavideo.sg
A-132, Sec-63,Noida-201307,
Uttar Pradesh (UP), India
Fax:+91-0120-2427338
E-mail: sales@datavideo.in
Tel: +91-0120-2427337
Please refer to our website for the latest PDF version of this manual
http://www.datavideo.info/Teleprompters/TP-650
All the trademarks are the properties of their respective owners. Datavideo Technologies Co., Ltd. All rights reserved 2014.
June 16, 2016 - P/N: TP-650 B1
14
 Loading...