

Page 1
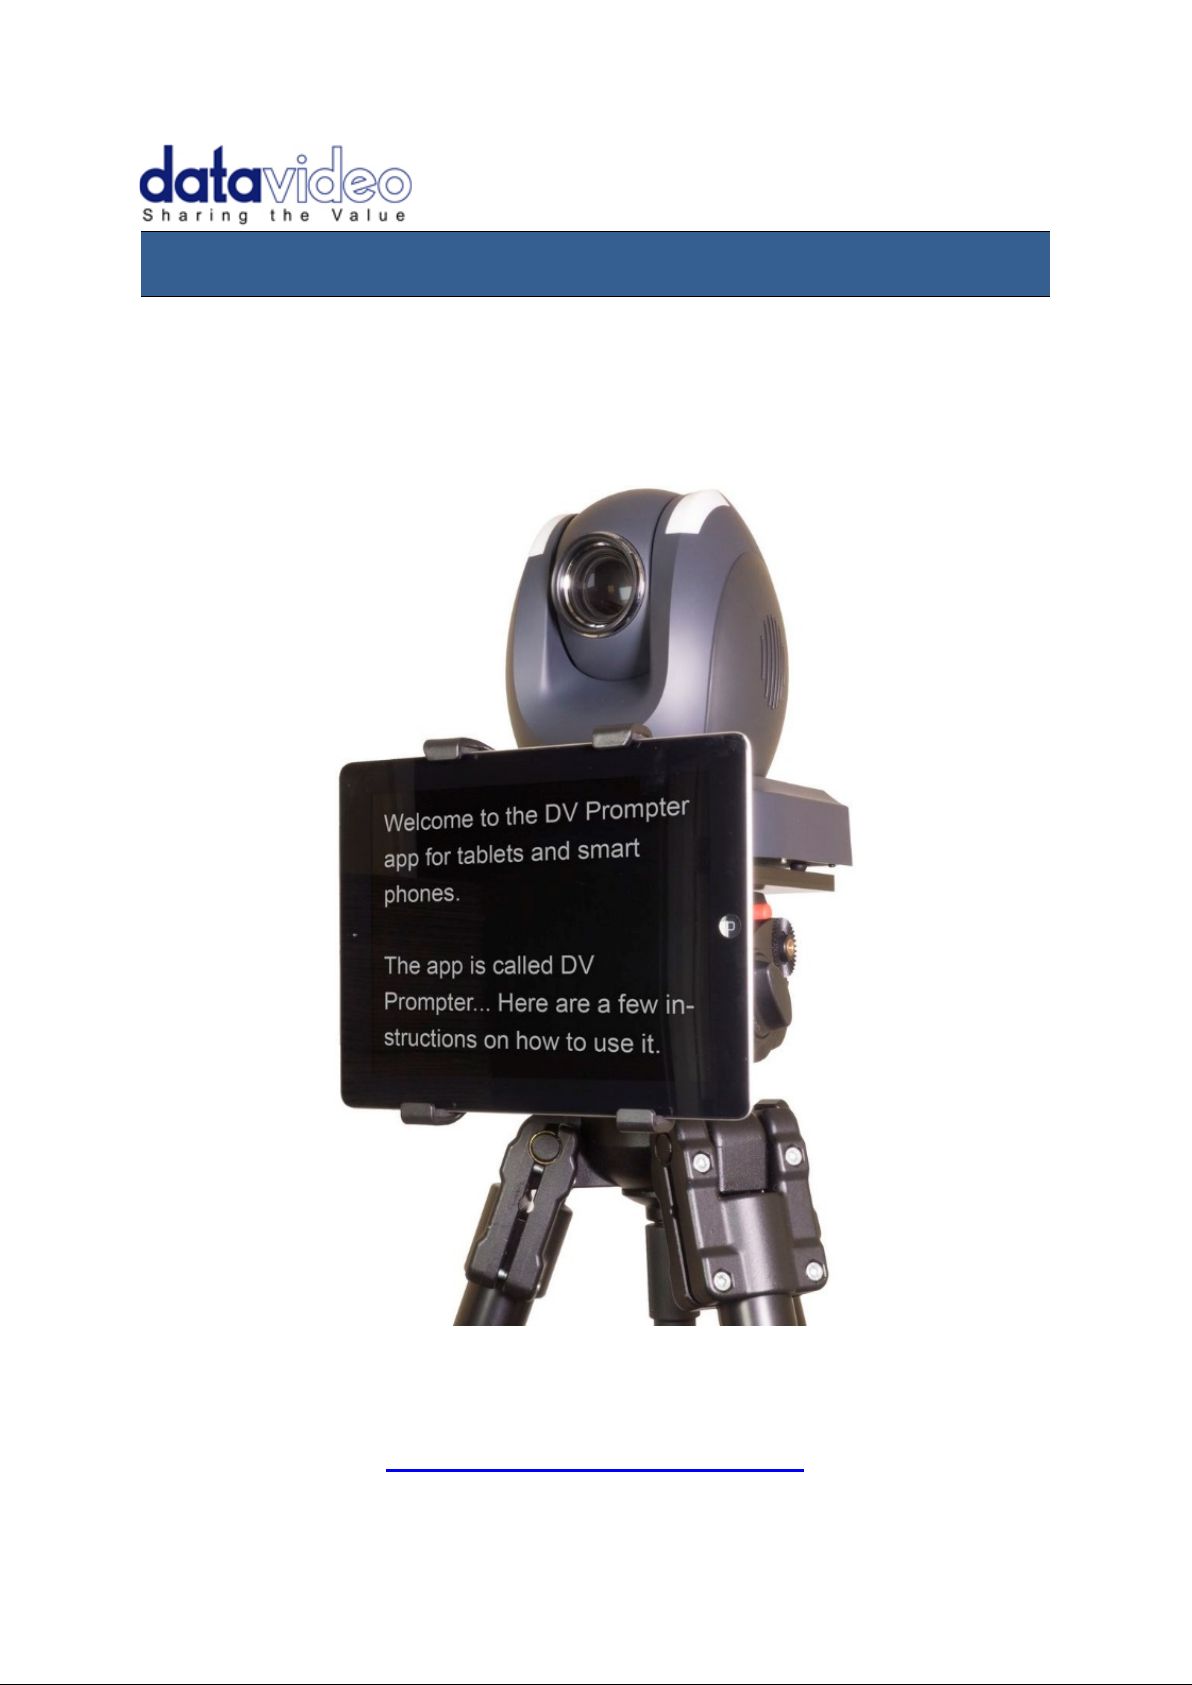
Prompter Kit for PTZ camera
TP-150
Instruction Manual
WWW.DATAVIDEO.COM
Page 2

Contents
Warnings and Precautions ...................................................................................... 3
Warranty .................................................................................................................... 4
Disposal .................................................................................................................... 4
Packing List .............................................................................................................. 5
Product Overview ..................................................................................................... 6
Normal tripod assembly .......................................................................................... 7
Free Software Download from the App Store™ .................................................... 8
Free Android App download from Google play™ ................................................. 8
Tablet / Device Tips .................................................................................................. 8
DV Prompter - User Interface - iPad ........................................................................ 9
DV Prompter Application Set Up........................................................................... 10
How to quickly add text into a DV Prompter document ...................................... 12
Frequently Asked Questions ................................................................................. 13
TP-150 Specifications ............................................................................................ 14
Optional remote specifications ............................................................................. 14
Service and Support .............................................................................................. 15
iPad, iTunes and App Store are trademarks of Apple Inc. Android and Google play are trademarks of Google Inc.
Disclaimer of Product and Services
The information offered in this instruction manual is intended as a guide only. At all times, Datavideo Technologies will try to give
correct, complete and suitable information. However, Datavideo Technologies cannot exclude that some information in this
manual, from time to time, may not be correct or may be incomplete. This manual may contain typing errors, omissions or incorrect
information. Datavideo Technologies always recommend that you double check the information in this document for accuracy
before making any purchase decision or using the product. Datavideo Technologies is not responsible for any omissions or errors,
or for any subsequent loss or damage caused by using the information contained within this manual. Further advice on the content
of this manual or on the product can be obtained by contacting your local Datavideo Office or dealer.
2
Page 3

Warnings and Precautions
1. Read all of these warnings and save them for later reference.
2. Follow all warnings and instructions marked on this unit.
3. Unplug this unit from the wall outlet before cleaning. Do not use liquid or aerosol cleaners. Use a damp
cloth for cleaning.
4. Do not use this unit in or near water.
5. Do not place this unit on an unstable cart, stand, or table. The unit may fall, causing serious damage.
6. Slots and openings on the cabinet top, back, and bottom are provided for ventilation. To ensure safe and
reliable operation of thi s unit, and to protect it from overheati n g, d o n ot blo ck or cov er these openings. Do
not place this unit on a bed, sofa, rug, or similar surface, as the ventilation openings on the bottom of the
cabinet will be bloc ked . T his unit should never be placed near or ov er a heat register or radiator. This unit
should not be placed in a built-in installation unless proper ventilation is provided.
7. This product should only be op erated from the type of power source indicated on the marking labe l of th e
AC adapter. If you ar e no t s ur e of the type of power available, consult your D atav id eo dea ler or your local
power company.
8. Do not allow anything to rest on the power cord. Do not locate this unit where the power cord will be
walked on, rolled over, or otherwise stressed.
9. If an extension cord must be used with this unit, make sure that the total of the ampere ratings on the
products plugged into the extension cord do not exceed the extension cord rating.
10. Make sure that the total amperes of all the units that are plugged into a single wall outlet do not exceed
15 amperes.
11. Never push objects of any kind into this unit through the cabinet ventilation slots, as they may touch
dangerous voltage points or short out parts that could result i n risk of fire or electric shock. Never spill
liquid of any kind onto or into this unit.
12. Except as specifically explained elsewhere in this manual, do not att e mpt t o s er v ice thi s pr o duct y ourself.
Opening or removing covers that are marked “Do Not Remove” may expose you to dangerous voltage
points or other risks, and will void your warranty. Refer all service issues to qualified service personnel.
13. Unplug this product from the wall outlet and refer to qualified service personnel under the following
conditions:
a. When the power cord is damaged or frayed;
b. When liquid has spilled into the unit;
c. W hen the product has been exposed to rain or water;
d. When the product does not operate normally under normal operating conditions. Adjust only
those controls that are cov ered by the oper ating in structions in this ma nual; improp er adjust ment
of other controls may result in damage to the unit and may often require extensive work by a
qualified technician to restore the unit to normal operation;
e. When the product has been dropped or the cabinet has been damaged;
f. When the product exhibits a distinct change in performance, indicating a need for service.
3
Page 4

Warranty
•
•
Standard Warranty
• Datavideo equipment is guaranteed against any manufacturing defects for one year from the
date of purchase.
• The original purchase invoice or other documentary evidence should be supplied at the time
of any request for repair under warranty.
• Damage caused by accident, misuse, unauthorized repairs, sand, grit or water is not covered
by this warranty.
• All mail or transportation costs including insurance are at the expense of the owner.
• All other claims of any nature are not covered.
• Cables & batteries are not covered under warra nty.
• Warranty only valid within the country or region of purchase.
• Your statutory rights are not affected.
Two Year Warranty
All Datavideo products purchased after 01-Oct.-2008 qualify for a free one year extension to the
standard Warranty, providing the product is registered with Datavideo within 30 days of
purchase. For information on how to register please visit
local Datavideo office or authorized Distributors
Certain parts with limited lifetime expectancy such as LCD Panels, DVD Drives, Hard Drives are
only covered for the first 10,000 hours, or 1 year (whichever comes first).
www.datavideo.com or contact your
Any second year warranty claims must be made to your local Datavideo office or one of its authorized
Distributors before the extended warranty expires.
Disposal
For EU Customers only - WEEE Marking
This symbol on the pr oduct indicates that it should n ot be treated as household
waste. It must be handed over to the applicable take-back scheme for the recycling
of Waste Electrical and Electronic Equipm ent. F or more detailed inform ation a bou t
the recycling of this product, please contact your local Datavideo office.
4
Page 5
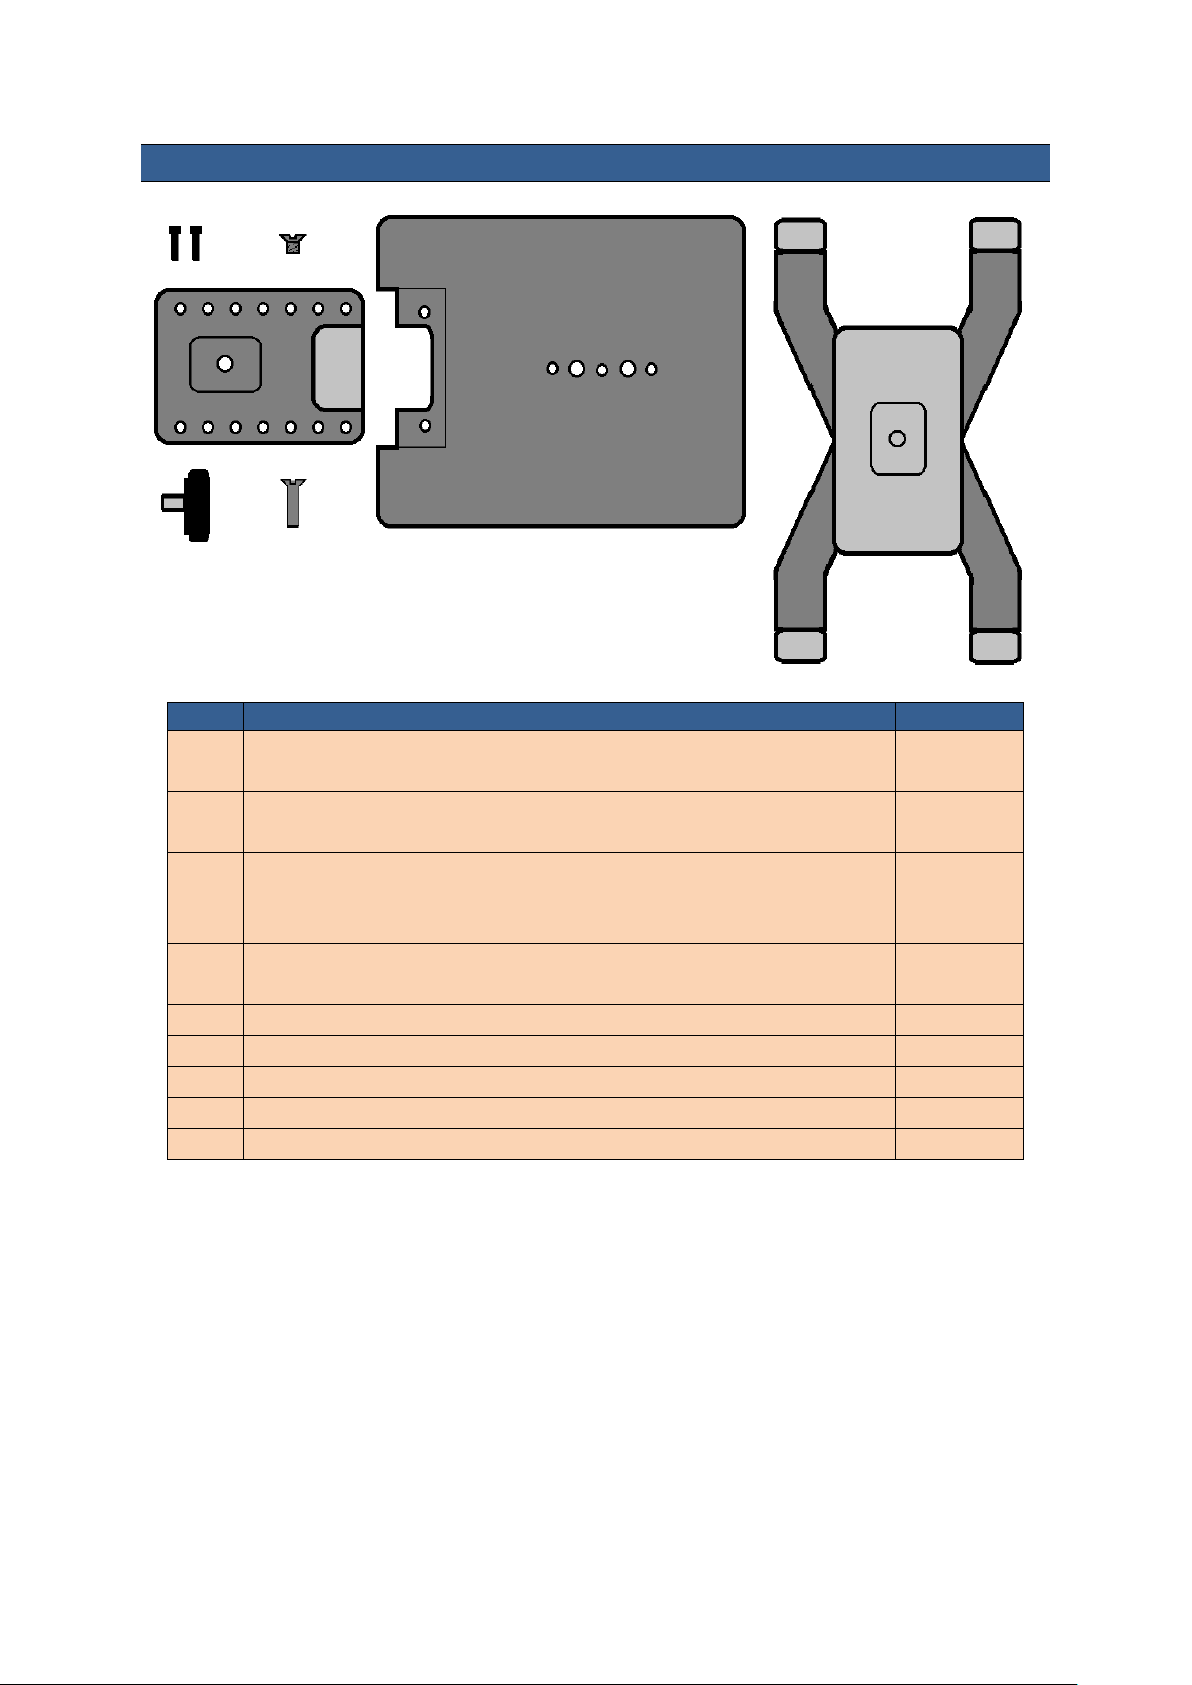
Packing List
Item
Description
Quantity
Secure the base of the camera to this plat e us ing ite m B
Used to secure the base of the camera to item A.
prompter frame to make it compatible with a standard 1/4" screw.
Used to secure item E to the front of item A
E
Vertical mounting plate
1
F
Expandable tablet holder
1
G
Large thumb screw for securing item F to item E
1
H
Hex tools to tighten item B & D screws
2
I
Instruction Manual
1
A
B
C
D
E
F
G
A Horizontal Plate A
B Screw B – 1/4” screw length 18mm
C Metal 3/8" to 1/4" adaptor screw
This item screws into one of the larger 3/8 holes on the bottom of the
D Hex head mounting screws
Please speak with your supplier or dealer if you wish to purchase an optional WR-500 remote control
or protective carry case for your prompter kit.
1
1
1
2
5
Page 6

Product Overview
TP-150 is the world’s first t eleprompter s ystem dedicated to PT Z cameras. It allows t he presenter to
read and control scripts in multiple languages.
The kit includes a m ount that securely holds an Android or iO S tablet device below the PTZ camera
head. Quick and easy to assemble, the TP-150 requires no special tooling. The TP-150 frame attaches
to any standard tripod quick release plate.
TP-150 is a cost-effective s olution that can be operated entire ly by the presenter using an optional
bluetooth or wired controller. The TP-150 is suitable for small studios, business presentations,
conferences or live events.
Features
• The free teleprompter app and optional remote allow users to produce professional results at
very low cost.
• Strong and rigid prompter frame fixes securely to any standard tripod quick release plate.
• The prompter frame is designed to allow standalone below lens prompting.
• Quick and simple assembly that requires no special tooling.
• Expandable mounting bracket system allows simple but secure installation of tablet computer
• An optional WR-500 remote control is available as an access or y purchase.
Normal Tripod Set Up
6
Page 7

Normal tripod assembly
1. Secure the PTZ camera to the TP-150 horizontal plate, item A, using the mounting hole(s) in item
A and the long countersunk 1/4” screw, item B. Ensure both the cut out of item A and PTZ camera
lens will be facing toward the position of the on screen talent / subject.
If necessary use the 3/8” to 1/4” adaptor screw, item C.
2. Now attach the tripod’s quick r elease plate to the underside of item A using the tripod plate’s
own 1/4 or 3/8 screw.
3. Now slid e and secur e the tr ipod plat e ont o t he he ad of tripod. Lock the quic k r elease p late insi de
the tripod head so the camera and item A above it are level.
4. Use two screws, item D, to secure the vertical plate, item E, to the front of It em A.
5. Secure th e expan dable ta blet ho lder, ite m F, to the f ront of item E using th e large thumb s crew,
Item G.
6. Now start t he DV prompter app on th e tablet device and load the appropriate text or script. Be
sure to add break markers in the text (usually at the start of a paragraph or topic) so you can quickly
navigate through the text using the optional remote control.
7. Now pair the optional remote control to the tablet and app by chan ging the settings in the app
menu.
8. Once the app a nd opt ional rem ote c ontrol are pre pare d fit the t ablet i nto the t able t holder, it em F
and lock it in place using the rear lever.
9. You can now hook up the camera connections and start prompting!
7
Page 8

Free Software Download fr om the App Store™
Ensure your tablet has internet access via your cellular service provider or a secure wireless connection.
Tap the App Store
are. Browse the section of the s tore that features apps designed spec ifically for these
devices or tap on the Search b ar at the top/b ottom of the sc reen and type i n Datavideo
or DV Prompter. Then execute the search by tapping on the Search icon to the right. You
will see this software as a result listed, simply tap on the Free icon and then Install.
The App Store icon on your device will show you when an update is available for any app
that you already have. Install the updates with a tap, and you’ll always ha ve the latest
version of your favourite apps like DV Prom p ter.
™ icon on the device Hom e Scr een to dow nload ap ps where ver you
Free Android App download from Google play™
Ensure your tablet has internet access via your cellular service provider or a secure wireless connection.
Tap on the Google play
latest or popular App downloads. Browse for Apps or tap on the
magnifying glass icon to show the Search bar. When searching type in
DV Prompter then execute the s earch by tapping on the se arch icon
again. You will see our software as a result listed, simply tap on DV
Prompter and choose download and install.
Android and Google play are trademarks of Google Inc.
™ icon on the device H ome Screen to see the
Remember to turn the table t’s Auto l ock / Auto Sle ep featur e in Settings to ‘Ne ver ’
so this does not interrupt sc ript reading when there may be very little us e of the
touch screen.
For the same reas on it may also be wise to turn off the Cellular, SMS and Email
functions / notifications of the device before the prompting session.
Amend the prompting tex t bef ore pa iring the Bluet ooth r em ote control with the c ell
phone / tablet as the device’s own on screen keyboard will be disabled once paired.
You also need to as k yourself if you have enough bat tery life left in your tablet to
run through the current prompting session.
Tablet / Device Tips
8
Page 9

DV Prompter - User Interface - iPad
When the DV Prompter App opens the script on a black background is the document selected for use.
To select a different script simply tap on it or choose the + button to add a new script document.
App Settings Button
This button opens the Settings Menu as shown on the following page.
Script Options Button
This button when tapped shows the following options for the selected document or script.
Tapping on Start will start the display and scrolling of the chosen document or script.
Tapping on Edit will allow amendment of the chosen document or script.
Tapping on Copy will create a new version of the chosen document or script which you can then edit.
Tapping on Delete you will be asked to confirm if you wish to delete the chosen document or script.
Tapping on Print will open the printer dialogue so the script can be sent to a printer.
9
Page 10

DV Prompter Applicati on S e t Up
Settings Menu
When the App is first started it is always best to check the settings
match your needs. The menu options are divided into Display,
Prompting, Start and Remote Settings. Most of these settings will
be chosen before the prompting session starts.
Display Settings
Allows you to change the look of the text displayed. You can
choose the Font Name, Font Size, Font Colour and the
Background Colour.
Prompting Settings
Allows you to change t he Orientation of the displa yed text an d if
it will be mirror reflected off the 60/40 Glass or just used as a
normal display.
Here you can also set th e text Scrolling Speed. H ave your on
screen talent read a page of the script a couple times and see how
long it takes them . The Slow Time and Fast Time are then s et
according to how quick ly they read. The optional remote c ontrol
can be used to speed up or s low down the speed of text scroll
between these two tim es. If your on screen talent takes 13 to 17
seconds to read one page of text then set Slow Time to 17
seconds and Fast Time to 13 seconds. When the script is moving
the Arrow up and do wn buttons can be pressed on the optional
remote control to change the speed in ten equal steps between 17
and 13 seconds. The Scrolling speed is the default speed used if
you are not using a remote control. If you ha ve set the fast and
slow time options then scrolling speed can be left at 5 for most people. This allows you to speed up the
speed of the text scroll by up to five steps or slow it down 5 steps.
External Displ a y Cable ; if someone else is c ontro lling the pr om pter f or th e on scr een ta lent t hen i t is
possible to have a second screen connected to the tablet device running the app. The second screen
option is only supported by iPad tablet devices a nd requires an optional Apple VGA/Composite
adaptor cable. This cable can be purchased from the Apple store and is not supplied by Datavideo.
The Border setting is used to bring the text displayed in from the ed ges of the display. T his can be
useful where the talent is not in line with the centre of the reading area or where the prompter is angled
slightly up or down. In the same way justification can make the text easier to see or read from an angle.
10
Page 11

Start Settings
You can set the prom pter up to automatic ally start scrolling t ext
or you can delay the beginning of the text scroll process by up to
10 seconds. If a del a y is s e t the n a countdown animation will be
shown before the script starts moving.
Remote Settings
Here you can choose to use no remote [none], an optional wired
remote or an optional Bluetooth remote.
You can also set up text char acters lik e *# tha t indicat e a break
in the scrolled text ca lled break markers. These markers c an
then be used to quickly jump forward or backward between points
in the text, when using a remote, should the running order of the
production change.
If using the Bluetooth remote: First amend the prompting text
before pairing the device with the Bluetooth remote control as the
device’s own on screen keyboard will be disabled once paired.
Build Version
Only confirms the version of the app being used.
App related adverts
When the DV Prompter App is used without an
optional remote control adverts may be displayed
when first starting up the dv Prompter app.
To remove these adverts simply connect an optional
wired remote or Bluetooth remote control.
Please speak with your supplier or dealer if you wish
to purchase an optional remote control.
11
Page 12

How to quickly add text into a DV Prompter document
The prompting script, or presenters’ text, will probably exist as a text document from the planning stage
of the production.
By copying and pasting this script text from the original document into the text body of an email it can
then be quickly sent to the email client on the smart phone or tablet.
When you attempt to forwa rd this email, using the email client on smar t phone or tablet, the prompting
text in the body of the em ail can then be copied i nto th e mem ory of the device. To do this press on a
single word in th e text for a few seconds and the word will be highlight ed when cop y option becomes
available. Move the end tabs of the highlighted text so the whole of the script is selected. Then choose
or tap on the copy icon.
Now open the DV Prompter app and create a new script document by using the new script + button.
Press on the empty body of the new script window and paste the copied text into the new document.
Tidy up the transfer red text as necessar y; add some Break Mark ers and a document title. You no w
have your newly created prompting document ready to save.
Amend the prompting t ext before pairing the Blueto oth remote control with the c ell
phone / tablet as the on screen keyboard may be disabled once paired to the remote.
Importing a text file via iTunes™ to an apple™ device
This process desc ribes the steps used to impor t a plain text file [.txt extens ion] into the DV Prom pter
App using iTunes™. The encoding of this imported file should be UTF-8.
Trying to import any other type of file such as RTF will be rejected or will result in a ‘Null’ file.
1. Connect your iPad™ to your PC or Mac via the apple cable (not supplied).
2. Launch iTunes™.
3. Select your iPad™ under the Devices section in the left hand pane of iTunes.
4. Select the Apps tab at the top of the iTunes window.
5. Scroll down to the bottom of the page and select DV Prompter from the FILE SHARING
Apps menu.
6. Click the 'Add' file button and browse for the text [ .txt ] file you wish to import.
7. Once transferred disconnect the apple device and restart D V Prom p ter, you should now see
a new document in the list.
12
Page 13

Frequently Asked Questi ons
Q: My Bluetooth remote does not seem to be charging and the LED does not light at all when
connected to my computer. Is there something I am doing wrong?
The LED light on the r emote should flash r ed whi lst c h ar gin g with a c omputer. Ensure the c omputer is
switched on during the charging process. C heck the supplied USB cable for damage. If the cable is
damaged try a differ ent USB cable. Connect the USB chargi ng cable to a different USB port on the
computer, or tr y with a dif ferent com puter. Still not f lashing? T he rem ote m ay need to be switch ed on
first. Press the green play button on the remote whilst it is still connected to the computer USB port. Still
not working? The charg e in the ba tter y may be ver y lo w or em pty. Lea ve the rem ote con nected t o the
computer and tr y switching it o n again after 15 minute s. Try the abo ve steps twice b efore contactin g
your supplier. Do not open the remote or attempt to replace the rechargeable battery as you will
invalidate the remote’s warranty.
Q: My Bluetooth remote does not pair with my cel l phone or tablet. Is the re something I am doing
wrong?
Is the remote f ull y ch arged ? If yes, try resett in g t he B l ueto oth r emote next. Then tr y pairing the device
and remote again. Still not working? Clear, or delete, an y items already in the tablet or cell phone’s
Bluetooth list. On Apple iOS devices there is an arrow right icon next to each Bluetooth item previously
connected. Tap on the arr ow then use the rem ove or forget o ption. Android devices act in a lmost the
same way with a settings ic on instead. On Androi d devices the opt ion may be unpair or delete. Once
all previous Bluetooth items have been removed from the list then try pairing the device with the
Bluetooth remote again. Try the above steps before contacting your supplier.
Q: My remote has paired with my tablet device over Bluetooth but I still have no control when
using the DV Prompter App. Is there something I am doing wrong?
Check you are usin g the latest version of the DV Prom pter App. If in doubt dele te the App from the
device, then download it again from the App store or Google Play. The DV Prompter App Settings are
important too. The Remote setting should be changed to Bluetooth before attempting to control the
script scrolling etc. Try the above steps before contacting your supplier.
Q: I recently updated to iOS 7 and now my remote no longer works. Is there anything I can do?
After updating your App le Device to iOS 7 you may be asked a question about permission for th e App
to use the mic / headset connector and Bluetooth connections. Please allow these permissions
otherwise the remote may not work. If the wrong option was chosen then these features can be turned
back on.
Q: My Bluetooth rem ote has been used for a while now. How will I know when it needs to be
recharged?
The DV Prompter app will display RECHARGE BATTERY in the
bottom right hand corner of the application window when the battery in
the Bluetooth remote is running low. When fully charged the remote will
last for approximately 6 hours depending on use.
1. Go to Settings > Privacy > Microphone
2. Activate DV Prompter (so that the slider is green)
3. Restart DV Prompter App
13
Page 14

TP-150 Specifications
Prompter Size
Width: 150 mm (5.90 inches)
Height: 225 mm (8.86 inches)
Depth: 200 mm (7.88 inches)
Expandable Mounting Bracket
Sizes: 145 mm (5.70 inches) Min tablet width
265 mm (10.43 inches) Max tablet width
Nett Weight: Kit: 0.78 Kg (1.72 lbs)
Packed weight: (Gross) Kit: 1.9 Kg (4.18 lbs)
Text File Format Copy and paste text from email
or import a .txt file via iTunes
Reading Range 3m (9ft) approx
Optional remote specifications
Wired remote control cable length 3m (9ft) approx
Bluetooth remote control range 3m (9ft) approx
Optional remote control - battery life 2 years at average usage
Replacement remote control Please speak with your supplier
Nett Weight [remote only] 22g (0.77 oz)
14
Page 15

Service and Support
Tel: +1 562 696 2324
Fax: +1 562-698-6930
E-Mail: contactus@datavideo.us
Tel: +31-30-261-96-56
Fax: +31-30 261-96-57
E-Mail: service@datavideo.nl
Tel: +44 1457 851 000
Fax: +44 1457 850 964
E-Mail: sales@datavideo.co.uk
Tel: +886 2 8227 2888
Fax: +886-2-8227-2777
E-mail: service@datavideo.com.tw
Tel: +86 21-5603 6599
Fax:+86 21-5603 6770
E-mail: service@datavideo.cn
Tel: +65-6749 6866
Fax: +65-6749 3266
E-mail: sales@datavideo.sg
Tel: +852 2833 1981
Fax: +852-2833-9916
E-mail: info@datavideo.com.hk
Tel: +33 1 60 37 02 46
Fax: +33 1 60 37 67 32
E-mail: info@datavideo.fr
Tel: +91 120 4309120
Fax: +91 120 4309121
E-mail: sales@datavideo.in
It is our goal to make your produc ts ownership a satisf yin g ex peri enc e. O ur s u ppo r t s taf f ar e a vaila bl e
to assist you in setting up and operating your system. Please refer to our web site www.datavideo.com
for answers to common questions, support requests or contact your local office below.
Datavideo Global Website: www.datavideo.com
Datavideo Corporation
Datavideo Technologies Europe BV
Datavideo UK Limited
Datavideo Technologies Co., Ltd
Datavideo Technologies China Co., Ltd
Datavideo Technologies (S) PTE Ltd
Datavideo HK Ltd
Datavideo France s.a.r.l.
Datavideo Technologies India PVT LTD.
All the trademarks are the properties of their respective owners.
Datavideo Technologies Co., Ltd. All rights reserved 2016.
Rev Date: 14/04/2016
P/N: TP-150_B1_A4
15
 Loading...