

DataTrace MPIII Quick Start Manual
DataTrace Quick Start Guide
Use this guide to help change the battery for a DataTrace MPIII data logger. This quick
start guide is intended to use the tools provided in the MPIII Maintenance Kit (part number 124808-500). Replacement batteries part number: 124804-500 (pkg of 20)
MPIII Battery Change Quick Start Guide
PN DT170002
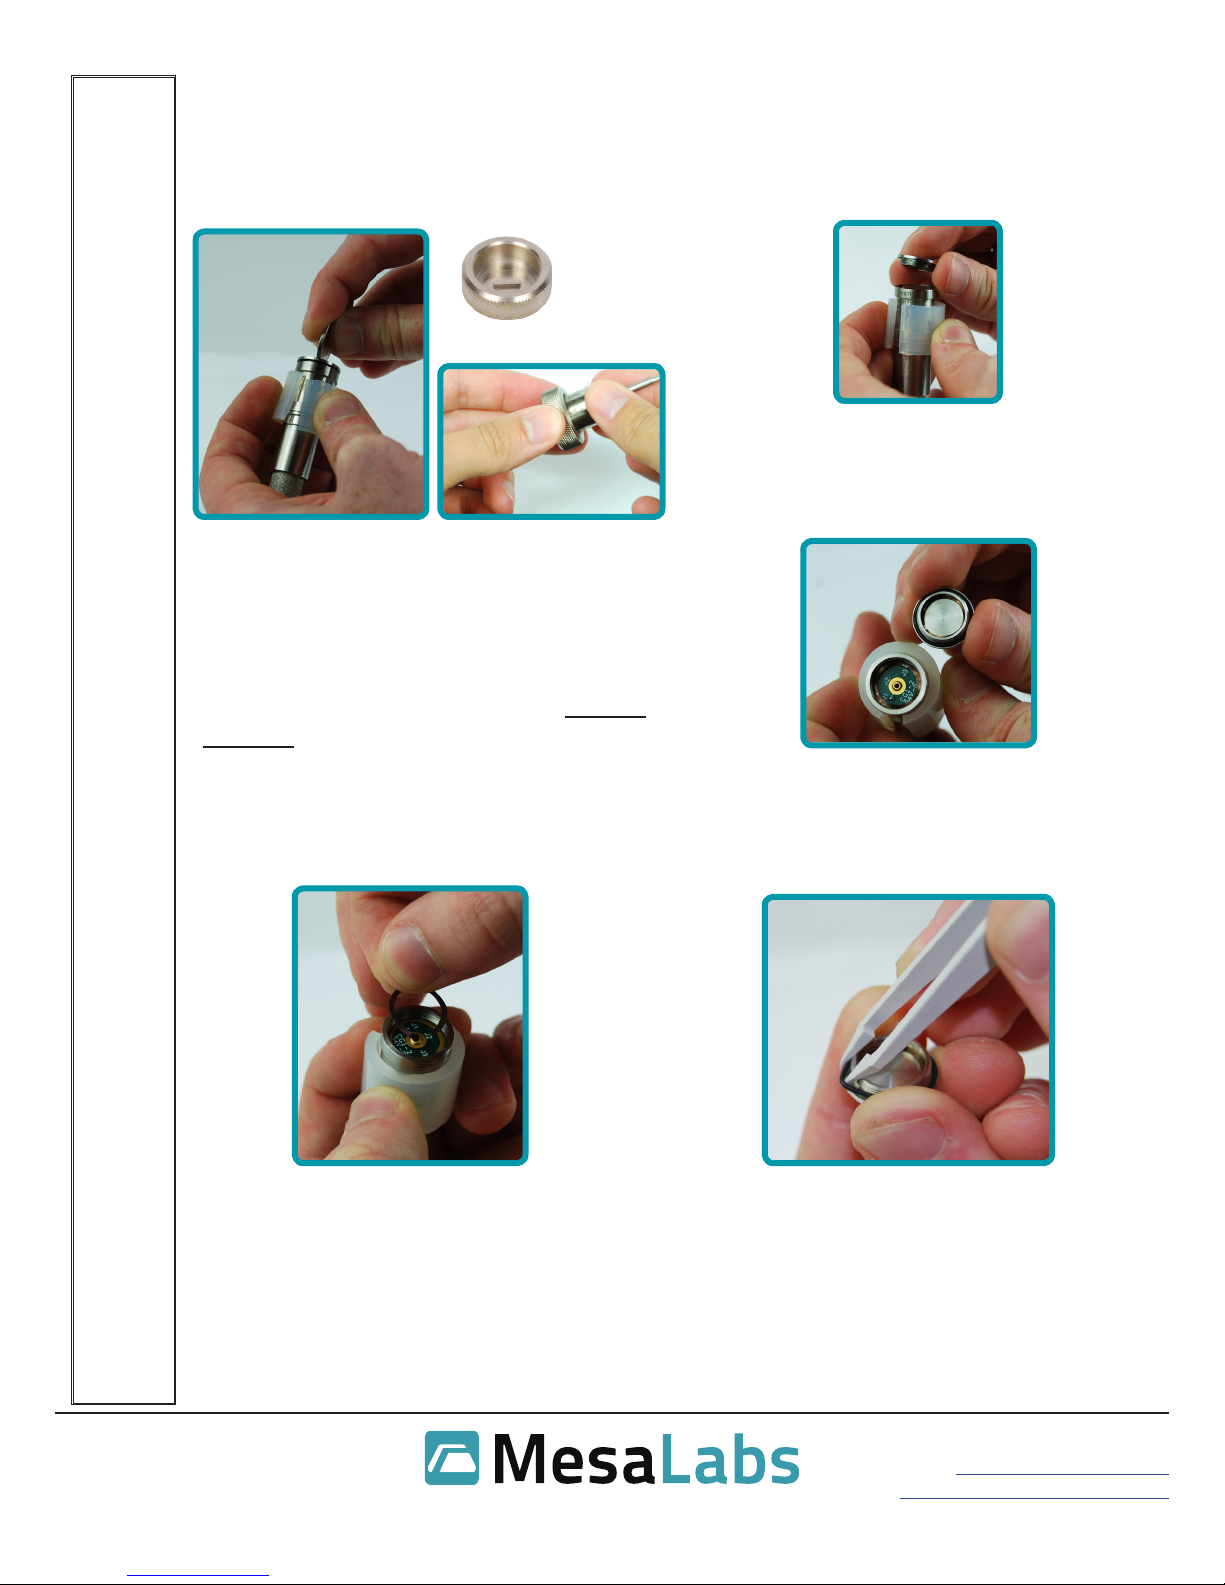
2 Lift off the battery cap and set it to the
side, taking care not to misplace the springs
inside the logger or cap.
1 Clean and dry the data logger, making sure
that the surfaces are clear of contaminants or
debris. Then, loosen the battery cap with the
logger gripper provided by holding the logger
in one hand with the probe facing toward the
ground, and twisting the battery cap counterclockwise with the other hand using the logger cap wrench provided. (PN DT170002)
3 Remove the old battery by tipping the
logger to its side until the battery falls out.
Dispose of the battery appropriately per local
regulations.
4 Examine the battery compartment and
threads, making sure that the wave springs
located in the cap and inside the battery
compartment are in place. If one of the
springs has fallen out, reinsert it.
Mesa Laboratories, Inc.
12100 W. 6th Avenue
Lakewood, CO 80228 USA
5 Remove and discard the O-ring to be
replaced using the pick tool provided. Clean
the O-ring groove with a clean, lint-free cloth.
Check for any scratches or nicks in the metal
before reassembly. If damage is detected or
contamination is noted, return the logger to
an authorized servicer for repair.
Tel: +1-303-987-8000
datatrace.mesalabs.com
datatracesales@mesalabs.com
Rev. 05OCT2016

DataTrace Quick Start Guide
6 Apply silicone grease to a new O-ring
by rubbing a small amount on your index
nger and thumb and slowly pulling the
O-ring through the grease on your ngers
until the entire O-ring is coated. Then
place the O-ring in the groove of the battery cap.
7 Holding the logger in the same posi-
tion as step 1, place a new battery in the
battery compartment of the logger, taking
care to put the “+” side of the battery facing up.
8 Install the battery cap in the reverse of
removal. Tighten the cap using the logger cap wrench provided until snug. Wipe
away any excess silicone grease that may
have been pressed out during closure.
Mesa Laboratories, Inc.
12100 W. 6th Avenue
Lakewood, CO 80228 USA
9 Place the logger in the interface. In
DTPro in the Test and Calibration window, click the “New Battery” button under
the “Tools” menu. Follow the on-screen
prompts to reset the battery and perform
a “test logger.” The new battery is now
successfully installed and the logger is
now ready for use.
Tel: +1-303-987-8000
www.MesaLabs.com
datatracesales@mesalabs.com
 Loading...