

Page 1
Evaluation Board User Guide
One Technology Way • P. O . Box 9106 • Norwood, MA 02062-9106, U.S.A. • Tel : 781.329.4700 • Fax : 781.461.3113 • www.analog.com
UG-004
Understanding EVAL-CONTROL BRD2Z/EVAL-CONTROL BRD3Z PC Interface Issues
INTRODUCTION
As PCs continue to evolve, differences become evident among the
manufactures of peripheral interfaces. This user guide details
some issues regarding the EVAL-CONTROL BRD2Z/EVALCONTROL BRD3Z (ECB) and the parallel port (LPTn) of the
PC and providesguidelines for configuring and testing the port(s)
for compatibility.
LPT INTERFACE
When PCs were introduced, line printer (LPT) capabilities were
developed for Centronics-style dot matrix printers. In this
topology, the LPT was a basic, byte-wide, transmit-only interface.
As the industry evolved, the LPT was used for more interfaces,
such as tablets, scanners, and external tape drives. Recently, more
control has been adopted, and bidirectional mode has been
introduced. Unfortunately, manufacturers veered away from the
standards because a definitive standard was never clearly
established.
USING ECBS WITH THE ADC EVALUATION BOARDS
Analog Devices, Inc., offers many analog-to-digital converter
(ADC) evaluation boards that use the ECB to capture data and
transfer it to the PC host. The basic methodology is as follows:
1. PC software invokes a command to capture a packet of
converted results.
2. The ADC evaluation board parses requests and sends a
burst of conversion results to the ECB where the DSP
microcontroller packetizes and stores it on the local SRAM.
3. The DSP generates a ready status to upload the SRAM
contents to the PC host.
4. Conversion results are then massaged in data arrays and
displayed via the evaluation board software, such as
LabVIEW by National Instruments.
ECB SYSTEM REQUIREMENTS
For the PulSAR evaluation software, the ECB requires at least
one parallel port set in bidirectional mode. Note that this must
be a native port either on a laptop docking station, or for desktops,
one directly coming from the PC motherboard or PCI peripheral
expansion. The use of USB-to-LPT dongles is not allowed because
the GIVEIO driver needs a legacy LPT, preferably a 0x378, or,
more commonly, a LPT1.
Port type can be verified in the following two ways:
• The Windows® 2000/XP Operating Systems (Win OS)
Device Manager
• The basic input/output system (BIOS) of the PC
Check both to validate the installation and to minimize any
problems that can be encountered when attempting to use the
software.
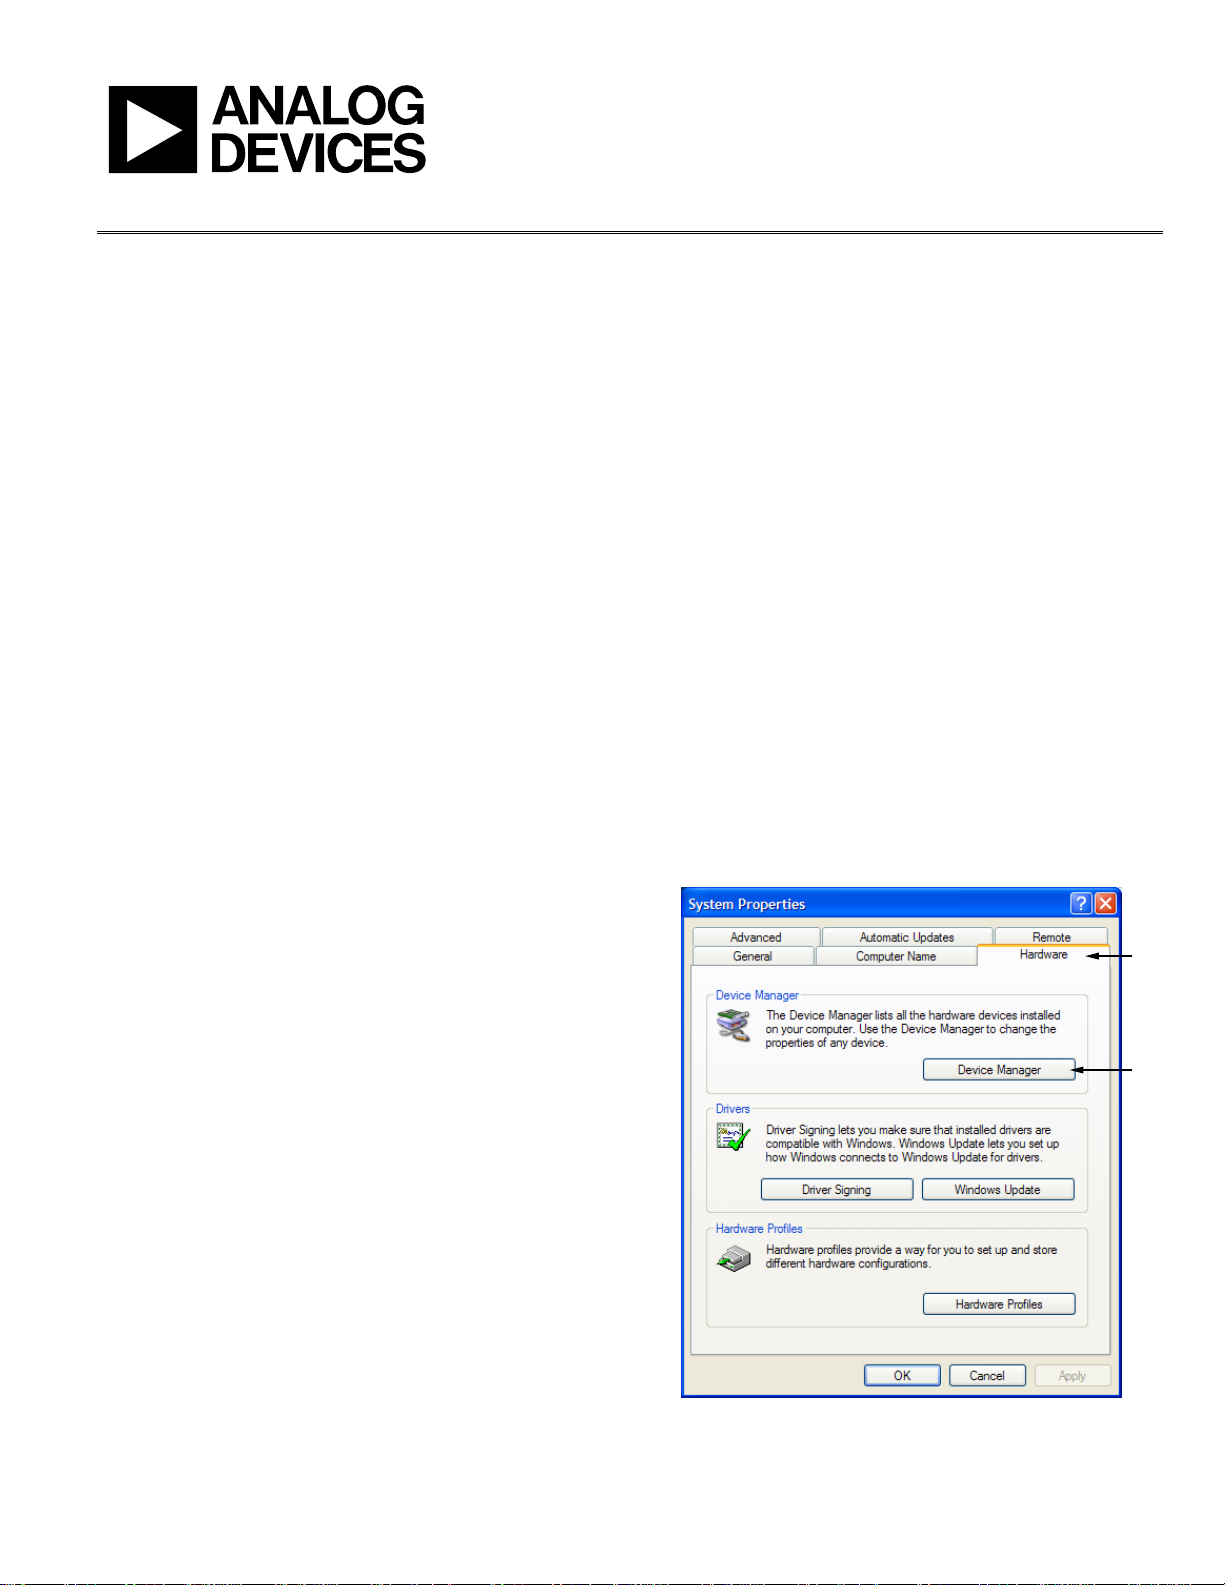
Windows OS LPT Port Settings
To check the PC port settings, right-click on the My Computer
icon on your desktop, click Properties, and then click Hardware.
The dialog box shown in Figure 1 appears.
USING ECBS WITH PULSAR ADC EVALUATION BOARDS
Following the previous guidelines , the evaluation boards
specific to the PulSAR high resolution SAR ADCs, mostly
falling under the EVAL-AD76xxCBZ (some EVAL-AD79xxCBZ),
use this interface with the exception of a dedicated driver,
GIVEIO.exe. The evaluation software for these ADCs was
developed with the National Instruments LabVIEW graphical
programming environment.
Please see the last page for an important warning and disclaimers. Rev. 0 | Page 1 of 8
Figure 1. Hardware Tab
08174-001
Page 2

UG-004 Evaluation Board User Guide
TABLE OF CONTENTS
Introduction ...................................................................................... 1
LPT Interface ..................................................................................... 1
Using ECBs with the ADC Evaluation Boards ............................. 1
Using ECBs with PulSAR ADC Evaluation Boards ..................... 1
ECB System Requirements .............................................................. 1
REVISION HISTORY
6/09—Revision 0: Initial Version
Revision History ................................................................................2
When All Else Fails .......................................................................7
RAM Test Failure ...........................................................................7
Conclusion .....................................................................................7
ESD Caution...................................................................................7
Rev. 0 | Page 2 of 8
Page 3

Evaluation Board User Guide UG-004
Next, click the Device Manager button. The dialog box shown in
Figure 2 appears.
08174-004
Figure 4. ECP General Settings Tab
08174-002
Figure 2. Device Manager Screen
Expand Ports (COM & LPT) and click ECP Printer Port (LPT1)
(see Figure 3), or if it is set from the BIOS, click EPP.
Figure 3. ECP Printer Port (LPT1) Screen
Set the port settings similar to the settings shown in Figure 4
and Figure 5, noting the Use this device (enable) and Never use
an interrupt settings. When a setting for using an interrupt is
selected, the PC can timeout indefinitely and it may need to be
rebooted; therefore, we do not recommended using an interrupt.
08174-003
Figure 5. ECP Port Settings Tab
08174-005
Rev. 0 | Page 3 of 8
Page 4

UG-004 Evaluation Board User Guide
For the Resources tab, note the I/O space assignments and
make sure Use automatic settings is selected. If any device
conflicts are present, select another port.
08174-006
Figure 6. ECP Resources
PC BIOS LPT Port Configuration
The second method for confirming your port settings is to
check the basic input/output system (BIOS) of the PC. Note that
LPT ports of most PCs come configured in ECP mode from the
factory. However, BIOS settings can be checked and/or modified
without actually saving changes. To check BIOS settings, reboot
the PC and invoke the BIOS setup, which varies from
manufacturer to manufacturer. Some manufacturers use the Esc
key, some use the DEL key, and others use a function key (F1 to
F12). For most Dell PCs, F2 invokes the BIOS setup screen.
Click F2 after the PC is powered up. Sometimes an audible beep
sounds noting that the user setup is starting. When the setup
screen is invoked, it should appear similar to Figure 7.
To check the LPT settings, scroll-down to Onboard Devices
and expand (usually with the Enter key), as shown Figure 9.
Figure 8. Onboard Devices Menu (Collapsed)
The LPT port settings are shown in Figure 9 through Figure 11.
The mode should be set to Extended Capability Protocol (ECP).
If the PC does not have ECP (bidirectional) mode available, the
Enhanced Parallel Port protocol (EPP) mode can also be used.
Figure 9. LPT Port Mode
08174-008
08174-009
Figure 7. Dell BIOS Setup Screen
08174-007
Rev. 0 | Page 4 of 8
Page 5

Evaluation Board User Guide UG-004
08174-012
08174-013
Figure 10. Settings
Figure 11. ECP Mode
When the LPT mode is configured properly, save the BIOS
(if changes were made) and exit. Exit is usually done with a
sequence of Esc, scrollbars, and Enter strokes, as shown in the
BIOS on-screen instructions for the system. After you exit the
setup, Windows starts.
PulSAR Evaluation Board Software Installation
This user guide is only intended for the ECB versions of the
software. The software for evaluating the Analog Devices PulSAR®
ADCs is included in the evaluation board box on the enclosed
CD or via download from the website (www.analog.com). Consult
the appropriate document for installing the software and follow
the instructions on the screen. Note that the user installing the
software must have full system administrator privileges because
the Giveio driver needs to overwrite some of the Windows OS
LPT configurations.
When prompted to install the Giveio driver, click Ye s
(see Figure 12).
Figure 12. Giveio Installation Window
Note that the PC must be manually rebooted for the driver to
take effect (see Figure 13).
08174-010
Figure 13. Reboot Notice Screen
After installing the software and rebooting the PC reboot, run
the software by selecting C:\Program Files\Analog Devices\
High Res ADCs\ADC.exe (or a similar executable). If downloading
the compressed version from the Analog Devices website, extract
the files first and then run setup.exe. If a correct LPT port is found,
you will hear a series of audible clicks from the ECB followed by
a flashing LED. On the PulSAR evaluation board, a green LED
is usually lit, indicating that the ADC is busy converting. If the
green LED is lit, the evaluation board software can be used as
described in the appropriate evaluation board data sheet.
Evaluation Software Port Problems
08174-011
The three most common LPT issues encountered include the
following:
• Multiple ports detected
• LPT Port(s) present but not in ECP (bidirectional) mode
• No LPT ports present
Multiple Ports Detected
This is a simple issue because the software just needs to know
which LPT the ECB is connected to. When there are multiple LPT
ports, a message similar to the one shown in Figure 14 displays.
PORT LIST
Figure 14. Port List
Note that the PC used for this user guide only had one LPT
port; therefore, only the 0x378 port was identified. When
multiple LPT ports are present and detected, a list of ports
appears in the grey drop-down box.
08174-014
Rev. 0 | Page 5 of 8
Page 6

UG-004 Evaluation Board User Guide
Following the steps outlined in the Evaluation Software Port
Problems and Multiple Ports Detected sections should aid in
alleviating this issue.
LPT Port Present But Not in ECP (Bidirectional) Mode
If some ports exist but are not set to ECP (bidirectional) mode,
the message shown in Figure 15 appears.
Figure 15. Port Not Set to Bidirectional Mode Screen
Following the steps outlined in the previous sections should aid in
alleviating this issue.
08174-015
No LPT Ports Present
If no ports are detected, the dialog box shown in Figure 16 appears.
Figure 16. No Ports Detected Screen
The steps outlined in the previous sections should aid in alleviating
this issue.
PortTest.exe
A simple program to test the LPT ports is available on the CD,
under the ECB subdirectory, and on the Analog Devices website.
Download the compressed (zipped) file and extract the contents
to a temporary directory. Run setup.exe and follow the instructions
onscreen. If the PulSAR evaluation board software or the Giveio
driver was previously installed, then the PC does not need to be
rebooted.
When the installation is complete, run the C:\Program Files\
Analog Devices\PulSAR ADC Evaluation Tools\PortTest.exe
program.
08174-016
Rev. 0 | Page 6 of 8
Page 7

Evaluation Board User Guide UG-004
Figure 17. Port Test Program
This program executes automatically and displays data similar to
Figure 17, noting the nomenclature for the valid and invalid
settings. This program can stay open while you reconfigure the
LPT port settings in the Windows Device Manager. To check if
the updated setting works, simply click the right arrow to run
the program.
WHEN ALL ELSE FAILS
Sometimes, the LPT port of a PC is not configurable for the
PulSAR evaluation software. The port settings may show LPT1
or ECP mode, and the software can still not work. If this occurs, try
using another PC.
RAM TEST FAILURE
In addition, a RAM test failure can occur; however, this error is
not related to the LPT port problems. If a RAM test failure
occurs, it can usually be corrected by returning the ECB to
where it was purchased in exchange for another one.
08174-017
CONCLUSION
This document describes the LPT port of the PC and provides
some configuration options for use with the EVAL-CONTROL
BRDZ2/EVAL-CONTRL BRDZ3 when used as a data capture
board for the Analog Devices high resolution, PulSAR ADC
evaluation boards. This user guide discusses some of the
challenges that tools developers and applications engineers have
uncovered for a variety of hardware, firmware, and software
configurations. The USB-based EVAL-CED1Z data capture board
drivers are now readily available for the PulSAR ADCs.
ESD CAUTION
08174-018
Figure 18. RAM Test Failure Screen
Rev. 0 | Page 7 of 8
Page 8

UG-004 Evaluation Board User Guide
NOTES
Evaluation boards are only intended for device evaluation and not for production purposes. Evaluation boards are supplied “as is” and without warranties of any kind, express,
implied, or statutory including, but not limited to, any implied warranty of merchantability or fitness for a particular purpose. No license is granted by implication or otherwise under
any patents or other intellectual property by application or use of evaluation boards. Information furnished by Analog Devices is believed to be accurate and reliable. However, no
responsibility is assumed by Analog Devices for its use, nor for any infringements of patents or other rights of third parties that may result from its use. Analog Devices reserves the
right to change devices or specifications at any time without notice. Trademarks and registered trademarks are the property of their respective owners. Evaluation boards are not
authorized to be used in life support devices or systems.
©2009 Analog Devices, Inc. All rights reserved. Trademarks and
registered trademarks are the property of their respective owners.
UG08174-0-6/09(0)
Rev. 0 | Page 8 of 8
 Loading...