

Page 1
Page 2
1
2
3
アルミニウム電解コンデンサ一覧 3
導電性高分子ハイブリッドアルミ電解コンデンサ 65
73
ALUMINIUM ELECTROLYTIC CAPACITORS
HYBRID CONDUCTIVE POLYMER ALUMINUM ELECTROLYTIC CAPACITORS
目 次
4
97取扱商品
HANDLING ARTICLES
プラスチックフィルムコンデンサ一覧
PLASTIC FILM CAPACITORS
導電性高分子アルミ固体電解コンデンサ
CONDUCTIVE POLYMER ALUMINUM SOLID ELECTROLYTIC CAPACITORS
Page 3
ELECTROLYTIC CAPACITORS
3
製品ガイド
P
4〜P21
製造品種一覧表
製品体系図
シリーズ統廃合
環境対策コンデンサ
品番標準呼称法
基本発注単位
チップ形
(CE-
32) リフロー許容条件/推奨ランド寸法
テーピング仕様
リードフォーミング仕様
使用上の注意事項
チップ形アルミニウム電解コンデンサ
P
22 〜P29
小形アルミニウム電解コンデンサ
P
30 〜P49
大形アルミニウム電解コンデンサ
P
50 〜P59
(基板自立形、ネジ端子形)
オーディオ用アルミニウム電解コンデンサ
P
62 〜P64
アルミニウム電解コンデンサ
Aluminum Electrolytic Capacitors
−目次−
Page 4
ELECTROLYTIC CAPACITORS
4
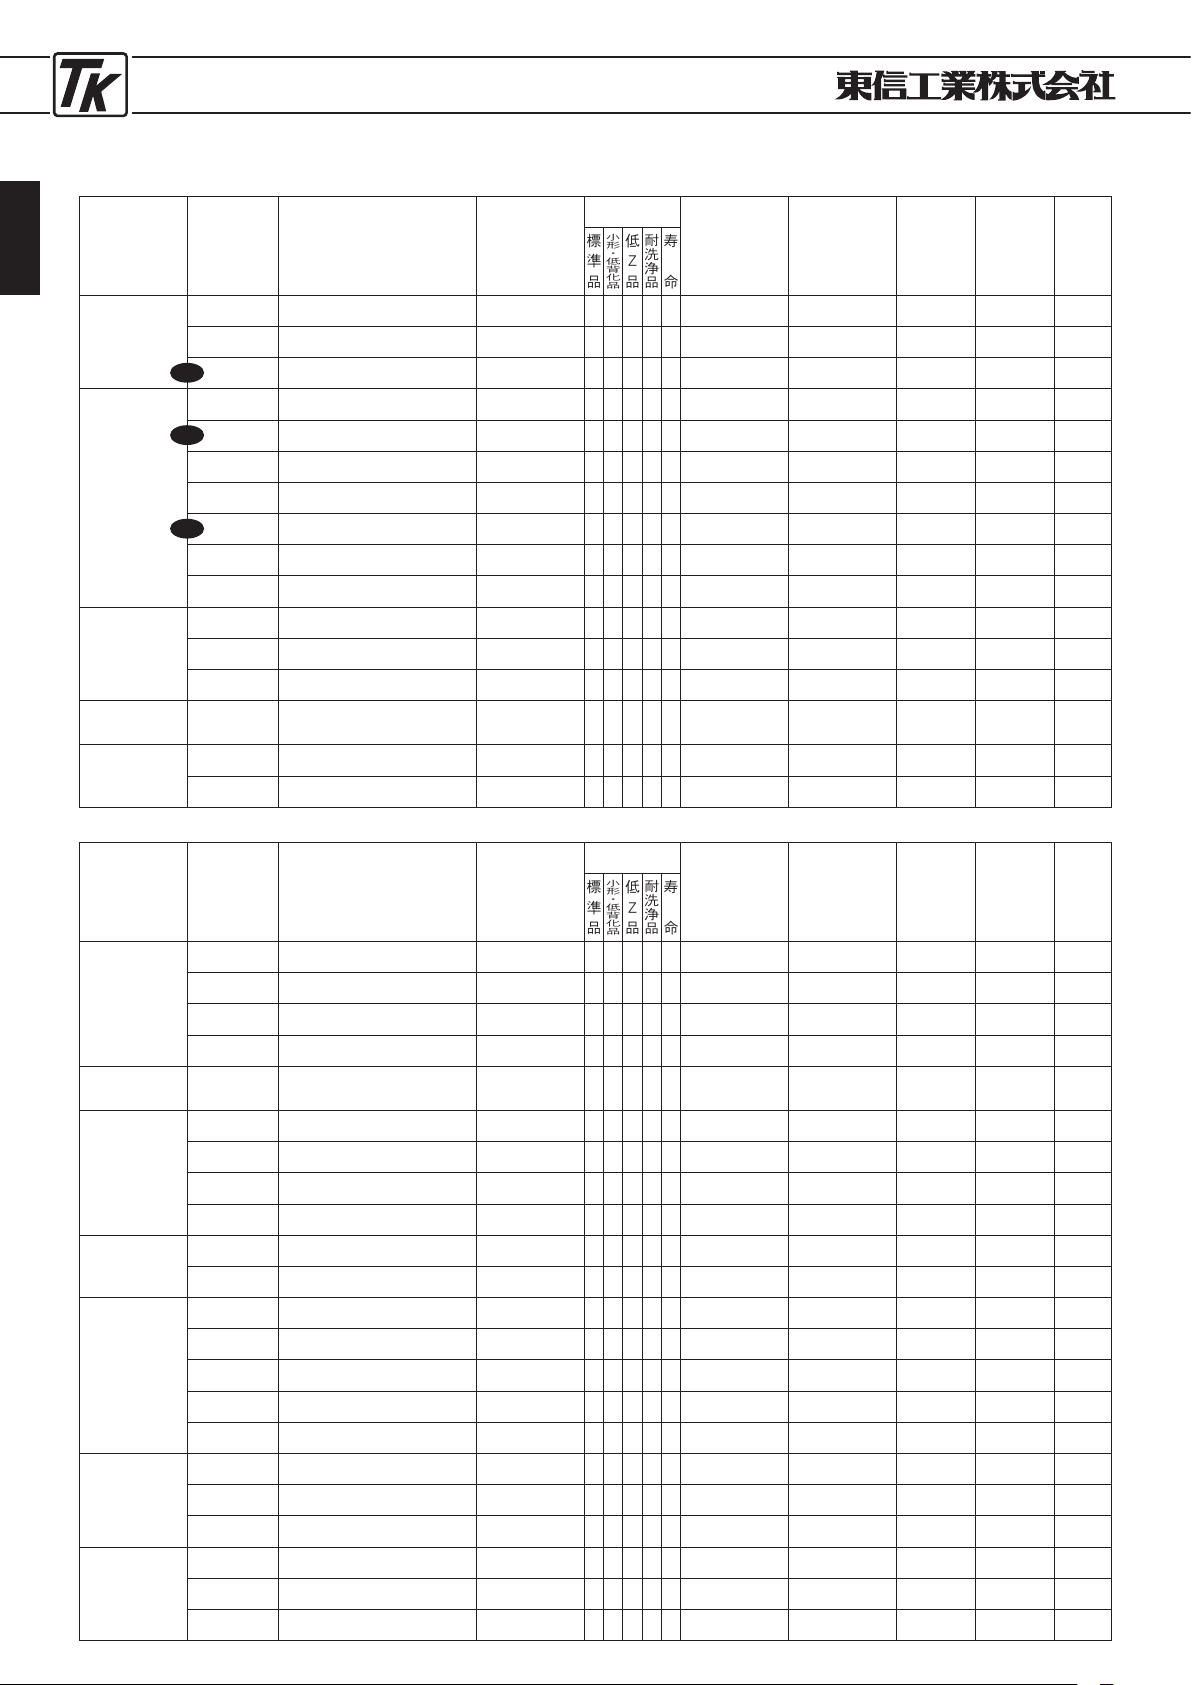
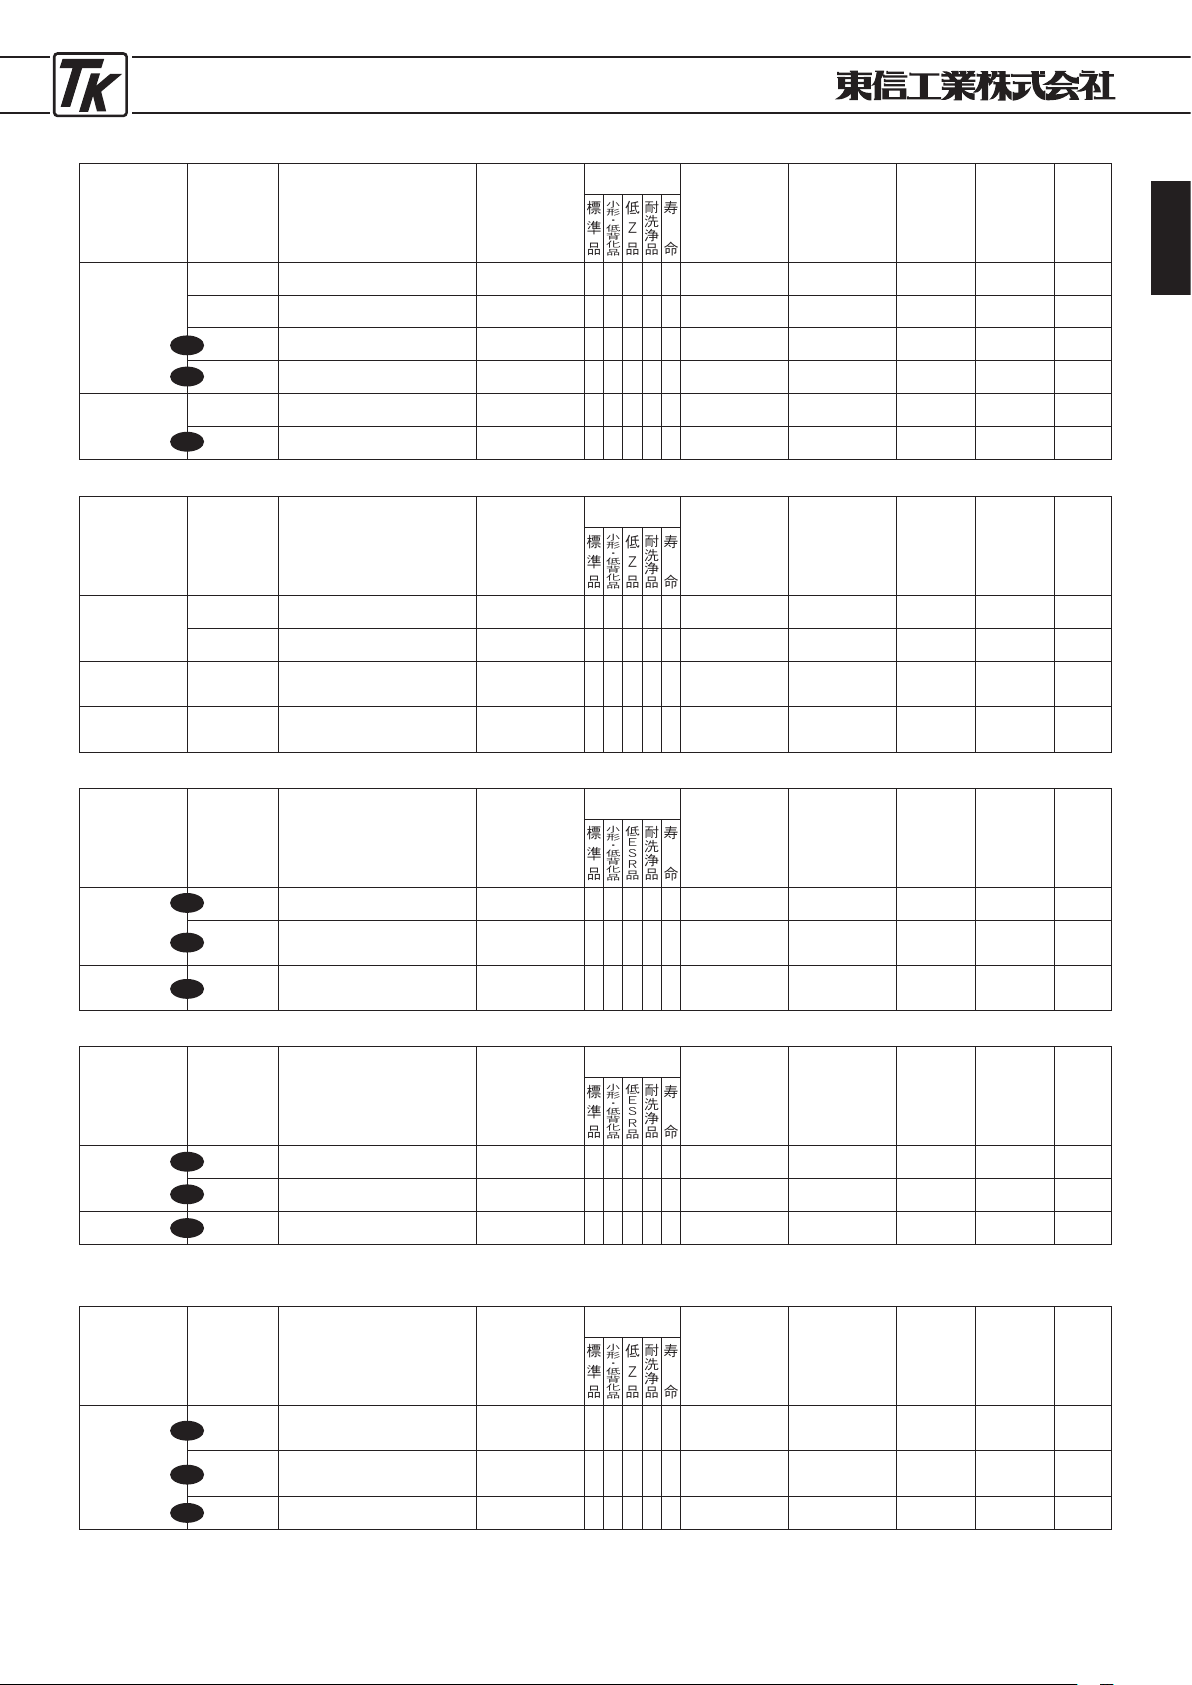
●製造品種一覧表/
PRODUCTS SUMMARY
■チップ形アルミニウム電解コンデンサ/
Chip Aluminum Electrolytic Capacitors
■小形アルミニウム電解コンデンサ/
Miniature Aluminum Electrolytic Capacitors
分 類
Classification
シリーズ名
Type
概 要
Application
カテゴリ温度範囲
Category
temp. range
(℃)
特徴
Features
定格電圧範囲
Rated voltage
(
V. DC
)
静電容量範囲
Capacitance
(μF)
外装色
Sleeve color
印字色
Print color
掲載頁
Page
標準
品
小形
・
低背化品
低
Z
品
耐洗浄品
寿命
CE-
32
標準品
Standard
EC-BS
85℃標準品
85℃
Standardized
−40〜+85 ● ● ○ 4〜100 0.47〜6800 ──
黒
Bla ck
22
EC-C
85℃、 φ3品
85℃
Use (φ3)
−40〜+85 ● ● ○ 6.3〜35 3.3〜22 ──
黒
Bla ck
22
EC-FS
105℃品
105℃
Use
−55〜+105
−40〜+105●●
●
▲
6
.
3〜63
100〜400
0.47〜6800
1〜150
──
黒
Bla ck
23
CE-
32
高信頼性品
High
Reriability
EC-KX
低インピーダンス品
Low-Impedance
−55〜+105 ● ● ○ 6.3〜100 3.3〜6800 ──
黒
Bla ck
24
EC-LX
長寿命低インピーダンス品
Long-Life & Low-Impedance
−40〜+105 ● ● ◇ 6.3〜100 4.7〜10000 ──
黒
Bla ck
25
EC-LL
長寿命低インピーダンス品
Long-Life & Low-Impedance
−25〜+105 ● ● ◇ 6.3〜50 10〜1000 ──
黒
Bla ck
26
EC-LS
長寿命低インピーダンス品
Long-Life & Low-Impedance
−40〜+105 ● ● ◇ 6.3〜50 10〜330 ──
黒
Bla ck
※
EC-GA
高さ5.4mm、低インピーダンス品
5
.4mm Height, Low-Impedance
−55〜+105 ● ● 6.3〜63 1.0〜220 ──
黒
Bla ck
27
EC-FH
長寿命品
Long-Life
−40〜+105 ● ◇ 6.3〜50 1.0〜4700 ──
黒
Bla ck
28
EC-PC
125℃長寿命品
125℃
Long-Life
−40〜+105 ● ◇ 6.3〜200 1.0〜4700 ──
黒
Bla ck
29
CE-
32
薄形品
Low Profile
EC-BD
高さ4.5mm品
4
.5mm Height
−40〜+85 ● ● ○ 4〜50 0.47〜220 ──
黒
Bla ck
※
EC-BE
高さ3.9mm品
3
.9mm Height
−40〜+85 ● ● 4〜50 1.0〜180 ──
黒
Bla ck
※
EC-BES
高さ3.9mm小形化品
3
.9mm Height Miniaturized
−40〜+85 ● ● 4〜50 22〜100 ──
黒
Bla ck
※
CE-
32
小形化品
Miniaturization
EC-BSS
小形化品
Miniaturized
−40〜+85 ● ● ○ 6.3〜50 4.7〜220 ──
黒
Bla ck
※
CE-
32
両極性品
Bi-polar
EC-NP
両極性品
Bipolarized
−40〜+85 ● ○ 6.3〜50 1.0〜47 ──
黒
Bla ck
※
EC-FN
105℃両極性品
105℃
Bipolarized
−55〜+105 ● 6.3〜50 1.0〜47 ──
黒
Bla ck
※
Upgrade
Upgrade
New
分 類
Classification
シリーズ名
Type
概 要
Application
カテゴリ温度範囲
Category
temp. range
(℃)
特徴
Features
定格電圧範囲
Rated voltage
(
V. DC
)
静電容量範囲
Capacitance
(μF)
外装色
Sleeve color
印字色
Print color
掲載頁
Page
標準
品
小形
・
低背化品
低
Z
品
耐洗浄品
寿命
CE-
04
低
Z
品
Low
Impedance
UTWRZ
低インピーダンス品
Low Inpedance
−55〜+105 ● ● ◇ 6.3〜50 0.47〜3300
茶
Brown
白
White
※
UTWKZ
低インピーダンス品
Low Inpedance
−55〜+105 ● ● ◇ 6.3〜63 12〜6800
茶
Brown
白
White
30
UTWXZ
低インピーダンス品
Low Inpedance
−55〜+105 ● ● ◇ 6.3〜63 12〜15000
茶
Brown
白
White
32
UTWYZ
長寿命&低インピーダンス品
Long-Life & Low Inpedance
−55〜+105 ● ◇ 6.3〜63 15〜18000
茶
Brown
白
White
34
CE-
04
高温度化品
High Temperature
UTCZ
広使用温度範囲125℃品
Wide Operating Temp.
125℃
Use
−40〜+125 ○ 10〜63 1〜4700
青
(透明)
Clear Blue黒Black
36
CE-
04
電源用途
For Switching
Power Supply
UTWHM
中高圧105℃品
Med.& High Voltage
105℃
Use
−40〜+105
−25〜+105
○
○
160〜250
350〜450
0
.
47〜330
0.47〜100茶Brown
白
White
37
UTWHS
400
WV
105℃
400
WV
105℃
Use
−25〜+105 ○ 400 3.3〜150
茶
Brown
白
White
37
UTWV
高リプル長寿命品
High Ripple & Long-Life
−25〜+105 ◇ 200〜450 3.3〜100
茶
Brown
白
White
39
UTWBX
高リプル長寿命品
High Ripple & Long-Life
−25〜+105 ◇ 200〜450 6.8〜330
茶
Brown
白
White
40
CE-
04
標準品
Standard
UTES
85℃標準品
85℃
StandardIzed
−40〜+85 ● ● ◯ 6.3〜100 0.1〜22000
黒
Black
白
White
42
UTWE
低電圧105℃品
Low Volt.
105℃
Use
−40〜+105 ● ● ◯ 6.3〜100 0.1〜15000
黒
Black
金
Gold
43
CE-
04
薄形品
Low Profile
UTCX
高さ5mm品
5
mm Height
−40〜+85 ● ● 4〜50 0.1〜470
黒
Black
白
White
44
UTCXW
高さ5mm105℃品
5
mm Height
105℃
Use
−40〜+105 ● ● 6.3〜50 0.1〜100
黒
Black
金
Gold
※
UTCM
高さ7mm品
7
mm Height
−40〜+85 ● ● 4〜50 0.1〜470
黒
Black
白
White
45
UTCMS
高さ7mm小形化品
7
mm Height Miniaturized
−40〜+85 ● ● 6.3〜50 4.7〜220
黒
Black
白
White
45
UTCMD
高さ7mm105℃品
7
mm Height
105℃
Use
−40〜+105 ● ● 6.3〜50 0.1〜330
黒
Black
金
Gold
※
CE-
04
低漏れ電流品
Low Leakage
Current
UTCML
高さ5mm品
5
mm Height
−40〜+85 ● ● 6.3〜50 0.1〜330
橙
Orange
黒
Black
※
UTLS
低漏れ電流品
Low Leakage Current
−40〜+85 ● ◯ 6.3〜63 0.1〜4700
橙
Orange
黒
Black
46
UTWL
低漏れ電流105℃品
Low Leakage Current
105℃
Use
−40〜+105 ● ◯ 6.3〜50 0.1〜2200
橙
Orange
黒
Black
47
CE-
04
両極性品
Bipolar
BPUE
両極性標準品
Bipolar Standardized
−40〜+85 ● ◯ 6.3〜63 0.1〜2200
黒
Black
白
White
48
BPX
高さ5mm両極性品
5
mm Height Bipolarized
−40〜+85 ● ● 6.3〜50 0.1〜47
黒
Black
白
White
49
BPM
高さ7mm両極性品
7
mm Height Bipolarized
−40〜+85 ● ● 4〜50 0.1〜100
黒
Black
白
White
49
Page 5
ELECTROLYTIC CAPACITORS
5
■大形アルミニウム電解コンデンサ/
Large Case Type Aluminum Electrolytic Capacitors
■音響用アルミニウム電解コンデンサ/
Aluminum Electrolytic Capacitors for Audio
分 類
Classification
シリーズ名
Type
概 要
Application
カテゴリ温度範囲
Category
temp. range
(℃)
特徴
Features
定格電圧範囲
Rated voltage
(
V. DC
)
静電容量範囲
Capacitance
(μF)
外装色
Sleeve color
印字色
Print color
掲載頁
Page
標準
品
小形
・
低背化品
低
Z
品
耐洗浄品
寿命
CE-
69
LG
基板自立形標準品
Snap-In Terminal Standardized
−40〜+85
−25〜+85
●
●
◯
◯
16〜100
160〜450
1000〜33000
82〜1800
黒
Black
白
White
50
LGW
基板自立形105℃品
Snap-In Terminal
105℃
Use
−40〜+105
−25〜+105●●
◯
◯
16〜100
160〜500
1000〜33000
47〜1800
黒
Black
白
White
52
LGWA
基板自立形長寿命品
Snap-In Long-Life
−25〜+105 ● ◇ 200〜450 270〜1800
黒
Black
白
White
54
LGWB
基板自立形長寿命品
Snap-In Long-Life
−25〜+105 ● ◇ 200〜450 270〜1500
黒
Black
白
White
55
CE-
33
SL
ねじ端子形標準品
Screw Terminal Standardized
−40〜+85
−25〜+85
●
●
◯
◯
10〜250
315〜450
680〜820000
270〜15000黒Black
白
White
56
SLW
ねじ端子形105℃品
Screw Terminal
105℃
Use
−40〜+105
−25〜+105●●
◯
◯
200〜250
350〜400
1500〜22000
1000〜15000黒Black
白
White
59
New
New
New
分 類
Classification
シリーズ名
Type
概 要
Application
カテゴリ温度範囲
Category
temp. range
(℃)
特徴
Features
定格電圧範囲
Rated voltage
(
V. DC
)
静電容量範囲
Capacitance
(μF)
外装色
Sleeve color
印字色
Print color
56掲載
59頁
Page
標準
品
小形
・
低背化品
低
Z
品
耐洗浄品
寿命
CE-
04
音響用
For Audio
UTSJ
ハイグレード品
High Grade
−40〜+85 6.3〜63 0.47〜18000
透明
Clear
黒
Black
62
UTSP
標準品
Standardized
−40〜+85 ● 6.3〜63 0.47〜18000
黒
Black
白
White
63
CE-
04
両極性品
Bipolar
BPUS
スピーカーネットワーク用両極性品
Bipolarized type for Speaker Network
−40〜+85 ● 50 0.47〜100
黒
Black
白
White
64
CE-
02
リード反対方向形両極性品
Axial type Bipolar
BPUSLL
スピーカーネットワーク用両極性品
Bipolarized type for Speaker Network
−40〜+85 ● 50〜100 1.0〜100
メタリック・ブルー
Metalic Blue黒Black
64
■導電性高分子ハイブリッドアルミ電解コンデンサ/
Hybrid Conductive Polymer Aluminum Electrolytic Capacitors
分 類
Classification
シリーズ名
Type
概 要
Application
カテゴリ温度範囲
Category
temp. range
(℃)
特徴
Features
定格電圧範囲
Rated voltage
(
V. DC
)
静電容量範囲
Capacitance
(μF)
外装色
Sleeve color
印字色
Print color
掲載頁
Page
標準
品
小形
・
低背化品
低ESR
品
耐洗浄品
寿命
CE-32
HVA
超低
ESR
、長寿命品
Ultra low E.S.R., Long Life
−55〜+105 ● ● ◇ 6.3〜16 10〜1000 ──
青
Blue
66
HVH
超低
ESR
、長寿命品、高電圧化
Ultra low E.S.R., Long Life,
High Voltage
−55〜+105 ● ● ◇ 25〜125 6.8〜330 ──
青
Blue
67
CE-
04
HEH
超低
ESR
、長寿命品、高電圧化
Ultra low E.S.R., Long Life,
High Voltage
−55〜+105 ● ● ◇ 25〜100 10〜330 ──
青
Blue
68
New
New
New
■導電性高分子アルミ固体電解コンデンサ/
Conductive Polymer Aluminum Solid Electrolytic Capacitors
分 類
Classification
シリーズ名
Type
概 要
Application
カテゴリ温度範囲
Category
temp. range
(℃)
特徴
Features
定格電圧範囲
Rated voltage
(
V. DC
)
静電容量範囲
Capacitance
(μF)
外装色
Sleeve color
印字色
Print color
掲載頁
Page
標準
品
小形
・
低背化品
低ESR
品
耐洗浄品
寿命
CE-32
PVW
超低
ESR
品
Ultra low E.S.R.
−55〜+105 ● ◯ 2.5〜35 6.8〜1500 ──
紫
Purple
70
PVWZ
超低
ESR
、高リプル品
Ultra low E.S.R., High Ripple
−55〜+105 ● ◯ 2.5〜16 39〜2700 ──
紫
Purple
71
CE-
04
PUW
超低
ESR
、高リプル品
Ultra low E.S.R., High Ripple
−55〜+105 ● ◯ 2.5〜50 22〜1500
黒
Black
金
Gold
72
■低インピーダンスタイプ小形アルミニウム電解コンデンサ/
Low Inpedance Type Miniature Aluminum Electrolytic Capacitors
分 類
Classification
シリーズ名
Type
概 要
Application
カテゴリ温度範囲
Category
temp. range
(℃)
特徴
Features
定格電圧範囲
Rated voltage
(
V. DC
)
静電容量範囲
Capacitance
(μF)
外装色
Sleeve color
印字色
Print color
掲載頁
Page
標準
品
小形
・
低背化品
低
Z
品
耐洗浄品
寿命
CE
−04
USXW
高周波低インピーダンス、高リプル品
High Frequency Low Inpedance,
High Ripple
−40〜+105 ● ◇ 6.3〜50 22〜6800
黒
Black
白
White
−
USAW
高周波低インピーダンス、 高リプル、小型長寿命品
High Frequency Low Inpedance, High Ripple,
Miniaturized, Long Life
−40〜+105 ● ● ◇ 6.3〜50 100〜8200
黒
Black
白
White
−
USGW
超低
ESR
品
Ultra low E.S.R.
−40〜+105 ● ◯ 6.3〜25 220〜3300
黒
Black
白
White
−
New
New
New
New
New
New
*下記シリーズの詳細は営業へお問い合わせ下さい。
Please refer for the details of the following series.
▲:100V以下に適用
Apply
100
V and below
◆:200V以下に適用
Apply
200
V and below
・ここに記載していないカスタム製品も製造いたしますので、御用命下さい。
Produce custom products too, which are not found in these tables.
・掲載頁※印の製品はホームページを御覧下さい。(
http://www.toshinkk.co.jp/
)
The publishing page must look at the homepage about
※
mark.
耐洗浄
○:2000時間
2000
hrs
◇:長寿命
Long-Life
空欄:1000時間
1000
hrs
寿 命
Page 6
ELECTROLYTIC CAPACITORS
6
■チップ形アルミニウム電解コンデンサ/
Chip Aluminum Electrolytic Capacitors
■小形アルミニウム電解コンデンサ(1)/
Miniature Aluminum Electrolytic Capacitors
(1)
ラジアルリードタイプ(有極性)/
Radial Lead Type (Polarized
)
CE-04
低漏れ電流品
/Low-leakage
UTLS
85℃
(P.46)
UTWL
105℃
(P.47)
高温度化品
/High-temperature
UTCZ
125℃
(P.36)
UTES
85℃
(P.42)
UTWE
105℃
(P.43)
標 準 品
/Standard Type
薄形・低漏れ電流品
/Low-profile・leakage
UTCML
85℃・7
mm Height
UTCM,UTCMS
85℃・7
mm Height
(P.45)
UTCMD
105℃・7
mm Height
UTCX
85℃・5
mm Height
(P.44)
UTCXW
105℃・5
mm Height
薄 形 品
/Low-profile Type
UTWFZ
105℃
UTWKZ
105℃
(P.30)
低インピーダンス品
/Low-impedance Type
UTWRZ
105℃
中高圧品
/Medium & High voltage
UTWV
105℃・5000
h
(P.39)
UTWBX
105℃・10000
h
(P.40)
チップタイプ/
Chip Type
CE-32
長寿命品
/Long-life Type
EC-FH
105℃
(P.28)
低インピーダンス品
/Low-impedance
EC-KX
105℃
(P.24)
両 極 性 品
/Bi-polar Type
EC-NP
85℃
薄 形 品
/Low-profile Type
EC-BD
85℃・4.5
mm Height
EC-BE(S
)
85℃・3.9
mm Height
長寿命低インピーダンス品
/Low-Impedance & Long-Life
EC-LS
105℃
EC-LX
105℃
(P.25)
UTWYZ
105℃
UTWXZ
105℃
(P.31)
(
P.
34)
EC-LL
105℃
(P.26)
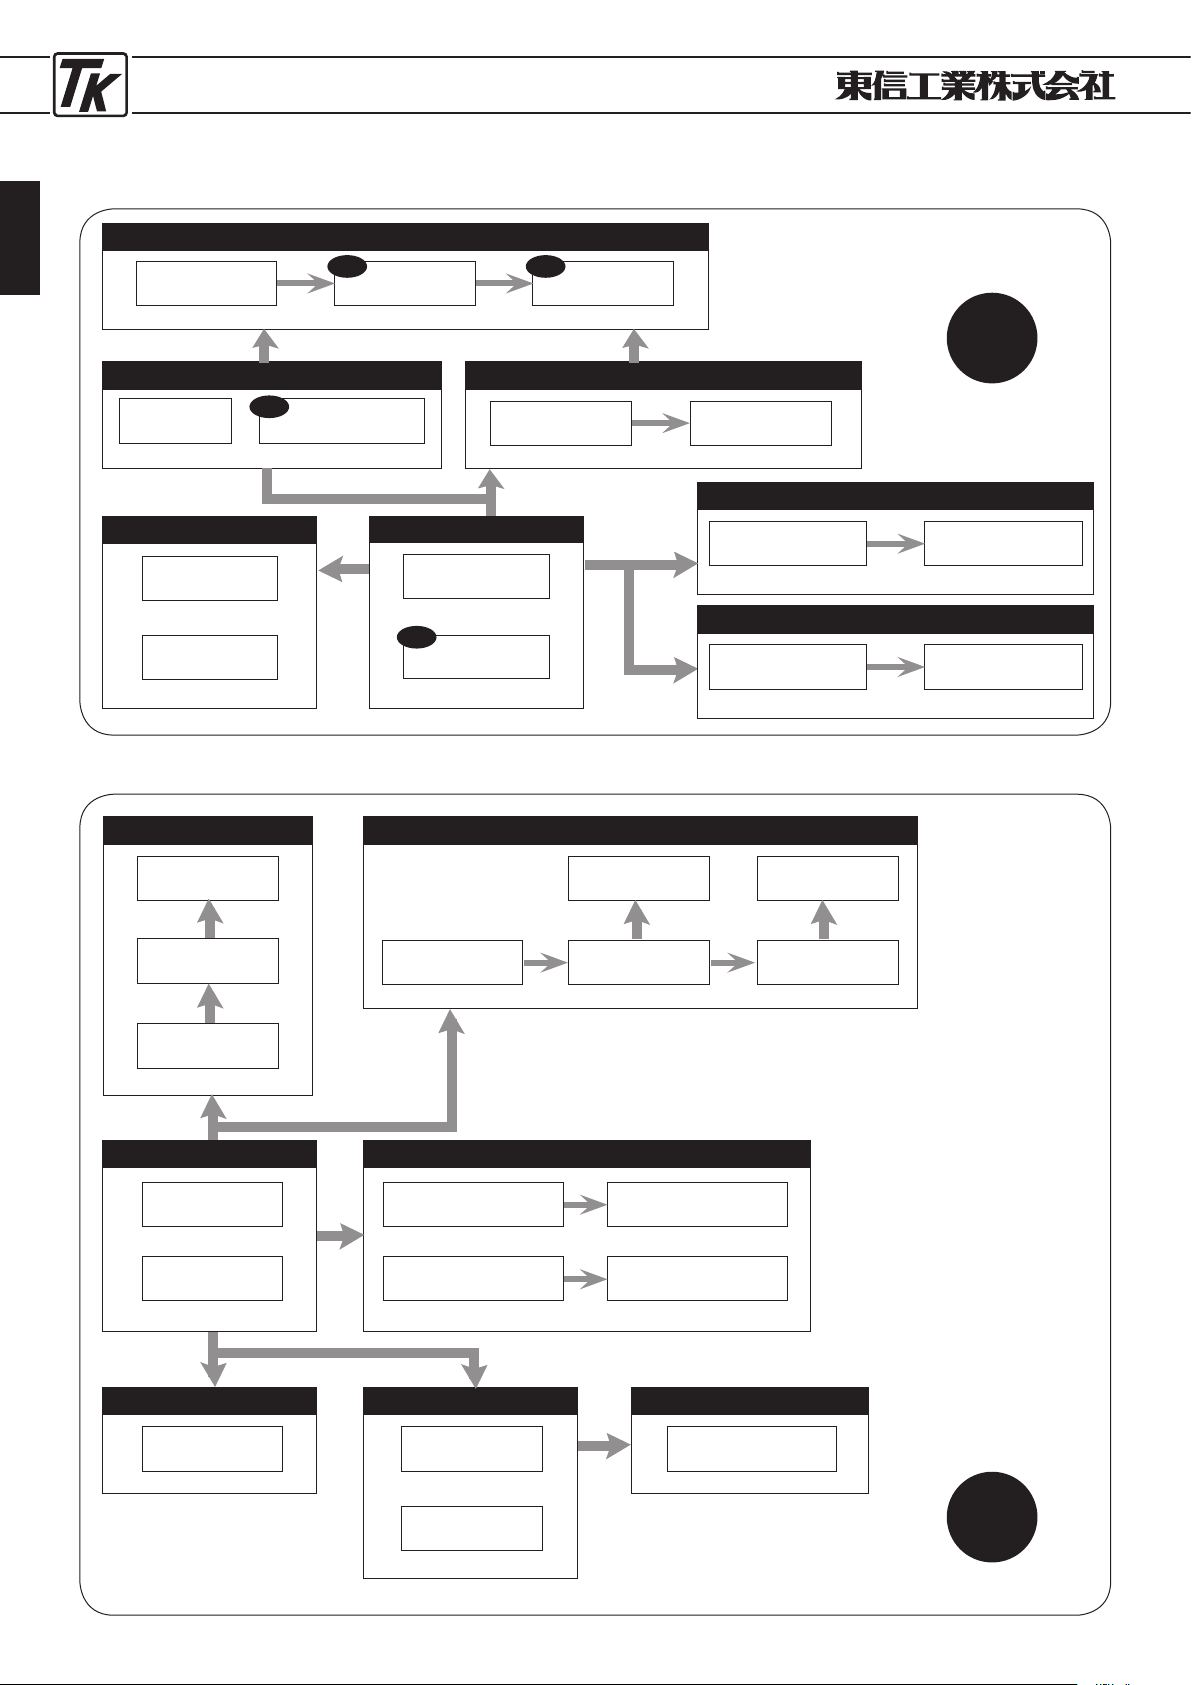
●製品体系図/
PRODUCTS CHART
EC-PC
125℃
(P.29)
EC-FN
105℃
標 準 品
/Standard Type
EC-C , EC-BS
85℃
(P22)
EC-FS
105℃
(P.23)
小形化品
/Miniaturization
EC-BSS
85℃
EC-C
85℃
New
Upgrade
UTWHM,UTWHS
105℃
(P.37)
Upgrade
EC-GA
105℃・5.4
mm Height
(P.27)
Upgrade
Page 7
ELECTROLYTIC CAPACITORS
7
■小形アルミニウム電解コンデンサ(2)/
Miniature Aluminum Electrolytic Capacitors
(2)
■大形アルミニウム電解コンデンサ/
Large Case Type Aluminum Electrolytic Capacitors
両極性タイプ/
Bi-polar Type
チップ形アルミ電解コンデンサ
Chip Aluminum Electrolytic Capacitors
EC-NP EC-FN
CE-04
小形アルミ電解コンデンサ
Miniature Aluminum Electrolytic Capacitors
UTES
標準品/Standard Type
BPUE
85℃
(P.48)
薄 形 品/
Low-profile Type
BPM
85℃, 7
mm Height
(P.49)
BPX
85℃, 5
mm Height
(P.49)
ラジアルリードタイプ/
Radial Lead Type
チップ化
Chip
小形アルミ電解コンデンサ
Miniature Aluminum Electrolytic Capacitors
UTWHM, UTWHS
基板自立形品/Snap-in Type
LG
85℃
(P.50)
LGW
105℃
(P.52)
CE-69
CE-33
大形タイプ/
Large Case Type
小形化
Miniaturization
■音響用小形アルミニウム電解コンデンサ/
Miniature Aluminum Electrolytic Capacitors For AUDIO
有極性タイプ/
Polarized Type
標準品/Standard Type
UTSP
85℃
ラジアルリードタイプ/
Radial Lead Type
(P.63)
ハイグレード品
/High Grade Type
UTSJ
85℃
(P.62)
CE-04
両極性タイプ/
Bi-polar Type
スピーカ
N.W.用/For Speaker N.W.
BPUS
85℃
ラジアルリードタイプ/
Radial Lead Type
(P.64)
CE-04
両極性化
Bi-polar
スピーカ
N.W.用/For Speaker N.W.
BPUSLL
85℃
アキシャルリードタイプ/
Axial Lead Type
(P.64)
CE-02
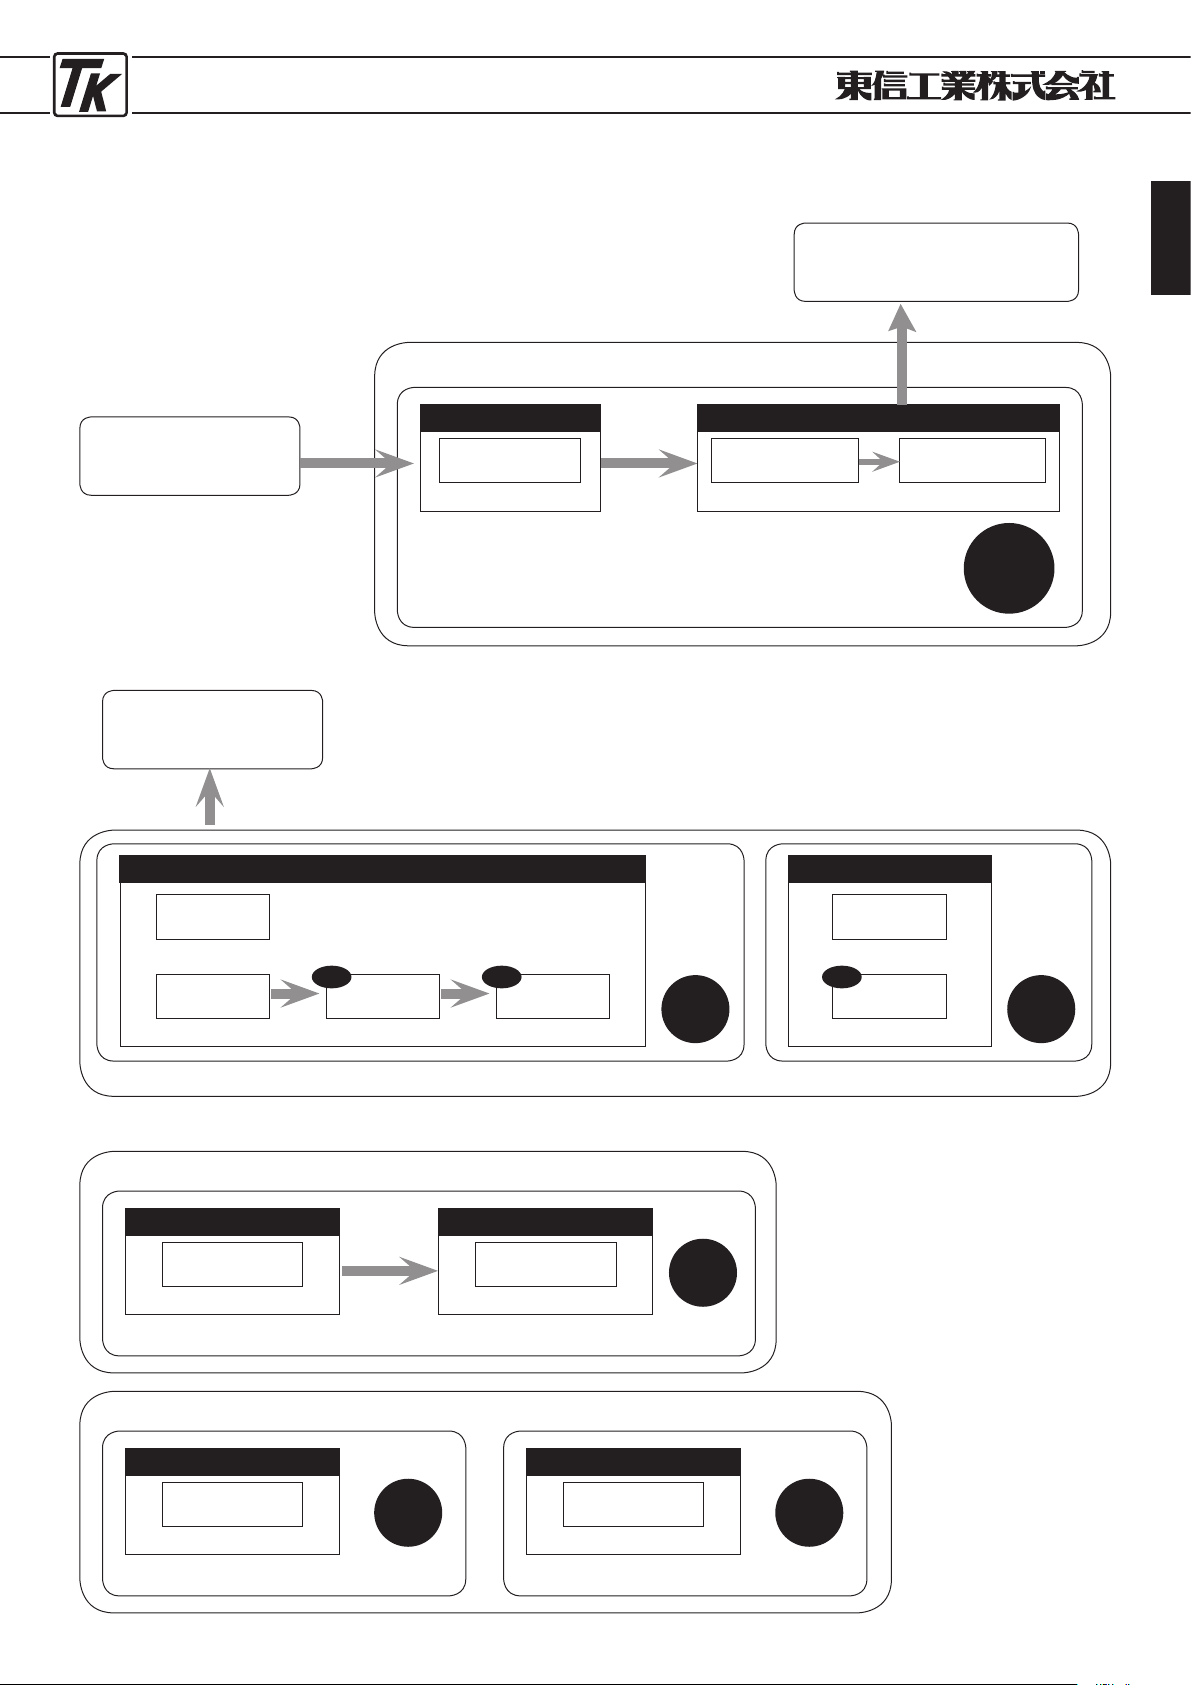
●製品体系図/
PRODUCTS CHART
LGWA
105℃
(P.54)
LGWB
105℃
(P.55)
New New
ネジ端子形品/Screw Type
SL
85℃
(P.56)
SLW
105℃
(P.59)
New
Page 8
ELECTROLYTIC CAPACITORS
8
分類
Classihfucation
概要
Application
旧シリーズ
Previous series (type)
代替シリーズ
Substitute series (type)
掲載頁
Page
CE-
02
リード反対方向形
Axial Type
リード反対方向形標準品
Axial Standardized
TTC
生産中止
/Abolition
――
リード反対方向105℃品
Axial
105℃
Use
TTW
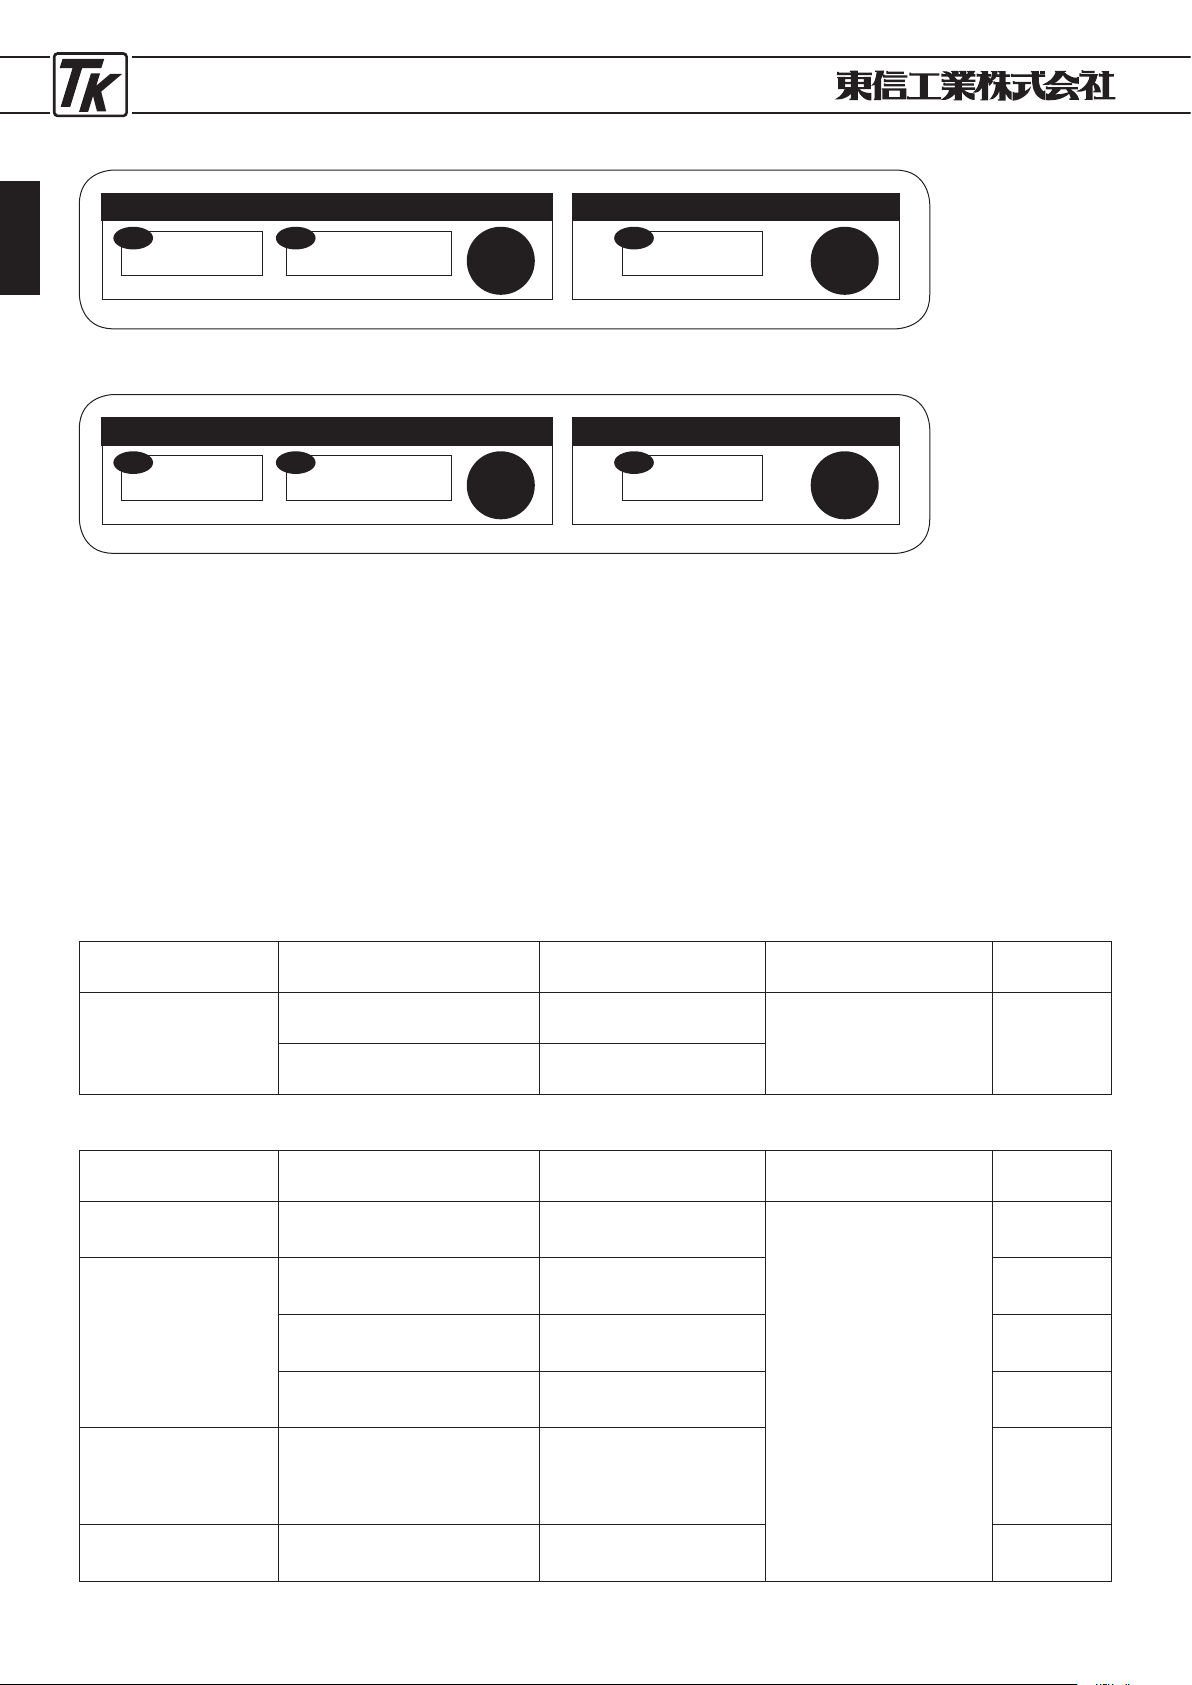
●カタログ削除品についてのお願い/
PROPOSAL ON DELETION SERIES FROM CATALOG
●統廃合一覧表/
List of Integration and Abolition Series
■小形アルミニウム電解コンデンサ
/Miniature Aluminum Electrolytic Capacitors
下記の旧シリーズをカタログより削除いたしました。
代替シリーズへの変更については、御承認に必要なサンプル、技術資料等を御要望により提出させて頂いた上で、調整と準備
をさせて頂きます。
誠に勝手ではございますが、何卒ご理解を賜りますよう宜しくお願いいたします。
Deleted the following previous series from catalog.
When a series change to the substitution series is proposed, we will supply the samples, technical data and other
materials at your demand for approval, and we will coordinate and prepare with customers.
It is greatly appreciated that you would understand and accept the proposal stated in above.
■導電性高分子ハイブリッドアルミ電解コンデンサ/
Hybrid Conductive Polymaer Aluminum Electrolytic Capacitors
チップ形
/Chip Type
HVA
105℃
(P.66)
CE-32
HVH
105℃
High voltage
(P.67)
New New
ラジアルリード形
/Radial Lead Type
HEH
105℃・10000
h
(P.68)
CE-04
New
■導電性高分子アルミ固体電解コンデンサ/
Conductive Polymer Aluminum Solid Electrolytic Capacitors
チップ形
/Chip Type
PVW
105℃
(P70)
CE-32
PVWZ
10℃
High ripple
(P.71)
New New
ラジアルリード形
/Radial Lead Type
PUW
105℃
(P.72)
CE-04
New
分類
Classihfucation
概要
Application
旧シリーズ
Previous series (type)
代替シリーズ
Substitute series (type)
掲載頁
Page
ポリプロピレンフィルム
Polyprophylene film
中圧品
Higher Voltage UPZ type
UPH
生産中止
/Abolition
76
メタライズド
ポリエステル
フィルム
Metallized polyester
film
小形化品
For miniature size
MMCX
79
小形化品
For miniature size
MMDX
80
テープラップ形
Tape wrap type
UTMDC
82
積層型メタライズド
ポリエステルフィルム
Stacked metallized
polyester film
樹脂ディップ積層形
Stacked metallized
polyester film resin dipped
MSAN
84
メタライズド
PPS
フィルム
Metallized PPS film
広容量範囲
Wide range capacitance
CHA
86
■プラスチックフィルムコンデンサ
/Plastic Film Capacitors
Page 9
ELECTROLYTIC CAPACITORS
9
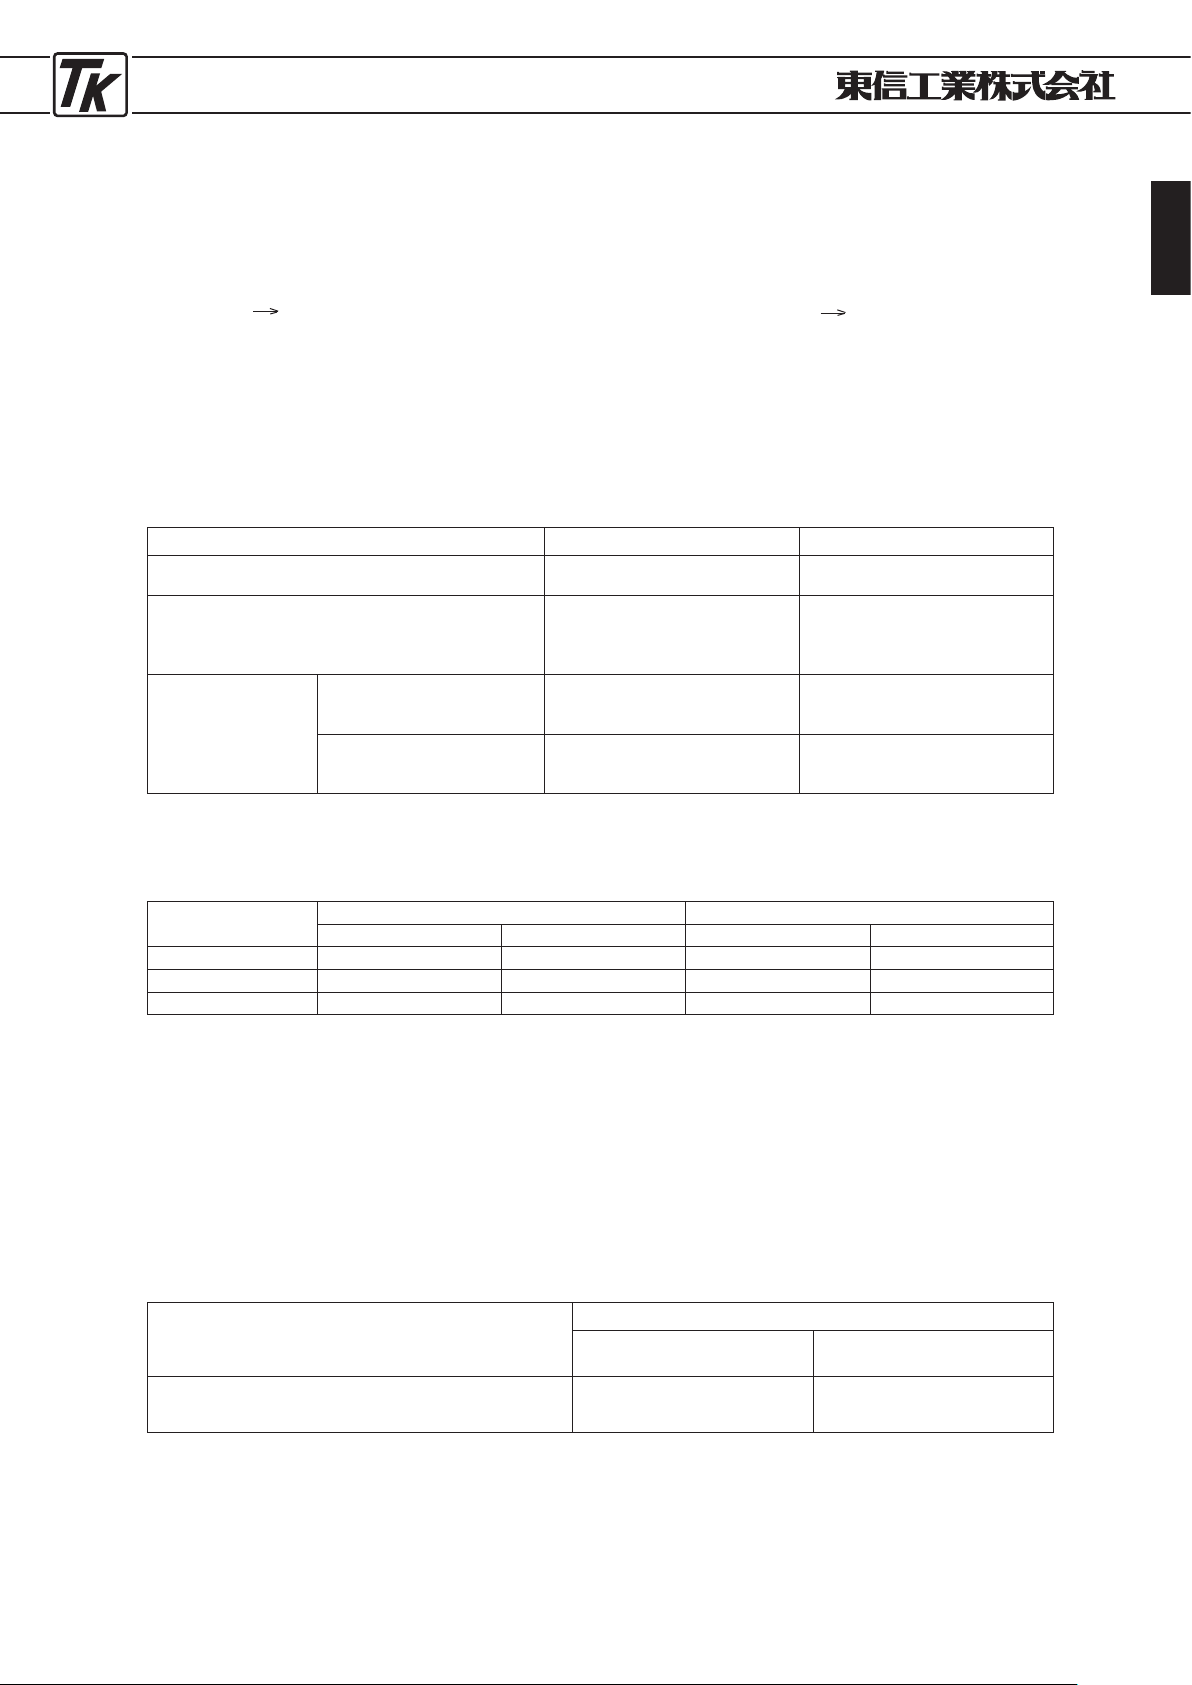
●環境対応コンデンサ(
RoHS
対応)について/
ENVIRONMENT FRIENDLY(RoHS Compliance) CAPACITORS
■脱
PVC
対応/
Non-PVC
■環境対応製品/
The list of Environment Friendly Capacitors
PVC
(ポリ塩化ビニール)は、大気や土壌、人体への
影響が懸念される環境対策上の重点物質です。
この脱
PVC
対応は以下の通りです。
〔対策内容〕
PVC
スリーブ→
PET
(ポリエチレンテレフタレート)
スリーブ
PVC(Polyvinyl chloride
)
is one of the critical substances that directly
effects to the air, soil and the human body.
How to eliminate PVC is as following.
〔
The Measure
〕
PVC Sleeve → PET(Polyethylene Telephthalate) Sleeve
スリーブ色及び印字色が標準色と異なる場合がござ
います。
標準色と異なる製品は次の通りです。(都合により
下表以外でも異なる場合がございます)
※
By a case, a sleeve color and a printing color can be different from
standard color.
A different product from the standard sleeve color (and print color) are as
follows. (By circumstances, it can be different besides a list shown below.
)
■鉛レス対応/
Lead Less
鉛は地下浸透による水質汚染、人体への影響等が以前より
指摘されており、端子のメッキに鉛を含有しない鉛レス化
対応は以下の通りです。
〔対策内容〕
鉛入りメッキ端子 錫100%メッキ
It has been being pointed out for a long time about an effect of Lead to
the human body especially as water pollution by its penetration to ground.
Never contains Lead in form of plating of a wire is as following.
〔
The Measure
〕
Plating of a wire containing Lead
100%
Tin Plating
■環境対応品ご指定法/
How to Specify for Environment Friendly Capacitors
品番標準呼称法(P10参照)の表記が次のようにな
ります。
The notation of METHOD OF BASIC DENOMINATING ITEM NUMBER
(
Ref.P
10)
becomes as follow.
・大型品(基板自立・ネジ端子)
大形品については、別途お問い合わせください。
・
Large Case Type (Snap-in・Screw terminal
)
About Large Case Type please inquire separately.
・リード形(ラジアルリード・アキシャルリード)
リード形については、下表の付記コードで表記されます。
・
Lead Type (Radial Lead・Axial Lead
)
About Lead Type, it is represented by the Additional code in the following list.
・チップ型
本カタログのシリーズ名でご指定ください。
・
Chip Type
Please appoint it by the series name of this catalogue.
There could be a deviation from this method for the item number of the
actual capacitors, the voucher, etc. in special cases at our computer system.
(
In case of the above, we will correspond at Additional code.
)
コンピュータシステム上、現品及び伝票等の品番が異
なる場合がございます。(付記コードで対応の場合)
※ ※
特 殊 品 コ ー ド
Special Code
脱
PVC/Non-PVC
鉛レス
Lead less
対 応 品
Corresponding Products
0
未
対 応
品
Un-Corresponded Products
7
PVC
非使用
PVC is not used
対応可能
※
Possible to correspond
対応可能
※
Possible to correspond
対応可能
※
Possible to correspond
形 状 /
Type
鉛レス対応/
Lead less
鉛非使用
Lead is not used
鉛非使用
Lead is not used
鉛非使用
Lead is not used
鉛非使用
Lead is not used
チップ形/
Chip Type
(
CE-
32)
ラジアルリード形/
Radial Lead Type
(
CE-
04)
アキシャルリード形/
Axial Lead Type
(
CE-
02)
基板自立形
Snap-in Type
(
CE-
69)
大形品
Large Case Type
ネジ端子形
Screw terminal Type
(
CE-
33)
脱
PVC
対応/
Non-PVC
スリーブ色/
Sleeve color
黒/
Black
淡緑/
Light Green
淡青/
Light Blue
印字色/
Print color
白/
White
黒/
Black
黒/
Black
スリーブ色/
Sleeve color
黒/
Black
黒/
Black
黒/
Black
標準(
PVC
使用)品/
Standard (PVC use) product
シリーズ名/
Series
UTWE
UTCM・UTCMS
BPX・BPM・BPUE
脱
PVC
対応(
PET
使用)品/
Non-PVC (PET use) product
印字色/
Print color
金/
Gold
白/
White
白/
White
Page 10
ELECTROLYTIC CAPACITORS
10
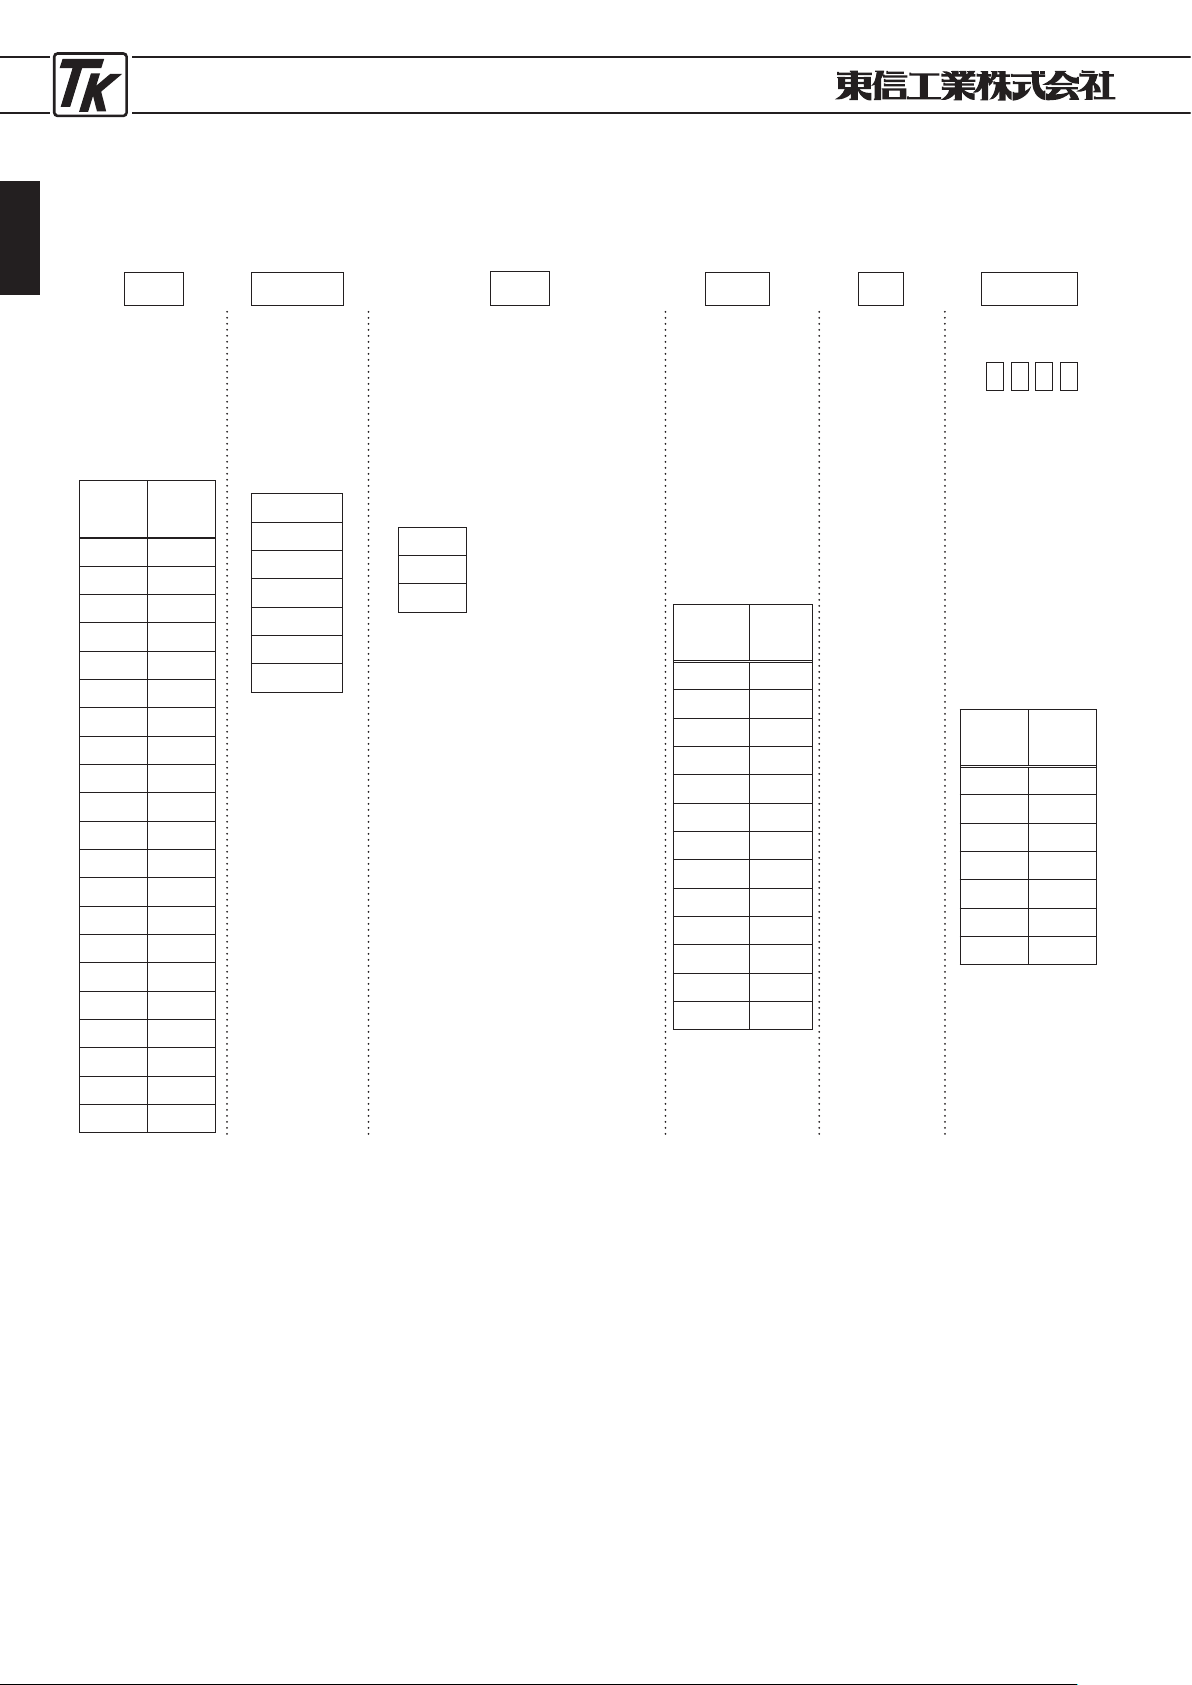
●品番標準呼称法(ご指定法)/
METHOD OF BASIC DENOMINATING ITEM NUMBER
(
HOW TO BASIC SPECIFY ITEM NUMBER
)
例/
Example
1
C
UTES
TF
471
M
UTWXZ
シリーズ
UTWXZ series
16
W.V
定格電圧
Rated Voltage
シリーズ名
Series Name
形状記号
Style Symbl
静電容量記号
Capacitance
Symbol
容量許容差
Capacitance
tolerance
定格 電 圧 は
J I S
記号で記入する。
Write JIS Code
Voltage.
例/
Example
電圧
Voltage
記号
Symbol
4 0
G
6.3 0
J
10 1
A
16 1
C
25 1
E
35 1
V
40 1
G
50 1
H
63 1
J
80 1
K
100 2
A
160 2
C
180 2
P
200 2
D
250 2
E
315 2
F
350 2
V
400 2
G
420 2
Q
450 2
W
500 2
H
カタログの
シリーズ名を
記入する。
Write a series
name of catalog.
例/
Example
テーピング及びリード加工の形
状記号を記入する。
テー ピ ン グ 加 工 及 びリー
ド加 工 の 無 い 製 品 の場合
は記入しない。
チッ プ タ イ プ 品 の 場合も
記入しない。
Write style symbol
of taping & leads
process.
I n t he c as e o f
pro d u c t wi t h ou t
t a pi ng & l e ad s
proce s s, do n o t
write it.
Do not write it in
th e cas e of ch ip
type product.
静電容量の記号を
記入する。
(単位はμF、小数
点はRとする)
Write the
capacitance
symbol (Unit
is μF, and
R represents
decimal point.
)
例/
Example
±10%=
K
±20%=
M
例/
Example
470μ
F
±20%
5mmピッチテーピング
5
mm-Pitch taping product.
UTWXZ
UTWYZ
UTWBX
UTWHS
UTES
UTCX
UTCM
TF
TS
FB
例/
Example
0F20
付記コード
Additional code
①:環境対応製品記号
Environment Friendly
Capacitors Symbol
②:ケースサイズ記号 [φ
D]
Case size symbol [φD]
③④:ケースサイズ記号
[L]
Case size symbol [L]
例
/Example
①:0
RoHS対応PET
スリーブ
RoHS compliance
PET sleeve
②ケースサイズ記号 [φ
D]
Case size symbol [φD]
PET
スリーブ, φ8・20
L
PET sleeve,
φ8・20
L
静電容量
Cap.μF記号Symbol
0.1 0R1
0
.22R
22
0
.33R
33
0
.47R
47
1
.
0 010
10 100
47 470
100 101
470 471
1000 102
4700 472
10000 103
47000 473
φ
D
記号
Symbol
5.0
D
6.3
E
8.0
F
10.0
G
12.5
H
16.0
K
18.0
M
① ② ③ ④
Page 11
ELECTROLYTIC CAPACITORS
11
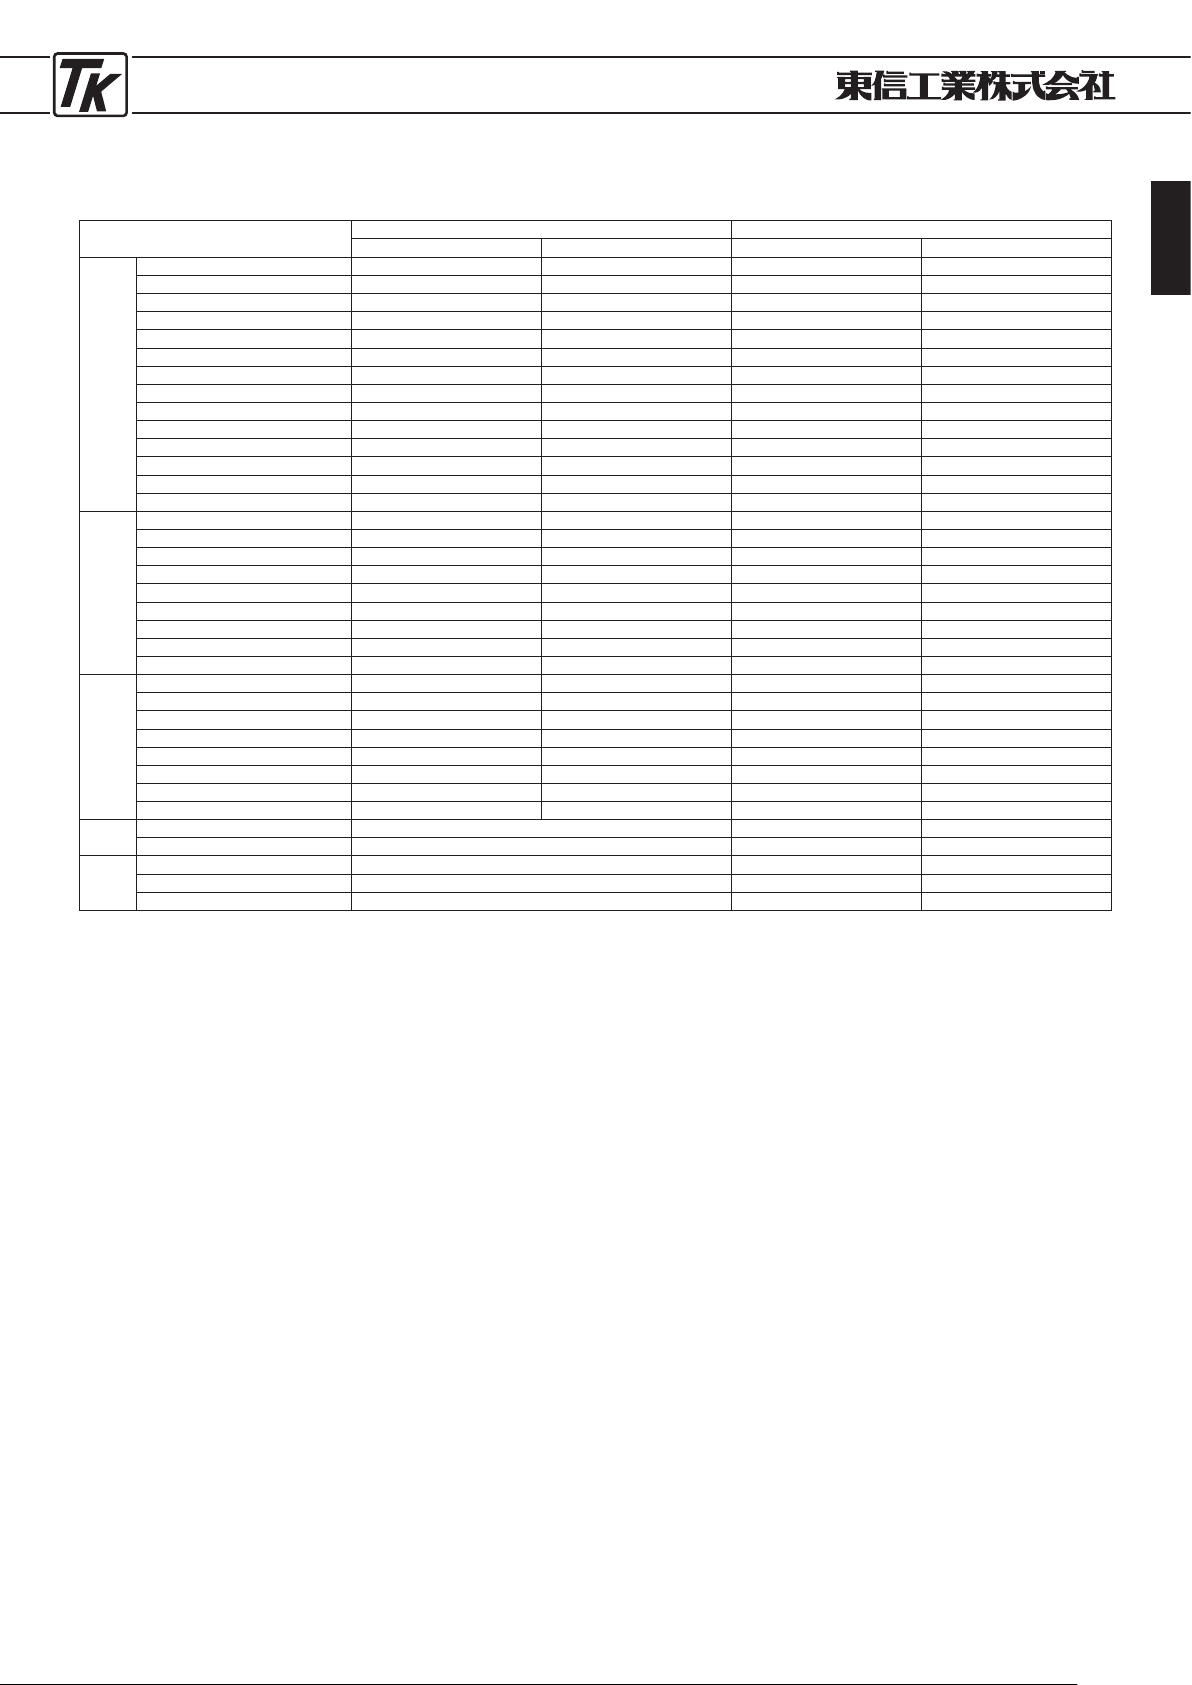
●基本ご発注単位
/BASIC ORDERING UNIT
ご注文に際しましては、基本発注単位の整数倍でご指定下さるようにお願い致します。
Please note the ordering quantity must be in multiples of the basic ordering unit.
( )内は、
UTCZ・BPUS・BPUSLL
シリーズ
The enclosed value is the ordering unit of UTCZ, BPUS and BPUSLL series.
※1:
BPUSLL
シリーズは対応不可
Can taping except BPUSLL series.
※2:数量は、基本発注単位(発注ロット)ではなく基本最少発注数量です。
The quantity is not basic ordering unit
(
Ordering Lot) , this is the basic minimum ordering quantity.
※3:その他都合により予告なく変更する場合もあります。
This may be changed for certain reasons without notice.
製品サイズ
Size
バルク品
Bulk(pcs
) テーピング品
Taping(pcs
)
ロングリード
Long Lead
フォーミング
Lead Forming
ツヅラ方式
Ammo-Pack
リール方式
Reel-Pack
CE-
32
φ3×5
.
4 ──── ──── ──── 2000
φ4 ──── ──── ──── 2000
φ5×3.9〜5.4 ──── ──── ──── 1000
φ5×6.0〜7.0 ──── ──── ──── 1000
φ6.3×3.25,3.9 ──── ──── ──── 1000
φ6.3×4.5〜7.0 ──── ──── ──── 1000
φ6.3×7.7 ──── ──── ──── 900
φ6.3×8.4 ──── ──── ──── 800
φ8 ──── ──── ──── 500
φ10×7.7〜10.2(10.5
)
──── ──── ──── 500
φ10×12.5,13.5 ──── ──── ──── 400
φ12.5 ──── ──── ──── 250
φ16 ──── ──── ──── 200
φ18 ──── ──── ──── 175
CE-
04
φ4〜φ6
.
3 200 200 2000 ────
φ8
200 200 1000 ────
φ10
200 200 500 ────
φ12
.
5 100 100 500 ────
φ16×16
50 50 250 ────
φ16×20〜
50 50 250 ────
φ18×20/25
50 50 ──── ────
φ18×30〜 30
(50) 30
──── ────
φ18×40/φ22
30 30 ──── ────
CE-
02
φ5
500 ──── ──── 1500
φ6
.
3 400 ──── ──── 1000
φ8
200 ──── ──── 1000
φ10 100
(50) ──── ──── 500 ※1
φ12
.
5/φ13 50 ──── ──── 300 ※1
φ16 25
(50) ──── ──── ────
φ18 20
(30) ──── ──── ────
φ22 15 (25) ──── ──── ────
CE-
69
φ22/φ25 10000 ※2 ──── ────
φ30/φ35 5000 ※
2 ──── ────
CE-
33
φ35 1000 ※
2 ──── ────
φ51/φ63
.
5 500 ※2 ──── ────
φ76/φ89 200 ※
2 ──── ────
Page 12
ELECTROLYTIC CAPACITORS
12
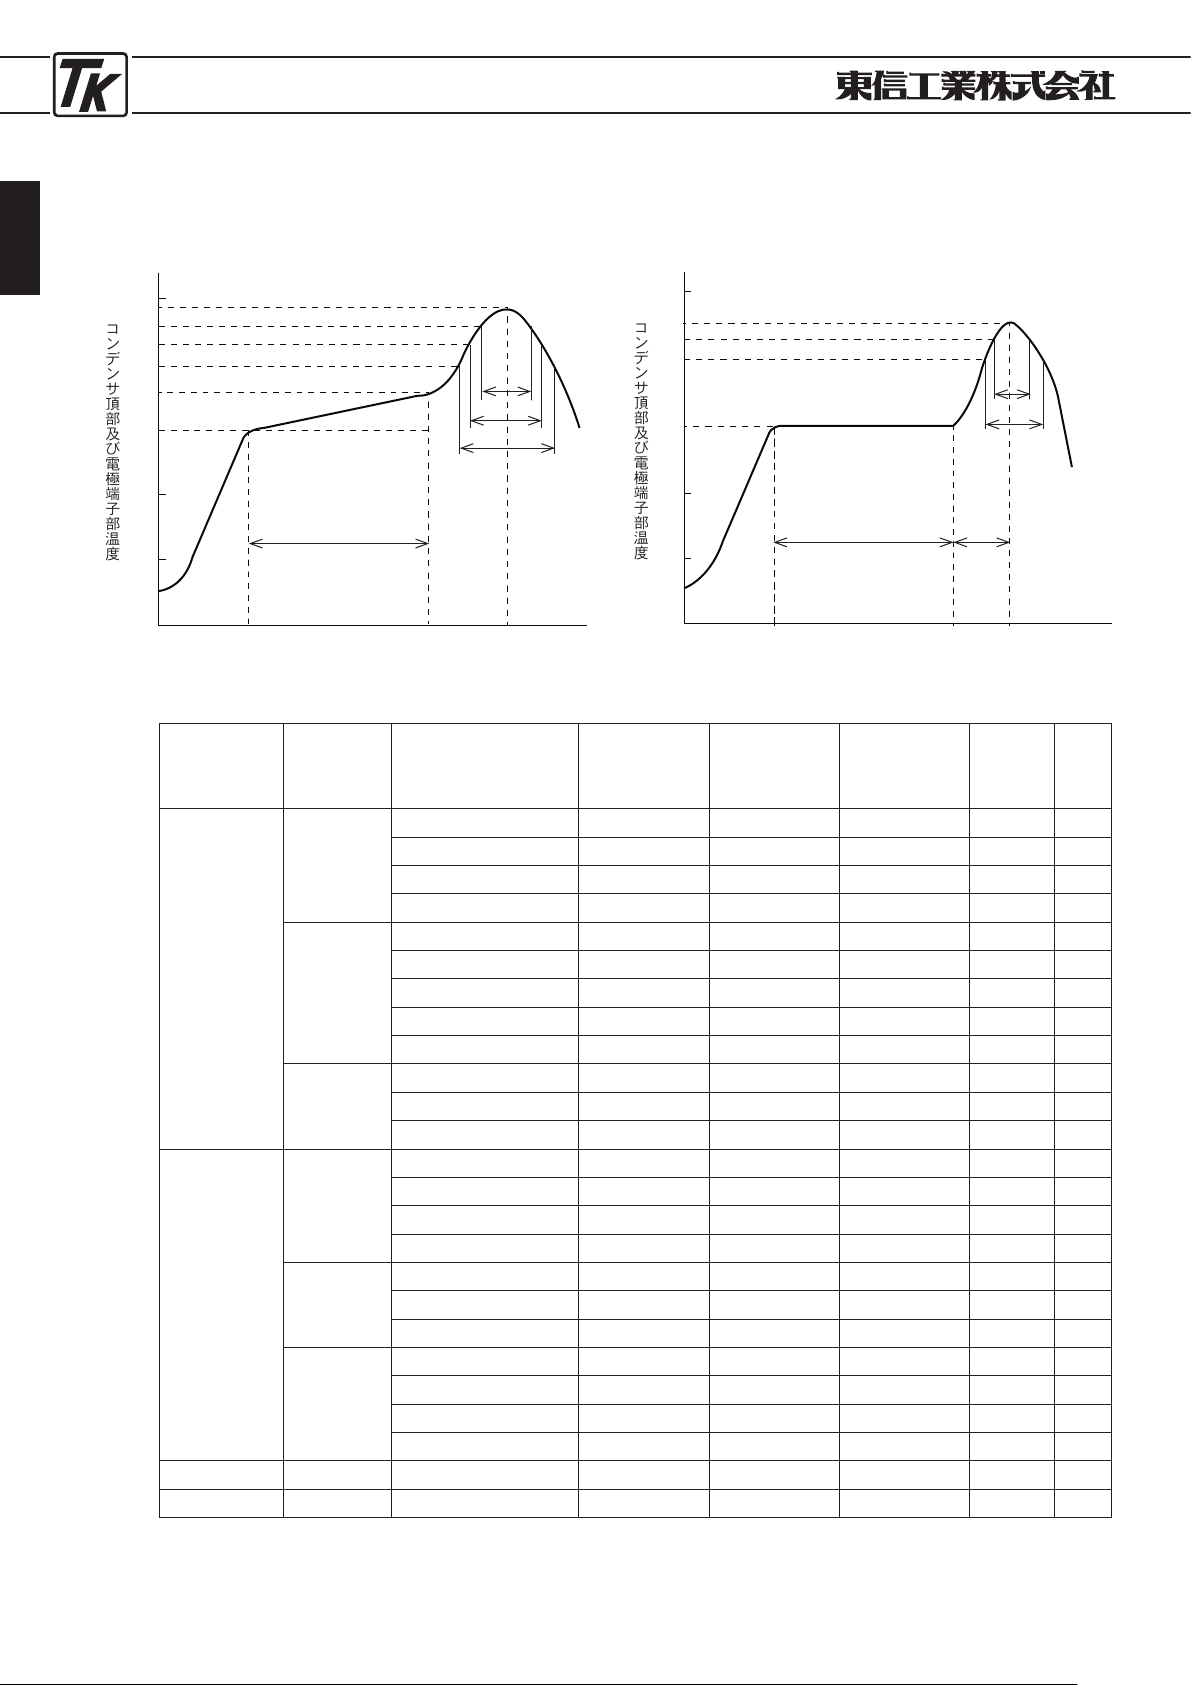
●チップ形(
CE-
32)リフロー許容条件/
CHIP (CE-
32)
TYPE PERMISSIBLE REFROW CONDITION
エアリフロー法及び赤外線リフロー法
AIR reflow and IR reflow
リーズ名
Series
電圧範囲
Voltage
(V)
対象サイズ
Size
200℃以上での
滞留時間(t)
Time for more
than
200℃(t)
217℃以上での
滞留時間(t1)
Time for more
than
217℃(t1)
230℃以上での
滞留時間(t2
)
Time for more
than
230℃(t2)
ピーク温度
(5 秒以内)
Peak
temperature
(Within 5sec)
プロファイル
Profile
EC-LL
EC-BSS
EC-C
EC-BS
EC-FS
EC-FH
EC-GA
EC-KX
EC-NP
EC-FN
4〜6.3
φ3
~φ6.
3
Within 70sec. Within 60sec. Within 40sec.
250℃ 1
φ8
Within 60sec. Within 50sec. Within 30sec.
245℃ 1
φ10
,
φ12.5
Within 50sec. Within 40sec. Within 20sec.
240℃ 1
φ16
,
φ18
Within 50sec. Within 30sec. Within 15sec.
235℃ 1
80〜100
φ4
~φ6.
3
Within 60sec. Within 50sec. Within 40sec.
250℃ 1
φ8
Within 60sec. Within 40sec. Within 30sec.
240℃ 1
φ10
Within 50sec. Within 30sec. Within 20sec.
240℃ 1
φ12
.
5
Within 50sec. Within 30sec. Within 20sec.
235℃ 1
φ16
,
φ18
Within 45sec. Within 20sec. Within 10sec.
235℃ 1
160〜400
φ8
,
φ10
Within 50sec. Within 30sec. Within 20sec.
240℃ 1
φ12
.
5
Within 45sec. Within 20sec. Within 10sec.
235℃ 1
φ16
Within 30sec. Within 15sec.
― 230℃ 2
EC-LX
EC-LS
EC-PC
6.3〜50
φ4
~
φ8
Within 80sec. Within 70sec. Within 40sec.
260℃ 1
φ10×10
.2,13.
5
Within 70sec. Within 60sec. Within 40sec.
250℃ 1
φ12
.
5
Within 60sec. Within 50sec. Within 30sec.
245℃ 1
φ10×7
.7,
φ16,φ18
Within 50sec. Within 40sec. Within 20sec.
240℃ 1
63
φ8
Within 60sec. Within 50sec. Within 30sec.
245℃ 1
φ10
,
φ12.5
Within 50sec. Within 40sec. Within 20sec.
240℃ 1
φ16
,
φ18
Within 50sec. Within 40sec. Within 15sec.
235℃ 1
80〜100
φ8
Within 60sec. Within 50sec. Within 30sec.
240℃ 1
φ10
Within 50sec. Within 40sec. Within 20sec.
240℃ 1
φ12
.
5
Within 50sec. Within 40sec. Within 20sec.
235℃ 1
φ16
,
φ18
Within 45sec. Within 30sec. Within 10sec.
235℃ 1
EC-BD ALL ALL Within 60sec. Within 50sec. Within 30sec.
245℃ 1
EC-BE(S
)
ALL ALL Within 50sec. Within 40sec. Within 20sec.
240℃ 1
〔プロファイル1
/Profile
1〕
エアリフロー法及び赤外線リフロー法
AIR reflow and IR reflow
プレヒートは150℃以下で120秒以内
Preheat
;150℃
, Within
120
sec.
〔プロファイル2
/Profile
2〕
Time (s)
上記の条件で2回リフローを行うことは可としますが。2回目を行う場合は1時間以上自然冷却し、基板及び部品が常温に復帰後行って下さい。
Capacitors can withstand two reflow processes on the above conditions. Second reflow shall be taken after more than one hour natural
cooling time and taken the return to normal temperatures of PCB board and components.
コンデンサ頂部及び電極端子部温度
[℃]
230
217
200
150
0
プレヒートは150〜180℃以下で120秒以内
Preheat
;150℃
to
180℃
, Within
120
sec.
Time (s)
プレヒート
Preheat
t2
max
t1
max
t
max
T
230
217
200
180
150
0
ピーク温度
Peak temp.
プレヒート
Preheat
リフロー時間
Refrow time
(
30
sec.max)
ピーク温度
Peak temp.
t
max
t1
max
Temperature at top pf capacitor and terminal
コンデンサ頂部及び電極端子部温度
[℃]
Temperature at top pf capacitor and terminal
Page 13
ELECTROLYTIC CAPACITORS
13
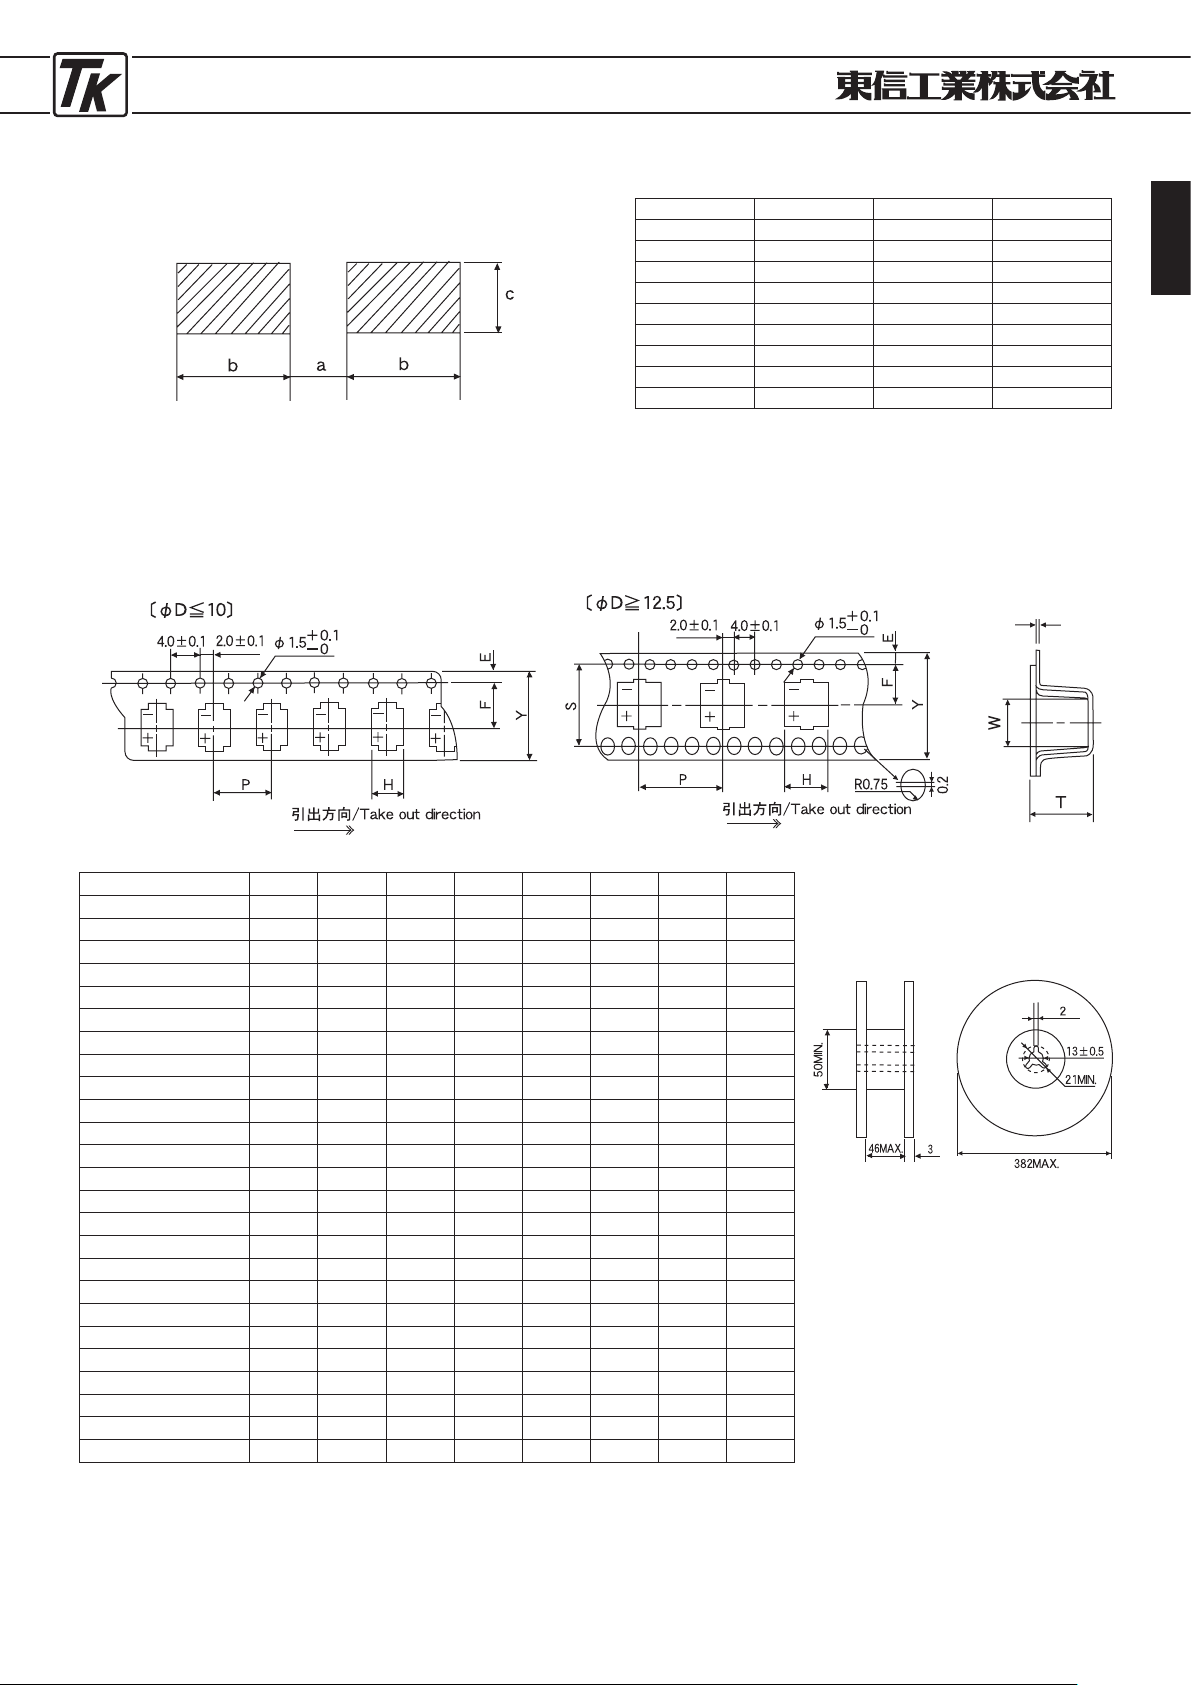
●チップ形(
CE-
32)テーピング仕様/
CHIP (CE-
32)
TYPE TAPING
■キャリアテープ
/CARRIER TAPE
Unit : mm
■リール
REEL
D × L Y±0.3H±0.2W±0.2P±0.1E±0.1F±0.1T±0.2S±0.
1
φ3×5
.
4 12.0
3.7
3.7
8.0
1.75
5.5
5.8
−
φ4×4
.
5 12.0
4.7
4.7
8.0
1.75
5.5
5.0
−
φ4×5
.
4 12.0
4.7
4.7
8.0
1.75
5.5
5.8
−
φ4×6
.
0 12.0
4.7
4.7
8.0
1.75
5.5
6.4
−
φ5×3
.
9 12.0
5.7
5.7
12.0
1.75
5.5
4.5
−
φ5×4
.
5 12.0
5.7
5.7
12.0
1.75
5.5
5.0
−
φ5×5
.
4 12.0
5.7
5.7
12.0
1.75
5.5
5.8
−
φ5×6
.
0 12.0
5.7
5.7
12.0
1.75
5.5
6.4
−
φ5×7
.
0 12.0
5.7
5.7
12.0
1.75
5.5
7.1
−
φ6
.
3×3.25
16.0
7.0
7.0
12.0
1.75
7.5
3.8
−
φ6
.
3×3.9
16.0
7.0
7.0
12.0
1.75
7.5
4.5
−
φ6
.
3×4.5 16.0
7.0
7.0
12.0
1.75
7.5
5.1
−
φ6
.
3×5.4 16.0
7.0
7.0
12.0
1.75
7.5
5.8
−
φ6
.
3×6.0 16.0
7.0
7.0
12.0
1.75
7.5
6.5
−
φ6
.
3×7.0 16.0
7.0
7.0
12.0
1.75
7.5
7.5
−
φ6
.
3×7.7 16.0
7.0
7.0
12.0
1.75
7.5
8.2
−
φ6
.
3×8.4 16.0
7.0
7.0
12.0
1.75
7.5
9.2
−
φ8×10
.
2(10.5) 24.0
8.7
8.7
16.0
1.75
11.5
11.1
−
φ10×7
.
7 24.0 10.7
10.7
16.0
1.75
11.5
8.3
−
φ10×10
.
2(10.5) 24.0 10.7
10.7
16.0
1.75
11.5
11.2
−
φ10×12
.
5 24.0 10.7
10.7
16.0
1.75
11.5
13.3
−
φ10×13
.
5 24.0 10.7
10.7
16.0
1.75
11.5
14.5
−
φ12
.
5×13.5 32.0 13.2
13.2
24.0
1.75
14.2
14.3
28.4
φ16×16.5 44.0 17.5
17.5
28.0
1.75
20.2
17.3
40.4
φ18×16.5 44.0 19.5
19.5
32.0
1.75
20.2
17.8
40.4
●チップ形(
CE-
32)推奨ランド寸法/
CHIP (CE-
32)
TYPE RECOMMENDED LAND PATTERN
ランドパターン
LAND PATTERN
φ
D a b c
φ3 0.8 2.2 1.7
φ4 1
.
0 2.6 1.8
φ5 1
.
4 3.0 1.8
φ6
.
3 2.1 3.5 1.8
φ8 2
.
8 4.1 2.1
φ10 4
.
3 4.4 2.5
φ12
.
5 4.3 5.8 2.5
φ16 6
.
6 6.5 5.0
φ18 6.6 7.7 5.0
※
When using large chip capacitor, please design possibly larger land pattern area than the recommended
pattern dimension in order to increase vibration resistance and avoid to falling off a circuit board.
※大形品については基板のパターン剥れ防止(耐振性)のため、できるだけ
推奨ランド寸法よりパターン面積を大きく設けるよう推奨致します。
Unit : mm
0.6
max
Page 14
ELECTROLYTIC CAPACITORS
14
■5
mm
ピッチテーピング 記号:TF
5
mm-pitch taping
Symbol
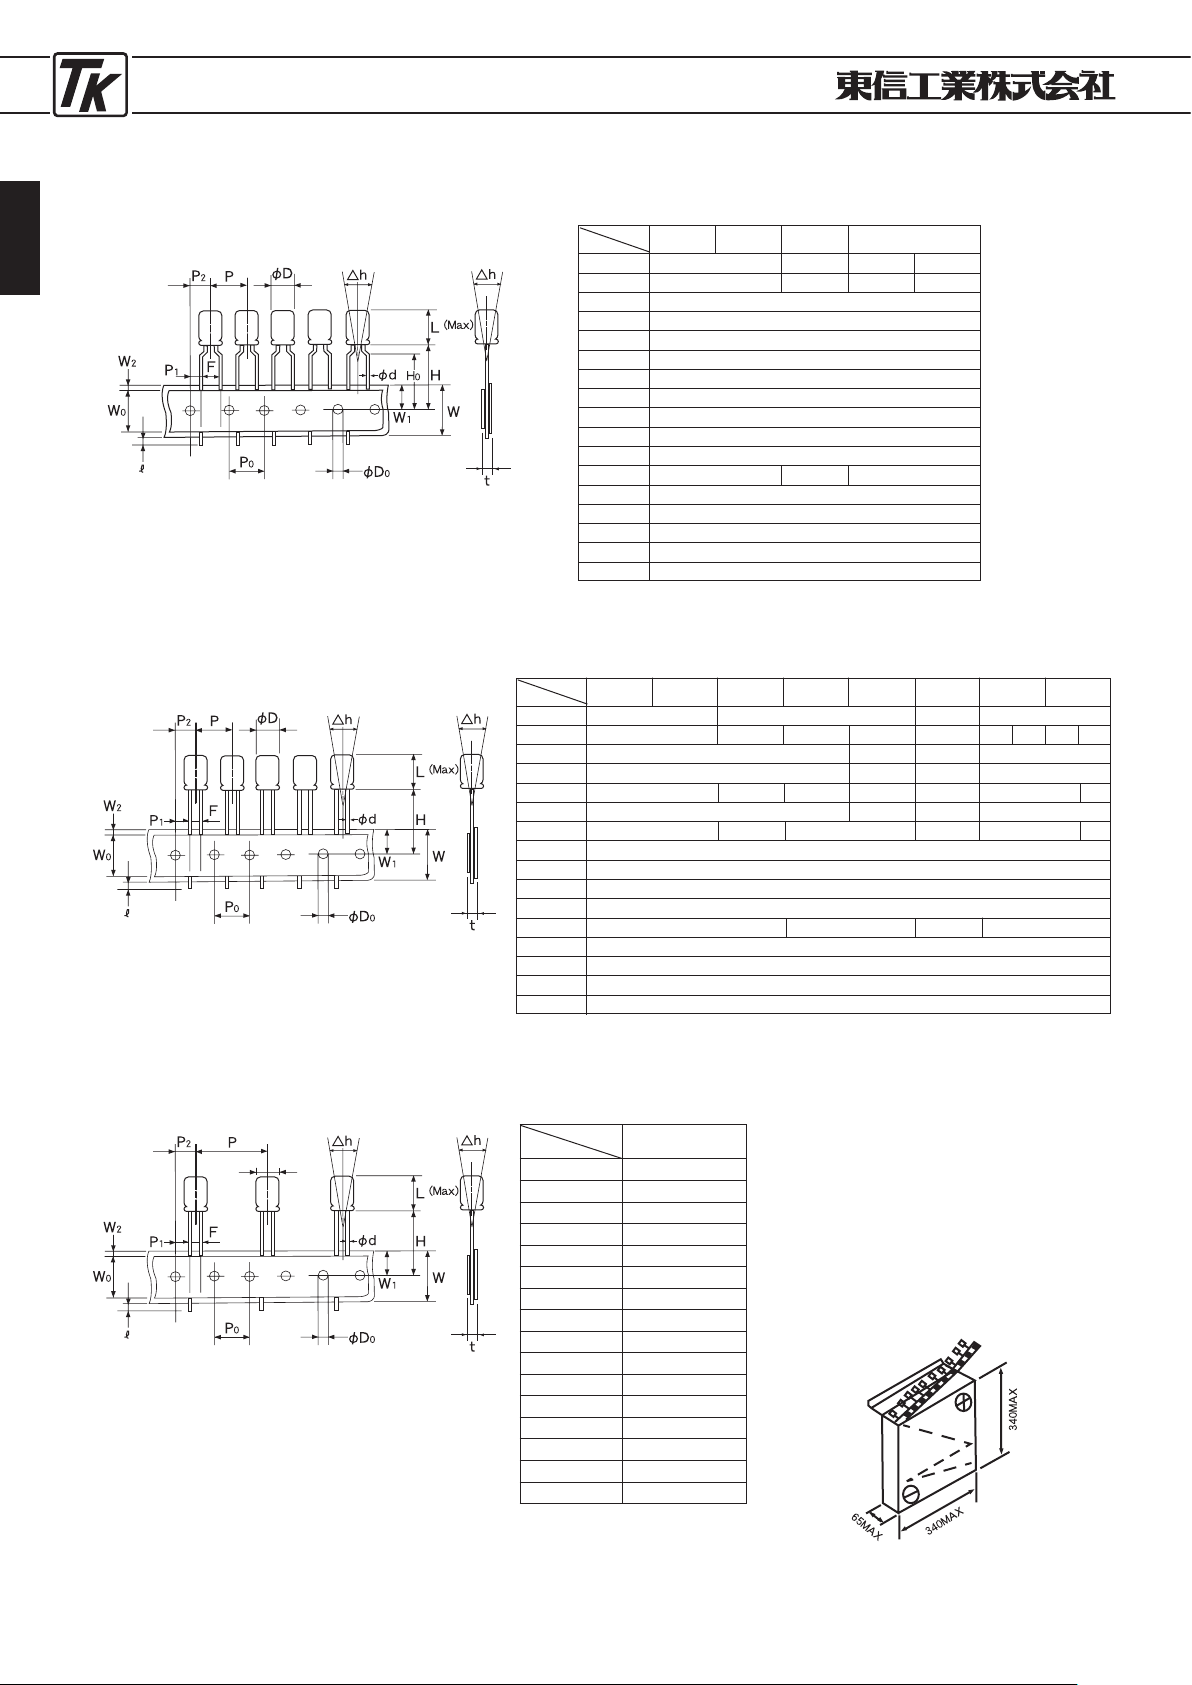
●ラジアルリード形(
CE-
04)自動挿入用テーピング仕様/
RADIAL LEAD (CE-
04)
TYPE TAPING FOR AUTOMATIC INSERTION
■リードストレートテーピング
Leads straight taping
φ
D
Sign
φ
d
L
P
P
0
P
1
P
2
F
W
W
0
W
1
W
2
H
ℓ
φ
D
0
△
h
t
φ5 φ6.3 φ8 φ10
φ12.5
φ16φ4,φ5,φ6.
3
0.5±0.05 0.6±0.05
0.8±0.05
0.45±0.05
12
.
0
12
.
5
22.0
27
.
0
15±1
.
0
15±0.2
5±0.5
7
.
5±1.0
32.0
30
.
0±1.0
15.0±0.2
3
.
75±0.7
7.5±1.0
7.5±0.8
6.0 8.0
12
.
7±1.0
12.7±0.2
12.7±1.0
12
.
7±0.2
5
.
2±0.5
4
.
6 3.8±0.5 5.2±0.5
6
.
35±1.0 6.35±1.0
2
.
5±0.5
3
.
5
5.0±0.8 2.5±0.5
Unit : mm
φ8
6.0 8.0
4.6
3
.
5
18
.
0±0.5
6
.0 Min.
9.0±0.5
1
.5 Max.
17.5±0.75 18.5±0.75
18.5±0.75
17.5±0.75
2
.0 Max.
4.0±0.2
0±1
.
0
0.7±0.2
■包装方法(つづら折)
PACKING WAY(AMMO PACK
)
Unit : mm
Unit : mm
φ
D
Sign
φ
d
L
P
P
0
P
1
P
2
F
W
W
0
W
1
W
2
H
H
0
ℓ
φ
D
0
△
h
t
φ5
φ6
.
3 φ8
φ4
,φ5,φ6.3,
φ8
0
.
5±0.05 0.6±0.050.
45±0.05 0.45±0.05
12.0 12.5
12
.
7±1.0
12
.
7±0.2
3.85±0.5
6.35±1.0
5
.
0±0.8
18.0±0.5
6
.0 Min.
9.0±0.5
1.5
Max.
20.0±0.75
16.0±0.5
2
.0 Max.
4.0±0.2
0±1.0
0
.
7±0.2
8.0 6.0
18.5±0.75
17
.
5±0.75
記号:TS
Symbol
記号:T
W
Symbol
φ
D
Sign
φ12.5
φ
d
0.6±0.05
L
27.0
P
25.4±1.0
P
0 12
.
7±0.2
P
1 3
.
8±0.5
P
2 6
.
35±1.0
F
5.0±0.8
W
18.0±0.5
W
0 6
.0 Min.
W
1 9
.
0±0.5
W
2 1
.5 Max.
H
18.5±0.75
ℓ 2.0
Max.
φ
D
0 4
.
0±0.2
△
h
0±1.0
t
0.7±0.2
φ
D
φ12.5に適用/
Applies to
φ12.5
Page 15
ELECTROLYTIC CAPACITORS
15
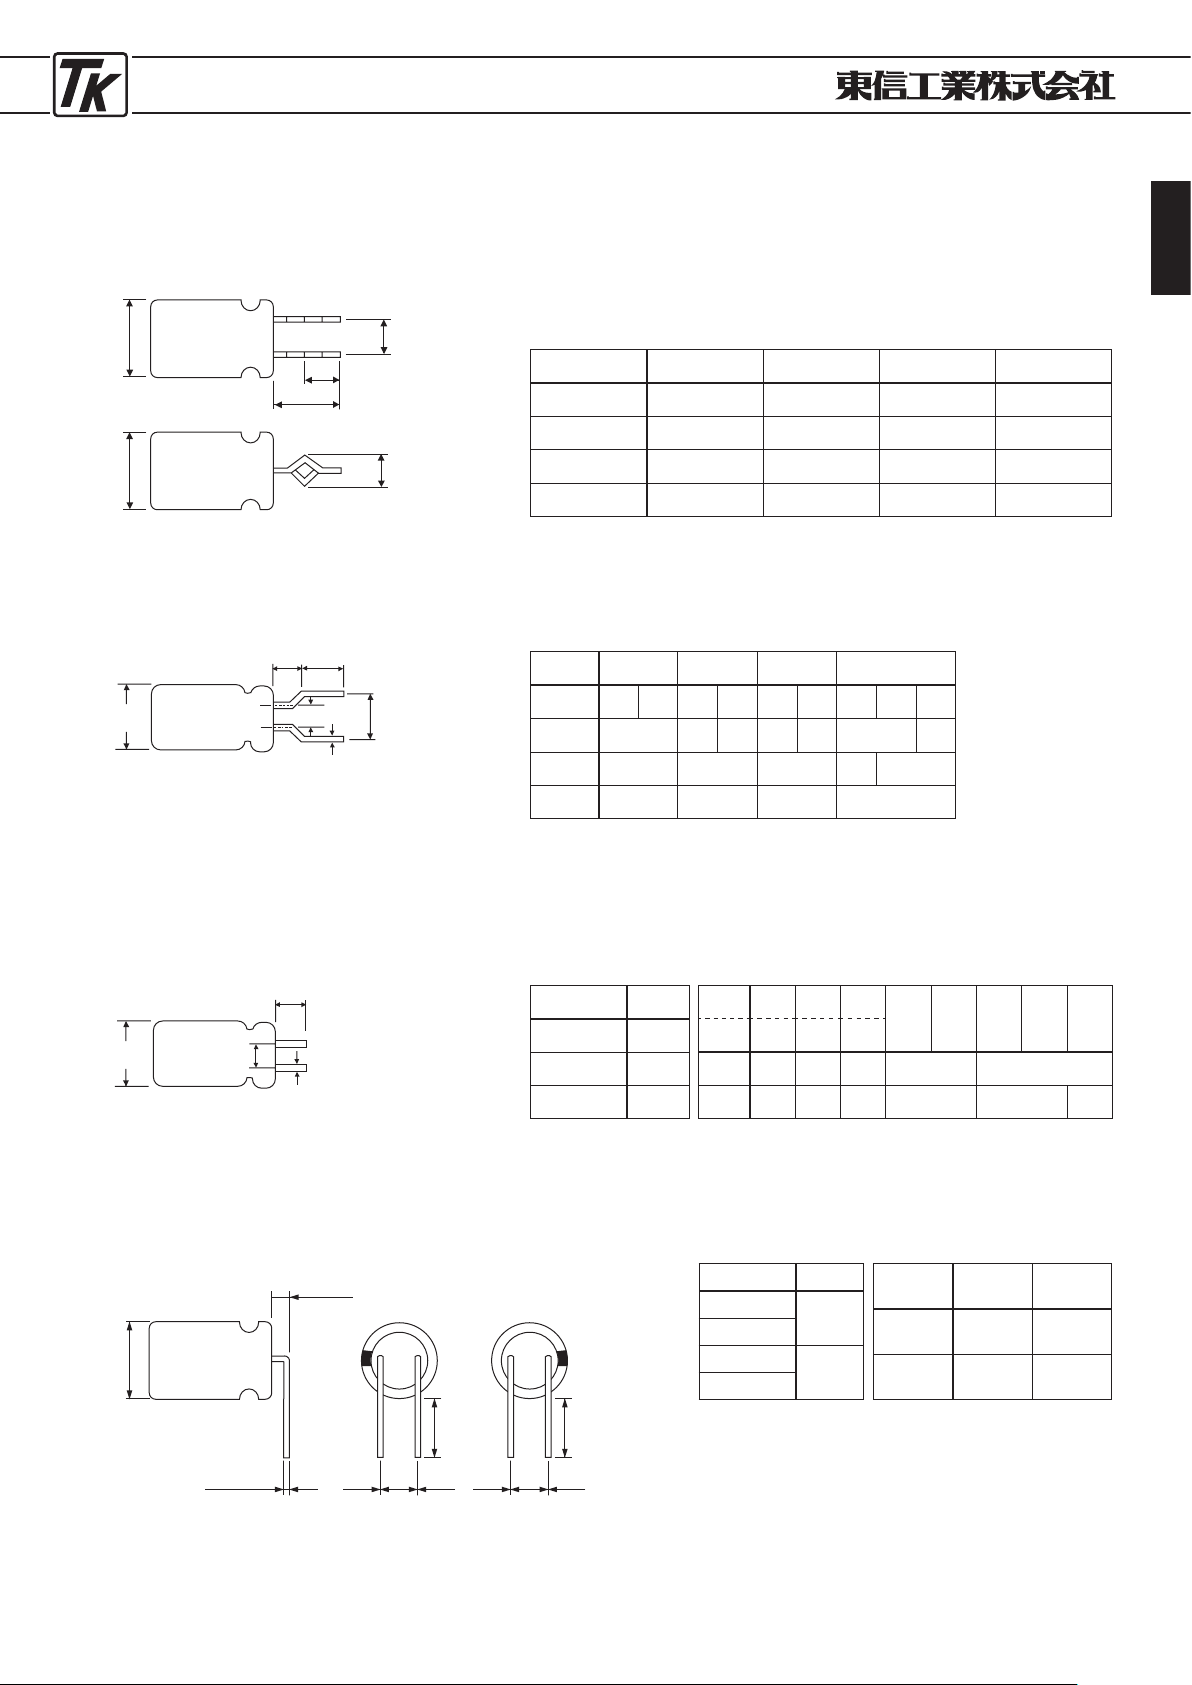
●ラジアルリード形(
CE-
04) リード加工仕様/
RADIAL LEAD(CE-
04)
TYPE LEADS PROCESS
■リードフォーミング/
LEADS FORMING
記号
/Symbol
:FB(フォーミングカット/
Forming cut
)
■リードカット/
LEADS CUTTING
記号
/Symbol: FC , GC , HC
※その他の加工については、別途お問い合わせ下さい。
Please make inquiries specially about other leads forming type.
■L形フォーミング/
L SHAPE FORMING
記号
/Symbol: FF , FG , LF , LG
φ
D
16 18
F
7.5 7.5
φ
d
0.8 0.8
φd
±0.1
Unit : mm
H±0.
5
φ
D
φ
D
5 6.3 8
10 12.5 16 18 22
L 11.0 11.0 11.5
φd0.6 0.6 0.6 0.6 0.8
F 2.0 2.5 3.5 5.0 7.5 10
Unit : mm
φd±0.5
5.0±0.5
φ
D
2.5
MAX
φ
D
10 12.5 16 18
H1±0.5 4.5 4.5 4.5 4.5
H2±0.5 2.8 2.8 2.8 2.8
F±0.5 5.0 50
.
7.5 7.5
E±0.5 2.0 2.0 2.0 2.0
Unit : mm
高さL、リード線太さφdは、ロングリードの仕様による。
Height "L" and lead wire chickness "
φ
d" depend on the specitication of the long lead type.
記号
/Symbol
:FA(スナップイン/
Snap-in
)
φ
D
4 5 6.3 8
L 5 7 5,7 11.0 5,7 11.0 5 7 11.5
φ
d
0.45 0.45 0.5 0.45 0.5 0.45 0.6
F 1.5 2.0 2.5 2.5 3.5
P
5.0 5.0 5.0 5.0
Unit : mm
φ
D
φ
D
F
E
H
1
H
2
F±0.
5
F±0.
5
P
±0
.
5
記号
/Symbol H
FF
4.0
FG
LF
3.5
LG
⊕⊖
F±0.
5
H±0.
5
φ±0.05
2±0.5
φ
D
⊖⊕
F±0.
5
H±0.
5
FF , LF FG , LG
記号
/Symbol H
FC
5.0
GC
4.0
HC
3.5
Page 16
ELECTROLYTIC CAPACITORS
16
(1)使用環境及び取付環境を確認の上、カタログ又は納入仕
様書に規定したコンデンサの定格性能の範囲内として下
さい。
(2)高温度(カテゴリ上限温度を超えた温度)で使用しない
で下さい。
カテゴリ上限温度を超えて使用した場合、コンデンサの
寿命が著しく短くなったり、防爆弁作動などの破損に至
ります。
(3)過電流(定格リプル電流を超える電流)を流さないで下
さい。
過大なリプル電流を流した場合、内部発熱が大きくなり、
寿命を短くしたり、防爆弁作動などの破損に至ります。
定格リプル電流は、リプル周波数が条件付けられています。
規定以外の周波数で使用する場合は、各シリーズ毎に規
定している周波数補正係数を乗じた値以下でご使用下さい。
(4)回路設計するとき、機器の寿命に合ったコンデンサを選
定して下さい。
(5)コンデンサは、有極性です。逆電圧又は交流電圧は、印
加しないで下さい。
極性が反転する回路には、両極性コンデンサをお選び下
さい。ただし、両極性コンデンサも交流回路には使用で
きません。
(6)コンデンサは、急激な充放電が繰り返される回路に使用
しないで下さい。
急激な充放電が繰り返される回路に使用されるコンデン
サについては、ご相談下さい。
(7)コンデンサに、過電圧(定格電圧を超えた電圧)を印加
しないで下さい。
直流電圧と重畳されたリプル電圧の尖頭値を定格電圧以
下として下さい。定格電圧を超えるサージ電圧の規定が
ありますが、条件が限定されており、長時間の使用を保
証したものではありません。
(8)コンデンサは次の間で、回路的に完全に隔離して下さい。
①ケースと陰極端子及び陽極端子並びに回路パターン間。
②自立形のブランク端子と他の陽極及び陰極並びに回路
パターン間。
(9)コンデンサの外装スリーブは、絶縁が保証されていません。
絶縁機能が必要な箇所には使用しないで下さい。
スリーブに絶縁機能が必要な場合は、ご相談下さい。
●アルミニウム電解コンデンサ使用上の注意事項/
APPLICATION GUIDELINES
(1)
Ens ure that operational and mounting conditions
follow the specified conditions detailed in the catalog
and specification sheets.
(2)
Category temperature must be within our specification.
If ca t e gory tempera t u r e ex c ee d t he ma xi mum
gua r an t ee d l i mi t , ra pi d el ec t ri ca l pa r am e te r
deterio ration will occ ur, and i rrevers ibl e dama ge
will result.
(3)
Do not apply excessive current which exceeds the
rated ripple current.
Th e exc e s s ive ri p ple cu r r ent wi l l short e n the
lifetime of capacitors and damage the capacitors by
generating heat, venting, etc.
The ma xi m um rat e d ri p pl e cur r en t ha s bee n
specified at a certain ripple frequency.
If the capacitors are operated at the other frequencies,
the maximum rated ripple current must be multiplied by
frequency multipliers prescribed for each product series.
(4)
Select the capacitors to meet the service life of a
device.
(5)
Alumin u m el ectrol y t ic ca pacito r s are pola r ized.
Do not apply reverse voltage or AC voltage.
Please use bi-polarized capacitors for a circuit that can
possibly see reversed polarity.
Note : Even bi-polarized capacitors can not be used for AC
voltage application.
(6)
Do not use alumi num elec trolytic cap acitors in a
circuit that requires rapid and very frequent charge
/ discharge. In this type of circuit, it is necessary to
use a spe cial design capacitor with extended life
characteristics.
(7)
Do not app ly an over- volta ge exce eding t he full
rated voltage of the capacitor. When AC voltage is
superimposed to DC voltage, the peak value of the
DC voltage and peak AC voltage
)
ripple current)
must not exceed the full rated voltage.
A surge voltage value, which exceeds the full rated
voltage, is presc rib ed in t he catal ogs , but i t onl y
ap p l i e s to the limited co nd i t i on s an d for short
periods of time.
(8)
E l e c t r i c a l l y is o l a t e th e fo l l o w i n g se c t i o n s of a
capacitor when designing the device circuits.
①
The outer can case of a non-solid aluminum capacitor
from the negative terminal, positive terminal and circuit
traces.
②
The dummy terminal)s) of a non-solid aluminum
capacitor, which may be especially designed for
mounting stability, from the positive terminal,
negative terminal and circuit traces.
(9)
The outer sleeve of a capacitor has not been asured
as an insulation-functioning part. For a place that
requires the outer sleeves functioning as insulation,
a special type of capacitors should be designed.
1. 回路設計上
■1
. Circuit Design
Page 17
ELECTROLYTIC CAPACITORS
17
(10)コンデンサは、次の環境では使用しないで下さい。
①直接水、塩水及び油がかかったり、または結露状態
となる環境。
②有害ガス(硫化水素、亜硫酸、亜硝酸、塩素、アン
モニアなど)が充満する環境。
③オゾン、紫外線及び放射線が照射される環境。
④振動または衝撃条件がカタログまたは納入仕様書の
規定範囲を超える過激な環境。
(11)コンデンサをプリント基板に取付けるとき、事前に次
の内容を確認の上、設計して下さい。
①コンデンサの端子間隔にプリント配線板の穴間隔を
合わせて下さい。
②コンデンサの防爆弁部の上に、配線や回路パターン
がこないようにして下さい。
③コンデンサの防爆弁部の上には、納入仕様書に規定
のない限り次の空間を設けて下さい。
④プリント配線板側にコンデンサの防爆弁部が付く場
合は、防爆弁の位置に合わせて、防爆弁作動時のガ
ス抜き穴を開けて下さい。
⑤コンデンサの封口部の下には、回路パターンを配線
しないで下さい。
万が一電解液が漏れたとき、回路パターンを短絡さ
せる恐れがあります。
⑥コンデンサの周辺及びプリント配線板の裏面(コン
デンサの下)への発熱部品の配置は避けて下さい。
⑦両 面のプリント 配線板にコン デンサを取付 けると
き、コンデンサの下に余分な基板穴及び表裏接続用
貫通穴がこないように設計して下さい。
⑧ネジ端子形コンデンサ(
CE-
33)の封口部は、下向き
にしないで下さい。
また、横に寝かせる場合には、陽極端子を上にして
下さい。
⑨ネジ端子形(
CE-
33)の締めつけトルクは、カタログ
または納入仕様書で規定された範囲内として下さい。
(12)チップコンデンサ
(
CE-
32) 用プリント配線板のランド
パターンは、カタログまたは納入仕様書の規定によっ
て回路設計して下さい。
(13)温度及び周波数の変動によってコンデンサの電気的特
性が変化します。この変化分を確認の上、回路設計し
て下さい。
(14)コンデンサを 2 個以上並列に接続するとき、電流バラ
ンスを考慮した回路設計をして下さい。
(15)コンデンサを 2 個以上直列に接続するとき、電圧バラ
ンスを考慮してコンデンサと並列に分圧抵抗器を挿入
して下さい。
(10) Do not expose capacitors to the following environment.
①
Water, salt water or oil spatters, or dewy places.
②
Toxic gases )hydrogen sulfide, sulfurous acid,
nitrous acid, chlorine, ammonium, etc.
)
fills into.
③
Ozone, ultraviolet rays or radiation is applied to.
④
Severe vibration or mechanical shock conditions
that exceed the limits prescribed in the catalogs
or product specification.
(11)
When designing a circuit board, please pay attention
to following :
①
Make the hole spacing on the P.C. board match
the lead space of the capacitor.
②
There should not be any circuit pattern or circuit
wire above the capacitor safety vent.
③
Unless otherwise specified, following clearance
should be made above the safety vent.
④
In case the vent side is placed toward P.C. board
(such as end seal vented parts) , make a corresponding
hole on the P.C. board to release the gas when
vent is operated.
⑤
The main chemical solution of the electrolyte and
the separator paper used in the c apacitors are
combustible. The electrolyte is conductive.
When it comes in contact with the P.C. board, there is
a possibility of pattern corrosion or short circuit
between the circuit pattern which could in result
smoking or catching fire.
Do not Locate any circuit pat ter n beneath t he
capacitor end seal.
⑥
Do not design a circuit board so that heat generating
components such as resistor and transistors are placed
near an aluminum capacitor or reverse side of P.C.
board
)
under the capacitor
)
.
⑦
When you are designing capacitors for use on
double-sides P.C. boards, avoid circuit patterns or
through holes
)
such to connect both sides), that
are placed under the capacitor.
⑧
The sealing side of the screw terminal type
)
CE-
33)
should not face down in the application.
When the capacitors are mounted horizontally,
the positive terminals must be positioned at the
upper side.
⑨
Torque of tightening screw terminals )CE-
33)
should not exceed the specified maximum value
which is described in the catalog or specification
sheets.
(12)
Please refer to the pad size layout recommendations
in our cat alo g whe n des ign ing in surface mount
capacitors.
)
CE-
32)
(13)
The electrical characteristics of capacitors vary with
respect to temperature, frequency and service life.
Design the device circuits by taking these changes
into account.
(14)
If usin g m ore than one cap acit o r to c onnec t i n
par allel, d esi gn the circuits so that the cur ren ts
can equally flow into the individual capacitors.
(15)
If using more than one capacitor to connect in series,
conn ect res i stor s in paral lel wit h t he indi vidual
capacitors for balancing the voltage.
製品直径
φ 8(6.3)〜φ 16
φ 18 〜φ 35
φ 40 〜
間 隔
2mm以上
3mm以上
5mm以上
Case Diameter
φ 8(6.3)〜φ 16
φ 18 〜φ 35
φ 40 〜
Gap Required
2
mm or more
3
mm or more
5
mm or more
Page 18
ELECTROLYTIC CAPACITORS
18
(1)
The used capacitors are not reusable, except the
case that they are taken from a device for periodic
inspection to measure their electrical characteristics
and then returned to the device.
(2)
Capacitors may have been re-charged by a recovery
voltage phenomenon. Although discharged at a
final manufacturing process, the capacitors are
somewhat re-charged spontaneously by a recovery
voltage phenomenon, Which is caused by a slowly
polarizing dielectric , with time. If these capacitors
bring an electric shock or damages any sensitive
circuit at assembly processes, discharge the electricity
of the capacitors through a resistor of approximately
1kΩ before use.
(3)
Leakage current of the capacitors, that have been
stored for a long time, may increase. When leakage
current has increased, please perform a voltage
treatment using
1kΩ
resistor.
(4)
Make sure of the rated capacitances and voltages
of the capacitors when installing.
(5)
Make sure of the polarity of the capacitors when
installing.
①
Negative polarity is indicated on the side of body
by means of a stripe or an arrow.
②
On Radial leaded type capacitors (CE-
04)
, the
shorter lead is the negative polarity.
③
On Snap-In (CE-
69)
terminal type capacitors, the
knurled rivet
〔 〕
indicatesthe negative polarity.
④
On Surface mounting type capacitors (CE-
32)
, the
ma rk
〔 〕
in dica tes the direc tion of negative
polarity.
(6)
Do not drop capacitors on the floor, nor use a capacitor
that was dropped.
(7)
Do not deform the can cases of capacitors.
(8)
Please confirm that the lead spacing of the capacitor
matches the hole spacing of the P.C. board prior to
installation.
(9)
Snap-in type capacitor
(
CE-
69)
should be installed
tightly to the P.C. board
)
allow no gap between the
P.C. board and bottom of the capacitor
)
.
(10)
Do not apply any mechanical force more than the
limits prescribed in the catalogs or product specifications
to capacitors. Also, note the capacitors may be damaged
by mechanical shocks caused by the vacuum/insertion
head, component checker or centering operation of
an automatic mounting or insertion machine.
(11)
Hand soldering :
①
Soldering conditions (temperature and time) should be
within the limits prescribed in the catalogs or product
specifications.
2. 取り付け時
■2
. Mounting
(1) セットに組み込んで通電したコンデンサは、再使用しな
いで下さい。定期点検時の電気的性能を測定するために
取り外したコンデンサ以外は、再使用できません。
(2)
コンデンサは、再起電圧が発生する場合があります。
このとき、約1kΩの抵抗器を通して放電して下さい。
(3) 長期保管のコンデンサは、漏れ電流が増大している場合
があります。このときは、約1kΩの抵抗器を通して電
圧処理をして下さい。
(4)
コンデンサの定格(静電容量及び定格電圧)を確認して
から、取り付けて下さい。
(5)
コンデンサの極性を確認してから、取り付けて下さい。
①本体側面に、帯または矢印で陰極側端子を示していま
す。
②リード同一方向形 (
CE-
04) は、リード端子の短い方が
陰極です。
③基板自立形(
CE-
69) は、リベットに〔 〕の刻印があ
る方が陰極です。
④チップ形(
CE-
32) は、〔 〕状の捺印がある方が陰極
です。
(6)
コンデンサは、床などに落下させないで下さい。
このとき落下したコンデンサは、使用しないで下さい。
(7)
コンデンサを変形させて取り付けないで下さい。
(8)
コンデンサの端子間隔とプリント配線板穴間隔とが合っ
ていることを確認してから取り付けて下さい。
(9)
基板自立形(
CE-
69) は、その基板に密着する(浮いた状
態にしない)まで押し込んで取り付けて下さい。
(10) カタログ又は納入仕様書に規定の機械強度を超える力
をコンデンサに加えないで下さい。自動挿入機による
吸着、装着及び位置合わせ時又は端子カ ット時にスト
レスが加わる場合がありますので、その衝撃力に注意
して下さい。
(11) はんだごてによるはんだ付け:
①はんだ付け条件(温度、時間)は、カタログ又は納
入仕様書に規定の範囲内として下さい。
Page 19
ELECTROLYTIC CAPACITORS
19
②端 子 間 隔とプリント配線板 穴 間 隔が不整合のため、
リード線端子を加工する必要がある場合は、はんだ
付けをする前に、コンデンサの本体にストレスがか
からないように加工して下さい。
③はんだごてによる 手直しをするとき、一度はんだ付
けをしたコンデンサを取り外す必要がある場合には、
コンデンサの端子にストレスがかからないように、は
んだが充分溶融してから行って下さい。
④はんだごての先がコンデンサ本体に触れないように
して下さい。
(12)フローはんだ付け:
①コンデンサ本体をはんだの中に浸漬してはんだ付けを
しないで下さい。プリント配線板を介在させて、コン
デンサのある反対側の裏面のみに、はんだ付けして下
さい。
②はんだ付け条件(予備加熱、はんだ温度と時間)は、
カタログ及び納入仕様書に規定の範囲内として下さい。
③端子部以外にフラックスが付着しないようにして下さ
い。
④はんだ付けのとき、他の部品が倒れてコンデンサに接
触しないようにして下さい。
(13)
リフローはんだ付け:
リフローはんだ付けは、
SMT
部品 (
CE-
32) のみ可能です。
①はんだ付け条件(予備加熱、はんだ温度と時間)は、
カタログ及び納入仕様書に規定の範囲内として下さい。
②赤外線ヒーターを 使用するとき、コンデンサの色や
材質、大きさによって、赤外線吸収率が異なるため、
加熱の度合いに注意して下さい。
③コンデンサのリフロー回数は、1 回として下さい。た
だし、2 回リフローを必要とする場合は、必ずご相談
下さい。
(14)プリント配線板にはんだ付け後の取り扱いで次の機械
的ストレスをかけないで下さい。
①コンデンサ本体を傾けたり、倒したり又はひねった
りしないで下さい。
②コンデンサを把手がわりにつかんでプリント配線板
を移動しないで下さい。
③コンデンサに物をぶつけないで下さい。また、プリ
ント配線板を重ねるとき、コンデンサにプリント配
線板又は他の部品が当たらないようにして下さい。
(15)
基板洗浄:
①コンデンサは、ハロゲン系溶剤などでは洗浄できま
せん。
ただし、洗浄する必要のある場合は、洗浄を保証し
たコンデンサを使用し、納入仕様書に規定の範囲内
として下さい。
②
If it is necessary that the leads must be formed
due to a mismatch of the lead space to hole space
on the board, bend the lead prior to soldering without
applying too much stress to the capacitor.
③
If you need to remove parts which were soldered,
please melt the solder enough so that stress is not
applied to lead.
④
Please pay attention so that solder iron does not
touch any portion of capacitor body.
(12)
Flow soldering (Wave solder) :
①
Aluminum capacitor body must not be submerged
into the solder bath. Aluminum capacitors must
be mounted on the
top sideof the P.C. board
and only allow the bottom side of the P.C. board
to come in contact with the solder.
②
Soldering condition must be confirmed to be within our
specification.
③
Please avoid having flux adhere to any portion
except the terminal.
④
Please avoid contact between other components
and the aluminum capacitor.
(13)
Reflow soldering (SMT〈CE-
32〉
only) :
①
Soldering condition must be confirmed to be within our
specification.
②
Wh e n a n inf r ared heate r is used, ple a s e pa y
attention to the extent of heating since the
a b s o r ption ra t e of in f r a r ed, will var y du e to
differ e n c e i n the color of the capacit o r body,
material of the sleeve and capacitor size.
③
The num ber of refl ow time for SMT aluminum
electrolytic capac itors shall be one tim e. If this
type of capacitor has to be inevitably subjected to
the reflow twice, please contact our sales office.
(14)
Do not apply any mechanical stress to the capacitor
after soldering to the P.C. board.
①
Do not incl i ne, twist or pu sh the bo dy of the
capacitor down after soldering it to the P.C. board.
②
Do not take the assembly board by the capacitor
in lifting or carrying the assembly board.
③
Do n ot bump or strike any o bjec t a gain st the
capacitor after soldering to the P.C. board.
Also, if the assembly boards are piled up, they should be
so placed that any of the boards and other components
can not touch the capacitor.
(15)
Circuit Board cleaning :
①
Do not clean capacitors with halogenated cleaning
agent.
However, if it is necessary to clean with halogenated
cleaning agent, use cleaning proof capacitors but
within the range specified in the specification.
Page 20
ELECTROLYTIC CAPACITORS
20
②推奨洗浄方法
《対 象》 耐洗浄品
《洗 浄 剤》
パインアルファ
ST-
100
S
クリンスルー 750
H
イソプロピルアルコール (
IPA
)
《洗浄条件》
浸漬、超音波などの方法で洗浄時間の合計が 5 分以内
(5L、7L品は 3 分以内)として下さい。(洗浄液温度
は、60℃以下)
洗浄後コンデンサをプリント配線板とともに熱風で
10 分以上乾燥させて下さい。熱風の温度は、コンデ
ンサのカテゴリ上限温度以下として下さい。
なお、すすぎ後の乾燥が不充分な場合、スリーブの
二次収縮、底板の膨らみ等、外観上の不具合を起こす
場合がありますのでご注意下さい。
③代替フロン
《対 象》 耐洗浄品
《洗 浄 剤》
AK-
225
AES
《洗浄条件》
浸漬、蒸気、超音波のいずれかの方法で、洗浄時間
の合計が 2 分または 3 分以内。(溶剤温度 40℃以下)た
だし、この代替フロンも地球環境問題の見地から将
来禁止の方向であり、当面の暫定対策として、極力
避けて下さい。
(16)コンデンサに対して、固定剤・コーティング剤を使用
するとき、次の内容を確認して下さい。
①ハロゲン系溶剤などを含有する固定剤・コーティング
剤は使用しないで下さい。
②固定剤・コーティング剤を使用する前に、基板とコ
ンデンサの封口間にフラックス残渣及び汚れが残ら
ないようにして下さい。
③固定剤・コーティング剤を使用する前に、洗浄剤な
どを乾燥させて下さい。また、封口部の全面を塞が
ないで下さい。
④固定剤・コーティング剤の熱硬化条件は、納入仕様
書の規定に従って下さい。
②
Recommeded cleaning method
〈
Applicable〉 Washable product
〈
Cleaning agents〉 Pine Alpha ST-
100
S
Clean Through-
750
H
Iso-propyl Alcohol
)
IPA
)
〈Cleaning conditions〉 Total cleaning time shall be within
5
minutes(5mm and 7mm height :
within 3 minutes) by immersion,
ultrasonic or other method.
(
Temperature of the cleaning
agent shall be
60℃
or lower.
)
After cleaning capacitors should
be dried using hot air for minimum
of 10 minutes along with the P.C.
board.
Hot air temperature should be
below the maximum category
temperature of the cap acit or.
Insufficient dry after water rinse
may cause appearance problems.
sleeve shrink, bottom-plate bulge
and such.
③
CFC substitute
〈
Applicable〉 Washable product
〈
Cleaning agents〉 AK-
225
AES
〈
Cleaning conditions〉
Total cleaning time shall be within
2 or 3 minutes by immersion,
ultrasonic or other method.
(
Temperature of the cleaning
agent shall be
40℃
or lower.
)
However, this CFCs substitute solvent should be
considered as one of the solvents to be completely
regulated in future from the environmental point of
view.
(16)
Fixing materials and coating materials :
①
Do not use any ingredients which contain halogen.
②
Ple a s e pay at t e n t i o n to re m o v e flux an d any
contamination which remains in the gap between
the end seal and P.C. board and dry that portion
well before coating.
③
Please do not apply any material all around the
capacitor body but apply it partially.
④
Please contact our sales office to make sure whether
the curing con ditio n o f c oatin g m ateri al would
cause any problems.
3. セット使用中
■3
. In the Equipment
(1) コンデンサの端子に直接触れないで下さい。
(2)
コンデンサの端子間を導電体でショートさせないで下さ
い。また、酸およびアルカリ水溶液などの導電性溶液を
コンデンサにかけないで下さい。
(3)
コンデンサを取り付けたセットの設置環境を確認して
下さい。1-(10)の環境では使用しないで下さい。
(1)
Do not directly touch terminal by hand.
(2)
Do not short between terminals by conductor, nor
spill conductib le liqui d such as alkaline or acidic
solution on or near the capacitor.
(3)
Please make sure that the ambient conditions where
the set is installed will be free from spilling water
or oil, direct sunlig ht, ult ravi olet rays, rad iati on,
poisonous gases, vibration or mechanical shock.
Page 21
ELECTROLYTIC CAPACITORS
21
5. 万一の場合
■5
. In an Emergency
(1)セット使用中、コンデンサが開弁し、ガスが見えたとき、
セットのメイン電源を切るか、または電源コードのプラ
グをコンセントから抜いて下さい。
(2)コンデンサの防爆弁作動時は、+ 100℃を超える高温ガ
スが噴出しますので、顔を近づけないで下さい。
噴出したガスが目に入ったり、吸い込んだりした場合に
は、直ちに、水で目を洗ったり、うがいをして下さい。
コンデンサの電解液はなめないで下さい。電解液が皮膚
に付いたときは、石鹸で洗い流して下さい。
(1)
If you see smoke due to operation of safety vent,
turn off the m ain switch o r pull out the plug from
the outlet.
(2)
Do not draw y our f ace the safety vent sin ce gas
which in over
100℃
will be emitted when the safety vent
operates.
If the gas has entered your eyes, please flush your
eyes immediately in pure water.
If you breathed the ga s , imm e d i a tely wa s h out
your mouth and throat with water.
Do not ingest electrolyte. If your skin is exposed to
elec trolyte , plea se wash it awa y usin g soap a nd
water.
6. 保管の条件
(1) コンデンサを高温度・高湿度で保管しないで下さい。
室内で 5 〜 35℃の温度、75%以下の相対湿度で保管して
下さい。
(2)
コンデンサに直接、水、塩水及び油がかかる環境で保管
しないで下さい。
(3) コンデンサを有害ガス(硫化水素、亜硫酸、亜硝酸、塩
素、アンモニアなど)が充満する環境で保管しないで下
さい。
(4)
コンデンサをオゾン、紫外線および放射線が照射される
環境で保管しないで下さい。
■6
. Storage
(1)
Do not keep capacitor in high temperature and high
humidity.
Storage ambient should be :
Temperature :
5℃〜 35℃
, Humidity : lower than
75%
Place : Indoor
(2)
Avoid ambient conditions :
Where capacitors can be covered with water, brine
or oil.
(3)
Avoid ambient conditions :
Where capacitors are exposed poisonous gases such
as hydrogen sul fide, sulfurous acid, nitro us acid,
chlorine, ammonium etc.
(4)
Do not keep capacitor in conditions, that expose the
capacitor to ozone, ultraviolet ray or radiation.
7. 廃棄の場合
(1) コンデンサを廃棄する場合には、次のいずれかの方法を
取って下さい。
①コンデンサに穴を開けるか、または潰してから高温焼
却(800℃以上)して下さい。
②コンデンサを焼却しない場合は、専門の産業廃棄物処
理業者に渡し、埋め立てなどの処理をして下さい。
■7
. Disposal
(1)
Please dispose capacitors in either of the following
ways :
①
Incinerate capacitors (high temperature of more
than
800℃)
after crushing parts of making a hole on
the capacitor body.
②
Bury capacitors in the ground.
Please have a disposal specialist do it.
以上、アルミニウム電解コンデンサの使用上の注意事項
につきましては、
EIAJ RCR-
2367B 2002年 7月改正「電子
機器用固定アルミニウム電解コンデンサの使用上の注意
事項ガイドライン」に準じておりますので、詳細につき
ましては、上記ガイドラインをご参照下さい。
The above mentioned material is according to EIAJ,
RCR-
2367B(
revised in July,
2002)
, titledGuideline of
notabilia for Fixed Aluminum Electrolytic Capacitors for
use in Electrolytic Equipment
.
Please refer to the book for details.
4. 保守点検
■4
. Maintenance and Inspection
(1)産 業 用 機器に使用されてい る コ ンデンサについて は、
定期点検をして下さい。
点検項目として、次の内容を行って下さい。
①外観: 開弁、液漏れなどの著しい異常の有無。
②電気的性能:漏れ電流、静電容量、損失角の正接およ
びカタログまたは納入仕様書に規定した
項目。
(1)
Please periodically inspect the aluminum capacitors
that are installed in industrial equipment.
The following items should be checked :
①
Appearance :
Remarkable abnormality such as vent operation,
leaking electrolyte etc.
②
Electrical characteristic :
Capacitance, Dissipation factor, Leakage current
etc., which are specified in the drawing exchanged
between TK and our customers or the catalog.
Page 22
ELECTROLYTIC CAPACITORS
22
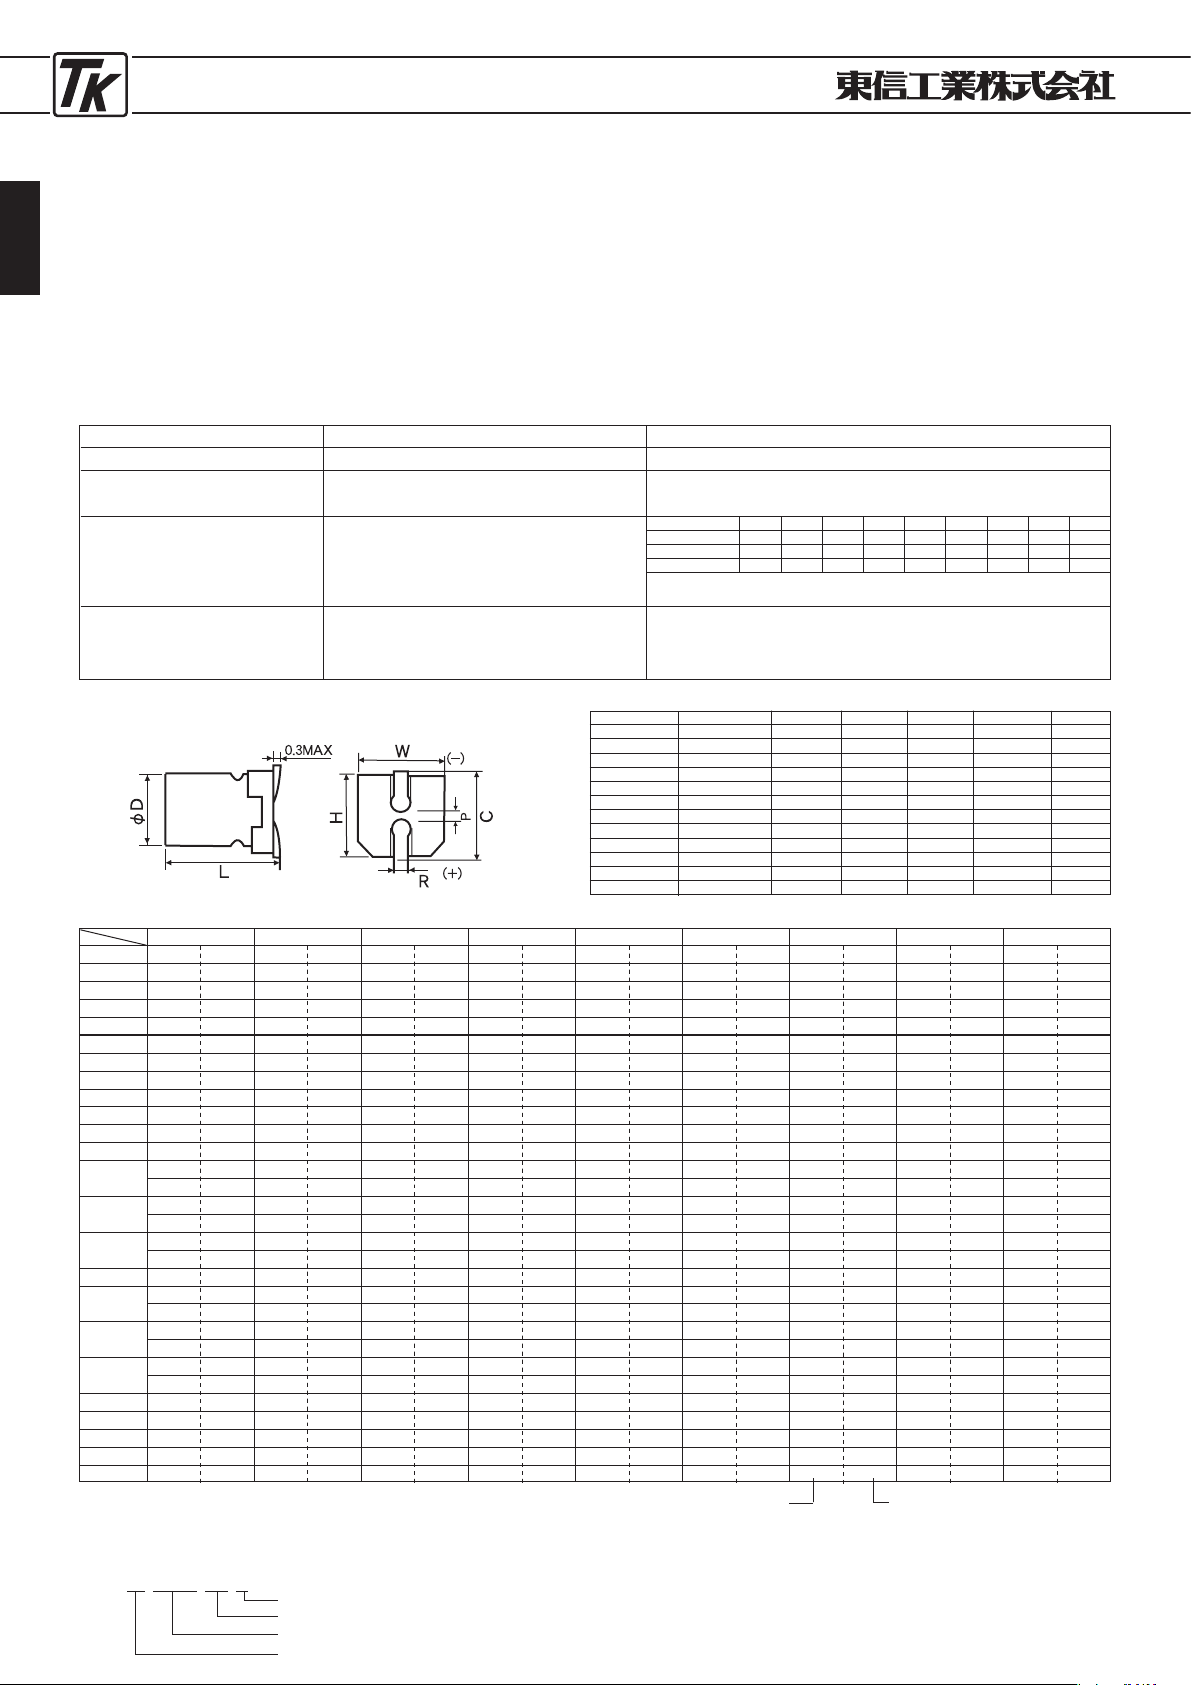
●縦型チップ標準品 ●
VERTICAL CHIP STANDARDIZED TYPE
■特 徴
■性 能
/PERFORMANCE SPECIFICATIONS
(単位 : mm)
EC-BSシリーズ
JIS C
5101
CE-
32
EC-Cシリーズ
(
φ3.0×5.4
L)
(耐洗浄品)
TYPEEC-BS
JIS C
5101
CE-
32
TYPEEC-C
(φ3.
0×5.4
L)
(
Washable product
)
・面実装構造で高密度実装に対応できます。
・耐熱性に優れ、
リフローはんだ付けが可能です。
■
FEATURES
・
The capacitor is a surface mounting construction and suited to
high density mounting.
・
The capacitor excels in heat resistance and can be
reflow-soldered.
カ テ ゴ リ 温 度 範 囲
標 準 静 電 容 量 許 容 差
漏 れ 電 流 ( 最 大 値 )
損 失 角 の 正 接 ( 最 大 値 )
(
tan δ)
耐 久 性
85℃
2000時間
定格電圧印加
CATEGORY TEMPERATURE RANGE
STANDARD CAPACITANCE TOLERANCE
LEAKAGE CURRENT (MAX. VALUE)
DISSIPATION FACTOR (MAX. VALUE)
ENDURANCE
APPLICATION OF RATED OPERATING
VOLTAGE, AT
85℃
FOR
2000
hrs.
−40℃〜+85℃
−20%〜+20%
(
120
Hz)
I=0.01CV OR 3μA WHICHEVER
IS THE GREATER (after
2
minutes)
When the capacitance exceed
1,000μ
F, the value of tanδ is increased by
0.02
for each increment of 1,
000μ
F or its fraction.
CAPACITANCE CHANGE : LESS THAN
25%
OF THE INITIAL
MEASURED VALUE.
DISSIPATION FACTOR : LESS THAN
200%
OF THE INITIAL
SPECIFIED VALUE.
LEAKAGE CURRENT : LESS THAN THE INITIAL SPECIFIED VALUE.
C=RATED CAPACITANCE (μF)
V
=
WORKING VOLTAGE (V)
W. V
φ3
φ4〜φ6
.
3
φ8〜φ16
4
0
.
40
0
.
35
0
.
40
6.3
0
.
30
0
.
26
0
.
30
10
−
0
.
20
0
.
24
16
0
.
19
0
.
16
0
.
20
25
0
.
16
0
.
14
0
.
16
35
0
.
14
0
.
12
0
.
14
50
0
.
14
0
.
12
0
.
12
63
−
0
.
12
0
.
12
100
−
0
.
10
0
.
10
■寸法図
/DIAGRAM OF DIMENSIONS
D+0.5MAX
3
4
5
6.3
4
6
.
3
6.3
8
10
10
12.5
16
L
5.4
5.4
5.
4
5.4
6.0±0.3
6
.
0±0.3
7.7±0.3
10.2±0.3
7.7±0.3
10
.
2±0.3
13.5±0.5
16.5±0.5
+0.1
−0.2
+0
.
1
−0.2
+0
.
1
−0.2
+0
.
1
−0.2
W±0.
2
3.3
4
.
3
5.3
6.6
4
.
3
6.6
6.6
8
.
3
10.3
10.3
12.8
16
.
3
H±0.
2
3.3
4
.
3
5.3
6.6
4
.
3
6.6
6.6
8
.
3
10.3
10.3
12.8
16
.
3
C±0.
2
3.9
5
.
0
6.0
7.3
5
.
0
7.3
7.3
9
.
0
11.0
11.0
13.5
17
.
0
R
0.45〜0.75
0
.
5〜0.8
0.5〜0.8
0.5〜0.8
0
.
5〜0.8
0.5〜0.8
0.5〜0.8
0
.
7〜1.0
1.1〜1.4
1.1〜1.4
1.1〜1.4
1
.
8〜2.1
P±0.
2
0.6
1
.
0
1.4
2.2
1
.
0
2.2
2.2
3
.
2
4.6
4.6
4.6
7
.
0
■寸法表 (φD×L)
SIZE TABLE (φD×L)
WV
μ
F
0.47
1
.
0
2
.
2
3.3
4
.
7
10
22
33
47
68
82
100
150
220
330
390
470
680
1000
1500
2200
3300
4700
6800
4 (0
G)
6.3 (0
J)
10 (1
A)
16 (1
C)
25 (1
E)
35 (1
V)
50 (1
H)
63 (1
J)
100 (2
A)
4×5.4
4×5.4
5×5
.
4
6
.
3×5.4
6
.
3×6.0
6
.
3×7.7
10×7
.
7
26
34
61
82
102
150
330
4×5
.
4※
5×5
.
4
5×5.4
6
.
3×5.4
6
.
3×6.0
6
.
3×7.7
8×10
.
2
8×10
.
2
10×7
.
7
8×10.2
10×10
.
2
12.5×13.5
16×16.5
31
(19)
39
47
71
95
150
300
300
300
330
450
750
1330
5×5
.
4
5×5
.
4
6.3×5.4
6
.
3×5.4
6.3×6.0
6
.
3×7.7
8×10
.
2
8×10
.
2
10×7
.
7
10×10
.
2
12.5×13.5
16×16.5
35
43
59
76
88
150
280
300
300
450
730
1260
4×5
.
4※
5×5
.
4
6
.
3×5.4
6.3×5.4
6
.
3×5.4
6.3×7.7
6
.
3×7.7
8×10
.
2
10×7.7
8×10
.
2
10×10
.
2
12.5×13.5
16×16.5
25
(18)
39
57
68
86
135
150
280
280
330
450
710
1200
4×5
.
4※
5×5
.
4
6
.
3×5.4
6
.
3×5.4
6.3×6.0
6
.
3×7.7
8×10.2
8×10
.
2
10×7
.
7
8×10
.
2
10×10
.
2
12.5×13.5
16×16.5
19
(12)
28
52
63
68
130
200
250
250
310
430
660
1150
※
※
4×5
.
4
5×5
.
4
6
.
3×5.4
6
.
3×6.0
6.3×6.0
6
.
3×7.7
8×10.2
10×7
.
7
8×10.2
10×10
.
2
12.5×13.5
12
.
5×13.5
16×16.5
(8)
(10)
20
30
54
60
70
120
220
220
270
340
590
610
1060
4×5
.
4
4×5
.
4※
4×5
.
4※
4×5.4
5×5
.
4
6
.
3×5.4
6
.
3×6.0
6
.
3×7.7
6.3×7.7
10×7
.
7
8×10
.
2
10×10
.
2
12.5×13.5
12
.
5×13.5
16×16.5
5
10
(8)
15(10
)
18
23
34
60
85
90
200
200
320
520
550
940
4×5
.
4
4×5
.
4
4×5
.
4
5×5.4
5×5
.
4
6
.
3×5.4
6
.
3×7.7
8×10
.
2
8×10.2
8×10
.
2
10×10
.
2
12.5×13.5
16×16.5
5
10
15
20
23
34
70
160
170
180
280
410
700
4×6
.
0
6
.
3×6.0
6.3×6.0
6
.
3×6.0
6
.
3×7.7
8×10
.
2
10×10
.
2
12.5×13.5
12
.
5×13.5
16×16.5
16×16.5
10
20
28
35
50
120
190
330
350
550
560
( ) はEC-C
シリーズ
The enclosed value is EC-C
※は
EC-C
シリーズ (3×5.4) で生産可能
※
is possible in EC-C(
3×5.4)
φ10×7
.7L
品については、シリーズ名記号を
EC-BSA
でご用命ください。
About
φ10×7.7
L product, an order give us the series name symbol in EC-BSA.
φ16×16.5L品については、シリーズ名記号を
EC-BST
でご用命ください。
About
φ16×16.5
L product, an order give us the series name symbol in EC-BST.
φD×
L
Ripple current (mA r.m.s.)
(
120
Hz,
85℃
)
■品番ご指定法/
HOW TO SPECIFY ITEM NUMBER
1
H EC-BS
010
M
静電容量許容差/
Capacitance Tolerance
静電容量記号/
Capacitance Symbol
シリーズ名/
Series Name
定格電圧/
Rated Voltage
Page 23
ELECTROLYTIC CAPACITORS
23
φ16×16.5L、φ18×16.5L品については、シリーズ名記号を
EC-FST
でご用命ください。
About
φ16×16.5
L &
φ18×16.5
L product, an order give us the series name symbol in
EC-FST.
●縦型チップ105℃品 ●
VERTICAL CHIP TYPE
105℃
USE
■特 徴
■性 能
/PERFORMANCE SPECIFICATIONS
(単位 : mm)
EC-FSシリーズ
JIS C
5101
CE-
32
(100WV以下耐洗浄品)
TYPEEC-FS
JIS C
5101
CE-
32
(
Through
100
WV only Washable product
)
・105℃、1000〜2000時間保証品
・耐熱性に優れ、
リフローはんだ付けが可能です。
■
FEATURES
・
It is guaranteed for
105℃
as well as 1,
000〜2,000
hours, and
is so excellent in heat resistance that it allows reflow soldering.
カ テ ゴ リ 温 度 範 囲
標 準 静 電 容 量 許 容 差
漏 れ 電 流 ( 最 大 値 )
損 失 角 の 正 接 ( 最 大 値 )
(
tan δ)
耐 久 性
6
.
3〜100
V
φ4〜φ6.3,φ10×7.7:1000時間
φ8〜φ18:2000時間
160〜400
V
φ8:1000時間
φ10〜φ18:2000時間
105℃定格電圧印加
CATEGORY TEMPERATURE RANGE
STANDARD CAPACITANCE TOLERANCE
LEAKAGE CURRENT (MAX. VALUE)
DISSIPATION FACTOR (MAX. VALUE)
ENDURANCE
6.3〜100
V
φ4〜φ6.3,φ10×7.7:1000
hrs
φ8〜φ18:2000
hrs
160〜400
V
φ8:1000
hrs
φ10~φ18:2000
hrs
APPLICATION OF RATED VOLTAGE AT
105℃
−55℃〜+105℃ (6.3〜63
V)
−20%〜+20% (120
Hz)
6.3〜100V:
I=0.01
CV OR 3μA WHICHEVER
IS THE GREATER (after 2 minutes)
When the capacitance exceed 1,
000μ
F, the value of tanδ is increased by
0.02
for each increment of 1,
000μ
F or its fraction.
CAPACITANCE CHANGE : LESS THAN
25%
OF THE INITIAL
MEASURED VALUE.
DISSIPATION FACTOR : LESS THAN
200%
OF THE INITIAL
SPECIFIED VALUE.
LEAKAGE CURRENT : LESS THAN THE INITIAL SPECIFIED VALUE.
160〜400V:
CV≦1000
; 0.03CV
+15
CV>1000
; 0.02CV
+25
W. V
φ4〜φ6.3
φ8〜φ16
6
.
3
0
.
24
0
.
28
10
0
.
20
0
.
24
16
0
.
16
0
.
20
25
0
.
14
0
.
16
35
0
.
12
0
.
14
50
0
.
10
0
.
12
63
0
.
12
0
.
12
100
0
.
10
0
.
10
160
0
.
20
0
.
20
200
0
.
20
0
.
20
250
0
.
20
0
.
20
400
0
.
25
0
.
25
■寸法図
/DIAGRAM OF DIMENSIONS
D+0.5MAX L W±0.2H±0.2C±0.
2
R P±0.
2
4 5.4
+0.1
−0
.
2
4.3 4.3 5.0 0.5〜0.8 1.0
4 6.0±0.3 4.3 4.3 5.0 0.5〜0.8 1.0
5 5.4
+0.1
−0
.
2
5.3 5.3 6.0 0.5〜0.8 1.4
6.3 5.4
+0.1
−0
.
2
6.6 6.6 7.3 0.5〜0.8 2.2
6
.
3 6.0±0.3 6.6 6.6 7.3 0.5〜0.8 2.2
6
.
3 7.7±0.3 6.6 6.6 7.3 0.5〜0.8 2.2
8 10.2±0.3 8.3 8.3 9.0 0.7〜1.0 3.2
8 10.5±0.3 8.3 8.3 9.0 0.7〜1.0 3.2
10 7.7±0.3 10.3 10.3 11.0 1.1〜1.4 4.6
10 10.2±0.3 10.3 10.3 11.0 1.1〜1.4 4.6
10 10.5±0.3 10.3 10.3 11.0 1.1〜1.4 4.6
12.5 13.5±0.5 12.8 12.8 13.5 1.1〜1.4 4.6
16 16.5±0.5 16.3 16.3 17.0 1.8〜2.1 7.0
18 16.5±1.0 19.0 19.0 20.0 1.7〜2.1 7.0
■寸法表 (φD×L)
SIZE TABLE (φD×L)
W.V.
μ
F
6.3V (0J) 10V (1A) 16V (1C) 25V (1E) 35V (1V) 50V (1H) 63V (1J) 100 (2A) 160 (2C) 200 (2D) 250 (2E) 400 (2G)
0
.
47(R47) 4×5.4 3.5 4×5.4 3.5
1(010) 4×5.4 7.0 4×5.4 7.0 4×6.0 7.0
2.2(2R2) 4×5.4 11 4×5.4 11 6.3×6.0 14 8×10.5 25
3
.
3(3R3) 4×5.4 13 5×5.4 14 6.3×6.0 20 8×10.5 31 10×10.5 36
4
.
7(4R7) 4×5.4 13 4×5.4 14 5×5.4 16 5×5.4 16 6.3×6.0 25 8×10.5 37 10×10.5 38
6
.
8(6R8) 8×10.5 44 12.5×13.5 47
10(100) 4×5.4 18 5×5.4 20 5×5.4 21 6.3×5.4 24 6.3×5.4 24 6.3×7.7 35 8×10.5 57 10×10.5 64 10×10.5 64 12.5×13.5 57
22(220) 4×5.4 22 5×5.4 25 5×5.4 27 6.3×5.4 36 6.3×5.4 38 6.3×6.0 42 6.3×7.7 49 8×10.2 84 12.5×13.5 112 12.5×13.5 112 12.5×13.5 112 16×16.5 115
33(330) 5×5.4 27 5×5.4 30 6.3×5.4 40 6.3×5.4 44 6.3×6.0 42 6.3×7.7 60 8×10.2 112 10×10.2 133 12.5×13.5 137 12.5×13.5 137 16×16.5 150
47(470) 5×5.4 33 6.3×5.4 41 6.3×5.4 48 6.3×6.0 48 6.3×6.0 49 6.3×7.7 63 8×10.2 119 12.5×13.5 240 16×16.5 180 16×16.5 180 16×16.5 180
68(680) 8×10.2 126 12.5×13.5 245 16×16.5 215 16×16.5 215
82(820) 10×7.7 140 16×16.5 235
100(101) 6.3×5.4 50 6.3×5.4 53 6.3×5.4 60 6.3×7.7 91 6.3×7.7 84 8×10.2 140 10×10.2 196 16×16.5 490
150(151) 6.3×6.0 62 6.3×7.7 95 8×10.2 140
8×10
.
2 155
16×16
.
5 500
10×7
.
7 155
220(221) 6.3×6.0 67 6.3×7.7 105 6.3×7.7 105
8×10
.
2 175
8×10
.
2 190 10×10.2 220 12.5×13.5 287 18×16.5 650
10×7
.
7 175
330(331) 6.3×7.7 105 8×10.2 195
8×10
.
2 195
8×10
.
2 220 10×10.2 300 12.5×13.5 365
10×7
.
7 195
390(390) 12.5×13.5 380
470(471) 8×10.2 210
8×10
.
2 210
8×10
.
2 230 8×10.2 300 12.5×13.5 410 16×16.5 630
10×7
.
7 210
680(681)
8×10.2 210
10×10.2 310 12.5×13.5 430 18×16.5 750
10×7
.
7 210
1000(102) 8×10.2 230 10×10.2 310 12.5×13.5 460 16×16.5 700 16×16.5 655
1500(152) 10×10.2 12.5×13.5 500 16×16.5 740
2200(222) 12.5×13.5 510 16×16.5 805 18×16.5 950
3300(332) 12.5×13.5 520 16×16.5 840 18×16.5 1040
4700(472) 16×16.5 880 18×16.5 1090
5600(562) 18×16.5 1150
6800(682) 16×16.5 930
10000(103) 18×16.5 1200
φ10×7.7L品については、シリーズ名記号を
EC-FSA
でご用命ください。
About
φ10×7.7
L product, an order give us the series name symbol in EC-FSA.
φD×
L
Ripple current (mA r.m.s.)
(
120
Hz,
105℃
)
−40℃〜+105℃ (100〜400
V)
−20%〜+20% (120
Hz)
Upgrade
■品番ご指定法/
HOW TO SPECIFY ITEM NUMBER
1
E EC-FS
100
M
静電容量許容差/
Capacitance Tolerance
静電容量記号/
Capacitance Symbol
シリーズ名/
Series Name
定格電圧/
Rated Voltage
Page 24
ELECTROLYTIC CAPACITORS
24
●縦型チップ低インピーダンス品 ●
VERTICAL CHIP LOW IMPEDANCE TYPE
■特 徴
■性 能
/PERFORMANCE SPECIFICATIONS
(単位 : mm)
EC-KXシリーズ
JIS C
5101
CE-
32
(耐洗浄品)
TYPEEC-KX
JIS C
5101
CE-
32
(
Washable product
)
・
EC-KX
シリーズは、面実装タイプの低インピーダンス
品です。
■
FEATURES
・
EC-KX series is low impedance.
カ テ ゴ リ 温 度 範 囲
標 準 静 電 容 量 許 容 差
漏 れ 電 流 ( 最 大 値 )
損 失 角 の 正 接 ( 最 大 値 )
(
tan δ)
耐 久 性
105℃
2000時間
定格電圧印加
(φD≦6.
3:1000時間)
低 温 特 性
+20℃における120Hzの
インピーダンスに対する比
(最大値)
CATEGORY TEMPERATURE RANGE
STANDARD CAPACITANCE TOLERANCE
LEAKAGE CURRENT (MAX. VALUE)
DISSIPATION FACTOR (MAX. VALUE)
ENDURANCE
APPLICATION OF RATED VOLTAGE,
AT
105℃
FOR
2000
hrs.
(φD≦6.
3:1000
hrs)
LOW TEMPERATURE STABILITY
RATIO OF IMPEDANCE AT COLD TO
THAT AT
20℃, 120
Hz. MAX. VALUE.
−55℃〜+105℃
−20%〜+20%
(
120
Hz)
I=0.01CV OR 3μA WHICHEVER
IS THE GREATER (after
2
minutes)
When the capacitance exceed
1,000μ
F, the value of tanδ is increased by
0.02
for each increment of 1,
000μ
F or its fraction.
CAPACITANCE CHANGE : LESS THAN
25%
OF THE INITIAL
MEASURED VALUE.
DISSIPATION FACTOR : LESS THAN
200%
OF THE INITIAL
SPECIFIED VALUE.
LEAKAGE CURRENT : LESS THAN THE INITIAL SPECIFIED VALUE.
C=RATED CAPACITANCE (μF)
V
=
WORKING VOLTAGE (V)
W. V
φ4〜φ6.3
φ8〜φ16
100
0
.
07
0
.
08
80
0
.
08
0
.
10
63
0
.
10
0
.
12
50
0
.
12
0
.
14
35
0
.
12
0
.
14
25
0
.
14
0
.
16
16
0
.
16
0
.
20
10
0
.
20
0
.
24
6.3
0
.
24
0
.
28
W. V
−40℃/+20℃
−55℃/+20℃
6
.
3
3
5
10
,
16
2
4
25〜100
2
3
■寸法図
/DIAGRAM OF DIMENSIONS
D±0.5MAX.
4
5
6
.
3
6
.
3
8
10
12
.
5
16
L±0.
3
6
.
0
6
.
0
6
.
0
7
.
7
10
.
2
10
.
2
13
.
5±0.5
16
.
5±0.5
W±0.
2
4
.
3
5
.
3
6
.
6
6
.
6
8
.
3
10
.
3
12
.
8
16
.
3
H±0.
2
4
.
3
5
.
3
6
.
6
6
.
6
8
.
3
10
.
3
12
.
8
16
.
3
C±0.
2
5
.
0
6
.
0
7
.
3
7
.
3
9
.
0
11
.
0
13
.
5
17
.
0
R
0.5〜0.8
0
.
5〜0.8
0
.
5〜0.8
0
.
5〜0.8
0
.
7〜1.0
1
.
1〜1.4
1
.
1〜1.4
1
.
8〜2.1
P±0.
2
1
.
0
1
.
4
2
.
2
2
.
2
3
.
2
4
.
6
4
.
6
7
.
0
■寸法表 (φD×L)
SIZE TABLE (φD×L)
Case size ; φD×L (mm)
Ripple current (mA r.m.s. )
(
100
kHz,
105℃
)
Impedance (Ω)
MAX. at
100
kHz,
20℃
( )
( )
W.V
μ
F
4×6.0
5×6
.
0
5×6
.
0
6
.
3×6.0
6
.
3×6.0
6
.
3×6.0
6
.
3×7.7
8×10
.
2
8×10
.
2
8×10
.
2
10×10
.
2
12
.
5×13.5
16×16
.
5
4.7
10
15
22
27
33
47
56
68
100
150
220
330
470
680
1000
1500
2200
3300
4700
6800
1.45
0
.
70
0
.
70
0
.
39
0
.
39
0
.
39
0
.
30
0
.
15
0
.
15
0
.
15
0
.
08
0
.
058
0
.
035
90
170
170
250
250
250
300
600
600
600
850
1150
1800
6.3(0J)
4×6.0
5×6
.
0
6
.
3×6.0
6
.
3×6.0
6
.
3×7.7
8×10
.
2
8×10
.
2
10×10
.
2
12
.
5×13.5
16×16
.
5
1
.
45
0
.
70
0
.
39
0
.
39
0
.
30
0
.
15
0
.
15
0
.
08
0
.
058
0
.
035
90
170
250
250
300
600
600
850
1150
1800
10(1A)
4×6.0
5×6
.
0
6
.
3×6.0
6
.
3×6.0
6
.
3×6.0
6
.
3×7.7
6
.
3×7.7
8×10
.
2
8×10
.
2
10×10
.
2
12
.
5×13.5
16×16
.
5
1
.
45
0
.
70
0
.
39
0
.
39
0
.
39
0
.
30
0
.
30
0
.
15
0
.
15
0
.
08
0
.
058
0
.
035
90
170
250
250
250
300
300
600
600
850
1150
1800
16(1C)
4×6.0
5×6
.
0
5×6
.
0
6
.
3×6.0
6
.
3×6.0
6
.
3×6.0
6
.
3×6.0
6
.
3×7.7
8×10
.
2
8×10
.
2
8×10
.
2
10×10
.
2
12
.
5×13.5
16×16
.
5
1
.
45
0
.
70
0
.
70
0
.
39
0
.
39
0
.
39
0
.
39
0
.
30
0
.
15
0
.
15
0
.
15
0
.
08
0
.
058
0
.
035
90
170
170
250
250
250
250
300
600
600
600
850
1150
1800
25(1E)
4×6.0
5×6
.
0
5×6
.
0
5×6
.
0
6
.
3×6.0
6
.
3×6.0
6
.
3×7.7
8×10
.
2
8×10
.
2
8×10
.
2
10×10
.
2
12
.
5×13.5
12
.
5×13.5
16×16
.
5
1
.
45
0
.
70
0
.
70
0
.
70
0
.
39
0
.
39
0
.
30
0
.
15
0
.
15
0
.
15
0
.
08
0
.
058
0
.
058
0
.
035
90
170
170
170
250
250
300
600
600
600
850
1150
1150
1800
35(1V)
4×6.0
6
.
3×6.0
6
.
3×6.0
6
.
3×7.7
6
.
3×7.7
8×10
.
2
10×10
.
2
12
.
5×13.5
16×16
.
5
2
.
55
0
.
52
0
.
52
0
.
44
0
.
44
0
.
22
0
.
13
0
.
10
0
.
060
64
215
215
243
243
400
585
800
1610
50(1H)
5×6.0
6
.
3×6.0
6
.
3×7.7
8×10
.
2
8×10
.
2
10×10
.
2
12
.
5×13.5
16×16
.
5
2
.
00
1
.
00
0
.
80
0
.
35
0
.
35
0
.
20
0
.
14
0
.
065
55
90
135
280
280
480
800
1410
63(1J)
6.3×6.0
6
.
3×7.7
8×10
.
2
8×10
.
2
10×10
.
2
12
.
5×13.5
12
.
5×13.5
16×16
.
5
2
.
40
2
.
00
0
.
90
0
.
90
0
.
50
0
.
24
0
.
24
0
.
14
45
65
140
140
220
500
500
800
80(1K)
8×10.2
10×10
.
2
12
.
5×13.5
16×16
.
5
16×16
.
5
0
.
90
0
.
50
0
.
24
0
.
14
0
.
14
140
220
500
800
800
100(2A)
φ16×16.5L品については、シリーズ名記号を
EC-KXT
でご用命ください。
About
φ16×16.5
L product, an order give us the series name symbol in EC-KXT.
■品番ご指定法/
HOW TO SPECIFY ITEM NUMBER
1
V EC-KX 4R7 M
静電容量許容差/
Capacitance Tolerance
静電容量記号/
Capacitance Symbol
シリーズ名/
Series Name
定格電圧/
Rated Voltage
Page 25
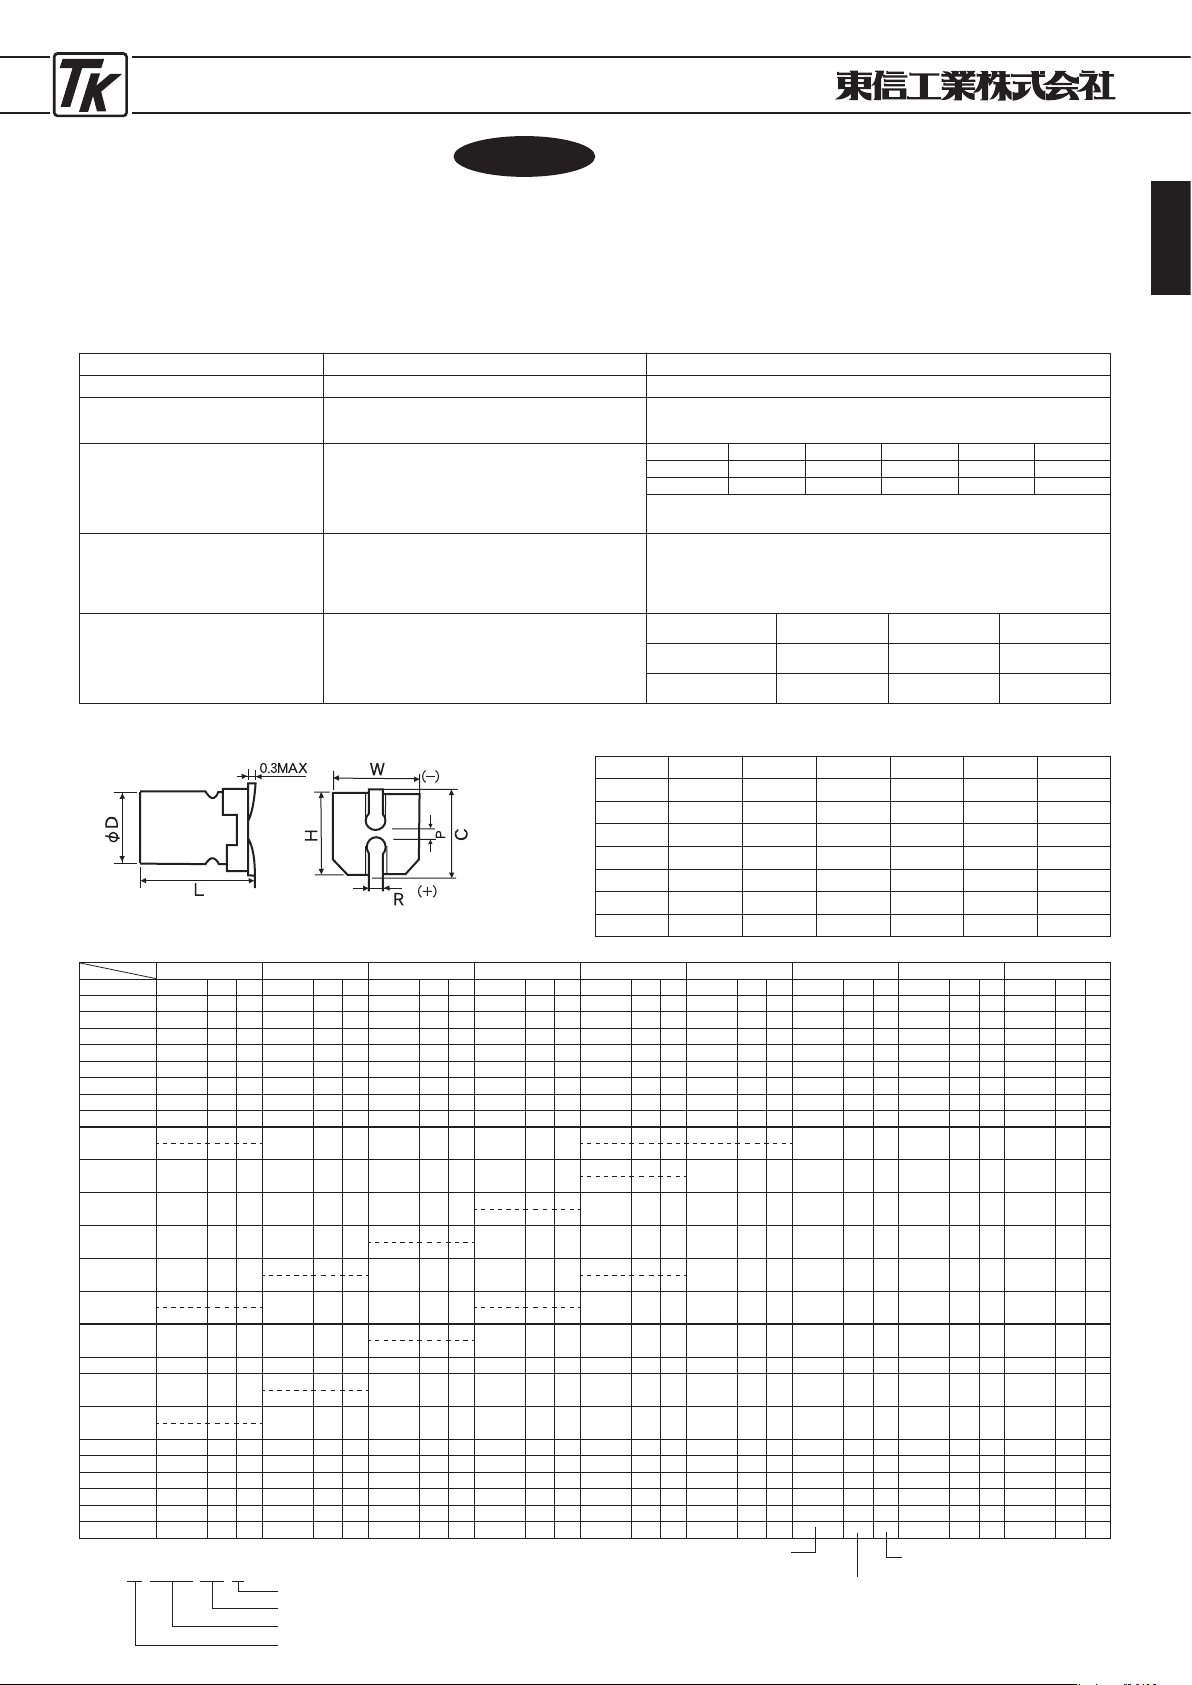
ELECTROLYTIC CAPACITORS
25
●縦型チップ長寿命低インピーダンス品
●
VERTICAL CHIP LOW IMPEDANCE LONG LIFE
■特 徴
■性 能
/PERFORMANCE SPECIFICATIONS
(単位 : mm)
EC-LXシリーズ
JIS C
5101
CE-
32
(耐洗浄品)
TYPEEC-LX
JIS C
5101
CE-
32
(
Washable product
)
・
EC-LX
シリーズは、長寿命タイプの低インピーダンス品です。
■
FEATURES
・
This series is a long load life with low impedance.
■寸法図
/DIAGRAM OF DIMENSIONS
D±0.5MAX.
4
5
6
.
3
6
.
3
8
10
12
.
5
L±0.
3
6
.
0
6
.
0
6
.
0
7
.
7
10
.
2
10
.
2
13
.
5±0.5
W±0.
2
4
.
3
5
.
3
6
.
6
6
.
6
8
.
3
10
.
3
12
.
8
H±0.
2
4
.
3
5
.
3
6
.
6
6
.
6
8
.
3
10
.
3
12
.
8
R
0.5〜0.8
0
.
5〜0.8
0
.
5〜0.8
0
.
5〜0.8
0
.
7〜1.0
1
.
1〜1.4
1
.
1〜1.4
P±0.
2
1
.
0
1
.
4
2
.
2
2
.
2
3
.
2
4
.
6
4
.
6
■寸法表 (φD×L)
SIZE TABLE (φD×L)
Case size ; φD×L (mm)
Ripple current (mA r.m.s.)
(
100
kHz,
105℃
)
Impedance (Ω)
MAX. at
100
kHz,
20℃
W.V.
μ
F
6.3
V (0J)
10
V (1A)
16
V (1C)
25
V (1E)
35
V (1V)
50
V (1H)
63
V (1J)
80V(1
K)
100 (2
A)
4.7(4R
7)
4×6.0 1.45 90 4×6.0 2.9 60
10
(100)
4×6.0 1.450 90 5×6.0 0.70 170 6.3×6.0 0.880 165
15
(150)
4×6.0 1.450 90 5×6.0 0.700 170 5×6.0 0.70 170
22
(220)
4×6.0 1.45 90 5×6.0 0.700 170 5×6.0 0.700 170 5×6.0 0.70 170 6.3×6.0 0.880 165
27
(270)
4×6.0 1.450 90 5×6.0 0.70 170 5×6.0 0.700 170 6.3×6.0 0.390 250 6.3×6.0 0.39 250 6.3×7.7 0.680 195
33
(330)
5×6.0 0.700 170 5×6.0 0.70 170 6.3×6.0 0.390 250 6.3×6.0 0.390 250 6.3×6.0 0.39 250 6.3×7.7 0.680 195 10×10.2 0.650 200
47
(470)
5×6.0 0.700 170 6.3×6.0 0.39 250 6.3×6.0 0.390 250 6.3×6.0 0.390 250 6.3×6.0 0.39 250 6.3×7.7 0.680 195 10×7.7 0.700 200 10×10.2 0.650 200 12.5×13.5 0.320 500
56
(560)
5×6.0 0.700 170 6.3×6.0 0.39 250 6.3×6.0 0.390 250 6.3×6.0 0.390 250 6.3×7.7 0.30 300 8×10.2 0.340 300
68
(680)6.
3×6.0 0.390 250 6.3×6.0 0.39 250 6.3×6.0 0.390 250 6.3×6.0 0.390 250 6.3×7.7 0.30 300 8×10.2 0.340 300 12.5×13.5 0.320 500
100
(101)
5×6.0 0.700 170
6
.
3×6.0 0.39 250 6.3×6.0 0.39 250 6.3×7.7 0.30 300
6
.
3×7.7 0.30 300 8×10.2 0.340 300
12
.
5×13.5 0.16 580 12.5×13.5 0.32 500 16×16.5 0.17 793
6
.
3×6.0 0.390 250 8×10.2 0.17 450 10×7.7 0.340 300
150
(151)6.
3×6.0 0.39 250 6.3×6.0 0.39 250 6.3×7.7 0.30 300 8×10.2 0.17 450
8×10.2 0.17 450
10×10.2 0.18 490 12.5×13.5 0.16 580 12.5×13.5 0.32 500 16×16.5 0.17 793
10×7.7 0.17 450
220
(221)6.
3×6.0 0.39 250 6.3×7.7 0.30 300 6.3×7.7 0.30 300
8×10.2 0.170 450
8×10.2 0.17 450 10×10.2 0.18 490 12.5×13.5 0.16 580 18×16.5 0.15 917
10×7.7 0.170 450
330
(331)6.
3×7.7 0.3 300 8×10.2 0.17 450
8×10.2 0.170 450
8×10.2 0.17 450 10×10.2 0.09 670 12.5×13.5 0.12 620 16×16.5 0.17 793
10×7.7 0.170 450
470
(471)
8×10.2 0.17 450
8×10.2 0.17 450
8×10.2 0.17 450 10×10.2 0.09 670
10×13.5 0.07 850
16×16.5 0.073 1610 16×16.5 0.082 1410
10×7.7 0.17 450 12.5×13.5 0.06 900
680
(681)
8×10.2 0.170 450
10×10.2 0.09 670 10×10.2 0.09 670
10×13.5 0.070 850
12
.
5×13.5 0.06 900 16×16.5 0.073 1610 18×16.5 0.08 1690
10×7.7 0.170 450 12.5×13.5 0.060 900
1000
(102)
8×10.2 0.17 450 10×10.2 0.09 670
10×13.5 0.070 850
12
.
5×13.5 0.06 900 16×16.5 0.04 1800 16×16.5 0.07 1610
12
.
5×13.5 0.060 900
1200
(122)
18×16.5 0.068 1900
1500
(152)
10×10.2 0.09 670
10×13.5 0.07 850
12
.
5×13.5 0.06 900 16×16.5 0.04 1800 16×16.5 0.04 1800
12
.
5×13.5 0.06 900
2200
(222)
10×13.5 0.070 850
12
.
5×13.5 0.06 900 16×16.5 0.04 1800 18×16.5 0.03 2060
12
.
5×13.5 0.060 900
3300
(332)
16×16.5 0.035 1800 18×16.5 0.033 2060
4700
(472)
16×16.5 0.04 1800 16×16.5 0.033 2060
5600
(562)
18×16.5 0.03 2060
6800
(682)
16×16.5 0.035 1800
8200
(822)
16×16.5 0.033 2060
10000
(103)
18×16.5 0.033 2060
カ テ ゴ リ 温 度 範 囲
標 準 静 電 容 量 許 容 差
漏 れ 電 流 ( 最 大 値 )
損 失 角 の 正 接 ( 最 大 値 )
(
tan δ)
耐 久 性
105℃
5000時間
定格電圧印加
(φD≦6.
3:2000時間)
低 温 特 性
+20℃における120Hzの
インピーダンスに対する比
(最大値)
CATEGORY TEMPERATURE RANGE
STANDARD CAPACITANCE TOLERANCE
LEAKAGE CURRENT (MAX. VALUE)
DISSIPATION FACTOR (MAX. VALUE)
ENDURANCE
APPLICATION OF RATED VOLTAGE,
AT
105℃
FOR
5000
hrs.
(φD≦6.
3:2000
hrs)
LOW TEMPERATURE STABILITY
RATIO OF IMPEDANCE AT COLD TO
THAT AT
20℃, 120
Hz. MAX. VALUE.
−40℃〜+105℃
−20%〜+20%
(
120
Hz)
I=0.01CV OR 3μA WHICHEVER
IS THE GREATER (after
2
minutes)
When the capacitance exceed
1,000μ
F, the value of tanδ is increased by
0.02
for each increment of 1,
000μ
F or its fraction.
CAPACITANCE CHANGE : LESS THAN
30%
OF THE INITIAL
MEASURED VALUE.
DISSIPATION FACTOR : LESS THAN
300%
OF THE INITIAL
SPECIFIED VALUE.
LEAKAGE CURRENT : LESS THAN THE INITIAL SPECIFIED VALUE.
C=RATED CAPACITANCE (μF)
V
=
WORKING VOLTAGE (V)
W. V
φ4〜φ6.3
φ8〜φ12
.
5
25
0
.
14
0
.
16
35・50
0
.
12
0
.
14
16
0
.
16
0
.
22
10
0
.
20
0
.
24
6.3
0
.
26
0
.
28
W. V
−25℃/+20℃
−40℃/+20℃
6
.
3
3
5
10
,
16
2
4
25〜50
2
3
( )
( )
C±0.
2
5
.
0
6
.
0
7
.
3
7
.
3
9
.
0
11
.
0
13
.
5
■品番ご指定法/
HOW TO SPECIFY ITEM NUMBER
0
J EC-LX
220
M
静電容量許容差/
Capacitance Tolerance
静電容量記号/
Capacitance Symbol
シリーズ名/
Series Name
定格電圧/
Rated Voltage
Upgrade
Page 26
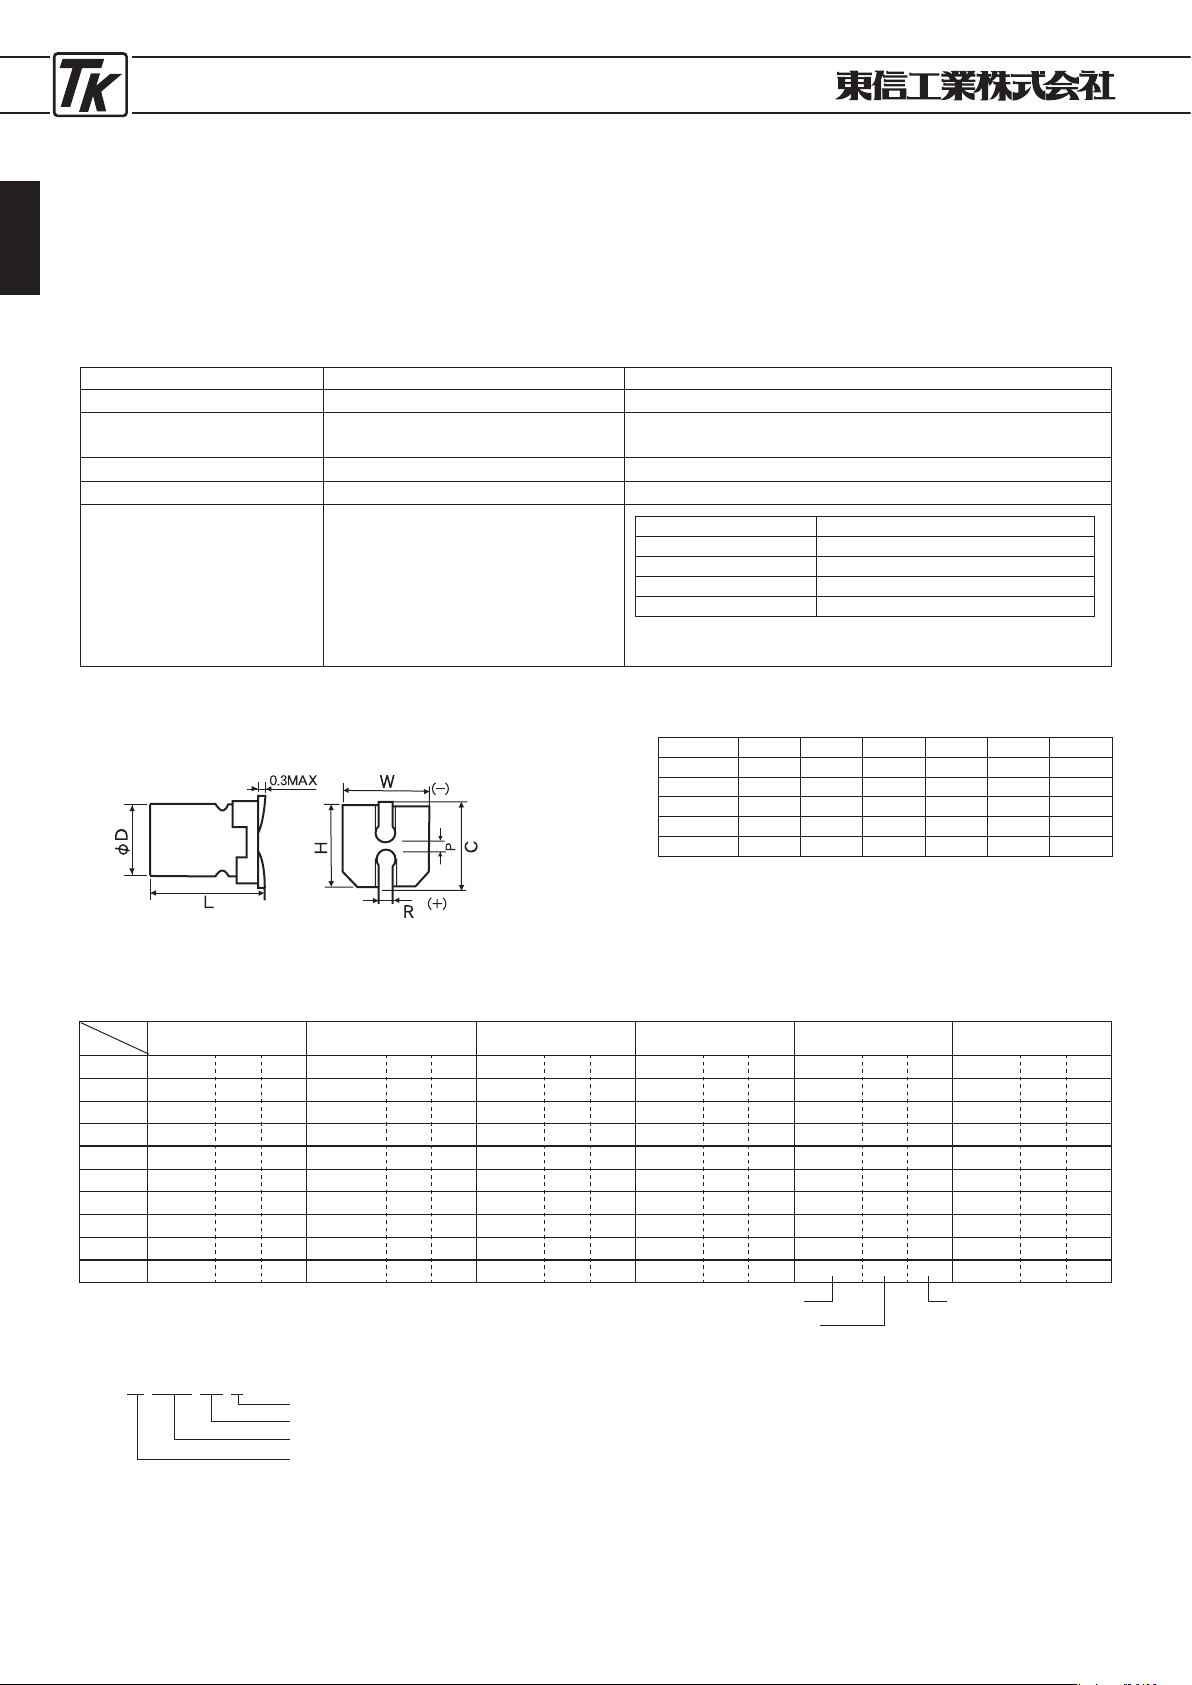
ELECTROLYTIC CAPACITORS
26
●縦型チップ長寿命低インピーダンス品
●
VERTICAL CHIP LOW IMPEDANCE LONG LIFE
■特 徴
EC-LLシリーズ
TYPEEC-LL
・
EC-LL
シリーズは低インピーダンスの105℃ 7,000〜
10,000時間保証品です。
■
FEATURES
・
This series gurantees
105℃ 7,000〜10,000
hours
With low impedance.
■寸法図/
DIAGRAM OF DIMENSIONS
JIS C
5101
CE-
32
JIS C
5101
CE-
32
■性 能
/PERFORMANCE SPECIFICATIONS
カ テ ゴ リ 温 度 範 囲
標 準 静 電 容 量 許 容 差
漏 れ 電 流
( L C )
損 失 角 の 正 接
(Tanδ)
E.S.R.
耐
久
性
Category Temperature Range
Standard Capacitance Tolerance
Leakage Current [at
20℃
]
Dissipation Factor (Tan
δ
)
E.S.R.
Load Life Test
−25℃〜+105℃
±20
%
I =
0.01
CV (μA) whichever is greater (after
2
minutes)
Where, C= rated capacitance in
μ
F. V = rated DC working voltage in V.
See the standard product table
See the standard product table.
*
The above specifications shall be satisfied when the capacitors are
restored to
20℃
after the rated voltage applied for
2000
hrs at
105℃
.
Test Time
φD≦6.3:7000 φD≧8:10000
Hrs
Capacitance Change Within
±30
% of initial value
Dissipation Factor Less than
200
% of specified value
E.S.R. Less than
200
% of specified value
Leakage Current Within specified value
■標準品一覧表/
STANDARD PRODUCT TABLE
D+0.5max L±0.3W±0.2H±0.2C±0.
2
R P±0.2
5 7.0 5.3 5.3 6.0 0.5~0.8 1.4
6.3 7.0 6.6 6.6 7.3 0.5~0.8 2.2
6.3 8.4 6.6 6.6 7.3 0.5~0.8 2.2
8 10.2 8.3 8.3 9.0 0.7~1.0 3.2
10 10.2 10.3 10.3 11.0 1.0~1.4 4.6
Unit : mm
W.V
uF
10
5×7.0 2.2 95
22
5×7.0 2.2 95 5×7.0 2.2 95 5×7.0 2.2 95
33 5×7.0 2.2 95 6.3×7.0 1.1 140 6.3×8.4 1.0 230
47 5×7.0 2.2 95
6.
3×7.0 1.1 140 6.3×7.0 1.1 140 6.3×8.4 1.0 230 8×10.2 0.53 350
100 6.3×7.0 1.1 140 6.3×7.0 1.1 140 6.3×8.4 1.0 230 8×10.2 0.22 600 10×10.2 0.35 670
150
6.
3×7.0 1.1 140 6.3×8.4 1.0 230
220 6.3×8.4 1.0 230 6.3×8.4 1.0 230 8×10.2 0.22 600 10×10.2 0.16 850
330 6.3×8.4 1.0 230 8×10.2 0.22 600 10×10.2 0.16 850
470 8×10.2 0.22 600 10×10.2 0.16 850
1000 10×10.2 0.16 850
50(1H)35(1V)25(1E)16(1C)10(1A)6.3(0J)
定格リブル電流
mArms(
100
kHz,
105℃)
ケースサイズ
:φD×
L(mm)
インピーダンス(Ω)
max at
100
kHz,
20℃
■品番ご指定法/
HOW TO SPECIFY ITEM NUMBER
1
A EC-LL
101
M
静電容量許容差/
Capacitance Tolerance
静電容量記号/
Capacitance Symbol
シリーズ名/
Series Name
定格電圧/
Rated Voltage
Page 27
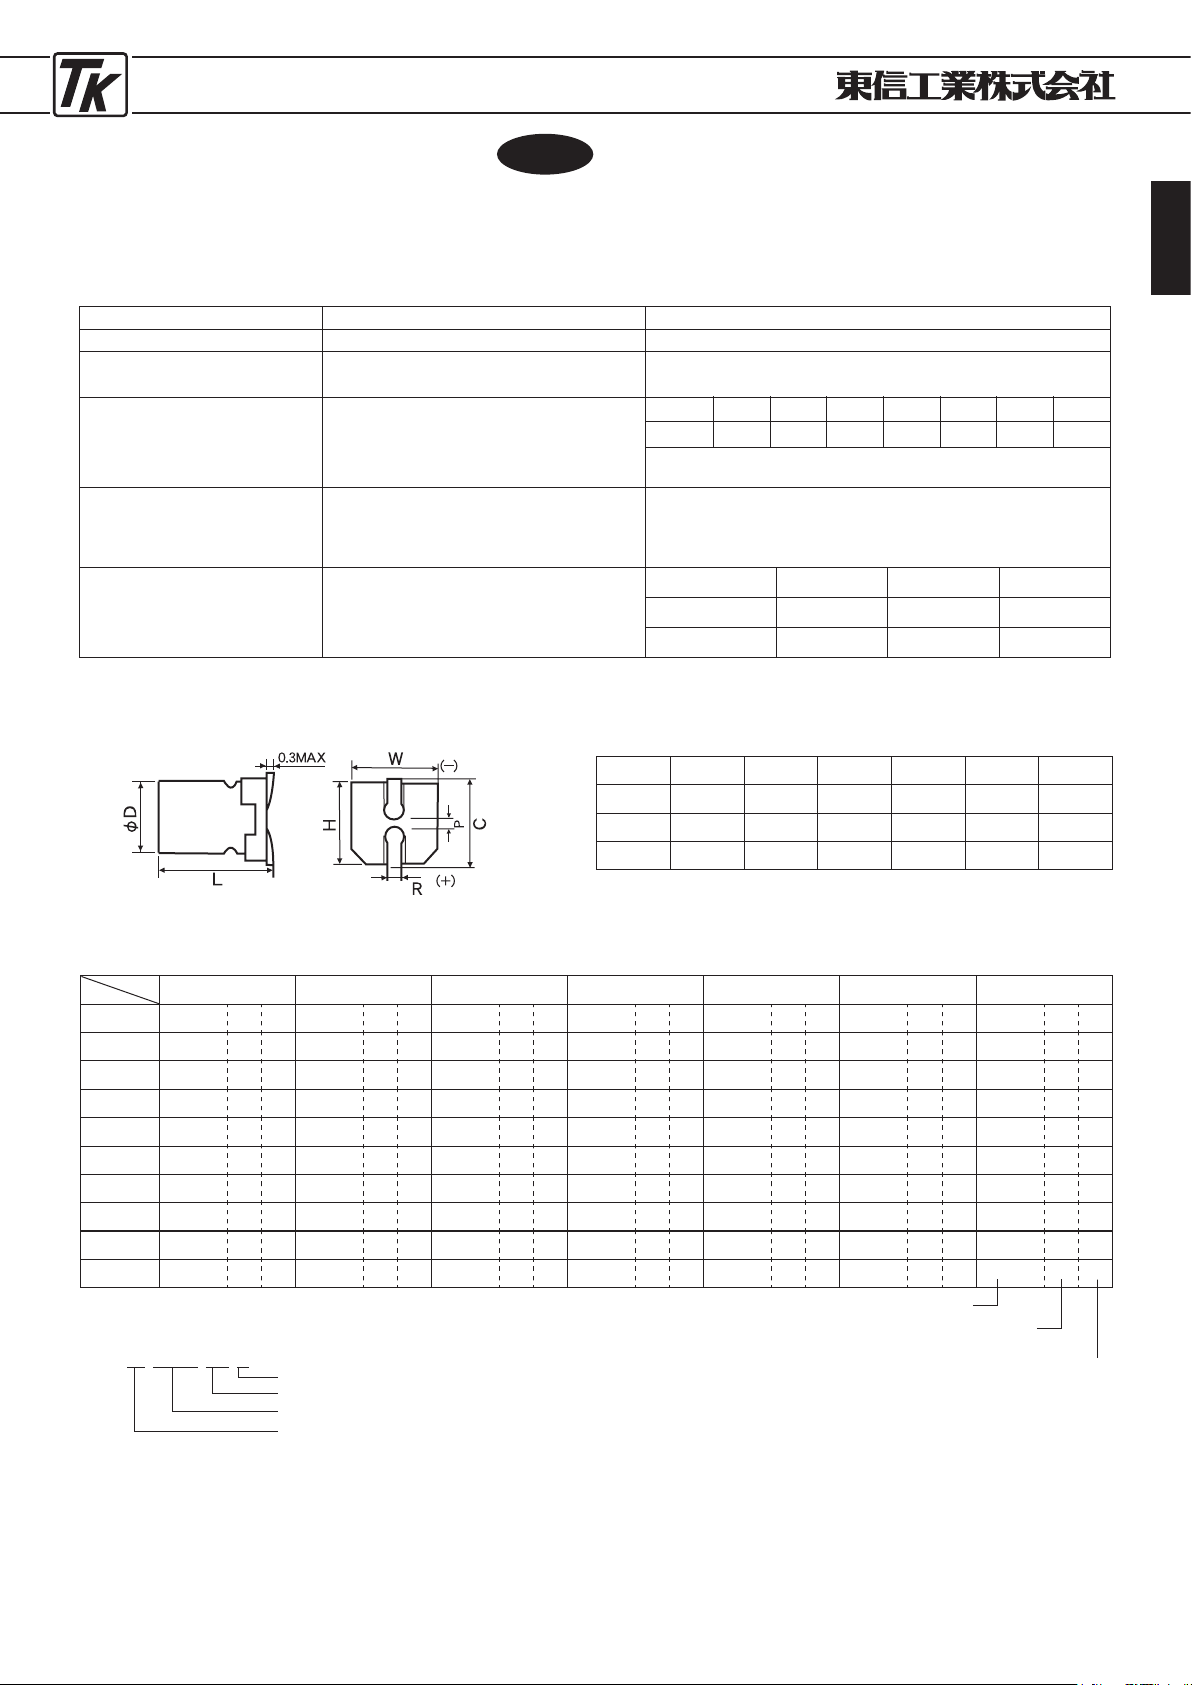
ELECTROLYTIC CAPACITORS
27
●縦型チップ低インピーダンス高さ5.4mm品
●
VERTICAL CHIP LOW INPEDANCE 5.4mm HEIGHT TYPE
■性 能
/PERFORMANCE SPECIFICATIONS
(単位 : mm)
EC-GAシリーズ
JIS C
5101
CE-
32
(耐洗浄品)
TYPEEC-GA
JIS C
5101
CE-
32
(
Washable product
)
カ テ ゴ リ 温 度 範 囲
標 準 静 電 容 量 許 容 差
漏 れ 電 流 ( 最 大 値 )
損 失 角 の 正 接 ( 最 大 値 )
(
tan δ)
耐 久 性
105℃
1000時間
定格電圧印加
低 温 特 性
+20℃における120Hzの
インピーダンスに対する比
(最大値)
CATEGORY TEMPERATURE RANGE
STANDARD CAPACITANCE TOLERANCE
LEAKAGE CURRENT (MAX. VALUE)
DISSIPATION FACTOR (MAX. VALUE)
ENDURANCE
APPLICATION OF RATED VOLTAGE,
AT
105℃
FOR
1000
hrs.
LOW TEMPERATURE STABILITY
RATIO OF IMPEDANCE AT COLD TO
THAT AT
20℃, 120
Hz. MAX. VALUE.
−55℃〜+105℃
−20%〜+20%
(
120
Hz)
I=0.01CV OR 3μA WHICHEVER
IS THE GREATER (after
2
minutes)
When the capacitance exceed
1,000μ
F, the value of tanδ is increased by
0.02
for each increment of 1,
000μ
F or its fraction.
CAPACITANCE CHANGE : LESS THAN
25%
OF THE INITIAL
MEASURED VALUE.
DISSIPATION FACTOR : LESS THAN
200%
OF THE INITIAL
SPECIFIED VALUE.
LEAKAGE CURRENT : LESS THAN THE INITIAL SPECIFIED VALUE.
C=RATED CAPACITANCE (μF)
V
=
WORKING VOLTAGE (V)
W. V
6.3 10 16 25 35 50 63
Tan
δ 0.24 0.20 0.16 0.14 0.12 0.12 0.12
W. V
−40℃/+20℃
−55℃/+20℃
6
.
3
3
5
10
,
16
2
4
25〜63
3
■寸法図
/DIAGRAM OF DIMENSIONS
D+5max
+0.1
L
−0.2
W±0.
2
H±0.
2
C±0.
2
R P±0.
2
4 5.4 4.3 4.3 5.0 0.5〜0.8 1.0
5 5.4 5.3 5.3 6.0 0.5〜0.8 1.4
6
.
3 5.4 6.6 6.6 7.3 0.5〜0.8 2.2
■寸法表 (φD×L)
SIZE TABLE (φD×L)
Case size ; φD×L (mm)
Ripple current
(
mA r.m.s
)(100
kHz,
105℃)
Impedance (Ω)
MAX.at
100
kHz,
20℃
( )
( )
W.V.
μ
F
6.3
V (0J)
10
V (1A)
16
V (1C)
25
V (1E)
35
V (1V)
50
V (1H)
63
V (1J)
1.0 (010) 4×5.4 3.1 68 4×5.4 7.4 37 4×5.4 8.0 20
2
.2 (2R
2) 4×5.4 2.9 68 4×5.4 6.6 45 4×5.4 8.0 24
3
.3 (3R
3) 4×5.4 2.7 68 4×5.4 5.4 52 5×5.4 3.5 40
4
.7 (4R
7) 4×5.4 2.3 68 4×5.4 2.3 68 5×5.4 2.9 75 5×5.4 3.5 40
10
(100) 4×5.4 2.3 68 5×5.4 1.1 105 5×5.4 1.1 105 6.3×5.4 1.3 120 6.3×5.4 1.6 65
22
(220) 4×5.4 2.3 68 5×5.4 1.1 105 5×5.4 1.1 105 6.3×5.4 0.6 155 6.3×5.4 0.6 155 6.3×5.4 1.3 120
33
(330) 5×5.4 1.1 105 5×5.4 1.1 105 6.3×5.4 0.6 155 6.3×5.4 0.6 155 6.3×5.4 0.6 155
47
(470) 5×5.4 1.1 105 6.3×5.4 0.6 155 6.3×5.4 0.6 155 6.3×5.4 0.6 155 6.3×5.4 0.6 155
100
(101)6.3×5.4 0.6 155 6.3×5.4 0.6 155 6.3×5.4 0.6 155
220
(221)6.3×5.4 0.6 155
■品番ご指定法/
HOW TO SPECIFY ITEM NUMBER
1
C EC-GA
100
M
静電容量許容差/
Capacitance Tolerance
静電容量記号/
Capacitance Symbol
シリーズ名/
Series Name
定格電圧/
Rated Voltage
New
Page 28
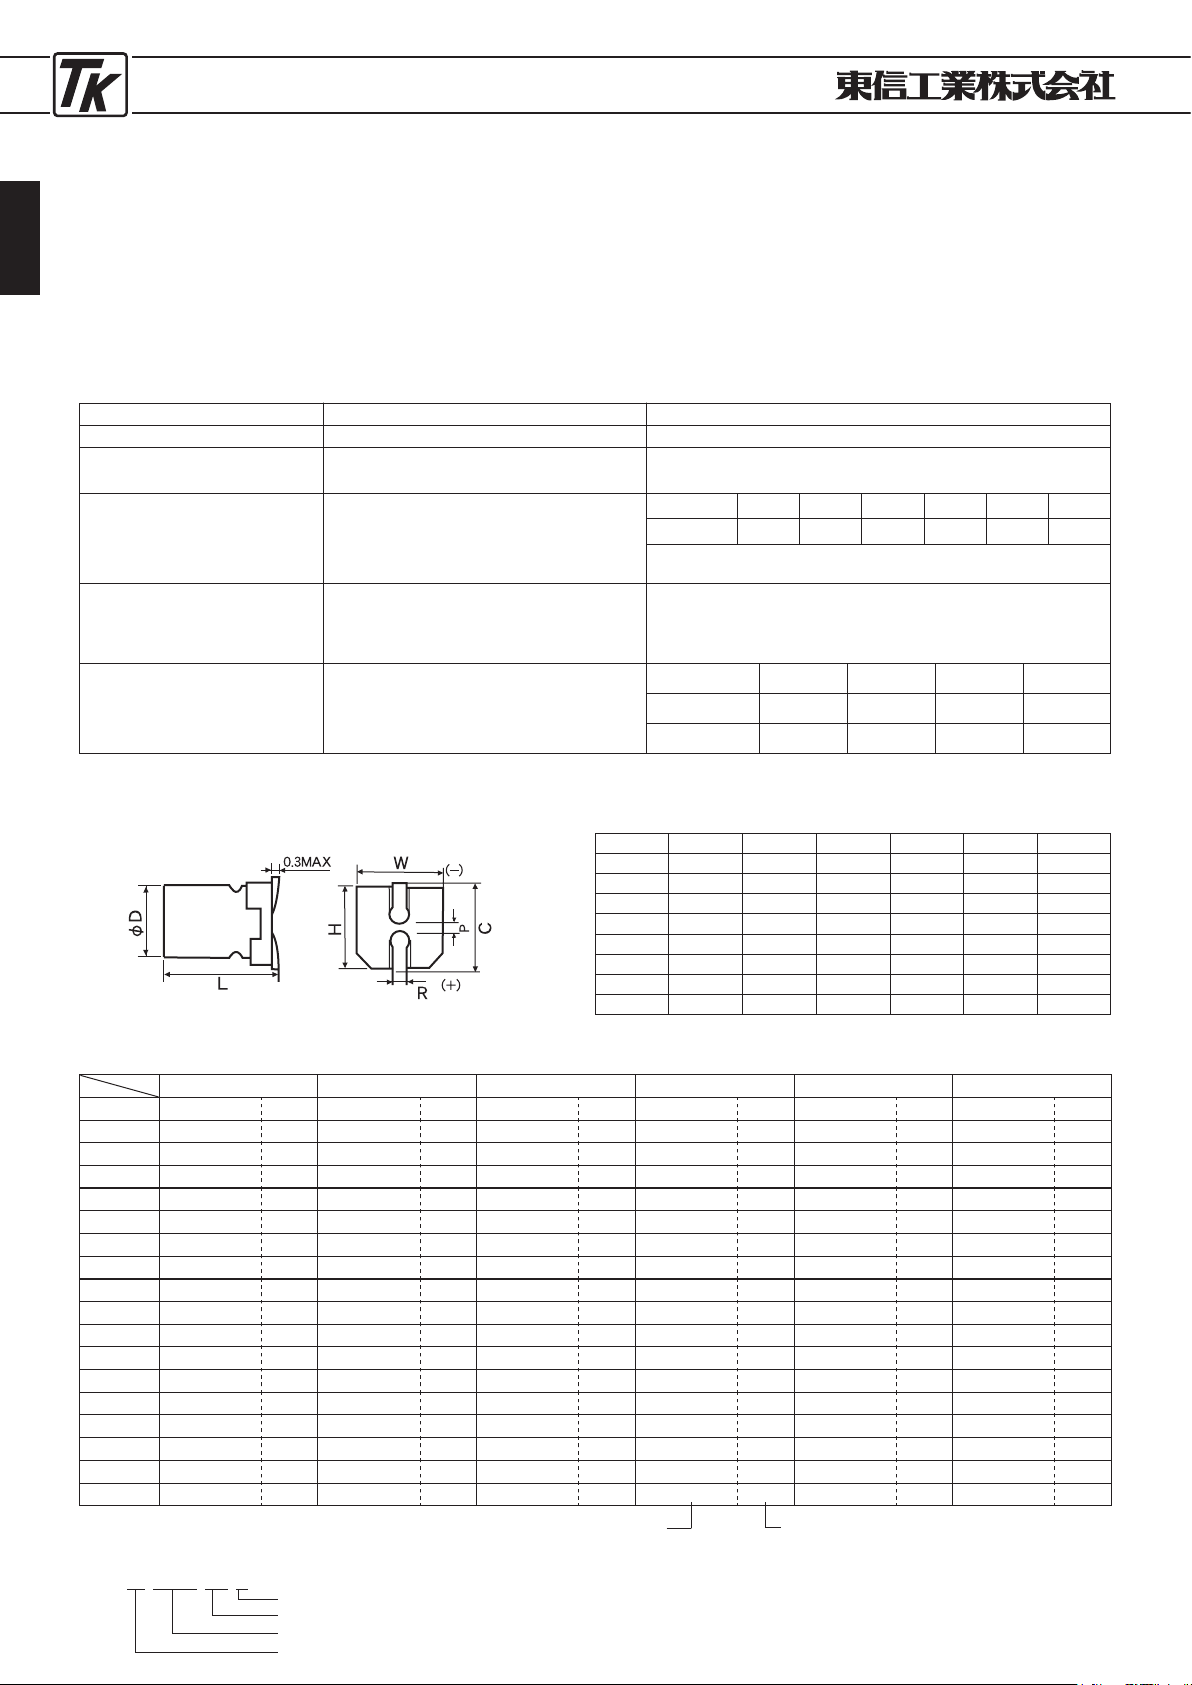
ELECTROLYTIC CAPACITORS
28
φ16×16.5L品については、シリーズ名記号を
EC-FHT
でご用命ください。
About
φ16×16.5
L product, an order give us the series name symbol in EC-FHT.
●縦型チップ長寿命品 ●
VERTICAL CHIP LONG LIFE TYPE
■特 徴
■性 能
/PERFORMANCE SPECIFICATIONS
(単位 : mm)
EC-FHシリーズ
JIS C
5101
CE-
32
(耐洗浄品)
TYPEEC-FH
JIS C
5101
CE-
32
(
Washable product
)
・
EC-FH
シリーズは、面実装タイプの長寿命品です。
■
FEATURES
・
EC-FH series is long life.
カ テ ゴ リ 温 度 範 囲
標 準 静 電 容 量 許 容 差
漏 れ 電 流 ( 最 大 値 )
損 失 角 の 正 接 ( 最 大 値 )
(
tan δ)
耐 久 性
105℃
2000時間
定格電圧印加
(
φ8〜φ10:3000時間、φ12.5〜φ16:5000時間)
低 温 特 性
+20℃における120Hzの
インピーダンスに対する比
(最大値)
CATEGORY TEMPERATURE RANGE
STANDARD CAPACITANCE TOLERANCE
LEAKAGE CURRENT (MAX. VALUE)
DISSIPATION FACTOR (MAX. VALUE)
ENDURANCE
APPLICATION OF RATED VOLTAGE,
AT
105℃
FOR
2000
hrs.
(
φ8〜φ10:3000
hrs,
φ12.5〜φ16:5000
hrs
)
LOW TEMPERATURE STABILITY
RATIO OF IMPEDANCE AT COLD TO
THAT AT
20℃, 120
Hz. MAX. VALUE.
−40℃〜+105℃
−20%〜+20%
(
120
Hz)
I=0.01CV OR 3μA WHICHEVER
IS THE GREATER (after
2
minutes)
When the capacitance exceed
1,000μ
F, the value of tanδ is increased by
0.02
for each increment of 1,
000μ
F or its fraction.
CAPACITANCE CHANGE : LESS THAN
25%
OF THE INITIAL
MEASURED VALUE.
DISSIPATION FACTOR : LESS THAN
250%
OF THE INITIAL
SPECIFIED VALUE.
LEAKAGE CURRENT : LESS THAN THE INITIAL SPECIFIED VALUE.
C=RATED CAPACITANCE (μF)
V
=
WORKING VOLTAGE (V)
W. V
Tan
δ
6
.
3
0
.
30
10
0
.
24
16
0
.
20
25
0
.
16
35
0
.
14
50
0
.
14
W. V
−25℃/+20℃
−40℃/+20℃
6
.
3
4
8
10
3
6
16・25
2
4
35・50
2
3
■寸法図
/DIAGRAM OF DIMENSIONS
D±0.5MAX.
4
5
6
.
3
6
.
3
8
10
12
.
5
16
L±0.
3
6
.
0
6
.
0
6
.
0
7
.
7
10
.
2
10
.
2
13
.
5±0.5
16
.
5±0.5
W±0.
2
4
.
3
5
.
3
6
.
6
6
.
6
8
.
3
10
.
3
12
.
8
16
.
3
H±0.
2
4
.
3
5
.
3
6
.
6
6
.
6
8
.
3
10
.
3
12
.
8
16
.
3
C±0.
2
5
.
0
6
.
0
7
.
3
7
.
3
9
.
0
11
.
0
13
.
5
17
.
0
R
0.5〜0.8
0
.
5〜0.8
0
.
5〜0.8
0
.
5〜0.8
0
.
7〜1.0
1
.
1〜1.4
1
.
1〜1.4
1
.
8〜2.1
P±0.
2
1
.
0
1
.
4
2
.
2
2
.
2
3
.
2
4
.
6
4
.
6
7
.
0
■寸法表 (φD×L)
SIZE TABLE (φD×L)
φD×
L
Ripple current (mA r.m.s.)
(
120
Hz,
105℃
)
( )
( )
W.V
μ
F
6.3(0J) 10 (1A) 1 6( 1C) 2 5( 1E) 35(1V) 5 0( 1H)
1
.
0 4×6.0 7
2
.
2 4×6.0 11
3
.
3 4×6.0 13
4
.
7 4×6.0 13 4×6.0 15 5×6.0 19
10 4×6.0 18 5×6.0 23 5×6.0 25 6.3×6.0 32
22 4×6.0 22 5×6.0 27 5×6.0 30 6.3×6.0 42 6.3×6.0 44 6.3×7.7 60
33 5×6.0 30 5×6.0 35 6.3×6.0 44 6.3×6.0 58 6.3×7.7 77 8×10.2 140
47 5×6.0 36 6.3×6.0 46 6.3×6.0 60 6.3×7.7 91 8×10.2 150 8×10.2 150
100 6.3×6.0 67 6.3×6.0 62 6.3×7.7 95 8×10.2 150 8×10.2 160 10×10.2 220
220 6.3×7.7 105 8×10.2 175 8×10.2 175 8×10.2 195 10×10.2 290 12.5×13.5 340
330 8×10.2 195 8×10.2 195 8×10.2 210 10×10.2 290 12.5×13.5 380
470 8×10.2 210 8×10.2 210 10×10.2 290 12.5×13.5 400 16×16.5 610
680 10×10.2 300 12.5×13.5 415
1000 10×10.2 300 12.5×13.5 440 16×16.5 620
1500 12.5×13.5 480 16×16.5 720
2200 12.5×13.5 490 16×16.5 785
3300 16×16.5 820
4700 16×16.5 860
■品番ご指定法/
HOW TO SPECIFY ITEM NUMBER
1
C EC-FH
220
M
静電容量許容差/
Capacitance Tolerance
静電容量記号/
Capacitance Symbol
シリーズ名/
Series Name
定格電圧/
Rated Voltage
Page 29
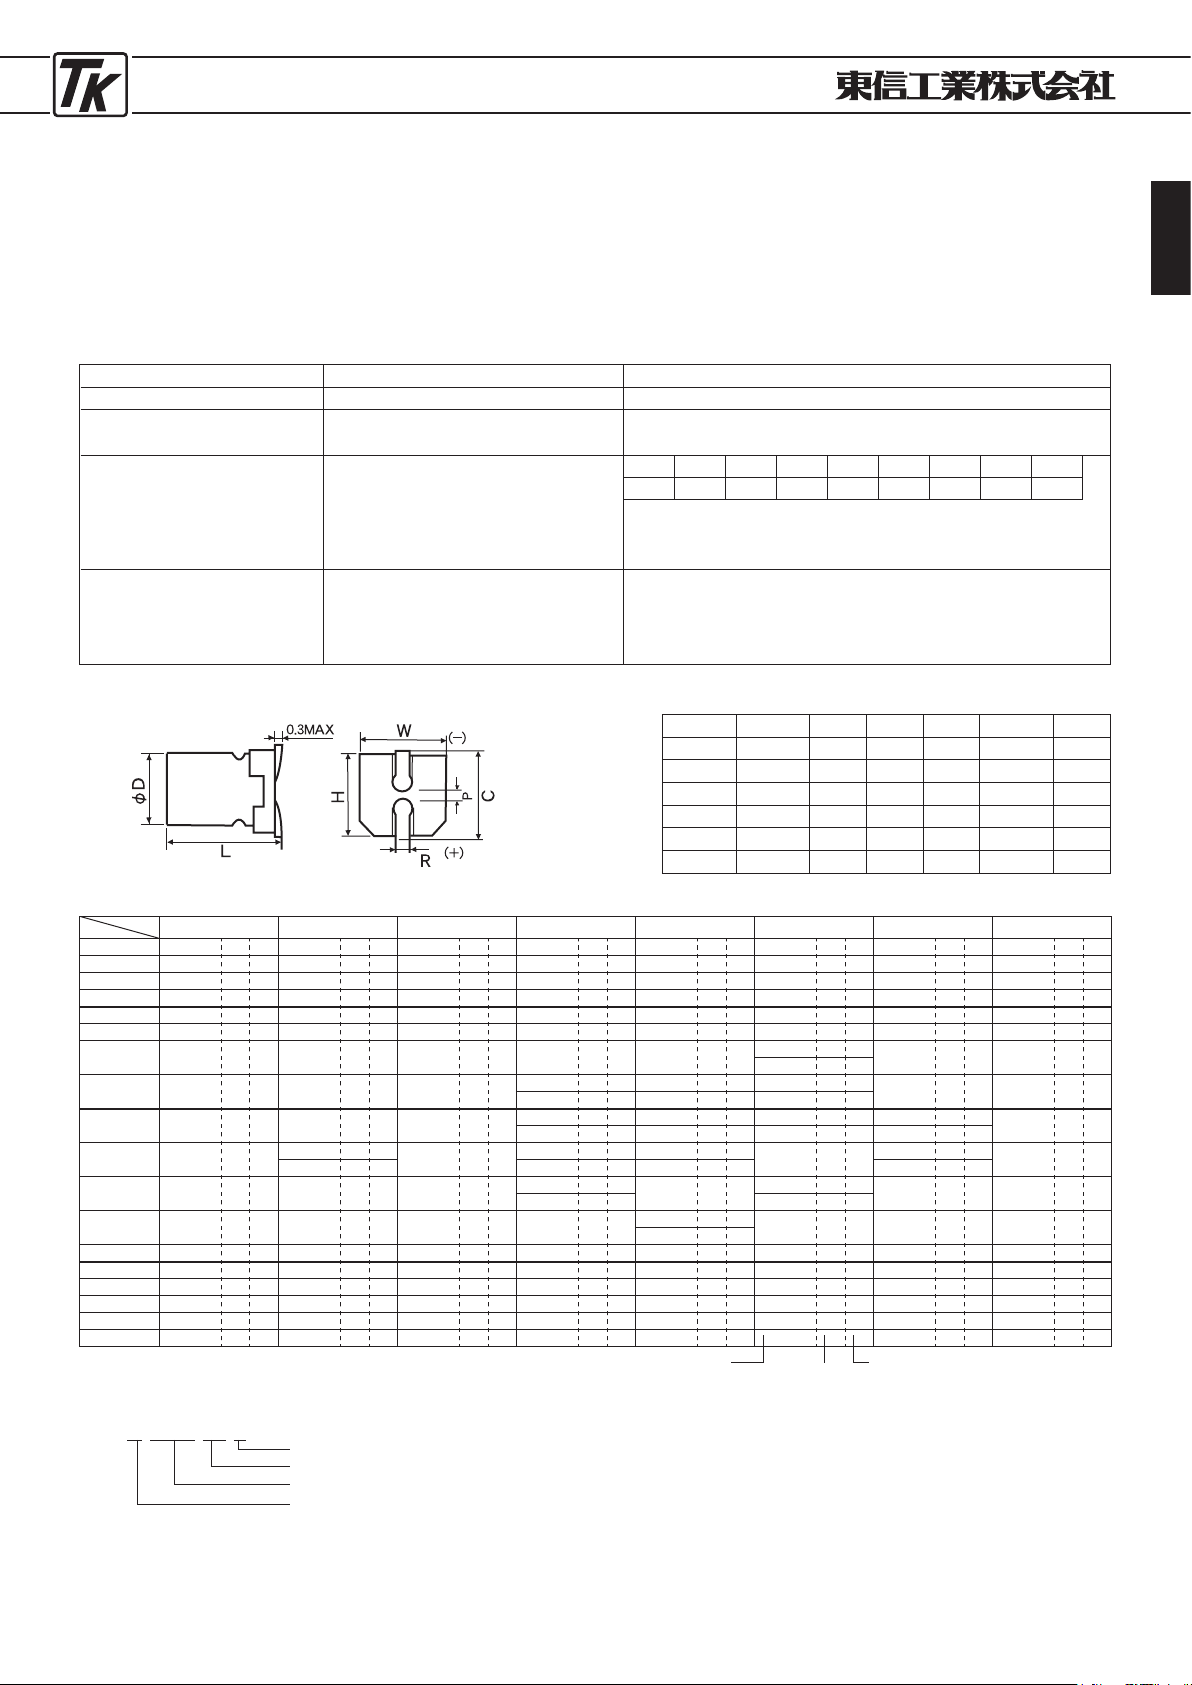
ELECTROLYTIC CAPACITORS
29
●縦型チップ125℃長寿命品 ●
VERTICAL CHIP
125℃
LONG LIFE TYPE
■特 徴
EC-PCシリーズ
TYPEEC-PC
・
EC-PC
シリーズは、125℃1,000~2,000時間の長寿命品
です。
■
FEATURES
・
EC-PC series is
125℃
long life(
1000
to
2000
hrs.).
■寸法図/
DIAGRAM OF DIMENSIONS
(耐洗浄品)
■標準品一覧表/
STANDARD PRODUCT TABLE
D+0.5max L±0.3W±0.2H±0.2C±0.
2
R P±0.2
6.3 6.0 6.6 6.6 7.3 0.5〜0.8 2.2
6.3 7.7 6.6 6.6 7.3 0.5〜0.8 2.2
8 10.2 8.3 8.3 9.0 0.7〜1.0 3.2
10 10.2 10.3 10.3 11.0 1.0〜1.4 4.6
12.5 13.5±0.5 12.8 12.8 13.5 1.0〜1.4 4.6
16 16.5±0.5 16.3 16.3 17.3 1.8〜2.1 7.0
(
Unit : mm
)
W.V
μ
F
6.3(0J) 10(1A) 16(1C) 25(1E) 35(1V) 50(1H) 63(1J) 100(2A)
1.0
6.3×6.0 3.5 45
2.2
6.3×6.0 3.5 45
3.3
6.3×6.0 3.5 45
4.7
6.3×6.0 2.0 60 6.3×6.0 3.5 45
10
6.3×6.0 1.6 70 6.3×6.0 2.8 50 8×10.2 1.0 70
22
6.3×6.0 1.6 70 6.3×7.7 2.0 80 8×10.2 1.0 100 8×10.2 1.0 70
33
6.3×6.0 1.6 70 6.3×7.7 0.9 110
6.3×7.7 2.0 80
8×10.2 1.0 100 10×10.2 0.8 115
8×10.2 0.7 140
47
6.3×6.0 1.6 70 6.3×6.0 1.6 70
6.3×7.7 0.9 110 6.3×7.7 0.9 110 8×10.2 0.7 140
8×10.2 1.0 100 12.5×13.5 0.33 350
8×10.2 0.4 160 10×10.2 0.5 240 10×10.2 0.5 150
100
6.3×6.0 1.6 70 6.3×7.7 0.9 110 8×10.2 0.4 160
6.3×7.7 0.9 110 8×10.2 0.4 160 10×10.2 0.5 240 10×10.2 0.5 150
16×16.5 0.24 500
8×10.2 0.4 160 10×10.2 0.3 220 12.5×13.5 0.23 350 12.5×13.5 0.25 350
220
6.3×7.7 0.9 110
6.3×7.7 0.9 110
8×10.2 0.4 160
8×10.2 0.4 160 10×10.2 0.3 220
12.5×13.5 0.23 490
12.5×13.5 0.25 350
8×10.2 0.4 160 10×10.2 0.3 220 12.5×13.5 0.12 550 16×16.5 0.18 500
330
8×10.2 0.4 160 8×10.2 0.4 160 10×10.2 0.3 220
10×10.2 0.3 220
12.5×13.5 0.12 550
12.5×13.5 0.23 90
16×16.5 0.18 500
12.5×13.5 0.12 550 16×16.5 0.15 800
470
8×10.2 0.4 160 10×10.2 0.3 220 12.5×13.5 0.12 550 12.5×13.5 0.15 550
12.5×13.5 0.12 550
16×16.5 0.15 800 16×16.5 0.18 500
16×16.5 0.08 900
680
10×10.2 0.3 220 12.5×13.5 0.12 550 12.5×13.5 01.2 550 12.5×13.5 0.12 550 16×16.5 0.08 900 16×16.5 0.15 800
1000
12.5×13.5 0.12 550 12.5×13.5 0.12 550 12.5×13.5 0.12 550 16×16.5 0.08 900 16×16.5 0.08 900
1500
12.5×13.5 0.12 550 12.5×13.5 0.12 550 16×16.5 0.08 900 16×16.5 0.08 900
2200
12.5×13.5 0.12 550 16×16.5 0.08 900 16×165.0.08 900
3300
16×16.5 0.08 900 16×16.5 0.08 900
4700
16×16.5 0.08 900
Ripple current (mA r.m.s.)
(100
kHz,
125℃
)
Case size:
φD×
L (mm)
16×16.5
:EC-PCT series
(
Washable product
)
ESR (Ω)
Max at
100
kHz,
20℃
Upper: PCS series
Lower: PC series
■品番ご指定法/
HOW TO SPECIFY ITEM NUMBER
1
J EC-PC
471
M
静電容量許容差/
Capacitance Tolerance
静電容量記号/
Capacitance Symbol
シリーズ名/
Series Name
定格電圧/
Rated Voltage
■性 能
/PERFORMANCE SPECIFICATIONS
カ テ ゴ リ 温 度 範 囲
静 電 容 量 許 容 差
漏 れ 電 流(最 大 値
)
損 失 角 の 正 接(最 大 値
)
(tan
δ
)
耐 久 性
6.3~50V:2000
hrs
(φD=6.3
1000
hrs)
63V~
100V:1500
hrs
125℃
定格電圧印加
CATEGORY TEMPERATUR RANGE
STANDARD CAPACITANCE TOLERANCE
LEAKAGE CURRENT (MAX. VALUE)
DESSIPATION FACTOR (MAX.VALUE)
(tan
δ
)
ENDURANCE
6.3~50V:2000
hrs
(φD=6.3
1000
hrs)
63V~
100V:1500
hrs
APPLICATION OF RATED VOLTAGE
AT
125℃
−55℃〜+125℃
−20%〜+20
%
I=
0.01
CV 3μA WHICHEVER C=RATED CAPACITANCE(μF)
IS THE GRATER (after
2
minutes) V=RATED VOLTAGE(V)
定格静電容量が1,000μFをこえるものは、1,000μF増すごとに上記の値に
0.02を加える
When the capacitance exceed 1,
000μ
F, the value of tanδ is increased
by 0.02 for each increment of 1,
000μ
F or its fraction.
CAPACITANCE CHANGE: LESS THAN
30
% OF THE INITIAL
MEASURED VALUE
DISSIPATION FACTOR: LESS THAN
200
% OF THE INITIAL
SPECIFIED VALUE
LEAKAGE CURRENT: LESS THAN THE INITIAL SPECIFIED VALUE
W.V.6.
3 10 16 25 35 50 63 100
tanδ0.30 0.24 0.20 0.16 0.14 0.14 0.12 0.10
Page 30
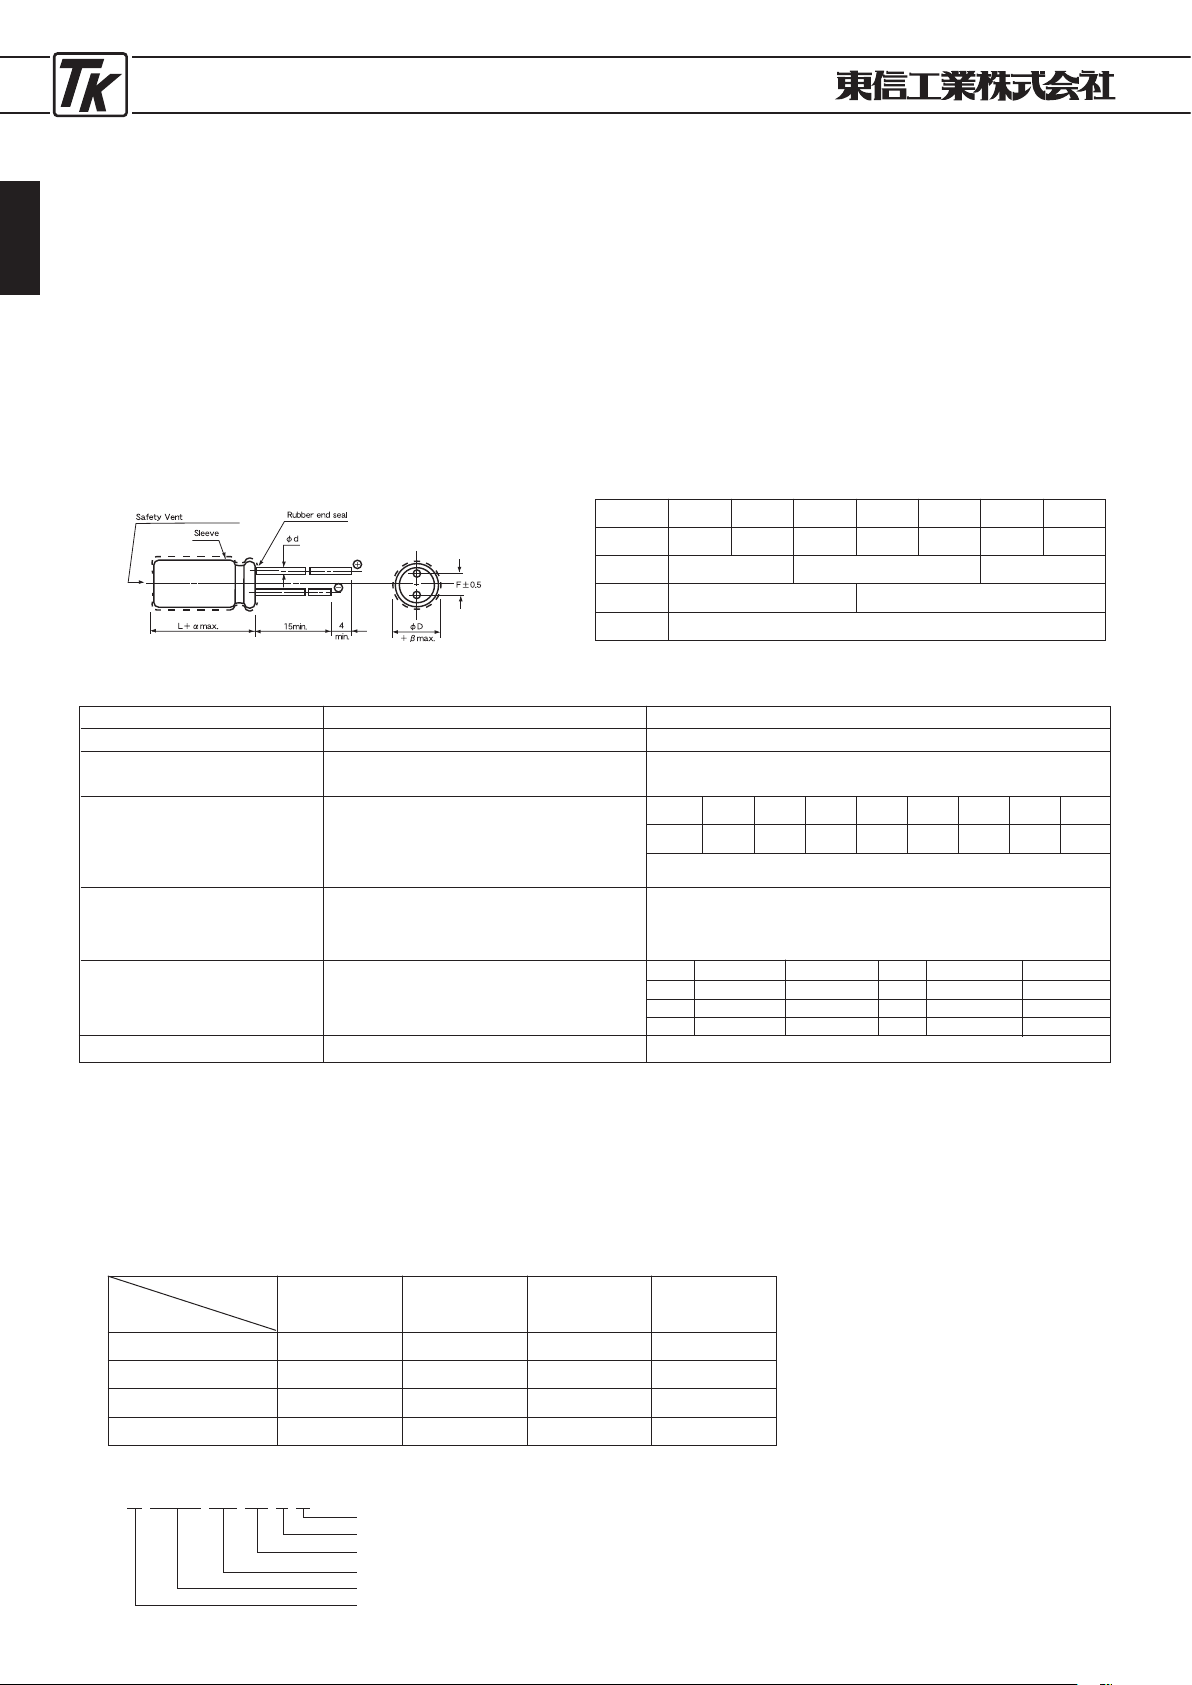
ELECTROLYTIC CAPACITORS
30
●低インピーダンス品 ●
LOW-IMPEDANCE TYPE
■特 徴
UTWKZシリーズ
JIS C
5101
CE-
04
(耐洗浄品)
TYPEUTWKZ
JIS C
5101
CE-
04
(
Washable product
)
・非4級塩系の電解液を使用し、高周波平滑用として
設計した 製品です。特に高周波の インピー ダンス
を低く抑えてあります。
・寿命特性 も105℃ 5 000時間を保 証した高安定化
製品です。
(
但しφ5、φ6.3、φ8は2000時間、φ10
は4000時間保証)
■
FEATURES
・
This is a product for high-frequency smoothing, in which
non-quaternary salt electrolyte is used.
Especially, the impedance of high frequency is kept low.
・
This product is highly stable with the guaranteed service life of
5000
hours at
105℃
.
(φ5, φ6.3
, and φ8 :
2000
hrs ,
φ10
:
4000
hrs)
■寸法図
/DIAGRAM OF DIMENSIONS
(D
≧φ6.3
)
Unit : mm
φ
D
F
φ
d
α
β
5
2
.
0
0
.
5 0.6
1.0 L<20:1.5 L≧20:2
0.5
0.8
6
.
3
2
.
5
8
3
.
5
10
5
.
0
12
.
5
5
.
0
16
7
.
5
18
7
.
5
■性 能
/PERFORMANCE SPECIFICATIONS
カ テ ゴ リ 温 度 範 囲
標 準 静 電 容 量 許 容 差
漏 れ 電 流 ( 最 大 値 )
損 失 角 の 正 接 ( 最 大 値 )
(
tan δ)
耐 久 性
105℃
5000時間
定格使用電圧印加
低 温 特 性
+20℃における120
Hz
の
インピーダンスに対する比
(最大値)
その他の 特性は
JI S C
5101-4に準ず る
CATEGORY TEMPERATURE RANGE
STANDARD CAPACITANCE TOLERANCE
LEAKAGE CURRENT (MAX. VALUE)
DISSIPATION FACTOR (MAX. VALUE)
ENDURANCE
APPLICATION OF RATED OPERATING
VOLTAGE, AT
105℃
FOR
5000
HOURS.
(φD≦8
:
2000
Hr,
φ10
:
4000
Hr)
LOW TEMPERATURE STABILITY
RATIO OF IMPEDANCE AT COLD TO
THAT AT
20℃, 120
Hz. MAX. VALUE.
THE OTHER CHARACTERISTICS
−55℃〜+105℃
−20%〜+20%
(
120
Hz)
I=0.01CV OR 3μA WHICHEVER
IS THE GREATER (after
2
minutes)
When the capacitance exceed
1,000μ
F, the value of tanδ is increased by
0.02
for each increment of 1,
000μ
F or its fraction.
CAPACITANCE CHANGE : LESS THAN
20%
OF THE INITIAL
MEASURED VALUE.
DISSIPATION FACTOR : LESS THAN
200%
OF THE INITIAL
SPECIFIED VALUE.
LEAKAGE CURRENT : LESS THAN THE INITIAL SPECIFIED VALUE.
THE OTHER CHARACTERISTICS ARE BASED ON JIS C
5101-4
C=RATED CAPACITANCE (μF)
V
=
WORKING VOLTAGE (V)
W. V
tan
δ
6
.
3
0
.
22
10
0
.
19
16
0
.
16
25
0
.
14
35
0
.
12
50
0
.
10
63
0
.
09
100
0
.
08
W. V
6.3
10
16
■定格リプル電流補正係数
リプル周波数が標準品一覧表の規定値と異なる場合には、下表の係数を乗じた値以下でご使用下さい。
When the ripple frequency differs from the specification shown in the list of standard products, multiply the value with the
coefficient shown below, and use the products under the obtained value.
周波数補正係数
/FREQUENCY CORRECTION FACTOR
(φD≦8 :
2000時間, φ10
:
4000時間
)
−25℃/+20℃
2
2
2
( )
(
)
W. V
25
35
50
−55℃/+20℃
5
5
4
−25℃/+20℃
2
2
2
−55℃/+20℃
3
3
3
Cap. (μF)
12 〜
27
33 〜
330
390
〜
1000
1200
〜
6800
120
0
.
55
0
.
70
0
.
80
0
.
90
1
K
0.80
0
.
90
0
.
95
0
.
98
10
K
0.90
0
.
95
1
.
00
1
.
00
100
K
1.00
1
.
00
1
.
00
1
.
00
Freq. (Hz)
■品番ご指定法/
HOW TO SPECIFY ITEM NUMBER
0
J UTWKZ □□
121
M
□
付記コード/
Additional Code
静電容量許容差/
Capacitance Tolerance
静電容量記号/
Capacitance Symbol
形状記号/
Style Symbol
シリーズ名/
Series Name
定格電圧/
Rated Voltage
Page 31
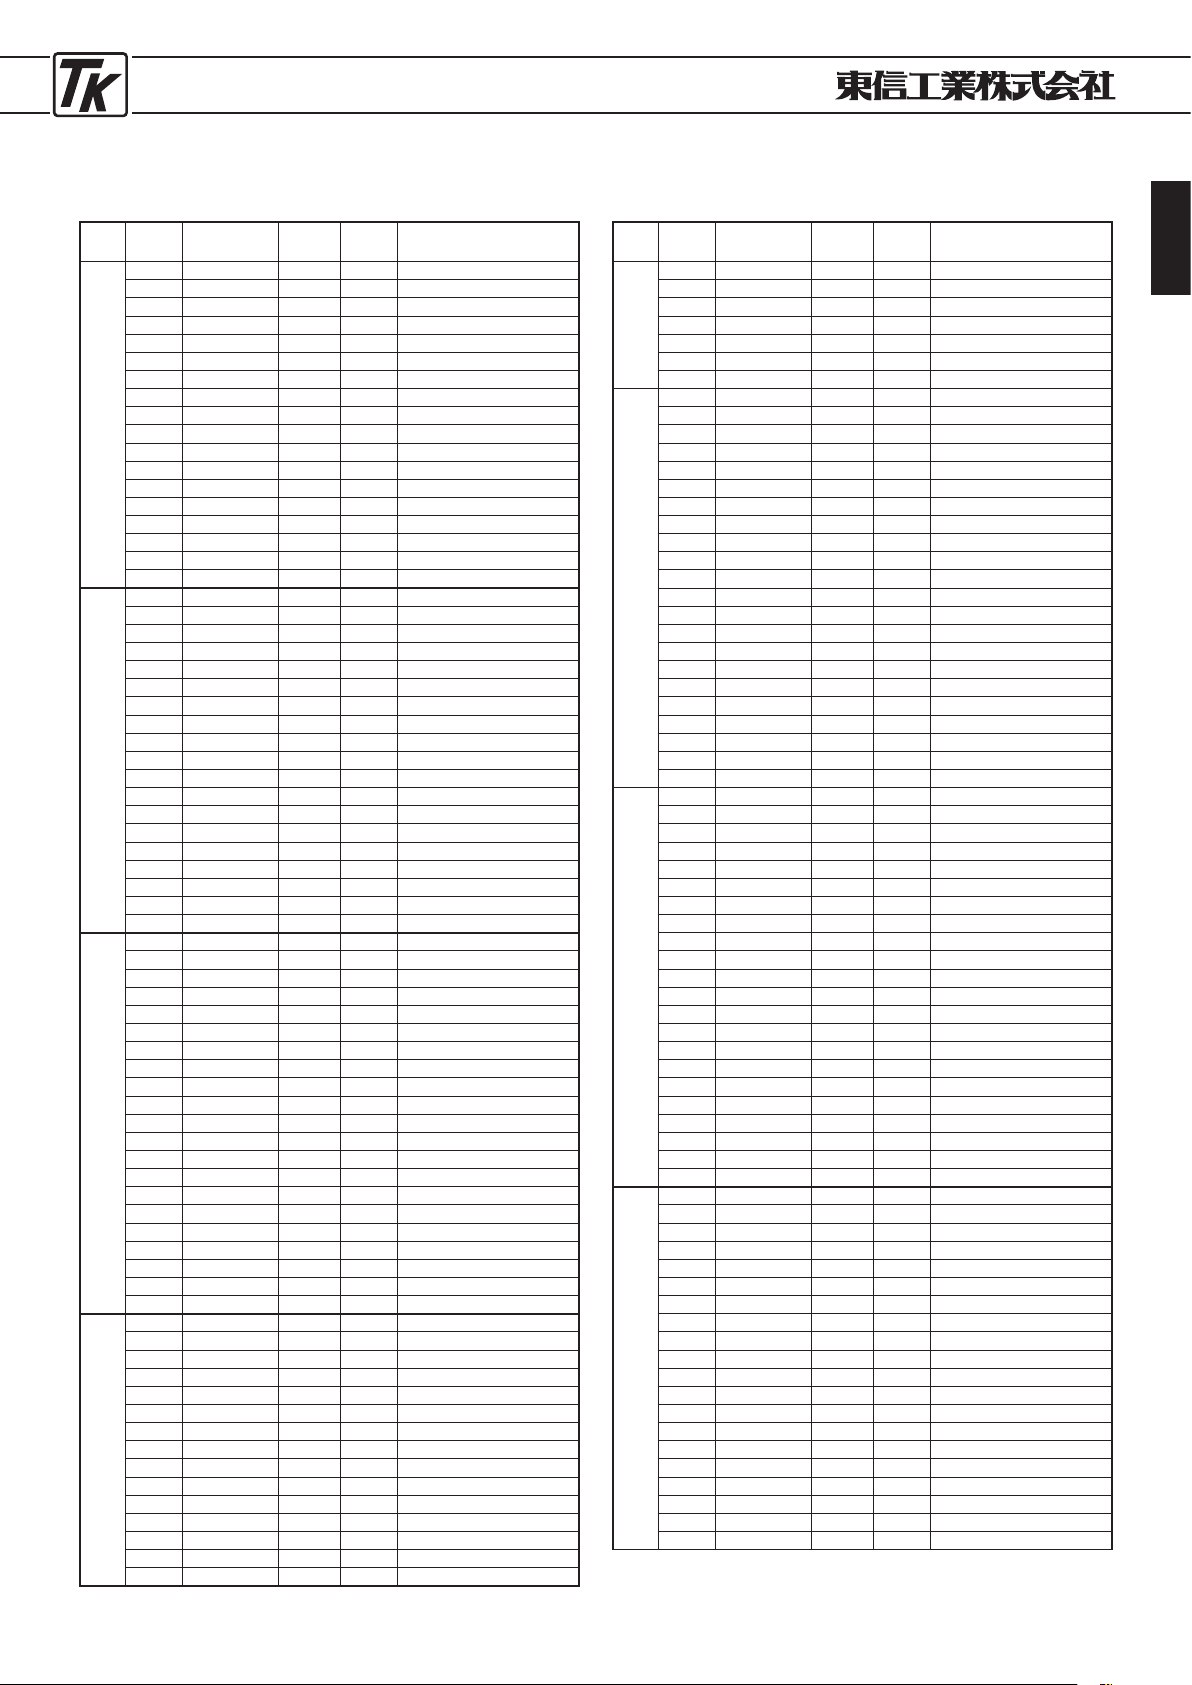
ELECTROLYTIC CAPACITORS
31
W.V
(vdc)
Cap
(
μ
F)
ΦD×
L
(mm)
Impedance
Ripple
品番
6
.
3
120 5× 11 0.720 165 0
JUTWKZ
□□121M0
220 6.3×11 0.380 255 0
JUTWKZ
□□221M0
330 6.3×15 0.270 330 0
JUTWKZ
□□331M0
390 8× 11.5 0.200 415 0
JUTWKZ
□□391M0
470 10×12.5 0.120 625 0
JUTWKZ
□□471M0
560 8× 15 0.160 495 0
JUTWKZ
□□561M0
680 10×16 0.084 825 0
JUTWKZ
□□681M0
820 8× 20 0.110 640 0
JUTWKZ
□□821M0
1200 10×20 0.062 1040 0
JUTWKZ
□□122M0
1500 10×25 0.052 1260 0
JUTWKZ
□□152M0
2200 10×30 0.044 1440 0
JUTWKZ
□□222M0G30
2200 12.5×20 0.046 1340 0
JUTWKZ
□□222M0H20
2700 12.5×25 0.034 1690 0
JUTWKZ
□□272M0
3900 12.5×30 0.030 1950 0
JUTWKZ
□□392M0
4700 12.5×35 0.027 2200 0
JUTWKZ
□□472M0
5600 12.5×40 0.024 2390 0
JUTWKZ
□□562M0H40
5600 16×25 0.028 2070 0
JUTWKZ
□□562M0K25
6800 16×31.5 0.025 2350 0
JUTWKZ
□□682M0
10
82 5× 11 0.720 165 1
AUTWKZ
□□820M0
220 6.3×11 0.380 255 1
AUTWKZ
□□221M0E11
270 6.3×15 0.270 330 1
AUTWKZ
□□271M0
330 8× 11.5 0.200 415 1
AUTWKZ
□□331M0
390 10×12.5 0.120 625 1
AUTWKZ
□□391M0
470 8× 15 0.160 495 1
AUTWKZ
□□471M0
680 8× 20 0.110 640 1
AUTWKZ
□□681M0F20
680 10×16 0.084 825 1
AUTWKZ
□□681M0G16
1000 10×20 0.062 1040 1
AUTWKZ
□□102M0
1200 10×25 0.052 1260 1
AUTWKZ
□□122M0
1500 10×30 0.044 1440 1
AUTWKZ
□□152M0
1800 12.5×20 0.046 1340 1
AUTWKZ
□□182M0
2200 12.5×25 0.034 1690 1
AUTWKZ
□□222M0
2700 12.5×30 0.030 1950 1
AUTWKZ
□□272M0
3300 12.5×35 0.027 2200 1
AUTWKZ
□□332M0
3900 12.5×40 0.024 2390 1
AUTWKZ
□□392M0H40
3900 16×25 0.028 2070 1
AUTWKZ
□□392M0K25
5600 16×31.5 0.025 2350 1
AUTWKZ
□□562M0
6800 16×35.5 0.022 2550 1
AUTWKZ
□□682M0
16
56 5× 11 0.720 165 1
CUTWKZ
□□560M0
120 6.3×11 0.380 255 1
CUTWKZ
□□121M0
180 6.3×15 0.270 330 1
CUTWKZ
□□181M0
270 8× 11.5 0.200 415 1
CUTWKZ
□□271M0F11
270 10×12.5 0.120 625 1
CUTWKZ
□□271M0G12
330 8× 15 0.160 495 1
CUTWKZ
□□331M0
470 8× 20 0.110 640 1
CUTWKZ
□□471M0F20
470 10×16 0.084 825 1
CUTWKZ
□□471M0G16
680 10×20 0.062 1040 1
CUTWKZ
□□681M0
820 10×25 0.052 1260 1
CUTWKZ
□□821M0
1200 10×30 0.044 1440 1
CUTWKZ
□□122M0G30
1200 12.5×20 0.046 1340 1
CUTWKZ
□□122M0H20
1500 12.5×25 0.034 1690 1
CUTWKZ
□□152M0
2200 12.5×30 0.030 1950 1
CUTWKZ
□□222M0
2700 12.5×35 0.027 2200 1
CUTWKZ
□□272M0H35
2700 16×25 0.028 2070 1
CUTWKZ
□□272M0K25
3300 12.5×40 0.024 2390 1
CUTWKZ
□□332M0
3900 16×31.5 0.025 2350 1
CUTWKZ
□□392M0
4700 16×35.5 0.022 2550 1
CUTWKZ
□□472M0
5600 16×40 0.018 2900 1
CUTWKZ
□□562M0
6800 18×35.5 0.021 2660 1
CUTWKZ
□□682M0
25
39 5× 11 0.720 165 1
EUTWKZ
□□390M0
82 6.3×11 0.380 255 1
EUTWKZ
□□820M0
120 6.3×15 0.270 330 1
EUTWKZ
□□121M0
150 8× 11.5 0.200 415 1
EUTWKZ
□□151M0
180 10×12.5 0.120 625 1
EUTWKZ
□□181M0
220 8× 15 0.160 495 1
EUTWKZ
□□221M0
330 8× 20 0.110 640 1
EUTWKZ
□□331M0F20
330 10×16 0.084 825 1
EUTWKZ
□□331M0G16
470 10×20 0.062 1040 1
EUTWKZ
□□471M0
560 10×25 0.052 1260 1
EUTWKZ
□□561M0G25
820 10×30 0.044 1440 1
EUTWKZ
□□821M0G30
820 12.5×20 0.046 1340 1
EUTWKZ
□□821M0
1000 12.5×25 0.034 1690 1
EUTWKZ
□□102M0
1500 12.5×30 0.030 1950 1
EUTWKZ
□□152M0
1800 12.5×35 0.027 2200 1
EUTWKZ
□□182M0H35
■寸法表/
CASE SIZE TABLE
■
Impedance [Max.Value Ω] at
20℃ 100
kHz
■
Ripple Current [Max.Value mA] at
105℃ 100
kHz
(
mm)
・□□には端子加工・テーピング記号が入ります。バルク品の場合は空白となります。
□□
:Enter the appropriate lead forming or taping code. The bulk item is a blank.
・この寸法表にないカスタム品も製造いたしますので、ご相談下さい。
Produce custom product too, which are not found in these tables.
W.V
(vdc)
Cap
(
μ
F)
ΦD×
L
(mm)
Impedance
Ripple
品番
25
1800 16× 25 0.028 2070 1
EUTWKZ
□□182M0
2200 12.5× 40 0.024 2390 1
EUTWKZ
□□222M0
2700 16× 31.5 0.025 2350 1
EUTWKZ
□□272M0
3300 16× 35.5 0.022 2550 1
EUTWKZ
□□332M0
3900 16× 40 0.018 2900 1
EUTWKZ
□□392M0K40
3900 18× 35.5 0.021 2660 1
EUTWKZ
□□392M0M35
4700 18× 40 0.017 3010 1
EUTWKZ
□□472M0
35
27 5× 11 0.720 165 1
VUTWKZ
□□270M0
56 6.3× 11 0.380 255 1
VUTWKZ
□□560M0
82 6.3× 15 0.270 330 1
VUTWKZ
□□820M0
120 8× 11.5 0.200 415 1
VUTWKZ
□□121M0F11
120 10× 12.5 0.120 625 1
VUTWKZ
□□121M0G12
180 8× 15 0.160 495 1
VUTWKZ
□□181M0
220 8× 20 0.110 640 1
VUTWKZ
□□221M0F20
220 10× 16 0.084 825 1
VUTWKZ
□□221M0G16
330 10× 20 0.062 1040 1
VUTWKZ
□□331M0
390 10× 25 0.052 1260 1
VUTWKZ
□□391M0
560 10× 30 0.044 1440 1
VUTWKZ
□□561M0G30
560 12.5× 20 0.046 1340 1
VUTWKZ
□□561M0H20
680 12.5× 25 0.034 1690 1
VUTWKZ
□□681M0
1000 12.5× 30 0.030 1950 1
VUTWKZ
□□102M0
1200 12.5× 35 0.027 2200 1
VUTWKZ
□□122M0H35
1200 16× 25 0.028 2070 1
VUTWKZ
□□122M0
1500 12.5× 40 0.024 2390 1
VUTWKZ
□□152M0
1800 16× 31.5 0.025 2350 1
VUTWKZ
□□182M0
2200 16× 35.5 0.022 2550 1
VUTWKZ
□□222M0
2700 16× 40 0.018 2900 1
VUTWKZ
□□272M0K40
2700 18× 35.5 0.021 2660 1
VUTWKZ
□□272M0M35
3300 18× 40 0.010 3010 1
VUTWKZ
□□332M0
50
18 5× 11 1.100 130 1
HUTWKZ
□□180M0
39 6.3× 11 0.560 220 1
HUTWKZ
□□390M0
56 6.3× 15 0.410 310 1
HUTWKZ
□□560M0
68 8× 11.5 0.290 340 1
HUTWKZ
□□680M0
82 8× 15 0.250 470 1
HUTWKZ
□□820M0F15
82 10× 12.5 0.160 480 1
HUTWKZ
□□820M0G12
120 8× 20 0.180 610 1
HUTWKZ
□□121M0F20
120 10× 16 0.120 755 1
HUTWKZ
□□121M0G16
180 10× 20 0.088 945 1
HUTWKZ
□□181M0
220 10× 25 0.068 1150 1
HUTWKZ
□□221M0
330 10× 30 0.059 1260 1
HUTWKZ
□□331M0G30
330 12.5× 20 0.059 1190 1
HUTWKZ
□□331M0H20
470 12.5× 25 0.045 1490 1
HUTWKZ
□□471M0
560 12.5× 30 0.039 1720 1
HUTWKZ
□□561M0
680 12.5× 35 0.033 1890 1
HUTWKZ
□□681M0
820 12.5× 40 0.029 2030 1
HUTWKZ
□□821M0H40
820 16× 25 0.033 1880 1
HUTWKZ
□□821M0K25
1000 16× 31.5 0.029 2150 1
HUTWKZ
□□102M0
1200 16× 35.5 0.025 2320 1
HUTWKZ
□□122M0
1500 16× 40 0.021 2540 1
HUTWKZ
□□152M0
1800 18× 35.5 0.023 2400 1
HUTWKZ
□□182M0
2200 18× 40 0.020 2610 1
HUTWKZ
□□222M0
63
12 5× 11 1.900 100 1
JUTWKZ
□□120M0
27 6.3× 11 1.100 160 1
JUTWKZ
□□270M0
39 6.3× 15 0.620 230 1
JUTWKZ
□□390M0
47 8× 11.5 0.490 275 1
JUTWKZ
□□470M0
56 10× 12.5 0.270 420 1
JUTWKZ
□□560M0
68 8× 15 0.340 360 1
JUTWKZ
□□680M0F15
68 10× 16 0.210 523 1
JUTWKZ
□□680M0G16
82 8× 20 0.210 500 1
JUTWKZ
□□820M0
120 10× 20 0.160 650 1
JUTWKZ
□□121M0
150 10× 25 0.130 780 1
JUTWKZ
□□151M0
180 10× 30 0.100 960 1
JUTWKZ
□□181M0
220 12.5× 20 0.110 870 1
JUTWKZ
□□221M0
270 12.5× 25 0.074 1150 1
JUTWKZ
□□271M0
390 12.5× 30 0.068 1280 1
JUTWKZ
□□391M0
470 12.5× 35 0.630 1390 1
JUTWKZ
□□471M0H35
470 16× 25 0.055 1480 1
JUTWKZ
□□471M0K25
560 12.5× 40 0.051 1530 1
JUTWKZ
□□561M0
680 16× 31.5 0.046 1720 1
JUTWKZ
□□681M0
820 16× 35.5 0.040 1910 1
JUTWKZ
□□821M0
1000 18× 35.5 0.040 1970 1
JUTWKZ
□□102M0
Page 32
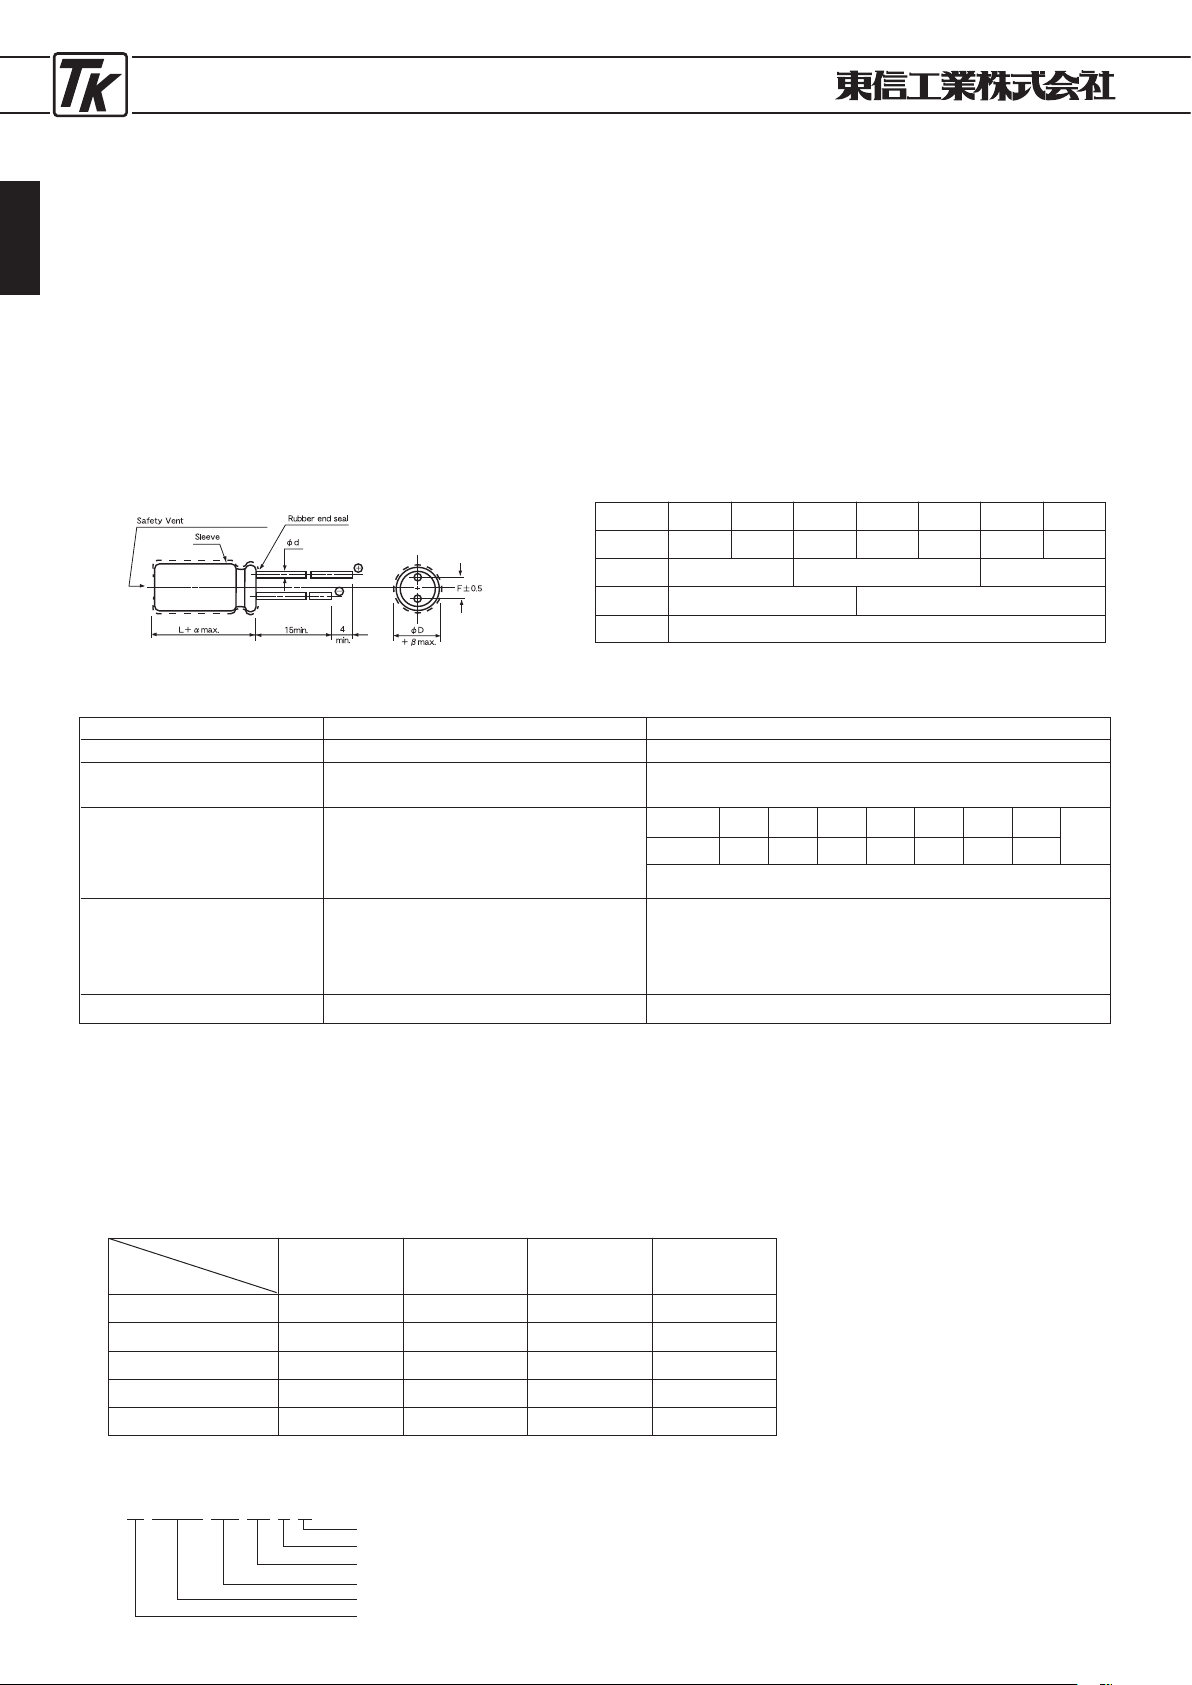
ELECTROLYTIC CAPACITORS
32
●低インピーダンス品 ●
LOW-IMPEDANCE TYPE
■特 徴
UTWXZシリーズ
JIS C
5101
CE-
04
(耐洗浄品)
TYPEUTWXZ
JIS C
5101
CE-
04
(
Washable product
)
・高周波平滑用として設計した製品です。特に高周
波のリプル電流とインピーダンスを更に低く抑え
てあります。
・寿命特性も105℃ 6000時間を保証した高安定化
製品です。(但しφ5、φ6.3は3000時間、φ8は
4000時間、φ10は5000時間保証)
■
FEATURES
・
This is a product for high-frequency smoothing. Especially, the
impedance and the ripple current of high frequency is kept
more lower.
・
This product is highly stable with the guaranteed service life of
6000
hours at
105℃
. (φ5, φ6.3 :
3000
hrs , φ8 :
4000
hrs ,
φ10
: 5,
000
hrs)
■寸法図
/DIAGRAM OF DIMENSIONS
(D
≧φ6.3
orφ8)
Unit : mm
■性 能
/PERFORMANCE SPECIFICATIONS
カ テ ゴ リ 温 度 範 囲
標 準 静 電 容 量 許 容 差
漏 れ 電 流 ( 最 大 値 )
損 失 角 の 正 接 ( 最 大 値 )
(
tan δ)
耐 久 性
105℃
6000時間
定格使用電圧印加
その他の 特性は
JI S C
5101-4に準ず る
CATEGORY TEMPERATURE RANGE
STANDARD CAPACITANCE TOLERANCE
LEAKAGE CURRENT (MAX. VALUE)
DISSIPATION FACTOR (MAX. VALUE)
ENDURANCE
APPLICATION OF RATED OPERATING
VOLTAGE, AT
105℃
FOR
6000
HOURS.
φD≦6.3
:
3000
Hr, φ8 :
4000
Hr
φ10
:
5000
Hr
THE OTHER CHARACTERISTICS
−55℃〜+105℃
−20%〜+20%
(
120
Hz)
I=0.01CV OR 3μA WHICHEVER
IS THE GREATER (after
2
minutes)
When the capacitance exceed
1,000μ
F, the value of tanδ is increased by
0.02
for each increment of 1,
000μ
F or its fraction.
CAPACITANCE CHANGE
: LESS THAN
25%
OF THE INITIAL
MEASURED VALUE.
DISSIPATION FACTOR : LESS THAN
200%
OF THE INITIAL
SPECIFIED VALUE.
LEAKAGE CURRENT :
LESS THAN THE INITIAL SPECIFIED VALUE.
THE OTHER CHARACTERISTICS ARE BASED ON JIS C
5101-4
C=RATED CAPACITANCE (μF)
V
=
WORKING VOLTAGE (V)
W. V
tan
δ
6
.
3
0.22100.19160.16250.14350.12500.10630.09
■定格リプル電流補正係数
リプル周波数が標準品一覧表の規定値と異なる場合には、下表の係数を乗じた値以下でご使用下さい。
When the ripple frequency differs from the specification shown in the list of standard products, multiply the value with the
coefficient shown below, and use the products under the obtained value.
周波数補正係数
/FREQUENCY CORRECTION FACTOR
φD≦6.3
:
3000時間, φ8
:
4000時間
φ10
:
5000時間
( )
( )
φ
D
F
φ
d
α
β
5
2
.
0
0.5 0.6
1
.
0 L< 20:1.5 L≧ 20:2
0
.
5
0
.
8
6
.
3
2
.
5
8
3
.
5
10
5
.
0
12
.
5
5
.
0
16
7
.
5
18
7
.
5
Cap. (μF)
120
6
.8 〜
33
39
〜
270
330
〜
680
820
〜
1800
2200
〜
15000
0
.
42
0
.
50
0
.
55
0
.
60
0
.
70
1
K
0.70
0
.
73
0
.
77
0
.
80
0
.
85
10
K
0.90
0
.
92
0
.
94
0
.
96
0
.
98
100
K
1.0
1
.
0
1
.
0
1
.
0
1
.
0
Freq. (Hz)
■品番ご指定法/
HOW TO SPECIFY ITEM NUMBER
1
A UTWXZ □□
102
M
□
付記コード/
Additional Code
静電容量許容差/
Capacitance Tolerance
静電容量記号/
Capacitance Symbol
形状記号/
Style Symbol
シリーズ名/
Series Name
定格電圧/
Rated Voltage
Page 33
ELECTROLYTIC CAPACITORS
33
■寸法表/
CASE SIZE TABLE
■
Impedance [Max.Value Ω] at
20℃ 100
kHz
■
Ripple Current [Max.Value mA] at
105℃ 100
kHz
W.V
(vdc)
Cap
(
μ
F)
ΦD×
L
(mm)
Impedance
Ripple
品番
6
.
3
100 5× 11 0.600 180 0
JUTWXZ
□□101M0
330 6.3×11 0.250 290 0
JUTWXZ
□□331M0
330 6.3×15 0.230 430 0
JUTWXZ
□□331M0E15
560 8× 11.5 0.117 555 0
JUTWXZ
□□561M0
820 8× 15 0.085 730 0
JUTWXZ
□□821M0
1000 10×12.5 0.090 755 0
JUTWXZ
□□102M0
1200 8× 20 0.065 955 0
JUTWXZ
□□122M0F20
1200 10×16 0.068 1050 0
JUTWXZ
□□122M0
1500 10×20 0.052 1220 0
JUTWXZ
□□152M0
2200 10×25 0.045 1440 0
JUTWXZ
□□222M0
2700 10×30 0.035 1815 0
JUTWXZ
□□272M0
3300 12.5×20 0.038 1655 0
JUTWXZ
□□332M0
3900 12.5×25 0.030 1945 0
JUTWXZ
□□392M0
4700 12.5×30 0.025 2310 0
JUTWXZ
□□472M0
5600 12.5×35 0.022 2510 0
JUTWXZ
□□562M0H35
5600 16×20 0.029 2205 0
JUTWXZ
□□562M0
6800 16×25 0.022 2555 0
JUTWXZ
□□682M0
8200 16×31.5 0.018 3010 0
JUTWXZ
□□822M0
10000 18×25 0.020 2740 0
JUTWXZ
□□103M0
12000 18×31.5 0.016 3635 0
JUTWXZ
□□123M0
15000 18×35.5 0.015 3680 0
JUTWXZ
□□153M0
10
100 5× 11 0.600 180 1
AUTWXZ
□□101M0
220 6.3×11 0.250 290 1
AUTWXZ
□□221M0
220 6.3×15 0.230 430 1
AUTWXZ
□□221M0E15
470 8× 11.5 0.117 555 1
AUTWXZ
□□471M0
680 8× 15 0.085 730 1
AUTWXZ
□□681M0F15
680 10×12.5 0.090 755 1
AUTWXZ
□□681M0
1000 8× 20 0.065 955 1
AUTWXZ
□□102M0F20
1000 10×16 0.068 1050 1
AUTWXZ
□□102M0
1500 10×20 0.052 1220 1
AUTWXZ
□□152M0
1500 10×25 0.045 1440 1
AUTWXZ
□□152M0G25
2200 10×30 0.035 1815 1
AUTWXZ
□□222M0G30
2200 12.5×20 0.038 1655 1
AUTWXZ
□□222M0
3300 12.5×25 0.030 1945 1
AUTWXZ
□□332M0
3300 12.5×30 0.025 2310 1
AUTWXZ
□□332M0H30
3900 12.5×35 0.022 2510 1
AUTWXZ
□□392M0H35
3900 16×20 0.029 2205 1
AUTWXZ
□□392M0
5600 16×25 0.022 2555 1
AUTWXZ
□□562M0
6800 16×31.5 0.018 3010 1
AUTWXZ
□□682M0
6800 18×25 0.020 2740 1
AUTWXZ
□□682M0M25
8200 16×35.5 0.016 3150 1
AUTWXZ
□□822M0K35
8200 18×31.5 0.016 3635 1
AUTWXZ
□□822M0
10000 18×35.5 0.015 3680 1
AUTWXZ
□□103M0
15000 18×40 0.014 3800 1
AUTWXZ
□□153M0
16
56 5× 11 0.600 180 1
CUTWXZ
□□560M0
150 6.3×11 0.250 290 1
CUTWXZ
□□151M0
180 6.3×15 0.230 430 1
CUTWXZ
□□181M0
330 8× 11.5 0.117 555 1
CUTWXZ
□□331M0
470 8× 15 0.085 730 1
CUTWXZ
□□471M0F15
470 10×12.5 0.090 755 1
CUTWXZ
□□471M0
680 8× 20 0.065 955 1
CUTWXZ
□□681M0F20
680 10×16 0.068 1050 1
CUTWXZ
□□681M0
1000 10×20 0.052 1220 1
CUTWXZ
□□102M0
1200 10×25 0.045 1440 1
CUTWXZ
□□122M0
1500 10×30 0.035 1815 1
CUTWXZ
□□152M0G30
1500 12.5×20 0.038 1655 1
CUTWXZ
□□152M0
2200 12.5×25 0.030 1945 1
CUTWXZ
□□222M0
2700 12.5×30 0.025 2310 1
CUTWXZ
□□272M0H30
2700 16×20 0.029 2205 1
CUTWXZ
□□272M0
3300 12.5×35 0.022 2510 1
CUTWXZ
□□332M0
3900 16×25 0.022 2555 1
CUTWXZ
□□392M0
4700 16×31.5 0.018 3010 1
CUTWXZ
□□472M0
4700 18×25 0.020 2740 1
CUTWXZ
□□472M0M25
5600 16×35.5 0.016 3150 1
CUTWXZ
□□562M0K35
5600 18×31.5 0.016 3635 1
CUTWXZ
□□562M0
8200 18×35.5 0.015 3680 1
CUTWXZ
□□822M0
10000 18×40 0.014 3800 1
CUTWXZ
□□103M0
25
47 5× 11 0.600 180 1
EUTWXZ
□□470M0
100 6.3×11 0.250 290 1
EUTWXZ
□□101M0
120 6.3×15 0.230 430 1
EUTWXZ
□□121M0
220 8× 11.5 0.117 555 1
EUTWXZ
□□221M0
330 8× 15 0.085 730 1
EUTWXZ
□□331M0F15
330 10×12.5 0.090 755 1
EUTWXZ
□□331M0
470 8× 20 0.065 955 1
EUTWXZ
□□471M0F20
470 10×16 0.068 1050 1
EUTWXZ
□□471M0
680 10×20 0.052 1220 1
EUTWXZ
□□681M0
820 10×25 0.045 1440 1
EUTWXZ
□□821M0
1000 10×30 0.035 1815 1
EUTWXZ
□□102M0G30
1000 12.5×20 0.038 1655 1
EUTWXZ
□□102M0
(
mm)
・□□には端子加工・テーピング記号が入ります。バルク品の場合は空白となります。
□□
:Enter the appropriate lead forming or taping code. The bulk item is a blank.
・この寸法表にないカスタム品も製造いたしますので、ご相談下さい。
Produce custom product too, which are not found in these tables.
W.V
(vdc)
Cap
(
μ
F)
ΦD×
L
(mm)
Impedance
Ripple
品番
25
1500 12.5×25 0.030 1945 1
EUTWXZ
□□152M0
1800 12.5×30 0.025 2310 1
EUTWXZ
□□182M0H30
1800 16×20 0.029 2205 1
EUTWXZ
□□182M0
2200 12.5×35 0.022 2510 1
EUTWXZ
□□222M0
2700 16×25 0.022 2555 1
EUTWXZ
□□272M0
3300 16×31.5 0.018 3010 1
EUTWXZ
□□332M0
3300 18×25 0.020 2740 1
EUTWXZ
□□332M0M25
3900 16×35.5 0.016 3150 1
EUTWXZ
□□392M0K35
3900 18×31.5 0.016 3635 1
EUTWXZ
□□392M0
4700 18×35.5 0.015 3680 1
EUTWXZ
□□472M0
6800 18×40 0.014 3800 1
EUTWXZ
□□682M0
35
33 5× 11 0.600 180 1
VUTWXZ
□□330M0
56 6.3×11 0.250 290 1
VUTWXZ
□□560M0
82 6.3×15 0.230 430 1
VUTWXZ
□□820M0
150 8× 11.5 0.117 555 1
VUTWXZ
□□151M0
220 8× 15 0.085 730 1
VUTWXZ
□□221M0F15
220 10×12.5 0.090 755 1
VUTWXZ
□□221M0
330 8× 20 0.065 955 1
VUTWXZ
□□331M0F20
330 10×16 0.068 1050 1
VUTWXZ
□□331M0
470 10×20 0.052 1220 1
VUTWXZ
□□471M0
560 10×25 0.045 1440 1
VUTWXZ
□□561M0
680 10×30 0.035 1815 1
VUTWXZ
□□681M0G30
680 12.5×20 0.038 1655 1
VUTWXZ
□□681M0
1000 12.5×25 0.030 1945 1
VUTWXZ
□□102M0
1200 12.5×30 0.025 2310 1
VUTWXZ
□□122M0H30
1200 16×20 0.029 2205 1
VUTWXZ
□□122M0
1500 12.5×35 0.022 2510 1
VUTWXZ
□□152M0
1800 16×25 0.022 2555 1
VUTWXZ
□□182M0
2200 16×31.5 0.018 3010 1
VUTWXZ
□□222M0
2200 18×25 0.020 2740 1
VUTWXZ
□□222M0M25
2700 16×35.5 0.016 3150 1
VUTWXZ
□□272M0K35
2700 18×31.5 0.016 3635 1
VUTWXZ
□□272M0
3300 18×35.5 0.015 3680 1
VUTWXZ
□□332M0
4700 18×40 0.014 3800 1
VUTWXZ
□□472M0
50
22 5× 11 1.200 170 1
HUTWXZ
□□220M0
47 6.3×11 0.430 300 1
HUTWXZ
□□470M0
56 6.3×15 0.400 360 1
HUTWXZ
□□560M0
100 8× 11.5 0.240 485 1
HUTWXZ
□□101M0
120 8× 15 0.160 635 1
HUTWXZ
□□121M0
150 10×12.5 0.160 615 1
HUTWXZ
□□151M0
180 8× 20 0.120 860 1
HUTWXZ
□□181M0
220 10×16 0.120 850 1
HUTWXZ
□□221M0
220 10×20 0.090 1030 1
HUTWXZ
□□221M0G20
270 10×25 0.082 1200 1
HUTWXZ
□□271M0
330 10×30 0.060 1610 1
HUTWXZ
□□331M0
470 12.5×20 0.060 1500 1
HUTWXZ
□□471M0
680 12.5×25 0.050 1832 1
HUTWXZ
□□681M0
680 16×20 0.048 1835 1
HUTWXZ
□□681M0K20
820 12.5×35 0.034 2285 1
HUTWXZ
□□821M0
1000 16×25 0.034 2235 1
HUTWXZ
□□102M0
1200 16×31.5 0.028 2700 1
HUTWXZ
□□122M0
1200 18×25 0.029 2610 1
HUTWXZ
□□122M0M25
1500 16×35.5 0.025 2790 1
HUTWXZ
□□152M0
1800 18×31.5 0.025 3000 1
HUTWXZ
□□182M0
2200 18×35.5 0.023 3100 1
HUTWXZ
□□222M0
63
12 5× 11 2.000 145 1
JUTWXZ
□□120M0
33 6.3×11 0.710 250 1
JUTWXZ
□□330M0
39 6.3×15 0.700 330 1
JUTWXZ
□□390M0
68 8× 11.5 0.340 405 1
JUTWXZ
□□680M0
100 8× 15 0.230 535 1
JUTWXZ
□□101M0F15
100 10×12.5 0.250 535 1
JUTWXZ
□□101M0
150 10×16 0.190 660 1
JUTWXZ
□□151M0
220 10×20 0.150 885 1
JUTWXZ
□□221M0
220 10×25 0.130 1050 1
JUTWXZ
□□221M0G25
330 12.5×20 0.085 1285 1
JUTWXZ
□□331M0
390 12.5×25 0.070 1720 1
JUTWXZ
□□391M0
470 12.5×30 0.055 2090 1
JUTWXZ
□□471M0
470 16×20 0.059 1765 1
JUTWXZ
□□471M0K20
560 16×25 0.050 2160 1
JUTWXZ
□□561M0
680 12.5×35 0.047 2265 1
JUTWXZ
□□681M0
820 16×31.5 0.043 2670 1
JUTWXZ
□□821M0
820 18×25 0.043 2585 1
JUTWXZ
□□821M0M25
1000 16×35.5 0.036 2770 1
JUTWXZ
□□102M0
1200 18×31.5 0.032 2950 1
JUTWXZ
□□122M0
1500 18×35.5 0.030 3095 1
JUTWXZ
□□152M0
2200 18×40 0.028 3200 1
JUTWXZ
□□222M0
Page 34
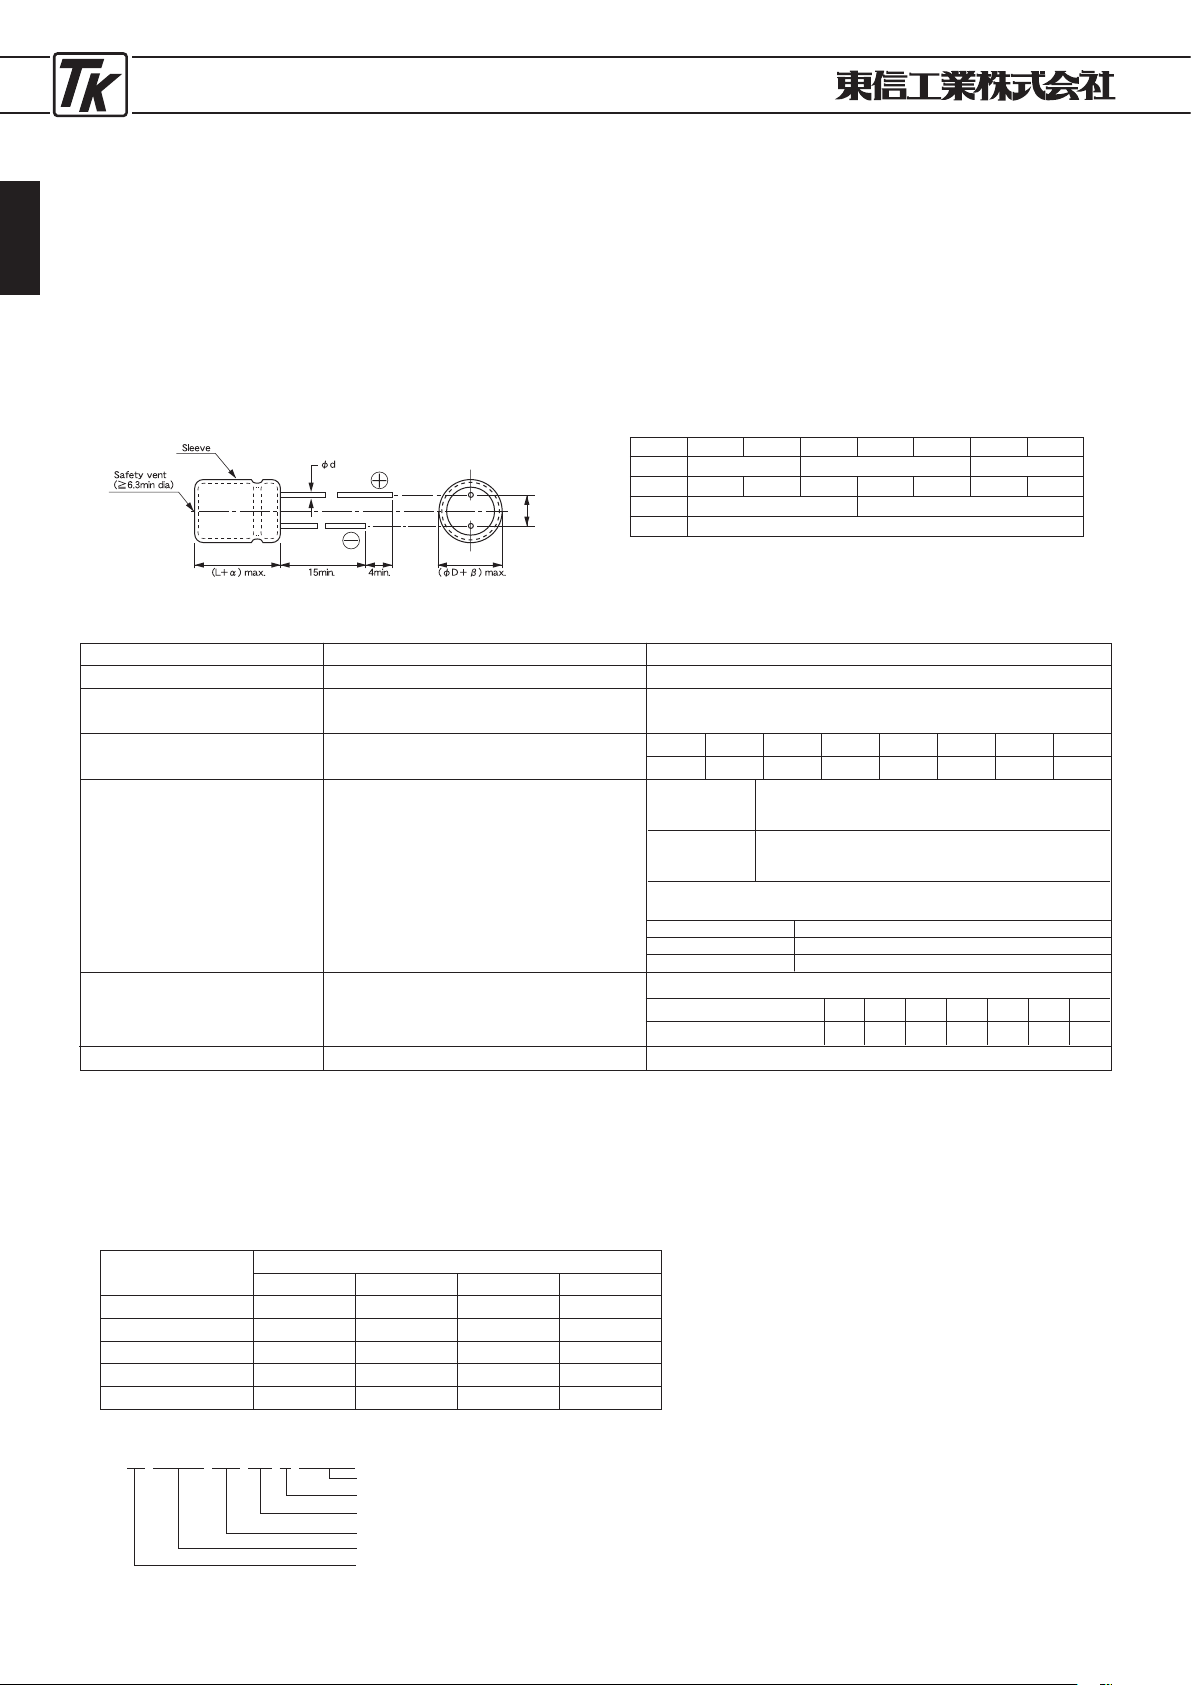
ELECTROLYTIC CAPACITORS
34
●高リプル・長寿命品(105℃
)
●
High Ripple Current & Long Life type(
105℃
)
■特 徴
UTWYZシリーズ
JIS C
5101
CE-
04
TYPEUTWYZ
JIS C
5101
CE-
04
・低
ESR
で、スイッチング電源に最適
・105℃ 4,000~10,000時間を保証
・高リプル小
形化品
■
FEATURES
・
Low ESR, For Switchng Power Supply.
・
This product is the guaranteed service life of 4,
000~10,000
hours
at
105℃
.
・
Smaller size with large permissible ripple current.
■寸法図
/DIAGRAM OF DIMENSIONS
■性 能
/PERFORMANCE SPECIFICATIONS
カ テ ゴ リ 温 度 範 囲
標 準 静 電 容 量 許 容 差
漏 れ 電 流 ( 最 大 値 )
損 失 角 の 正 接 ( 最 大 値 )
(
tan δ)
耐 久 性
低 温 特 性
+20℃における120
Hz
の
インピーダンスに対する比
(最大値)
その他の 特性は
JI S C
5101-4に準ず る
CATEGORY TEMPERATURE RANGE
STANDARD CAPACITANCE TOLERANCE
LEAKAGE CURRENT (MAX. VALUE)
DISSIPATION FACTOR (MAX. VALUE)
(
tan δ)
ENDURANCE
LOW TEMPERATURE STABILITY
RATIO OF IMPEDANCE AT COLD TO
THAT AT
20℃, 120
Hz. MAX. VALUE.
THE OTHER CHARACTERISTICS
−55℃〜+105℃
−20%〜+20%
(
20℃, 120
Hz)
I=0.01CV OR 3μA WHICHEVER
IS THE GREATER (after
2
minutes)
φD=5~6.3
mm: 4,
000
hrs
6.3〜10
V
φD=8~10
mm: 6,
000
hrs
φD≧12.5
mm: 8,
000
hrs
φD=5~6.3
mm: 5,
000
hrs
16〜63
V
φD=8~10
mm: 7,
000
hrs
φD≧12.5
mm: 10,
000
hrs
The other characteristics are based on JIS C
5101-4
.
C=RATED CAPACITANCE (μF)
V
=
WORKING VOLTAGE (V)
W. V
6.3 10 16 25 35 50 63
tan
δ 0.22 0.19 0.16 0.14 0.12 0.10 0.09
W.V.
6.3 10 16 25 35 50 63
Z
(−25℃)/Z(+20℃) 3 3 3 3 3 3 3
φD 5 6.3 8 10 12.5 16 18
φd 0.6
F 2.0 2.5 3.5 5.0 5.0 7.5 7.5
α
β 0.5
L<20:1
.
5 L≧20:21.0
0.5 0.8
■定格リプル電流補正係数
リプル周波数が標準品一覧表の規定値と異なる場合には、下表の係数を乗じた値以下でご使用下さい。
When the ripple frequency differs from the spicification shown in the list of standard products,multiply the value with the
coefficient shown below,and use the products under the obtained value.
周波数補正係数/
FREQUENCY CORRECTION FACTOR
Cap(μF
)
120 1
k
10
k
100
k up
〜 33 0.42 0.70 0.90 1.0
39 〜 270 0.50 0.73 0.92 1.0
330 〜 680 0.55 0.77 0.94 1.0
820 〜 1800 0.60 0.80 0.96 1.0
2200 〜 18000 0.70 0.85 0.96 1.0
Frequency(Hz)
After applying rated voltage at
105℃
The capacitors shall meet the following requirements.
Capacitance Change Within
±25
% of the intial value
Dissipation Facto Less than
200
% of the intial specified value
Leakage Cureent Less than the intial specified value
インピーダンス比/
Impedance ratio (at
120
Hz)
■品番ご指定法/
HOW TO SPECIFY ITEM NUMBER
1
C UTWYZ □□
272
M
□□□□
付記コード/
Additional Code
静電容量許容差/
Capacitance Tolerance
静電容量記号/
Capacitance Symbol
形状記号/
Style Symbol
シリーズ名/
Series Name
定格電圧/
Rated Voltage
F
±0
.
5
Page 35
ELECTROLYTIC CAPACITORS
35
■寸法表/
CASE SIZE TABLE
■
Inpedance[Max.Value Ω] at
20℃ 100
kHz
■
Ripple Curent [Max.Value mA] at
105℃ 100
kHz
W.V
(vdc)
Cap
(
μ
F)
ΦD×
L
(mm)
Impedance
Ripple
品番
6
.
3
150 5× 11 0.580 210 0
JUTWYZ
□□151M0D11
330 6.3×11 0.220 340 0
JUTWYZ
□□331M0E11
680 8× 11.5 0.130 640 0
JUTWYZ
□□681M0F11
820 10×12.5 0.080 865 0
JUTWYZ
□□821M0G12
1000 8× 15 0.087 840 0
JUTWYZ
□□102M0F15
1200 8× 20 0.069 1050 0
JUTWYZ
□□122M0F20
1200 10×16 0.060 1210 0
JUTWYZ
□□122M0G16
1500 10×20 0.046 1400 0
JUTWYZ
□□152M0G20
2200 10×25 0.042 1650 0
JUTWYZ
□□222M0G25
2700 10×30 0.031 1910 0
JUTWYZ
□□272M0G30
3300 12.5×20 0.035 1900 0
JUTWYZ
□□332M0H20
3900 12.5×25 0.027 2230 0
JUTWYZ
□□392M0H25
4700 12.5×30 0.024 2650 0
JUTWYZ
□□472M0H30
5600 12.5×35 0.020 2880 0
JUTWYZ
□□562M0H35
5600 16×20 0.027 2530 0
JUTWYZ
□□562M0K20
6800 16×25 0.021 2930 0
JUTWYZ
□□682M0K25
8200 16×31.5 0.017 3450 0
JUTWYZ
□□822M0K30
10000 16×35.5 0.015 3610 0
JUTWYZ
□□103M0K35
10000 18×25 0.019 3410 0
JUTWYZ
□□103M0M25
12000 18×31.5 0.015 4170 0
JUTWYZ
□□123M0M30
15000 18×35.5 0.014 4220 0
JUTWYZ
□□153M0M35
18000 18×40 0.012 4280 0
JUTWYZ
□□183M0M40
10
100 5× 11 0.580 210 1
AUTWYZ
□□101M0D11
220 6.3×11 0.220 340 1
AUTWYZ
□□221M0E11
470 8× 11.5 0.130 640 1
AUTWYZ
□□471M0F11
680 8× 15 0.087 840 1
AUTWYZ
□□681M0F15
680 10×12.5 0.080 865 1
AUTWYZ
□□681M0G12
1000 8× 20 0.069 1050 1
AUTWYZ
□□102M0F20
1000 10×16 0.060 1210 1
AUTWYZ
□□102M0G16
1200 10×20 0.046 1400 1
AUTWYZ
□□122M0G20
1500 10×25 0.042 1650 1
AUTWYZ
□□152M0G25
2200 10×30 0.031 1910 1
AUTWYZ
□□222M0G30
2200 12.5×20 0.035 1900 1
AUTWYZ
□□222M0H20
3300 12.5×25 0.027 2230 1
AUTWYZ
□□332M0H25
3900 12.5×30 0.024 2650 1
AUTWYZ
□□392M0H30
3900 16×20 0.027 2530 1
AUTWYZ
□□392M0K20
4700 12.5×35 0.020 2880 1
AUTWYZ
□□472M0H35
5600 16×25 0.021 2930 1
AUTWYZ
□□562M0K25
6800 16×31.5 0.017 3450 1
AUTWYZ
□□682M0K30
6800 18×25 0.019 3140 1
AUTWYZ
□□682M0M25
8200 16×35.5 0.015 3610 1
AUTWYZ
□□822M0K35
8200 18×31.5 0.015 4170 1
AUTWYZ
□□822M0M30
10000 18×35.5 0.014 4220 1
AUTWYZ
□□103M0M35
12000 18×40 0.012 4280 1
AUTWYZ
□□123M0M40
16
56 5× 11 0.580 210 1
CUTWYZ
□□560M0D11
120 6.3×11 0.220 340 1
CUTWYZ
□□121M0E11
330 8× 11.5 0.130 640 1
CUTWYZ
□□331M0F11
470 8× 15 0.087 840 1
CUTWYZ
□□471M0F15
470 10×12.5 0.080 865 1
CUTWYZ
□□471M0G12
680 8× 20 0.069 1050 1
CUTWYZ
□□681M0F20
680 10×16 0.060 1210 1
CUTWYZ
□□681M0G16
1000 10×20 0.046 1400 1
CUTWYZ
□□102M0G20
1200 10×25 0.042 1650 1
CUTWYZ
□□122M0G25
1500 10×30 0.031 1910 1
CUTWYZ
□□152M0G30
1500 12.5×20 0.035 1900 1
CUTWYZ
□□152M0H20
2200 12.5×25 0.027 2230 1
CUTWYZ
□□222M0H25
2700 12.5×30 0.024 2650 1
CUTWYZ
□□272M0H30
2700 16×20 0.027 2530 1
CUTWYZ
□□272M0K20
3300 12.5×35 0.020 2880 1
CUTWYZ
□□332M0H35
3900 16×25 0.021 2930 1
CUTWYZ
□□392M0K25
4700 16×31.5 0.017 3450 1
CUTWYZ
□□472M0K30
4700 18×25 0.019 3140 1
CUTWYZ
□□472M0M25
5600 16×35.5 0.015 3610 1
CUTWYZ
□□562M0K35
5600 18×31.5 0.015 4170 1
CUTWYZ
□□562M0M30
8200 18×35.5 0.014 4220 1
CUTWYZ
□□822M0M35
10000 18×40 0.012 4280 1
CUTWYZ
□□103M0M40
25
47 5× 11 0.580 210 1
EUTWYZ
□□470M0D11
100 6.3×11 0.220 340 1
EUTWYZ
□□101M0E11
220 8× 11.5 0.130 640 1
EUTWYZ
□□221M0F11
330 8× 15 0.087 840 1
EUTWYZ
□□331M0F15
330 10×12.5 0.080 865 1
EUTWYZ
□□331M0G12
470 8× 20 0.069 1050 1
EUTWYZ
□□471M0F20
470 10×16 0.060 1210 1
EUTWYZ
□□471M0G16
680 10×20 0.046 1400 1
EUTWYZ
□□681M0G20
820 10×25 0.042 1650 1
EUTWYZ
□□821M0G25
1000 10×30 0.031 1910 1
EUTWYZ
□□102M0G30
1000 12.5×20 0.035 1900 1
EUTWYZ
□□102M0H20
1500 12.5×25 0.027 2230 1
EUTWYZ
□□152M0H25
1800 12.5×30 0.024 2650 1
EUTWYZ
□□182M0H30
1800 16×20 0.027 2530 1
EUTWYZ
□□182M0K20
2200 12.5×35 0.020 2880 1
EUTWYZ
□□222M0H35
(
mm)
・□□には端子加工・テーピング記号が入ります。バルク品の場合は空白となります。
□□
:Enter the appropriate lead forming or taping code. The bulk item is a blank.
・この寸法表にないカスタム品も製造いたしますので、ご相談下さい。
Produce custom product too, which are not found in these tables.
W.V
(vdc)
Cap
(
μ
F)
ΦD×
L
(mm)
Impedance
Ripple
品番
25
2700 16×25 0.021 2930 1
EUTWYZ
□□272M0K25
3300 16×31.5 0.017 3450 1
EUTWYZ
□□332M0K30
3300 18×25 0.019 3140 1
EUTWYZ
□□332M0M25
3900 16×35.5 0.015 3610 1
EUTWYZ
□□392M0K35
3900 18×31.5 0.015 4170 1
EUTWYZ
□□392M0M30
4700 18×35.5 0.014 4220 1
EUTWYZ
□□472M0M35
5600 18×40 0.012 4280 1
EUTWYZ
□□562M0M40
35
33 5× 11 0.580 210 1
VUTWYZ
□□330M0D11
56 6.3×11 0.220 340 1
VUTWYZ
□□560M0E11
150 8× 11.5 0.130 640 1
VUTWYZ
□□151M0F11
220 8× 15 0.087 840 1
VUTWYZ
□□221M0F15
220 10×12.5 0.080 865 1
VUTWYZ
□□221M0G12
270 8× 20 0.069 1050 1
VUTWYZ
□□271M0F20
330 10×16 0.060 1210 1
VUTWYZ
□□331M0G16
470 10×20 0.046 1400 1
VUTWYZ
□□471M0G20
560 10×25 0.042 1650 1
VUTWYZ
□□561M0G25
680 10×30 0.031 1910 1
VUTWYZ
□□681M0G30
680 12.5×20 0.035 1900 1
VUTWYZ
□□681M0H20
1000 12.5×25 0.027 2230 1
VUTWYZ
□□102M0H25
1200 12.5×30 0.024 2650 1
VUTWYZ
□□122M0H30
1200 16×20 0.027 2530 1
VUTWYZ
□□122M0K20
1500 12.5×35 0.020 2880 1
VUTWYZ
□□152M0H35
1800 16×25 0.021 2930 1
VUTWYZ
□□182M0K25
2200 16×31.5 0.017 3450 1
VUTWYZ
□□222M0K30
2200 18×25 0.019 3140 1
VUTWYZ
□□222M0M25
2700 16×35.5 0.015 3610 1
VUTWYZ
□□272M0K35
2700 18×31.5 0.015 4170 1
VUTWYZ
□□272M0M30
3300 18×35.5 0.014 4220 1
VUTWYZ
□□332M0M35
3900 18×40 0.012 4280 1
VUTWYZ
□□392M0M40
50
0
.
47 5× 11 5.500
17 1
HUTWYZ
□□R47M0D11
1 5× 11 4.000
30 1
HUTWYZ
□□010M0D11
2
.
2 5× 11 2.500
43 1
HUTWYZ
□□2R2M0D11
3
.
3 5× 11 2.200
53 1
HUTWYZ
□□3R3M0D11
4
.
7 5× 11 1.900
88 1
HUTWYZ
□□4R7M0D11
10 5× 11 1.500 100 1
HUTWYZ
□□100M0D11
22 5× 11 0.700 180 1
HUTWYZ
□□220M0D11
56 6.3×11 0.300 295 1
HUTWYZ
□□560M0E11
100 8× 11.5 0.170 555 1
HUTWYZ
□□101M0F11
120 8× 15 0.120 730 1
HUTWYZ
□□121M0F15
150 10×12.5 0.120 760 1
HUTWYZ
□□151M0G12
180 8× 20 0.091 910 1
HUTWYZ
□□181M0F20
220 10×16 0.084 1050 1
HUTWYZ
□□221M0G16
270 10×20 0.060 1220 1
HUTWYZ
□□271M0G20
330 10×25 0.055 1440 1
HUTWYZ
□□331M0G25
470 10×30 0.043 1910 1
HUTWYZ
□□471M0G30
470 12.5×20 0.045 1900 1
HUTWYZ
□□471M0H20
560 12.5×25 0.034 1950 1
HUTWYZ
□□561M0H25
680 12.5×30 0.030 2310 1
HUTWYZ
□□681M0H30
820 12.5×35 0.025 2510 1
HUTWYZ
□□821M0H35
820 16×20 0.034 2210 1
HUTWYZ
□□821M0K20
1000 16×25 0.025 2555 1
HUTWYZ
□□102M0K25
1200 16×31.5 0.022 3010 1
HUTWYZ
□□122M0K30
1200 18×25 0.026 2740 1
HUTWYZ
□□122M0M25
1500 16×35.5 0.019 3150 1
HUTWYZ
□□152M0K35
1800 18×31.5 0.021 3635 1
HUTWYZ
□□182M0M30
2200 18×35.5 0.017 3680 1
HUTWYZ
□□222M0M35
2700 18×40 0.014 3800 1
HUTWYZ
□□272M0M40
63
15 5× 11 0.88 165 1
JUTWYZ
□□150M0D11
33 6.3×11 0.350 265 1
JUTWYZ
□□330M0E11
56 8× 11.5 0.22 500 1
JUTWYZ
□□560M0F11
82 8× 15 0.160 665 1
JUTWYZ
□□820M0F15
82 10×12.5 0.110 690 1
JUTWYZ
□□820M0G12
120 8× 20 0.12 820 1
JUTWYZ
□□121M0F20
120 10×16 0.076 950 1
JUTWYZ
□□121M0G16
180 10×20 0.056 1150 1
JUTWYZ
□□181M0G20
220 10×25 0.046 1350 1
JUTWYZ
□□221M0G25
270 12.5×20 0.041 1500 1
JUTWYZ
□□271M0H20
390 12.5×25 0.031 1900 1
JUTWYZ
□□271M0H25
470 12.5×30 0.028 2300 1
JUTWYZ
□□471M0H30
470 16×20 0.032 2000 1
JUTWYZ
□□470M0K20
560 12.5×30 0.024 2500 1
JUTWYZ
□□561M0H30
680 16×25 0.025 2600 1
JUTWYZ
□□680M0K25
820 16×31.5 0.021 2850 1
JUTWYZ
□□821M0K30
820 18×25 0.024 2800 1
JUTWYZ
□□821M0M25
1000 16×35.5 0.019 2900 1
JUTWYZ
□□102M0K35
1200 18×31.5 0.020 3300 1
JUTWYZ
□□122M0M30
1500 18×35.5 0.018 3400 1
JUTWYZ
□□152M0M35
1800 18×40 0.017 3500 1
JUTWYZ
□□182M0M40
Page 36
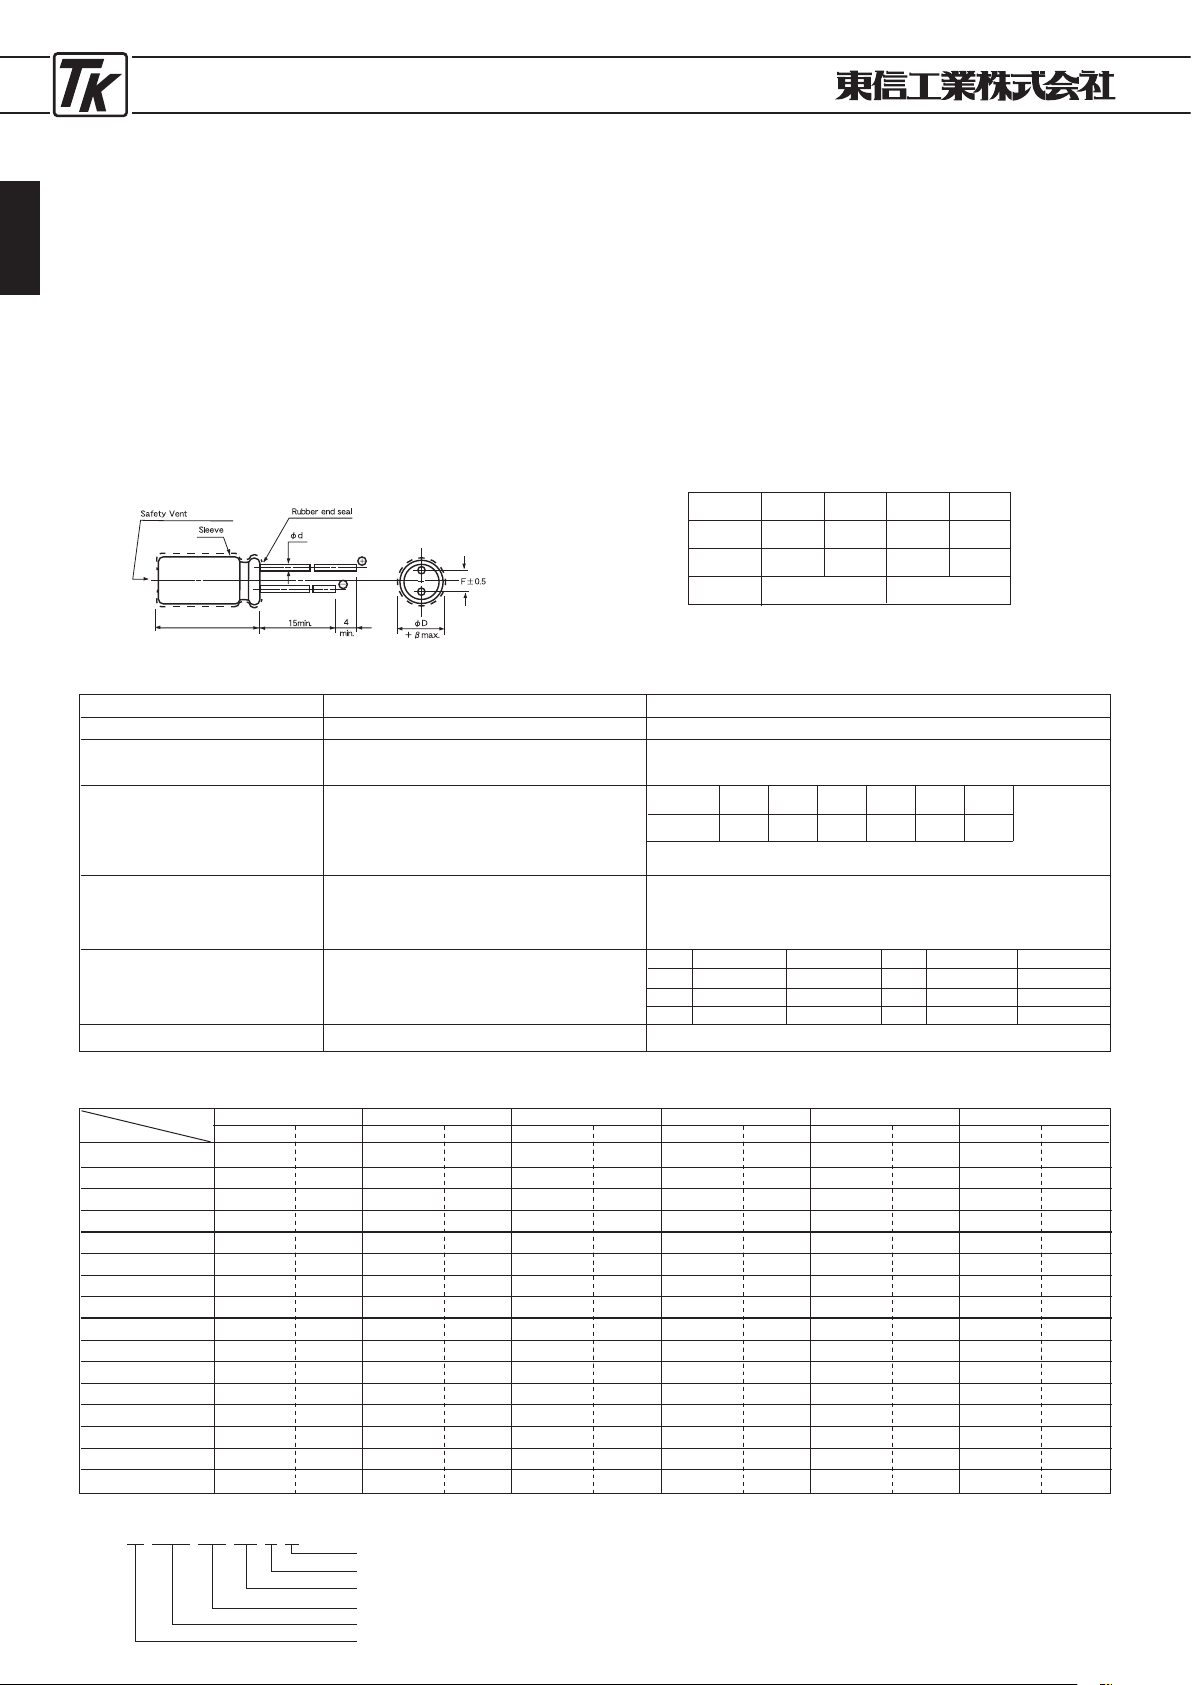
ELECTROLYTIC CAPACITORS
36
●広使用温度範囲125℃品
●
WIDE OPERATING TEMP. RANGE TYPE
125℃
USE
■特 徴
UTCZシリーズ
JIS C
5101
CE-
04
(基板洗浄タイプではありません)
TYPEUTCZ
JIS C
5101
CE-
04
(
Unsuitable washing product
)
・
UTCZ
シリーズは、広温度範囲(−40〜+125℃)
で極めて安定した性能をもつ製品です。
・苛酷な使用条件 が要求される自 動車電装機器、通
信機器、各種産業用機器等に最適です。
■
FEATURES
・
The UTCZ series constitutes products which show extraordinary
stabilization in performance at a wide temperature range of
−40
to
+125℃
.
・
This series is most suitable for use in automobile electric devices,
communications equipment and various types of industrial
machinery and equipment which are subjected to rigorous using
conditions.
■寸法図
/DIAGRAM OF DIMENSIONS
(D
≧φ8
)
■性 能
/PERFORMANCE SPECIFICATIONS
カ テ ゴ リ 温 度 範 囲
標 準 静 電 容 量 許 容 差
漏 れ 電 流 ( 最 大 値 )
損 失 角 の 正 接 ( 最 大 値 )
(
tan δ)
耐 久 性
125℃
2000時間
定格使用電圧印加
(
但し、φ8は1000時間)
低 温 特 性
+20℃における120
Hz
の
インピーダンスに対する比
(最大値)
その他の 特性は
JI S C
5101-4に準ず る
CATEGORY TEMPERATURE RANGE
STANDARD CAPACITANCE TOLERANCE
LEAKAGE CURRENT (MAX. VALUE)
DISSIPATION FACTOR (MAX. VALUE)
ENDURANCE
APPLICATION OF RATED OPERATING
VOLTAGE, AT
125℃
FOR
2000
HOURS.
(φ8=1000
hr)
LOW TEMPERATURE STABILITY
RATIO OF IMPEDANCE AT COLD TO
THAT AT
20℃, 120
Hz. MAX. VALUE
THE OTHER CHARACTERISTICS
−40℃〜+125℃
−20%〜+20%
(
120
Hz)
I=0.01CV OR 3μA WHICHEVER
IS THE GREATER (after
2
minutes)
When the capacitance exceed
1,000μ
F, the value of tanδ is increased by
0.02
for each increment of 1,
000μ
F or its fraction.
CAPACITANCE CHANGE : LESS THAN
20%
OF THE INITIAL
MEASURED VALUE.
DISSIPATION FACTOR : LESS THAN
200%
OF THE INITIAL
SPECIFIED VALUE.
LEAKAGE CURRENT : LESS THAN THE INITIAL SPECIFIED VALUE.
THE OTHER CHARACTERISTICS ARE BASED ON JIS C
5101-4
C=RATED CAPACITANCE (μF)
V
=
WORKING VOLTAGE (V)
W. V
tan
δ
10
0
.
20
16
0
.
16
25
0
.
14
35
0
.
12
50
0
.
10
63
0
.
10
■寸法表
/CASE SIZE TABLE
8×11.5
10×12
.
5
10×12
.
5
10×20
12
.
5×25
16×25
16×31
.
5
10×12
.
5
10×12
.
5
10×16
12
.
5×20
16×25
16×31
.
5
8×11
.
5
10×12
.
5
10×16
10×20
12
.
5×25
16×31
.
5
10×12
.
5
10×16
10×20
12
.
5×20
16×25
8×11
.
5
8×11
.
5
8×11
.
5
8×11
.
5
8×11
.
5
8×11
.
5
8×11
.
5
8×11
.
5
10×12
.
5
10×20
12
.
5×20
12
.
5×25
16×31
.
5
10×12
.
5
10×16
12
.
5×20
12
.
5×25
16×25
W.V
μ
F
10 (1
A)
16 (1
C)
25 (1
E)
35 (1
V)
50 (1
H)
63 (1
J)
Unit : mm
Unit : mm
φ
D
φ
d
F
β
8
0
.
6
3
.
5
10
0
.
6
5
.
0
12
.
5
0
.
6
5
.
0
16
0
.
8
7
.
5
0
.
5 1.0
■
Ripple current
〔
Max. Value mA〕at
125℃ 120
Hz.
155
220
270
470
820
1090
1390
210
250
330
590
1030
1330
125
220
300
390
700
1210
160
260
350
470
850
10
22
27
32
47
70
85
105
180
320
430
570
1030
120
200
360
480
650
W.V
10
16
25
−
25℃/+20℃
3
2
2
−
40℃/+20℃
4
4
4
W.V
35
50
63
L+2max.
( )
( )
−
25℃/+20℃
2
2
2
−
40℃/+20℃
4
4
4
1.0 (010
)
2.2 (2R2
)
3.3 (3R3
)
4.7 (4R7
)
10 (100
)
22 (220
)
33 (330
)
47 (470
)
100 (101
)
220 (221
)
330 (331
)
470 (471
)
1000 (102
)
2200 (222
)
3300 (332
)
4700 (472
)
φD×LRipple currentφD×L
Ripple currentφD×L
Ripple currentφD×L
Ripple currentφD×L
Ripple currentφD×L
Ripple current
■品番ご指定法/
HOW TO SPECIFY ITEM NUMBER
1
A UTCZ □□
221
M
□
付記コード/
Additional Code
静電容量許容差/
Capacitance Tolerance
静電容量記号/
Capacitance Symbol
形状記号/
Style Symbol
シリーズ名/
Series Name
定格電圧/
Rated Voltage
・この寸法表にないカスタム品も製造いたしますので、ご相談下さい。
Produce custom product too, which are not found in these tables.
Page 37
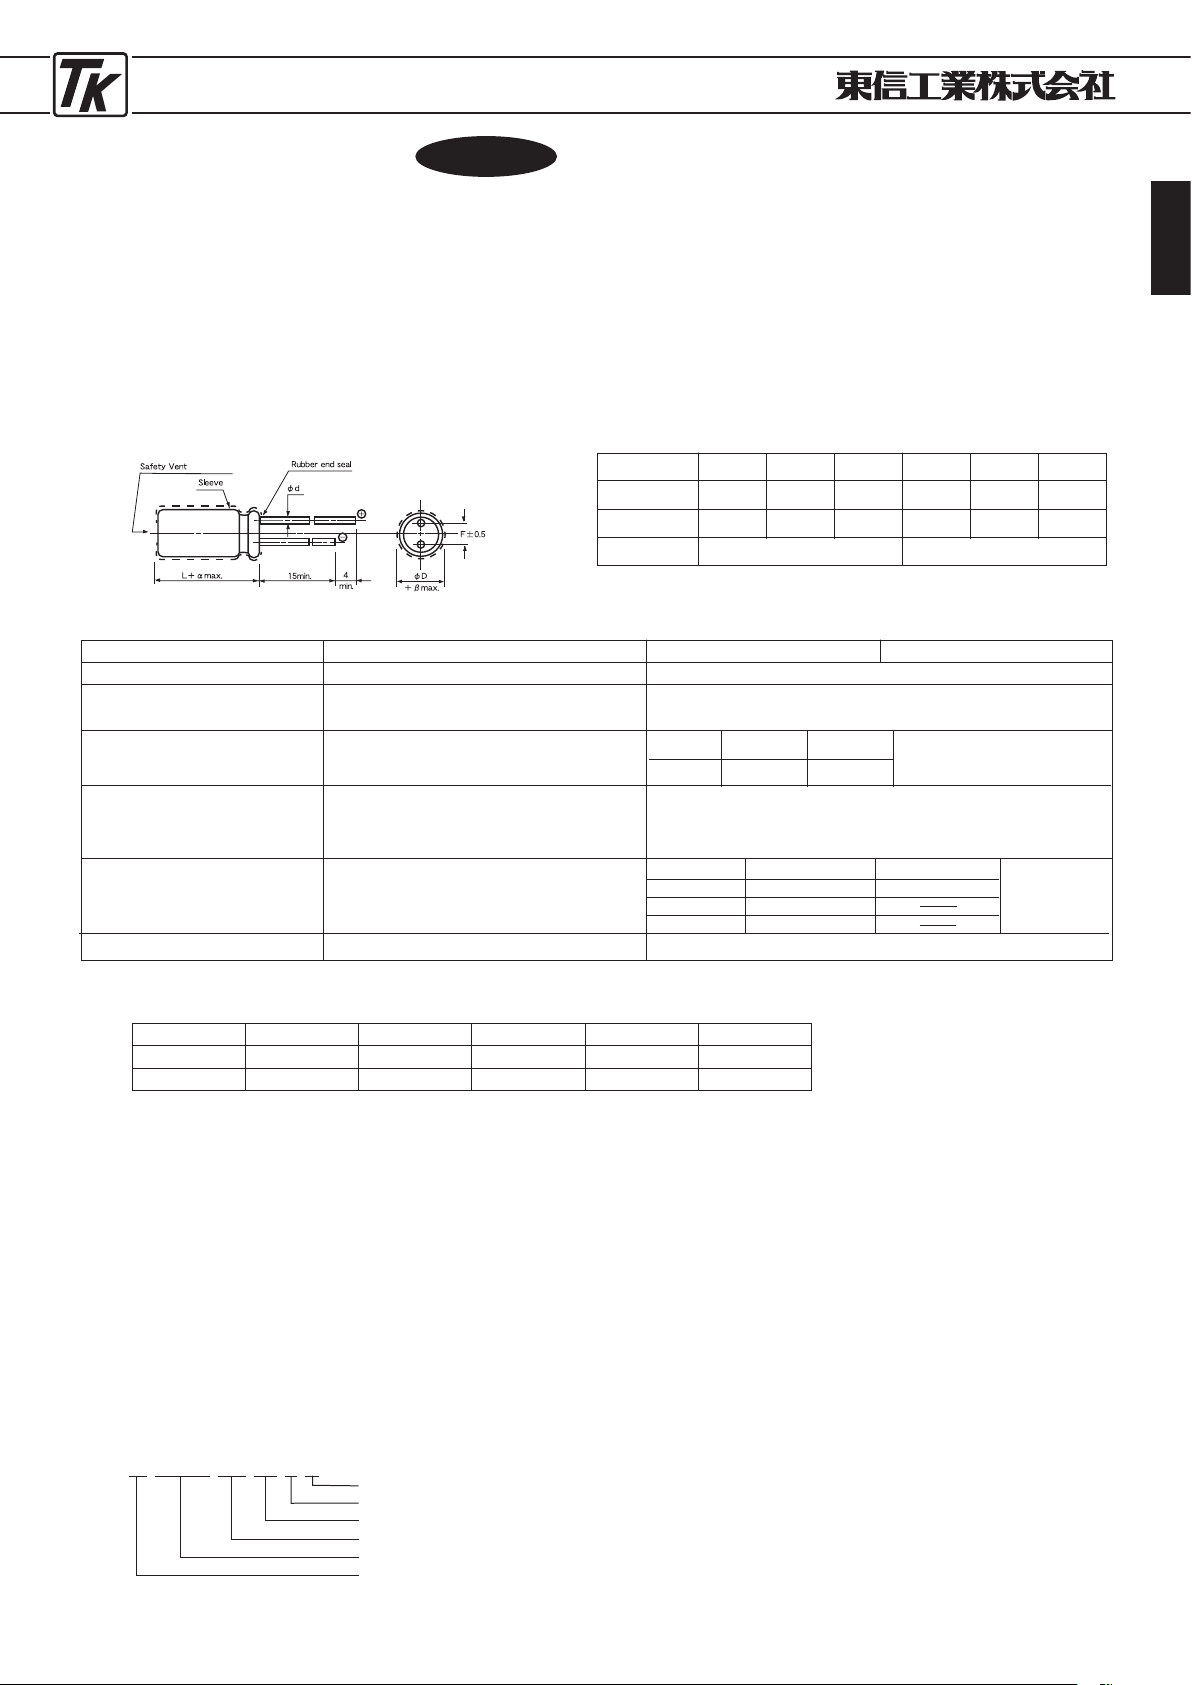
ELECTROLYTIC CAPACITORS
37
■定格リプル電流周波数補正係数
60
Hz
0.80
0
.
80
CAP.
≦47μ
F
47μF<
120
Hz
1.00
1
.
00
500
Hz
1.20
1
.
10
1
kHz
1.30
1
.
15
10
kHz
≦
1
.
50
1
.
20
●中高圧105℃品
●
MEDIUM AND HIGH VOLTAGE PRODUCTS
105℃
USE
■特 徴
UTWHMシリーズ
JIS C
5101
CE-
04
(200WV以下耐洗浄品)
TYPEUTWHM
JIS C
5101
CE-
04
(
Through
200
WV only Washable product
)
・105℃ ラジアルリードタイプの中高圧品です。
・小形産業機器用に最適な製品です。
■
FEATURES
・
Medium and High-Voltage Product of radial-Lead Type to be
used at
105℃
・
For small industrial machineries and apparatus.
■寸法図
/DIAGRAM OF DIMENSIONS
(D
≧φ6.3
)
Unit : mm
φ
D
φ
d
F
β
6.3
0
.
5
2
.
5
1
.
0
L
<20 α=1.5
L
≧20 α=2
■性 能
/PERFORMANCE SPECIFICATIONS
カ テ ゴ リ 温 度 範 囲
標 準 静 電 容 量 許 容 差
漏 れ 電 流 ( 最 大 値 )
損 失 角 の 正 接 ( 最 大 値 )
(
tan δ)
耐 久 性
105℃
2000時間
定格使用電圧印加
(φD≦8 :
1000時間
)
低 温 特 性
+20℃における120
Hz
の
インピーダンスに対する比
(最大値)
その他の 特性は
JI S C
5101-4に準ず る
CATEGORY TEMPERATURE RANGE
STANDARD CAPACITANCE TOLERANCE
LEAKAGE CURRENT (MAX. VALUE)
DISSIPATION FACTOR (MAX. VALUE)
ENDURANCE
APPLICATION OF RATED OPERATING
VOLTAGE, AT
105℃
FOR
2000
HOURS.
(φD≦8
:
1000
Hr)
LOW TEMPERATURE STABILITY
RATIO OF IMPEDANCE AT COLD TO
THAT AT
20℃, 120
Hz. MAX. VALUE.
THE OTHER CHARACTERISTICS
(
160V〜250
V)
−40℃〜+105℃
−20%〜+20%
(
120
Hz)
I=0.03CV OR
10μ
A WHICHEVER
IS THE GREATER (after
2
minutes)
CAPACITANCE CHANGE : LESS THAN
20%
OF THE INITIAL
MEASURED VALUE.
DISSIPATION FACTOR : LESS THAN
200%
OF THE INITIAL
SPECIFIED VALUE.
LEAKAGE CURRENT : LESS THAN THE INITIAL SPECIFIED VALUE.
THE OTHER CHARACTERISTICS ARE BASED ON JIS C
5101-4
C=RATED CAPACITANCE (μF)
V
=
WORKING VOLTAGE (V)
W. V
tan
δ
160
~
250
0
.
20
W. V
160~250
350
~
400
450
UTWHSシリーズ
(
400WV小形化
)
TYPEUTWHS (400
WV SMALL SIZE)
8
0
.
6
3
.
5
10
0
.
6
5
.
0
12
.
5
0
.
6
5
.
0
16
0
.
8
7
.
5
18
0
.
8
7
.
5
0
.
5
(
350V〜450
V)
−25℃〜+105℃
350
~
450
0
.
25
−25℃/+20℃
3
6
15
−40℃
/
+20℃
6
( )
( )
Upgrade
■品番ご指定法/
HOW TO SPECIFY ITEM NUMBER
2
C UTWHM □□
470
M
□
付記コード/
Additional Code
静電容量許容差/
Capacitance Tolerance
静電容量記号/
Capacitance Symbol
形状記号/
Style Symbol
シリーズ名/
Series Name
定格電圧/
Rated Voltage
Page 38
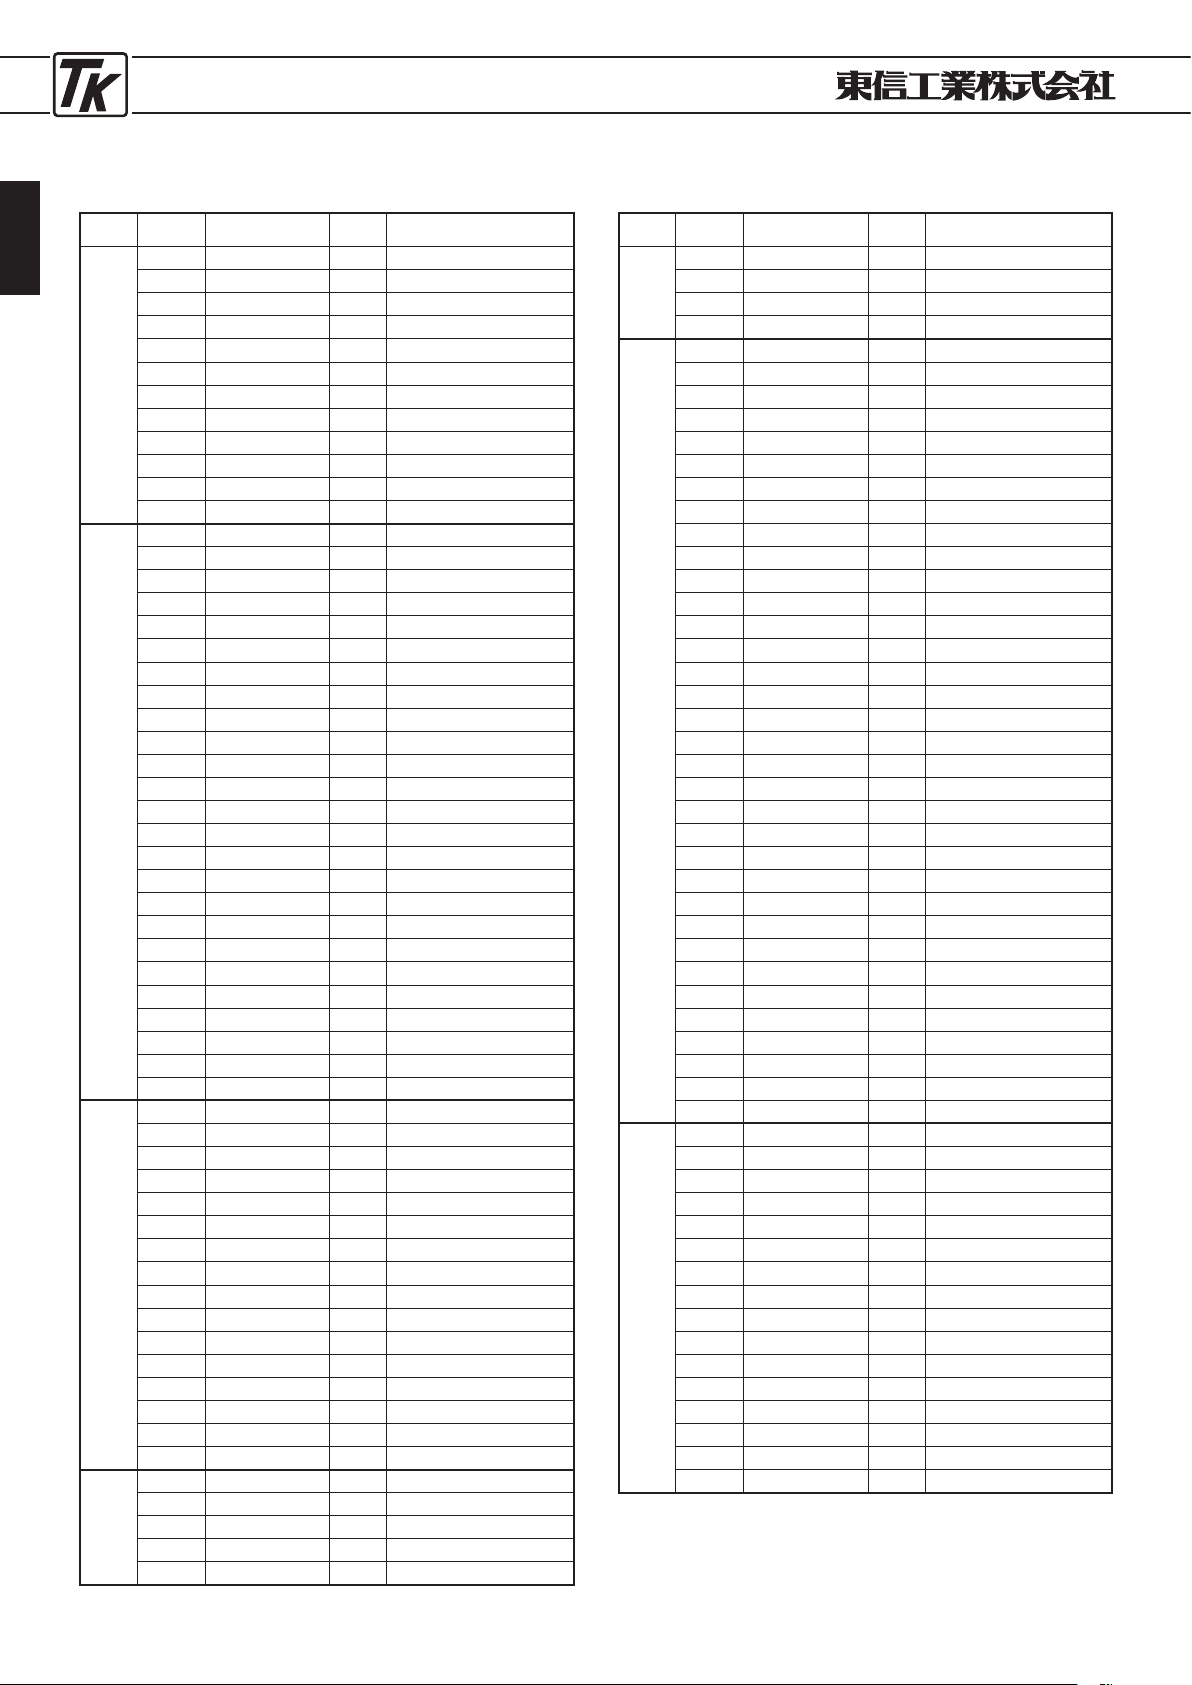
ELECTROLYTIC CAPACITORS
38
W.V
(vdc)
Cap
(
μ
F)
ΦD×
L (mm) Ripple
品番
160
0
.47
6.3 × 11 7 2
CUTWHM
□□R47M0
1
.0
6.3 × 11 15 2
CUTWHM
□□010M0
2
.2
6.3 × 11 21 2
CUTWHM
□□2R2M0
3
.3
6.3 × 11 28 2
CUTWHM
□□3R3M0
4
.7
6.3 × 11 34 2
CUTWHM
□□4R7M0
10
10 × 12.5 60 2
CUTWHM
□□100M0
22
10 × 16 74 2
CUTWHM
□□220M0
33
10 × 20 145 2
CUTWHM
□□330M0
47
12.5 × 20 195 2
CUTWHM
□□470M0
100
16 × 25 290 2
CUTWHM
□□101M0
220
16 × 35.5 540 2
CUTWHM
□□221M0
330
18 × 35.5 700 2
CUTWHM
□□331M0
200
0
.47
6.3 × 11 11 2
DUTWHM
□□R47M0
1
.0
6.3 × 11 15 2
DUTWHM
□□010M0
2
.2
6.3 × 11 21 2
DUTWHM
□□2R2M0
3
.3
6.3 × 11 28 2
DUTWHM
□□3R3M0
4
.7
8 × 11.5 39 2
DUTWHM
□□4R7M0
6
.8
8 × 11.5 41 2
DUTWHM
□□6R8M0
10
8 × 11.5 50 2
DUTWHM
□□100M0F11
10
10 × 12.5 60 2
DUTWHM
□□100M0
10
10 × 16 74 2
DUTWHM
□□100M0G16
15
10 × 16 82 2
DUTWHM
□□150M0
22
10 × 20 120 2
DUTWHM
□□220M0
33
10 × 20 160 2
DUTWHM
□□330M0G20
33
12.5 × 20 175 2
DUTWHM
□□330M0
47
12.5 × 20 195 2
DUTWHM
□□470M0
68
16 × 20 265 2
DUTWHM
□□680M0K20
68
16 × 25 270 2
DUTWHM
□□680M0
100
16 × 20 270 2
DUTWHM
□□101M0K20
100
16 × 25 335 2
DUTWHM
□□101M0
150
16 × 31.5 420 2
DUTWHM
□□151M0
220
16 × 31.5 415 2
DUTWHM
□□221M0K30
220
16 × 35.5 500 2
DUTWHM
□□221M0K35
220
18 × 25 405 2
DUTWHM
□□221M0M25
220
18 × 35.5 575 2
DUTWHM
□□221M0
330
18 × 31.5 500 2
DUTWHM
□□331M0M30
330
18 × 40 630 2
DUTWHM
□□331M0
250
1
.0
6.3 × 11 15 2
EUTWHM
□□010M0
2
.2
6.3 × 11 23 2
EUTWHM
□□2R2M0
3
.3
8 × 11.5 32 2
EUTWHM
□□3R3M0
4
.7
8 × 11.5 39 2
EUTWHM
□□4R7M0
10
10 × 16 74 2
EUTWHM
□□100M0
22
12.5 × 20 130 2
EUTWHM
□□220M0
33
12.5 × 20 160 2
EUTWHM
□□330M0
47
12.5 × 20 210 2
EUTWHM
□□470M0H20
47
12.5 × 25 230 2
EUTWHM
□□470M0
47
16 × 25 250 2
EUTWHM
□□470M0K25
100
16 × 25 335 2
EUTWHM
□□101M0K25
100
16 × 31.5 365 2
EUTWHM
□□101M0
150
18 × 25 405 2
EUTWHM
□□151M0M25
220
18 × 35.5 510 2
EUTWHM
□□221M0M35
220
18 × 40 585 2
EUTWHM
□□221M0
330
18 × 40 700 2
EUTWHM
□□331M0
350
1
.0
6.3 × 11 15 2
VUTWHM
□□010M0
2
.2
8 × 11.5 26 2
VUTWHM
□□2R2M0
3
.3
10 × 12.5 38 2
VUTWHM
□□3R3M0
4
.7
10 × 16 50 2
VUTWHM
□□4R7M0
10
10 × 20 80 2
VUTWHM
□□100M0
■寸法表/
CASE SIZE TABLE
■
Ripple Current [Max.Value mA] at
105℃ 120
Hz
(
mm)
・□□には端子加工・テーピング記号が入ります。バルク品の場合は
空白となります。
□□
:Enter the appropriate lead forming or taping code. The bulk
item is a blank.
・この寸法表にないカスタム品も製造いたしますので、ご相談下さい。
Produce custom product too, which are not found in these tables.
W.V
(vdc)
Cap
(
μ
F)
ΦD×
L (mm) Ripple
品番
350
22
12.5 × 20 130 2
VUTWHM
□□220M0
33
16 × 25 195 2
VUTWHM
□□330M0
47
16 × 25 230 2
VUTWHM
□□470M0
100
18 × 31.5 375 2
VUTWHM
□□101M0
400
1
.0
6.3 × 11 15 2
GUTWHM
□□010M0
2
.2
8 × 11.5 29 2
GUTWHM
□□2R2M0
3
.3
8 × 11.5 29 2
GUTWHS
□□3R3M0
3
.3
10 × 12.5 40 2
GUTWHM
□□3R3M0
4
.7
10 × 12.5 60 2
GUTWHS
□□4R7M0
4
.7
10 × 16 70 2
GUTWHM
□□4R7M0
6
.8
10 × 12.5 60 2
GUTWHS
□□6R8M0G12
6
.8
10 × 16 80 2
GUTWHS
□□6R8M0
8
.2
10 × 16 90 2
GUTWHS
□□8R2M0
10
10 × 16 100 2
GUTWHS
□□100M0
10
10 × 20 120 2
GUTWHM
□□100M0
15
10 × 20 120 2
GUTWHS
□□150M0
22
12.5 × 20 140 2
GUTWHS
□□220M0
22
12.5 × 25 180 2
GUTWHM
□□220M0
33
12.5 × 25 205 2
GUTWHS
□□330M0
33
16 × 20 205 2
GUTWHS
□□330M0K20
33
16 × 25 300 2
GUTWHM
□□330M0
39
16 × 20 300 2
GUTWHS
□□390M0
47
16 × 25 305 2
GUTWHS
□□470M0
47
16 × 31.5 330 2
GUTWHM
□□470M0
47
18 × 20 305 2
GUTWHS
□□470M0
56
16 × 25 305 2
GUTWHS
□□560M0
68
16 × 31.5 450 2
GUTWHS
□□680M0K30
68
18 × 25 440 2
GUTWHS
□□680M0
68
18 × 35.5 560 2
GUTWHM
□□680M0
82
16 × 31.5 470 2
GUTWHS
□□820M0K30
82
16 × 35.5 540 2
GUTWHS
□□820M0K35
82
18 × 31.5 540 2
GUTWHS
□□820M0
100
18 × 31.5 560 2
GUTWHS
□□101M0M30
100
18 × 35.5 580 2
GUTWHS
□□101M0
100
18 × 40 600 2
GUTWHM
□□101M0
120
18 × 35.5 620 2
GUTWHS
□□121M0M35
120
18 × 40 700 2
GUTWHS
□□121M0
150
18 × 40 750 2
GUTWHS
□□151M0
450
2
.2
10 × 12.5 23 2
WUTWHM
□□2R2M0
3
.3
10 × 16 31 2
WUTWHM
□□3R3M0
4
.7
10 × 16 35 2
WUTWHM
□□4R7M0G16
4
.7
10 × 20 40 2
WUTWHM
□□4R7M0
10
12.5 × 20 140 2
WUTWHM
□□100M0
22
16 × 20 250 2
WUTWHM
□□220M0K20
22
16 × 25 260 2
WUTWHM
□□220M0
33
16 × 31.5 320 2
WUTWHM
□□330M0
47
16 × 31.5 330 2
WUTWHM
□□470M0K30
47
16 × 35.5 350 2
WUTWHM
□□470M0
68
18 × 31.5 450 2
WUTWHM
□□680M0M30
68
18 × 35.5 470 2
WUTWHM
□□680M0
82
18 × 35.5 530 2
WUTWHM
□□820M0M35
82
18 × 40 570 2
WUTWHM
□□820M0
100
18 × 40 630 2
WUTWHM
□□101M0M40
120
18 × 40 650 2
WUTWHM
□□121M0M40
Page 39
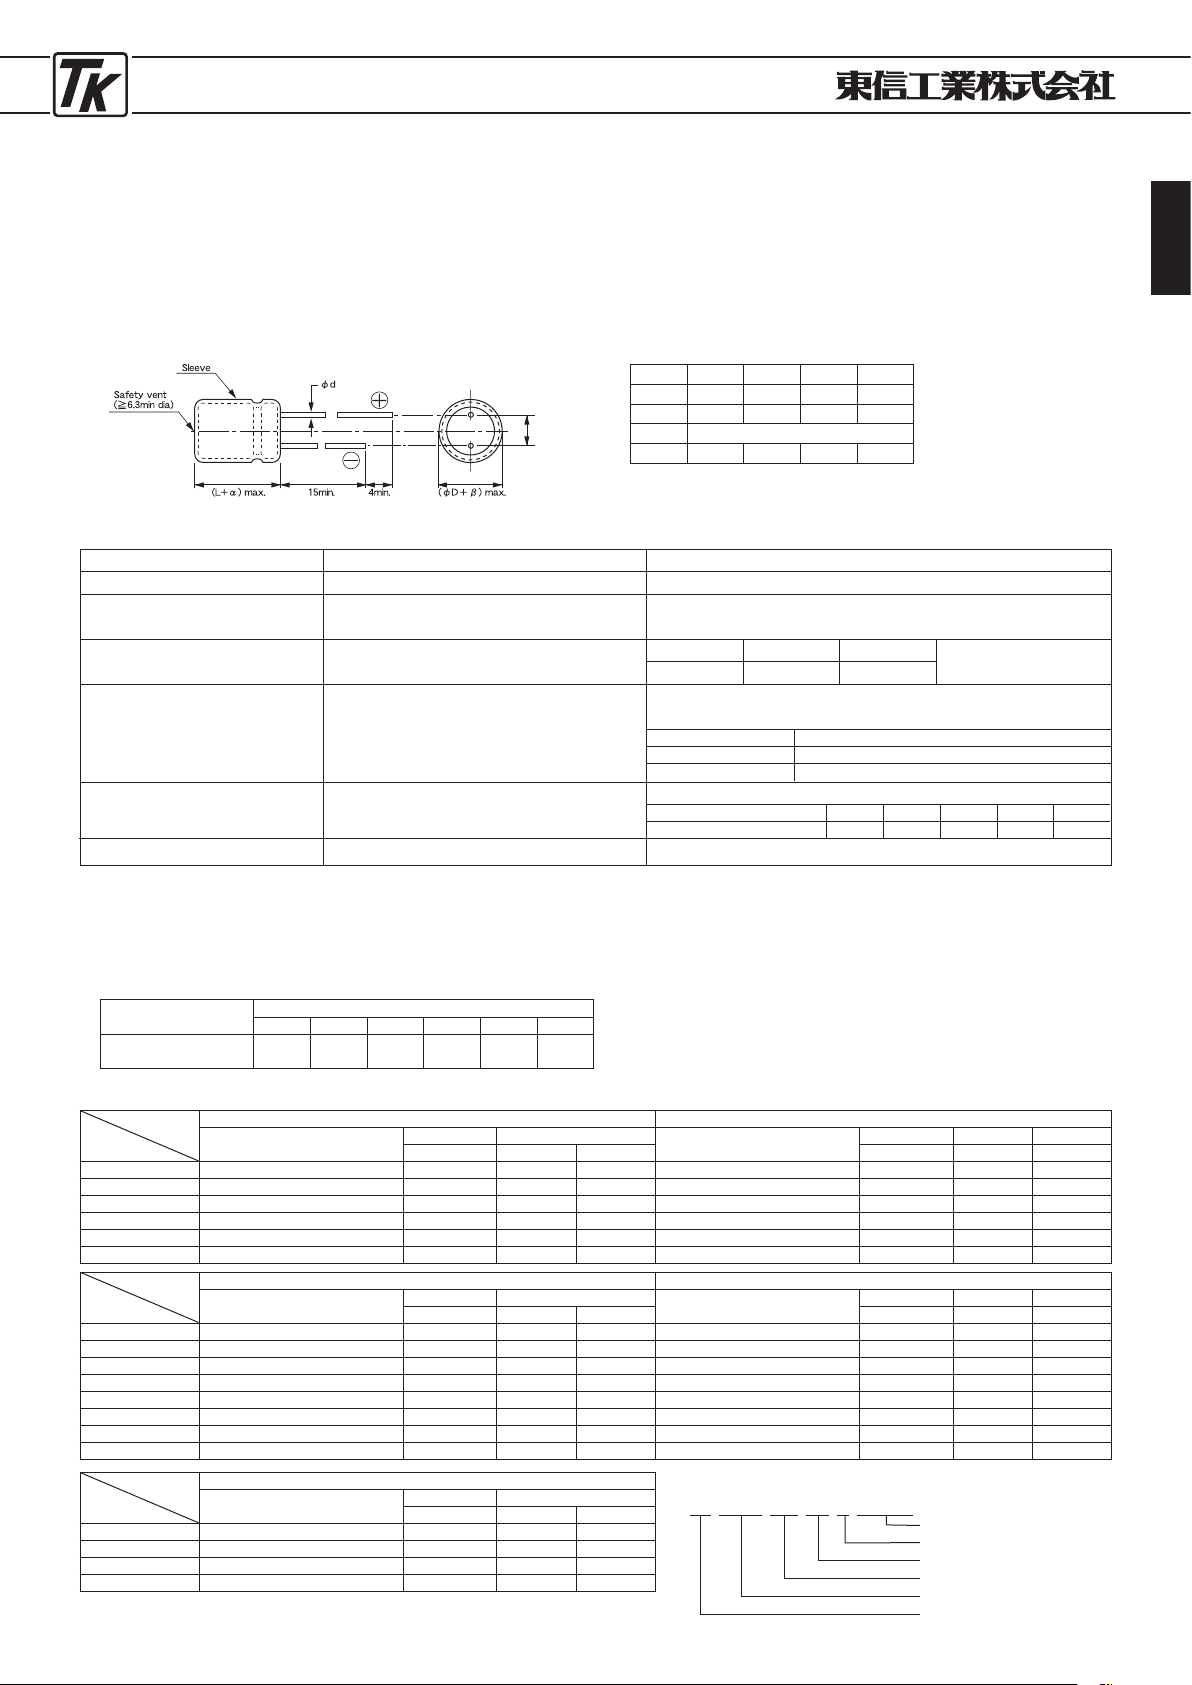
ELECTROLYTIC CAPACITORS
39
●高リプル・長寿命品(105℃
)
●
High Ripple Current & Long Life type(
105℃
)
■特 徴
UTWVシリーズ
JIS C
5101
CE-
04
TYPEUTWV
JIS C
5101
CE-
04
・電子バラスト、電源入力平滑用などに最適
・105
℃ 5,000時間を保証。
・基板洗浄タイプではありません。
■
FEATURES
・
For Electronic Ballast,Power Supply etc.
・
This product is the guaranteed service life of
5,000
hours at
105℃
.
・
Not washable product.
■寸法図
/DIAGRAM OF DIMENSIONS
■性 能
/PERFORMANCE SPECIFICATIONS
カ テ ゴ リ 温 度 範 囲
標 準 静 電 容 量 許 容 差
漏 れ 電 流 ( 最 大 値 )
損 失 角 の 正 接 ( 最 大 値 )
(
tan δ)
耐 久 性
105℃ 5000時間
低 温 特 性
+20℃における120
Hz
のインピ
ーダンスに対する比(最大値)
その他の 特性は
JI S C
5101-4に準ず る
CATEGORY TEMPERATURE RANGE
STANDARD CAPACITANCE TOLERANCE
LEAKAGE CURRENT (MAX. VALUE)
DISSIPATION FACTOR (MAX. VALUE)
(
tan δ)
ENDURANCE
LOW TEMPERATURE STABILITY
RATIO OF IMPEDANCE AT COLD TO
THAT AT
20℃, 120
Hz. MAX. VALUE.
THE OTHER CHARACTERISTICS
−25℃〜+105℃
−20%〜+20%
(
20℃, 120
Hz)
I=0.02CV or
10μ
A WHICHEVER
IS THE GREATER (after
2
minutes)
The other characteristics are based on JIS C
5101-4
.
C=RATED CAPACITANCE (μF)
V
=
WORKING VOLTAGE (V)
W. V
200~250V350〜450
V
tan
δ 0.20 0.25
W.V.
200 250 350 400 450
Z
(−25℃)/Z(+20℃) 3 3 6 6 6
φD 10 12.5 16 18
φd 0.6 0.6 0.8 0.8
F 5.0 5.0 7.5 7.5
α
L<20 : α=1.5, L
≧20
: α=
2
β 0.5 1.0 1.0 1.0
■寸法表
/ CASE SIZE TABLE
■
Ripple current [Max. Value mA] at
105℃ 120
Hz/
100
kHz
リプル周波数が標準品一覧表の規定値と異なる場合には、下表の係数を乗じた値以下でご使用下さい。
When the ripple frequency differs from the spicification shown in the list of standard products,multiply the value with the
coefficient shown below,and use the products under the obtained value.
周波数補正係数/
FREQUENCY CORRECTION FACTOR
Frequency(Hz)
50 120 300 1
k
10k100
k
Frequency
0.60 1.00 1.20 1.60 1.80 2.00
Coefficient
After applying rated voltage at
105℃
for
5000
hours.
The capacitors shall meet the following requirements.
Capacitance Change Within
±20
% of the intial value
Dissipation Facto Less than
200
% of the intial specified value
Leakage Cureent Less than the intial specified value
インピーダンス比/
Impedance ratio (at
120
Hz)
(
20℃, 120
Hz)
■定格リプル電流補正係数
W.V.
μ
F
200 (2
D)
250 (2
E)
ITEM NUMBER
φD×
L
Ripple current (mA)
ITEM NUMBER
φD×
L
(mm)
120
Hz
100
kHz (mm)
120
Hz
100
kHz
10(100
)
− − − − 2
EUTWV
100M□G16 10×16 130 260
22(220
)
2
DUTWV
220M□G16 10×16 140 280 2
EUTWV
220M□G20 10×20 220 440
33
(
330
)
2
DUTWV
330M□G20 10×20 230 460 2
EUTWV
330M□H20 12.5×20 270 540
47
(
470
)
2
DUTWV
470M□H20 12.5×20 300 600 2
EUTWV
470M□H25 12.5×25 320 640
68
(
680
)
2
DUTWV
680M□H25 12.5×25 340 680 2
EUTWV
680M□K25 16×25 410 820
100
(
101
)
2
DUTWV
101M□K25 16×25 430 860 2
EUTWV
101M□M25 18×25 500 1000
Ripple current (mA)
W.V.
μ
F
350 (2
V)
400 (2
G)
ITEM NUMBER
φD×
L
Ripple current (mA)
ITEM NUMBER
φD×
L
(mm)
120
Hz
100
kHz (mm)
120
Hz
100
kHz
3.3(3R3
)
2
VUTWV3R3M□G
16 10×16 90 180 2
GUTWV3R3M□G
16 10×16 90 180
4
.7(4R7)
2
VUTWV4R7M□G
16 10×16 110 220 2
GUTWV4R7M□G
16 10×16 110 220
6
.8(6R8)
2
VUTWV6R8M□G
16 10×16 110 220 2
GUTWV6R8M□G
16 10×16 110 220
10
(
100
)
2
VUTWV
100M□G20 10×20 140 280 2
GUTWV
100M□G20 10×20 140 280
22
(
220
)
2
VUTWV
220M□H20 12.5×20 175 350 2
GUTWV
220M□H25 12.5×25 215 430
33
(
330
)
2
VUTWV
330M□H25 12.5×25 215 430 2
GUTWV
330M□K25 16×25 320 640
47
(
470
)
2
VUTWV
470M□K25 16×25 330 660 2
GUTWV
470M□M25 18×25 420 840
68
(
680
)
2
VUTWV
680M□M25 18×25 425 850 − − − −
Ripple current (mA)
W.V.
μ
F
450 (2
W)
ITEM NUMBER
φD×
L
Ripple current (mA)
(mm)
120
Hz
100
kHz
6.8(6R8
)
2
WUTWV6R8M□G
20 10×20 75 150
10
(
100
)
2
WUTWV
100M□H20 12.5×20 150 300
22
(
220
)
2
WUTWV
220M□K25 16×25 275 550
33
(
330
)
2
WUTWV
330M□M25 18×25 350 700
■品番ご指定法/
HOW TO SPECIFY ITEM NUMBER
2
W UTWV □□
330
M
□□□□
付記コード/
Additional Code
静電容量許容差/
Capacitance Tolerance
静電容量記号/
Capacitance Symbol
形状記号/
Style Symbol
シリーズ名/
Series Name
定格電圧/
Rated Voltage
F±0
.
5
・この寸法表にないカスタム品も製造いたしますので、ご相談下さい。
Produce custom product too, which are not found in these tables.
Page 40
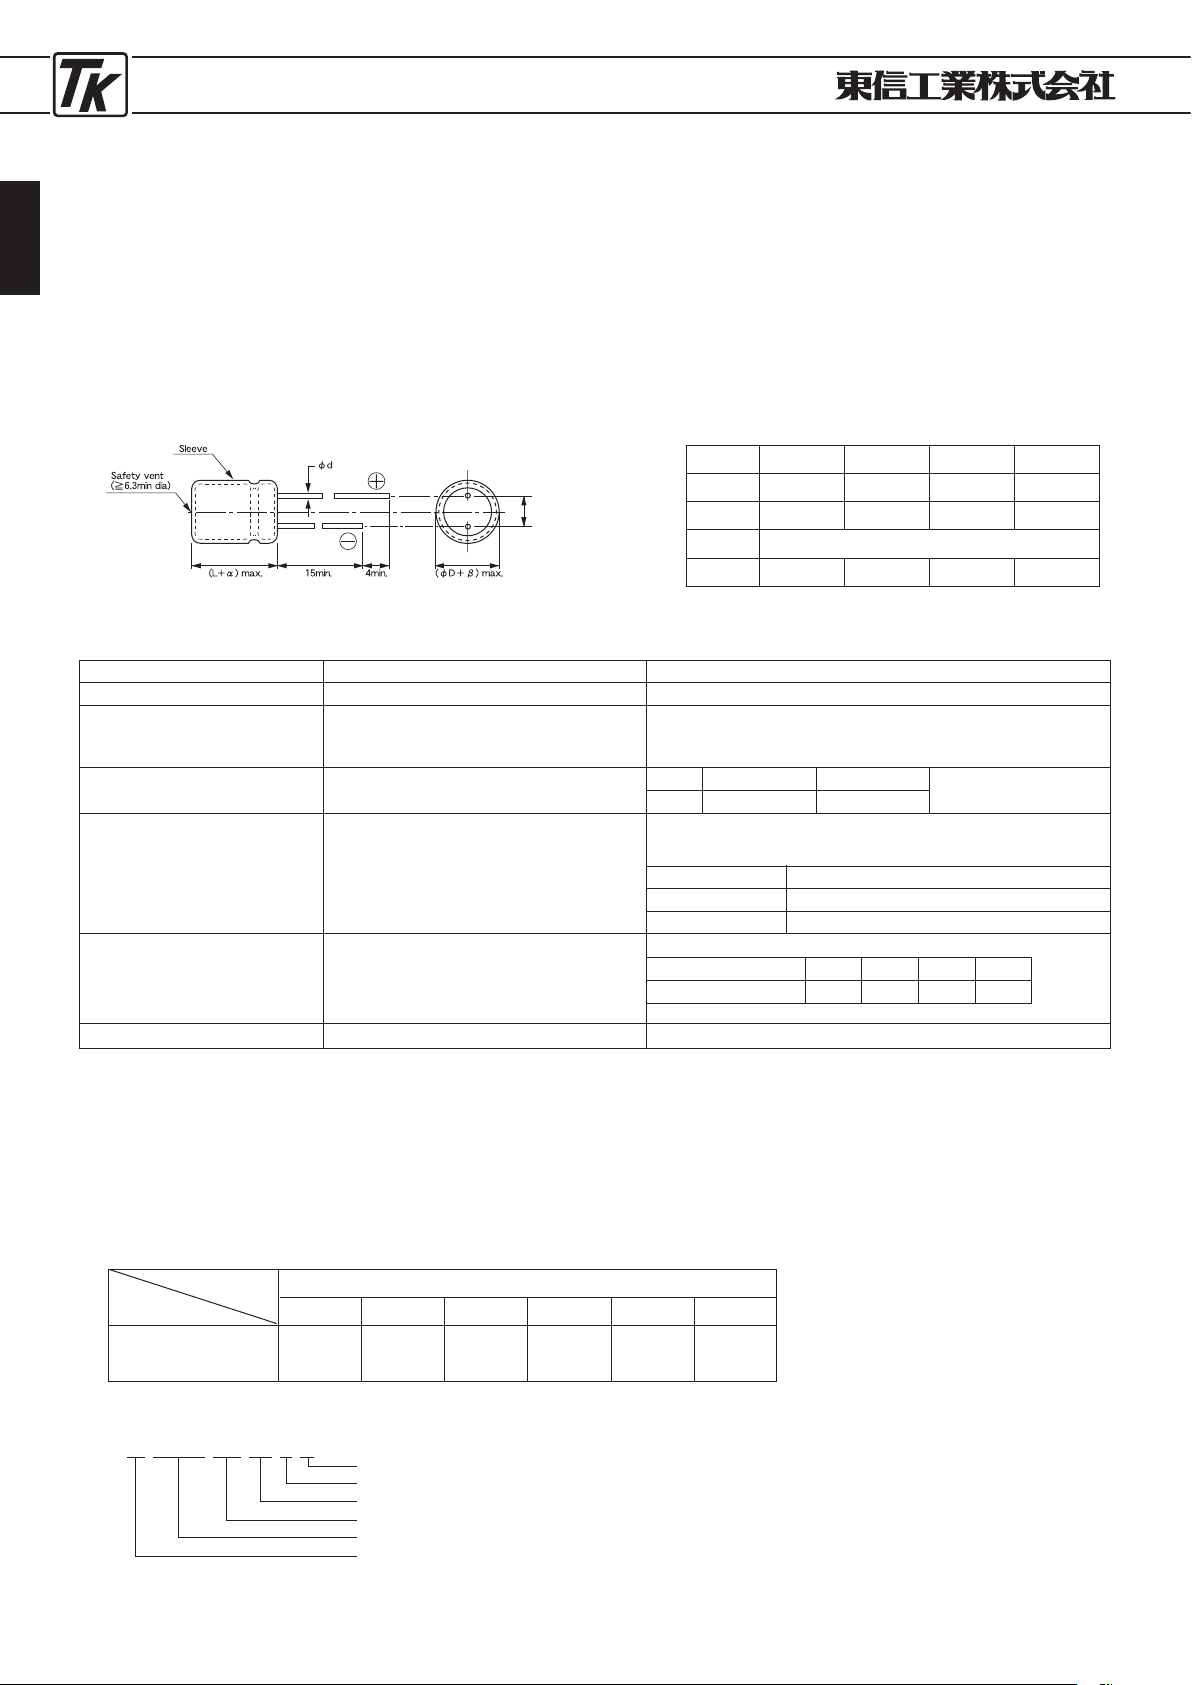
ELECTROLYTIC CAPACITORS
40
●高リプル・長寿命品(105℃)
●
HIGH RIPPLE CURRENT & LONG LIFE TYPE (
105℃)
■特 徴
UTWBXシリーズ
JIS C
5101
CE-
04
TYPEUTWBX
JIS C
5101
CE-
04
・電子バラスト、電源入力平滑用などに最適
・105℃ 10
,
000時間を保証。
■
FEATURES
・
For Electronic Ballast, Power Supply etc.
・
This product is the guaranteed service life of 10,
000
hours at
105℃
.
■寸法図
/DIAGRAM OF DIMENSIONS
■性 能
/PERFORMANCE SPECIFICATIONS
カ テ ゴ リ 温 度 範 囲
標 準 静 電 容 量 許 容 差
漏 れ 電 流 ( 最 大 値 )
損 失 角 の 正 接 ( 最 大 値 )
(
tan δ)
耐 久 性
低 温 特 性
+20℃における120
Hz
の
インピーダンスに対する比
(最大値)
その他の特性は
JIS C
5101-4に準ずる
Unit : mm
φ
D
φ
d
F
α
β
10
0
.
6
5
.
0
0
.
5
L
<20
: α=1.5, L
≧20
: α=
2
12
.
5
0
.
6
5
.
0
1
.
0
16
0
.
8
7
.
5
1
.
0
18
0
.
8
7
.
5
1
.
0
( )
CATEGORY TEMPERATURE RANGE
STANDARD CAPACITANCE TOLERANCE
LEAKAGE CURRENT (MAX. VALUE)
DISSIPATION FACTOR (MAX. VALUE)
(
tan
δ)
ENDURANCE
LOW TEMPERATURE STABILITY
RATIO OF IMPEDANCE AT COLD TO
THAT AT
20℃, 120
Hz. MAX.VALUE
THE OTHER CHARACTERISTICS
−40℃〜+105℃
−20%〜+20%
(
20℃, 120
Hz)
I=0.02CV OR
10μ
A WHICHEVER IS THE GREATER (after 2 minutes)
I
:
IEAKAGE CURRENT (μA). C:RATED CAPACITANCE (μF),
V
:
RATED VOLTAGE (V)
After applying rated voltage with rated ripple current for 10,
000
hrs (
φ10:8,000
hrs) at
105℃
, the capacitors shall meet the following requirements.
Capacitance Change Within
±20%
of the initial value
Dissipation Factor Less than
200
% of the initial specified value
Leakage Cureent Less than the initial specified value
インピーダンス比/
Impedance ratio (at
120
Hz)
The other characteristics are based on JIS C
5101-4
.
( )
W.V
tan
δ
W.V
Z(-
25℃
)/Z(+
20℃
)
450
6
400
6
250
3
200
3
200〜250
V
0.20
400〜450
V
0.25 (20℃, 120Hz)
■定格リプル電流補正係数
リプル周波数が標準品一覧表の規定値と異なる場合には、下表の係数を乗じた値以下でご使用下さい。
When the ripple frequency differs from the specification shown in the list of standard products, multiply the value with the
coefficient shown below, and use the products under the obtained value.
周波数補正係数
/FREQUENCY CORRECTION FACTOR
50
Frequency (Hz)
120 300 1
k
10
k
100
k
Frequency
Coefficient
0.60 1.00 1.20 1.60 1.80 2.00
(基板洗浄タイプではありません)
(
Unsuitable washing product
)
■品番ご指定法/
HOW TO SPECIFY ITEM NUMBER
2
D UTWBX □□
680
M
□
付記コード/
Additional Code
静電容量許容差/
Capacitance Tolerance
静電容量記号/
Capacitance Symbol
形状記号/
Style Symbol
シリーズ名/
Series Name
定格電圧/
Rated Voltage
F±0
.
5
Page 41
ELECTROLYTIC CAPACITORS
41
■寸法表/
CASE SIZE TABLE
■
Ripple Current [Max.Value mA] at
105℃ 120
Hz
(
mm)
W.V
(vdc)
Cap
(
μ
F)
ΦD×
L (mm) Ripple
品番
200
22
10 × 20 200 2
DUTWBX
□□220M0
27
10 × 16 245 2
DUTWBX
□□270M0G16
33
10 × 20 260 2
DUTWBX
□□330M0
39
10 × 20 320 2
DUTWBX
□□390M0G20
47
12.5 × 20 390 2
DUTWBX
□□470M0
56
10 × 25 410 2
DUTWBX
□□560M0G25
68
10 × 30 470 2
DUTWBX
□□680M0G30
68
12.5 × 20 470 2
DUTWBX
□□680M0
82
10 × 35 540 2
DUTWBX
□□820M0G35
82
12.5 × 25 540 2
DUTWBX
□□820M0H25
82
16 × 20 550 2
DUTWBX
□□820M0
100
10 × 40 620 2
DUTWBX
□□101M0G40
100
16 × 20 630 2
DUTWBX
□□101M0
120
10 × 45 710 2
DUTWBX
□□121M0G45
120
12.5 × 30 700 2
DUTWBX
□□121M0H30
120
16 × 20 690 2
DUTWBX
□□121M0K20
150
12.5 × 35 840 2
DUTWBX
□□151M0H35
150
16 × 25 840 2
DUTWBX
□□151M0
150
18 × 20 830 2
DUTWBX
□□151M0M20
180
12.5 × 40 950 2
DUTWBX
□□181M0H40
220
12.5 × 50 1090 2
DUTWBX
□□221M0H50
220
16 × 31.5 1080 2
DUTWBX
□□221M0K30
220
18 × 25 1050 2
DUTWBX
□□221M0M25
220
18 × 31.5 1050 2
DUTWBX
□□221M0
270
16 × 35.5 1250 2
DUTWBX
□□271M0K35
270
18 × 31.5 1230 2
DUTWBX
□□271M0M30
330
18 × 35.5 1430 2
DUTWBX
□□331M0
390
18 × 40 1600 2
DUTWBX
□□391M0M40
250
22
10 × 16 140 2
EUTWBX
□□220M0G16
22
10 × 20 200 2
EUTWBX
□□220M0
27
10 × 20 220 2
EUTWBX
□□270M0G20
33
12.5 × 20 320 2
EUTWBX
□□330M0
39
10 × 25 300 2
EUTWBX
□□390M0G25
47
10 × 30 350 2
EUTWBX
□□470M0G30
47
12.5 × 20 390 2
EUTWBX
□□470M0
56
10 × 35 420 2
EUTWBX
□□560M0G35
68
10 × 40 480 2
EUTWBX
□□680M0G40
68
12.5 × 25 470 2
EUTWBX
□□680M0H25
68
16 × 20 520 2
EUTWBX
□□680M0
82
10 × 45 510 2
EUTWBX
□□820M0G45
82
12.5 × 30 510 2
EUTWBX
□□820M0H30
82
16 × 20 550 2
EUTWBX
□□820M0
100
12.5 × 35 680 2
EUTWBX
□□101M0H35
100
16 × 25 600 2
EUTWBX
□□101M0
100
18 × 20 650 2
EUTWBX
□□101M0M20
120
12.5 × 40 730 2
EUTWBX
□□121M0H40
120
16 × 25 720 2
EUTWBX
□□121M0K25
150
12.5 × 50 860 2
EUTWBX
□□151M0H50
150
16 × 31.5 860 2
EUTWBX
□□151M0K30
150
18 × 25 860 2
EUTWBX
□□151M0
180
16 × 35.5 1000 2
EUTWBX
□□181M0K35
180
18 × 31.5 950 2
EUTWBX
□□181M0M30
220
18 × 35.5 1130 2
EUTWBX
□□221M0
270
18 × 40 1350 2
EUTWBX
□□271M0M40
400
10
10 × 16 110 2
GUTWBX
□□100M0G16
10
10 × 20 140 2
GUTWBX
□□100M0
15
10 × 20 150 2
GUTWBX
□□150M0G20
15
12.5 × 20 220 2
GUTWBX
□□150M0
18
10 × 25 170 2
GUTWBX
□□180M0G25
22
10 × 30 200 2
GUTWBX
□□220M0G30
22
12.5 × 20 260 2
GUTWBX
□□220M0
27
10 × 35 250 2
GUTWBX
□□270M0G35
・□□には端子加工・テーピング記号が入ります。バルク品の場合は
空白となります。
□□
:Enter the appropriate lead forming or taping code. The bulk
item is a blank.
・この寸法表にないカスタム品も製造いたしますので、ご相談下さい。
Produce custom product too, which are not found in these tables.
W.V
(vdc)
Cap
(
μ
F)
ΦD×
L (mm) Ripple
品番
400
27
12.5 × 20 240 2
GUTWBX
□□270M0H20
33
10 × 40 300 2
GUTWBX
□□330M0G40
33
12.5 × 25 290 2
GUTWBX
□□330M0H25
33
16 × 20 360 2
GUTWBX
□□330M0
39
10 × 45 340 2
GUTWBX
□□390M0
39
12.5 × 30 330 2
GUTWBX
□□390M0H30
39
16 × 20 330 2
GUTWBX
□□390M0K20
47
10 × 50 390 2
GUTWBX
□□470M0G50
47
12.5 × 35 400 2
GUTWBX
□□470M0H35
47
16 × 25 470 2
GUTWBX
□□470M0
47
18 × 20 450 2
GUTWBX
□□470M0M20
56
12.5 × 40 500 2
GUTWBX
□□560M0H40
56
16 × 25 470 2
GUTWBX
□□560M0K25
56
18 × 20 450 2
GUTWBX
□□560M0M20
68
12.5 × 45 560 2
GUTWBX
□□680M0H25
68
18 × 25 585 2
GUTWBX
□□680M0
68
16 × 31.5 540 2
GUTWBX
□□680M0K30
82
12.5 × 50 630 2
GUTWBX
□□820M0H50
82
18 × 25 585 2
GUTWBX
□□820M0M25
82
18 × 31.5 610 2
GUTWBX
□□820M0
100
16 × 35.5 760 2
GUTWBX
□□101M0K35
100
18 × 31.5 765 2
GUTWBX
□□101M0
120
18 × 31.5 765 2
GUTWBX
□□121M0K30
120
18 × 35.5 865 2
GUTWBX
□□121M0
150
18 × 40 950 2
GUTWBX
□□151M0M40
450
6
.8
10 × 16 90 2
WUTWBX
□□6R8M0G16
6.8
10 × 20 110 2
WUTWBX
□□6R8M0
10
12.5 × 20 180 2
WUTWBX
□□100M0
12
10 × 20 130 2
WUTWBX
□□120M0G20
15
10 × 25 150 2
WUTWBX
□□150M0G25
15
12.5 × 25 240 2
WUTWBX
□□150M0
18
10 × 30 190 2
WUTWBX
□□180M0G30
22
10 × 35 230 2
WUTWBX
□□220M0G35
22
12.5 × 20 230 2
WUTWBX
□□220M0H20
22
16 × 20 290 2
WUTWBX
□□220M0
27
12.5 × 25 270 2
WUTWBX
□□270M0H25
27
10 × 40 280 2
WUTWBX
□□270M0G40
33
10 × 45 320 2
WUTWBX
□□330M0G45
33
12.5 × 30 320 2
WUTWBX
□□330M0H30
33
16 × 20 310 2
WUTWBX
□□330M0K20
33
16 × 25 390 2
WUTWBX
□□330M0
33
18 × 20 380 2
WUTWBX
□□330M0M20
39
10 × 50 370 2
WUTWBX
□□390M0G50
39
12.5 × 35 370 2
WUTWBX
□□390M0H35
47
12.5 × 40 400 2
WUTWBX
□□470M0H40
47
16 × 25 390 2
WUTWBX
□□470M0K25
47
18 × 20 380 2
WUTWBX
□□470M0M20
47
18 × 25 480 2
WUTWBX
□□470M0
56
12.5 × 45 500 2
WUTWBX
□□560M0H45
56
16 × 31.5 500 2
WUTWBX
□□560M0K30
68
12.5 × 50 600 2
WUTWBX
□□680M0H50
68
16 × 35.5 600 2
WUTWBX
□□680M0K35
68
18 × 25 480 2
WUTWBX
□□680M0M25
68
18 × 31.5 630 2
WUTWBX
□□680M0
82
18 × 31.5 650 2
WUTWBX
□□820M0M30
82
18 × 35.5 715 2
WUTWBX
□□820M0
100
18 × 35.5 715 2
WUTWBX
□□101M0M35
100
18 × 40 800 2
WUTWBX
□□101M0
120
18 × 40 880 2
WUTWBX
□□121M0M40
Page 42
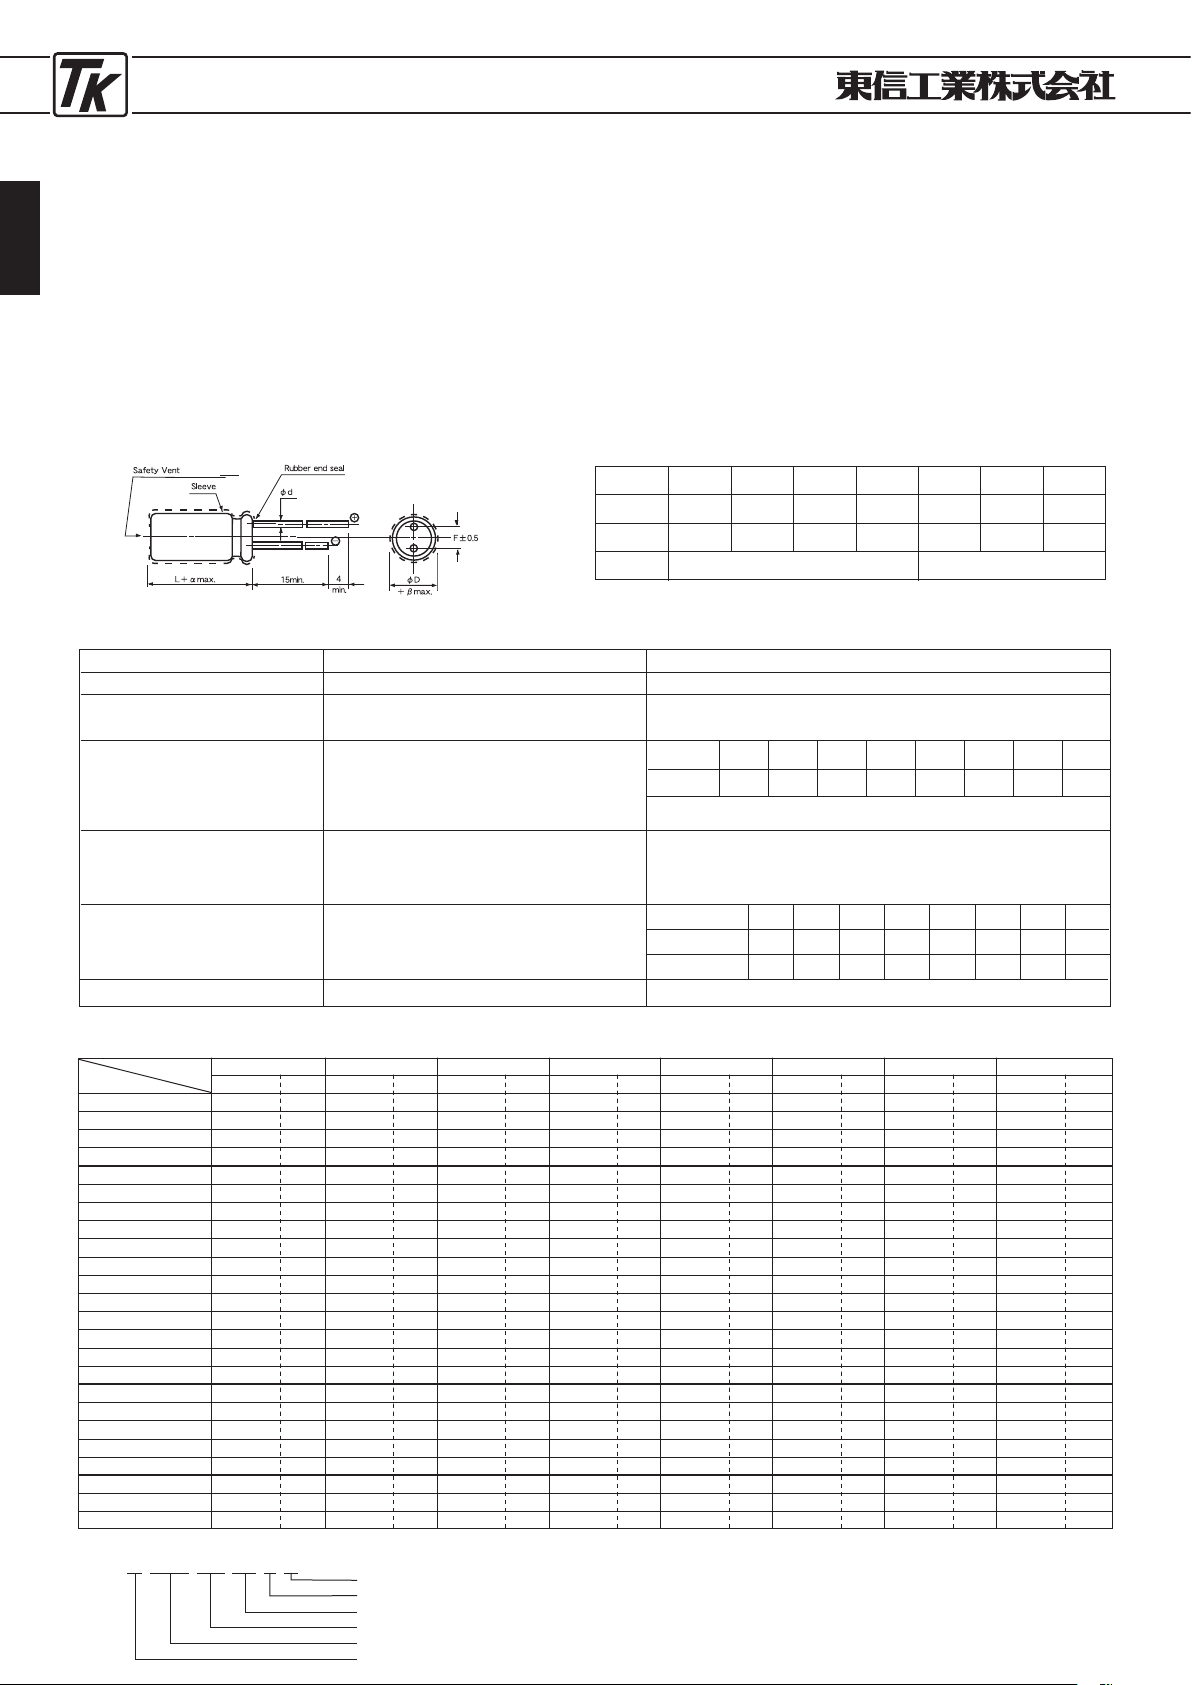
ELECTROLYTIC CAPACITORS
42
●85℃標準品 ●85℃
STANDARD TYPE
■特 徴
UTESシリーズ
JIS C
5101
CE-
04
(耐洗浄品)
TYPEUTES
JIS C
5101
CE-
04
(
Washable product
)
・
従来の
UTSS
シリーズに比べ1〜2ランク小形化した
製品でセットの小形化・軽量化に最も適しており
ます。
・小形化に伴いテーピングによる自動挿入適用範囲
が広くなりました。
■
FEATURES
・
Capacitors of this series are products which are smaller than
former (UTSS series) by
1
or 2 ranks, and most suitable for
saving size and weight of an electronic apparatus.
・
As the results of minimization, capacitors of more wide range in
item become applicable for automatic insertion
by taping.
■寸法図
/DIAGRAM OF DIMENSIONS
(D
≧φ6.3
)
■性 能
/PERFORMANCE SPECIFICATIONS
カ テ ゴ リ 温 度 範 囲
標 準 静 電 容 量 許 容 差
漏 れ 電 流 ( 最 大 値 )
損 失 角 の 正 接 ( 最 大 値 )
(
tan δ)
耐 久 性
85℃
2000時間
定格使用電圧印加
低 温 特 性
+20℃における120
Hz
の
インピーダンスに対する比
(最大値)
その他の 特性は
JI S C
5101-4に準ず る
CATEGORY TEMPERATURE RANGE
STANDARD CAPACITANCE TOLERANCE
LEAKAGE CURRENT (MAX. VALUE)
DISSIPATION FACTOR (MAX. VALUE)
ENDURANCE
APPLICATION OF RATED OPERATING
VOLTAGE, AT
85℃
FOR
2000
HOURS.
LOW TEMPERATURE STABILITY
RATIO OF IMPEDANCE AT COLD TO
THAT AT
20℃, 120
Hz. MAX. VALUE.
THE OTHER CHARACTERISTICS
−40℃〜+85℃
−20%〜+20%
(
120
Hz)
I=0.01CV OR 3μA WHICHEVER
IS THE GREATER (after
2
minutes)
When the capacitance exceed
1,000μ
F, the value of tanδ is increased by
0.02
for each increment of 1,
000μ
F or its fraction.
CAPACITANCE CHANGE : LESS THAN
20%
OF THE INITIAL
MEASURED VALUE.
DISSIPATION FACTOR : LESS THAN
200%
OF THE INITIAL
SPECIFIED VALUE.
LEAKAGE CURRENT : LESS THAN THE INITIAL SPECIFIED VALUE.
THE OTHER CHARACTERISTICS ARE BASED ON JIS C
5101-4
C=RATED CAPACITANCE (μF)
V
=
WORKING VOLTAGE (V)
W. V
tan
δ
6
.
3
0
.
28
10
0
.
24
16
0
.
20
25
0
.
16
35
0
.
14
50
0
.
12
63
0
.
11
100
0
.
10
W. V
Z
−25℃/Z+20℃
Z
−40℃/Z+20℃
6.3
5
12
10
4
10
16
3
8
25
2
5
35
2
4
50
2
3
63
2
3
100
2
3
■寸法表
/CASE SIZE TABLE
0.1
0
.
22
0.33
0
.
47
1.0
2
.
2
3
.
3
4.7
10
22
33
47
100
220
330
470
1000
2200
3300
4700
6800
10000
15000
22000
W.V
μ
F
6.3 (0
J)
10 (1
A)
16 (1
C)
25 (1
E)
35 (1
V)
50 (1
H)
63 (1
J)
100 (2
A)
Unit : mm
φ
D
φ
d
F
β
5
0
.
5
2
.
0
6
.
3
0
.
5
2
.
5
8
0
.
6
3
.
5
10
0
.
6
5
.
0
12
.
5
0
.
6
5
.
0
16
0
.
8
7
.
5
18
0
.
8
7
.
5
0
.
5 1.0
L
<20 α=1.5
L
≧20 α=2
5×11
5×11
5×11
5×11
6
.
3×11
6
.
3×11
8×11.5
10×16
10×20
12
.
5×20
12
.
5×25
16×25
16×30
18×35
5×11
5×11
5×11
6
.
3×11
6
.
3×11
8×11
.
5
10×12.5
10×20
12
.
5×20
12.5×25
16×25
16×30
18×35
5×11
5×11
5×11
5×11
5×11
6
.
3×11
8×11
.
5
8×11
.
5
10×16
12
.
5×20
12
.
5×25
16×25
16×30
18×35
5×11
5×11
5×11
5×11
5×11
6
.
3×11
8×11.5
8×11
.
5
10×12
.
5
10×20
12
.
5×25
16×25
16×30
18×35
5×11
5×11
5×11
5×11
5×11
6
.
3×11
8×11.5
10×12
.
5
10×16
12
.
5×20
16×25
16×30
18×35
5×11
5×11
5×11
5×11
5×11
5×11
5×11
5×11
5×11
5×11
5×11
6
.
3×11
8×11
.
5
10×12.5
10×16
10×20
12
.
5×25
16×30
18×35
5×11
5×11
5×11
5×11
5×11
5×11
5×11
5×11
5×11
5×11
6
.
3×11
6.3×11
8×11
.
5
10×16
10×20
12
.
5×20
16×25
18×35
5×11
5×11
5×11
5×11
5×11
5×11
5×11
5×11
5×11
6
.
3×11
8×11
.
5
10×12.5
10×16
12
.
5×20
16×25
16×30
18×40
Unit : mm
( )
( )
φD×
L
55
75
130
140
170
235
400
750
960
1170
1270
1450
1700
1900
80
95
100
170
210
295
510
870
1090
1200
1400
1600
1850
30
75
90
110
120
190
270
325
615
1000
1200
1360
1600
1800
30
45
80
100
120
140
250
360
430
750
1200
1300
1500
1750
35
55
85
105
130
150
290
385
505
900
1250
1400
1600
2
3
5
6
10
20
30
37
65
100
110
115
195
340
455
630
1050
1250
1300
2
3
5
7
11
22
30
37
70
85
100
150
260
450
550
750
1100
1400
2
4
7
10
15
25
35
42
60
110
145
180
350
550
700
900
1300
■
Ripple current
〔
Max. Value mA〕at
85℃ 120
Hz.
Ripple currentφD×L
Ripple currentφD×L
Ripple currentφD×L
Ripple currentφD×L
Ripple currentφD×L
Ripple currentφD×L
Ripple currentφD×L
Ripple current
■品番ご指定法/
HOW TO SPECIFY ITEM NUMBER
0
J UTES □□
330
M
□
付記コード/
Additional Code
静電容量許容差/
Capacitance Tolerance
静電容量記号/
Capacitance Symbol
形状記号/
Style Symbol
シリーズ名/
Series Name
定格電圧/
Rated Voltage
(0R1)
(R
22
)
(R33)
(R
47
)
(
010
)
(
2R2
)
(
3R3
)
(4R7)
(
100
)
(
220
)
(
330
)
(
470
)
(
101
)
(
221
)
(
331
)
(
471
)
(
102
)
(
222
)
(
332
)
(
472
)
(
682
)
(
103
)
(
153
)
(
223
)
Page 43
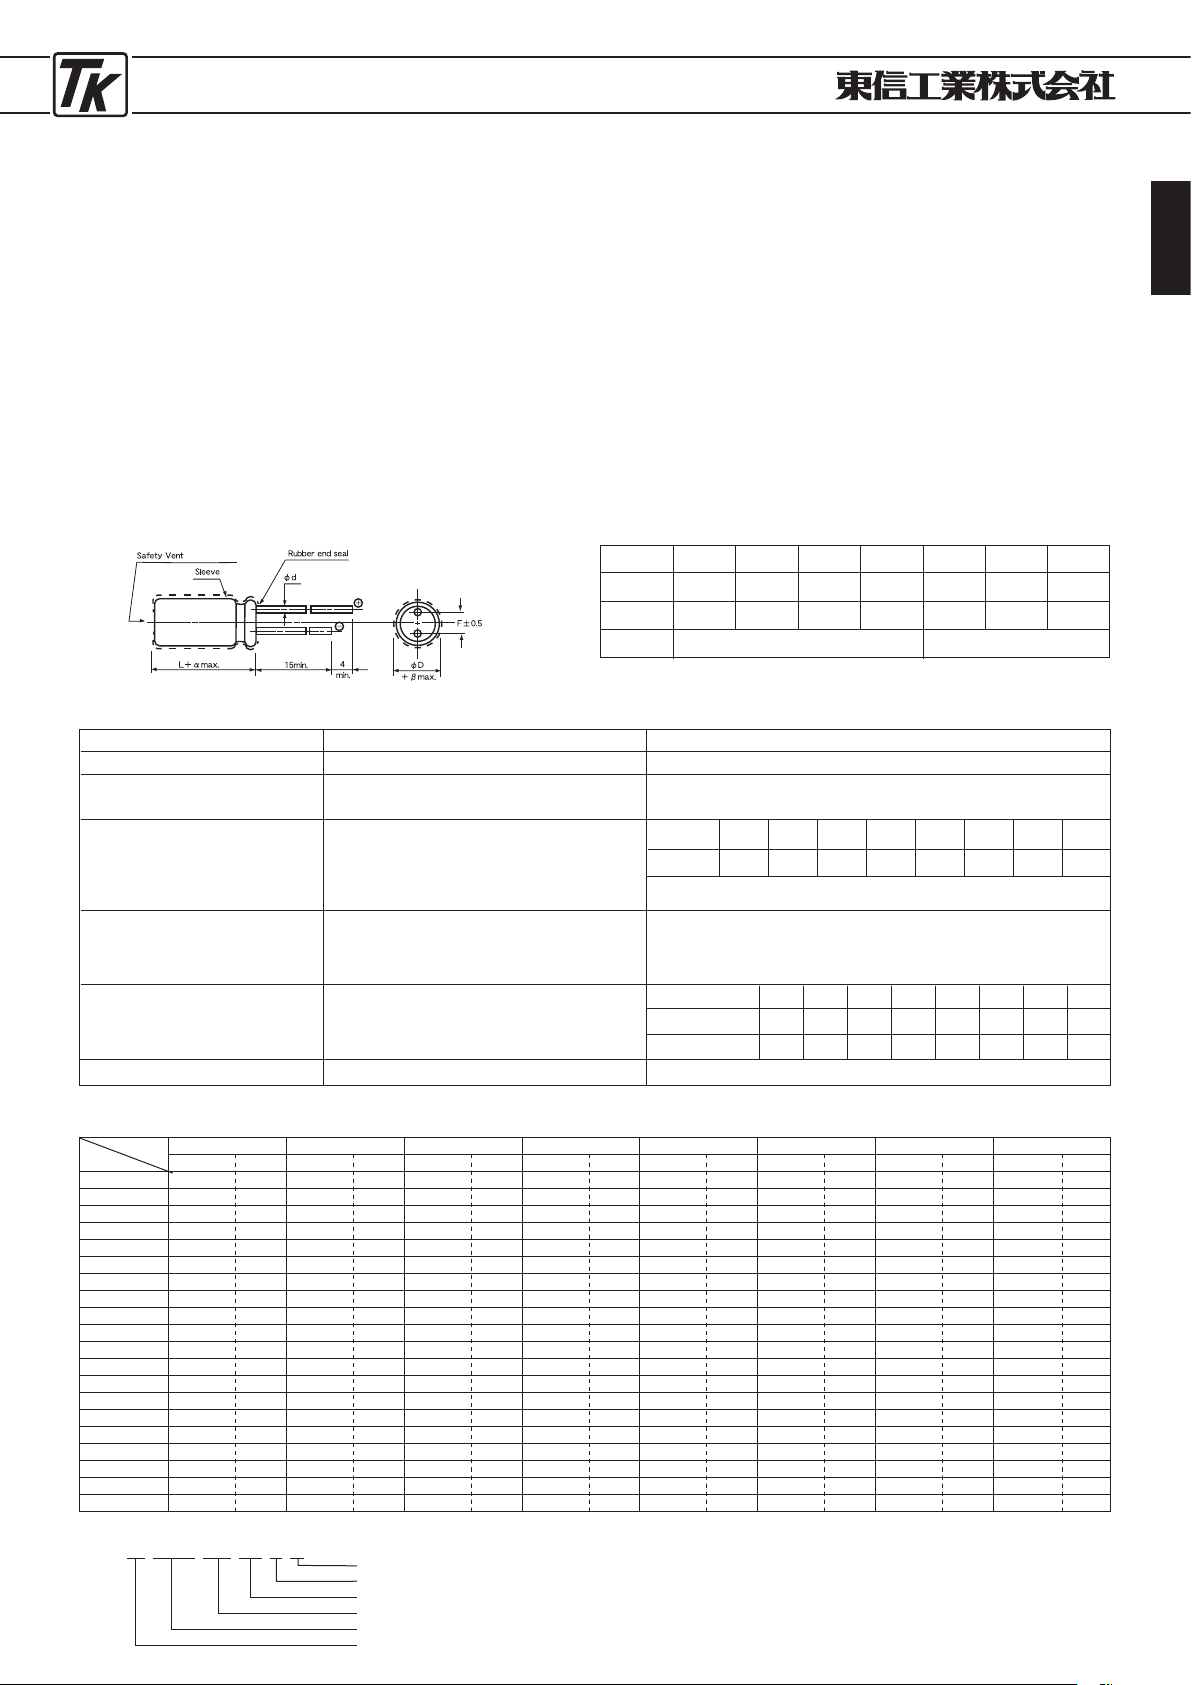
ELECTROLYTIC CAPACITORS
43
●低電圧小形化105℃品
●
LOW VOLTAGE MINIATURIZED PRODUCTS
105℃
USE
■特 徴
UTWEシリーズ
JIS C
5101
CE-
04
(耐洗浄品)
TYPEUTWE
JIS C
5101
CE-
04
(
Washable product
)
・使 用温度範 囲が−40℃〜10 5℃と広く、更に寿 命
特性も105℃、2
,
000時間を保証した高安定化アル
ミ電解コンデンサです。
・従 来 品よ り 小形化 さ れ、 通 信機 器 ・工 業 用計 測
器・自動車電装 品等高信頼性を 要求される用途に
最適です。
・自動挿入機用テーピング製品
(
φ16×30以下)及び
自立形フォーミ ング製品も取り 揃えております。
■
FEATURES
・
Products of this type are highly stabilized aluminum electrolytic capacitors
with a wide operating temperature range of
−40℃
to
+105℃
, and
their life characteristic is such that
2,000
hours are guaranteed at
105℃
.
・
These capacitors are small-sized as com pared with traditional
ones, and are very suit able to su ch use whi ch requires high
reliability as telecommunication equipment, industrial measuring
instrument, electrical equipment for automobile.
・
A series of capacitors with taped leads for automatic insertion
(φ16×30
or less) and a series of self-standing type capacitors
with formed leads are provided.
■寸法図
/DIAGRAM OF DIMENSIONS
(D
≧φ6.3
)
■性 能
/PERFORMANCE SPECIFICATIONS
カ テ ゴ リ 温 度 範 囲
標 準 静 電 容 量 許 容 差
漏 れ 電 流 ( 最 大 値 )
損 失 角 の 正 接 ( 最 大 値 )
(
tan δ)
耐 久 性
105℃
2000時間
定格使用電圧印加
低 温 特 性
+20℃における120
Hz
の
インピーダンスに対する比
(最大値)
その他の 特性は
JI S C
5101-4に準ず る
CATEGORY TEMPERATURE RANGE
STANDARD CAPACITANCE TOLERANCE
LEAKAGE CURRENT (MAX. VALUE)
DISSIPATION FACTOR (MAX. VALUE)
ENDURANCE
APPLICATION OF RATED OPERATING
VOLTAGE, AT
105℃
FOR
2000
HOURS.
LOW TEMPERATURE STABILITY
RATIO OF IMPEDANCE AT COLD TO
THAT AT
20℃, 120
Hz. MAX. VALUE
THE OTHER CHARACTERISTICS
−40〜+105℃
−20〜+20%
(
120
Hz)
I=0.01CV OR 3μA WHICHEVER
IS THE GREATER (after
2
minutes)
When the capacitance exceed
1,000μ
F, the value of tanδ is increased by
0.02
for each increment of 1,
000μ
F or its fraction.
CAPACITANCE CHANGE : LESS THAN
25%
OF THE INITIAL
MEASURED VALUE.
DISSIPATION FACTOR : LESS THAN
200%
OF THE INITIAL
SPECIFIED VALUE.
LEAKAGE CURRENT : LESS THAN THE INITIAL SPECIFIED VALUE.
THE OTHER CHARACTERISTICS ARE BASED ON JIS C
5101-4
C=RATED CAPACITANCE (μF)
V
=
WORKING VOLTAGE (V)
W. V
tan
δ
6
.
3
0
.
28
10
0
.
24
16
0
.
20
25
0
.
16
35
0
.
14
50
0
.
12
63
0
.
11
100
0
.
10
■寸法表
/CASE SIZE TABLE
0.1〜0.47
1
.
0
2
.
2
3
.
3
4
.
7
10
22
33
47
100
220
330
470
1000
2200
3300
4700
6800
10000
15000
5×11
5×11
5×11
5×11
6
.
3×11
6
.
3×11
10×12
.
5
10×20
12
.
5×20
12
.
5×20
12
.
5×25
16×25
16×35
5×11
5×11
5×11
6
.
3×11
6
.
3×11
8×11
.
5
10×12
.
5
10×20
12
.
5×20
12
.
5×25
16×25
16×35
18×35
5×11
5×11
5×11
5×11
5×11
6.3×11
8×11
.
5
8×11
.
5
10×16
12
.
5×20
12
.
5×25
16×25
16×30
18×35
5×11
5×11
5×11
5×11
5×11
6.3×11
8×11
.
5
10×12
.
5
10×12
.
5
10×20
12
.
5×25
16×25
16×30
18×35
5×11
5×11
5×11
5×11
5×11
6
.
3×11
10×12
.
5
10×12
.
5
10×16
12
.
5×20
16×25
16×35
18×35
5×11
5×11
5×11
5×11
5×11
5×11
5×11
5×11
6
.
3×11
8×11
.
5
10×16
10×20
12.5×20
12
.
5×25
16×35
18×35
5×11
5×11
6.3×11
6
.
3×11
10×12
.
5
10×16
10×20
12.5×20
16×25
18×35
5×11
5×11
5×11
5×11
5×11
6
.
3×11
8×11
.
5
8×11
.
5
10×12
.
5
10×20
12
.
5×25
16×25
16×30
18×40
W.V
μ
F
φD×
L
φD×
L
φD×
L
φD×
L
φD×
L
φD×
L
φD×
L
φD×
L
Unit : mm
W.V
Z
−25℃/Z+20℃
Z
−40℃/Z+20℃
6.3
5
12
10
4
10
16
3
8
25
2
5
35
2
4
50
2
3
63
2
3
100
2
3
Unit : mm
φ
D
φ
d
F
β
5
0
.
5
2
.
0
6
.
3
0
.
5
2
.
5
8
0
.
6
3
.
5
10
0
.
6
5
.
0
12
.
5
0
.
6
5
.
0
16
0
.
8
7
.
5
18
0
.
8
7
.
5
0
.
5 1.0
L
<20 α=1.5
L
≧20 α=2
■
Ripple current
〔
Max. Value mA〕at
105℃ 120
Hz.
40
45
50
135
190
230
340
645
750
965
1150
1430
1800
50
55
105
150
200
250
445
695
895
1080
1330
1650
2110
30
50
55
60
110
180
260
310
510
825
1000
1220
1450
1930
20
30
50
65
80
130
230
310
375
595
930
1180
1470
1830
25
39
60
75
90
150
270
340
415
715
1110
1460
1720
2〜6
12
18
22
29
43
68
86
110
180
295
375
530
790
1310
1580
46
71
100
120
215
335
510
640
930
1450
1.5~7.1
15
21
29
32
54
93
130
165
269
440
540
715
985
( )
( )
6.3 (0
J)
10 (1
A)
16 (1
C)
25 (1
E)
35 (1
V)
50 (1
H)
63 (1
J)
100 (2
A)
Ripple current Ripple current Ripple current Ripple current Ripple current Ripple current Ripple current Ripple current
■品番ご指定法/
HOW TO SPECIFY ITEM NUMBER
1
V UTWE □□
101
M
□
付記コード/
Additional Code
静電容量許容差/
Capacitance Tolerance
静電容量記号/
Capacitance Symbol
形状記号/
Style Symbol
シリーズ名/
Series Name
定格電圧/
Rated Voltage
Page 44
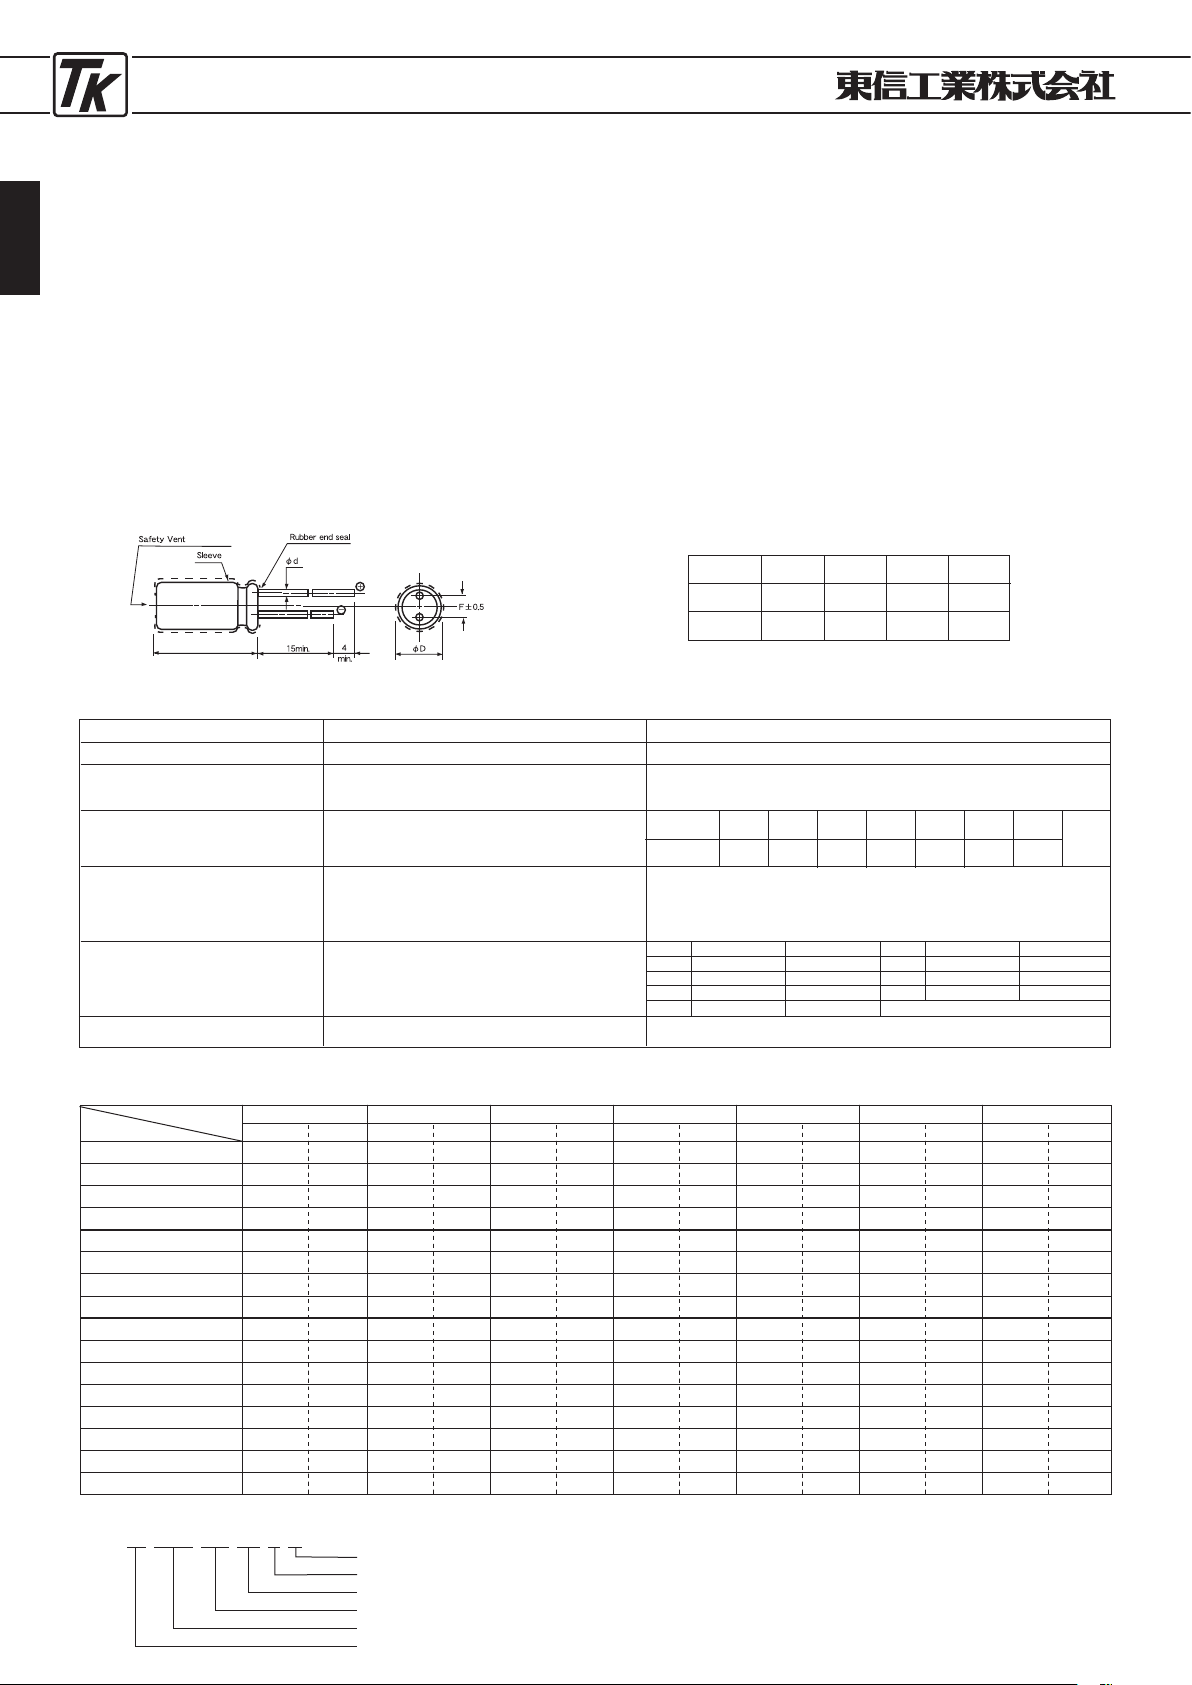
ELECTROLYTIC CAPACITORS
44
●高さ5
mm
超小形製品 ●5
mm HEIGHT SUBMINIATURIZED TYPE
■特 徴
UTCXシリーズ
JIS C
5101
CE-
04
(耐洗浄品)
TYPEUTCX
JIS C
5101
CE-
04
(
Washable product
)
・公称高さ寸法を5mmに統一した超小形の電解コン
デンサで超小形機器、薄型機器へのご使用には最
適なシリーズです。
・自動化されたラインで製造された高信頼性をもっ
た製品です。
・他の標準品に比べ特性的にも遜色なく一般民生用
機器のほか産業機器へのご使用も可能です。
■
FEATURES
・
This is a series of extra small sized electrolytic capacitors nominal
height of which is standardized to 5 mm, and consequently this series is
most suitable for application to electronic apparatus of extra miniature
size and of thin shape.
・
These products are of high reliability produced in fully automated
production lines.
・
These products have good enough characteristics as compared
with other standard products, and are applicable for industrial
apparatus not only for general domestic apparatus.
■寸法図
/DIAGRAM OF DIMENSIONS
■性 能
/PERFORMANCE SPECIFICATIONS
カ テ ゴ リ 温 度 範 囲
標 準 静 電 容 量 許 容 差
漏 れ 電 流 ( 最 大 値 )
損 失 角 の 正 接 ( 最 大 値 )
(
tan δ)
耐 久 性
85℃
1000時間
定格使用電圧印加
低 温 特 性
+20℃における120
Hz
の
インピーダンスに対する比
(最大値)
その他の 特性は
JI S C
5101-4に準ず る
CATEGORY TEMPERATURE RANGE
STANDARD CAPACITANCE TOLERANCE
LEAKAGE CURRENT (MAX. VALUE)
DISSIPATION FACTOR (MAX. VALUE)
ENDURANCE
APPLICATION OF RATED OPERATING
VOLTAGE, AT
85℃
FOR
1000
HOURS.
THE OTHER CHARACTERISTICS
−40℃〜+85℃
−20%〜+20%
(
120
Hz)
I=0.01CV OR 3μA WHICHEVER
IS THE GREATER (after
2
minutes)
CAPACITANCE CHANGE : LESS THAN
25%
OF THE INITIAL
MEASURED VALUE. (
4
WV : LESS THAN
30%)
DISSIPATION FACTOR : LESS THAN
200%
OF THE INITIAL
SPECIFIED VALUE.
LEAKAGE CURRENT : LESS THAN THE INITIAL SPECIFIED VALUE.
THE OTHER CHARACTERISTICS ARE BASED ON JIS C
5101-4
C=RATED CAPACITANCE (μF)
V
=
WORKING VOLTAGE (V)
W. V
tan
δ
6
.
3
0
.
25
10
0
.
20
16
0
.
17
25
0
.
15
35
0
.
13
50
0
.
10
■寸法表
/CASE SIZE TABLE
0.1
0
.
22
0
.
33
0
.
47
1
.
0
2
.
2
3
.
3
4
.
7
10
22
33
47
100
220
330
470
W.V
μ
F
6.3 (0
J)
10 (1
A)
16 (1
C)
25 (1
E)
35 (1
V)
50 (1
H)
4 (0
G)
Unit : mm
φ
D
φ
d
F
4
0
.
45
1
.
5
5
0
.
45
2
.
0
6
.
3
0
.
45
2
.
5
8
0
.
45
2
.
5
4×5
4×5
5×5
6
.
3×5
−
8×5
4×5
5×5
5×5
6
.
3×5
−
8×5
5×5
5×5
6
.
3×5
6
.
3×5
8×5
4×5
5×5
6
.
3×5
6
.
3×5
8×5
4×5
5×5
6
.
3×5
6
.
3×5
6
.
3×5
8×5
4×5
4×5
5×5
6
.
3×5
6
.
3×5
8×5
4×5
4×5
4×5
4×5
4×5
4×5
4×5
5×5
6
.
3×5
6
.
3×5
8×5
Unit : mm
W.V
4
6
.
3
10
16
−
25℃/+20℃
7
4
3
2
−
40℃/+20℃
15
10
8
6
W.V
25
35
50
−
25℃/+20℃
2
2
2
−
40℃/+20℃
4
4
3
4
0
.
35
L+1max.
+0.5max.
( )
LOW TEMPERATURE STABILITY
RATIO OF IMPEDANCE AT COLD TO
THAT AT
20℃, 120
Hz. MAX. VALUE.
( )
27
34
55
74
−
145
22
34
37
62
−
130
30
41
50
70
120
33
35
49
58
110
17
27
42
52
58
110
12
14
27
46
52
80
1
2
3
5
8
.
5
10
13
20
31
46
71
φD×LRipple currentφD×L
Ripple currentφD×L
Ripple currentφD×L
Ripple currentφD×L
Ripple currentφD×L
Ripple currentφD×L
Ripple current
■
Ripple current
〔
Max. Value mA〕at
85℃ 120
Hz.
■品番ご指定法/
HOW TO SPECIFY ITEM NUMBER
0
G UTCX □□
470
M
□
付記コード/
Additional Code
静電容量許容差/
Capacitance Tolerance
静電容量記号/
Capacitance Symbol
形状記号/
Style Symbol
シリーズ名/
Series Name
定格電圧/
Rated Voltage
(0R1)
(
R
22)
(
R
33)
(
R
47)
(010)
(2
R
2)
(3
R
3)
(4
R
7)
(100)
(220)
(330)
(470)
(101)
(221)
(331)
(471)
Page 45
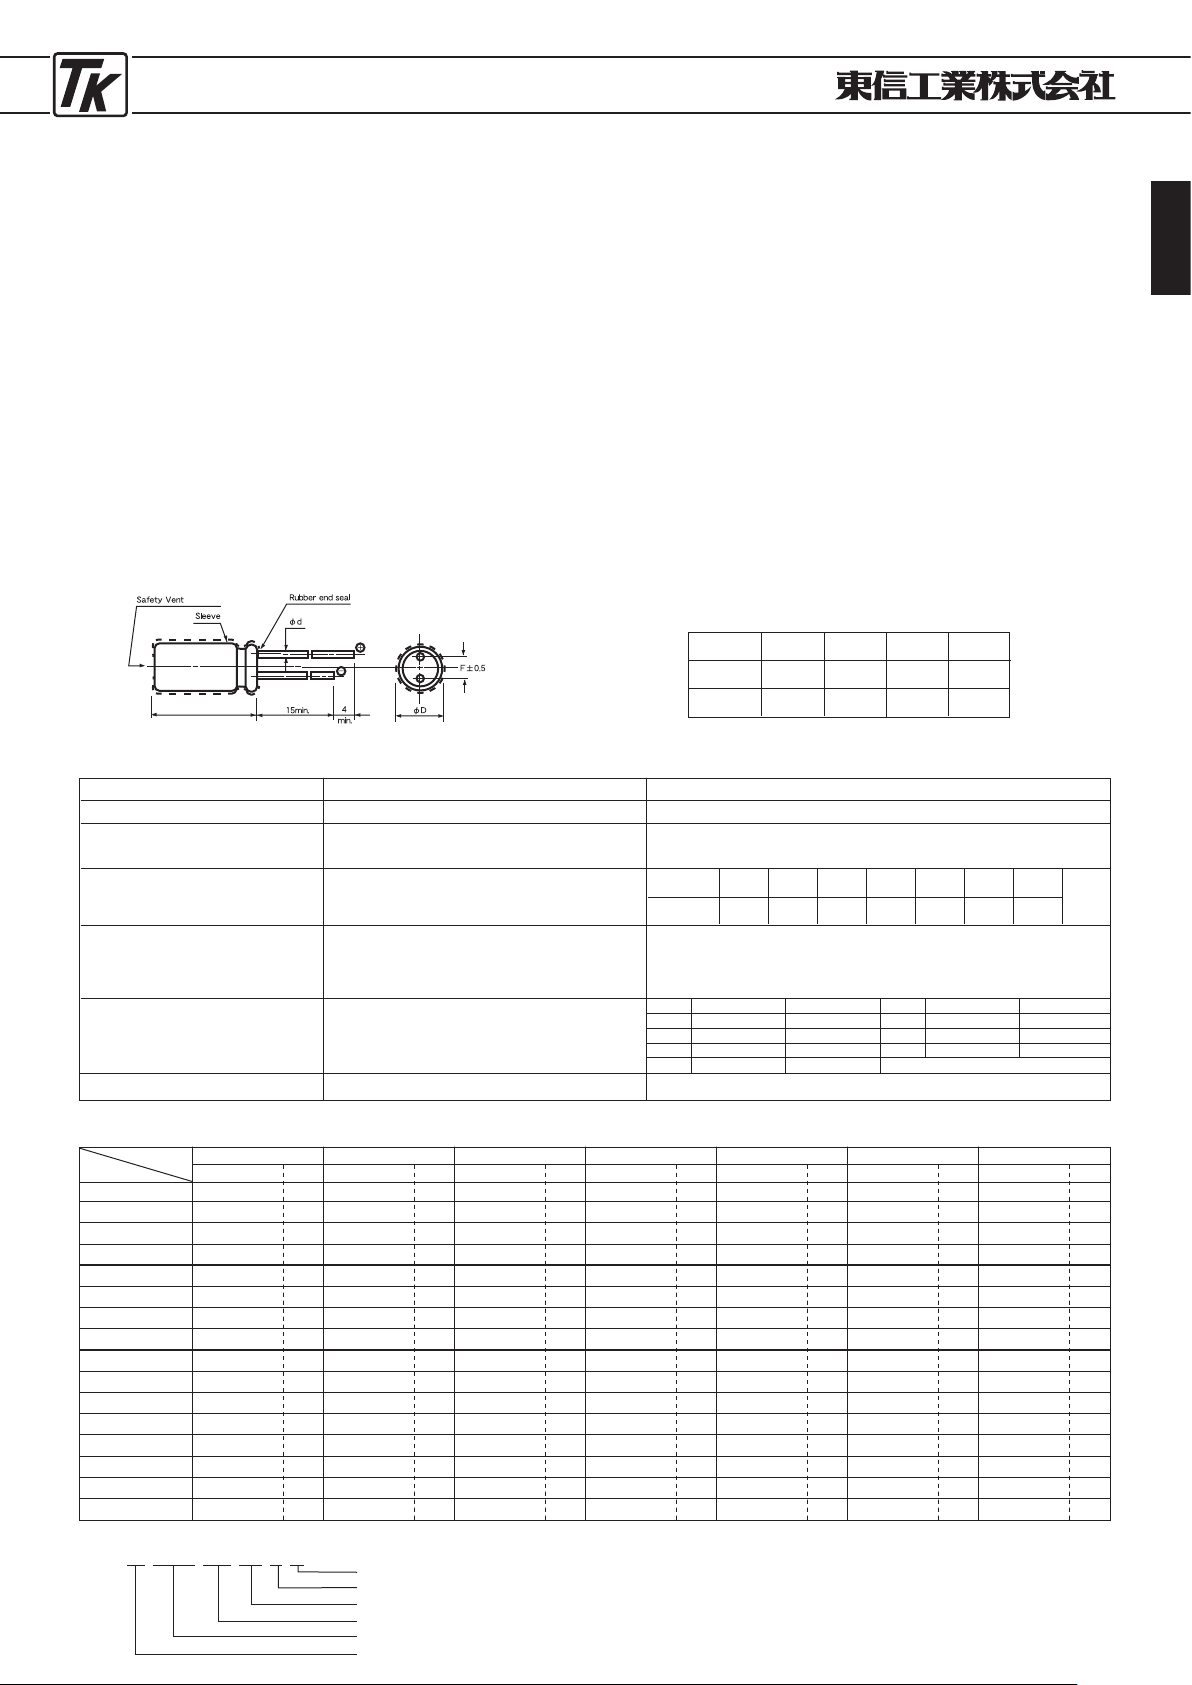
ELECTROLYTIC CAPACITORS
45
●高さ7
mm
標準品 ●7
mm HEIGHT STANDARDIZED TYPE
■特 徴
UTCMシリーズ
JIS C
5101
CE-
04
(耐洗浄品)
TYPEUTCM
JIS C
5101
CE-
04
(
Washable product
)
・高さ寸法を7mmに統一し外径φ4のものからありま
す。このため機器の実装密度が高くできてセットの
小形化に役立ちます。
・自動化ラインで製造されバラツキが少く高信頼性を
もった製品です。
・電気特性も優れており、一般民生用機器の他に産業
用機器にも充分ご使用頂けます。
・自動挿入機用テーピング製品及び自立形フォーミン
グ製品も取り揃えております。
・
UTCMSはUTCM
をさらに小形化したシリーズです。
■
FEATURES
・
Height dimension is standardized to 7mm, and products of an outside
diameter from 4φ are available. This small height enables dense actual
mounting of capacitors on equipment and are useful to make the
equipment more smaller or thinner.
・
These products are of high reliability with less dispersion produced under
fully automated production lines.
・
Electrical performances are also excellent and this type products are
sufficiently used for industrial equipment besides for general domestic
appliances.
・
Capacitors with taped leads for automatic insertion and selfstanding
type capacitors with formed leads are also available.
・
UTCMS is a series which is a subminiature of UTCM.
■寸法図
/DIAGRAM OF DIMENSIONS
■性 能
/PERFORMANCE SPECIFICATIONS
カ テ ゴ リ 温 度 範 囲
標 準 静 電 容 量 許 容 差
漏 れ 電 流 ( 最 大 値 )
損 失 角 の 正 接 ( 最 大 値 )
(
tan δ)
耐 久 性
85℃
1000時間
定格使用電圧印加
低 温 特 性
+20℃における120
Hz
の
インピーダンスに対する比
(最大値)
その他の 特性は
JI S C
5101-4に準ず る
CATEGORY TEMPERATURE RANGE
STANDARD CAPACITANCE TOLERANCE
LEAKAGE CURRENT (MAX. VALUE)
DISSIPATION FACTOR (MAX. VALUE)
ENDURANCE
APPLICATION OF RATED OPERATING
VOLTAGE, AT
85℃
FOR
1000
HOURS.
LOW TEMPERATURE STABILITY
RATIO OF IMPEDANCE AT COLD TO
THAT AT
20℃, 120
Hz. MAX. VALUE.
THE OTHER CHARACTERISTICS
−40℃〜+85℃
−20%〜+20%
(
120
Hz)
I=0.01CV OR 3μA WHICHEVER
IS THE GREATER (after
2
minutes)
CAPACITANCE CHANGE : LESS THAN
20%
OF THE INITIAL
MEASURED VALUE.
DISSIPATION FACTOR : LESS THAN
200%
OF THE INITIAL
SPECIFIED VALUE.
LEAKAGE CURRENT : LESS THAN THE INITIAL SPECIFIED VALUE.
THE OTHER CHARACTERISTICS ARE BASED ON JIS C
5101-4
C=RATED CAPACITANCE (μF)
V
=
WORKING VOLTAGE (V)
W. V
tan
δ
6
.
3
0
.
25
10
0
.
20
16
0
.
17
25
0
.
15
35
0
.
13
50
0
.
10
0.1
0
.
22
0
.
33
0
.
47
1
.
0
2
.
2
3
.
3
4
.
7
10
22
33
47
100
220
330
470
W.V
μ
F
6.3 (0
J)
10 (1
A)
16 (1
C)
25 (1
E)
35 (1
V)
50 (1
H)
4 (0
G)
Unit : mm
φ
D
φ
d
F
4
0
.
45
1
.
5
5
0
.
45
2
.
0
6
.
3
0
.
45
2
.
5
8
0
.
45
3
.
5
4×7
4×7
5×7
6
.
3×7
8×7
8×7
4×7
5×7
(
4×7)
5×7
(
4×7)
6
.
3×7 (5×7)
6
.
3×7
8×7
5×7
(
4×7)
5×7
(
4×7)
6
.
3×7 (5×7)
6
.
3×7
8×7
(6.
3×7)
4×7
5×7
(
4×7)
6
.
3×7 (5×7)
6
.
3×7 (5×7)
6
.
3×7
8×7
4×7
5×7
(
4×7)
6
.
3×7 (5×7)
6
.
3×7
6
.
3×7
8×7
4×7
5×7
(
4×7)
6
.
3×7 (5×7)
6
.
3×7
8×7
4×7
4×7
4×7
4×7
4×7
4×7
4×7
5×7
(
4×7)
6
.
3×7 (5×7)
6
.
3×7
8×7
W.V
4
6
.
3
10
16
−
25℃/+20℃
7
4
3
2
−
40℃/+20℃
15
10
8
6
W.V
25
35
50
−
25℃/+20℃
2
2
2
−
40℃/+20℃
4
4
3
4
0
.
35
(D
=φ8
)
UTCMSシリーズ
TYPEUTCMS
+0.5max.
L+1max.
( )
( )
■寸法表
/CASE SIZE TABLE
Unit : mm
■
Ripple current
〔
Max. Value mA r.m.s〕at
85℃ 120
Hz.
22
34
61
82
110
140
29
38
46
71
103
130
35
43
65
80
120
28
39
60
70
91
130
21
28
55
65
85
100
22
30
60
65
85
1
2
3
5
10
16
18
23
35
60
75
φ
D×L
Ripple currentφD×L
Ripple currentφD×L
Ripple currentφD×L
Ripple currentφD×L
Ripple currentφD×L
Ripple currentφD×L
Ripple current
■品番ご指定法/
HOW TO SPECIFY ITEM NUMBER
1
C UTCM □□
470
M
□
付記コード/
Additional Code
静電容量許容差/
Capacitance Tolerance
静電容量記号/
Capacitance Symbol
形状記号/
Style Symbol
シリーズ名/
Series Name
定格電圧/
Rated Voltage
(0R1
)
(R22)
(
R
33)
(
R
47)
(010)
(2
R
2)
(3
R
3)
(4
R
7)
(100)
(220)
(330)
(470)
(101)
(221)
(331)
(471)
( )内は
UTCMS
シリーズとなります。
Page 46
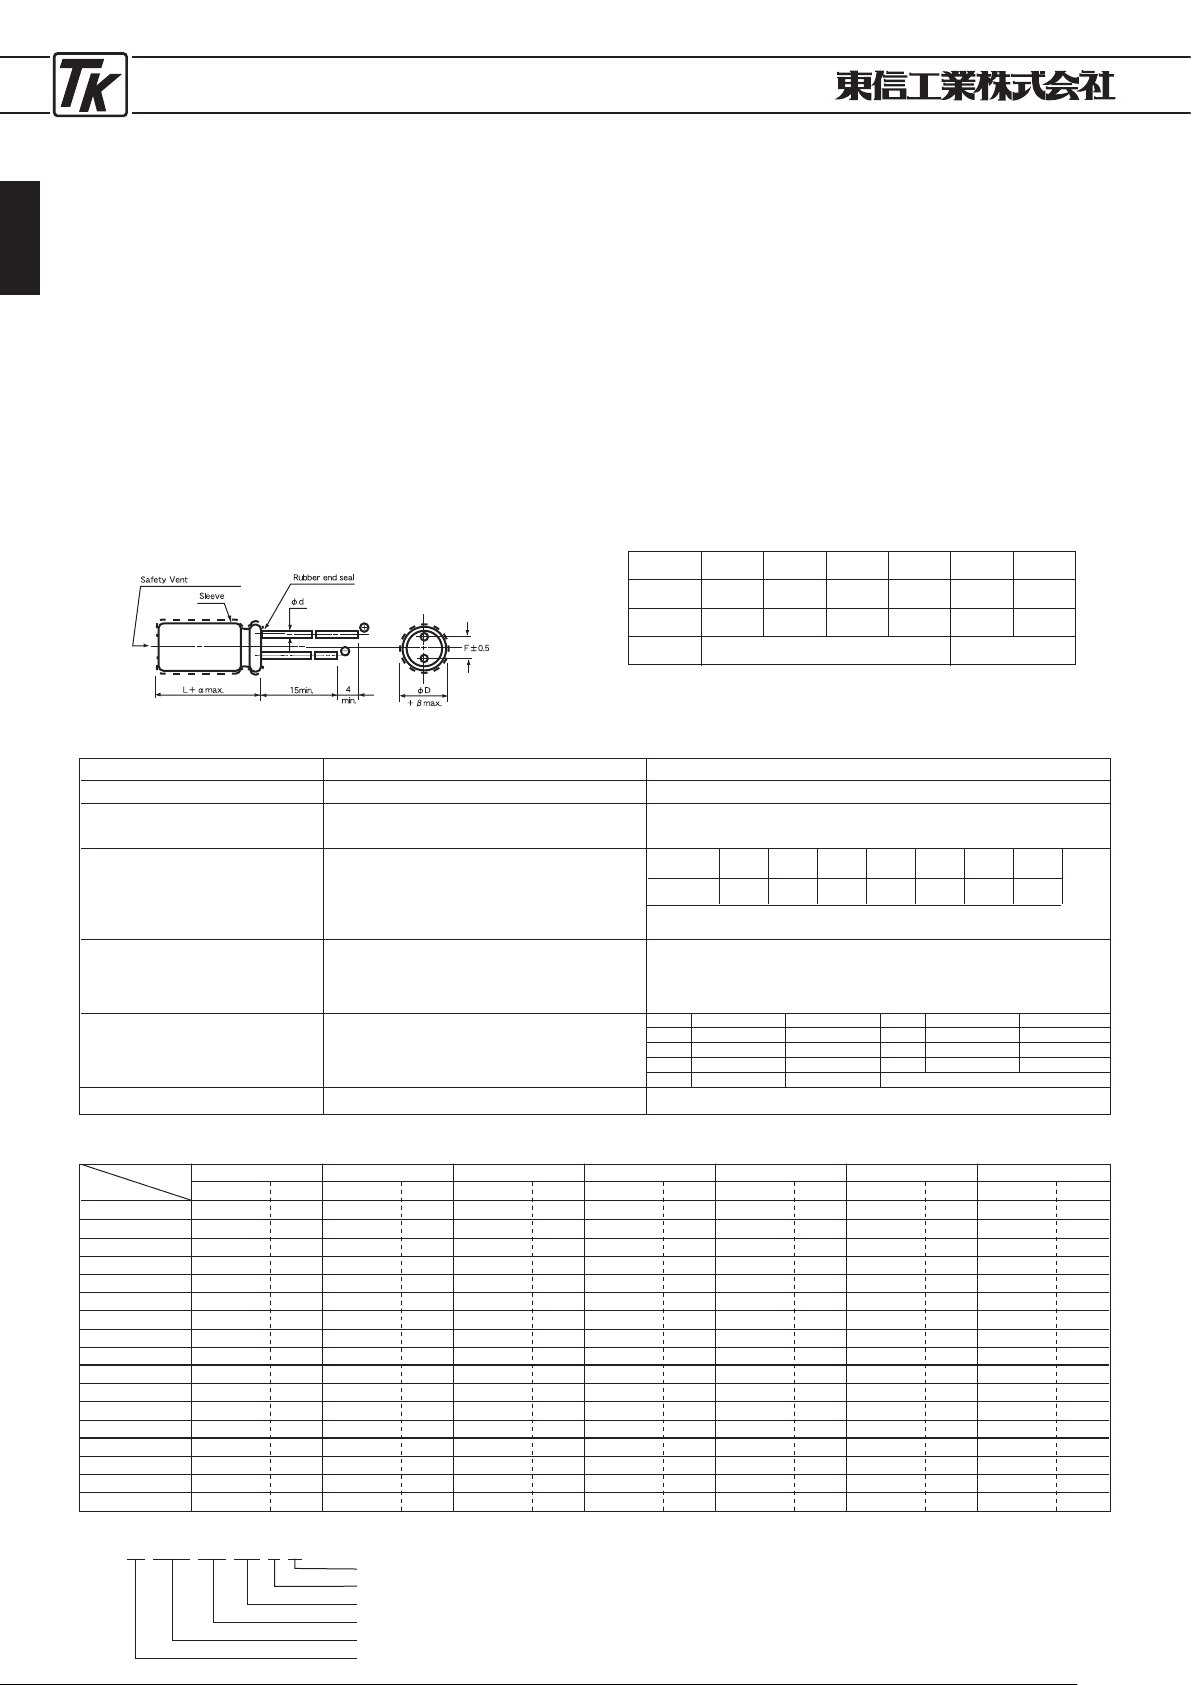
ELECTROLYTIC CAPACITORS
46
●低漏れ電流標準品
●
LOW LEAKAGE CURRENT STANDARDIZED TYPE
■特 徴
UTLSシリーズ
JIS C
5101
CE-
04
(耐洗浄品)
TYPEUTLS
JIS C
5101
CE-
04
(
Washable product
)
・漏れ電流を極めて低く抑えた製品で、高級音響機器
のイコライザー回路のカップリングコンデンサ及び
バイパスコンデンサの残留ノイズ、ソース切換時の
クリック音、可変抵抗まわりのノイズの防止用に最
適です。
・静電容量許容差が±10%の製品も取り揃えており時
定数回路にもご使用頂けます。
・自動挿入機用のテーピング製品(φ16×30以下)及
び自立形フォーミング製品も取り揃えております。
■
FEATURES
・
In products of this type leakage current is maintained within a
very small value therefore these products are very suitable for
suppressing residual noise of coupling capacitor or by-pass capacitor of
equalizer circuit, click at change-over of power sause, and noise caused
by variable resistors.
・
Products with the nominal capacitance tolerance of
±10%
are
available. They can be also used for a time constant circuit.
・
Capacitors with taped leads for automatic insertion (
φ16×30
or less)
and self-standing type capacitors with formed leads are also available.
■寸法図
/DIAGRAM OF DIMENSIONS
■性 能
/PERFORMANCE SPECIFICATIONS
カ テ ゴ リ 温 度 範 囲
標 準 静 電 容 量 許 容 差
漏 れ 電 流 ( 最 大 値 )
損 失 角 の 正 接 ( 最 大 値 )
(
tan δ)
耐 久 性
85℃
2000時間
定格使用電圧印加
低 温 特 性
+20℃における120
Hz
の
インピーダンスに対する比
(最大値)
その他の 特性は
JI S C
5101-4に準ず る
CATEGORY TEMPERATURE RANGE
STANDARD CAPACITANCE TOLERANCE
LEAKAGE CURRENT (MAX. VALUE)
DISSIPATION FACTOR (MAX. VALUE)
ENDURANCE
APPLICATION OF RATED OPERATING
VOLTAGE, AT
85℃
FOR
2000
HOURS.
LOW TEMPERATURE STABILITY
RATIO OF IMPEDANCE AT COLD TO
THAT AT
20℃, 120
Hz. MAX. VALUE.
THE OTHER CHARACTERISTICS
−40℃〜+85℃
−20〜+20%
(
120
Hz)
I=0.
002
CV OR 0.3μA WHICHEVER
IS THE GREATER (after
2
minutes)
When the capacitance exceed
1,000μ
F, the value of tanδ is increased by
0.02
for each increment of 1,
000μ
F or its fraction.
CAPACITANCE CHANGE : LESS THAN
20%
OF THE INITIAL
MEASURED VALUE.
DISSIPATION FACTOR : LESS THAN
200%
OF THE INITIAL
SPECIFIED VALUE.
LEAKAGE CURRENT : LESS THAN THE INITIAL SPECIFIED VALUE.
THE OTHER CHARACTERISTICS ARE BASED ON JIS C
5101-4
C=RATED CAPACITANCE (μF)
V
=
WORKING VOLTAGE (V)
W. V
tan
δ
6
.
3
0
.
25
10
0
.
20
16
0
.
17
25
0
.
15
35
0
.
13
50
0
.
10
0.1〜0.47
1
.
0
2.2
3
.3
4.7
10
22
33
47
100
220
330
470
1000
2200
3300
4700
6
.3 (0J)
10 (1
A)
16 (1
C)
25 (1
E)
35 (1
V)
50 (1
H)
63 (1
J)
10×12.5
10×20
12
.
5×25
16×25
16×30
5×11
5×11
5×11
6
.
3×11
8×11
.
5
10×12.5
10×16
12
.
5×20
16×25
16×25
5×11
5×11
5×11
6
.
3×11
8×11
.
5
10×12.5
10×16
10×20
12
.
5×20
16×25
5×11
5×11
5×11
6
.
3×11
6
.
3×11
8×11.5
10×16
10×20
12
.
5×20
16×25
16×30
5×11
5×11
6
.
3×11
6.3×11
8×11
.
5
10×12
.
5
10×20
12
.
5×20
12.5×25
16×25
5×11
5×11
5×11
5×11
5×11
5×11
6
.
3×11
8×11
.
5
8×11.5
10×16
12
.
5×20
12
.
5×20
16×25
5×11
5×11
5×11
5×11
5×11
5×11
8×11
.
5
8×11
.
5
10×12.5
10×20
12
.
5×20
12
.
5×25
16×25
W.V
6.3
10
16
25
−
25℃/+20℃
4
3
2
2
−
40℃/+20℃
10
8
6
4
W.V
35
50
63
−
25℃/+20℃
2
2
2
−
40℃/+20℃
4
3
3
(D
≧φ6.3
)
Unit : mm
φ
D
φ
d
F
β
5
0
.
5
2
.
0
6
.
3
0
.
5
2
.
5
8
0
.
6
3
.
5
10
0
.
6
5
.
0
12
.
5
0
.
6
5
.
0
16
0
.
8
7
.
5
0
.
5 1.0
L
<20 α=1.5
L
≧20 α=2
63
0
.
10
( )
( )
W.V
μ
F
φD×LRipple currentφD×L
Ripple currentφD×L
Ripple currentφD×L
Ripple currentφD×L
Ripple currentφD×L
Ripple currentφD×L
Ripple current
■寸法表
/CASE SIZE TABLE
Unit : mm
■
Ripple current
〔
Max. Value mA r.m.s〕at
85℃ 120
Hz.
390
650
1060
1270
1500
35
52
75
150
280
400
500
810
1200
1270
25
55
80
130
210
340
420
550
810
1300
25
39
87
120
130
210
400
490
660
1010
1350
30
55
110
120
190
320
490
600
760
1140
1〜5
10
23
25
35
60
110
160
190
320
490
600
760
2〜7
13
25
30
38
60
115
160
200
330
550
710
850
■品番ご指定法/
HOW TO SPECIFY ITEM NUMBER
1
H UTLS □□ 3R3 M
□
付記コード/
Additional Code
静電容量許容差/
Capacitance Tolerance
静電容量記号/
Capacitance Symbol
形状記号/
Style Symbol
シリーズ名/
Series Name
定格電圧/
Rated Voltage
(
010
)
(2R2)
(
3R3
)
(4R7)
(
100
)
(
220
)
(
330
)
(
470
)
(
101
)
(
221
)
(
331
)
(
471
)
(
102
)
(
222
)
(
332
)
(
472
)
Page 47
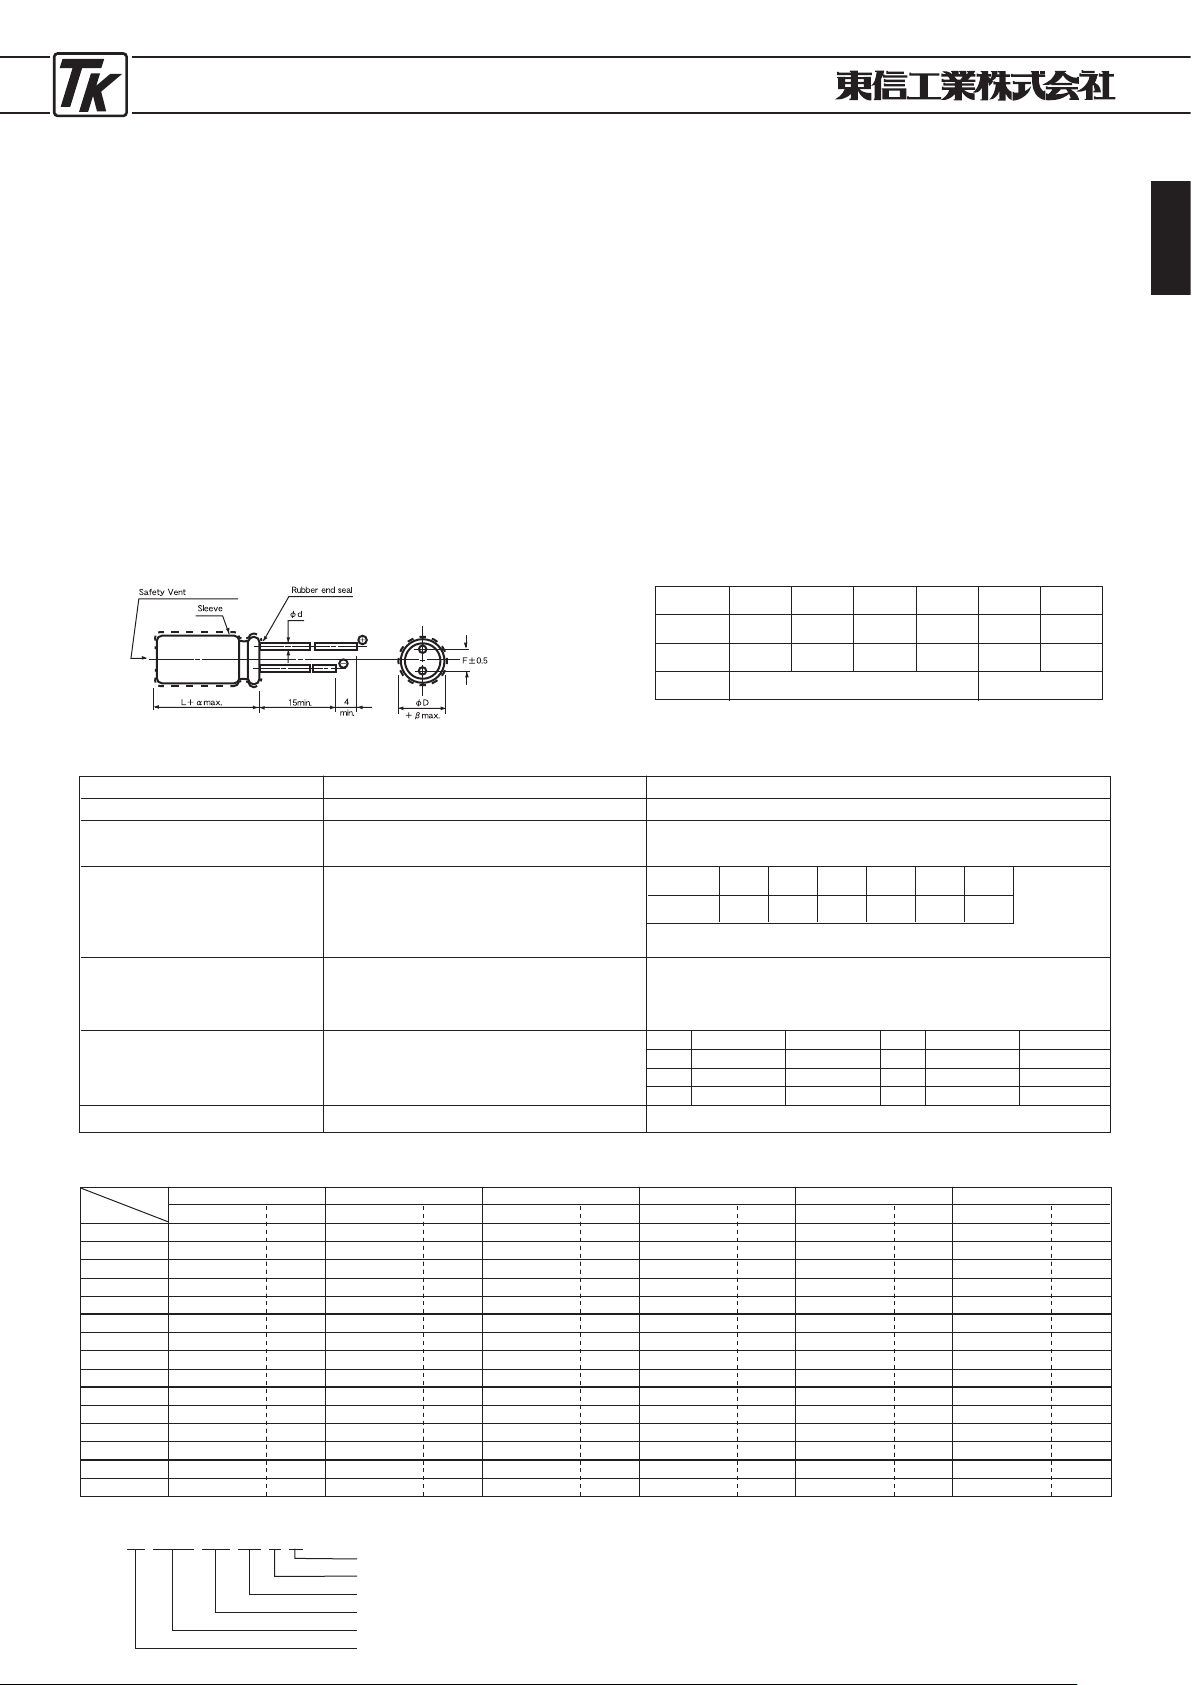
ELECTROLYTIC CAPACITORS
47
●低漏れ電流105℃品 ●
LOW LEAKAGE CURRENT TYPE
105℃
USE
■特 徴
UTWLシリーズ
JIS C
5101
CE-
04
(耐洗浄品)
TYPEUTWL
JIS C
5101
CE-
04
(
Washable product
)
・使 用温度範 囲を−40〜+10 5℃と広くした低漏 れ
電流品で、更に寿命特性も105℃
2,
000時間を保証
した高安定化アルミ電解コンデンサです。
・従 来 品よ り 小形化 さ れ、 通 信機 器 ・工 業 用計 測
器・自動車電装 品等高信頼性を 要求される用途に
最適です。
・自動挿入機用テーピング製品(φ16×30以下)及
び自立形フォーミング製品も取り揃えております。
■
FEATURES
・
P r od uc ts of t h is t yp e a r e l o w l e ak ag e c u rr e nt t yp e a l um i nu m
el e ct r ol yt i c cap a ci t or s wi th a wi de op e ra t in g tem p er a tu re
ra n ge of
−40℃
t o
+105℃
, and thei r lif e ch aract e ristic
is such that
2000
hours are guaranteed at
105℃
.
・
These capacitors are small-sized as compared with traditional
ones, and are very suitable to such use which requires high
reliability as telecommunication equipment, industrial measuring
instrument, electrical equipment for automobile.
・
A series of capacitors with taped leads for automatic insertion
(φ16×30
or less) and a series of self-standing type capacitors
with formed leads are provided.
■寸法図
/DIAGRAM OF DIMENSIONS
■性 能
/PERFORMANCE SPECIFICATIONS
カ テ ゴ リ 温 度 範 囲
標 準 静 電 容 量 許 容 差
漏 れ 電 流 ( 最 大 値 )
損 失 角 の 正 接 ( 最 大 値 )
(
tan δ)
耐 久 性
105℃
2000時間
定格使用電圧印加
(
但しφ8以下は1000時間保証
)
低 温 特 性
+20℃における120
Hz
の
インピーダンスに対する比
(最大値)
その他の 特性は
JI S C
5101-4に準ず る
CATEGORY TEMPERATURE RANGE
STANDARD CAPACITANCE TOLERANCE
LEAKAGE CURRENT (MAX. VALUE)
DISSIPATION FACTOR (MAX. VALUE)
ENDURANCE
APPLICATION OF RATED OPERATING
VOLTAGE, AT
105℃
FOR
2000
HOURS.
(φD≦8
:
1000
Hr)
LOW TEMPERATURE STABILITY
RATIO OF IMPEDANCE AT COLD TO
THAT AT
20℃, 120
Hz. MAX. VALUE.
THE OTHER CHARACTERISTICS
−40℃〜+105℃
−20%〜+20%
(
120
Hz)
I=0.
002
CV OR 0.3μA WHICHEVER
IS THE GREATER (after
2
minutes)
When the capacitance exceed
1,000μ
F, the value of tanδ is increased by
0.02
for each increment of 1,
000μ
F or its fraction.
CAPACITANCE CHANGE : LESS THAN
20%
OF THE INITIAL
MEASURED VALUE.
DISSIPATION FACTOR : LESS THAN
200%
OF THE INITIAL
SPECIFIED VALUE.
LEAKAGE CURRENT : LESS THAN THE INITIAL SPECIFIED VALUE.
THE OTHER CHARACTERISTICS ARE BASED ON JIS C
5101-4
C=RATED CAPACITANCE (μF)
V
=
WORKING VOLTAGE (V)
W. V
tan
δ
6
.
3
0
.
25
10
0
.
20
16
0
.
17
25
0
.
15
35
0
.
13
50
0
.
10
■寸法表
/CASE SIZE TABLE
0.1〜0.47
1.0
2.2
3.3
4.7
10
22
33
47
100
220
330
470
1000
2200
6
.3 (0J)
10 (1
A)
16 (1
C)
25 (1
E)
35 (1
V)
50 (1
H)
6.3×11
8×11
.
5
10×12.5
10×12
.
5
10×20
12
.
5×25
5×11
5×11
5×11
6
.
3×11
8×11
.
5
10×12.5
10×16
12
.
5×20
16×25
5×11
5×11
5×11
6
.
3×11
8×11
.
5
10×12
.
5
10×16
10×20
12
.
5×20
16×25
5×11
5×11
5×11
6
.
3×11
6.3×11
8×11
.
5
10×16
10×20
12
.
5×20
16×25
16×30
5×11
5×11
6
.
3×11
6
.
3×11
8×11
.
5
10×12.5
10×20
12
.
5×20
12
.
5×25
16×25
5×11
5×11
5×11
5×11
5×11
5×11
6.3×11
8×11
.
5
8×11
.
5
10×16
12
.
5×20
12.5×20
16×25
Unit : mm
W.V
6.3
10
16
−
25℃/+20℃
4
3
2
−
40℃/+20℃
10
8
6
W.V
25
35
50
−
25℃/+20℃
2
2
2
−
40℃/+20℃
5
3
3
■
Ripple current
〔
Max. Value mA〕at
105℃ 120
Hz.
91
155
220
263
455
780
40
50
60
98
172
243
317
580
850
30
45
56
75
128
220
299
386
675
1000
20
35
50
68
80
138
260
349
470
800
1200
23
40
59
86
100
186
333
477
636
870
5
10
17
21
25
43
75
95
125
236
424
536
650
(D
≧φ6.3
)
Unit : mm
φ
D
φ
d
F
β
5
0
.
5
2
.
0
6
.
3
0
.
5
2
.
5
8
0
.
6
3
.
5
10
0
.
6
5
.
0
12
.
5
0
.
6
5
.
0
16
0
.
8
7
.
5
0
.
5 1.0
L
<20 α=1.5
L
≧20 α=2
(
)
(
)
W.V
μ
F
φD×LRipple currentφD×L
Ripple currentφD×L
Ripple currentφD×L
Ripple currentφD×L
Ripple currentφD×L
Ripple current
■品番ご指定法/
HOW TO SPECIFY ITEM NUMBER
1
H UTWL □□
010
M
□
付記コード/
Additional Code
静電容量許容差/
Capacitance Tolerance
静電容量記号/
Capacitance Symbol
形状記号/
Style Symbol
シリーズ名/
Series Name
定格電圧/
Rated Voltage
Page 48
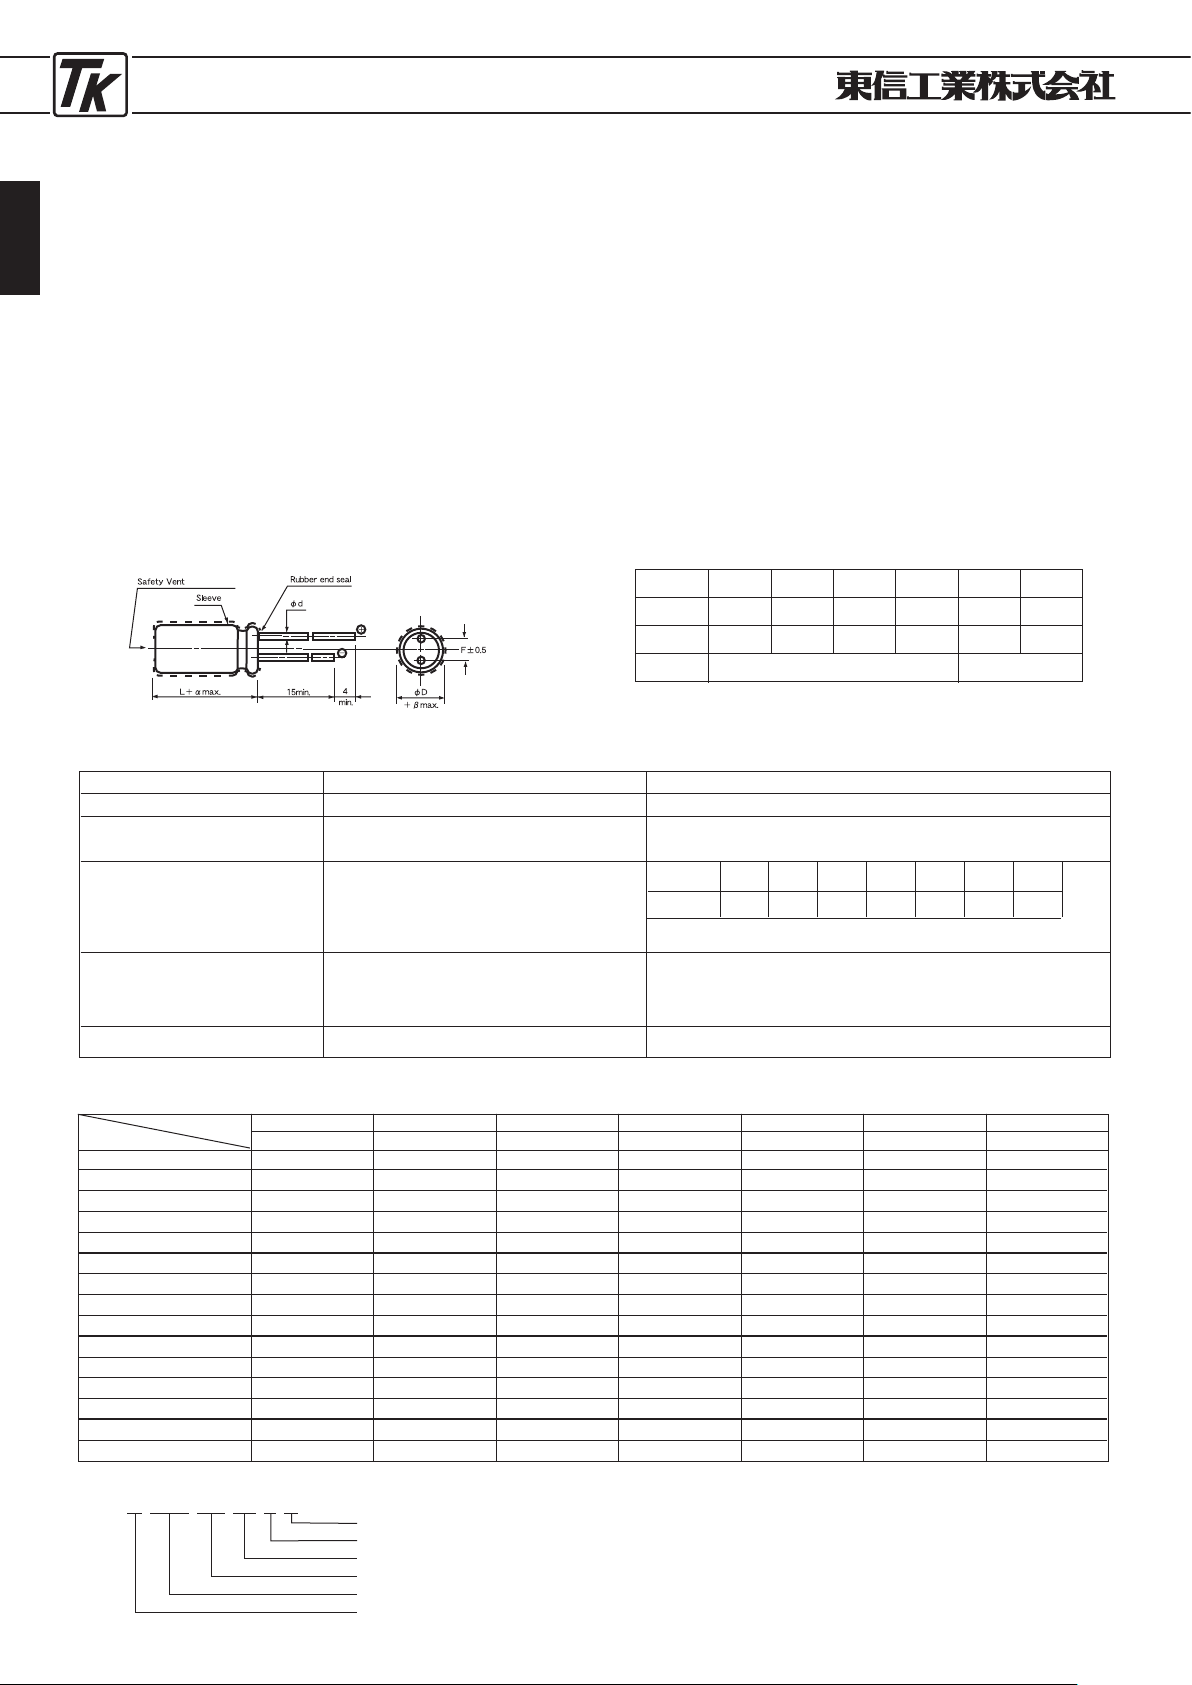
ELECTROLYTIC CAPACITORS
48
●両極性標準品 ●
BIPOLARIZED STANDARD TYPE
■特 徴
BPUEシリーズ
JIS C
5101
CE-
04
(耐洗浄品)
TYPEBPUE
JIS C
5101
CE-
04
(
Washable product
)
・両極性構造の電解コンデンサです。
・極性が反転したり、また直流回路であるが短時間の
交流電圧が印加されるような極性の一定しない回路
にご使用頂けます。
・従来品より小形化されましたので機器の小形化がで
きます。
・自動挿入機用テーピング製品(φ16×30以下)及び
自立形フォーミング製品も取り揃えてあります。
■
FEATURES
・
These capacitors are bipolarized electrolytic capacitors.
・
This can be used in such circuit in which the polarity is not certain as
the polarity is reversed or the applied voltage to the capacitor is
principally D.C. but sometimes A.C. voltage is superposed there on for a
short time.
・
This type capacitors can contribute to make electronic equipment
smaller since these products have smaller dimensions as compared with
the traditional ones.
・
A series of products with taped leads for automatic insertion (
φ16×30
or less) and self-standing products with formed leads are included.
■寸法図
/DIAGRAM OF DIMENSIONS
■性 能
/PERFORMANCE SPECIFICATIONS
カ テ ゴ リ 温 度 範 囲
標 準 静 電 容 量 許 容 差
漏 れ 電 流 ( 最 大 値 )
損 失 角 の 正 接 ( 最 大 値 )
(
tan δ)
耐 久 性
85℃
2000時間
定格使用電圧印加
その他の 特性は
JI S C
5101-4に準ず る
CATEGORY TEMPERATURE RANGE
STANDARD CAPACITANCE TOLERANCE
LEAKAGE CURRENT (MAX. VALUE)
DISSIPATION FACTOR (MAX. VALUE)
ENDURANCE
APPLICATION OF RATED OPERATING
VOLTAGE, AT
85℃
FOR
2000
HOURS.
THE OTHER CHARACTERISTICS
−40℃〜+85℃
−20%〜+20%
(
120
Hz)
I=0.06CV OR
10μ
A WHICHEVER
IS THE GREATER (after
2
minutes)
When the capacitance exceed
1,000μ
F, the value of tanδ is increased by
0.02
for each increment of 1,
000μ
F or its fraction.
CAPACITANCE CHANGE : LESS THAN
20%
OF THE INITIAL
MEASURED VALUE.
DISSIPATION FACTOR : LESS THAN
200%
OF THE INITIAL
SPECIFIED VALUE.
LEAKAGE CURRENT : LESS THAN THE INITIAL SPECIFIED VALUE.
THE OTHER CHARACTERISTICS ARE BASED ON JIS C
5101-4
C=RATED CAPACITANCE (μF)
V
=
WORKING VOLTAGE (V)
W. V
tan
δ
6
.
3
0
.
30
10
0
.
25
16
0
.
22
25
0
.
20
35
0
.
15
50
0
.
15
(D
≧φ6.3
)
■寸法表
/CASE SIZE TABLE
0.1〜0.47
1
.
0
2
.
2
3
.
3
4
.
7
10
22
33
47
100
220
330
470
1000
2200
6
.3 (0J)
φD×
L
10 (1
A)
φD×
L
16 (1
C)
φD×
L
25 (1
E)
φD×
L
35 (1
V)
φD×
L
50 (1
H)
φD×
L
63 (1
J)
φD×
L
5×11
6
.
3×11
8×11
.
5
8×11
.
5
10×12
.
5
10×20
12
.
5×25
5×11
5×11
5×11
6
.
3×11
8×11
.
5
10×16
10×16
12
.
5×20
16×25
5×11
5×11
5×11
6
.
3×11
8×11
.
5
10×12
.
5
10×16
10×20
12
.
5×25
16×30
5×11
5×11
6
.
3×11
6
.
3×11
6
.
3×11
8×11
.
5
10×16
12
.
5×20
12
.
5×20
16×25
5×11
5×11
6
.
3×11
8×11
.
5
8×11
.
5
10×16
12
.
5×20
12
.
5×20
12
.
5×25
16×30
5×11
5×11
5×11
5×11
5×11
6
.
3×11
8×11
.
5
8×11
.
5
10×12
.
5
10×20
12
.
5×25
16×25
16×30
−
−
−
5×11
6
.
3×11
6
.
3×11
8×11
.
5
10×12
.
5
10×16
12
.
5×20
16×25
16×30
Unit : mm
Unit : mm
φ
D
φ
d
F
β
5
0
.
5
2
.
0
6
.
3
0
.
5
2
.
5
8
0
.
6
3
.
5
10
0
.
6
5
.
0
12
.
5
0
.
6
5
.
0
16
0
.
8
7
.
5
0.5 1.0
L
<20 α=1.5
L
≧20 α=2
63
0
.
13
W.V
μ
F
■品番ご指定法/
HOW TO SPECIFY ITEM NUMBER
1
J BPUE □□
100
M
□
付記コード/
Additional Code
静電容量許容差/
Capacitance Tolerance
静電容量記号/
Capacitance Symbol
形状記号/
Style Symbol
シリーズ名/
Series Name
定格電圧/
Rated Voltage
(
010
)
(
2R2
)
(
3R3
)
(
4R7
)
(
100
)
(
220
)
(
330
)
(
470
)
(
101
)
(
221
)
(
331
)
(
471
)
(
102
)
(
222
)
Page 49
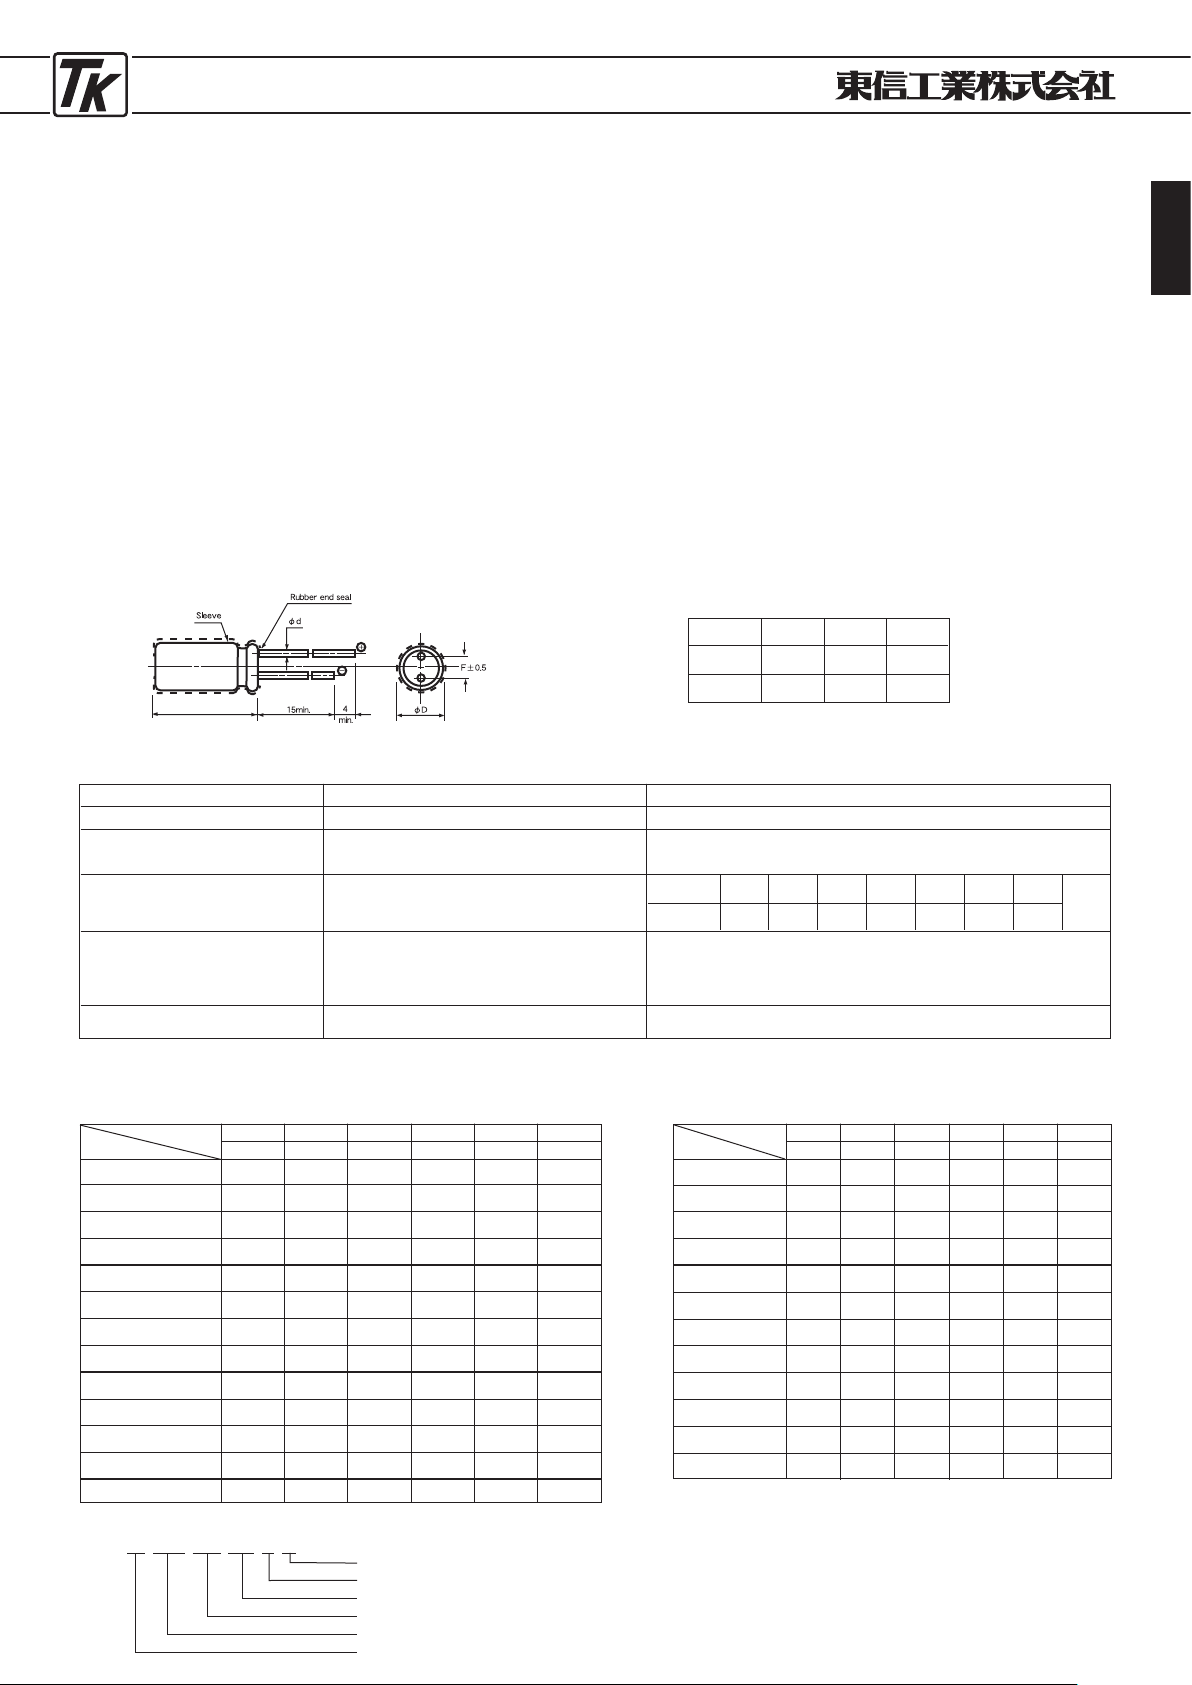
ELECTROLYTIC CAPACITORS
49
●高さ7
mm,
高さ5
mm
両極性品
●7
mm HEIGHT AND 5mm HEIGHT BIPOLARIZED TYPE
■特 徴
BPMシリーズ
JIS C
5101
CE-
04
(耐洗浄品)
TYPEBPM
JIS C
5101
CE-
04
(
Washable product
)
・高さ寸法を7mm及び5mmに統一した両極性電 解コ
ンデンサで超小形機器の極性の反転する回路にご使
用頂けます。
・外 径 寸法が4.0φ か らございます の でセットの薄 形
化・高密度化が可能となります。
・
BPX
シリーズは公称高さ寸法を5mmに統一した超小
形両極性の電解コンデンサで超薄形セットにご使用
頂くのに最適の製品です。
・自動挿入機用のテーピング製品も取り揃えております。
■
FEATURES
・
These are bipolarized electrolytic capacitors the height of which
is standardized to 7mm or 5mm, and can be used in a circuit of
miniature apparatus where the polarity reverses.
・
There are products of small diameter, from 4φ, such diameter
enables to make the electronic apparatus thinner and to install
components more dense.
・
Type BPX are extra small sized bipolarized electrolytic capacitors
nominal height of which is standardized to 5mm, and consequently this
series is most suitable for application to electronic apparatus of extra
miniature and of thin shape.
・
Taped products for automatic inserting machines are also available.
■寸法図
/DIAGRAM OF DIMENSIONS
■性 能
/PERFORMANCE SPECIFICATIONS
カ テ ゴ リ 温 度 範 囲
標 準 静 電 容 量 許 容 差
漏 れ 電 流 ( 最 大 値 )
損 失 角 の 正 接 ( 最 大 値 )
(
tan δ)
耐 久 性
85℃
1000時間
定格使用電圧印加
その他の 特性は
JI S C
5101-4に準ず る
CATEGORY TEMPERATURE RANGE
STANDARD CAPACITANCE TOLERANCE
LEAKAGE CURRENT (MAX. VALUE)
DISSIPATION FACTOR (MAX. VALUE)
ENDURANCE
APPLICATION OF RATED OPERATING
VOLTAGE, AT
85℃
FOR
1000
HOURS.
THE OTHER CHARACTERISTICS
−40℃〜+85℃
−20%〜+20%
(
120
Hz)
I=0.06CV OR
10μ
A WHICHEVER
IS THE GREATER (after
2
minutes)
CAPACITANCE CHANGE : LESS THAN
20%
OF THE INITIAL
MEASURED VALUE.
DISSIPATION FACTOR : LESS THAN
200%
OF THE INITIAL
SPECIFIED VALUE.
LEAKAGE CURRENT : LESS THAN THE INITIAL SPECIFIED VALUE.
THE OTHER CHARACTERISTICS ARE BASED ON JIS C
5101-4
C=RATED CAPACITANCE (μF)
V
=
WORKING VOLTAGE (V)
W. V
tan
δ
6
.
3
0
.
30
10
0
.
25
16
0
.
22
25
0
.
20
35
0
.
17
50
0
.
15
Unit : mm
φ
D
φ
d
F
4
0
.
45
1
.
5
5
0
.
45
2
.
0
6
.
3
0
.
45
2
.
5
4
0
.
40
BPXシリーズ
TYPEBPX
■寸法表
/CASE SIZE TABLE
TYPE BPM
0.1
0
.
22
0
.
33
0
.
47
1
.
0
2
.
2
3
.
3
4
.
7
10
22
33
47
100
10 (1
A)
φD×
L
16 (1
C)
φD×
L
25 (1
E)
φD×
L
35 (1
V)
φD×
L
50 (1
H)
φD×
L
6.3×7
5×7
−
6
.
3×7
4×7
−
6
.
3×7
6
.
3×7
4×7
4×7
6
.
3×7
6
.
3×7
4×7
−
−
6
.
3×7
4×7
4×7
4×7
4×7
4×7
5×7
5×7
6
.
3×7
Unit : mm
4 (0
G)
φD×
L
TYPE BPX
6.3 (0
J)
φD×
L
10 (1
A)
φD×
L
16 (1
C)
φD×
L
25 (1
E)
φD×
L
35 (1
V)
φD×
L
50 (1
H)
φD×
L
5×5
−
6
.
3×5
−
6
.
3×5
4×5
4×5
6
.
3×5
5×5
5×5
6
.
3×5
4×5
4×5
4×5
4×5
4×5
4×5
5×5
Unit : mm
L+1max.
+
0.5
max.
W.V
μ
F
0.1
0.22
0.33
0.47
1.0
2.2
3.3
4.7
10
22
33
47
W.V
μ
F
■品番ご指定法/
HOW TO SPECIFY ITEM NUMBER
1
H BPM □□ 0R1 M
□
付記コード/
Additional Code
静電容量許容差/
Capacitance Tolerance
静電容量記号/
Capacitance Symbol
形状記号/
Style Symbol
シリーズ名/
Series Name
定格電圧/
Rated Voltage
(0R1)
(
R
22)
(
R
33)
(
R
47)
(010)
(2
R
2)
(3
R
3)
(4
R
7)
(100)
(220)
(330)
(470)
(101)
Page 50
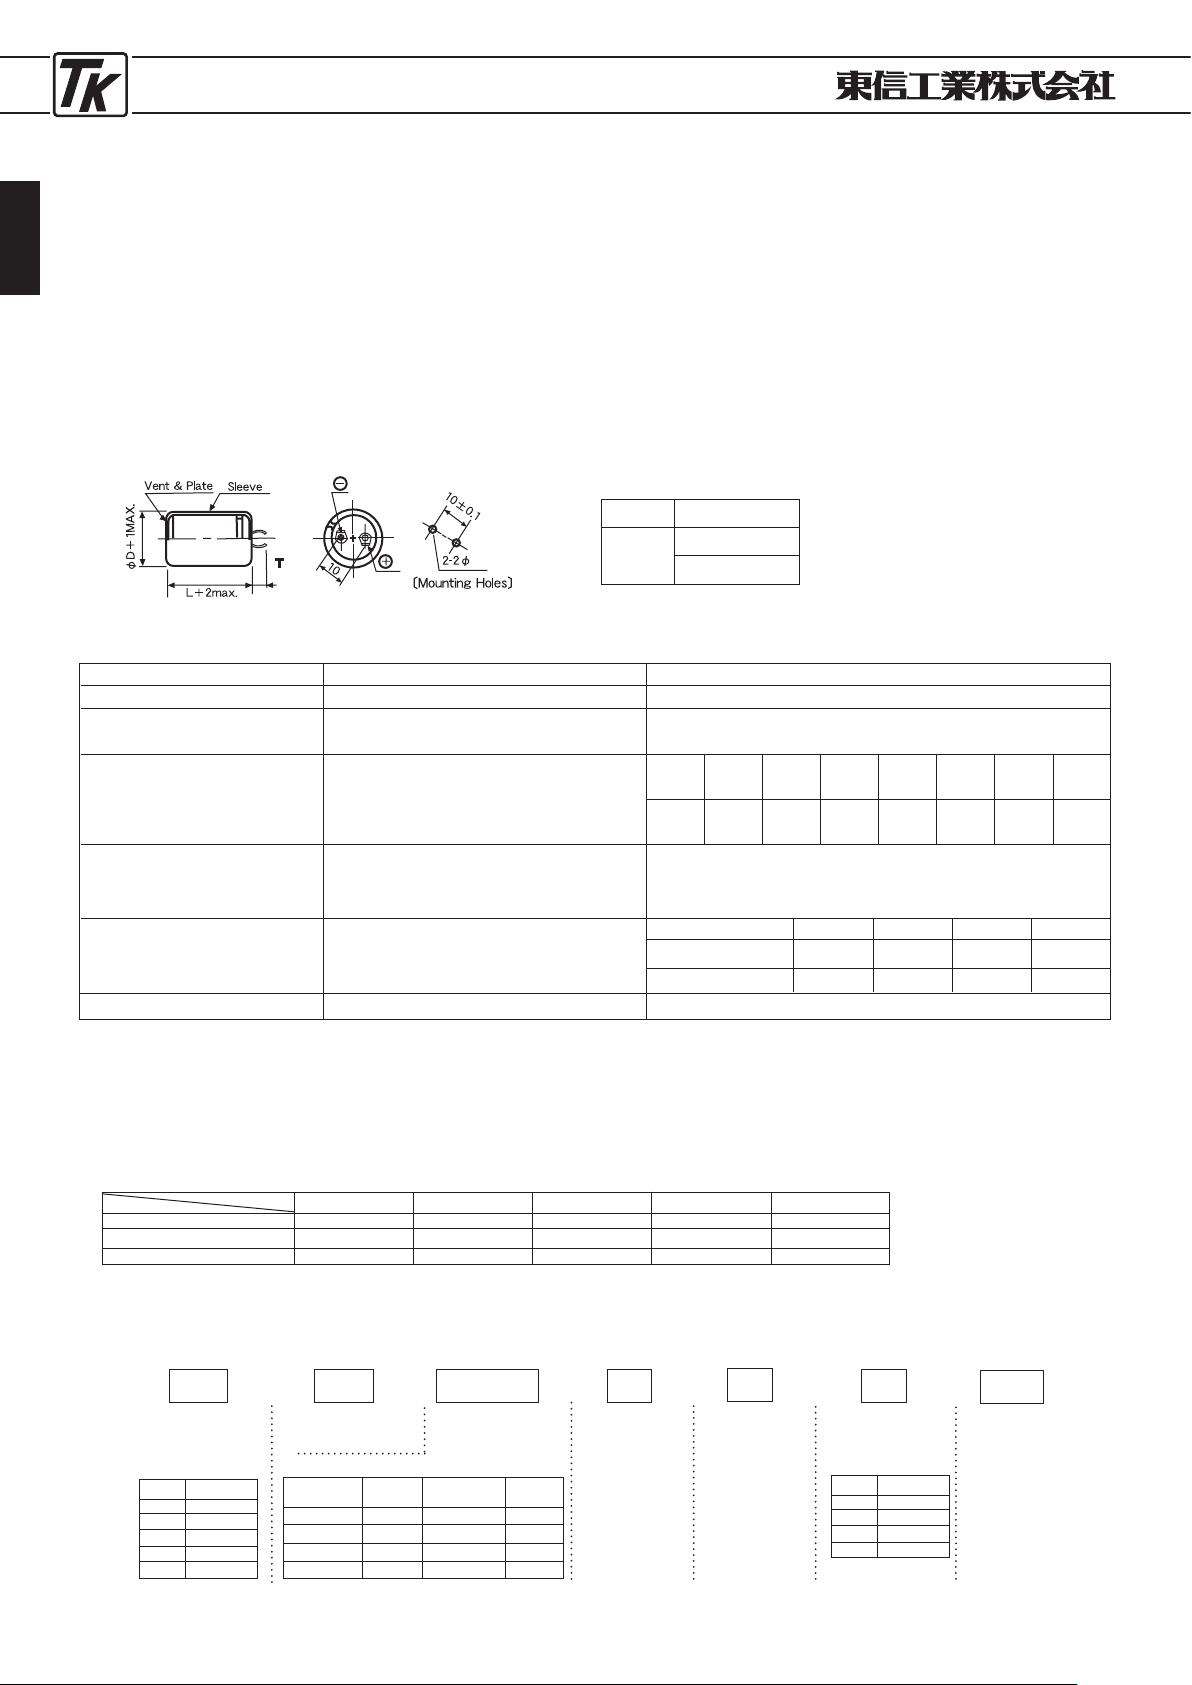
ELECTROLYTIC CAPACITORS
50
●基板自立形標準品
●
SNAP-IN TERMINAL STANDARDIZED TYPE
■特 徴
LGシリーズ
JIS C
5101
CE-
69
TYPELG
JIS C
5101
CE-
69
・プリント基板自 立形端子構造の 低圧から高圧の大
容量電解コンデ ンサで、ラグ端 子形に比べマウン
トの省力化、セットの小形化が可能になります。
・一般電子機器及 び産業用機器の 電源回路、出力回
路等にご使用頂くのに最適の製品です。
■
FEATURES
・
Electrolytic capacitors with large capacitance for use in low to
high voltage circuits whose terminals are designed for self
standing on a printed circuit board.
・
This type enables to save manpower and to minimize the size
of an electronic apparatus as compared with lug terminal type.
・
This product is most suitable for power source circuits, output
circuits, etc. of general electronic apparatus and industrial
electronic apparatus.
■寸法図
/DIAGRAM OF DIMENSIONS
■性 能
/PERFORMANCE SPECIFICATIONS
カ テ ゴ リ 温 度 範 囲
標 準 静 電 容 量 許 容 差
漏 れ 電 流 ( 最 大 値 )
損 失 角 の 正 接 ( 最 大 値 )
(25℃
,
120
Hz)
耐 久 性
85℃
2000時間
定格使用電圧印加
低 温 特 性
+20℃における120
Hz
の
インピーダンスに対する比
(最大値)
その他の 特性は
JI S C
5101-4に準ず る
CATEGORY TEMPERATURE RANGE
STANDARD CAPACITANCE TOLERANCE
LEAKAGE CURRENT (MAX. VALUE)
DISSIPATION FACTOR (MAX. VALUE)
(25℃, 120
Hz)
ENDURANCE
APPLICATION OF RATED OPERATING
VOLTAGE, AT
85℃
FOR
2000
HOURS.
LOW TEMPERATURE STABILITY
RATIO OF IMPEDANCE AT COLD TO
THAT AT
20℃, 120
Hz. MAX. VALUE.
THE OTHER CHARACTERISTICS
−40℃〜+85℃(16〜100
VDC) ,
−25℃〜+85℃(160〜450
VDC)
−20%〜+20% (25℃, 120
Hz)
I=0.02CV OR 3mA WHICHEVER
IS THE SMALLER (at
25℃
, after 5 minutes)
CAPACITANCE CHANGE : LESS THAN
20%
OF THE INITIAL
MEASURED VALUE.
DISSIPATION FACTOR : LESS THAN
200%
OF THE INITIAL
SPECIFIED VALUE.
LEAKAGE CURRENT : LESS THAN THE INITIAL SPECIFIED VALUE.
THE OTHER CHARACTERISTICS ARE BASED ON JIS C
5101-4
C=RATED CAPACITANCE (μF)
V
=
WORKING VOLTAGE (V)
16〜35
4
15
50〜100
3
10
160〜400
4
−
450
8
−
W. V
Z
−25℃
/Z
+20℃
Z
−40℃
/Z
+20℃
■定格リプル電流補正係数
リプル周波数が標準品一覧表の規定値と異なる場合には、下表の係数を乗じた値以下でご使用下さい。
When the ripple frequency differs from the specification shown in the list of standard products, multiply the value with the
coefficient shown below, and use the products under the obtained value.
周波数補正係数
/FREQUENCY CORRECTION FACTOR
f (Hz)
W.V
16 〜 100
160 〜 250
350 〜 450
0.95
0
.
81
0
.
77
1
.
0
1
.
0
1
.
0
1
.
10
1
.
32
1
.
30
1
.
15
1
.
45
1
.
41
1
.
20
1
.
50
1
.
43
50 120 1
K
10
K
50
K
■品番ご指定法
/HOW TO SPECIFY ITEM NUMBER FOR TYPE LG
W.V
tan
δ
16
0
.
50
25
0
.
40
35
0
.
35
50
0
.
30
63
0
.
25
100
0
.
20
160〜450
0.15
例/
Example
1
V LG
682
M
LG series
35
W.V
定格電圧
Rated Voltage
シリーズ名
Series Name
静電容量記号
Capacitance
Symbol
容量許容差
Capacitance
tolerance
例/
Example
W.V
80
100
160
180
200
SYMBOL
1
K
2
A
2
C
2
P
2
D
±20%=
M
例/
Example
静電容量
RATED
Cap.
μ
F
68
82
180
270
1200
1500
3300
12000
記号
SYM-
BOL
680
820
181
271
122
152
332
123
±20%
6800μ
F
静電容量
RATED
Cap.
μ
F
記号
SYM-
BOL
6
端子長さ
(T)
Terminal
length
6.3mm=6
4.0mm=7
6.3
mm
P
製品外径(φ
D)
Products
diameter
25φ
35
製品長さ
(L)
Products
length
25L=25
30L=30
35L=35
40L=40
45L=45
50L=50
35
L
φ
D
22
25
30
35
SYMBOL
N
P
Q
R
φ
D
T
22〜35
6
.
3±1.0
4
.
0±1.0
Unit : mm
(
)
( )
Page 51
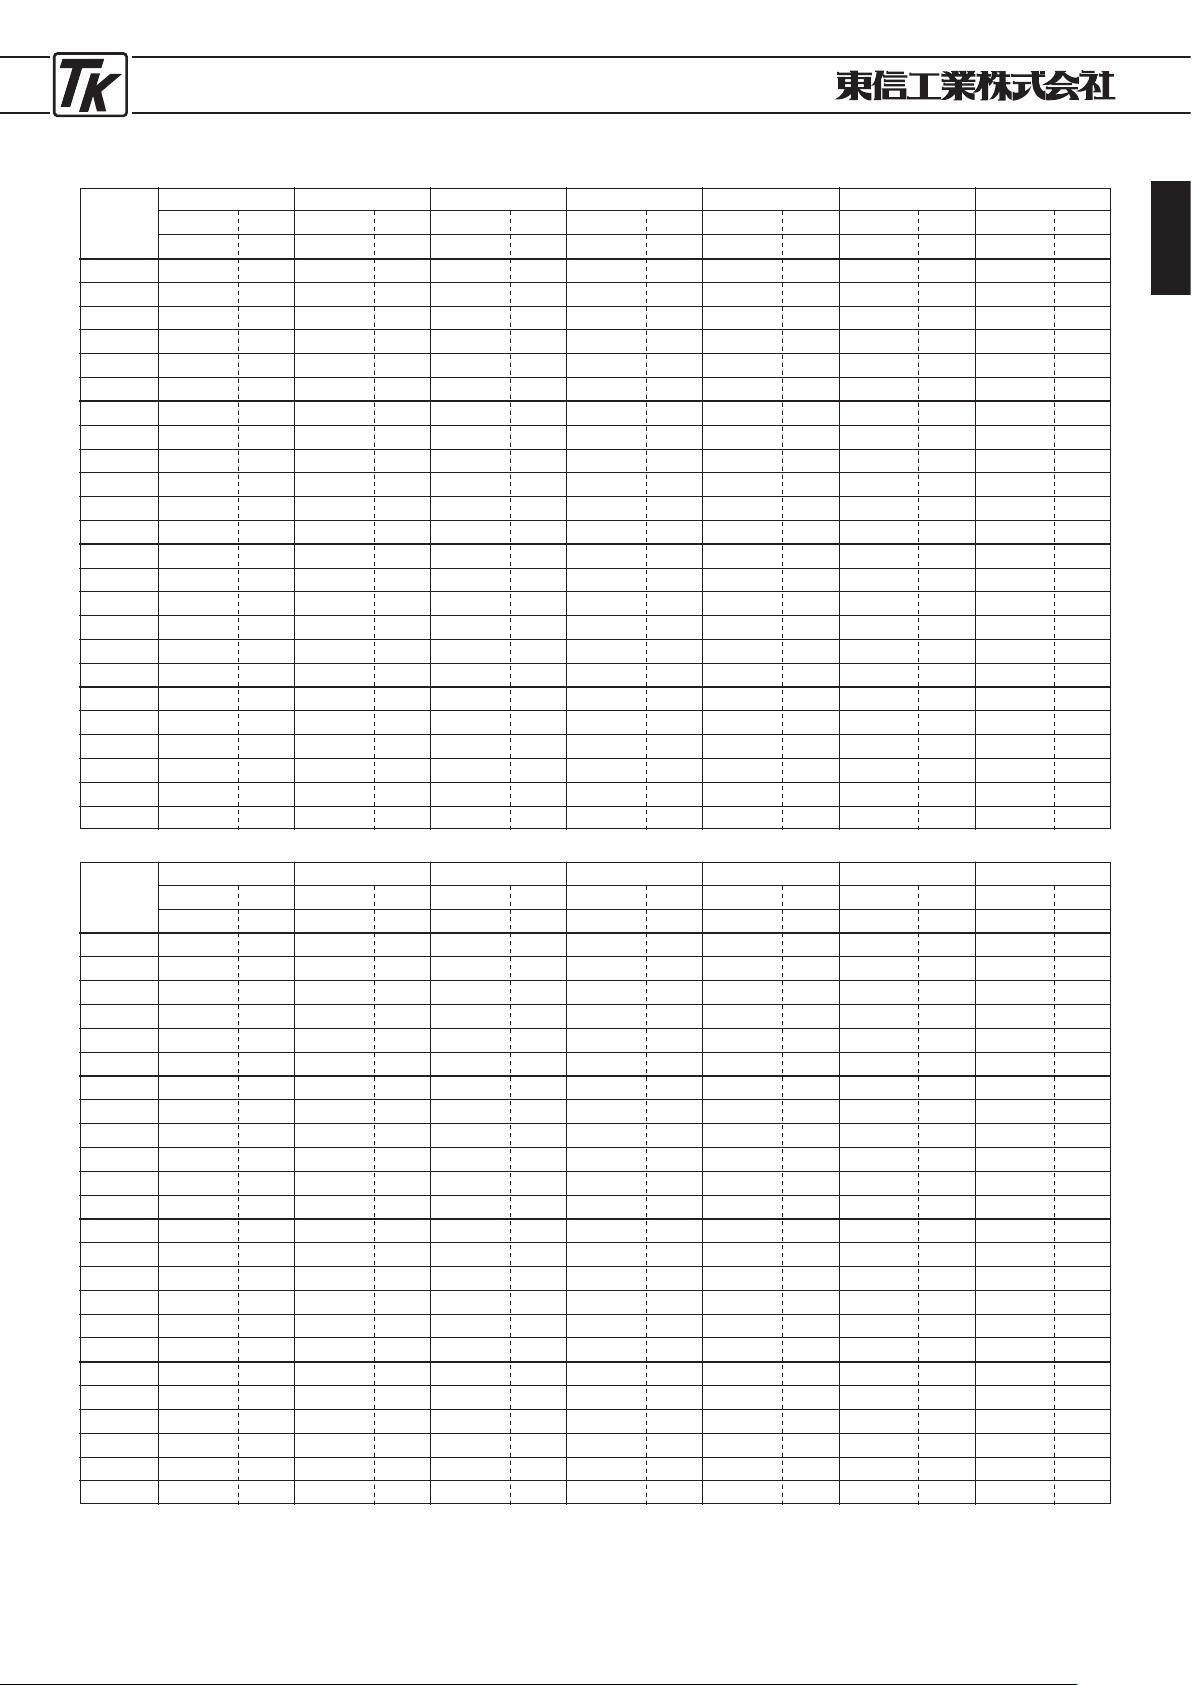
ELECTROLYTIC CAPACITORS
51
■寸法表
/CASE SIZE TABLE
■
Ripple current
〔
Max. Value A〕at
85℃ 120
Hz.
φD×
L
(mm)
160
V (2C)
Cap
μ
F
390
470
560
680
820
1000
470
680
820
1000
1200
−
680
1000
1200
1500
1800
−
1000
1200
1800
−
−
−
Ripple
A,r ms
1.55
1.76
2.03
2
.
36
2.72
3.13
1.74
2
.
24
2.61
3.00
3.44
−
2.24
2.88
3.34
3
.
91
4.47
−
2.88
3
.
34
4.34
−
−
−
100
V (2A)
Cap
μ
F
−
1000
1500
−
−
2200
1000
1500
−
2200
−
3300
1500
2200
−
3300
−
4700
2200
3300
−
4700
−
−
Ripple
A,r ms
−
0.94
1.22
−
−
1.47
0.93
1
.
22
−
1.41
−
1
.
88
1.22
1.35
−
1
.
83
−
2.12
1.35
1
.
75
−
2.05
−
−
63
V (1J)
Cap
μ
F
1500
2200
3300
−
4700
−
2200
3300
4700
−
−
6800
3300
4700
6800
−
10000
−
4700
6800
−
10000
−
15000
Ripple
A,r ms
1.08
1.20
1.56
−
1.84
−
1.19
1
.
56
1.77
−
−
2
.
42
1.56
1.77
2.25
−
2.52
−
1.77
2
.
25
−
2.53
−
3
.
36
50
V (1H)
Cap
μ
F
2200
3300
4700
−
−
6800
3300
4700
−
6800
−
10000
4700
6800
10000
−
−
15000
6800
10000
−
15000
−
−
Ripple
A,r ms
1.13
1.47
1.67
−
−
2.31
1.46
1
.
67
−
2.21
−
2
.
48
1.67
2.13
2.30
−
−
3.21
2.13
2
.
30
−
3.10
−
−
35
V (1V)
Cap
μ
F
3300
4700
6800
−
10000
−
4700
6800
10000
−
−
15000
6800
10000
15000
−
22000
−
10000
15000
−
22000
−
33000
Ripple
A,r ms
1.38
1.57
2.01
−
2.27
−
1.56
2
.
01
2.18
−
−
3
.
03
2.01
2.18
2.82
−
3.73
−
2.18
2
.
82
−
3.76
−
4
.
67
25
V (1E)
Cap
μ
F
4700
6800
10000
−
15000
−
6800
10000
15000
−
22000
−
10000
15000
22000
−
−
33000
15000
22000
−
33000
−
−
Ripple
A,r ms
1.48
1.89
2.06
−
2.78
−
1.87
2
.
06
2.67
−
3.52
−
2.06
2.67
3.41
−
−
4.45
2.67
3
.
41
−
4.31
−
−
16
V (1C)
Cap
μ
F
6800
10000
−
15000
−
−
10000
15000
−
−
22000
−
15000
22000
−
−
33000
−
22000
−
33000
−
−
−
Ripple
A,r ms
1.78
1.94
−
2
.
65
−
−
1.92
2
.
52
−
−
3.52
−
2.52
3.23
−
−
4.28
−
3.23
−
4.12
−
−
−
22×25
22×30
22×35
22×40
22×45
22×50
25×25
25×30
25×35
25×40
25×45
25×50
30×25
30×30
30×35
30×40
30×45
30×50
35×25
35×30
35×35
35×40
35×45
35×50
φD×
L
(mm)
450
V (2W)
Cap
μ
F
82
120
150
180
−
220
120
150
180
220
270
330
180
220
270
330
390
470
220
270
390
470
560
−
Ripple
A,r ms
0.83
1
.
07
1.26
1.46
−
1
.
77
1.06
1.26
1.46
1
.
70
1.96
2.26
1.38
1
.
62
1.90
2.19
2.48
2
.
84
1.62
1.90
2.40
2
.
75
3.13
−
420
V (2Q)
Cap
μ
F
100
120
150
180
220
270
120
180
220
270
330
−
180
220
330
390
470
−
220
330
390
470
560
680
Ripple
A,r ms
0.92
1
.
07
1.26
1.46
1.70
1
.
96
1.06
1.38
1.61
1
.
87
2.17
−
1.38
1
.
62
2.08
2.38
2.73
−
1.62
2.10
2.40
2
.
75
3.13
3.59
400
V (2G)
Cap
μ
F
120
150
180
220
270
−
150
180
220
270
330
390
220
270
330
390
470
560
270
330
470
560
680
−
Ripple
A,r ms
1.00
1
.
20
1.38
1.62
1.88
−
1.18
1.38
1.62
1
.
88
2.17
2.46
1.52
1
.
79
2.08
2.38
2.73
3
.
10
1.79
2.10
2.63
3
.
01
3.45
−
350
V (2V)
Cap
μ
F
100
150
180
220
−
270
150
180
220
270
330
390
220
270
330
470
−
560
270
390
470
560
680
−
Ripple
A,r ms
0.76
0
.
99
1.15
1.34
−
1
.
63
0.98
1.15
1.34
1
.
56
1.80
2.04
1.28
1
.
50
1.75
2.19
−
2
.
59
1.50
1.90
2.22
2
.
54
2.88
−
250
V (2E)
Cap
μ
F
220
270
390
470
−
560
270
390
470
560
680
820
470
560
680
820
1000
1200
560
820
1000
1200
−
1500
Ripple
A,r ms
1.36
1
.
60
2.04
2.35
−
2
.
81
1.58
2.04
2.35
2
.
69
3.11
3.55
2.24
2
.
59
3.01
3.47
4.00
4
.
55
2.59
3.3
3.88
4
.
40
−
5.34
200
V (2D)
Cap
μ
F
270
390
470
560
680
−
390
470
680
820
−
1000
560
820
1000
1200
−
−
820
1000
1200
1500
−
1800
Ripple
A,r ms
1.38
1
.
76
2.03
2.36
2.72
−
1.74
2.03
2.35
2
.
72
−
3.59
2.24
2
.
61
3.04
3.49
−
−
2.88
3.34
3.96
4
.
50
−
5.34
180
V (2P)
Cap
μ
F
330
470
560
680
820
−
470
560
680
820
1000
1200
680
820
1000
1200
1500
−
1000
1200
1500
1800
−
−
Ripple
A,r ms
1.38
1
.
76
2.06
2.36
2.72
−
1.74
2.03
2.35
2
.
72
3.14
3.59
2.24
2
.
61
3.04
3.49
4.08
−
2.88
3,34
3,96
4
.
50
−
−
22×25
22×30
22×35
22×40
22×45
22×50
25×25
25×30
25×35
25×40
25×45
25×50
30×25
30×30
30×35
30×40
30×45
30×50
35×25
35×30
35×35
35×40
35×45
35×50
●この寸法表にないカスタム製品も製造いたしますので、御相談下さい。
●
Produce custom products too, which are not found in these tables.
Page 52
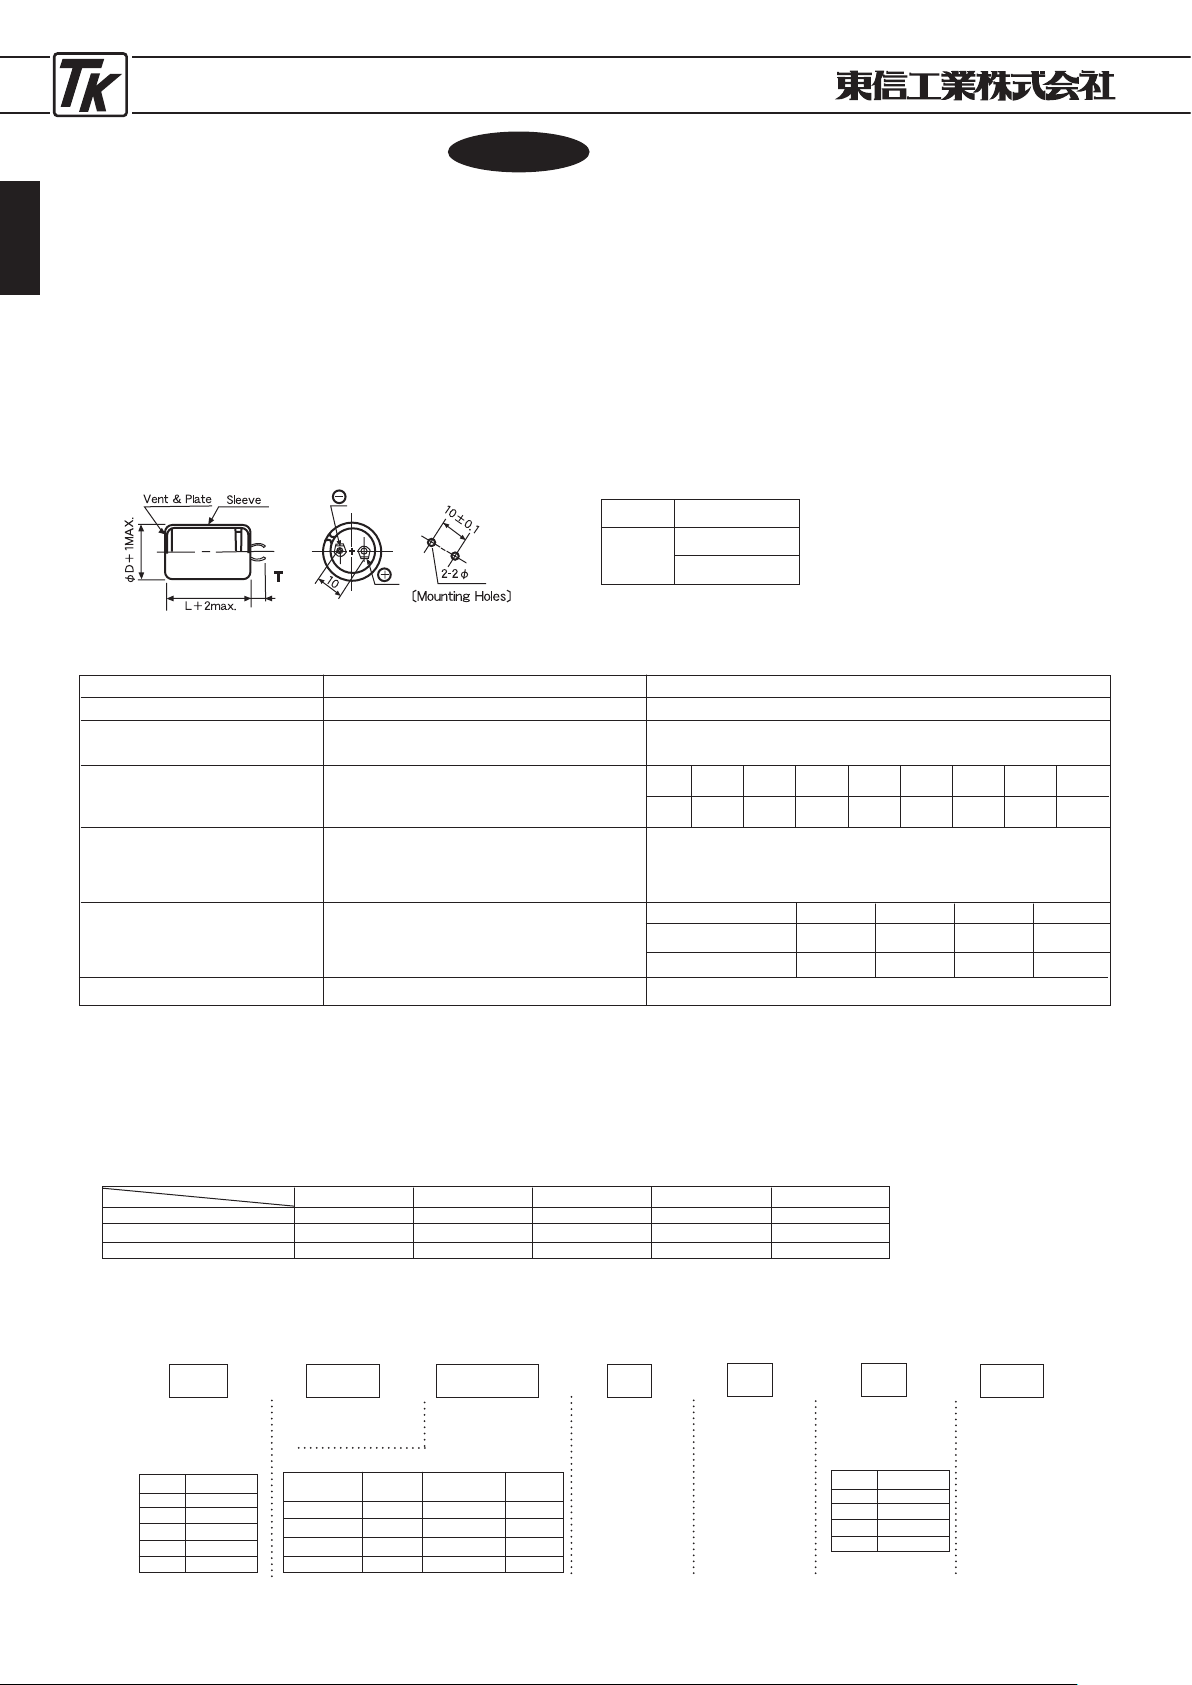
ELECTROLYTIC CAPACITORS
52
●基板自立形105℃品 ●
SNAP-IN TERMINAL TYPE
105℃
USE
■特 徴
LGWシリーズ
JIS C
5101
CE-
69
TYPELGW
JIS C
5101
CE-
69
・プリント基板自 立形端子構造の 大容量電解コンデ
ンサで、最高使用温度を105℃とした製品です。
・一般電子機器及 び産業用機器の 電源回路、出力回
路等にご使用頂くのに最適の製品です。
■
FEATURES
・
This product is a large capacitance electrolytic capacitor
having a printed circuit board snap-in terminal structure
and operates at the maximum operating temperature of
105℃
.
・
This product is most suitable for use in the power supply circuit,
etc. for general electronic equipment and industrial equipment.
■寸法図
/DIAGRAM OF DIMENSIONS
■性 能
/PERFORMANCE SPECIFICATIONS
カ テ ゴ リ 温 度 範 囲
標 準 静 電 容 量 許 容 差
漏 れ 電 流 ( 最 大 値 )
損 失 角 の 正 接 ( 最 大 値 )
(25℃
,
120
Hz)
耐 久 性
105℃
2000時間
定格使用電圧印加
低 温 特 性
+20℃における120
Hz
の
インピーダンスに対する比
(最大値)
その他の 特性は
JI S C
5101-4に準ず る
CATEGORY TEMPERATURE RANGE
STANDARD CAPACITANCE TOLERANCE
LEAKAGE CURRENT (MAX. VALUE)
DISSIPATION FACTOR (MAX. VALUE)
(25℃, 120
Hz)
ENDURANCE
APPLICATION OF RATED OPERATING
VOLTAGE, AT
105℃
FOR
2000
HOURS.
LOW TEMPERATURE STABILITY
RATIO OF IMPEDANCE AT COLD TO
THAT AT
20℃, 120
Hz. MAX. VALUE.
THE OTHER CHARACTERISTICS
−40℃〜+105℃(16〜100
VDC) ,
−25℃〜+105℃(160〜500
VDC)
−20%〜+20%
(
25℃, 120
Hz)
I=0.02CV OR 3mA WHICHEVER
IS THE SMALLER (at
25℃
, after 5 minutes)
CAPACITANCE CHANGE : LESS THAN
20%
OF THE INITIAL
MEASURED VALUE.
DISSIPATION FACTOR : LESS THAN
200%
OF THE INITIAL
SPECIFIED VALUE.
LEAKAGE CURRENT : LESS THAN THE INITIAL SPECIFIED VALUE.
THE OTHER CHARACTERISTICS ARE BASED ON JIS C
5101-4
C=RATED CAPACITANCE (μF)
V
=
WORKING VOLTAGE (V)
W. V
Z
−25℃
/Z
+20℃
Z
−40℃
/Z
+20℃
φ
D
T
22〜35
6
.
3±1.0
4
.
0±1.0
Unit : mm
W. V
tan
δ
16
0.50
( )
( )
■定格リプル電流補正係数
リプル周波数が標準品一覧表の規定値と異なる場合には、下表の係数を乗じた値以下でご使用下さい。
When the ripple frequency differs from the specification shown in the list of standard products, multiply the value with the
coefficient shown below, and use the products under the obtained value.
周波数補正係数
/FREQUENCY CORRECTION FACTOR
f (Hz)
W.V
16 〜 100
160 〜 250
350 〜500
0
.
95
0
.
81
0
.
77
1
.
0
1
.
0
1
.
0
1
.
10
1
.
32
1
.
30
1.15
1
.
45
1
.
41
1
.
20
1
.
50
1
.
43
50 120 1
K
10
K
50
K
■品番ご指定法
/HOW TO SPECIFY ITEM NUMBER FOR TYPE LGW
例/
Example
1
K
LGW
182
M
LGW series
80
W.V
定格電圧
Rated Voltage
シリーズ名
Series Name
静電容量記号
Capacitance
Symbol
容量許容差
Capacitance
tolerance
例/
Example
W.V
80
100
160
180
200
SYMBOL
1
K
2
A
2
C
2
P
2
D
±20%=
M
例/
Example
静電容量
RATED
Cap.
μ
F
68
82
180
270
1200
1500
3300
12000
記号
SYM-
BOL
680
820
181
271
122
152
332
123
±20%
1800μ
F
静電容量
RATED
Cap.
μ
F
記号
SYM-
BOL
6
端子長さ
(T)
Terminal
length
6.3mm=7
4.0mm=6
4.0
mm
Q
製品外径(φ
D)
Products
diameter
30φ
35
製品長さ
(L)
Products
length
25L=25
30L=30
35L=35
40L=40
50L=50
35
L
φ
D
22
25
30
35
SYMBOL
N
P
Q
R
16〜35
4
15
50〜100
3
10
160〜400
4
−
500
8
−
Upgrade
25
0.40350.35500.35630.30
100
0.25
160〜450
0.15
500
0.20
Page 53
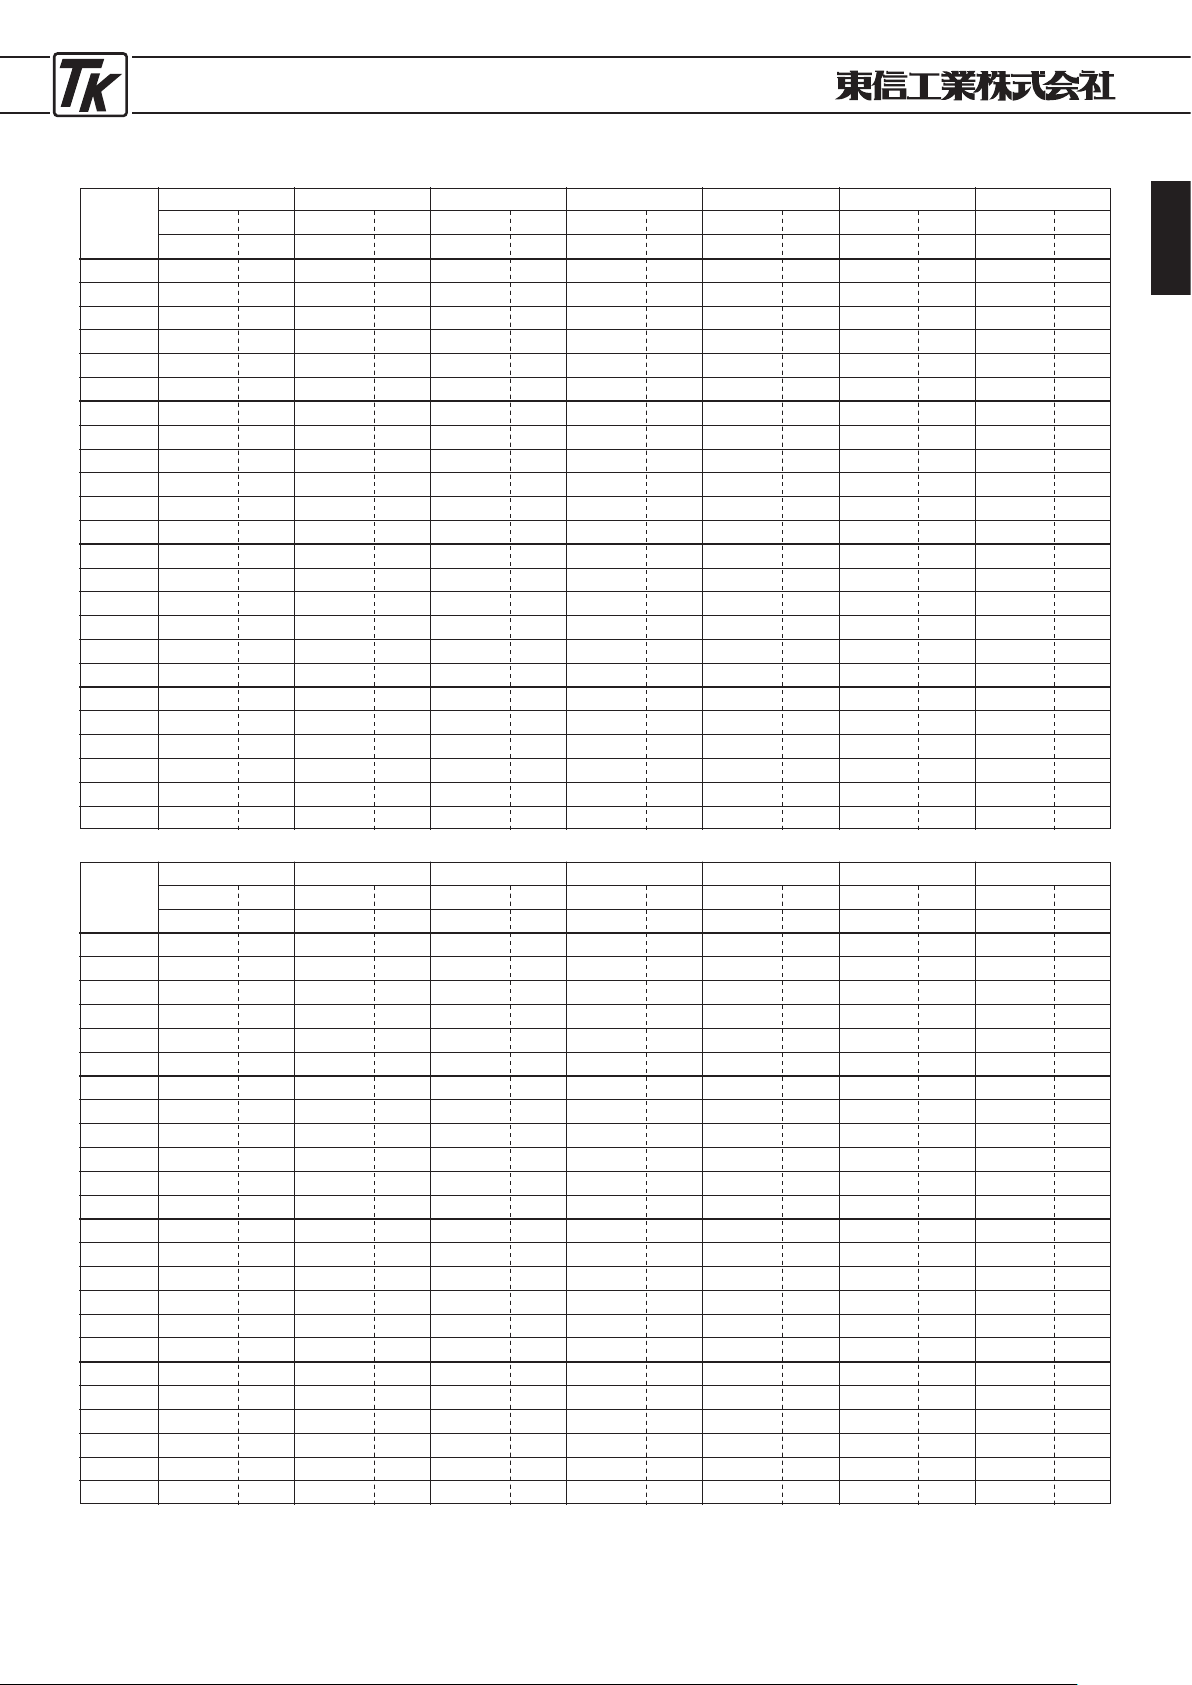
ELECTROLYTIC CAPACITORS
53
■寸法表
/CASE SIZE TABLE
■
Ripple current
〔
Max. Value A〕at
105℃ 120
Hz.
●この寸法表にないカスタム製品も製造いたしますので、御相談下さい。
●
Produce custom products too, which are not found in these tables.
φD×
L
(mm)
160
V (2C)
Cap
μ
F
330
470
560
680
820
−
470
560
680
820
1000
1200
680
820
1200
−
1500
−
1000
1200
1500
1800
−
−
Ripple
A,r ms
0.98
1.21
1.40
1
.
62
1.86
−
1.19
1
.
40
1.61
1.86
2.15
2
.
46
1.54
1.79
2.29
−
2.80
−
1.98
2
.
29
2.72
3.09
−
−
100
V (2A)
Cap
μ
F
−
1000
−
1500
−
−
1000
−
1500
−
2200
−
1500
−
2200
−
3300
−
−
−
3300
−
4700
−
Ripple
A,r ms
−
0.59
−
0
.
81
−
−
0.59
−
0.81
−
0.93
−
0.77
−
0.90
−
1.21
−
−
−
1.16
−
1.35
−
63
V (1J)
Cap
μ
F
1000
1500
2200
−
3300
−
1500
2200
−
3300
−
4700
2200
3300
4700
−
6800
−
3300
4700
−
6800
−
10000
Ripple
A,r ms
0.56
0.73
0.81
−
1.09
−
0.72
0
.
80
−
1.09
−
1
.
27
0.81
1.05
1.18
−
1.55
−
1.05
1
.
18
−
1.56
−
1
.
74
50
V (1H)
Cap
μ
F
1500
2200
3300
−
4700
−
2200
3300
4700
−
−
6800
3300
4700
6800
−
10000
−
4700
6800
−
10000
−
15000
Ripple
A,r ms
0.68
0.76
0.99
−
1.16
−
0.75
0
.
98
1.11
−
−
1
.
53
0.99
1.12
1.42
−
1.59
−
1.12
1
.
42
−
1.60
−
2
.
13
35
V (1V)
Cap
μ
F
2200
3300
4700
−
−
6800
3300
4700
−
6800
−
10000
4700
6800
10000
−
−
15000
6800
10000
−
15000
−
−
Ripple
A,r ms
0.71
0.93
1.05
−
−
1.46
0.92
1
.
05
−
1.40
−
1
.
57
1.05
1.34
1.46
−
−
2.03
1.34
1
.
46
−
1.96
−
−
25
V (1E)
Cap
μ
F
3300
4700
6800
−
10000
−
4700
6800
10000
−
15000
−
6800
10000
15000
−
22000
−
10000
15000
−
22000
−
33000
Ripple
A,r ms
0.87
1.00
1.27
−
1.43
−
0.98
1
.
27
1.38
−
1.84
−
1.27
1.38
1.78
−
2.36
−
1.38
1
.
78
−
2.38
−
2
.
95
16
V (1C)
Cap
μ
F
4700
−
6800
−
10000
−
−
6800
10000
−
15000
−
10000
−
15000
−
22000
−
−
15000
22000
−
−
33000
Ripple
A,r ms
0.93
−
1.27
−
1.43
−
−
1
.
26
1.36
−
1.84
−
1.30
−
1.77
−
2.36
−
−
1
.
78
2.27
−
−
2
.
95
22×25
22×30
22×35
22×40
22×45
22×50
25×25
25×30
25×35
25×40
25×45
25×50
30×25
30×30
30×35
30×40
30×45
30×50
35×25
35×30
35×35
35×40
35×45
35×50
φD×
L
(mm)
450
V (2W)
Cap
μ
F
47
68
82
100
120
−
68
82
120
−
150
180
100
120
180
220
−
270
120
180
220
270
330
390
Ripple
A,r ms
0.42
0.55
0.64
0.74
0
.
85
−
0.54
0.64
0
.
80
−
1.00
1.14
0
.
71
0.82
1.06
1.22
−
1.48
0.82
1.06
1
.
24
1.43
1.64
1.86
420
V (2Q)
Cap
μ
F
47
82
100
120
150
−
82
120
150
180
−
220
120
180
220
270
−
330
180
220
270
330
390
470
Ripple
A,r ms
0.38
0.54
0.63
0.73
0
.
86
−
0.54
0.70
0
.
82
0.94
−
1.13
0
.
70
0.91
1.05
1.22
−
1.49
0.90
1.05
1
.
23
1.41
1.61
1.85
400
V (2G)
Cap
μ
F
68
100
120
150
180
−
100
120
150
180
220
270
120
180
220
270
330
−
180
270
330
390
470
560
Ripple
A,r ms
0.52
0.67
0.78
0.91
1
.
04
−
0.66
0.77
0
.
91
1.04
1.21
1.40
0
.
78
1.01
1.18
1.37
1
.
57
−
1.01
1.31
1
.
52
1.73
1.97
2.23
350
V (2V)
Cap
μ
F
82
120
150
180
−
220
120
150
180
220
270
330
150
220
270
330
390
−
220
330
390
470
560
−
Ripple
A,r ms
0.47
0.61
0.72
0.83
−
1.01
0.60
0.72
0
.
83
0.96
1.12
1.29
0
.
72
0.93
1.09
1.26
1
.
43
−
0.93
1.20
1
.
38
1.58
1.79
−
250
V (2E)
Cap
μ
F
−
220
330
390
−
470
270
330
390
470
560
680
390
470
680
−
820
−
560
680
820
1000
1200
1500
Ripple
A,r ms
−
1.00
1.28
1.48
−
1.76
1.08
1.27
1
.
46
1.69
1.93
2.22
1
.
39
1.63
2.06
−
2
.
48
−
1.78
2.06
2
.
41
2.76
3.14
3.66
200
V (2D)
Cap
μ
F
270
330
390
470
680
−
390
470
560
680
820
1000
470
680
820
1000
1200
−
680
1000
1200
−
1500
1800
Ripple
A,r ms
1.03
1.21
1.39
1.62
2
.
04
−
1.31
1.52
1
.
75
2.04
2.34
2.70
1
.
54
1.96
2.27
2.63
3
.
00
−
1.96
2.51
2
.
92
−
3.38
4.01
22×25
22×30
22×35
22×40
22×45
22×50
25×25
25×30
25×35
25×40
25×45
25×50
30×25
30×30
30×35
30×40
30×45
30×50
35×25
35×30
35×35
35×40
35×45
35×50
500
V (2H)
Cap
μ
F
―
39
47
56
68
82
―
―
―
―
100
120
―
―
―
150
―
180
―
120
―
―
220
270
Ripple
A,r ms
―
0.35
0.41
0.47
0
.
54
0.62
―
―
―
―
0.67
0.77
―
―
―
0.85
―
1.01
―
0.72
―
―
1.12
1.29
Page 54
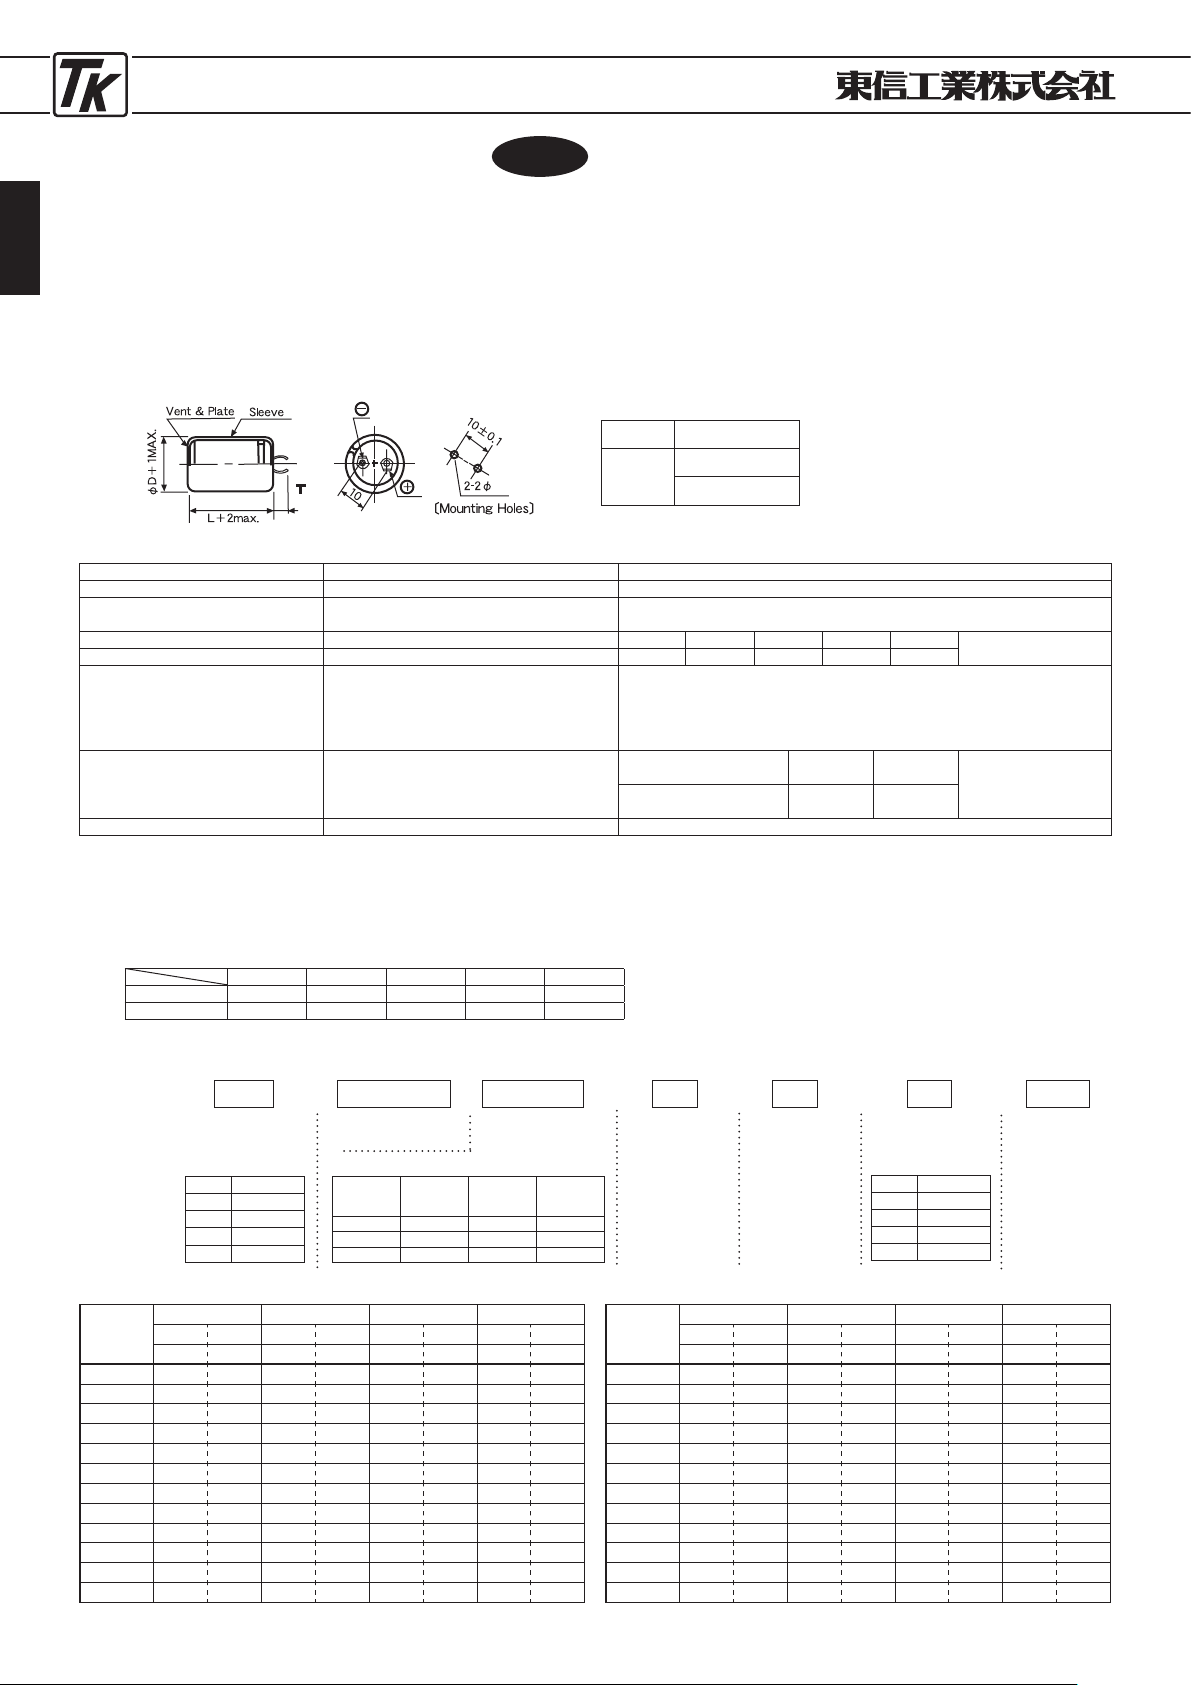
ELECTROLYTIC CAPACITORS
54
●基板自立形105℃品 ●
SNAP-IN TERMINAL TYPE
105℃
USE
■特 徴
LGWAシリーズ
JIS C
5101
CE-
69
TYPELGWA
JIS C
5101
CE-
69
・プリント基板自立形端子構造の大容量電解コンデンサで、
最高使用温度105℃
3,
000時間保証の製品です。
・一般電子機器及び産業用機器の電源回路、出力回路等に
ご使用頂くのに最適の製品です。
■
FEATURES
・
This product is a large capacitance electrolytic capacitor having
a printed circuit board snap-in terminal structure and operates
at the maximum operating temperature of
105℃
.
And, product of 3,
000
hour guarantee.
・
This product is most suitable for use in the power supply circuit,
etc. for general electronic equipment and industrial equipment.
■寸法図
/DIAGRAM OF DIMENSIONS
■性 能
/PERFORMANCE SPECIFICATIONS
カテゴリ温度範囲
CATEGORY TEMPERATURE RANGE -
25℃〜+105℃(200〜450
VDC
)
標準静電容量許容差
STANDARD CAPACITANCE TOLERANCE -20%〜+20%
(25℃, 120Hz)
漏れ電流(
最大値)
LEAKAGE CURRENT
(
MAX. VALUE
)
I=0.02CV OR 3mA WHICHEVER C=RATED CAPACITANCE(μF)
IS THE SMALLER (at
25℃
, after 5 minutes) V=WORKING VOLTAGE (V)
損失角の正接( 最大値)
DISSIPATION FACTOR(MAX. VALUE
)
(25℃
,
120Hz)
(25℃, 120Hz)
耐
久
性
105℃
3000時間
定格使用電圧印加
ENDURANCE
APPLICATION OF RATED OPERATING
VOLTAGE, AT
105℃
FOR
3000
HOURS.
CAPACITANCE CHANGE : LESS THAN
20
% OF THE INITIAL
MEASURED VALUE.
DISSIPATION FACTOR : LESS THAN
200
% OF THE INITIAL
SPECIFIED VALUE.
LEAKAGE CURRENT : LESS THAN THE INITIAL SPECIFIED VALUE.
低 温 特 性
+
20℃における120Hzの
インピーダンスに対する比
(最大値)
LOW TEMPERATURE STABILITY
RATIO OF IMPEDANCE AT COLD TO
THAT AT
20℃, 120
Hz. MAX. VALUE.
その他の特性は
JIS C
5101-4に準ずる
THE OTHER CHARACTERISTICS THE OTHER CHARACTERISTICS ARE BASED ON JIS C
5101-4
■定格リプル電流補正係数
リプル周波数が標準品一覧表の規定値と異なる場合には、下表の係数を乗じた値以下でご使用下さい。
When the ripple frequency differs from the specification shown in the list of standard products, multiply the value with the
coefficient shown below, and use the products under the obtained value.
周波数補正係数
/FREQUENCY CORRECTION FACTOR
f
(Hz)
50/60 120 1
k
10
k
100
k
200〜250 0.80
1.00
1.15
1.17
1.20
400〜450 0.70
1.00
1.10
1.12
1.15
■品番ご指定法
/HOW TO SPECIFY ITEM NUMBER FOR TYPE LGW
例/
Example
2
E LGWA
122
M
LGWA series
250
V
定格電圧
Rated Voltage
シリーズ名
Series Name
静電容量記号
Capacitance Symbol
容量許容差
Capacitance tolerance
例/
Example
±20
%=M
静電容量
RATED
Cap.μF
記号
SYMBOL
静電容量
RATED
Cap.μF
記号
SYMBOL
68 680 270 271
82 820 1200 122
180 181 1500 152
±20%1200μ
F
6
端子長さ
(T)
Termina length
6.3
mm=
7
4.0
mm=
6
4.0
mm
R
製品外径(φ
D)
Product diameter
φ35
45
製品長さ
(L)
Product length
25L=25
30L=30
35L=35
40L=40
45L=45
50L=50
45
L
φ
D SYMBOL
22
N
25
P
30
Q
35
R
New
W.V. SYMBOL
200 2
D
250 2
E
400 2
G
450 2
W
W.V.
200 250 400 450
tan
δ 0.15 0.15 0.15 0.15
W.V.
200~250 400~450
Z -
25℃/
Z +
20℃ 7 7
■寸法表
/CASE SIZE TABLE
■
Ripple current [Max. Value A] at
105℃ 120
Hz
φD×
L
(mm)
200
V (2D)
250
V (2E)
400
V (2G)
450
V (2W)
Cap Ripple Cap Ripple Cap Ripple Cap Ripple
μ
F A,rms
μ
F A,rms
μ
F A,rms
μ
F A,rms
22×25 270 1.01
82 0.58 56 0.41
22×30 330 1.15 270 1.05 100 0.64 82 0.59
22×35 390 1.21 330 1.17 120 0.69 100 0.64
22×40 470 1.33 390 1.36 150 0.81 120 0.69
22×45 560 1.47 470 1.46 180 0.90 150 0.81
22×50 680 1.61 560 1.57 220 1.01 180 0.87
25×25 100 0.64 82 0.59
25×30 390 1.20 330 1.16 150 0.81 120 0.69
25×35 470 1.32 390 1.33 180 0.89 150 0.81
25×40 560 1.46 470 1.43 220 1.00 180 0.87
25×45 680 1.62 560 1.64
220 1.01
25×50 820 1.78 680 1.93 270 1.10
φD×
L
(mm)
200
V (2D)
250
V (2E)
400
V (2G)
450
V (2W)
Cap Ripple Cap Ripple Cap Ripple Cap Ripple
μ
F A,rms
μ
F A,rms
μ
F A,rms
μ
F A,rms
30×25 390 1.36 150 0.75 120 0.67
30×30
560 1.46 470 1.51 220 1.00 180 0.84
30×35 680 1.63 560 1.64 270 1.11 220 0.94
30×40 820 1.83 680 1.82 330 1.31 270 1.07
30×45 1000 2.10 820 1.99 330 1.21
30×50 1200 2.41 1000 2.19 390 1.41
35×25
220 1.00 180 0.79
35×30 820 1.82 680 1.82 330 1.31 270 1.17
35×35 1000 2.10 820 2.03 390 1.42 330 1.33
35×40 1200 2.42 1000 2.14 470 1.73 390 1.52
35×45 1500 2.81 1200 2.76 560 1.93 470 1.70
35×50 1800 3.05 680 2.12
●この寸法表にないカスタム製品も製造いたしますので、御相談下さい。
●
Produce custom products too, which are not found in these tables.
φ
D
T
22〜35
6
.
3±1.0
4
.
0±1.0
Unit : mm
Page 55
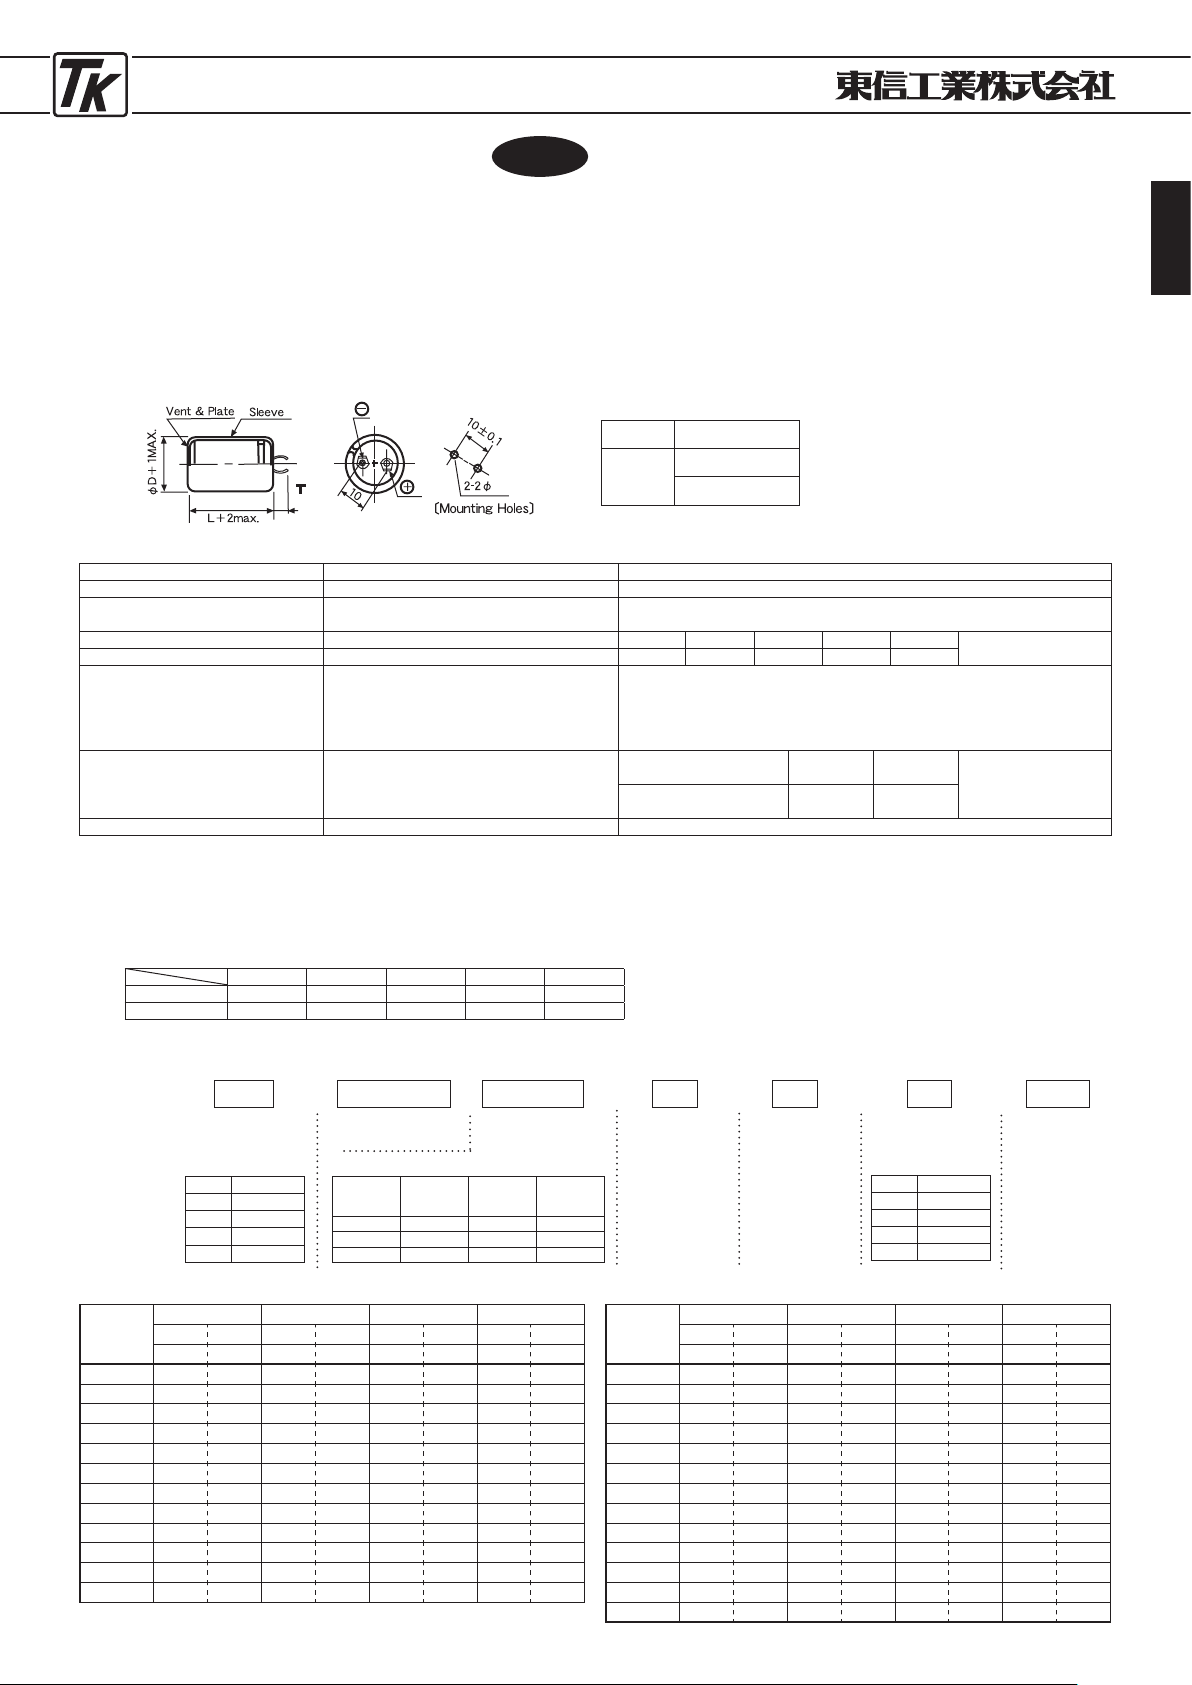
ELECTROLYTIC CAPACITORS
55
●基板自立形105℃品 ●
SNAP-IN TERMINAL TYPE
105℃
USE
■特 徴
LGWBシリーズ
JIS C
5101
CE-
69
TYPELGWB
JIS C
5101
CE-
69
・プリント基板自立形端子構造の大容量電解コンデンサで、
最高使用温度105℃
5,
000時間保証の製品です。
・一般電子機器及び産業用機器の電源回路、出力回路等に
ご使用頂くのに最適の製品です。
■
FEATURES
・
These product is a large capacitance electrolytic capacitor having
a printed circuit board snap-in terminal structure and operates
at the maximum operating temperature of
105℃
.
And, product of 5,
000
hour guarantee.
・
This product is most suitable for use in the power supply circuit,
etc. for general electronic equipment and industrial equipment.
■寸法図
/DIAGRAM OF DIMENSIONS
■性 能
/PERFORMANCE SPECIFICATIONS
カテゴリ温度範囲
CATEGORY TEMPERATURE RANGE -
25℃〜+105℃(200〜450
VDC
)
標準静電容量許容差
STANDARD CAPACITANCE TOLERANCE -20%〜+20%
(25℃, 120Hz)
漏れ電流(
最大値)
LEAKAGE CURRENT
(
MAX. VALUE
)
I=0.02CV OR 3mA WHICHEVER C=RATED CAPACITANCE(μF)
IS THE SMALLER (at
25℃
, after 5 minutes) V=WORKING VOLTAGE (V)
損失角の正接( 最大値)
DISSIPATION FACTOR(MAX. VALUE
)
(25℃
,
120Hz)
(25℃, 120Hz)
耐
久
性
105℃
5000時間
定格使用電圧印加
ENDURANCE
APPLICATION OF RATED OPERATING
VOLTAGE, AT
105℃
FOR
5000
HOURS.
CAPACITANCE CHANGE : LESS THAN
20
% OF THE INITIAL
MEASURED VALUE.
DISSIPATION FACTOR : LESS THAN
200
% OF THE INITIAL
SPECIFIED VALUE.
LEAKAGE CURRENT : LESS THAN THE INITIAL SPECIFIED VALUE.
低 温 特 性
+
20℃における120Hzの
インピーダンスに対する比
(最大値)
LOW TEMPERATURE STABILITY
RATIO OF IMPEDANCE AT COLD TO
THAT AT
20℃, 120
Hz. MAX. VALUE.
その他の特性は
JIS C
5101-4に準ずる
THE OTHER CHARACTERISTICS THE OTHER CHARACTERISTICS ARE BASED ON JIS C
5101-4
■定格リプル電流補正係数
リプル周波数が標準品一覧表の規定値と異なる場合には、下表の係数を乗じた値以下でご使用下さい。
When the ripple frequency differs from the specification shown in the list of standard products, multiply the value with the
coefficient shown below, and use the products under the obtained value.
周波数補正係数
/FREQUENCY CORRECTION FACTOR
f
(Hz)
50/60 120 1
k
10
k
100
k
200〜250 0.80
1.00
1.20 1.30 1.40
400〜450 0.70
1.00
1.10
1.12
1.15
■品番ご指定法
/HOW TO SPECIFY ITEM NUMBER FOR TYPE LGW
例/
Example
2
G LGWB
391
M
LGWB series
400
V
定格電圧
Rated Voltage
シリーズ名
Series Name
静電容量記号
Capacitance Symbol
容量許容差
Capacitance tolerance
例/
Example
±20
%=M
静電容量
RATED
Cap.μF
記号
SYMBOL
静電容量
RATED
Cap.μF
記号
SYMBOL
68 680 270 271
82 820 1200 122
180 181 1500 152
±20%390μ
F
6
端子長さ
(T)
Termina length
6.3
mm=
7
4.0
mm=
6
4.0
mm
Q
製品外径(φ
D)
Product diameter
φ35
50
製品長さ
(L)
Product length
25L=25
30L=30
35L=35
40L=40
45L=45
50L=50
55L=55
45
L
φ
D SYMBOL
22
N
25
P
30
Q
35
R
New
W.V. SYMBOL
200 2
D
250 2
E
400 2
G
450 2
W
W.V.
200 250 400 450
tan
δ 0.20 0.20 0.25 0.25
W.V.
200~250 400~450
Z -
25℃/
Z +
20℃ 7 7
■寸法表
/CASE SIZE TABLE
■
Ripple current [Max. Value A] at
105℃ 120
Hz
φD×
L
(mm)
200
V (2D)
250
V (2E)
400
V (2G)
450
V (2W)
Cap Ripple Cap Ripple Cap Ripple Cap Ripple
μ
F A,rms
μ
F A,rms
μ
F A,rms
μ
F A,rms
22×25 82 0.58 68 0.49
22×30
270 1.01 220 0.91 100 0.64 82 0.59
22×35
330 1.15 270 1.05 120 0.69 100 0.64
22×40
390 1.21 330 1.17 150 0.81 120 0.69
22×45
470 1.33 390 1.36 180 0.90 150 0.81
22×50
560 1.47 470 1.46 220 1.01 180 0.90
25×25
100 0.68
25×30
390 1.20 150 0.81 100 0.64
25×35
470 1.32 330 1.16 180 0.89 120 0.69
25×40
560 1.46 390 1.33 220 1.00 150 0.81
25×45
680 1.62 470 1.43 180 0.87
25×50
820 1.78 560 1.64 270 1.10 220 1.01
φD×
L
(mm)
200
V (2D)
250
V (2E)
400
V (2G)
450
V (2W)
Cap Ripple Cap Ripple Cap Ripple Cap Ripple
μ
F A,rms
μ
F A,rms
μ
F A,rms
μ
F A,rms
30×25 150 0.75 120 0.67
30×30
560 1.46 390 1.36 180 0.87 150 0.74
30×35 682 1.63 470 1.51 220 1.00 180 0.84
30×40 820 1.83 560 1.64 270 1.10 220 0.94
30×45 1000 2.10 682 1.82 330 1.31 270 1.07
30×50 1200 2.41 820 1.99 390 1.41 330 1.21
35×25
150 0.69
35×30 820 1.82 270 1.11 220 0.97
35×35 1000 2.10 680 1.82 330 1.31 270 1.08
35×40 1200 2.42 820 2.03 390 1.42 330 1.25
35×45 1500 2.81 1000 2.14 470 1.53 390 1.38
35×50 1200 2.76 560 1.68 470 1.56
35×55 680 1.88
●この寸法表にないカスタム製品も製造いたしますので、御相談下さい。
●
Produce custom products too, which are not found in these tables.
φ
D
T
22〜35
6
.
3±1.0
4
.
0±1.0
Unit : mm
Page 56
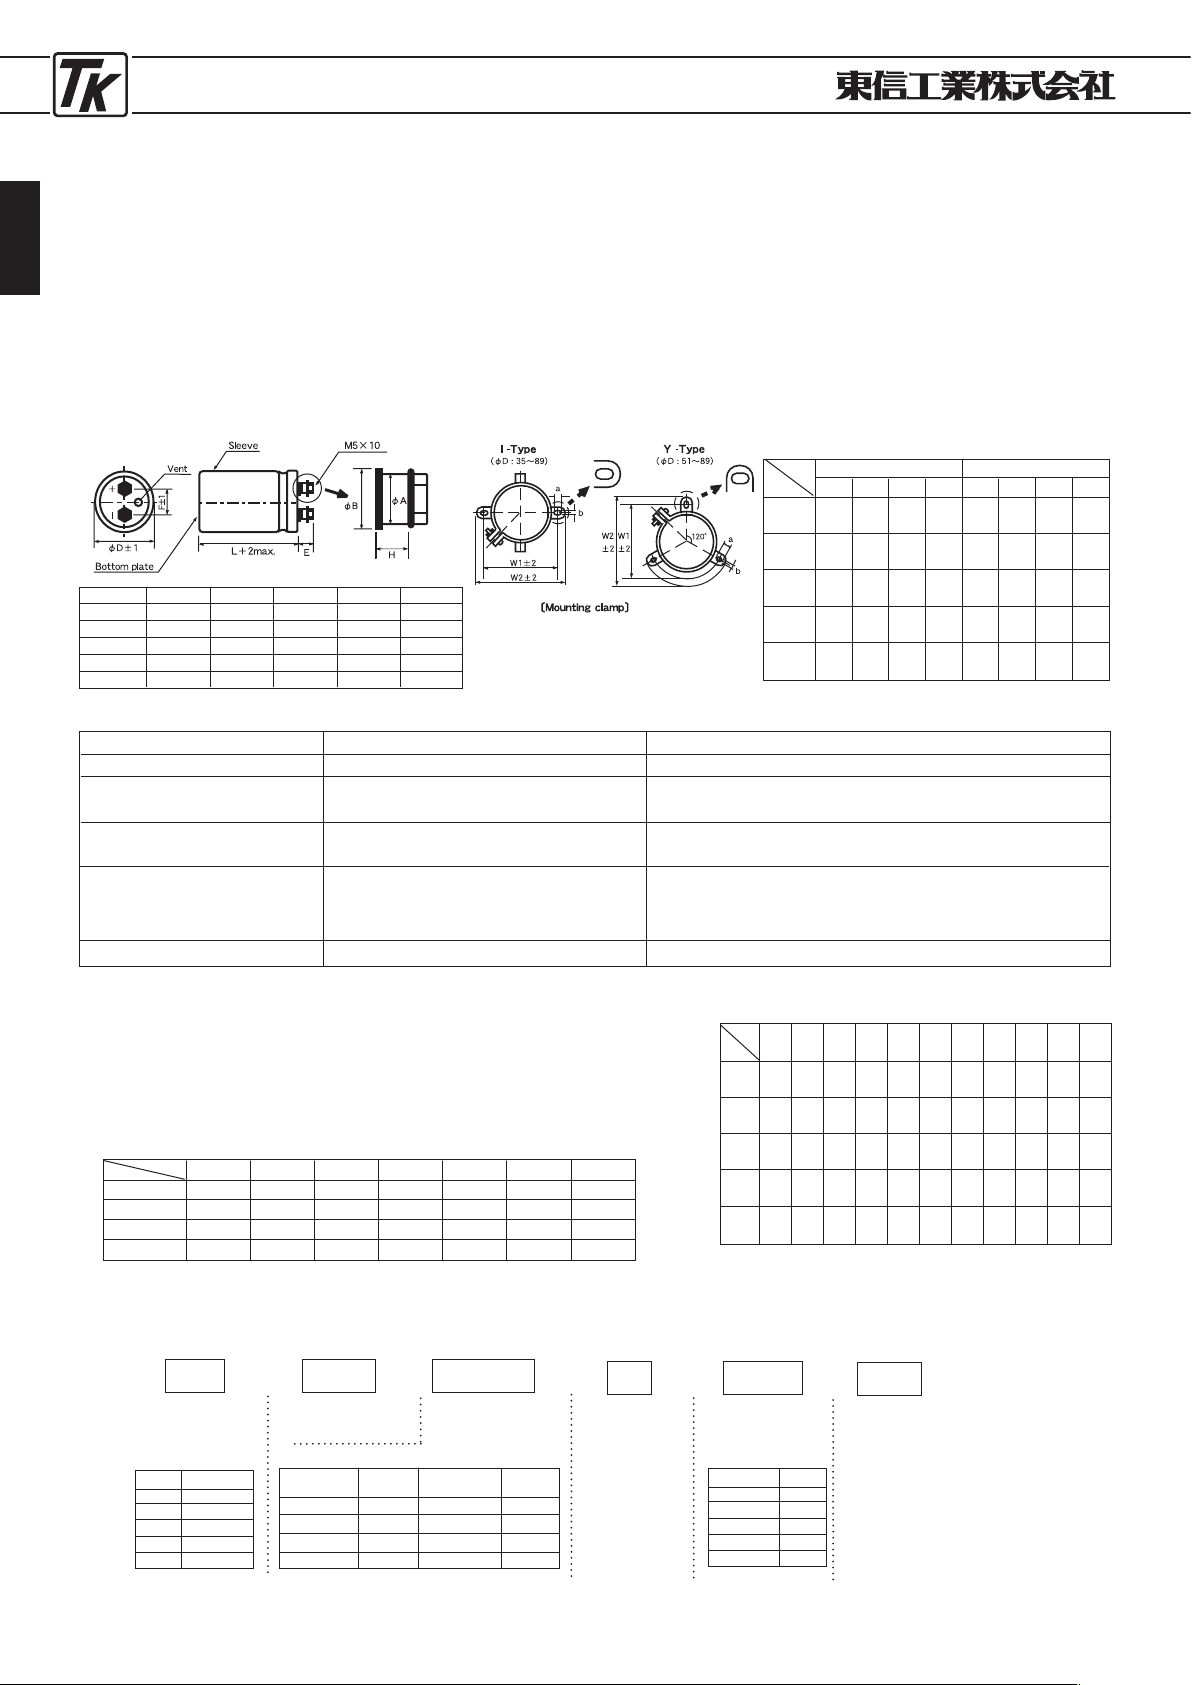
ELECTROLYTIC CAPACITORS
56
●ネジ端子形標準品
●
SCREW TERMINAL STANDARDIZED TYPE
■特 徴
SLシリーズ
JIS C
5101
CE-
33
TYPESL
JIS C
5101
CE-
33
・産業用機器の大 形電源、インバ ータ等を用途とし
て開発したネジ端子形の大容量の製品です。
・従来品より一段 と小形化されて おりますが、定格
リプル電流は同一水準になっております。
■
FEATURES
・
This is large capacitance product developed for use in power
supply, inverter, etc. for industrial equipment.
・
Although this product is made compact much more than the
conventional ones, its rated ripple current is on the same
level as that of the conventional one.
■寸法図
/DIAGRAM OF DIMENSIONS
■性 能
/PERFORMANCE SPECIFICATIONS
カ テ ゴ リ 温 度 範 囲
標 準 静 電 容 量 許 容 差
漏 れ 電 流 ( 最 大 値 )
損 失 角 の 正 接 ( 最 大 値 )
(25℃
,
120
Hz)
耐 久 性
85℃
2000時間
定格使用電圧印加
その他の 特性は
JI S C
5101-4に準ず る
CATEGORY TEMPERATURE RANGE
STANDARD CAPACITANCE TOLERANCE
LEAKAGE CURRENT (MAX. VALUE)
DISSIPATION FACTOR (MAX. VALUE)
(25℃, 120
Hz)
ENDURANCE
APPLICATION OF RATED OPERATING
VOLTAGE, AT
85℃
FOR
2000
HOURS.
THE OTHER CHARACTERISTICS
−40℃〜+85℃ (≧315
WV :
−25℃〜+85℃
)
−20%〜+20% (25℃, 120
Hz)
I=0.02CV OR 5mA WHICHEVER
IS THE SMALLER (at
25℃
, after 5 minutes)
CAPACITANCE CHANGE : LESS THAN
20%
OF THE INITIAL
MEASURED VALUE.
DISSIPATION FACTOR : LESS THAN
200%
OF THE INITIAL
SPECIFIED VALUE.
LEAKAGE CURRENT : LESS THAN THE INITIAL SPECIFIED VALUE.
THE OTHER CHARACTERISTICS ARE BASED ON JIS C
5101-4
C=RATED CAPACITANCE (μF)
V
=
WORKING VOLTAGE (V)
■定格リプル電流補正係数
リプル周波数が標準品一覧表の規定値と異なる場合には、下表の係数を乗じ
た値以下でご使用下さい。
When the ripple frequency differs from the specification shown in the list of
standard products, multiply the value with the coefficient shown below, and
use the products under the obtained value.
周波数補正係数
/FREQUENCY CORRECTION FACTOR
f(Hz)
W.V
10〜 50
63〜100
160〜200
250〜450
0
.
95
0
.
95
0
.
90
0
.
80
50
1
.
0
1
.
0
1
.
0
1
.
0
120
1
.
04
1
.
06
1
.
10
1
.
10
300
1
.
10
1
.
16
1
.
20
1
.
20
1
K
1.12
1
.
20
1
.
35
1
.
35
3
K
1.13
1
.
25
1
.
40
1
.
40
5
K
1.15
1
.
30
1
.
50
1
.
50
10
K
■品番ご指定法
/HOW TO SPECIFY ITEM NUMBER FOR TYPE SL
例/
Example
M
容量許容差
Capacitance
tolerance
±20%=
M
±20%
F
9
サイズコード
Case size code
φ89×90
L
Y
金具オプション
Clamp Option
不要=
N
Without clamp
I 型金具=I
With I-type clamp
Y
型金具=
Y
With Y-type clamp
Y-type
φD×
L
35×58
51×90
63
.
5×120
76×80
89×160
CODE
A
5
C
9
D
12
E
8
F
16
■
CASE SIZE CODE
L
φ
D
35
51
63
.
5
76
89
A
5
−
−
−
−
58
A
6
C
6
−
−
−
63
A
7
C
7
D
7
−
−
72
A
8
C
8
D
8
E
8
F
8
80
A
9
C
9
D
9
E
9
F
9
90
A
10
C
10
D
10
E
10
F
10
100
A
11
C
11
D
11
E
11
F
11
115
A
12
C
12
D
12
E
12
F
12
120
−
C
13
D
13
E
13
F
13
130
−
−
D
14
E
14
F
14
140
−
−
−
E
16
F
16
160
REFER TO CASE SIZE TABLES.
φ
D
35
51
63
.
5
76
89
Unit : mm
6.0
6
.
0
6
.
0
6
.
0
7
.
0
a
3.2
4
.
5
4
.
5
4
.
5
5
.
0
b
50
68
81
93
.
5
108
W
1
62
80
93
106
120
.
5
W
2
−
7
.
0
7
.
0
7
.
0
7
.
0
a
−
4
.
5
4
.
5
4
.
5
4
.
5
b
−
63
.
5
76
.
2
88
.
9
101
.
6
W
1
−
73
85
.
1
98
.
4
111
.
1
W
2
Clamp
type
I
Y
Unit : mm
φ
D
F
E
H
φ
A
φ
B
35
13
12
8
.
4
8
11
.
5
51
22
12
6
.
5
10
13
.
5
63
.
5
28
12
7
.
0
10
15
.
5
76
32
12
6
.
5
10
15
.
5
89
32
12
6
.
5
10
15
.
5
2
C SL
223
SL series
160
W.V
定格電圧
Rated Voltage
シリーズ名
Series Name
静電容量記号
Capacitance
Symbol
例/
Example
W.V
80
100
160
180
200
SYMBOL
1
K
2
A
2
C
2
P
2
D
例/
Example
静電容量
RATED
Cap.
μ
F
68
82
180
270
1200
1500
3300
12000
記号
SYM-
BOL
680
820
181
271
122
152
332
123
22000μ
F
静電容量
RATED
Cap.
μ
F
記号
SYM-
BOL
例/
Example
Page 57
ELECTROLYTIC CAPACITORS
57
■寸法表
/CASE SIZE TABLE
■
Ripple current
〔
Max. Value A〕at
85℃ 120
Hz.
W.V
μ
F
10
V (1A)
A
5
A
5
A
5
A
6
A
6
A
7
A
8
A
9
A
11
A
12
C
8
C
9
C
11
C
13
D
10
D
11
D
13
E
11
0
.
80
0
.
80
0
.
80
0
.
80
0
.
80
0
.
80
0
.
80
0
.
80
1.0
1.
0
1.
5
1.
5
1.
5
1.
5
2.
0
2.
0
2.
0
2.
0
4
.
3
4
.
7
5
.
2
6
.
1
6
.
7
7
.
7
8
.
8
10.
0
10.
8
12.
0
11.
2
12.
8
15.
3
17.
3
16.
7
19.
0
21.
7
24.
7
C
6
C
6
C
6
C
7
D
7
D
7
D
8
D
9
E
8
E
9
E
10
F
9
1
.
5
1
.
5
1
.
5
1
.
5
2
.
0
2
.
0
2
.
0
2
.
0
2
.
0
2
.
0
2
.
0
2
.
0
7
.
0
7
.
7
8
.
6
9
.
8
10.
4
11.
5
13.
1
14.
7
16.
9
19.
1
21.
6
21.
9
E
8
−
F
8
F
8
2
.
0
−
2
.
5
2
.
5
15
.
4
−
17
.
5
19
.
3
A
5
A
5
A
5
A
6
A
6
A
7
A
8
A
9
A
10
A
11
C
8
C
9
C
11
C
13
D
11
D
11
D
14
E
11
E
14
F
13
0
.
60
0
.
60
0
.
60
0
.
60
0
.
60
0
.
60
0
.
60
0
.
80
0
.
80
0
.
80
1.
0
1.
0
1.
0
1.
0
1.
5
1.
5
1.
5
1.
5
1.
5
2.
0
4
.
1
4
.
5
5
.
0
5
.
9
6
.
4
7
.
3
8
.
4
8
.
3
9
.
5
10.
9
11.
3
12.
8
15.
3
17.
6
16.
8
18.
3
21.
3
23.
6
27.
6
27.
1
C
6
C
6
D
7
D
7
D
8
D
9
E
8
E
9
E
11
F
9
F
11
1
.
0
1
.
0
1
.
5
1
.
5
1
.
5
1
.
5
1
.
5
1
.
5
1
.
5
2
.
0
2
.
0
8
.
6
9
.
4
9
.
9
10.
8
12.
3
14.
2
16.
3
18.
4
21.
6
20.
2
23.
8
E
8
−
F
8
F
8
1
.
5
−
2
.
0
2
.
0
14
.
8
−
16
.
3
17
.
9
A
5
A
5
A
5
A
5
A
6
A
7
A
8
A
9
A
10
A
11
C
8
C
9
C
11
C
12
D
10
D
11
D
14
E
11
E
14
F
11
F
14
0
.
50
0
.
50
0
.
50
0
.
50
0
.
50
0
.
50
0
.
50
0
.
60
0
.
60
0
.
60
0
.
80
0
.
80
0
.
80
0
.
80
1.
0
1.
0
1.
0
1.
2
1.
2
1.
2
1.
2
3
.
7
4
.
1
4
.
5
5
.
0
5
.
9
6
.
7
7
.
7
7
.
9
9
.
1
10.
4
10.
3
11.
7
14.
1
15.
7
16.
1
18.
6
21.
9
22.
0
25.
6
27.
9
32.
5
C
6
C
6
C
6
C
6
C
7
D
7
D
7
D
8
D
9
E
8
E
9
E
11
F
9
F
10
0
.
80
0
.
80
0
.
80
0
.
80
0
.
80
1.
0
1.
0
1.
0
1.
0
1.
2
1.
2
1.
2
1.
2
1.
2
6
.
0
6
.
6
7
.
2
7
.
9
9
.
0
9
.
9
10.
8
12.
5
14.
2
14.
9
17.
1
20.
3
21.
8
24.
6
E
8
−
F
8
F
8
1
.
2
−
1
.
2
1
.
2
13
.
5
−
17
.
5
19
.
4
15000
18000
22000
27000
33000
39000
47000
56000
68000
82000
100000
120000
150000
180000
220000
270000
330000
390000
470000
560000
680000
820000
16
V (1C)
25
V (1E)
35
V (1V)
A
5
A
5
A
5
A
6
A
7
A
7
A
8
A
9
A
11
C
7
C
8
C
10
C
11
C
12
D
10
C
11
C
14
E
12
E
14
F
13
F
14
0
.
40
0
.
40
0
.
40
0
.
40
0
.
40
0
.
40
0
.
40
0
.
50
0
.
50
0
.
60
0
.
60
0
.
60
0
.
60
0
.
60
0
.
80
0
.
80
0
.
80
1.
0
1.
0
1.
0
1.
0
3
.
4
3
.
7
4
.
2
4
.
9
5
.
7
6
.
3
7
.
2
7
.
3
8
.
7
8
.
6
9
.
8
11.
6
13.
3
14.
8
14.
9
17.
0
20.
0
20.
3
23.
5
26.
4
29.
6
C
6
C
6
C
6
C
7
−
D
7
D
7
D
8
D
9
E
8
E
9
E
11
F
10
F
11
0
.
60
0
.
60
0
.
60
0
.
60
−
0
.
80
0
.
80
0
.
80
0
.
80
1.
0
1.
0
1.
0
1.
0
1.
0
5
.
8
6
.
4
6
.
9
7
.
9
−
9
.
1
10
.
0
11
.
4
12
.
9
13
.
5
15
.
3
18
.
1
20
.
4
23
.
5
E
8
−
F
8
F
9
1
.
0
−
1
.
0
1
.
0
12
.
1
−
15
.
7
17
.
9
A
5
A
5
A
5
A
5
A
6
A
7
A
8
A
9
A
10
A
11
C
8
C
9
C
10
C
11
C
13
D
11
D
13
E
11
E
13
F
11
F
13
0
.
30
0
.
30
0
.
30
0
.
30
0
.
30
0
.
30
0
.
30
0
.
40
0
.
40
0
.
40
0
.
50
0
.
50
0
.
50
0
.
50
0
.
50
0
.
60
0
.
60
0
.
60
0
.
60
0
.
80
0
.
80
3
.
0
3
.
3
3
.
6
4
.
0
4
.
7
5
.
5
6
.
2
6
.
2
7
.
1
8
.
2
8
.
1
9
.
3
10
.
5
12
.
0
13
.
7
14
.
7
16
.
7
19
.
3
21
.
9
21
.
4
24
.
6
C
6
C
6
C
6
C
6
C
7
D
7
D
7
D
7
D
8
D
9
E
9
E
10
F
9
F
10
0
.
50
0
.
50
0
.
50
0
.
50
0
.
50
0
.
60
0
.
60
0
.
60
0
.
60
0
.
60
0
.
60
0
.
60
0
.
80
0
.
80
4
.
7
5
.
2
6
.
3
6
.
3
7
.
3
8
.
0
8
.
8
9
.
6
10
.
9
12
.
3
14
.
7
16
.
6
16
.
5
18
.
6
E
8
F
8
F
8
0
.
60
0
.
80
0
.
80
12
.
9
13
.
1
14
.
3
A
5
A
5
A
5
A
5
A
6
A
7
A
8
A
9
A
10
A
11
C
7
C
8
C
9
C
11
C
13
D
10
D
11
D
13
E
11
E
14
F
11
F
14
0.25
0
.
25
0
.
25
0
.
25
0
.
25
0
.
25
0
.
25
0
.
30
0
.
30
0
.
30
0
.
40
0
.
40
0
.
40
0
.
40
0
.
40
0
.
50
0
.
50
0
.
50
0
.
50
0
.
50
0
.
60
0
.
60
2.7
3
.
0
3
.
3
3
.
6
4
.
3
4
.
9
5
.
6
5
.
9
6
.
7
7
.
8
7
.
4
8
.
4
9
.
5
11
.
3
12
.
8
12
.
7
14
.
5
16
.
7
18
.
9
22
.
4
22
.
4
26
.
2
C
6
C
6
C
6
C
6
−
D
7
D
7
D
8
D
9
E
8
E
9
E
10
F
9
F
10
0
.
40
0
.
40
0
.
40
0
.
40
−
0
.
50
0
.
50
0
.
50
0
.
50
0
.
50
0
.
50
0
.
50
0
.
60
0
.
60
4
.
7
5
.
3
5
.
8
6
.
4
−
8
.
0
8
.
7
9
.
9
11
.
2
12
.
9
14
.
6
16
.
6
17
.
1
19
.
6
E
8
−
F
8
F
8
0
.
50
−
0
.
60
0
.
60
11
.
7
−
13
.
7
15
.
1
3900
4700
5600
6800
8200
10000
12000
15000
18000
22000
27000
33000
39000
47000
56000
68000
82000
100000
120000
150000
180000
220000
270000
330000
390000
470000
50
V (1H)
63
V (1J)
80
V (1K)
A
5
A
5
A
5
A
6
A
6
A
7
A
8
A
9
A
10
A
11
C
8
C
9
C
10
C
11
C
13
D
11
D
13
E
11
E
14
F
11
F
14
0
.
25
0
.
25
0
.
25
0
.
25
0
.
25
0
.
25
0
.
25
0
.
25
0
.
25
0
.
25
0
.
30
0
.
30
0
.
30
0
.
30
0
.
30
0
.
40
0
.
40
0
.
40
0
.
40
0
.
40
0
.
40
2
.
5
2
.
8
3
.
0
3
.
6
3
.
9
4
.
5
5
.
2
5
.
9
6
.
8
7
.
8
8
.
0
9
.
2
10
.
5
12
.
0
13
.
6
13
.
4
15
.
4
17
.
5
20
.
5
22
.
4
26
.
5
C
6
C
6
C
6
C
7
D
7
D
7
D
8
D
9
D
10
E
9
E
10
F
9
F
10
0
.
30
0
.
30
0
.
30
0
.
30
0
.
40
0
.
40
0
.
40
0
.
40
0
.
40
0
.
40
0
.
40
0
.
40
0
.
40
5
.
0
5
.
5
6
.
2
7
.
0
7
.
3
8
.
1
9
.
3
10
.
4
10
.
0
13
.
5
15
.
3
17
.
3
19
.
6
E
8
E
8
F
8
F
8
0
.
40
0
.
40
0
.
40
0
.
40
10
.
9
11
.
9
13
.
8
15
.
2
A
5
A
5
A
5
A
5
A
6
A
7
A
8
A
9
A
10
A
11
C
7
C
8
C
9
C
11
C
13
D
11
D
13
E
11
E
12
E
16
F
13
F
16
0
.
25
0
.
25
0
.
25
0
.
25
0
.
25
0
.
25
0
.
25
0
.
25
0
.
25
0
.
25
0
.
25
0
.
25
0
.
25
0
.
25
0
.
25
0
.
25
0
.
25
0
.
35
0
.
35
0
.
35
0
.
35
0
.
35
1
.
9
2
.
1
2
.
3
2
.
6
3
.
0
3
.
5
3
.
9
4
.
5
5
.
1
5
.
9
6
.
4
7
.
0
8
.
3
10
.
0
11
.
5
11
.
9
13
.
4
14
.
2
16
.
0
18
.
8
20
.
5
24
.
0
C
6
C
6
C
6
C
6
−
D
7
D
7
D
8
D
10
E
9
E
10
F
9
F
10
F
11
0
.
25
0
.
25
0
.
25
0
.
25
−
0
.
30
0
.
30
0
.
30
0
.
30
0
.
35
0
.
35
0
.
35
0
.
35
0
.
35
4
.
2
4
.
6
5
.
1
5
.
6
−
7
.
0
7
.
7
8
.
7
10
.
3
11
.
1
12
.
4
14
.
0
15
.
7
18
.
0
E
8
F
8
F
8
0
.
35
0
.
35
0
.
35
9
.
7
11
.
4
12
.
3
1800
(
182
)
2200 (222
)
2700 (272
)
3300 (332
)
3900 (392
)
4700 (472
)
5600 (562
)
6800 (682
)
8200 (822
)
10000 (103
)
12000 (123
)
15000 (153
)
18000 (183
)
22000 (223
)
27000 (273
)
33000 (333
)
39000 (393
)
47000 (473
)
56000 (563
)
68000 (683
)
82000 (823
)
100000 (104
)
120000 (124
)
150000 (154
)
100
V (2A)
Case size code
tanδ(
25℃, 120
Hz)
Ripple current
W.V
μ
F
W.V
μ
F
Page 58
ELECTROLYTIC CAPACITORS
58
160
V (2C)
A
5
−
A
6
A
7
A
8
A
10
A
11
C
7
C
8
C
9
C
10
C
11
C
13
D
11
D
13
E
11
E
14
F
13
F
14
0
.
25
−
0
.
25
0
.
25
0
.
25
0
.
25
0
.
25
0
.
25
0
.
25
0
.
25
0
.
25
0
.
25
0
.
25
0
.
25
0
.
25
0
.
25
0
.
25
0
.
25
0
.
25
2
.
0
−
2
.
7
3
.
1
3
.
5
4
.
2
4
.
8
5
.
2
5
.
9
6
.
7
7
.
6
8
.
8
10
.
0
11
.
6
13
.
2
14
.
5
17
.
0
19
.
4
21
.
6
C
6
C
6
C
6
C
6
−
D
7
D
7
D
7
D
9
D
10
E
9
E
10
F
9
F
10
0
.
25
0
.
25
0
.
25
0
.
25
−
0
.
25
0
.
25
0
.
25
0
.
25
0
.
25
0
.
25
0
.
25
0
.
25
0
.
25
3
.
4
3
.
8
4
.
2
4
.
5
−
6
.
2
6
.
8
7
.
5
8
.
8
10
.
0
11
.
2
12
.
6
14
.
3
16
.
3
E
8
E
8
F
8
F
8
0
.
25
0
.
25
0
.
25
0
.
25
8
.
8
9
.
7
11
.
5
12
.
6
A
5
A
6
A
6
A
7
A
8
A
9
A
11
C
7
C
8
C
9
C
10
C
11
C
13
D
11
D
13
E
11
E
14
F
11
F
14
0
.
25
0
.
25
0
.
25
0
.
25
0
.
25
0
.
25
0
.
25
0
.
25
0
.
25
0
.
25
0
.
25
0
.
25
0
.
25
0
.
25
0
.
25
0
.
25
0
.
25
0
.
25
0
.
25
1
.
9
2
.
2
2
.
5
2
.
8
3
.
2
3
.
7
4
.
5
4
.
8
5
.
4
6
.
1
7
.
0
8
.
0
9
.
2
10
.
5
12
.
2
13
.
2
15
.
5
17
.
0
19
.
9
C
6
C
6
C
6
C
6
−
D
7
D
7
D
7
D
8
D
10
E
9
E
10
F
9
F
10
0
.
25
0
.
25
0
.
25
0
.
25
−
0
.
25
0
.
25
0
.
25
0
.
25
0
.
25
0
.
25
0
.
25
0
.
25
0
.
25
3
.
1
3
.
4
3
.
8
4
.
2
−
5
.
7
6
.
3
6
.
9
8
.
1
9
.
2
10
.
1
11
.
6
13
.
3
14
.
7
E
8
E
8
F
8
F
8
0
.
25
0
.
25
0
.
25
0
.
25
8
.
1
8
.
9
10
.
2
11
.
5
A
5
A
6
A
7
A
8
A
9
A
10
A
11
C
8
C
9
C
10
C
11
C
13
D
11
D
13
E
11
E
13
F
11
F
14
0
.
25
0
.
25
0
.
25
0
.
25
0
.
25
0
.
25
0
.
25
0
.
25
0
.
25
0
.
25
0
.
25
0
.
25
0
.
25
0
.
25
0
.
25
0
.
25
0
.
25
0
.
25
1
.
9
2
.
2
2
.
6
3
.
0
3
.
4
3
.
9
4
.
5
5
.
0
5
.
7
6
.
4
7
.
4
8
.
4
9
.
8
11
.
2
12
.
3
13
.
9
15
.
3
18
.
0
C
6
C
6
C
6
C
6
C
7
D
7
D
7
D
7
D
8
D
9
E
9
E
10
F
9
F
10
0
.
25
0
.
25
0
.
25
0
.
25
0
.
25
0
.
25
0
.
25
0
.
25
0
.
25
0
.
25
0
.
25
0
.
25
0
.
25
0
.
25
2
.
9
3
.
2
3
.
5
3
.
9
4
.
5
5
.
3
5
.
9
6
.
4
7
.
3
8
.
3
9
.
3
10
.
5
11
.
8
11
.
3
E
8
F
8
F
8
0
.
25
0
.
25
0
.
25
8
.
2
9
.
4
10
.
2
1000
1200
1500
1800
2200
2700
3300
3900
4700
5600
6800
8200
10000
12000
15000
18000
22000
27000
33000
39000
180
V (2P)
200
V (2D)
400
V (2G)
A
5
A
6
A
6
A
7
A
8
A
9
A
10
A
11
C
8
C
9
C
10
C
11
D
10
D
11
D
13
E
11
E
14
F
11
F
14
0
.
20
0
.
20
0
.
20
0
.
20
0
.
20
0
.
20
0
.
20
0
.
20
0
.
20
0
.
20
0
.
20
0
.
20
0
.
20
0
.
20
0
.
20
0
.
20
0
.
20
0
.
20
0
.
20
1
.
7
2
.
0
2
.
2
2
.
5
2
.
9
3
.
3
3
.
7
4
.
3
4
.
6
5
.
3
6
.
0
7
.
0
8
.
1
9
.
2
10
.
5
11
.
9
13
.
8
15
.
2
17
.
7
C
6
C
6
C
6
C
7
D
7
D
7
D
8
D
9
E
8
E
9
F
8
F
9
F
10
0
.
20
0
.
20
0
.
20
0
.
20
0
.
20
0
.
20
0
.
20
0
.
20
0
.
20
0
.
20
0
.
20
0
.
20
0
.
20
2
.
9
3
.
2
3
.
5
4
.
0
5
.
0
5
.
4
6
.
2
7
.
1
8
.
2
9
.
2
10
.
4
11
.
7
13
.
3
E
8
−
F
8
0
.
20
−
0
.
20
7
.
4
−
9
.
5
A
5
A
6
A
7
A
7
A
8
A
9
A
11
C
7
C
8
C
9
C
11
C
13
D
10
D
11
D
14
E
13
E
14
F
11
F
14
0
.
25
0
.
25
0
.
25
0
.
25
0
.
25
0
.
25
0
.
25
0
.
25
0
.
25
0
.
25
0
.
25
0
.
25
0
.
25
0
.
25
0
.
25
0
.
25
0
.
25
0
.
25
0
.
25
1
.
5
1
.
8
2
.
0
2
.
2
2
.
5
2
.
9
3
.
4
3
.
6
4
.
0
4
.
7
5
.
5
6
.
3
7
.
1
8
.
2
9
.
5
10
.
9
12
.
2
13
.
4
15
.
6
C
6
C
6
C
6
C
7
−
D
7
D
7
D
8
D
9
E
8
E
9
E
11
F
8
F
10
0
.
25
0
.
25
0
.
25
0
.
25
−
0
.
25
0
.
25
0
.
25
0
.
25
0
.
25
0
.
25
0
.
25
0
.
25
0
.
25
2
.
3
2
.
6
2
.
8
3
.
2
−
4
.
3
4
.
8
5
.
4
6
.
2
7
.
2
8
.
2
9
.
6
10
.
4
11
.
7
E
8
−
F
8
F
8
0
.
25
−
0
.
25
0
.
25
6
.
5
−
8
.
5
9
.
2
270
330
390
470
560
680
820
1000
1200
1500
1800
2200
2700
3300
3900
4700
5600
5800
8200
10000
450
V (2W)
Case size code
tanδ(
25℃, 120
Hz) Ripple current
250
V (2E)
A
5
A
6
A
7
A
8
A
9
A
10
A
11
C
8
C
9
C
10
C
11
C
13
D
11
D
13
D
14
E
13
E
14
F
13
F
16
0
.
20
0
.
20
0
.
20
0
.
20
0
.
20
0
.
20
0
.
20
0
.
20
0
.
20
0
.
20
0
.
20
0
.
20
0
.
20
0
.
20
0
.
20
0
.
20
0
.
20
0
.
20
0
.
20
2
.
0
2
.
4
2
.
7
3
.
1
3
.
6
4
.
1
4
.
8
5
.
3
6
.
1
6
.
9
7
.
9
8
.
9
10
.
5
12
.
0
13
.
5
14
.
6
16
.
6
18
.
5
21
.
7
C
6
C
6
C
6
C
7
D
7
D
7
D
7
D
8
D
9
E
8
E
9
E
11
F
9
F
11
0
.
20
0
.
20
0
.
20
0
.
20
0
.
20
0
.
20
0
.
20
0
.
20
0
.
20
0
.
20
0
.
20
0
.
20
0
.
20
0
.
20
3
.
3
3
.
7
4
.
1
4
.
7
5
.
8
6
.
4
6
.
9
7
.
8
8
.
9
9
.
5
10
.
8
12
.
8
13
.
6
16
.
3
E
8
−
F
8
F
8
0
.
20
−
0
.
20
0
.
20
8
.
7
−
10
.
9
12
.
1
A
5
A
6
A
7
A
8
A
9
A
10
A
11
C
8
C
9
C
10
C
11
C
13
D
11
D
13
E
11
E
14
F
11
F
14
0
.
20
0
.
20
0
.
20
0
.
20
0
.
20
0
.
20
0
.
20
0
.
20
0
.
20
0
.
20
0
.
20
0
.
20
0
.
20
0
.
20
0
.
20
0
.
20
0
.
20
0
.
20
1
.
9
2
.
3
2
.
7
3
.
0
3
.
5
4
.
0
4
.
6
4
.
9
5
.
7
6
.
5
7
.
3
8
.
4
9
.
7
11
.
1
12
.
6
14
.
7
16
.
1
19
.
1
C
6
C
6
C
6
C
7
D
7
D
7
D
8
D
9
D
10
E
9
E
10
F
9
F
10
0
.
20
0
.
20
0
.
20
0
.
20
0
.
20
0
.
20
0
.
20
0
.
20
0
.
20
0
.
20
0
.
20
0
.
20
0
.
20
3
.
1
3
.
4
3
.
8
4
.
3
5
.
3
5
.
9
6
.
7
7
.
5
8
.
5
9
.
7
11
.
0
12
.
4
14
.
1
E
8
E
8
F
8
F
8
0
.
20
0
.
20
0
.
20
0
.
20
7
.
8
8
.
6
10
.
0
11
.
0
A
5
A
6
A
6
A
7
A
8
A
9
A
10
C
7
C
8
C
9
C
10
C
11
D
10
D
11
D
13
E
11
E
14
F
11
F
14
0
.
20
0
.
20
0
.
20
0
.
20
0
.
20
0
.
20
0
.
20
0
.
20
0
.
20
0
.
20
0
.
20
0
.
20
0
.
20
0
.
20
0
.
20
0
.
20
0
.
20
0
.
20
0
.
20
1
.
9
2
.
2
2
.
4
2
.
8
3
.
1
3
.
6
4
.
1
4
.
5
5
.
1
5
.
8
6
.
7
7
.
7
8
.
8
10
.
1
11
.
4
13
.
1
15
.
2
16
.
8
19
.
4
C
6
C
6
C
6
C
6
−
D
7
D
7
D
8
D
9
E
8
E
9
E
10
F
9
F
10
0
.
20
0
.
20
0
.
20
0
.
20
−
0
.
20
0
.
20
0
.
20
0
.
20
0
.
20
0
.
20
0
.
20
0
.
20
0
.
20
2
.
9
3
.
2
3
.
5
3
.
9
−
5
.
4
6
.
0
6
.
9
7
.
9
8
.
9
10
.
1
11
.
4
12
.
9
14
.
6
E
8
−
F
8
F
8
0
.
20
−
0
.
20
0
.
20
8
.
2
−
10
.
4
11
.
4
390
470
560
680
820
1000
1200
1500
1800
2200
2700
3300
3900
4700
5600
6800
8200
10000
12000
15000
18000
22000
315
V (2F)
350
V (2V)
●この寸法表にないカスタム製品も製造いたしますので、御相談下さい。
● 105℃品は
SLW
シリーズです。仕様をお問い合わせ下さい。
●
Produce custom products too, which are not found in these
tables.
●
This type for
105℃
use is SLW series, please make inquiries
about the specifications.
■寸法表
/CASE SIZE TABLE
■
Ripple current
〔
Max. Value A〕at
85℃ 120
Hz.
W.V
μ
F
W.V
μ
F
W.V
μ
F
Page 59
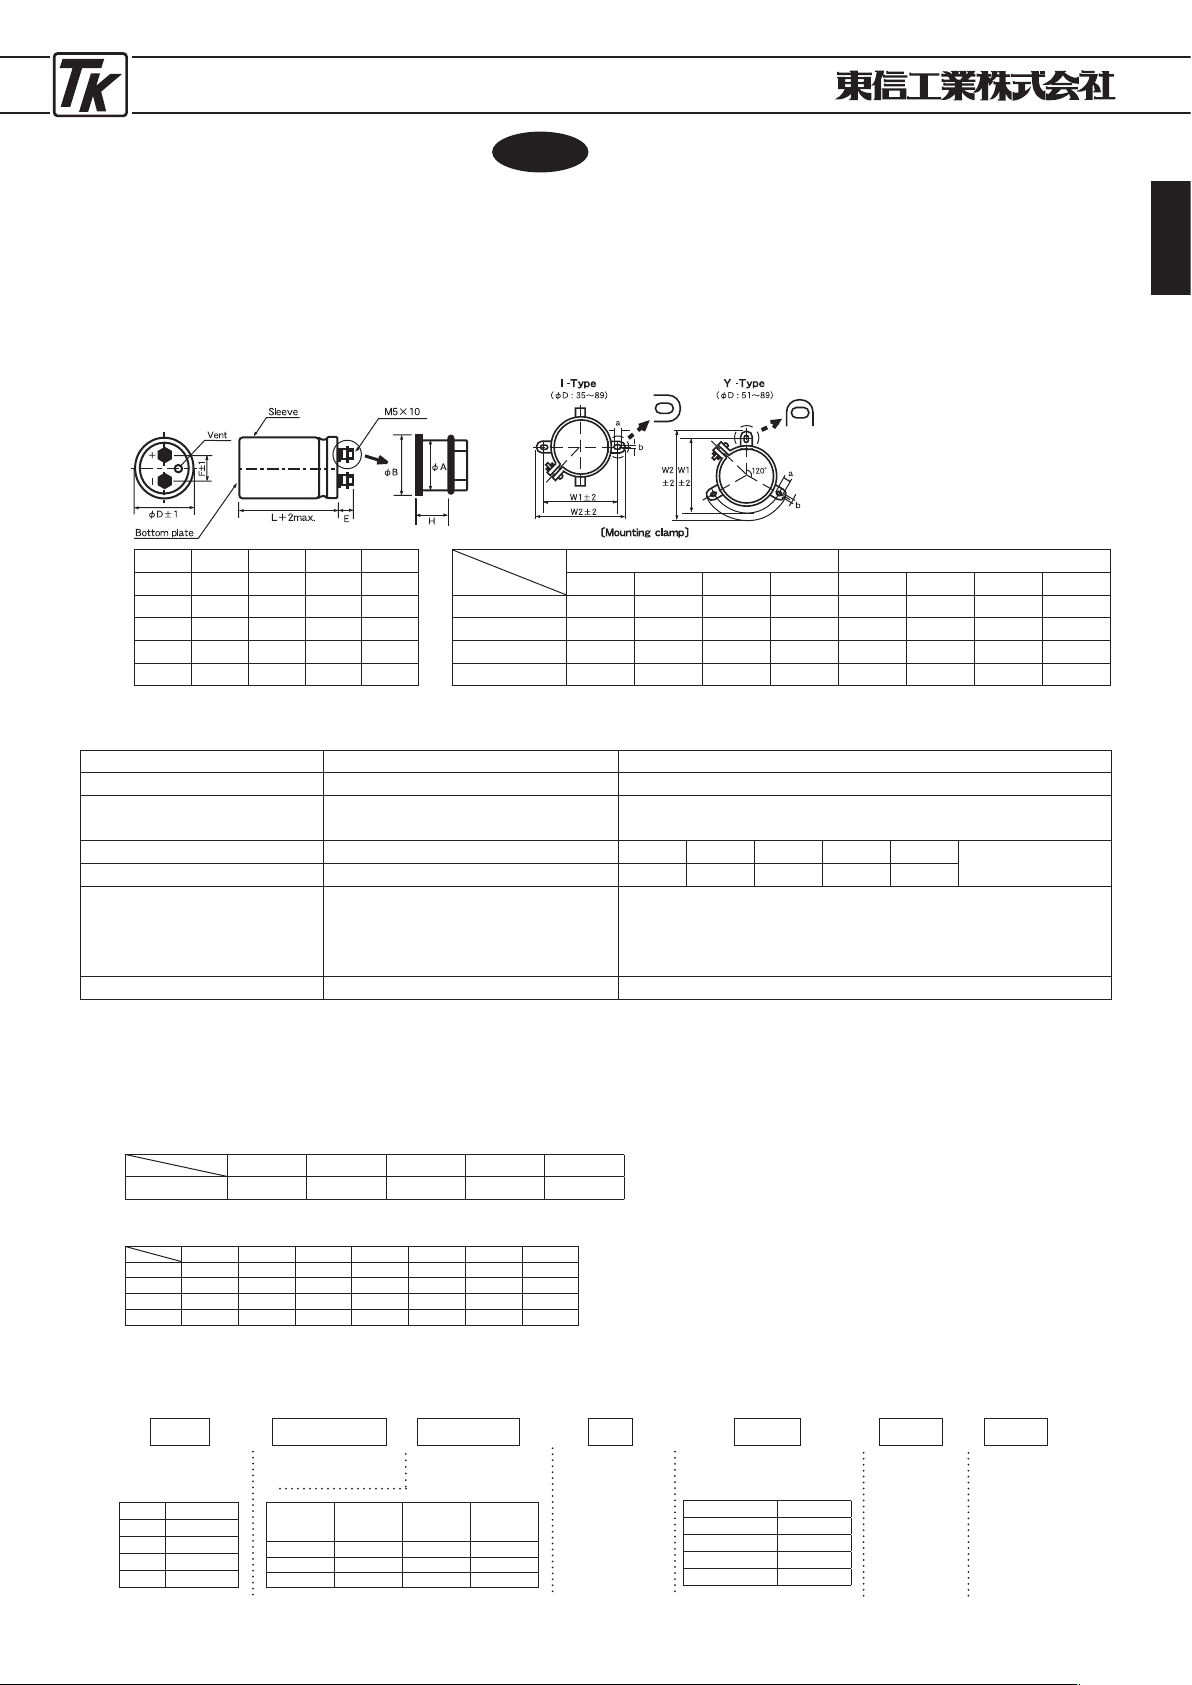
ELECTROLYTIC CAPACITORS
59
●ネジ端子形105℃品
●
SCREW TERMINAL TYPE
105℃
USE
■特 徴
SLWシリーズ
JIS C
5101
CE-
33
TYPESLW
JIS C
5101
CE-
33
・産業用機器の大形電源、インバータ等を用途として
開発したネジ端子形の大容量の製品です。
・高リプル電流、最高使用温度105℃
2000時間保証の
製品です。
■
FEATURES
・
This is large capacitance product developed for use in power
supply, inverter, etc. for industrial equipment.
・
High ripple current, operates at the maximum operating
temperature of
105℃
and product of
2000
hour guarantee.
■寸法図
/DIAGRAM OF DIMENSIONS
■性 能
/PERFORMANCE SPECIFICATIONS
カテゴリ温度範囲
CATEGORY TEMPERATURE RANGE -
40℃〜+105℃(200〜250
VDC) -
25℃〜+105℃(350〜450
VDC
)
標準静電容量許容差
STANDARD CAPACITANCE TOLERANCE -20%〜+20%
(25℃, 120Hz)
漏れ電流(
最大値)
LEAKAGE CURRENT
(
MAX. VALUE
)
I=0.02CV OR 5mA WHICHEVER C=RATED CAPACITANCE(μF)
IS THE SMALLER (at
25℃
, after 5 minutes) V=WORKING VOLTAGE (V)
損失角の正接( 最大値)
DISSIPATION FACTOR(MAX. VALUE
)
(25℃
,
120Hz)
(25℃, 120Hz)
耐
久
性
105℃
2000時間
定格使用電圧印加
ENDURANCE
APPLICATION OF RATED OPERATING
VOLTAGE, AT
105℃
FOR
2000
HOURS.
CAPACITANCE CHANGE : LESS THAN
20
% OF THE INITIAL
MEASURED VALUE.
DISSIPATION FACTOR : LESS THAN
200
% OF THE INITIAL
SPECIFIED VALUE.
LEAKAGE CURRENT : LESS THAN THE INITIAL SPECIFIED VALUE.
その他の特性は
JIS C
5101-4に準ずる
THE OTHER CHARACTERISTICS THE OTHER CHARACTERISTICS ARE BASED ON JIS C
5101-4
■定格リプル電流補正係数
リプル周波数が標準品一覧表の規定値と異なる場合には、下表の係数を乗じた値以下でご使用下さい。
When the ripple frequency differs from the specification shown in the list of standard products, multiply the value with the coefficient
shown below, and use the products under the obtained value.
周波数補正係数
/FREQUENCY CORRECTION FACTOR
f
(Hz)
50/60 120 360 1
k
10
k
200〜400 0.70 1.00 1.10 1.30 1.40
■品番ご指定法
/HOW TO SPECIFY ITEM NUMBER FOR TYPE LGW
例/
Example
2
G SLW
472
M
SLW series
400
V
定格電圧
Rated Voltage
シリーズ名
Series Name
静電容量記号
Capacitance Symbol
容量許容差
Capacitance tolerance
±20
%=M
静電容量
RATED
Cap.μF
記号
SYMBOL
静電容量
RATED
Cap.μF
記号
SYMBOL
1000 102 10000 103
4700 472 15000 153
8200 822 22000 223
±20%4700μ
F
F
10
サイズコード
Case size code
φ90×100
L
45
製品長さ
(L)
Product length
25L=25
30L=30
35L=35
40L=40
45L=45
50L=50
45
L
φD×
L CODE
51×80
C
8
64×100
D
10
76×150
E
15
90×190
F
19
New
W.V. SYMBOL
200 2
D
250 2
E
350 2
V
400 2
G
W.V.
200 250 350 400
tan
δ 0.25 0.25 0.20 0.20
■
CASE SIZE CODE
L
φ
D
80 100 120 150 170 190 230
51
C
8
C
10
C
12
64
D
8
D
10
D
12
D
15
76
E
10
E
12
E
15
E
17
E
19
90
F
10
F
12
F
15
F
17
F
19
F
23
φ
D
51 64 76 90
F
22.4 28.0 31.5 31.5
E
12.0 12.0 12.0 12.0
H
7.0 7.0 7.0 7.0
φ
A
10.0 10.0 10.0 10.0
φ
B
11.5 11.5 11.5 11.5
Clamp type
φD
I Y
a b W
1
W
2
a b W
1
W
2
51 7.0
5.0
68.0
80.0
5.0
7.0
63.6
73.0
64 7.0
5.0
81.0
93.0
5.0
7.0
76.1
87.2
76 7.0
5.0
93.6 106.0
5.0
7.0
89.0 100.4
90 7.0
5.0
108.0 120.6
5.0
7.0 101.6 113.0
Y
金具オプション
Clamp Option
不要=
N
Without clamp
I 型金具=I
With I-type clamp
Y
型金具=
Y
With Y-type clamp
Y-type
Page 60
ELECTROLYTIC CAPACITORS
60
■寸法表
/CASE SIZE TABLE
■
Ripple current [Max. Value A] at
105℃ 120
Hz
W.V.
μ
F
200
V (2D)
250
V (2E)
Case size
code
Ripple
A,rms
Case size
code
Ripple
A,rms
Case size
code
Ripple
A,rms
Case size
code
Ripple
A,rms
Case size
code
Ripple
A,rms
Case size
code
Ripple
A,rms
Case size
code
Ripple
A,rms
Case size
code
Ripple
A,rms
1500
C
8 2.4
1800
C
10 2.8
2200
C
8 2.9
C
10 3.2
D
8 3.0
2700
C
10 3.4
C
12 3.7
D
8 3.6
3300
C
10 3.9
D
8 3.7
C
12 4.4
D
10 4.3
3900
C
12 4.6
D
10 4.4
D
10 5.0
4700
D
10 5.1
D
12 5.9
E
10 5.6
5600
D
12 6.1
D
12 6.6
E
10 6.4
6800
D
12 7.2
E
10 7.0
D
15 7.3
E
12 7.1
8200
D
12 7.9
E
10 7.6
D
15 8.9
E
12 8.6
10000
D
15 8.5
E
12 8.2
E
15 10.0
F
12 9.6
12000
E
12 9.3
F
10 8.9
E
19 11.5
F
15 11.1
15000
E
15 10.4
F
12 9.9
F
17 12.7
18000
E
17 13.2
F
12 12.7
F
19 14.1
22000
E
19 15.7
F
15 15.1
F
23 15.4
●この寸法表にないカスタム製品も製造いたしますので、御相談下さい。
●
Produce custom products too, which are not found in these tables.
W.V.
μ
F
350
V (2V)
400
V (2G)
Case size
code
Ripple
A,rms
Case size
code
Ripple
A,rms
Case size
code
Ripple
A,rms
Case size
code
Ripple
A,rms
Case size
code
Ripple
A,rms
Case size
code
Ripple
A,rms
Case size
code
Ripple
A,rms
Case size
code
Ripple
A,rms
1000
C
8 3.9
C
8 3.9
1200
C
8 4.2
C
10 4.6
D
8 4.2
1500
C
10 5.2
C
12 5.6
D
8 6.0
1800
C
10 5.7
D
8 5.4
C
12 6.4
D
10 5.2
2200
C
12 7.1
D
10 6.7
D
10 6.9
2700
D
10 7.7
D
12 8.2
E
10 7.7
3300
D
12 9.1
D
12 9.5
E
10 9.0
3900
D
12 10.4
E
10 9.8
D
15 11.1
E
12 10.5
4700
D
15 12.2
E
12 11.5
E
12 12.0
F
10 9.9
5600
E
12 13.1
F
10 12.4
E
15 14.0
F
10 11.4
6800
E
15 15.5
F
12 14.7
E
19 17.3
F
12 13.3
8200
E
17 19.0
F
12 18.1
F
15 16.5
10000
E
19 20.9
F
15 19.9
F
17 18.1
12000
F
19 23.8
F
19 21.7
15000
F
23 28.8
F
23 25.8
Page 61
ELECTROLYTIC CAPACITORS
61
ラジアルリードタイプ(有極性)
P
62〜P63
ラジアルリードタイプ
(無極性)
P
64
アキシャルリードタイプ
(無極性)
P
64
オーディオ用アルミ電解コンデンサ
Aluminum Electrolytic Capacitors for AUDIO
−目次−
Page 62
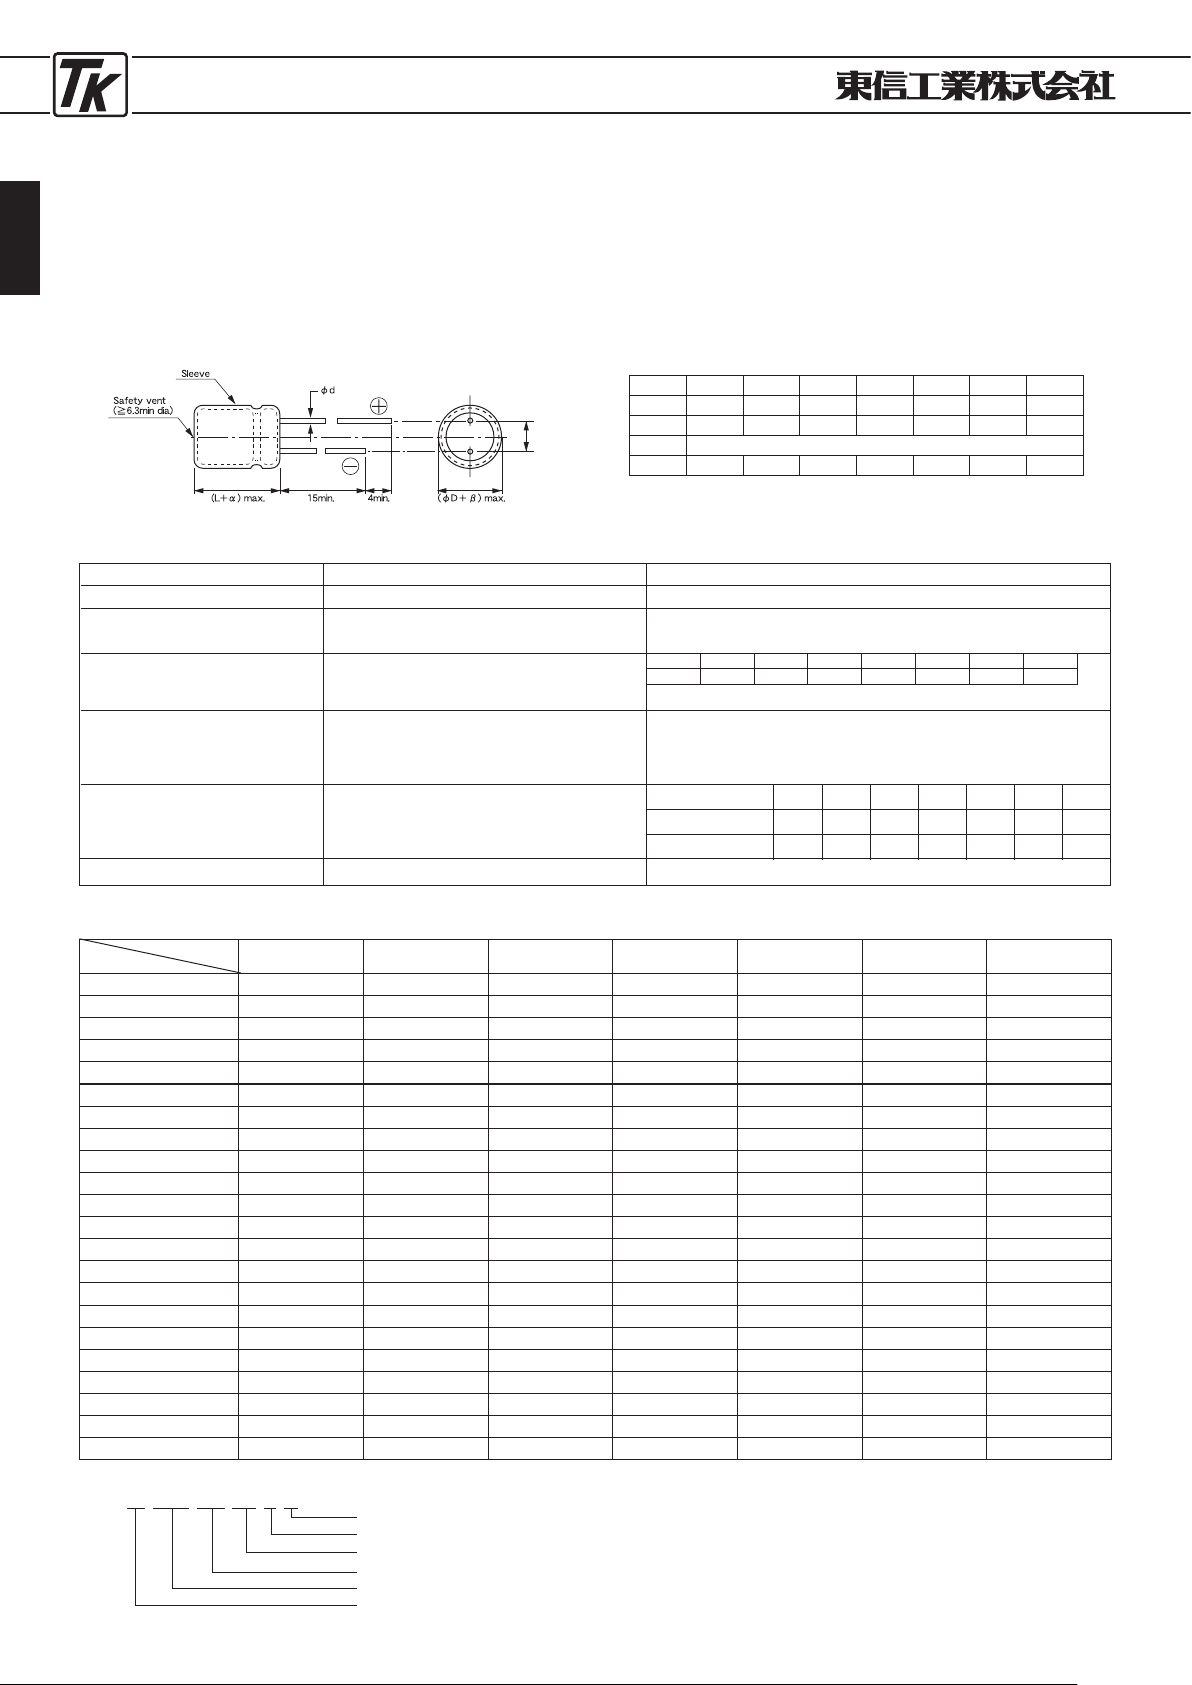
ELECTROLYTIC CAPACITORS
62
●オーディオ用ハイグレード品(85℃
)
●
HIGH GRADE FOR AUDIO (
85℃
)
■特 徴
UTSJシリーズ
JIS C
5101
CE-
04
TYPEUTSJ
JIS C
5101
CE-
04
・豊かな量感と質感を実現したシリーズで高級オーデ
ィオ機器に最適。
■
FEATURES
・
In the series that achieves amount of rich feeling and feeling
of quality, it is the best for high-end audio equipment.
■寸法図
/DIAGRAM OF DIMENSIONS
■性 能
/PERFORMANCE SPECIFICATIONS
カ テ ゴ リ 温 度 範 囲
標 準 静 電 容 量 許 容 差
漏 れ 電 流 ( 最 大 値 )
損 失 角 の 正 接 ( 最 大 値 )
(
tan δ)
耐 久 性
85℃ 1000時間
定格使用電圧印加
低 温 特 性
+20℃における120
Hz
の
インピーダンスに対する比
(最大値)
その他の 特性は
JI S C
5101-4に準ず る
CATEGORY TEMPERATURE RANGE
STANDARD CAPACITANCE TOLERANCE
LEAKAGE CURRENT (MAX. VALUE)
DISSIPATION FACTOR (MAX. VALUE)
(
tan δ)
ENDURANCE
APPLICATION OF RATED OPERATING
VOLTAGE, AT
85℃
FOR
1000
HOURS.
LOW TEMPERATURE STABILITY
RATIO OF IMPEDANCE AT COLD TO
THAT AT
20℃, 120
Hz. MAX. VALUE.
THE OTHER CHARACTERISTICS
−40℃〜+85℃
−20%〜+20%
(
120
Hz)
I=0.01CV OR 3μA WHICHEVER
IS THE GREATER (after
2
minutes)
CAPACITANCE CHANGE : LESS THAN
20%
OF THE INITIAL
MEASURED VALUE.
DISSIPATION FACTOR : LESS THAN
200%
OF THE INITIAL
SPECIFIED VALUE.
LEAKAGE CURRENT : LESS THAN THE INITIAL SPECIFIED VALUE.
THE OTHER CHARACTERISTICS ARE BASED ON JIS C
5101-4
C=RATED CAPACITANCE (μF)
V
=
WORKING VOLTAGE (V)
W. V6.
3 10 16 25 35 50 63
tan
δ 0.24 0.20 0.16 0.14 0.12 0.10 0.08
■寸法表
/CASE SIZE TABLE
6.3
V
10
V
16
V
25
V
35
V
50
V
63
V
0.47 5×11
1.0 5×11
2.2 5×11
3.3 5×11
4.7 5×11 5×11 5×11 5×11
10 5×11 5×11 5×11 5×11 5×11
22 5×11 5×11 5×11 5×11 5×11 5×11 6.3×11
33 5×11 5×11 5×11 5×11 5×11 6.3×11 6.3×11
47 5×11 5×11 5×11 5×11 6.3×11 6.3×11 8×11.5
100 5×11 5×11 6.3×11 6.3×11 8×11.5 8×11.5 10×12.5
220 6.3×11 6.3×11 8×11.5 8×11.5 10×12.5 10×16 10×20
330 6.3×11 8×11.5 8×11.5 10×12.5 10×16 10×20 12.5×20
470 8×11.5 8×11.5 10×12.5 10×16 10×20 12.5×20 12.5×25
1000 10×12.5 10×16 10×20 12.5×20 12.5×25 16×25 16×31.5
2200 12.5×20 12.5×20 12.5×25 16×25 16×31.5 18×35 18×40
3300 12.5×20 12.5×25 16×25 16×31.5 18×35
4700 16×25 16×25 16×31.5 18×35 18×40
6800 16×25 16×31.5 18×35
10000 16×31.5 18×35 18×40
12000 16×35 18×35
15000 18×35 18×40
18000 18×40
φD 5 6.3 8 10 12.5 16 18
φd 0.5 0.5 0.6 0.6 0.6 0.8 0.8
F 2 2.5 3.5 5.0 5.0 7.5 7.5
α
L<20:α=1.5, L
≧20:α=2
β 0.5 0.5 0.5 0.5 1.0 1.0 1.0
( )
( )
When the capacitance exceed
1000μ
F, the value of tanδis
increased by 0.02 for each increment of
1000μ
F or its fraction.
W.V.
6.3 10 16 25 35 50 63
Z-
25℃
/Z+
20℃ 4 3 2 2 2 2 2
Z-
40℃
/Z+
20℃ 10 8 6 4 3 3 3
W.V
μ
F
■品番ご指定法/
HOW TO SPECIFY ITEM NUMBER
1
E UTSJ □□
102
M
□
付記コード/
Additional Code
静電容量許容差/
Capacitance Tolerance
静電容量記号/
Capacitance Symbol
形状記号/
Style Symbol
シリーズ名/
Series Name
定格電圧/
Rated Voltage
F±0
.
5
Page 63
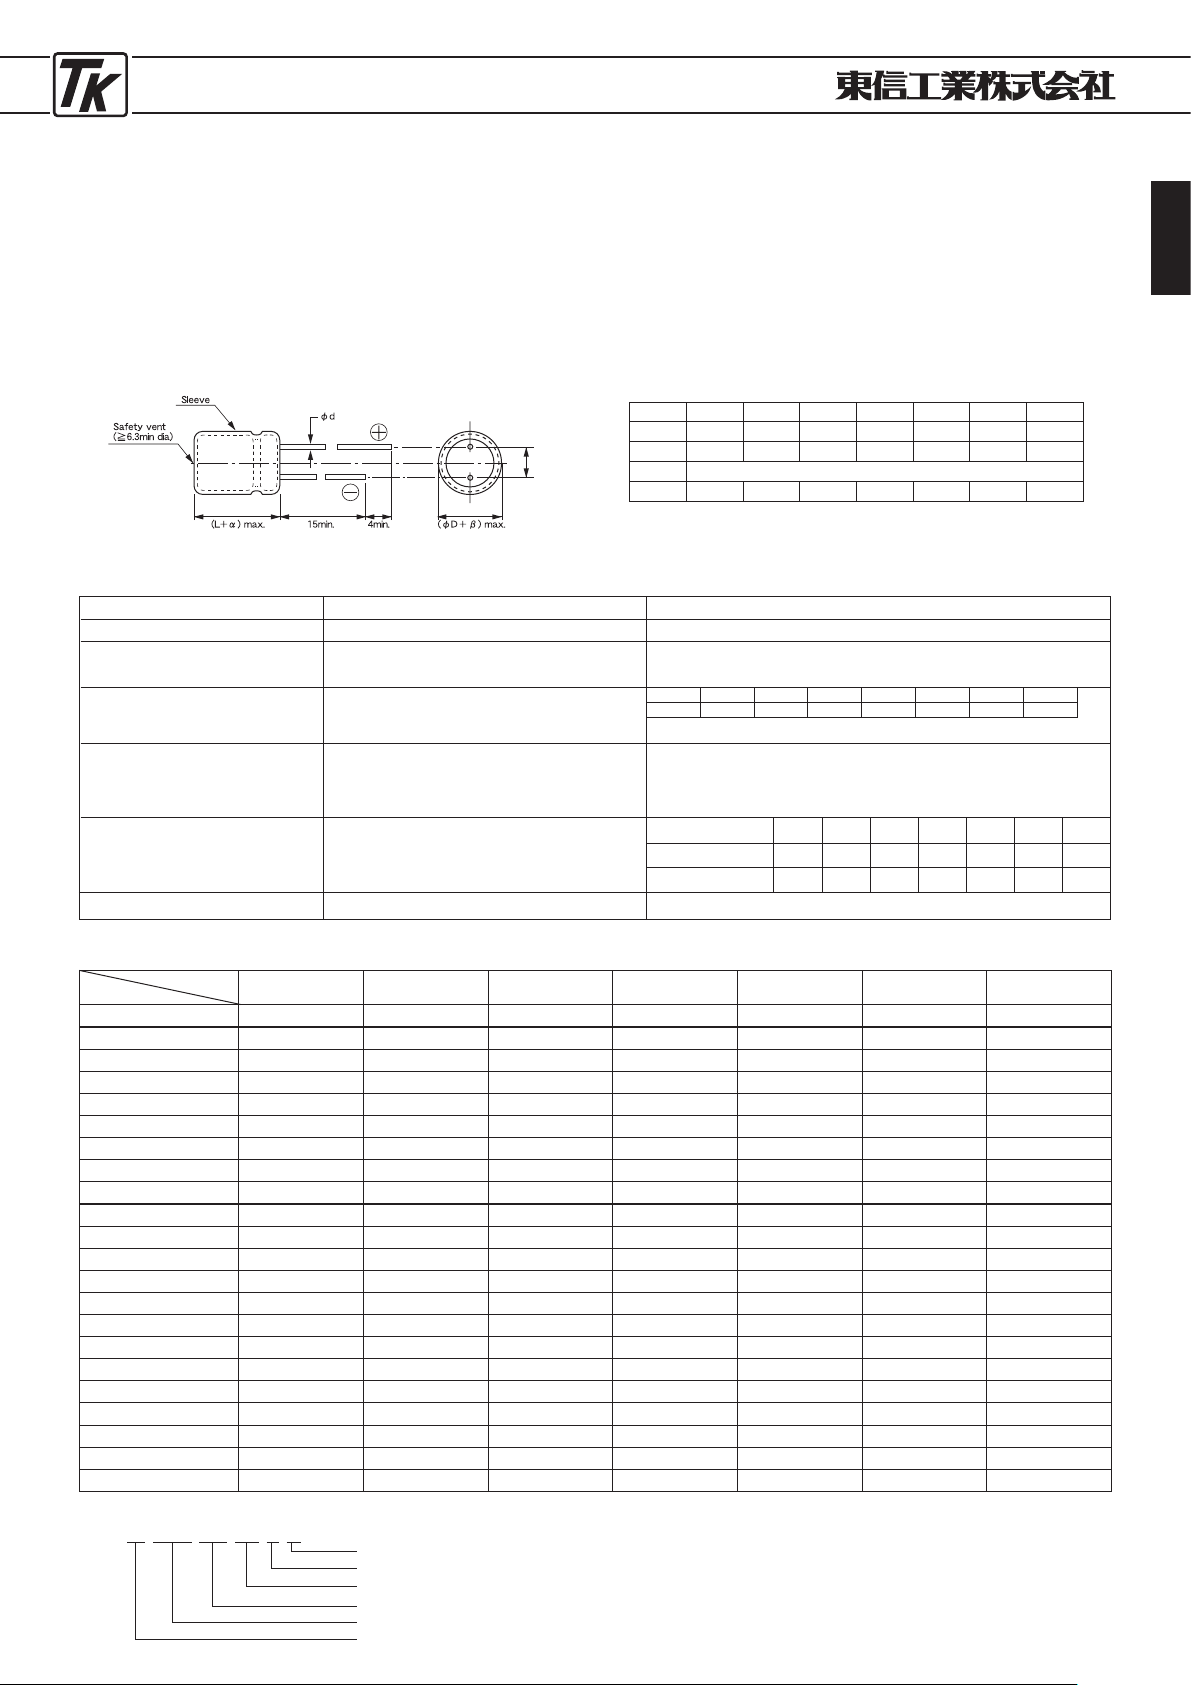
ELECTROLYTIC CAPACITORS
63
●オーディオ用標準品(85℃
)
●
STANDARD GRADE FOR AUDIO (
85℃
)
■特 徴
UTSPシリーズ
JIS C
5101
CE-
04
TYPEUTSP
JIS C
5101
CE-
04
・クリアーでハイクォリティーなサウンドを実現した
音響用コンデンサの標準品です。
■
FEATURES
・
It is standard goods of the capacitor for aodio that achieves
clearing and a high-quality sound.
■寸法図
/DIAGRAM OF DIMENSIONS
■性 能
/PERFORMANCE SPECIFICATIONS
カ テ ゴ リ 温 度 範 囲
標 準 静 電 容 量 許 容 差
漏 れ 電 流 ( 最 大 値 )
損 失 角 の 正 接 ( 最 大 値 )
(
tan δ)
耐 久 性
85℃
1000時間
定格使用電圧印加
低 温 特 性
+20℃における120
Hz
の
インピーダンスに対する比
(最大値)
その他の 特性は
JI S C
5101-4に準ず る
CATEGORY TEMPERATURE RANGE
STANDARD CAPACITANCE TOLERANCE
LEAKAGE CURRENT (MAX. VALUE)
DISSIPATION FACTOR (MAX. VALUE)
(
tan δ)
ENDURANCE
APPLICATION OF RATED OPERATING
VOLTAGE, AT
85℃
FOR
1000
HOURS.
LOW TEMPERATURE STABILITY
RATIO OF IMPEDANCE AT COLD TO
THAT AT
20℃, 120
Hz. MAX. VALUE.
THE OTHER CHARACTERISTICS
−40℃〜+85℃
−20%〜+20%
(
120
Hz)
I=0.01CV OR 3μA WHICHEVER
IS THE GREATER (after
2
minutes)
CAPACITANCE CHANGE : LESS THAN
20%
OF THE INITIAL
MEASURED VALUE.
DISSIPATION FACTOR : LESS THAN
200%
OF THE INITIAL
SPECIFIED VALUE.
LEAKAGE CURRENT : LESS THAN THE INITIAL SPECIFIED VALUE.
THE OTHER CHARACTERISTICS ARE BASED ON JIS C
5101-4
C=RATED CAPACITANCE (μF)
V
=
WORKING VOLTAGE (V)
W. V6.
3 10 16 25 35 50 63
tan
δ 0.24 0.20 0.16 0.14 0.12 0.10 0.08
■寸法表
/CASE SIZE TABLE
6.3
V
10
V
16
V
25
V
35
V
50
V
63
V
0.47 5×11
1.0 5×11
2.2 5×11
3.3 5×11
4.7 5×11 5×11 5×11 5×11
10 5×11 5×11 5×11 5×11 5×11
22 5×11 5×11 5×11 5×11 5×11 5×11 6.3×11
33 5×11 5×11 5×11 5×11 5×11 6.3×11 6.3×11
47 5×11 5×11 5×11 5×11 6.3×11 6.3×11 8×11.5
100 5×11 5×11 6.3×11 6.3×11 8×11.5 8×11.5 10×12.5
220 6.3×11 6.3×11 8×11.5 8×11.5 10×12.5 10×16 10×20
330 6.3×11 8×11.5 8×11.5 10×12.5 10×16 10×20 12.5×20
470 8×11.5 8×11.5 10×12.5 10×16 10×20 12.5×20 12.5×25
1000 10×12.5 10×16 10×20 12.5×20 12.5×25 16×25 16×30
2200 12.5×20 12.5×20 12.5×25 16×25 16×30 18×35 18×40
3300 12.5×20 12.5×25 16×25 16×30 18×35
4700 16×25 16×25 16×30 18×35 18×40
6800 16×25 16×30 18×35
10000 16×30 18×35 18×40
12000 16×35 18×35
15000 18×35 18×40
18000 18×40
φD 5 6.3 8 10 12.5 16 18
φd 0.5 0.5 0.6 0.6 0.6 0.8 0.8
F 2 2.5 3.5 5.0 5.0 7.5 7.5
α
L<20:α=1.5, L
≧20:α=2
β 0.5 0.5 0.5 0.5 1.0 1.0 1.0
( )
( )
When the capacitance exceed
1000μ
F, the value of tanδis
increased by 0.02 for each increment of
1000μ
F or its fraction.
W.V.
6.3 10 16 25 35 50 63
Z-
25℃
/Z+
20℃ 4 3 2 2 2 2 2
Z-
40℃
/Z+
20℃ 10 8 6 4 3 3 3
W.V
μ
F
■品番ご指定法/
HOW TO SPECIFY ITEM NUMBER
1
C UTSP □□
330
M
□
付記コード/
Additional Code
静電容量許容差/
Capacitance Tolerance
静電容量記号/
Capacitance Symbol
形状記号/
Style Symbol
シリーズ名/
Series Name
定格電圧/
Rated Voltage
F±0
.
5
Page 64
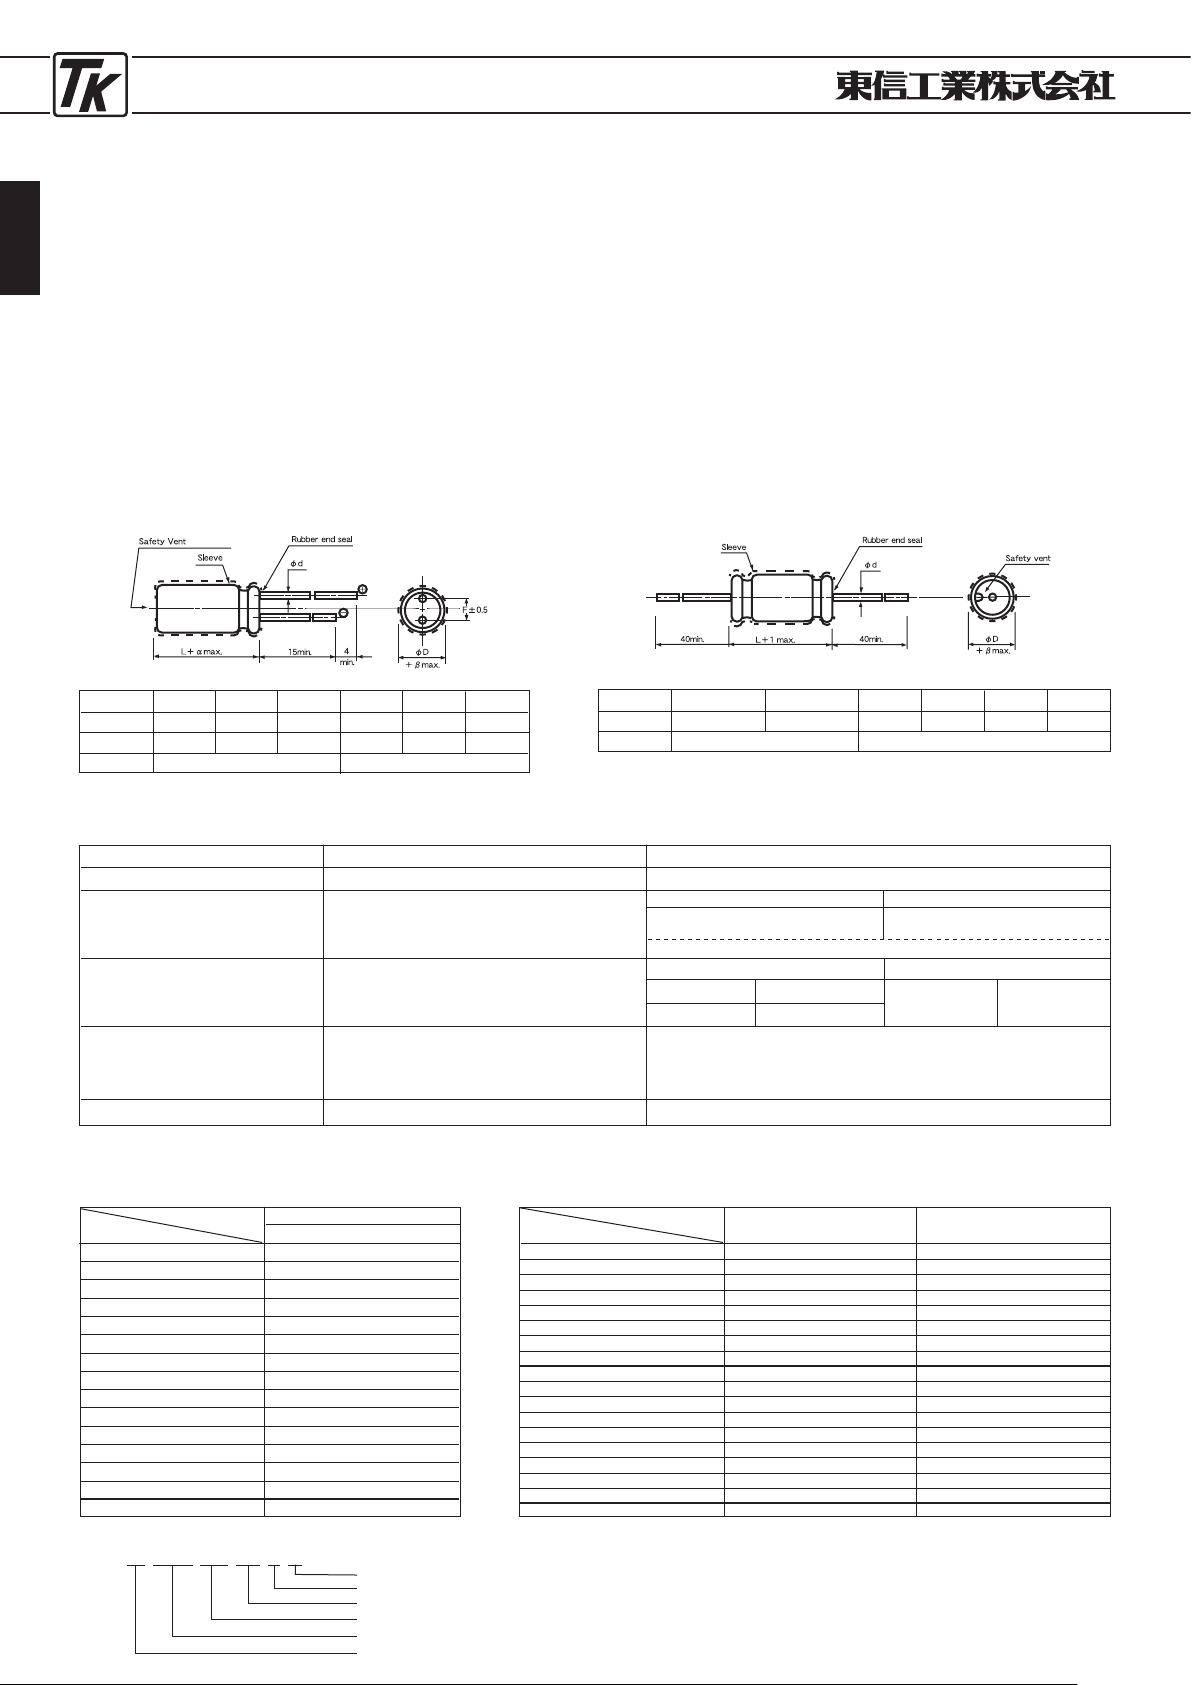
ELECTROLYTIC CAPACITORS
64
●スピーカーネットワーク用両極性品 ●
BIPOLARIZED TYPE FOR SPEAKER NETWORK
■特 徴
BPUSシリーズ
JIS C
5101
CE-
04
CE-
02
(基板洗浄タイプではありません)
TYPEBPUS
JIS C
5101
CE-
04
CE-
02
(
Unsuitable washing product
)
・
Hi-Fi
スピーカーのネットワーク用に開発されたシリ
ーズで、損失が小さく、周波数特性、温度特性が極
めて優れております。
・他の種類のコンデンサに比べ小形、低価格になって
おります。
■
FEATURES
・
These products are bi-polarized electrolytic capacitors which is specially
designed for use in Hi-Fi speaker systems with high performance
characteristics (Impedance) and low dissipation factor (tan δ).
・
Also these are smaller dimensions as compared with the traditional ones.
■寸法図
/DIAGRAM OF DIMENSIONS
■性 能
/PERFORMANCE SPECIFICATIONS
(D
≧φ8
)
BPUSLLシリーズ
TYPEBPUSLL
■寸法表
/CASE SIZE TABLE
TYPE BPUS
0.47
0
.
68
1
.
0
1
.
5
2
.
2
3
.
3
4
.
7
6
.
8
10
15
22
33
47
68
100
6.3×11
6
.
3×11
6
.
3×11
6
.
3×11
8×11
.
5
8×11
.
5
10×12
.
5
10×16
10×16
10×16
12
.
5×25
12
.
5×25
16×31
.
5
18×35
.
5
18×40
Unit : mm
D
50 (1
H)
カ テ ゴ リ 温 度 範 囲
標 準 静 電 容 量 許 容 差
漏 れ 電 流 ( 最 大 値 )
損 失 角 の 正 接 ( 最 大 値 )
(
tan δ)
耐 久 性
85℃
1000時間
定格使用電圧印加
(印加電圧は250時間毎に反転)
その他の 特性は
JI S C
5101-4に準ず る
CATEGORY TEMPERATURE RANGE
STANDARD CAPACITANCE TOLERANCE
LEAKAGE CURRENT (MAX. VALUE)
DISSIPATION FACTOR (MAX. VALUE)
THE OTHER CHARACTERISTICS
−40℃〜+85℃
BPUS :
±20%
BPUSLL :
±10% (1
KHz)
I=0.03CV OR 3μA WHICHEVER
IS THE GREATER (after
5
minutes)
CAPACITANCE CHANGE : LESS THAN
20%
OF THE INITIAL
MEASURED VALUE.
DISSIPATION FACTOR : LESS THAN
200%
OF THE INITIAL
SPECIFIED VALUE.
LEAKAGE CURRENT : LESS THAN THE INITIAL SPECIFIED VALUE.
THE OTHER CHARACTERISTICS ARE BASED ON JIS C
5101-4
C=RATED CAPACITANCE (μF) V=WORKING VOLTAGE (V)
Charact.
tanδ(1KHz)
I=0.03CV
+5μ
A (after 5 minutes)
BPUS
BPUSLL
Unit : mm
φ
D
F
φ
d
β
6.3
2
.
5
0
.
5
8
3
.
5
0
.
6
10
5
.
0
0
.
6
12
.
5
5
.
0
0
.
6
16
7
.
5
0
.
8
0
.
5
1
.
0
L
<20:α=1.5 / L≧20:α=2.0
18
7
.
5
0
.
8
TYPE BPUS
Unit : mm
φ
D
φ
d
β
10×19
L
0.6
10×29
L
0.8
13
0
.
8
16
0
.
8
0
.
5
1
.
0
18
0
.
8
TYPE BPUSLL
ENDURANCE
1000
HOURS APPLICATION OF DC
WORKING VOLTAGE AT
85℃
, REVERSING
POLARITY AT EACH
250
Hr.
D
0.08
tanδ(1KHz)
0.05
BPUS
BPUSLL
TYPE BPUSLL
1.0
1
.
5
2
.
2
3
.
3
4
.
0
4
.
7
6
.
0
8
.
0
10
12
16
20
25
33
40
50
75
100
10×19
10×29
13×32
13×32
13×32
13×32
13×32
13×32
13×32
13×32
13×32
16×34
16×34
16×34
16×34
18×44
18×44
22×46
Unit : mm
50 (1
H)
10×19
10×29
13×32
13×32
13×32
13×32
13×32
13×32
13×32
13×32
16×34
16×34
16×34
16×34
18×44
18×44
18×44
100
(2A)
μ
F
W.V
μ
F
22
0
.
8
Charact.
W.V
L
<20:α=1.5 / L≧20:α=2.0
■品番ご指定法/
HOW TO SPECIFY ITEM NUMBER
1
H BPUS □□
100
M
□
付記コード/
Additional Code
静電容量許容差/
Capacitance Tolerance
静電容量記号/
Capacitance Symbol
形状記号/
Style Symbol
シリーズ名/
Series Name
定格電圧/
Rated Voltage
(R47)
(
R
68)
(010)
(1
R
5)
(2
R
2)
(3
R
3)
(4
R
7)
(6
R
8)
(100)
(150)
(220)
(330)
(470)
(680)
(101)
(010)
(1
R
5)
(2
R
2)
(3
R
3)
(040)
(4
R
7)
(060)
(080)
(100)
(120)
(160)
(200)
(250)
(330)
(400)
(500)
(750)
(101)
Page 65
HYBRID CONDUCTIVE POLYMER CAPACITORS
65
導電性高分子ハイブリッドコンデンサ
P66 〜P
68
導電性高分子ハイブリッドアルミ電解コンデンサ
Hybrid Conductive Polymer Aluminum Electrolytic Capacitors
−目次−
Page 66
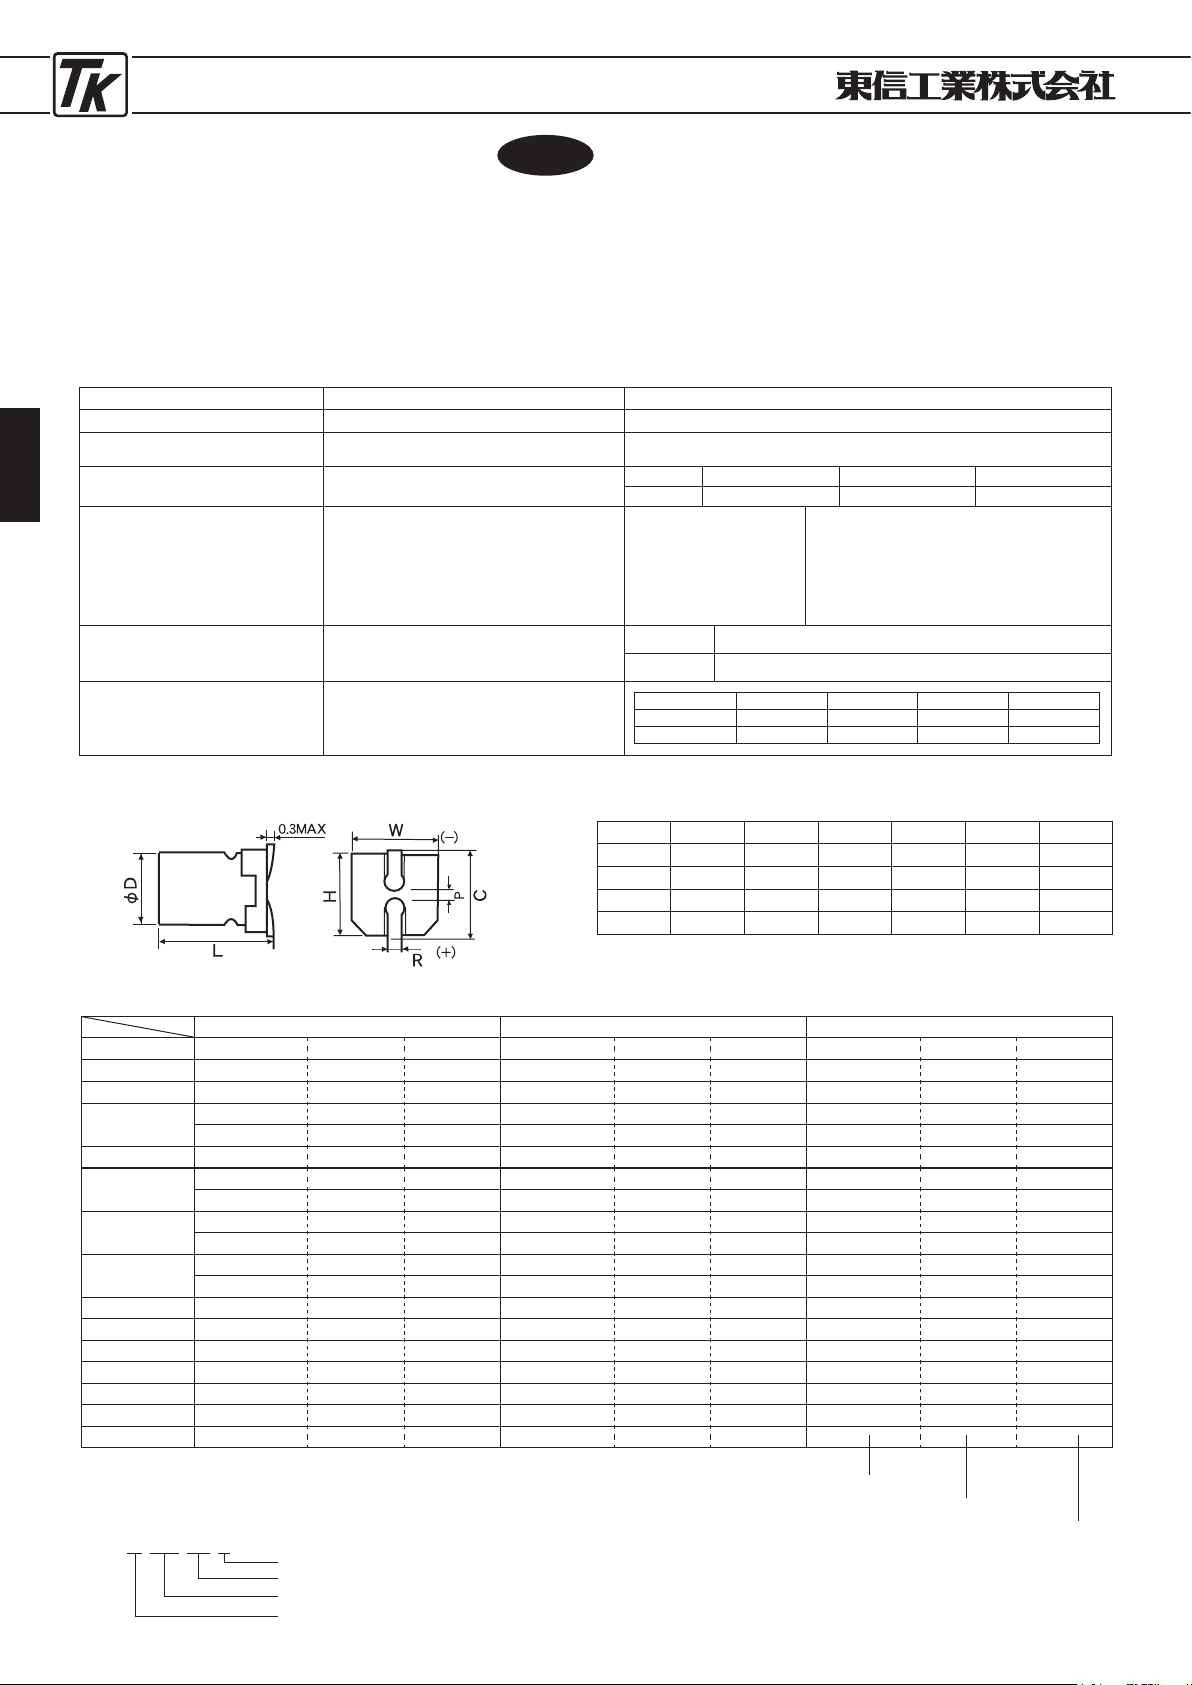
HYBRID CONDUCTIVE POLYMER CAPACITORS
66
カテゴリー温度範囲
CATEGORY TEMPERATURE RANGE -
55℃ 〜 +105℃
標準静電容量許容差
STANDARD CAPACITANCE TOLERANCE
±20% (120
Hz,
20℃)
漏れ電流
(最大値)
LEAKAGE CURRENT (MAX.VALUE
)
I=0.2CV OR
100μ
A WHICHEVER
C=RATED CAACITANCE(μF
)
IS THE GREATER(after 2 minutes) V=RATED VOLTAGE(V
)
損失角の正接
(最大値)
(
tan
δ)
DISSIPASION FACTOR (MAX.VALUE
)
(
tan
δ)
耐
久
性
105℃
,
3000〜5000時間
定格電圧印加
(φ6.
3:3000時間
φ8<:5000時間
)
ENDURANCE
APPLICATION OF RATED VOLTAGE,
AT
105℃
FOR
3000~5000
hrs.
(φ6.3:3000
hrs,
φ8<:5000
hrs.)
CAPACITANCE CHANGE:
DISSIPASION FACTOR:
E.S.R.:
LEAKAGE CURRENT:
LESS THAN
30
% OF THE INITIAL
MEASURED VALUE
LESS THAN
200
% OF THE INITIAL
SPECIFIED VALUE
LESS THAN
200
% OF THE INITIAL
SPECIFIED VALUE
LESS THAN THE INITIAL SPECIFIED VALUE
高温及び低温特性
インピーダンス比
120
Hz +
20℃を基準とする
TEMPERATURE CHARACTERISTICS
IMPEDANCE RETIO
BASED THE VALUE AT
120
Hz, +
20℃
-
55℃/20℃ 1〜2.5
105℃/20℃ 0.6〜1.0
定格リプル電流補正係数
RIPPLE CURRENT &
FREQUENCY MULTIPLIERS
●導電性高分子ハイブリッドコンデンサ
●
HYBRID CONDUCTIVE POLYMER CAPACITORS
■性 能
/PERFORMANCE SPECIFICATIONS
Unit:mm
HVAシリーズ
JIS C
5101
CE-
32
TYPEHVA
JIS C
5101
CE-
32
W. V
6.3 10 16
Tan
δ 0.18 0.16 0.14
■寸法図
/DIAGRAM OF DIMENSIONS
φ
D L±0.3W±0.2H±0.2C±0.
2
R P±0.
2
6
.
3 6.0 6.6 6.6 7.3 0.5〜0.8 2.2
6
.
3 7.7 6.6 6.6 7.3 0.5〜0.8 2.2
8 10.5 8.3 8.3 9.0 0.7〜1.0 3.2
10 10.5 10.3 10.3 11.0 1.0〜1.4 4.7
■寸法表 (φD×L)
SIZE TABLE (φD×L)
Case size ; φD×L (mm)
Ripple current
(
mA r.m.s
)(100
kHz,
105℃)
W.V.
μ
F
6.3 (0J) 10 (1A) 16 (1C)
10 6
.
3×6.0 54 11 30
22 6
.
3×6.0 54 11 30
33 6.3×6.0 40 15 10 6.3×6.0 54 11 30
47
6
.
3×7.7 ※ 4 5 1480
6
.
3×6.0 40 15 10 8 ×1 0.5 22 22 90
68 6
.
3×6.0 40 15 10 8 ×1 0.5 22 22 90
100
6
.
3×7.7 ※ 3 5 1910
6
.
3×6.0 36 16 30 8 ×1 0.5 18 28 00 8 ×1 0.5 22 22 90
150
6
.
3×7.7 ※ 3 5 1910
6
.
3×6.0 36 16 30 8 ×1 0.5 18 28 00 10×10.5 20 2920
220
6
.
3×7.7 ※ 3 2 2020
8×10
.
5 16 31 50 8 ×1 0.5 18 28 00
330 8×10
.
5 16 31 50 8 ×1 0.5 18 28 00
390 8×10
.
5 16 31 50
470 8×10
.
5 16 31 50 10×10.5 16 36 50
560 8×10
.
5 16 31 50 10×10.5 16 36 50
680 10×10
.
5 16 38 90
820 10×10
.
5 15 38 90
1000 10×1 0
.
5 16 38 90
■品番ご指定法/
HOW TO SPECIFY ITEM NUMBER
0
J HAV
221
M
静電容量許容差/
Capacitance Tolerance
静電容量記号/
Capacitance Symbol
シリーズ名/
Series Name
定格電圧/
Rated Voltage
New
■特 徴
・超低
ESRの
105℃×3000~5000時間保証品です。
・耐洗浄品(2分以内)
■
FEATURES
・
These series guarantees
105℃×3000~5000
hours with
ultra low E.S.R.
・
Solvent proof (with
2
minutes)
Frequency(Hz)
100 ≦
f< 1k1k ≦ f < 10k10k ≦ f<
100k100k ≦
f <
500
k
C
≦10 0.03 0.20 0.50 1.00
10<
C
0.05 0.20 0.50 1.00
E.S.R(mΩ max
)(100
kHz
20℃)
φ6.3×7.7L品については、製品名記号の末尾にSを付与します。
About φ6.
3×7.7
L product, add " S " at the product number.
Page 67
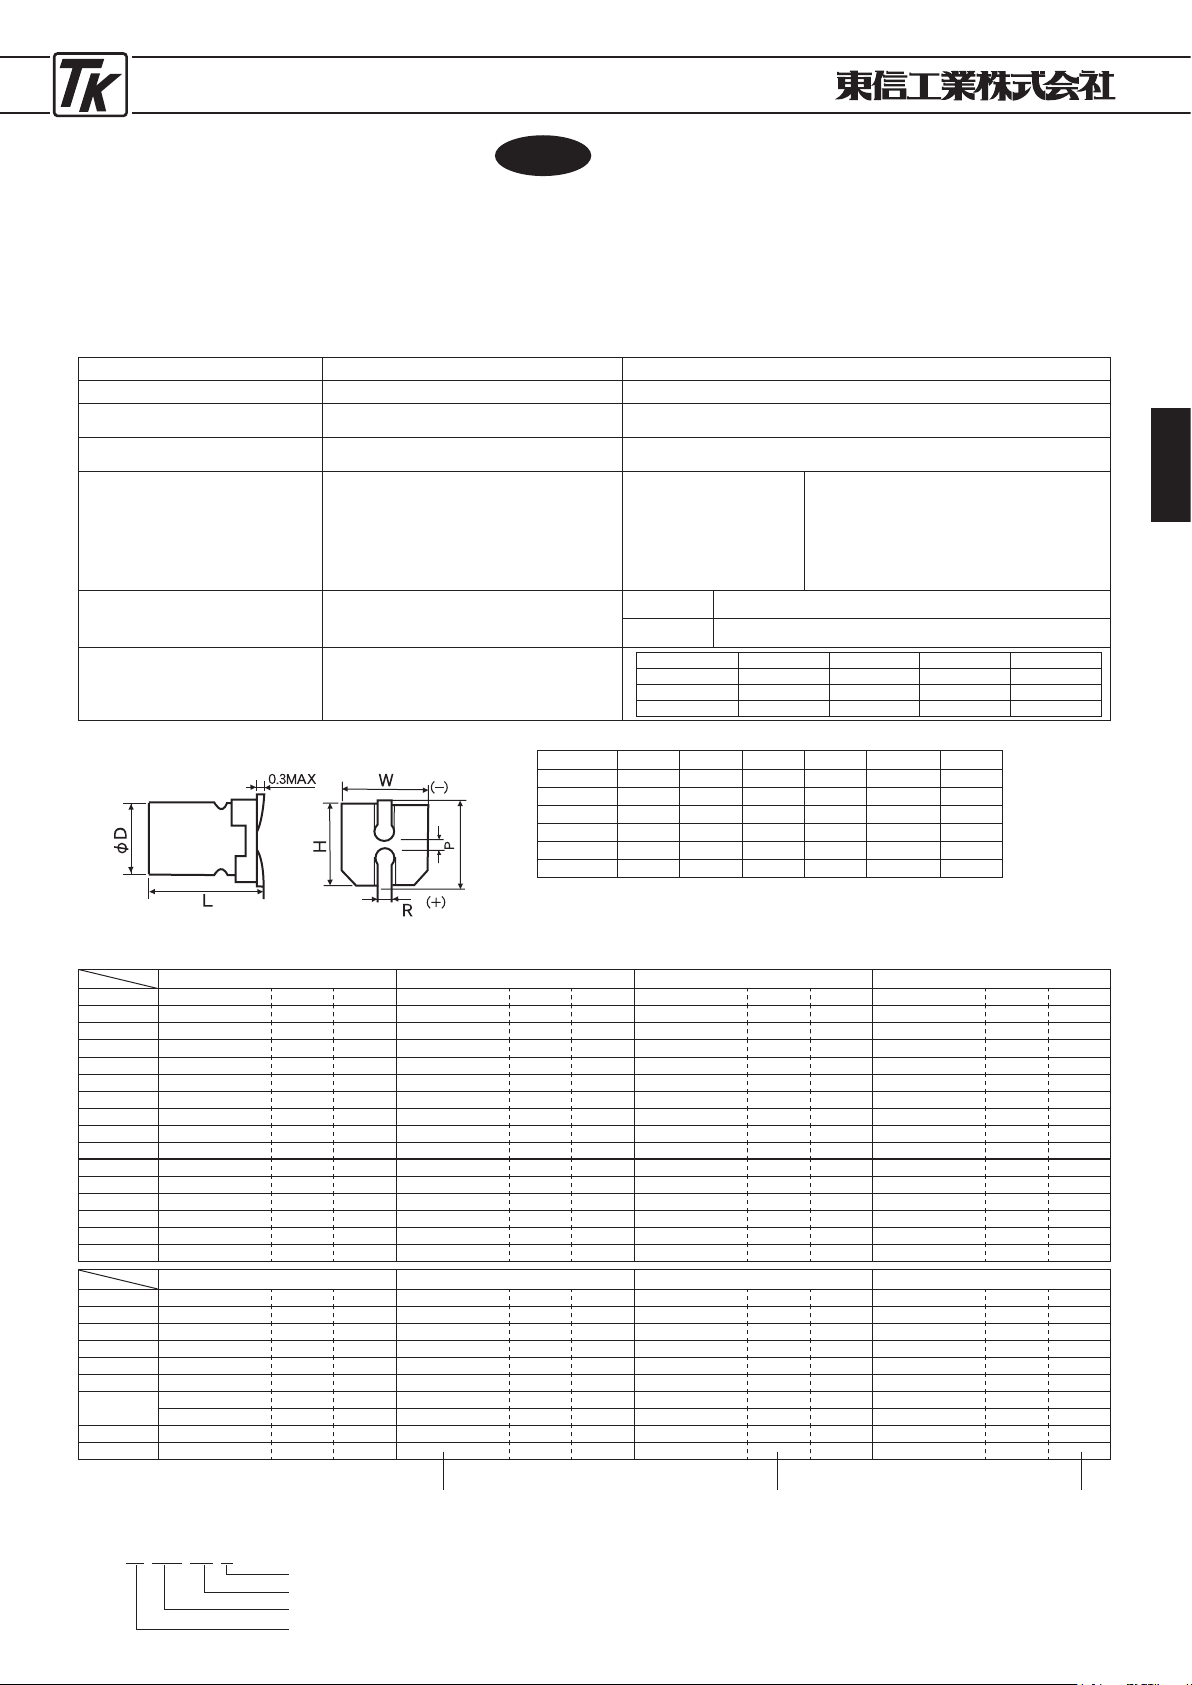
HYBRID CONDUCTIVE POLYMER CAPACITORS
67
●導電性高分子ハイブリッドコンデンサ
●
HYBRID CONDUCTIVE POLYMER CAPACITORS
■特 徴
HVH
TYPEHVH
・超低
ESRの
105℃×2000~10000時間保証品です。
・高電圧化、長寿命品
・耐洗浄品(2分以内)
■
FEATURES
・
These series guarantees
105℃×2000~10000
hours with
ultra low E.S.R.
・
High voltage, Long life
・
Solvent proof
(
with 2 minutes
)
■寸法図/
DIAGRAM OF DIMENSIONS
JIS C
5101
CE-
32
JIS C
5101
CE-
32
■性 能
/PERFORMANCE SPECIFICATIONS
カテゴリー温度範囲
CATEGORY TEMPERATURE RANGE -
55℃ 〜 +105℃
標準静電容量許容差
STANDARD CAPACITANCE TOLERANCE
±20% (120
Hz,
20℃)
漏れ電流
(最大値)
LEAKAGE CURRENT (MAX.VALUE
)
I=0.05CV OR
100μ
A WHICHEVER
C=RATED CAACITANCE(μF
)
IS THE GREATER(after 2 minutes) V=RATED VOLTAGE(V
)
損失角の正接
(最大値)
(
tan
δ)
DISSIPASION FACTOR (MAX.VALUE
)
(
tan
δ)
0
.
16
耐
久
性
105℃
,
2000〜10000時間
定格電圧印加
φ6
.
3×4.5
:
2000時間
φ6
.
3×6.0, φ6.3×7.7
:
5000時間
φ8
<:
10000時間
ENDURANCE
105℃,2000〜10000時間
APPLICATION OF RATED VOLTAGE,
AT
105℃
FOR
3000〜5000
hrs.
φ6.3×4.5
:
2000
hrs.
φ6.3×6.0, φ6.3×7.7
:
5000
hrs.
φ8<:10000
hrs.
CAPACITANCE CHANGE:
DISSIPASION FACTOR:
E.S.R.:
LEAKAGE CURRENT:
LESS THAN
30
% OF THE INITIAL
MEASURED VALUE
LESS THAN
200
% OF THE INITIAL
SPECIFIED VALUE
LESS THAN
200
% OF THE INITIAL
SPECIFIED VALUE
LESS THAN THE INITIAL SPECIFIED VALUE
高温及び低温特性
インピーダンス比
120
Hz +
20℃を基準とする
TEMPERATURE CHARACTERISTICS
IMPEDANCE RETIO
BASED THE VALUE AT
120
Hz, +
20℃
-
55℃/20℃ 1〜2.5
105℃/20℃ 0.6〜1.0
定格リプル電流補正係数
RIPPLE CURRENT &
FREQUENCY MULTIPLIERS
■標準品一覧表/
STANDARD PRODUCT TABLE
φ
D L±0.3W±0.2H±0.2C±0.
2
R P±0.2
6.3 4.5 6.6 6.6 7.3 0.5〜0.8 2.2
6
.
3 6.0 6.6 6.6 7.3 0.5〜0.8 2.2
6.3 7.7 6.6 6.6 7.3 0.5〜0.8 2.2
8 10.5 8.3 8.3 9.0 0.7〜1.0 3.2
10 10.5 10.3 10.3 11.0 1.0〜1.4 4.6
10 12.5 10.3 10.3 11.0 1.0〜1.4 4.6
Unit : mm
W.V
μ
F
25 (1E) 35 (1V) 40 (1G) 50 (1H)
10 6.3×6.0※ 120 980
12 6.3×4.5 150 640
15 6.3×7.7 80 1200
18 6.3×6.0 110 1030
27 6.3×4.5 95 800 6.3×6.0 100 1080 6.3×7.7 70 1250
33
8×10.5 35 1670
47 6.3×6.0 60 1270 6.3×7.7 60 1300
56 8×10.5 32 1750 10×10.5 25 2320
68
6.
3×7.7 45 1400
82 10×12.5 19 2650
100 8×10.5 30 1800 10×10.5 24 2400
120 10×12.5 18 2750
150 8×10.5 27 1900 10×10.5 23 2470
220 10×12.5 17 2830
270 10×10.5 22 2530
330 10×12.5 16 2900
Ripple current (mA r.m.s) (
100
kHz
105℃
)Case size:φD×L(mm) E.S.R(mΩ max) (
100
kHz
20℃
)
■品番ご指定法/
HOW TO SPECIFY ITEM NUMBER
1
K HVH
120
M
静電容量許容差/
Capacitance Tolerance
静電容量記号/
Capacitance Symbol
シリーズ名/
Series Name
定格電圧/
Rated Voltage
New
Frequency(Hz)
100 ≦
f< 1k1k ≦ f < 10k10k ≦ f<
100k100k ≦
f <
500
k
C≦4.
7 0.03 0.30 0.65 1.00
4
.7<C
≦33 0.05 0.32 0.67 1.00
33
>C
0.10 0.35 0.70 1.00
W.V
μ
F
63 (1J) 80 (1K) 100 (2A) 125 (2B)
6
.
8 6.3×6.0 150 960
10 6.3×7.7 100 1060 10×10.5 80 1450 10×10.5 90 1250
12 10×10.5 70 1600 10×10.5 80 1450
15 10×10.5 70 1600 10×12.5 60 1660
18 10×12.5 50 1830
22
8×10.5 40 1560
33
8×10.5※ 40 1560
10×10
.
5 30 2100
47 10×10.5 30 2100
56 10×12.5 22 2400
※は製品名記号の末尾に
S
を付与します。
※
is add " S " at the product number.
C
±0
.
2
Page 68
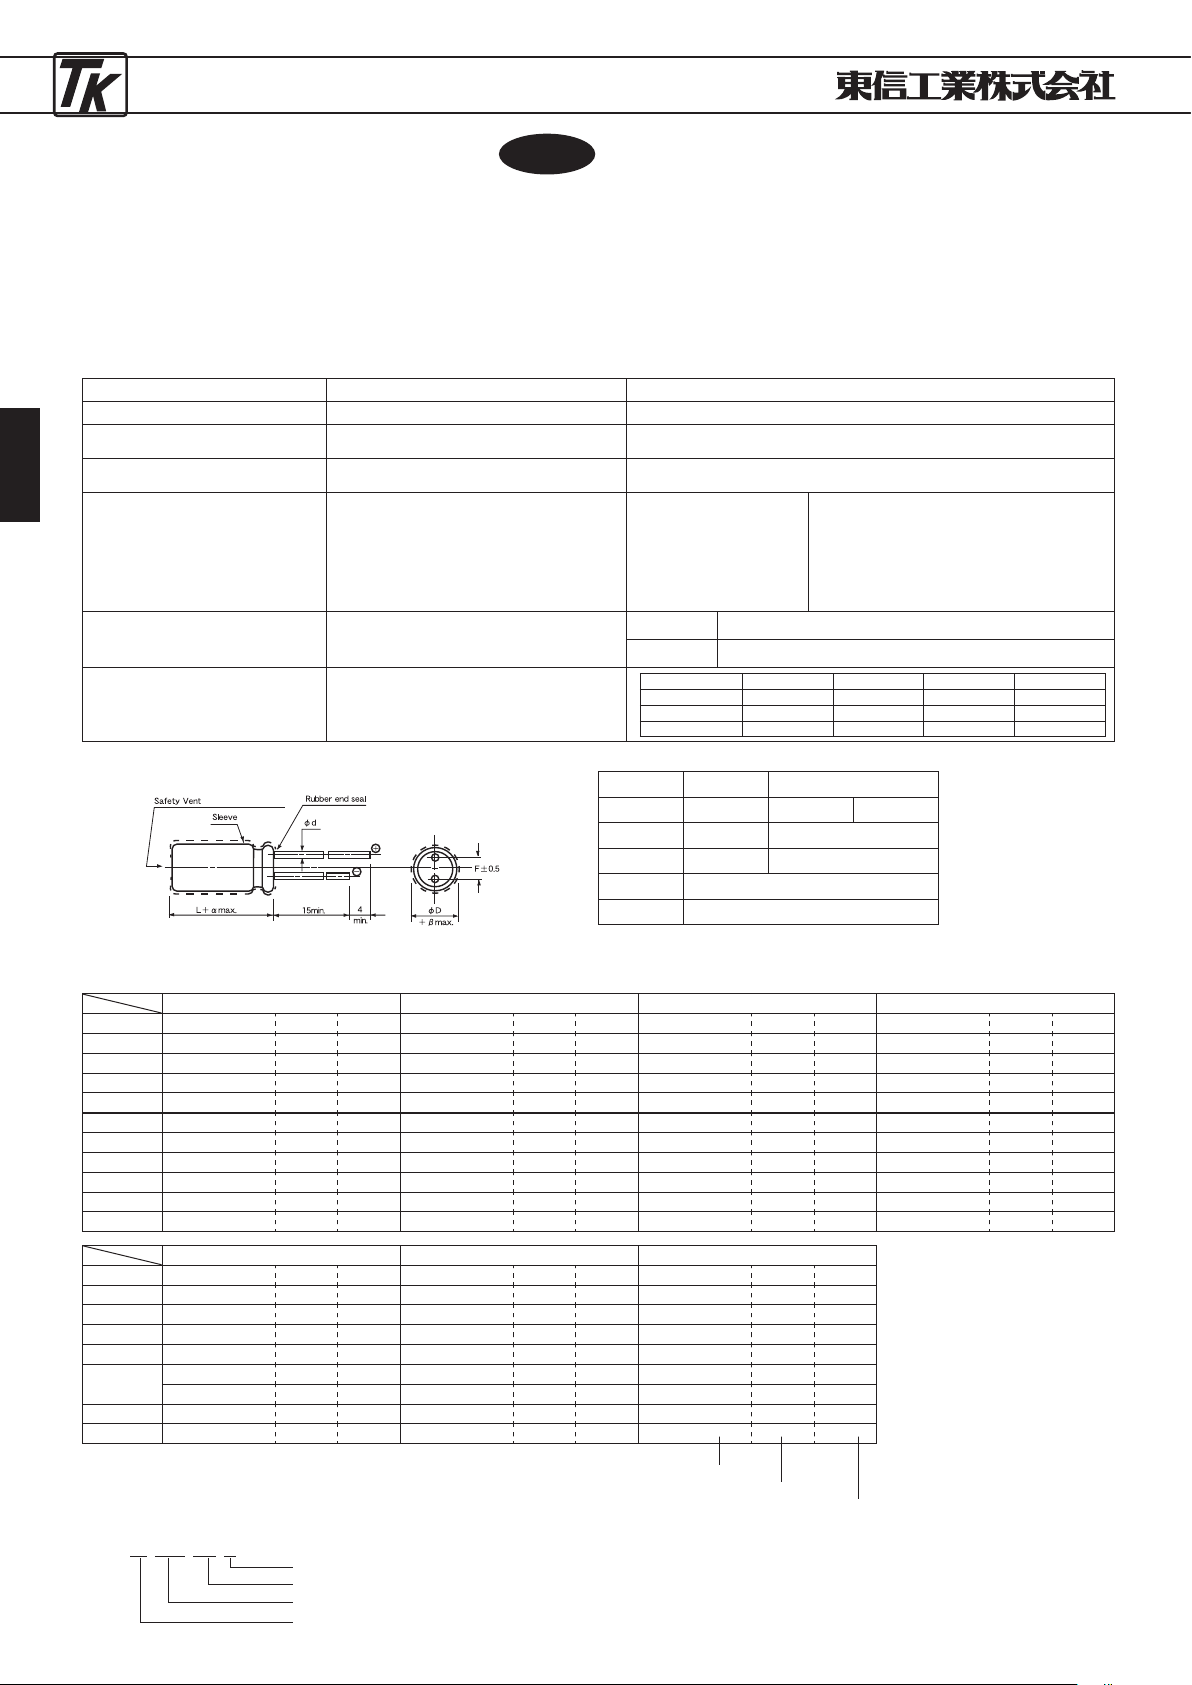
HYBRID CONDUCTIVE POLYMER CAPACITORS
68
●導電性高分子ハイブリッドコンデンサ
●
HYBRID CONDUCTIVE POLYMER CAPACITORS
■特 徴
HEH
TYPEHEH
・超低
ESRの
105℃×10000時間保証品です。
・高電圧化、長寿命品
・耐洗浄品(2分以内)
・外装スリーブを排し、ラミネートケースを使用
■
FEATURES
・
These series guarantees
105℃×10000
hours with ultra low E.S.R.
・
High voltage, Long life
・
Solvent proof
(
with 2 minutes
)
・
Laminated aluminum case
■寸法図/
DIAGRAM OF DIMENSIONS
JIS C
5101
CE-
04
JIS C
5101
CE-
04
■性 能
/PERFORMANCE SPECIFICATIONS
カテゴリー温度範囲
CATEGORY TEMPERATURE RANGE -
55℃ 〜 +105℃
標準静電容量許容差
STANDARD CAPACITANCE TOLERANCE
±20% (120
Hz,
20℃)
漏れ電流
(最大値)
LEAKAGE CURRENT (MAX.VALUE
)
I=0.05CV OR
100μ
A WHICHEVER
C=RATED CAACITANCE(μF
)
IS THE GREATER(after 2 minutes) V=RATED VOLTAGE(V
)
損失角の正接
(最大値)
(
tan
δ)
DISSIPASION FACTOR (MAX.VALUE
)
(
tan
δ)
0
.
16
耐
久
性
105℃
10000時間
定格電圧印加
ENDURANCE
APPLICATION OF RATED VOLTAGE,
AT
105℃
FOR
10000
hrs.
CAPACITANCE CHANGE:
DISSIPASION FACTOR:
E.S.R.:
LEAKAGE CURRENT:
LESS THAN
30
% OF THE INITIAL
MEASURED VALUE
LESS THAN
200
% OF THE INITIAL
SPECIFIED VALUE
LESS THAN
200
% OF THE INITIAL
SPECIFIED VALUE
LESS THAN THE INITIAL SPECIFIED VALUE
高温及び低温特性
インピーダンス比
120
Hz +
20℃を基準とする
TEMPERATURE CHARACTERISTICS
IMPEDANCE RETIO
BASED THE VALUE AT
120
Hz, +
20℃
-
55℃/20℃ 1〜2.5
105℃/20℃ 0.6〜1.0
定格リプル電流補正係数
RIPPLE CURRENT &
FREQUENCY MULTIPLIERS
■標準品一覧表/
STANDARD PRODUCT TABLE
φ
D
8 10
L
9.5 9.5 11.5
P
3.5 5.0
φ
d
0.6 0.7
α 1.5
β 0.5
Unit : mm
W.V
μ
F
25 (1E) 35 (1V) 40 (1G) 50 (1H)
33
8×9.5 35 1670
47 10×9.5 25 2320
56
8×9.5 32 1750
10×11.5 19 2650
68
82
100
8×9.5 30 1800 10×9.5 24 2400
120
10×11.5 18 2750
150
8×9.5 27 1900 10×9.5 23 2470
220
10×11.5 17 2830
270 10×9.5 22 2530
330
10×11.5 16 2900
Ripple current (mA r.m.s)
(100
kHz
105℃)
ase size:φD×L(mm
)
E.S.R(mΩ max)
(100
kHz
20℃)
■品番ご指定法/
HOW TO SPECIFY ITEM NUMBER
2
A HEH
100
M
静電容量許容差/
Capacitance Tolerance
静電容量記号/
Capacitance Symbol
シリーズ名/
Series Name
定格電圧/
Rated Voltage
New
Frequency(Hz)
100 ≦
f< 1k1k ≦ f < 10k10k ≦ f<
100k100k ≦
f <
500
k
C≦4.
7 0.03 0.30 0.65 1.00
4
.7<C
≦33 0.05 0.32 0.67 1.00
33
>C
0.10 0.35 0.70 1.00
W.V
μ
F
63 (1J) 80 (1K) 100 (2A)
10 10×9.5 80 1450
12 10×9.5 70 1600 10×9.5 80 1450
15 10×9.5 70 1600
10×11.5 60 1660
18
10×11.5 50 1830
22
8×9.5 40 1560
33
8×9.5※ 40 1560
10×9
.
5 30 2100
47 10×9.5 30 2100
56
10×11.5 20 2400
※は製品名記号の末尾に
S
を付与します。
※
is add " S " at the product number.
(D
≧φ6.3
orφ8)
Page 69
CONDUCTIVE POLYMER SOLID CAPACITORS
69
導電性高分子固体コンデンサ
P
70 〜P72
導電性高分子アルミ固体電解コンデンサ
Conductive Polymer Aluminum Solid Electrolytic Capacitors
−目次−
Page 70
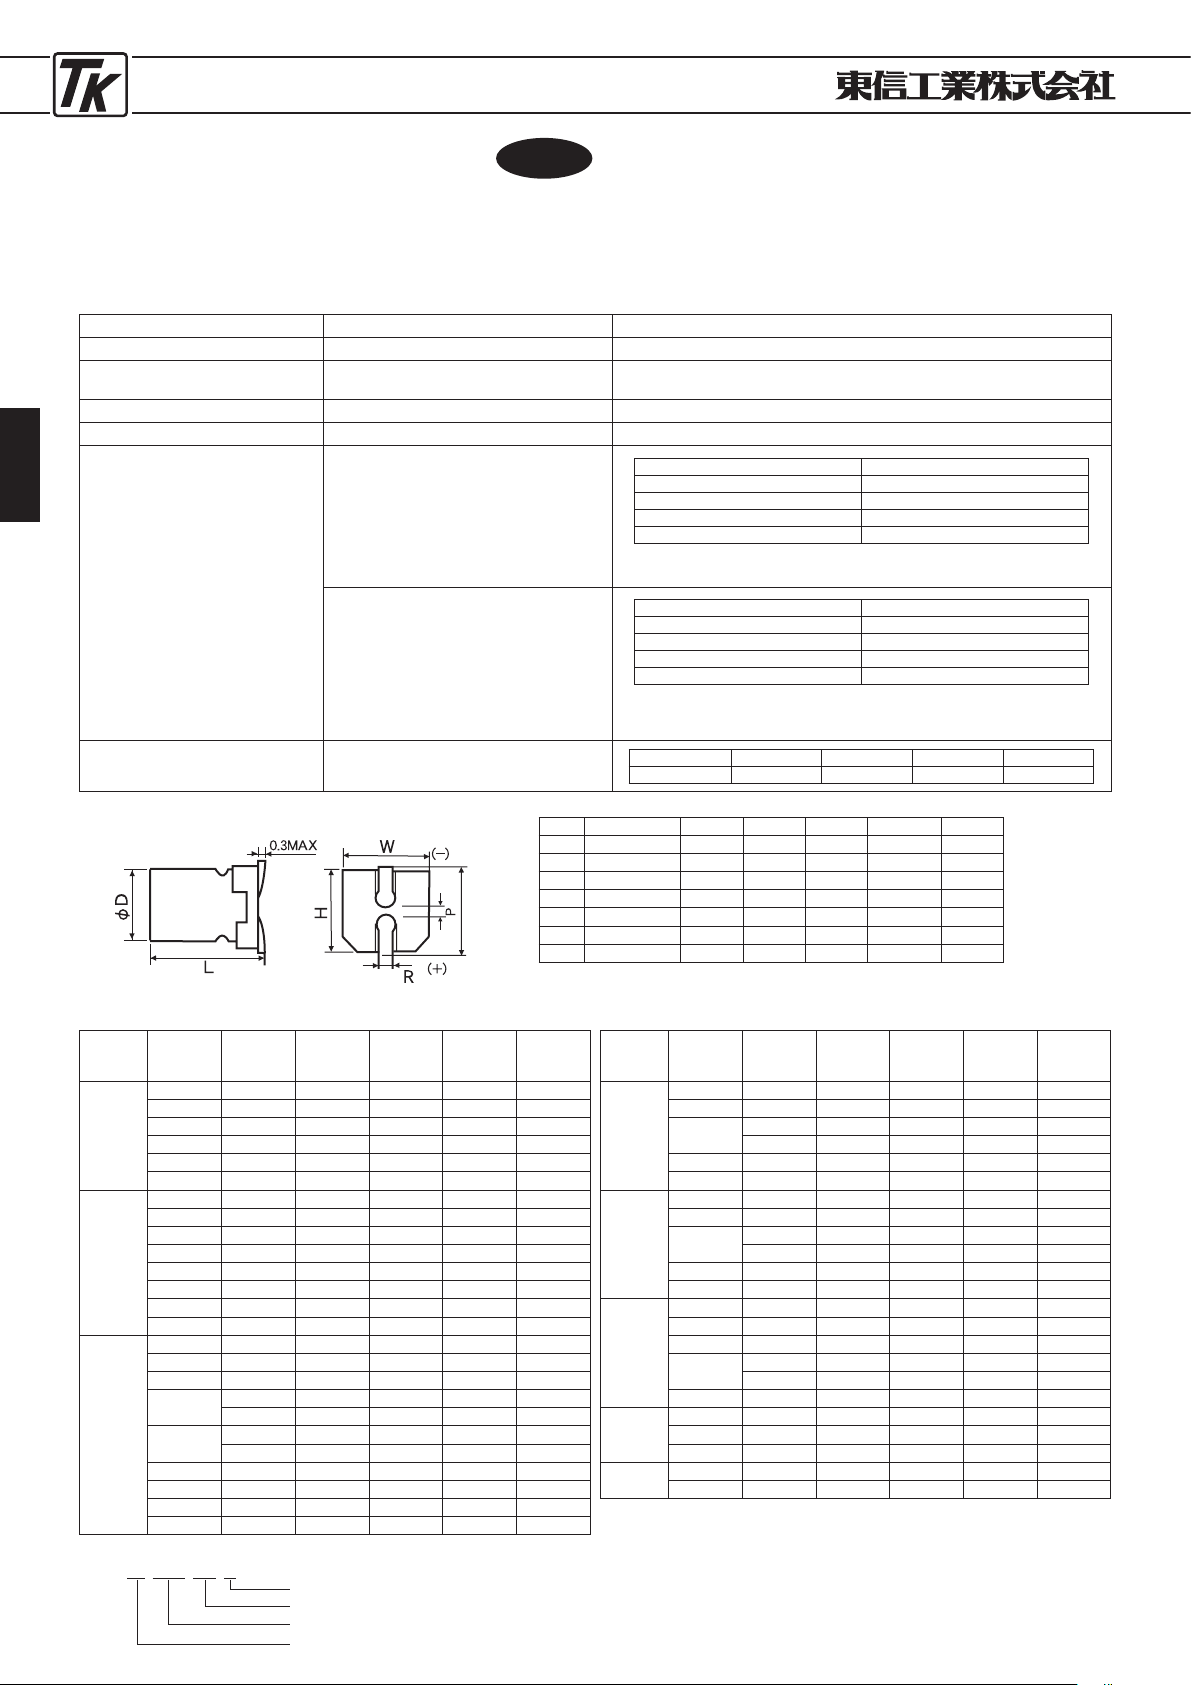
CONDUCTIVE POLYMER SOLID CAPACITORS
70
●導電性高分子固体コンデンサ
●
CONDUCTIVE POLYMER SOLID CAPACITORS
■特 徴
PVW
TYPEPVW
・超低
ESR
の105℃×2000時間保証品です。
■
FEATURES
・
These series guarantees
105℃×2000
hours with ultra low E.S.R.
■寸法図/
DIAGRAM OF DIMENSIONS
JIS C
5101
CE-
32
JIS C
5101
CE-
32
■性 能
/PERFORMANCE SPECIFICATIONS
カテゴリー温度範囲
CATEGORY TEMPERATURE RANGE -
55℃〜 +105℃
標準静電容量許容差
STANDARD CAPACITANCE TOLERANCE
±20
% (
120
Hz,
20℃
)
漏れ電流 (最大値)
LEAKAGE CURRENT (MAX.VALUE
)
Rated voltage applied, after
2
minutes at
20℃
.
See the dimension & characteristics table
損失角の正接 (最大値)
DISSIPASION FACTOR (MAX.VALUE
)
See the dimension & characteristics table. (
120
Hz,
20℃
)
E.S.R E.S.R. See the dimension & characteristics table. (
100k~300
kHz,
20℃
)
耐 久 性
LOAD LIFE TEST
*
The above specifications shall be satisfied when the capacitors are
restored to
20℃
after the rated voltage applied for
2000
hrs at
105℃
.
MOISTURE RESISTANCE
*
The above specifications shall be satisfied when the capacitors are
restored to
20℃
after subjecting them at
60℃, 90
to 95% RH for
1000
hrs. Leakage current should be tested after voltage treatment.
定格リプル電流補正係数
RIPPLE CURRENT &
FREQUENCY MULTIPLIERS
■標準品一覧表/
STANDARD PRODUCT TABLE
φ
D L W±0.2H±0.2C±0.
2
R P±0.2
6.3 5.9+0.1/-0.3 6.6 6.6 7.4 0.5〜0.8 2.0
6
.
3 7.0±0.2 6.6 6.6 7.4 0.5〜0.8 2.0
8 6.7±0.3 8.4 8.4 9.2 0.7〜1.1 3.1
8 12.0±0.5 8.4 8.4 9.2 0.7〜1.1 3.1
10 7.7±0.3 10.4 10.4 11.2 0.7〜1.1 4.7
10 9.9+0.1/-0.3 10.4 10.4 11.2 0.7〜1.1 4.7
10 12.7±0.5 10.4 10.4 11.2 0.7〜1.1 4.7
Unit : mm
W.V.
Capacitance
(μF)
Size
[φD×L]
(mm)
tan
δ
(
120
Hz,
20℃
)
Leakage
Current
(μA)
E.S.R.
[100k~300
kHz,
20℃]
(mΩMax.)
Rated Ripple Current
[100
kHz,
105℃]
(mArms)
2.5
V
[0E]
220 6.3×5.9 0.12 110 25 2500
560 8×6.7 0.12 280 23 3100
680 8×12 0.18 340 12 4770
1000 10×7.7 0.12 500 19 4240
1200 10×9.9 0.18 750 13 5200
1500 10×12.7 0.18 750 10 5500
4
V
[0G]
150 6.3×5.9 0.12 120 26 2450
220 8×6.7 0.12 176 25 3020
330 8×6.7 0.12 264 25 3020
470 10×7.7 0.12 376 20 4130
560 8×12 0.18 448 12 4770
680 10×7.7 0.12 544 20 4130
820 10×9.9 0.18 656 13 5200
1200 10×12.7 0.18 960 10 5500
6
.3V
[0J]
82 6.3×5.9 0.12 103 27 2400
100 6.3×5.9 0.12 126 27 2400
120 6.3×7 0.12 151 30 2010
150
6.3×7 0.12 189 30 2250
8×6
.
7 0.12 189 25 3020
220
6
.
3×7 0.12 277 30 2250
8×6
.
7 0.12 277 25 3020
330 10×7.7 0.12 416 20 4130
470 8×12 0.15 592 12 4770
560 10×9.9 0.15 706 16 4700
820 10×12.7 0.15 1033 10 5500
■品番ご指定法/
HOW TO SPECIFY ITEM NUMBER
0
E PVW
681
M
静電容量許容差/
Capacitance Tolerance
静電容量記号/
Capacitance Symbol
シリーズ名/
Series Name
定格電圧/
Rated Voltage
New
Test Time
2000
hrs
Capacitance Change Within
±20
% of initial value
Dissipation Factor Less than
150
% of specified value
E.S.R. Less than
150
% of specified value
Leakage Current Within specified value
C
±0
.
2
Frequency(Hz)
120 ≦
f< 1k1k ≦ f < 10k10k ≦ f<
100k100k ≦
f <
500
k
Multiplier
0.05 0.3 0.7 1.0
Test Time
1000
hrs
Capacitance Change Within
±20
% of initial value
Dissipation Factor Less than
150
% of specified value
E.S.R. Less than
150
% of specified value
Leakage Current Within specified value
W.V.
Capacitance
(μF)
Size
[φD×L]
(mm)
tan
δ
(
120
Hz,
20℃
)
Leakage
Current
(μA)
E.S.R.
[100k~300
kHz,
20℃]
(mΩMax.)
Rated Ripple Current
[100
kHz,
105℃]
(mArms)
10
V
[1A]
56 6.3×5.9 0.10 112 31 2250
150 8×6.7 0.10 300 27 2800
330
8×12 0
.
15 660 14 4420
10×7
.
7 0.10 660 24 3770
470 10×9.9 0.15 940 18 4400
560 10×12.7 0.15 1120 12 5300
16
V
[1C]
47 6.3×5.9 0.10 150 50 1650
82 8×6.7 0.10 262 30 2700
180
8×12 0
.
15 576 16 4360
10×7
.
7 0.10 576 26 3430
220 10×9.9 0.15 704 20 4200
330 10×12.7 0.15 792 14 5050
20
V
[1D]
22 6.3×5.9 0.10 88 50 1650
47 8×6.7 0.10 188 45 2000
82 10×7.7 0.10 328 40 2500
100
8×12 0
.
15 400 24 3320
10×9
.
9 0.15 400 25 3700
150 10×12.7 0.15 600 20 4320
25
V
[1E]
6
.
8 6.3×5.9 0.10 170 80 1200
33 8×12 0.12 413 30 2980
56 10×12.7 0.12 700 28 3800
35
V
[1V]
39 8×12 0.12 273 31 2100
68 10×12.7 0.12 476 28 2700
Page 71
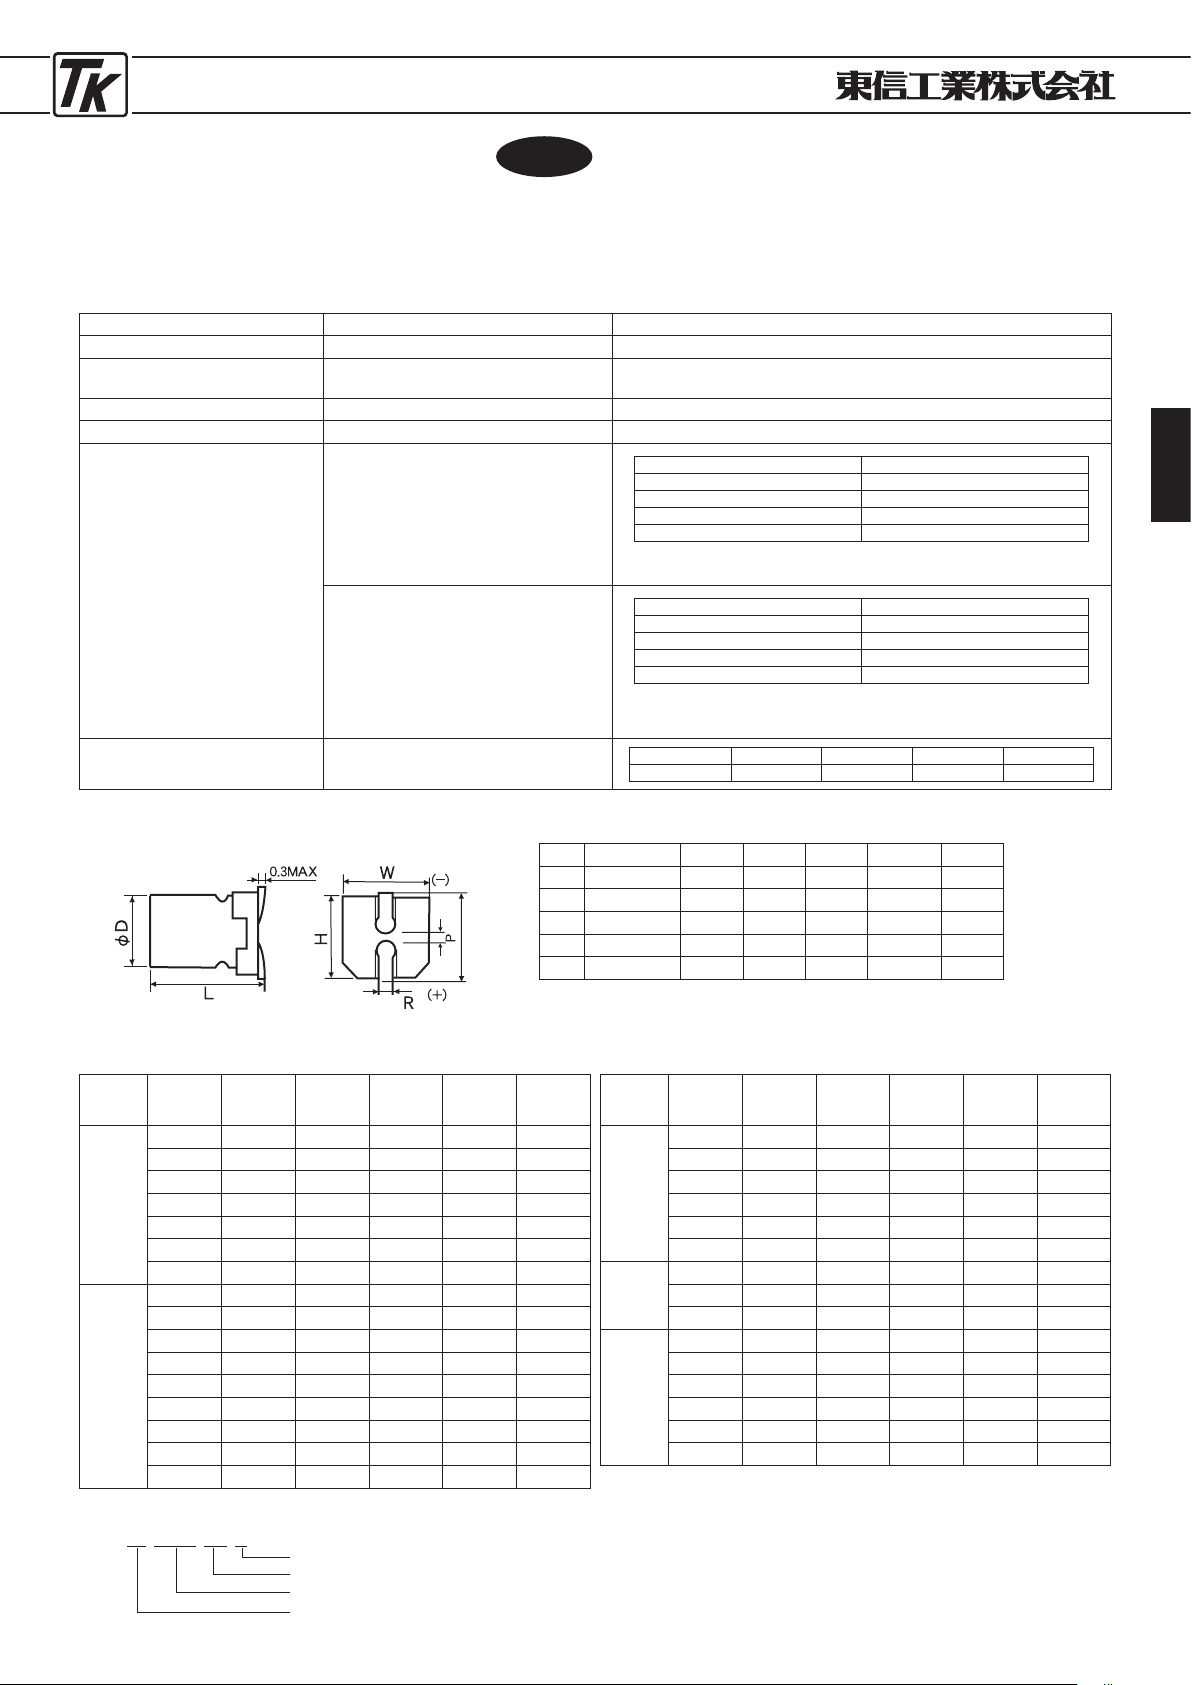
CONDUCTIVE POLYMER SOLID CAPACITORS
71
●導電性高分子固体コンデンサ
●
CONDUCTIVE POLYMER SOLID CAPACITORS
■特 徴
PVWZ
TYPEPVWZ
・超低
ESR
、高リプルの 105℃×2000時間保証品です。
■
FEATURES
・
These series guarantees
105℃×2000
hours with ultra low
E.S.R. with large permissible ripple current
■寸法図/
DIAGRAM OF DIMENSIONS
JIS C
5101
CE-
32
JIS C
5101
CE-
32
■性 能
/PERFORMANCE SPECIFICATIONS
カテゴリー温度範囲
CATEGORY TEMPERATURE RANGE -
55℃ 〜 +105℃
標準静電容量許容差
STANDARD CAPACITANCE TOLERANCE
±20
% (
120
Hz,
20℃
)
漏れ電流 (最大値)
LEAKAGE CURRENT (MAX.VALUE
)
Rated voltage applied, after
2
minutes at
20℃
.
See the dimension & characteristics table
損失角の正接 (最大値)
DISSIPASION FACTOR (MAX.VALUE
)
See the dimension & characteristics table. (
120
Hz,
20℃
)
E.S.R E.S.R. See the dimension & characteristics table. (
100k~300
kHz,
20℃
)
耐 久 性
LOAD LIFE TEST
*
The above specifications shall be satisfied when the capacitors are
restored to
20℃
after the rated voltage applied for
2000
hrs at
105℃
.
MOISTURE RESISTANCE
*
The above specifications shall be satisfied when the capacitors are
restored to
20℃
after subjecting them at
60℃, 90
to 95% RH for
1000
hrs. Leakage current should be tested after voltage treatment.
定格リプル電流補正係数
RIPPLE CURRENT &
FREQUENCY MULTIPLIERS
■標準品一覧表/
STANDARD PRODUCT TABLE
φ
D L W±0.2H±0.2C±0.
2
R P±0.2
6.3 5.9+0.1/-0.3 6.6 6.6 2.7 0.5〜0.8 2.0
8 7.0±0.2 8.4 8.4 3.0 0.5〜0.8 3.1
8 12.0±0.5 8.4 8.4 3.0 0.7〜1.1 3.1
10 8.0±0.2 10.4 10.4 3.3 0.7〜1.1 4.7
10 12.7±0.5 10.4 10.4 3.3 0.7〜1.1 4.7
Unit : mm
W.V.
Capacitance
(μF)
Size
[φD×L]
(mm)
tan
δ
(
120
Hz,
20℃
)
Leakage
Current
(μA)
E.S.R.
[100k~300
kHz,
20℃]
(mΩMax.)
Rated Ripple Current
[100
kHz,
105℃]
(mArms)
2.5
V
[0E]
390 6.3×5.9 0.12 300 14 3160
680 8×7 0.12 500 20 3370
820 8×12 0.15 500 9 5380
1200 10×8 0.12 600 13 4450
1500 8×12 0.15 750 12 5150
1500 10×12.7 0.15 750 7 7200
2700 10×12.7 0.15 1350 11 5600
4
V
[0G]
270 6.3×5.9 0.12 300 15 3160
330 6.3×5.9 0.12 300 15 3160
560 8×7 0.12 500 22 3220
560 8×12 0.15 500 9 5380
1200 8×12 0.15 960 12 4700
1500 8×12 0.15 1200 12 4700
1000 10×8 0.12 800 14 4300
1200 10×12.7 0.15 960 7 7200
2200 10×12.7 0.15 1760 11 7200
■品番ご指定法/
HOW TO SPECIFY ITEM NUMBER
0
G PVWZ
681
M
静電容量許容差/
Capacitance Tolerance
静電容量記号/
Capacitance Symbol
シリーズ名/
Series Name
定格電圧/
Rated Voltage
New
Test Time
2000
hrs
Capacitance Change Within
±20
% of initial value
Dissipation Factor Less than
150
% of specified value
E.S.R. Less than
150
% of specified value
Leakage Current Within specified value
C
±0
.
2
Frequency(Hz)
120 ≦
f< 1k1k ≦ f < 10k10k ≦ f<
100k100k ≦
f <
500
k
Multiplier
0.05 0.3 0.7 1.0
Test Time
1000
hrs
Capacitance Change Within
±20
% of initial value
Dissipation Factor Less than
150
% of specified value
E.S.R. Less than
150
% of specified value
Leakage Current Within specified value
W.V.
Capacitance
(μF)
Size
[φD×L]
(mm)
tan
δ
(
120
Hz,
20℃
)
Leakage
Current
(μA)
E.S.R.
[100k~300
kHz,
20℃]
(mΩMax.)
Rated Ripple Current
[100
kHz,
105℃]
(mArms)
6.3
V
[0J]
220 6.3×5.9 0.12 300 15 3160
390 8×7 0.12 491 22 3220
820 8×12 0.15 1033 13 4700
820 10×8 0.12 1033 14 4300
820 10×12.7 0.15 1033 7 5600
1500 10×12.7 0.15 1890 12 5560
10
V
[1A]
120 6.3×5.9 0.12 300 22 2600
270 8×7 0.12 500 22 3220
470 10×8 0.12 940 19 3800
16
V
[1C]
39 6.3×5.9 0.12 300 24 2460
68 6.3×5.9 0.12 300 25 2440
150 8×7 0.12 500 22 3220
270 8×12 0.15 864 16 4070
220 10×8 0.12 704 22 3450
330 10×12.7 0.15 1056 12 5300
Page 72
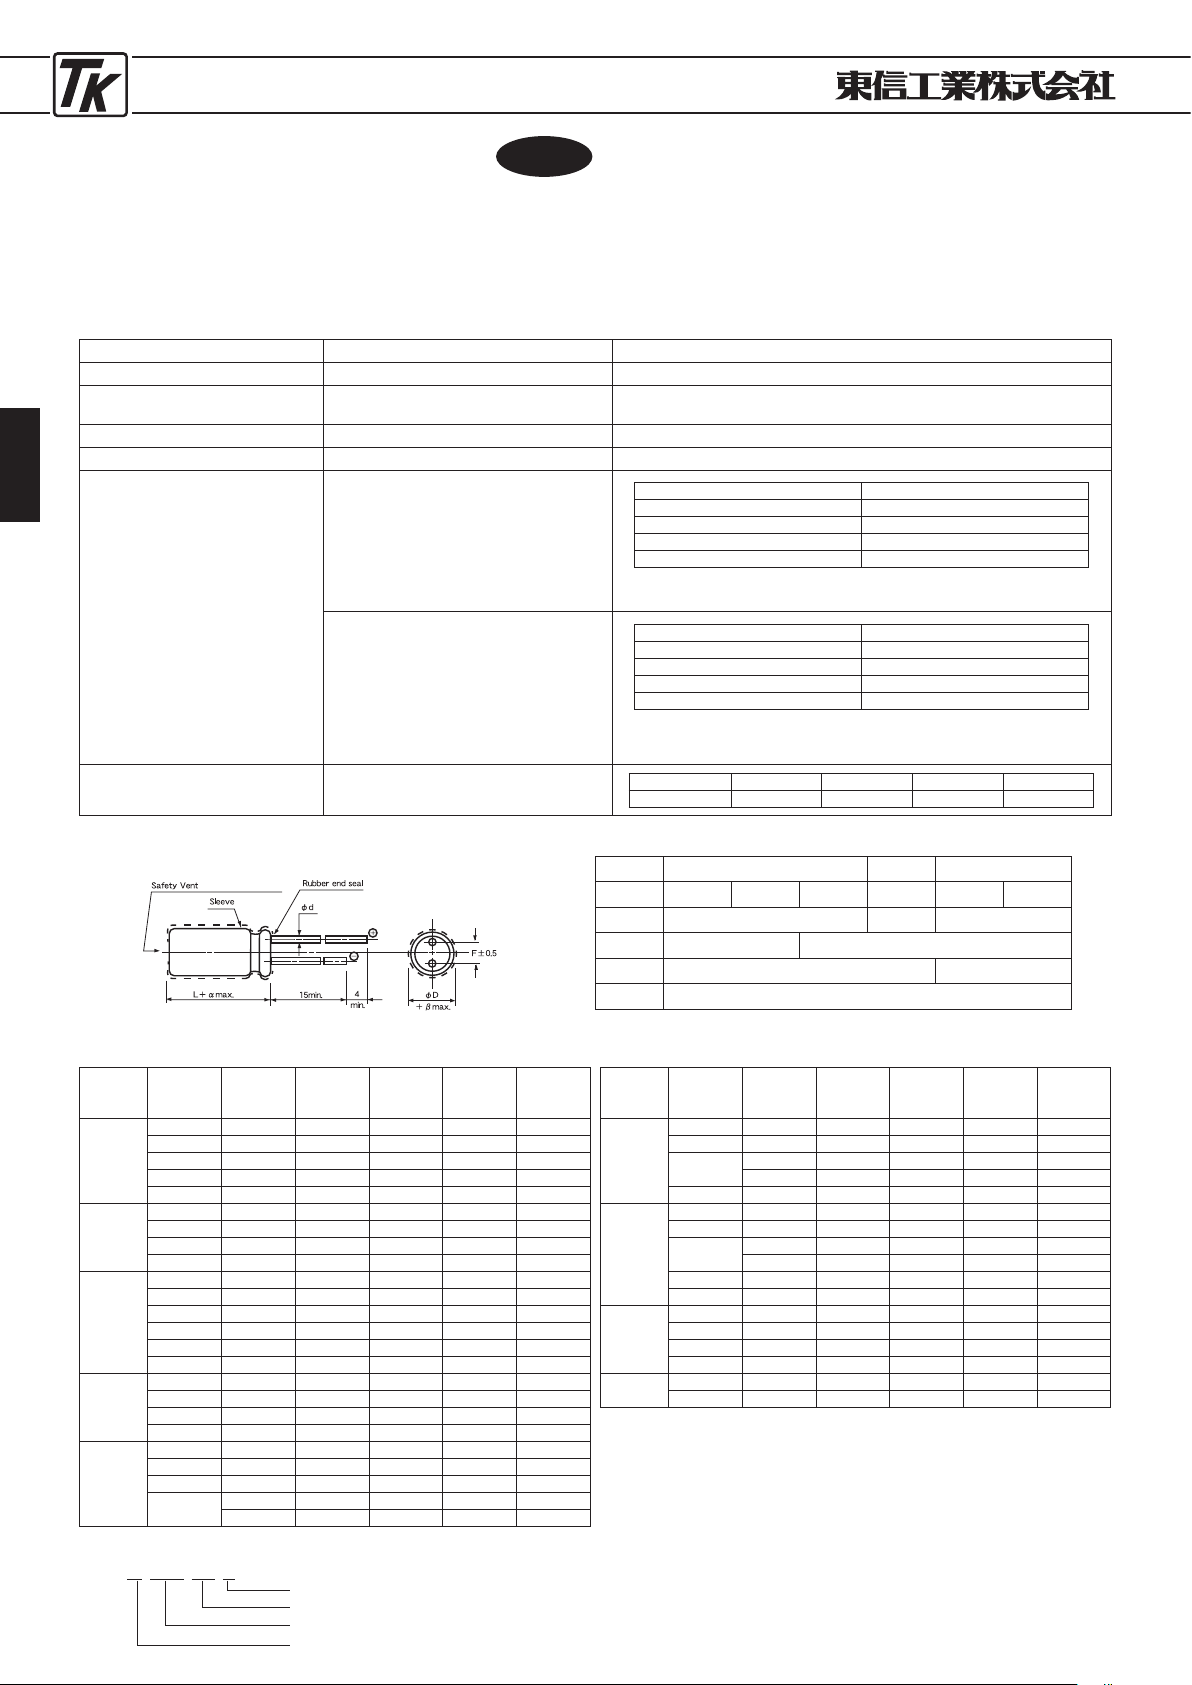
CONDUCTIVE POLYMER SOLID CAPACITORS
72
●導電性高分子固体コンデンサ
●
CONDUCTIVE POLYMER SOLID CAPACITORS
■特 徴
PUW
TYPEPUW
・超低
ESR
、高リプルの 105℃×2000時間保証品です。
■
FEATURES
・
These series guarantees
105℃× 2000
hours with ultra low
E.S.R. with large permissible ripple current
■寸法図/
DIAGRAM OF DIMENSIONS
JIS C
5101
CE-
04
JIS C
5101
CE-
04
■性 能
/PERFORMANCE SPECIFICATIONS
■標準品一覧表/
STANDARD PRODUCT TABLE
φ
D
6.3 8 10
L
5.5 6.5 11 11.5 10 12.5
P
2.5 3.5 5.0
φ
d
0.45 0.6
α 1.0 1.5
β 0.5
Unit : mm
■品番ご指定法/
HOW TO SPECIFY ITEM NUMBER
0
J PUW
391
M
静電容量許容差/
Capacitance Tolerance
静電容量記号/
Capacitance Symbol
シリーズ名/
Series Name
定格電圧/
Rated Voltage
New
(D
≧φ6.3
orφ8)
カテゴリー温度範囲
CATEGORY TEMPERATURE RANGE -
55℃〜 +105℃
標準静電容量許容差
STANDARD CAPACITANCE TOLERANCE
±20
% (
120
Hz,
20℃
)
漏れ電流 (最大値)
LEAKAGE CURRENT (MAX.VALUE
)
Rated voltage applied, after
2
minutes at
20℃
.
See the dimension & characteristics table
損失角の正接 (最大値)
DISSIPASION FACTOR (MAX.VALUE
)
See the dimension & characteristics table. (
120
Hz,
20℃
)
E.S.R E.S.R. See the dimension & characteristics table. (
100k~300
kHz,
20℃
)
耐 久 性
LOAD LIFE TEST
*
The above specifications shall be satisfied when the capacitors are
restored to
20℃
after the rated voltage applied for
2000
hrs at
105℃
.
MOISTURE RESISTANCE
*
The above specifications shall be satisfied when the capacitors are
restored to
20℃
after subjecting them at
60℃, 90
to 95% RH for
1000
hrs. Leakage current should be tested after voltage treatment.
定格リプル電流補正係数
RIPPLE CURRENT &
FREQUENCY MULTIPLIERS
Test Time
2000
hrs
Capacitance Change Within
±20
% of initial value
Dissipation Factor Less than
150
% of specified value
E.S.R. Less than
150
% of specified value
Leakage Current Within specified value
Frequency(Hz)
120 ≦
f< 1k1k ≦ f < 10k10k ≦ f<
100k100k ≦
f <
500
k
Multiplier
0.05 0.3 0.7 1.0
Test Time
1000
hrs
Capacitance Change Within
±20
% of initial value
Dissipation Factor Less than
150
% of specified value
E.S.R. Less than
150
% of specified value
Leakage Current Within specified value
W.V.
Capacitance
(μF)
Size
[φD×L]
(mm)
tan
δ
(
120
Hz,
20℃
)
Leakage
Current
(μA)
E.S.R.
[100k~300
kHz,
20℃]
(mΩMax.)
Rated Ripple Current
[100
kHz,
105℃]
(mArms)
2.5
V
[0E]
220 6.3×5.5 0.12 110 28 2390
390 6.3×11 0.12 195 18 3160
680 8×11.5 0.18 340 10 5230
1000 10×10 0.18 500 14 4700
1500 10×12.5 0.18 750 8 5500
4
V
[0G]
150 6.3×5.5 0.12 120 40 1810
270 6.3×11 0.12 216 15 3200
560 8×11.5 0.18 448 10 5230
1200 10×12.5 0.18 960 8 5500
6
.3V
[0J]
100 6.3×5.5 0.12 126 40 1810
220 6.3×11 0.12 277 18 3160
330 6.3×6.5 0.12 416 28 2390
390 8×11.5 0.15 491 12 4770
470 8×11.5 0.15 592 12 4770
820 10×12.5 0.15 1033 10 5500
10
V
[1A]
100 6.3×6.5 0.12 200 45 1700
220 10×10 0.15 440 17 3950
330 8×11.5 0.12 660 14 4420
560 10×12.5 0.12 1360 12 5300
16
V
[1C]
47 6.3×5.5 0.10 150 50 1650
100 6.3×11 0.10 320 22 2820
180 8×11.5 0.12 576 16 4360
330
10×10 0
.
12 1056 16 4360
10×12
.
5 0.12 1056 14 5050
W.V.
Capacitance
(μF)
Size
[φD×L]
(mm)
tan
δ
(
120
Hz,
20℃
)
Leakage
Current
(μA)
E.S.R.
[100k~300
kHz,
20℃]
(mΩMax.)
Rated Ripple Current
[100
kHz,
105℃]
(mArms)
20
V
[1D]
22 6.3×5.5 0.10 88 60 1450
56 6.3×11 0.10 224 25 2650
100
8×11
.
5 0.15 400 24 3320
10×10 0
.
15 400 24 3320
150 10×12.5 0.15 600 20 4320
25
V
[1E]
6
.
8 6.3×5.5 0.10 170 80 1200
33 8×11.5 0.12 165 24 3320
56
8×11
.
5 0.12 280 24 3320
10×12
.
5 0.12 280 20 4320
68 8×11.5 0.12 340 24 3320
100 10×12.5 0.12 500 20 4320
35
V
[1V]
22 8×11.5 0.12 154 50 2300
39 8×11.5 0.12 273 31 2100
47 10×12.5 0.12 329 30 3650
68 10×12.5 0.12 476 28 2700
50
V
[1H]
27 8×11.5 0.12 270 36 2000
47 10×12.5 0.12 470 31 2500
Page 73
PLASTIC FILM CAPACITORS
73
製品ガイド
P
74 〜P80
製造品種一覧表
製品体系図
品番呼称法
箔タイプテーピング
/リードフォーミング仕様
メタライズドフィルムテーピング
/リードフォーミング仕様
使用上の注意事項
ポリエステル・フィルム・コンデンサ P
81
ポリプロピレン・フィルム・コンデンサ
P
82 〜P83
メタライズド・フィルム・コンデンサ
P
84 〜P94
CR
複合部品
P
95
プラスチックフィルムコンデンサ
Plastic Film Capacitors
−目次−
Page 74
PLASTIC FILM CAPACITORS
74
誘電体フィルム
Dielectric film
用 途
Application
特 徴
Features
シリーズ名
Type
定格電圧
Rated
voltage
静電容量範囲
Capacitance
range
使用温度範囲
Operating
temperature
range (
℃)
許容差
Tolerance
(
%
)
外装色
Coating color
掲載頁
Page
ポリエステル
フィルム
Polyester film
一般機器用
For general
purpose
小形化品
For miniature size
UM XR 50
VDC
0.001〜
0
.
47μ
F
−40〜+85
(
105
)
± 5
( J )
±10
(K)
イエロー
Yellow
81
蛍光灯雑防用
Noise suppresscrs
for fluorescent lamp
高絶縁抵抗
High insulation resistance
UMNAC 250
VAC
0.006μ
F
−40〜+85
−15
〜+20
クリア
Clear
81
ポリプロピレン
フィルム
Polypropylene
film
一般機器用
For general
purpose
小形化品
For miniature size
UP Z 100
VDC
0.0001〜
0
.
22μ
F
−40〜+85
±1
(F)
±2
(G)
±5
( J)
ディープ
レッド
Deep red
82
一般機器用
For general
purpose
無誘導巻き
Extended foil type
QMPNS
100
VDC
〜
630
VDC
0.0003〜
4.7μ
F
−40〜+110
(
125
)
±5
( J)
グリーン
Green
83
メタライズド
ポリエステル
フィルム
Metallized
Polyester
film-
一般機器用
For general
purpose
標準品
Standard type
MMSSDC
100
VDC
〜
630
VDC
0.01〜
4
.7μF
−40〜+85
(
105
)
± 5
( J )
±10
(K)
ベンガラ
Brown
84
一般機器用
For general
purpose
交流電源雑防、交流回路
For noise suppresors,
alternating current circuit
MMSSAC
63
VAC
〜
250
VAC
0.01〜
0
.
47μ
F
−40〜+85
(
105
)
± 5
( J )
±10
(K)
ベンガラ
Brown
85
一般機器用
For general
purpose
超小型化品
Microminiaturization type
MMJX
63
VDC
~
400
VDC
0.00051〜
1
.0μF
−40〜+85
(
105
)
± 5
(J)
±10
(K)
ブルー
Blue
86
一般機器用
For general
purpose
テープラップ形
Tape wrap type
TMDC
100
VDC
〜
630
VDC
0.01〜
10
.0μF
−25〜+85
± 5
( J )
±10
(K)
イエロー
Yellow
87
高圧回路用
High voltage circuit
テープラップ形
Tape wrap type
TMHDC
2
.5kVDC
〜
12
.5kVDC
0.001〜
0
.1μF
−25〜+85
± 5
( J )
±10
(K)
イエロー
Yellow
88
メタライズド
PPS
フィルム
Metallized
PPS film
SMT
用チップコンデンサ
Chip capacitor for SMT
外装レス
Moldless
MML-E
100
DC
〜
250
DC
0.01〜
0
.
22μ
F
−40〜+125
± 5
(J)
±10
(K)
89
メタライズド
ポリプロピレン
フィルム
Metallized
Polypropylene
film
FPD
用電源
Power supply for FPD
インバータ、
PFC
回路用
Inverter, PFC circuit
小型化、大電流
Compact size
Higher current
MMEX
450
VDC
500
VDC
0.47〜
2
.2μF
−40〜+105
(
500
VDC)
−40〜+85
(105)
(
450
VDC)
± 5
(J)
±10
(K)
ブルー
Blue
90
インバータ照明用
Electronic ballast
共振型SW電源用
Resonance switching
power supply
小形化、大電流
Compact size
Higher current
MMPGM
250
VDC
〜
630
VDC
0.01〜
4
.7μF
−40〜+105
(
125
)
±3
(H)
±5
(J )
グリーン
Green
91
高周波
高圧パルス回路用
High frequency
High voltage circuit
小形化、大電流
Compact size
Higher current
MMPLS
800
Vp-p
〜
1800
Vp-p
0.001〜
0
.1μF
−40〜+110
(
125
)
±3
(H)
グリーン
Green
92
モーター起動運転
Mortor start and
running
高信頼性品
High reliability product
MHXH 250
VAC
0.5〜
12μ
F
−25〜+85
− 5
〜+10
ベンガラ
Brown
93
交流電源雑防用
For noise
suppressore
海外安全規格認定品
Interference suppressors
approved from overseas
MPX
250
VAC
275
VAC
0.01〜2.2μ
F
−40〜+100
±10
(K)
±20
(M)
イエロー
Yellow
94
複合部品
Composite unit
スパークキラー
Spark killer
CR
複合部品
CR composite unit
MMRS
125
VAC
250
VAC
0.033μF+47/120Ω
0
.1μF
+47/120Ω
−25〜+85 ±20
(M)
グリーン
Green
95
■製造品種一覧表(1)/
Products Summary (
1
)
New
New
Page 75
PLASTIC FILM CAPACITORS
75
■製品体系図
箔タイプ
/ FOIL TYPE
ポリエステルフィルム
一般電子機器用
UMXR
小形品
樹脂ディップ形
蛍光灯雑防用
UMNAC
樹脂ディップ形
ポリプロピレンフィルム
一般電子機器用
UPZ
標準品
樹脂ディップ形
一般電子機器用 (無誘導)
QMPNS
樹脂ディップ形
メタライズドタイプ
/ METALLIZED TYPE
メタライズド ポリエステルフィルム
一般電子機器用
MMSSDC
標準品
樹脂ディップ形
MMSSAC
交流回路標準品
樹脂ディップ形
TMDC
標準品
テープラップ形
高圧回路用
TMHDC
テープラップ形
メタライズド ポリプロピレンフィルム
FPD
用電源
インバータ、
PFC
回路用
MMEX
樹脂ディップ形
高周波
高圧パルス回路用
MMPLS
樹脂ディップ形
海外安全規格認定品
MPX
樹脂ケース形
電気機器用
MHXH
樹脂ディップ形
メタライズドポリフェニレンスルフィドフィルム
一般電子機器用
MML-E
無外装チップ品
複合部品
/ COMPOSITE UNIT
CR
・サージアブソーバー
MMRS
樹脂ディップ品
インバータ照明用
SW
電源用
MMPGM
樹脂ディップ形
MMJX
超小型化品
樹脂ケース形
New
New
Page 76
PLASTIC FILM CAPACITORS
76
●品番呼称法(ご指定法) / Film capacitor Method of denominating item Number (How to specify item number)
例/
Example UPZ Series
100
V. DC 0.
001μF±5%
Forming product
2
A
UPZ
FC
102
J
①定格電圧
Rated voltage
②シリーズ名
Series name
③形状記号
Style Symbol
④静電容量
Capacitance symbol
⑤静電容量許容差
Capacitance tolerance
⑥
付記コード
Additional code
●
環境対策コンデンサ
(RoHS
指令対応)について
■鉛レス化対応
●
ENVIRONMENT FRIENDLY (RoHS Compliance) CAPACITORS
■
Lead Free Capacitors
地球環境の保全を考慮し、有害物質である
鉛を含まない鉛レス化に対応可能です。
ご要望の際 は 付 記 コードに環 境 対 策 品記
号、Eを付記下さい。
TOSHIN promote various activity to environment protection, we can
supply Lead Free Capacitors.
If you require Lead Free Capacitors, Please add the E in the
additional code.
MMSSDC TF K
①定格電圧
Rated voltage
②シリーズ名
Series name
③形状記号
Style Symbol
④静電容量記号
Capacitance symbol
⑤静電容量許容差
Capacitance tolerance
⑥
付記コード
Additional code
カタログの
シリーズ名の例
Series name of
catalog.
Example
UMXR
UPZ
MMSSDC
MMSSAC
テーピング及びリード加工
の形状記号を記入する。
テーピング加工及びリード
加工の無い製品の場合は記
入しない。
チップタイプ品の場合も記
入しない。
Write st y le sy m bol of
taping & leads process.
In the ca s e of produ ct
wi t hout tap ing & lea ds
process, do not write it.
Do not write it in the case
of chip type product.
単位は
pF
最初の2数字
は有効数字を表し、末尾
の数字はこれに続く零の
数を表す。
Unit is pF, and the first tow
digits represent a
significant number and the
last digit represent the
number of zeros following
the last digit.
±5%=
J,
±10%=
K
■箔タイプ・フィルム・コンデンサ
/ Foil type film capacitor
例/
Example MMSSDC Series
250
V. DC 0.1μF
±10%
Taping Product
■メタライズド・フィルム・コンデンサ
/ Metallized film capacitor
2
E
104
50
63
100
125
160
200
250
400
630
1000
1250
1600
2000
2500
定格電圧
(V)
Rated voltage記号Symbol
1
H
1
J
2
A
2
B
2
C
2
D
2
E
2
G
2
J
3
A
3
B
3
C
3
D
3
E
101
471
102
472
103
473
104
474
105
475
106
静電容量記号
symbol
静電容量
Capacitance
0.
0001 μ
F
0.00047 μ
F
0.001 μ
F
0.0047 μ
F
0.01 μ
F
0.047 μ
F
0.1 μ
F
0.47 μ
F
1.0 μ
F
4.7 μ
F
10.0 μ
F
● 最小包装単位
:
ストレートリード、フォーミングのバラ品は200個、テーピング品については77 、78ページを参照下さい。
御注文は最小包装単位の整数倍にてお願いいたします。
●
Min package unit :
200
pcs. for straight and forming leads. Refer to
77
, 78 page for the taping item. Please order in multiples of
the Min package unit.
MMSSDC TF K
E
①定格電圧
Rated voltage
②シリーズ名
Series name
③形状記号
Style Symbol
④静電容量記号
Capacitance symbol
⑤静電容量許容差
Capacitance tolerance
⑥
付記コード
Additional code
例/
Example MMSSDC Series
250
V. DC 0.1μF
±10%
Taping Product
2
E
104
(
100
pF)
(
470
pF)
Page 77
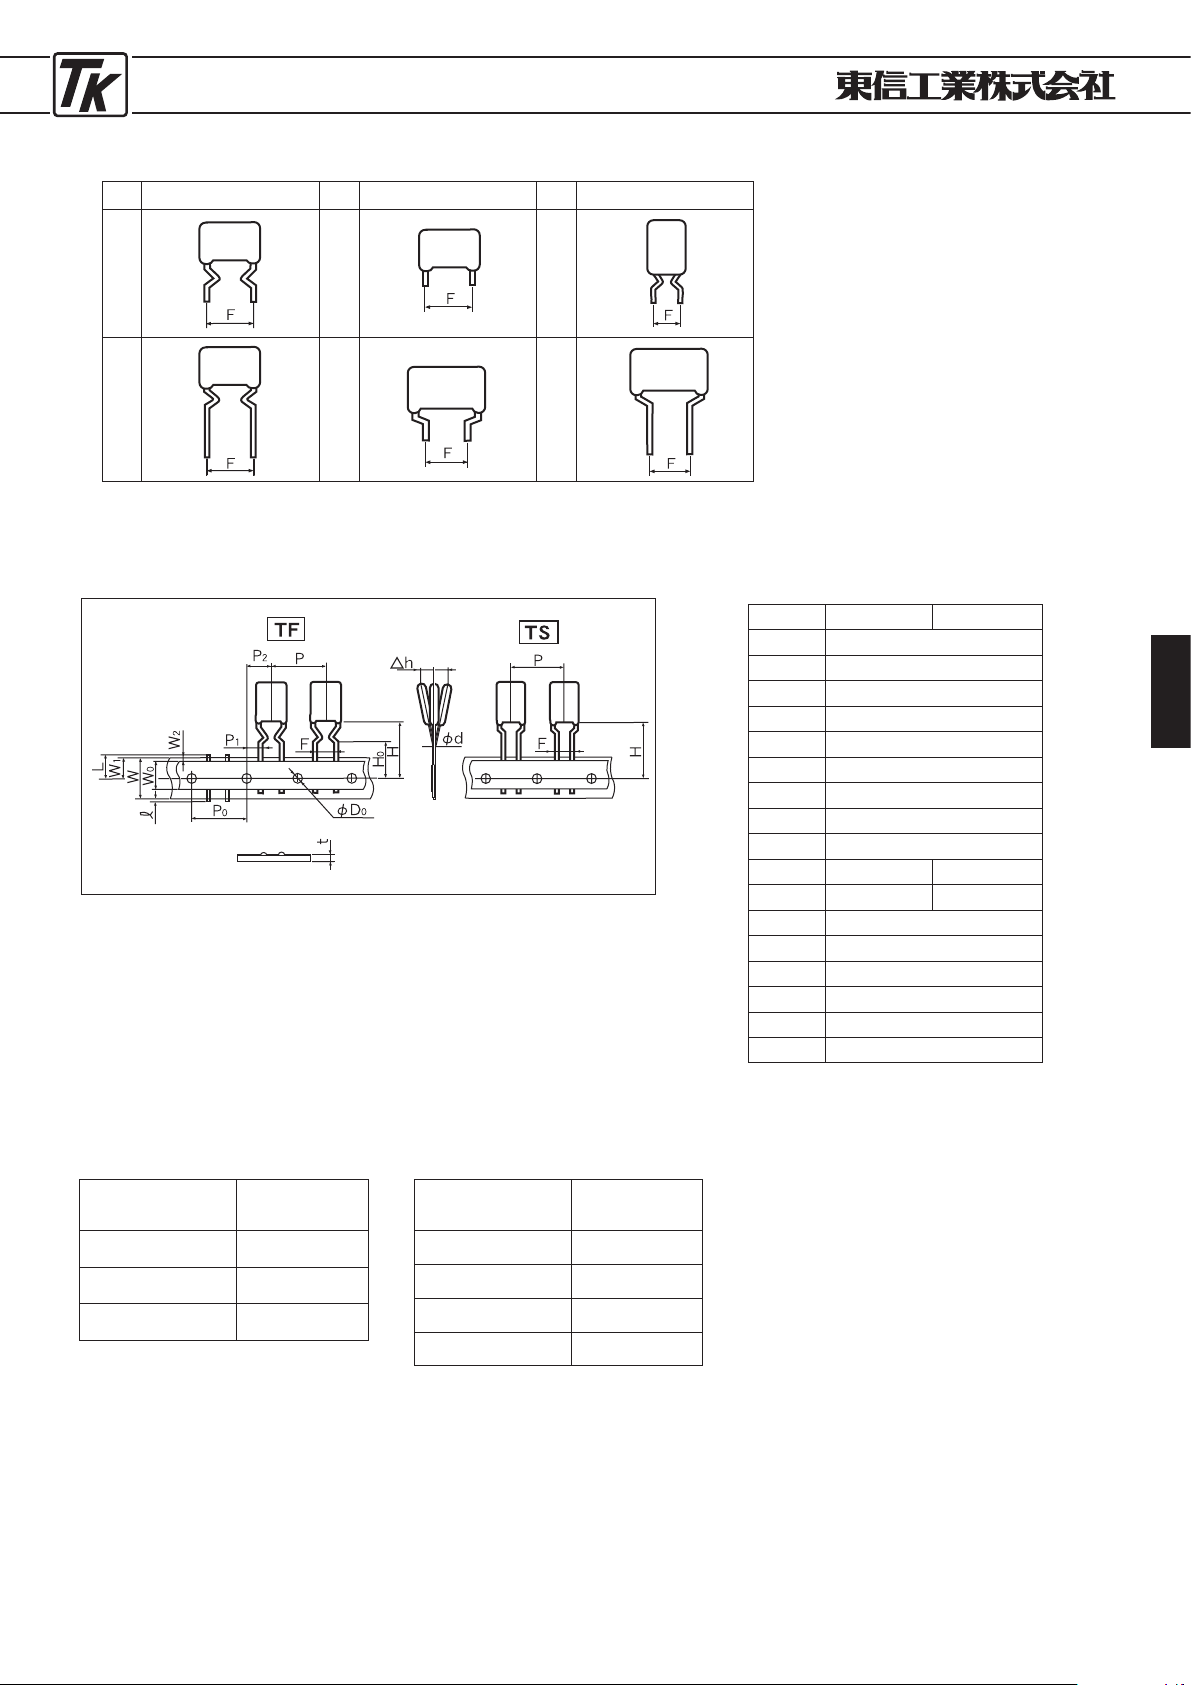
PLASTIC FILM CAPACITORS
77
●
フィルム・コンデンサ フォーミング形状/Film Capacitor Forming Style
型名
TYPE
型名
TYPE
型名
TYPE
形 状
STYLE
形 状
STYLE
形 状
STYLE
FD FC FE
FG FL FM
・未記載のフォーミングピッチについて
はお問い合わせてください。
Please inquire about Forming-pioh at
the undescription.
●自動挿入用テーピング仕様(1)/
SPECIFICATION OF TAPING FOR AUTOMATIC INSERTION
・箔タイプ・フィルム・コンデンサ/
Foil type Film Capacitors
P
P
0
P
1
P
2
F
W
W
0
W
1
W
2
H
H
0
ℓ
φ
D
0
△
h
t
L
φ
d
TF
TS
12.7±1.0
12
.
7±0.3
3
.
85±0.7
6
.
35±1.3
5.0
18.
0
9
.0
min
9.
0
3
.0
max
2
.0
max
4
.
0±0.2
0
.
0±2.0
0
.
7±0.2
11
.0
max
0
.5/0.6 ±0.
05
+0.8
−0.2
+1
.
0
−0.5
+0
.
75
−0.5
■1パックの梱包数/
QUANTITY OF ONE PACK
品種
(TYPE):UPZTF、UPZTS
容量範囲
Capacitance range
梱包単位
pcs./pack
101〜181
〜392
〜103
〜473
1500
2000
1500
1000
品種
(TYPE):UMXRTF
容量範囲
Capacitance range
梱包単位
pcs./pack
471〜223
273〜184
224
2000
1000
500
21.25 max
16
.
0±0.75
18
.
0±1.0
−
(
mm)
Page 78
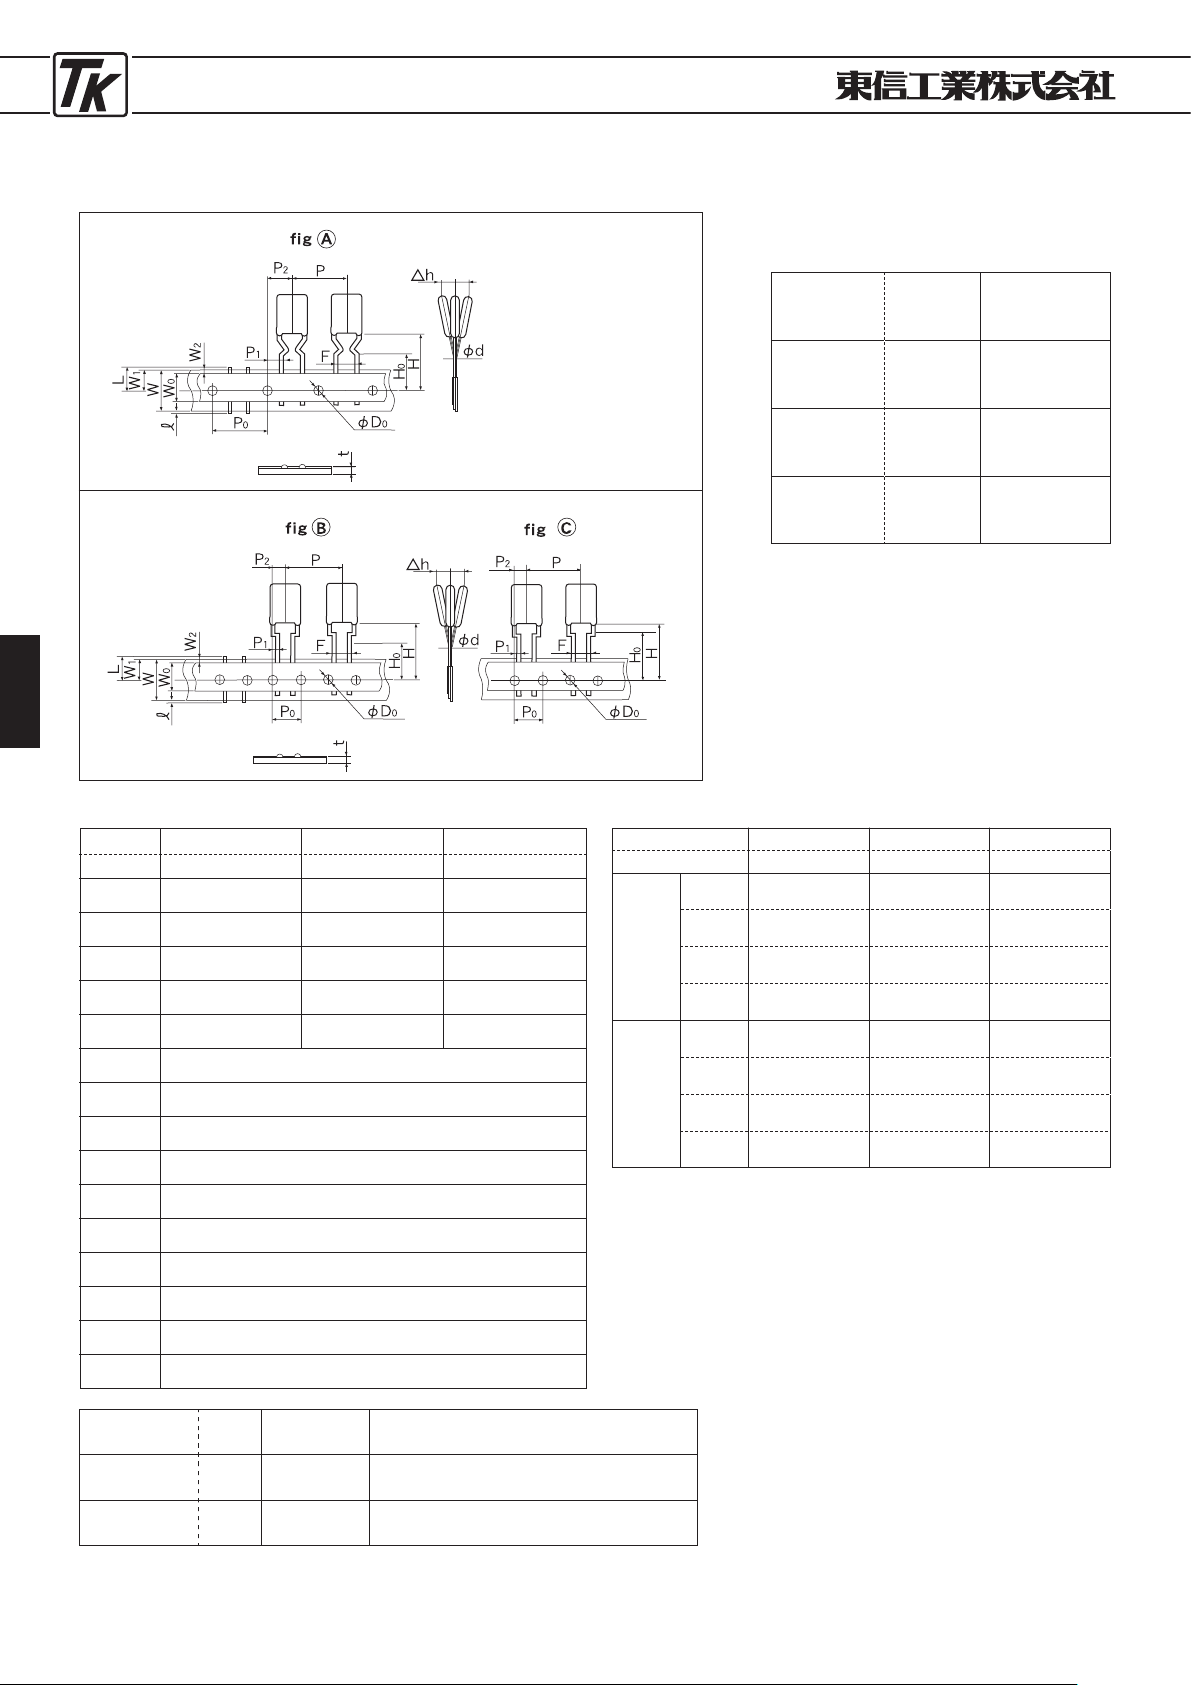
PLASTIC FILM CAPACITORS
78
●自動挿入用テーピング仕様(2)/
SPECIFICATION OF TAPING FOR AUTOMATIC INSERTION
・メタライズド・ポリエステル・フィルム・コンデンサ/
Metallized Polyester Film Capacitors
■1パックの梱包数
QUANTITY OF ONE PACK
Style symbol
包装単位
pcs./pack
1000
250〜500
250〜500
TF
TL
TL
fig
Ⓐ
Ⓑ
Ⓒ
P
P
0
P
1
P
2
F
W
W
0
W
1
W
2
H
H
0
ℓ
φ
D
0
△
h
t
18.0±0.5
12
.5 min
9.0±0.5
3
.0 max
20.0±1.0
16
.
0±0.5
2
.0 max
4.0±0.2
0
.
0±2.0
0
.
7±0.2
TF
Ⓐ
Style symbol
fig
TL
Ⓑ
TL
Ⓒ
12
.
7±1.0
12
.
7±0.2
3
.
85±0.5
6
.
35±1.0
5
.
0±
25
.
4±1.0
12
.
7±0.2
3
.
85±0.5
6
.
35±1.0
5
.
0±0.8
30
.
0±1.0
15
.
0±0.2
3
.
75±0.5
7
.
5±1.0
7
.
5±0.8
0.8
0.2
TF
Ⓐ
Style symbol
fig
TL
Ⓑ
TL
Ⓒ
104〜564
103〜334
103〜104
103〜273
104〜564
103〜184
103〜563
103〜
273
684〜335
394〜155
124〜474
333〜224
824〜335
224〜125
823〜334
393〜224
684〜335
394〜155
124〜474
333〜224
824〜335
224〜125
823〜334
393〜224
100
VDC
250
VDC
400
VDC
630
VDC
63
VAC
125
VAC
200
VAC
250
VAC
MMSSDC
MMSSAC
(
mm)
Style TL
は付記コードを付記下さい。
If you require style TL, Please abb the additional code.
形状記号
Style symbol
fig F
寸法
付記コード
Additional code
TL
Ⓑ
5
mm
810(一個飛ばしテーピング)
Taping that makes one space
TL
Ⓒ
7
.5 mm
815(一個飛ばしテーピング)
Taping that makes one space
Page 79
PLASTIC FILM CAPACITORS
79
1. 定格電圧
定格電圧は使用最高温度においてコンデンサに連続印加で
きるせん頭電圧値(直流電圧及び個別規格で規定される値
以下の交流せん頭電圧値の和)の最大値です。
2. 使用温度範囲
使用温度範囲は、周囲温度+自己温度上昇で規定していま
す。従って、特に高周波で使用する場合は自己発熱があり
ますので、コンデンサの壁温が必ず使用温度範囲内である
ことをご確認下さい。
3
.
自己温度上昇
AC
回路、特に高周波回路で使用する場合はコンデンサが
自己発熱します。自己発熱が大きいと、コンデンサが劣化
したり、損傷する恐れがありますので、無風状態(周囲温
度40℃)における自己温度上昇は下記の規定値以内でご使
用下さい。
●プラスチックフィルムコンデンサご使用上の注意事項
1.
Rated voltage
The maximum peak voltage (sum of d.c. voltage and peak
a.c. voltage which is no more than the value specified in
the individual specication) which may be applied to a
capacitor continuously at its upper category temperature.
2.
Operating temperature range
Operating temperature range is specified as a sum of
ambient temperature and inherent temperature rise.
Especially at high frequency operation, temperature of
capacitor rises inherently. For such an application, make
sure that the temperature at capacitor surface is within
the operating temperature range.
3.
Inherent temperature rise
When capacitor is operated in AC circuit, especially at high
frequency, temperature of capacitor rises inherently. In case
tenperature rises too high, performance of capacitor may
be deteriorated or damaged. The inherent temperature rise
at no air circulation (Ambient temp. at
40℃
) shall be within
a value specified below.
コンデンサの種類
Type of capacitor
自己温度上昇
Inherent temperature rise
ポリエステルフィルムコンデンサ
Polyester film capacitor
メタライズドポリエステルフィルムコンデンサ
Metallized polyester film capacitor
10℃ 以内
Within
10℃
5℃ 以内
Within
5℃
4
.
アクロス・ザ・ライン(電源間挿入)に使用する場合。
雑音防止用として電源間に挿入するコンデンサについては
国内国外共に厳しい安全性能が要求されますので、海外安
全規格品(
MPX
)又は雑音防止用コンデンサ(
MMSSAC)
を
ご使用下さい。
なお、
MMSSAC
を使用する場合は下記条件1項目以上を満
足するようにして下さい。
4-1.
コンデンサと並列にバリスタ電圧が表1以下のバリスタ
が入っていること。
4-2.
コンデンサの両端に表1以上のパルス電圧が印加されな
いこと。
4
. Operating for across-the-line.
At home and abroad, severe safe performance is required
of capacitors to be inserted between power and equipment
for noise prevention. Please use products conforming to
overseas safety regulations (MPX) or the interference
suppression capacitors (MMSSAC).
When using MMSSAC as a acress-the-line capacitor it shall
be required to follow either item
1
. or 2. condition.
4-1
. Capacitor shall be connected with varistor in paralleled
(Specified varistor voltage in table
1
. )
4-2. Capacitor shall not be exceeded voltage specified in table
1, while using these capacitors,
コンデンサ定格電圧
Cap. Rated. Voltage
バリスタ電圧
Varistor Voltage
パルス電圧
Pulse Voltage
AC
12 5
V
AC
25 0
V
25 0
V
47 0
V
25 0
Vo- p
63 0
Vo- p
ポリプロピレンフィルムコンデンサ
Polypropylene film capacitor
メタライズドポリプロピレンフィルムコンデンサ
Metallized polypropylene film capacitor
メタライズドポリフェニレンスルフィドフィルムコンデンサ
Metallized polyphenylene sulfid film capacitor
表1
Page 80
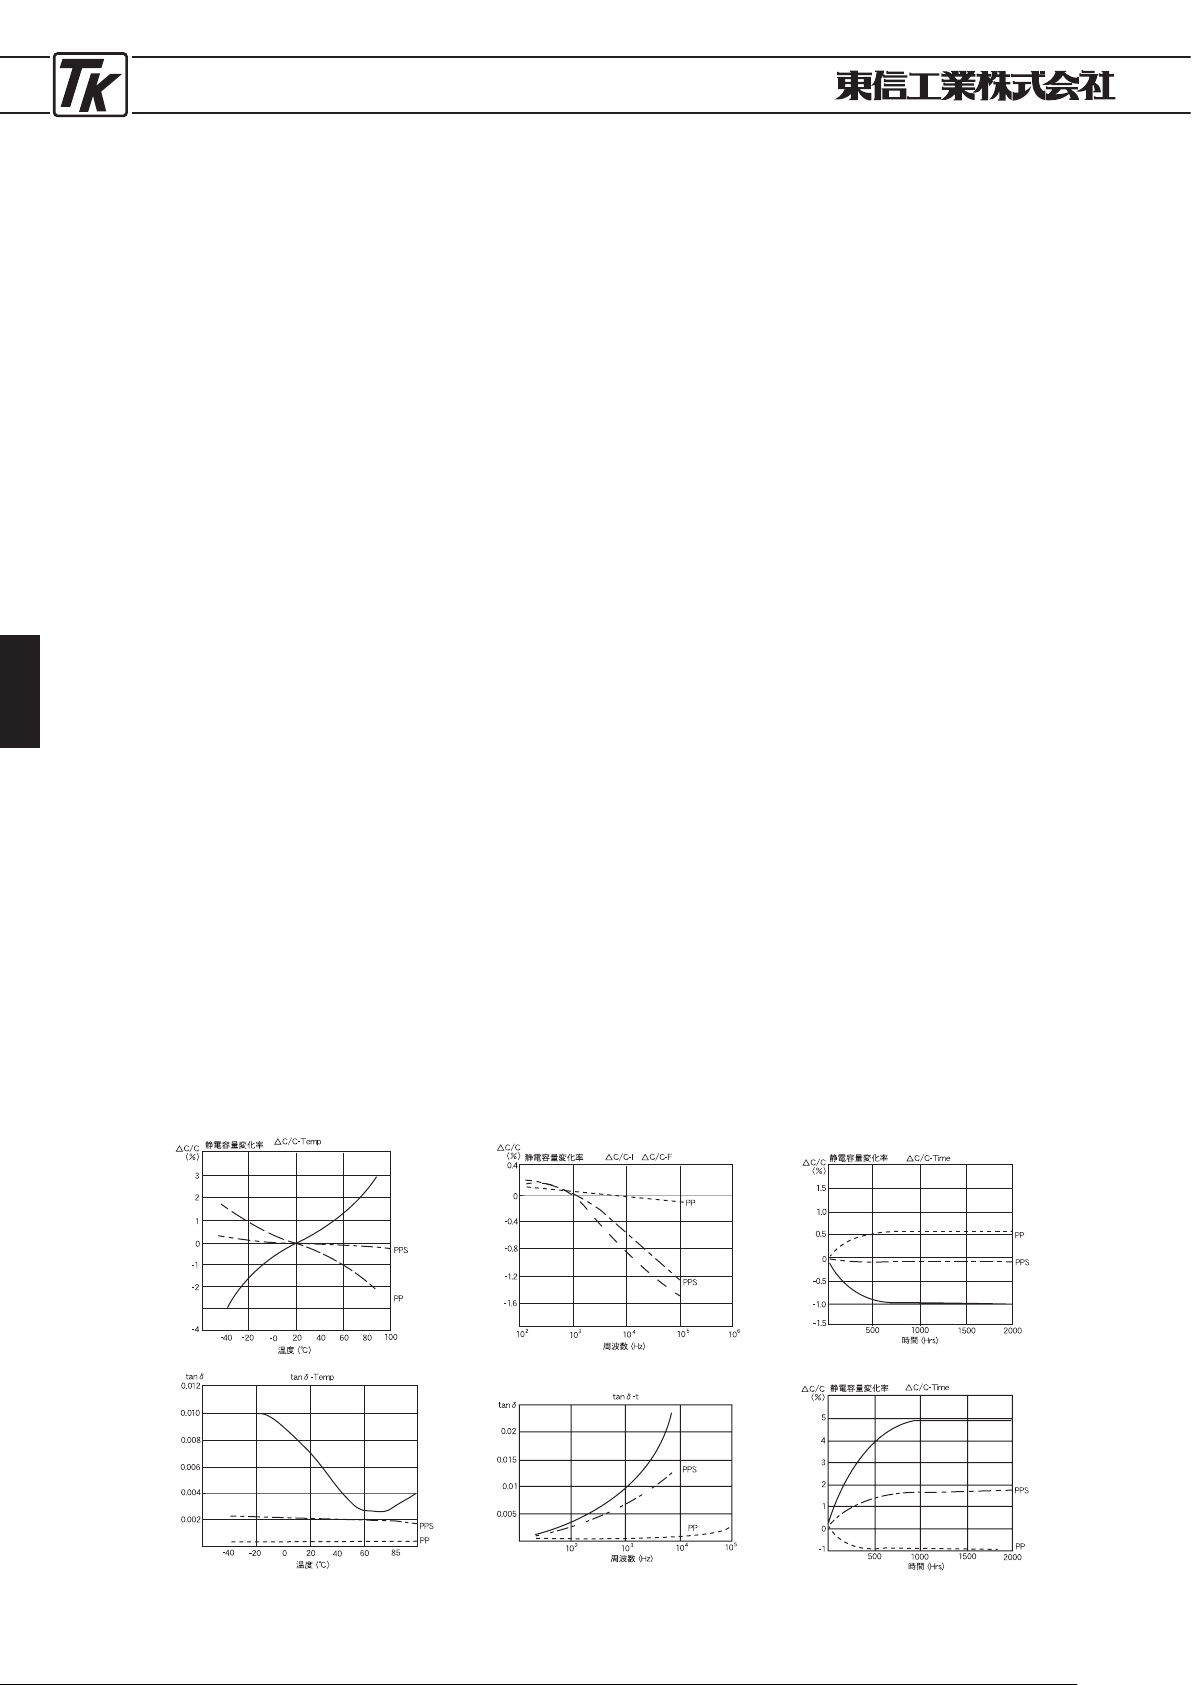
PLASTIC FILM CAPACITORS
80
5. はんだ付け作業
はんだ付けは、仕様書で定められた範囲内で行ってください。
リード線タイプのリフロー半田付け及び接着剤硬化炉の通
過は熱の影響が大きいため避けてください。
6
.
取扱上の注意
6-1.
急激な充放電は、コンデンサの特性劣化につながります
ので行なわないでください。充放電は2kΩ以上の抵抗
を通じて行なって下さい。
6-2.
本体に衝撃を与えたり、損傷したりしないで下さい。
またリード線には必要以上の荷重をかけないでくださ
い。(リード線の再加工等)
6-3.
洗浄等の目的のため、溶剤を使用する場合は、アルコール
系など影響の少ないものをご使用下さい。なお、洗浄後
は洗浄剤が残留しないよう十分乾燥してください。
7
.
その他
7-1.
製品仕様、使用条件など詳細については、別途、製品仕
様書及び技術資料をお求めください。
7-2.
このカタログ記載製品の仕様、寸法は予告なく変更され
る場合があります。ご購入及びご使用前に、納入仕様書
を取り交わし、それに基づいて購入及び使用していただ
きますようお願いいたします。
5
. Soldering operation
Please solder within the range decided with specifications.
Becau se ref low s olde rin g and the pass age of the
adhesive hardening furnace have a big influence of the
heat, please avoid the lead type.
6.
General Precautions
6-1.
Pleas avoid rapid charging and discharging, which will lead
to deterioration of performance. Charging and discharging
should be done through a resistor of more than
2kΩ
.
6-2. Avoid mechanical shock or damage to capacitors, lead
wires should not be loaded over and above what is needed
(When reprocessing the lead etc).
6-3.
When a solvent is used for cleaning etc., inactive material
such as alcohol, stac. should be used. It is necessary to
remove cleaning solvent from P.W.B. by enough dryness.
7.
Additional Points
7-1
. For details, please see specifications or technical date.
7-2.
Specifications and dementions in this catalogue is subject
to change without notice. Please check the submitted
specifications details for approval befor purchase or use.
●フィルムコンデンサの諸特性 ●
PERFORMANCE CHARACTERISTICS
■温度特性/
TEMPERATURE DEPENDENCE
■周波数特性/
FREQUENCY CHARACTERISTIC
■高温負荷寿命/
HIGH TEMPERATURE LIFE
■耐温負荷寿命/
MOISTURE RESISTANCE LOAD LIFE
PET
PET
PET
PET
PET
PET
Page 81
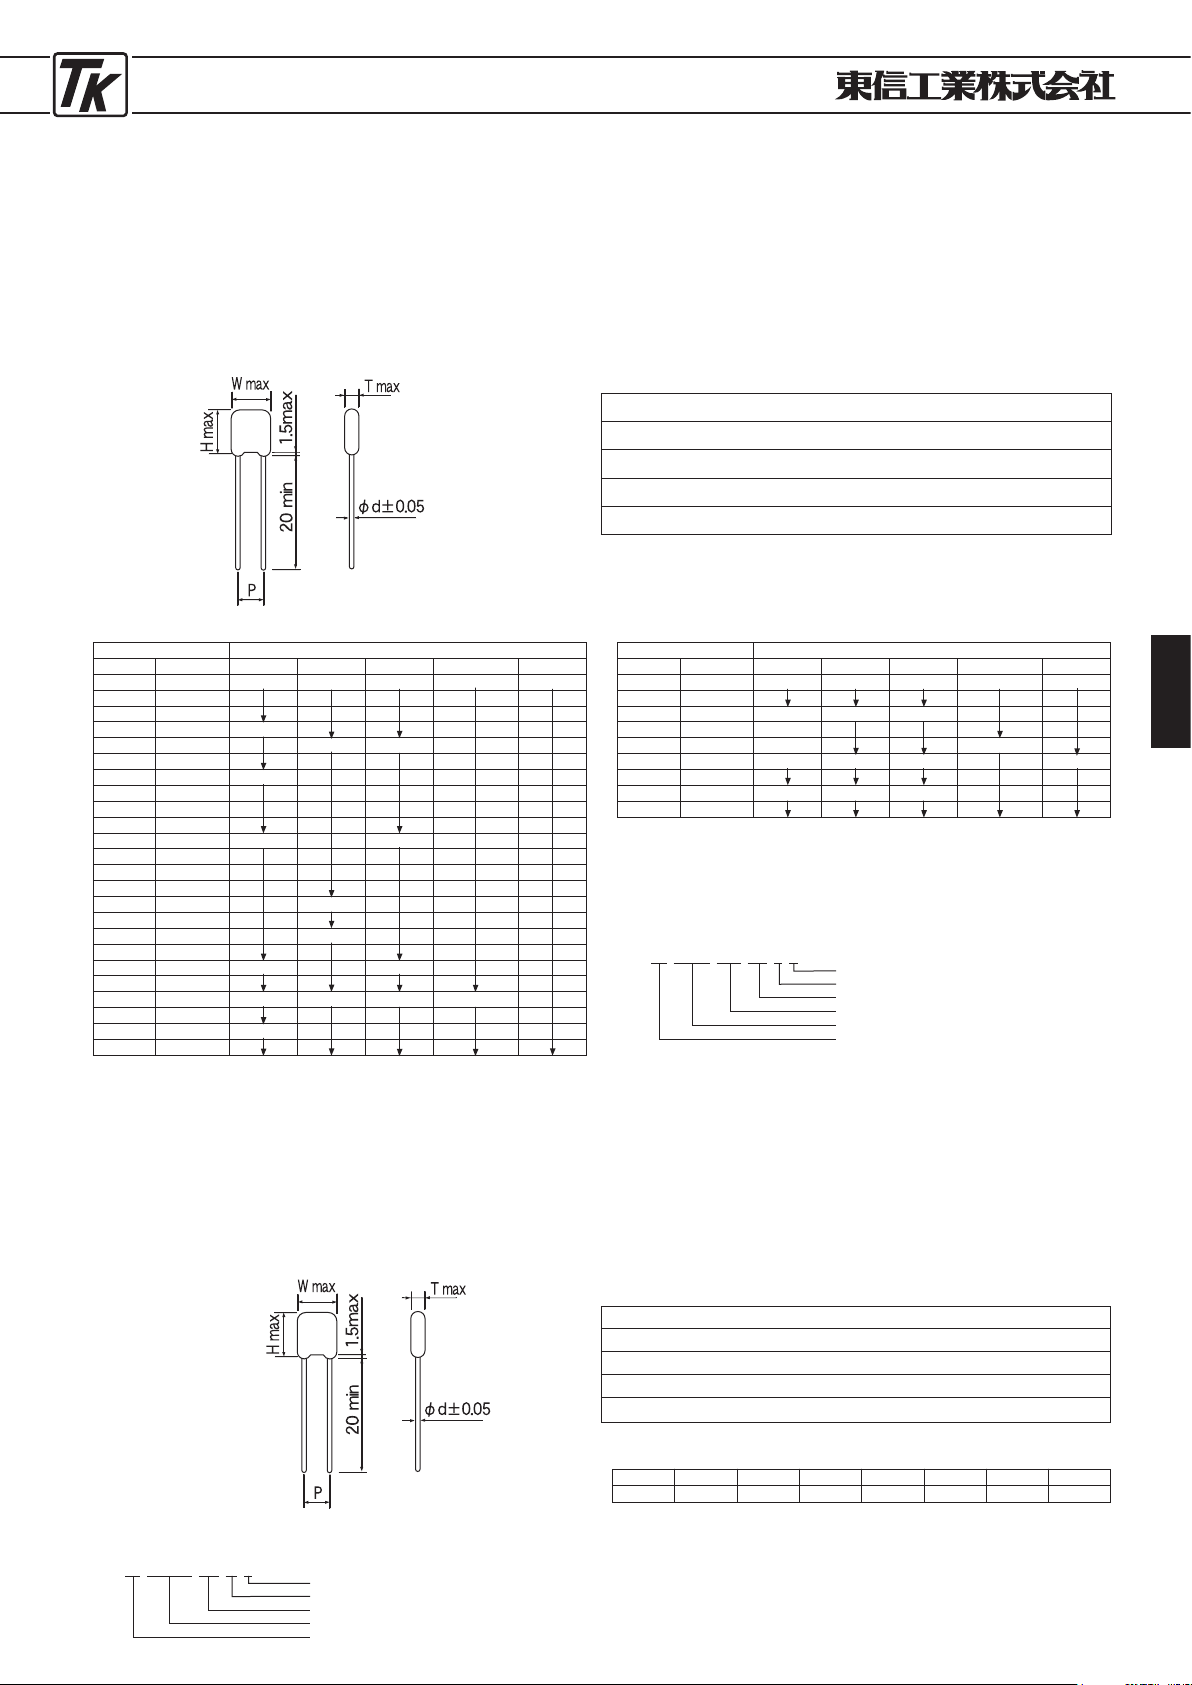
PLASTIC FILM CAPACITORS
81
●ポリエステル・フィルム・コンデンサ ●
POLYESTER FILM CAPACITORS
UMXRシリーズ
TYPEUMXR
・ポリエステルフィルムを誘電体として使用しており、優れた性能を
有しています。
・小形軽量化していることにより、自動挿入に適しています。
・外装にはエポキシ樹脂を使用しており、耐熱、耐湿性、耐溶剤性に
優れています。
・
This product uses a polyester film for a dielectric and has superior
performance.
・
Small size is suitable as a condenser for automatic insertion by
being lightweighted.
・
This product uses epoxy resin for exterior and am superior in heat
resistance, resistance against humidity, resistance to solvent.
■性 能
/PERFORMANCE SPECIFICATIONS
・使用温度範囲
/Temperature range : -
40℃~+85℃ (105℃
)
・誘電正接
/Dissipation factor :
1.0
% Max.(at
20℃, 1
kHz)
・絶縁抵抗
/Insulation resistance :
30,000MΩ
Min.
・耐電圧
/Withstand voltage : WV
×2.5 (1~5
sec)
・静電容量許容差
/Capacitance tolerance :
±5%
(J)
±10
%(K)
■特 徴 ■
FEATURES
■寸法図
/DIAGRAM OF DIMENSIONS
■寸法表
/DIMENSIONS
静電容量 50
VDC (1H)
記号 μF W H T P φd
102 0.001 5.0 7.0 2.5 3.5±0.75 0.5
122 0.0012
152 0.0015
182 0.0018 5.5
222 0.0022 7.5 3.0
272 0.0027
332 0.0033 6.0
392 0.0039
472 0.0047
562 0.0056
682 0.0068 6.5 4.0
822 0.0082
103 0.01
123 0.012
153 0.015 8.5
183 0.018
223 0.022 9.0
273 0.027
333 0.033 7.0 4.5
393 0.039
473 0.047 7.5 9.5 5.0 5.0±1.0
563 0.056
683 0.068 8.0
823 0.082
(
mm)
■品番ご指定法/
HOW TO SPECIFY ITEM NUMBER
2
E UMNAC
602
W E
環境対策品記号/
Environment Friendly Symbol
静電容量許容差/
Capacitance Tolerance
静電容量記号/
Capacitance Symbol
シリーズ名/
Series Name
定格電圧/
Rated Voltage
●ポリエステル・フィルム・コンデンサ
●蛍光灯用雑音防止コンデンサ
●
POLYESTER FILM CAPACITORS
●
FOR FLUORESCENT LAMP
UMNACシリーズ
TYPEUMNAC
・小形軽量のためのグロースタータの雑音防止用として最適です。
・外装にはエポキシ樹脂を使用しており、耐熱、耐湿性に優れています。
・
It is especially suited for noise suppressor for fluorescent lamp.
・
This product uses epoxy resin for decoration and am superior in
heat resistance, resistance against humidity.
■寸法表
/DIMENSIONS
■性 能
/PERFORMANCE SPECIFICATIONS
・使用温度範囲/
Temperature range :
−40℃〜+85℃
・誘電正接/
Dissipation factor :
1.0%
at 1kHz
・絶縁抵抗/
Insulation resistance :
10,000MΩ
Min
・耐電圧/
Withstand voltage :
1600
VAC
1〜5
sec.
・静電容量許容差/
Capacitance tolerance :
−15%〜+20%
■特 徴 ■
FEATURES
■寸法図
/
DIAGRAM OF
DIMENSIONS
記号
602
容量μ
F
0.006WV250
VACW10.5H16.5T5.5P6.5±1
φ
d
0.5
(
mm)
静電容量 50
VDC (1H)
記号 μF W H T P φd
104 0.1 9.0 10.5 5.5 5.0±1.0 0.5
124 0.12
154 0.15 10.0 12.5 6.0
184 0.18 10.5
224 0.22 11.0 7.5±1.2
274 0.27 12.5 15.0 7.5 0.6
334 0.33
394 0.39 14.0 15.5 9.5
474 0.47
■品番ご指定法/
HOW TO SPECIFY ITEM NUMBER
1
H UMXR □□
102
K E
環境対策品記号/
Environment Friendly Symbol
静電容量許容差/
Capacitance Tolerance
静電容量記号/
Capacitance Symbol
形状記号/
Style Symbol
シリーズ名/
Series Name
定格電圧/
Rated Voltage
Page 82
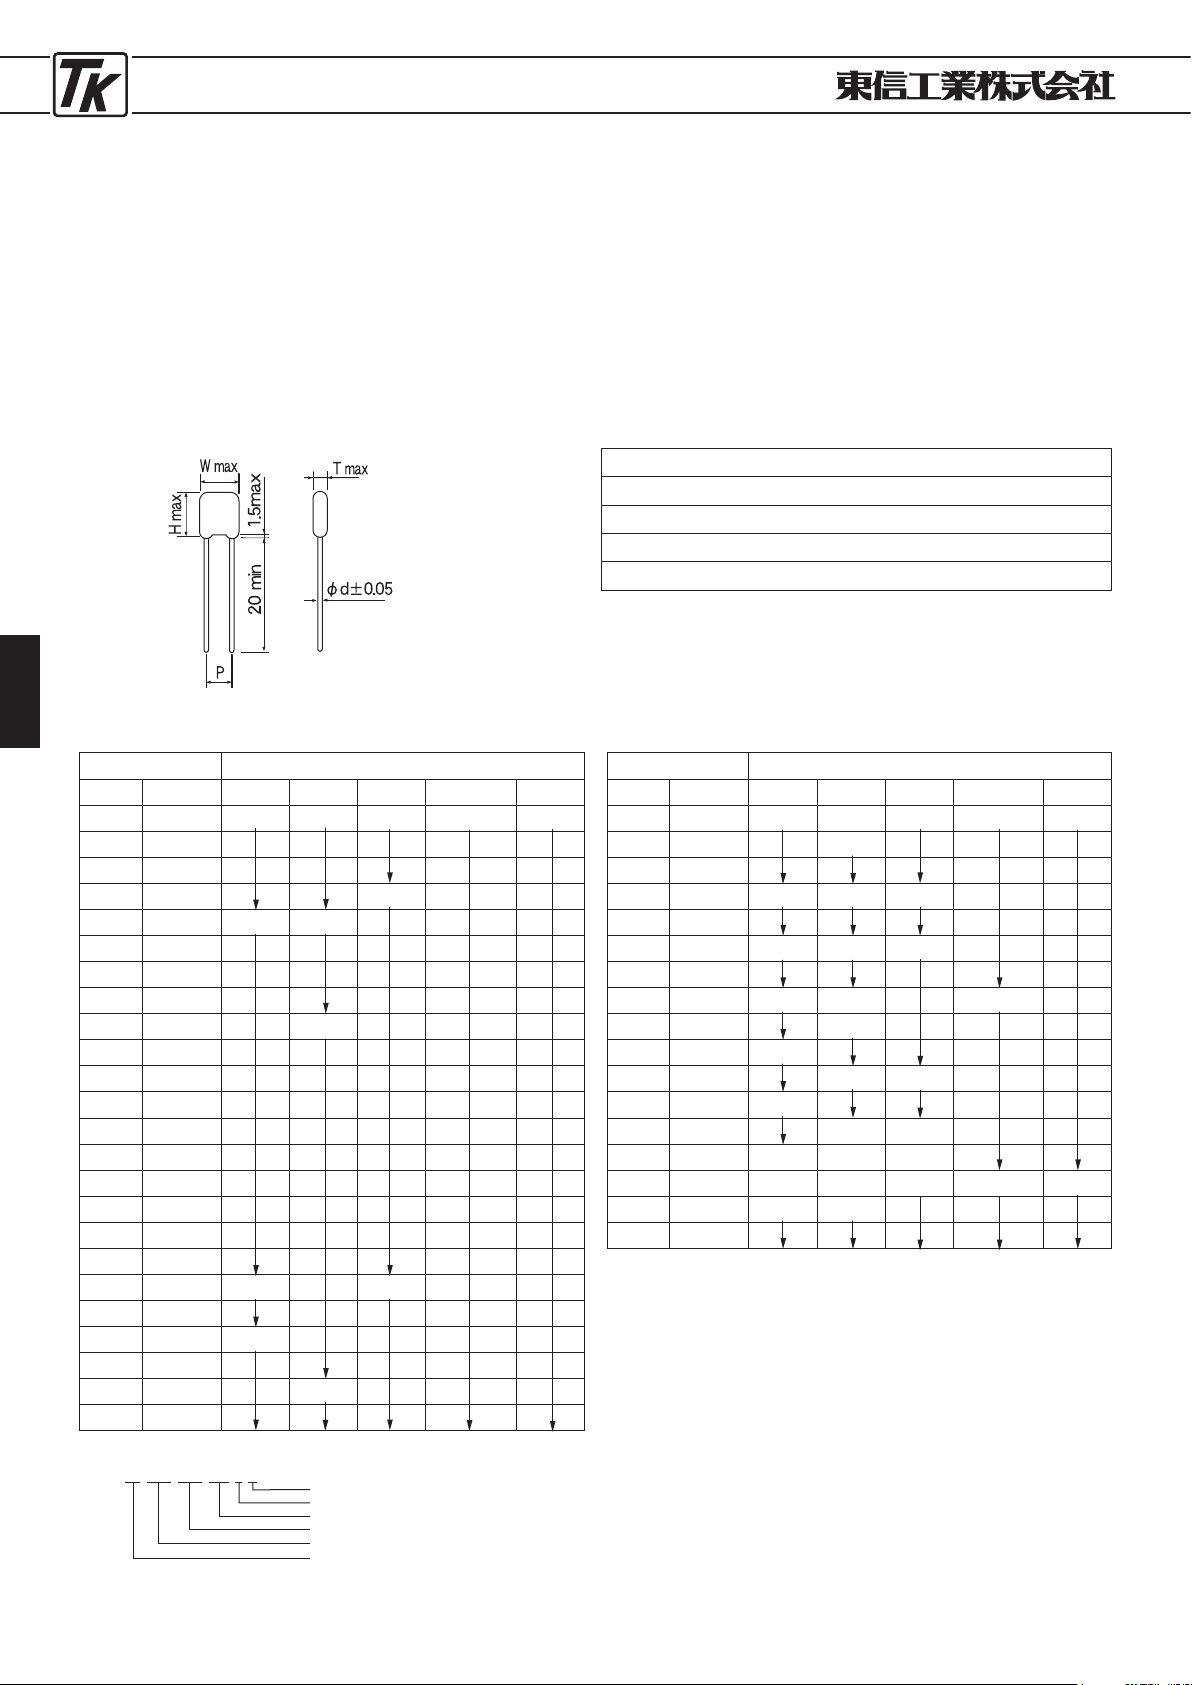
PLASTIC FILM CAPACITORS
82
●ポリプロピレン・フィルム・コンデンサ ●
POLYPROPYLENE FILM CAPACITORS
■特 徴
UPZシリーズ
TYPEUPZ
・容量の温度係数はマイナスで小さくイコライザー回
路に適しています。
・誘電正接が極めて小さくスチロールコンデンサとの
置換えが可能です。
・小
形、軽量です。
■
FEATURES
・
Temperature coefficient of capacitance is minus and small,
therefore, this type is suitable for equalizer circuits.
・
The dissipation factor is very small, therefore, styrene
capacitors can be replaced by this type.
・
Small size and light weight.
■寸法図
/DIAGRAM OF DIMENSIONS
■性 能
/PERFORMANCE SPECIFICATIONS
■寸法表
/DIMENSIONS
(mm)
■品番ご指定法/
HOW TO SPECIFY ITEM NUMBER
2
A UPZ □□
101
J E
環境対策品記号/
Environment Friendly Symbol
静電容量許容差/
Capacitance Tolerance
静電容量記号/
Capacitance Symbol
形状記号/
Style Symbol
シリーズ名/
Series Name
定格電圧/
Rated Voltage
静電容量 100
VDC(2A
)
記号 μ
F W H T P
φ
d
101 0.0001 7.0 9.0 4.5 3.5±1.0 0.5
121 0.00012
151 0.00015
181 0.00018 4.0
221 0.00022 6.5 8.5
271 0.00027
331 0.00033
391 0.00039
471 0.00047 9.0
561 0.00056
681 0.00068
821 0.00082
102 0.001
122 0.0012
152 0.0015
182 0.0018
222 0.0022
272 0.0027
332 0.0033 7.0 4.5
392 0.0039
472 0.0047 7.5
562 0.0056
682 0.0068 9.5
822 0.0082
静電容量 100
VDC(2A
)
記号 μ
F W H T P
φ
d
103 0.01 7.5 9.5 4.5 5.0 ± 1.0 0.5
123 0.012 11.0
153 0.015
183 0.018 8.0 11.5 5.5
223 0.022
273 0.027 9.0 12.0 6.0
333 0.033
393 0.039 10.0 13.0 7.5 ± 1.5
473 0.047 13.5
563 0.056 11.0
683 0.068 14.0 7.0
823 0.082 12.0
104 0.1 14.5 7.5
124 0.12 13.0 16.0 8.0
154 0.15 14.0 18.0 9.0 10.0±1.5 0.6
184 0.18 15.0 19.5
224 0.22
・
使用温度範囲/
Temperature range
:−40℃〜+85℃
・誘電正接/
Dissipation factor
:0.1
% Max.(at
20℃,1
kHz
)
・絶縁抵抗/
Insulation resistance
:30,000MΩ
Min.
・耐電圧/
Withstand voltage
:WV×2.5(1〜5
sec
)
・
静電容量許容差/
Capacitance tolerance
:±1%(F)
,
±2%(G)
,
±5%(J)
Page 83
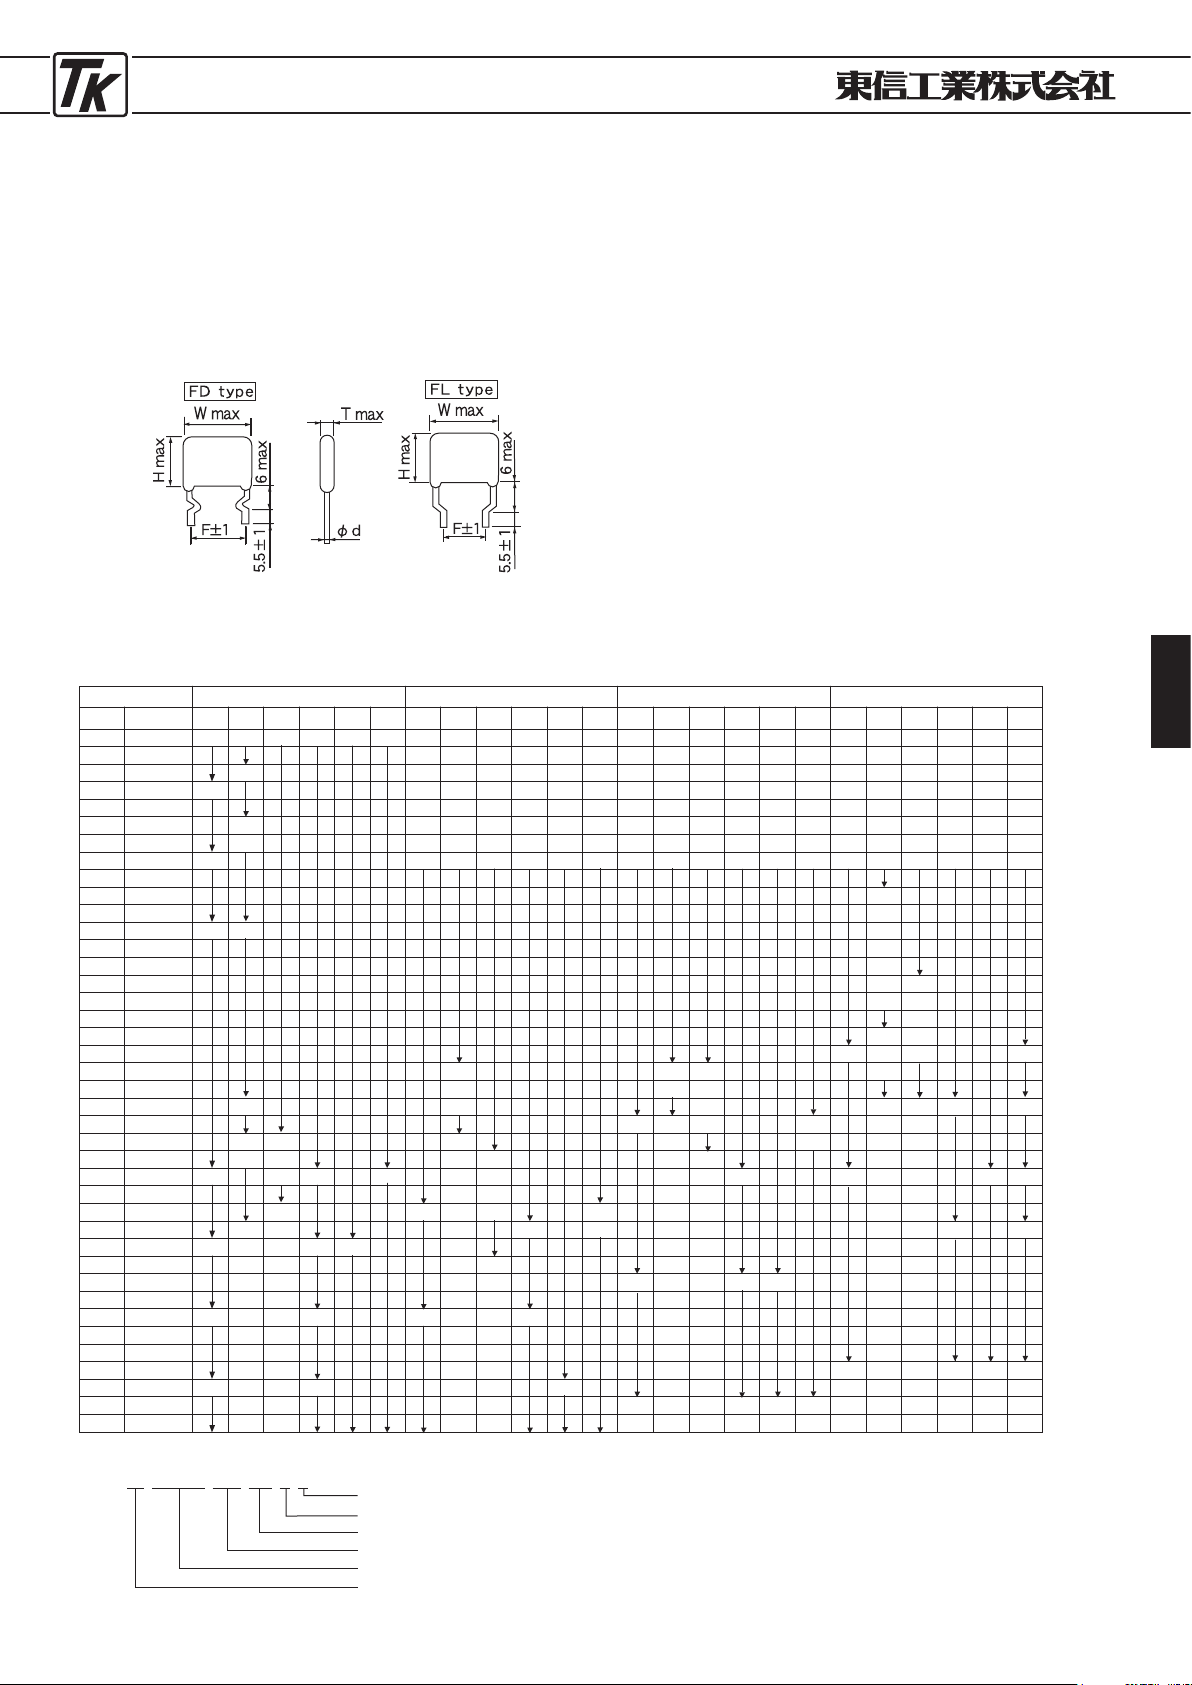
PLASTIC FILM CAPACITORS
83
●ポリプロピレン・フィルム・コンデンサ
●
POLYPROPYLENE FILM CAPACITORS
■特 徴
QMPNSシリーズ
TYPEQMPNS
・周波数特性が良い。
・誘電正接が小さい。
・誘電吸収が少ない。
■
FEATURES
・
Excellent frequency characteristics.
・
Low dissipation factor.
・
Low dielectric absorption.
■寸法図
/DIAGRAM OF DIMENSIONS
■性 能
/PERFORMANCE SPECIFICATIONS
・使用温度範囲/
Temperature range
−40℃〜+85℃
(+
125℃
)
・誘電正接/
Dissipation factor
0.1%
Max (at
20℃, 1
kHz)
・絶縁抵抗/
Insulation resistance
30,000MΩ
Min(C≦0.
33μ
F at
20℃)
10
,
000Ω
F Min(C>0.
33μ
F at
20℃)
・許容差/
Capacitance tolerance
±5%
(J)
・耐電圧/
Withstand voltage
WV×250% (1〜5
sec)
■
APPLICATION
・
General Purpose, TV, SW Power Supplise
■用 途
・一般回路、TV、SW電源。
■寸 法
/DIMENSIONS
静電容量
記号
μ
F
2
A (
100
VDC)
W H T Fφd
Type
2
D (
200
VDC)
W H T Fφd
Type
2
G (
400
VDC)
W H T Fφd
Type
2
J (
630
VDC)
W H T Fφd
Type
301
331
391
471
561
681
821
102
122
152
182
222
272
332
392
472
562
682
822
103
123
153
183
223
273
333
393
473
563
683
823
104
124
154
184
224
274
334
394
474
0
.
0003
0
.
00033
0
.
00039
0
.
00047
0
.
00056
0
.
00068
0
.
00082
0
.
001
0
.
0012
0
.
0015
0
.
0018
0
.
0022
0
.
0027
0
.
0033
0
.
0039
0
.
0047
0
.
0056
0
.
0068
0
.
0082
0
.
01
0
.
012
0
.
015
0
.
018
0
.
022
0
.
027
0
.
033
0
.
39
0
.
047
0
.
056
0
.
068
0
.
082
0
.
1
0
.
12
0
.
15
0
.
18
0
.
22
0
.
27
0
.
33
0
.
39
0
.
47
10
.
5
11
.
0
10
.
0
10
.
0
13
.
5
16
.
5
20
.
5
25
.
5
9
.
0
9
.
5
9
.
0
9
.
5
10
.
0
10
.
5
11
.
0
11
.
5
12
.
0
11
.
5
12
.
0
12
.
5
13
.
0
13
.
5
14
.
5
15
.
5
16
.
0
15
.
0
16
.
0
16
.
5
6
.
0
6.5
7
.
0
6
.
0
6.5
7
.
0
6
.
5
7
.
0
7
.
5
8
.
0
7
.
0
7
.
5
8
.
5
9
.
0
8
.
5
9
.
0
10
.
0
5.0
7.5
10
.
0
15
.
0
20
.
0
0
.
6
0
.
8
FD
FL
13.5
18.5
23.5
10.0
9.5
10.0
9
.
5
10
.
0
10
.
5
11
.
0
11
.
5
11
.
0
12
.
5
13
.
0
13
.
5
14
.
0
14
.
5
15
.
0
15
.
5
16
.
0
17
.
0
18
.
0
18
.
5
19
.
5
6
.
0
6
.
5
7
.
0
7
.
5
6
.
0
6
.
5
7
.
0
8
.
0
6
.
5
7
.
0
7
.
5
8
.
5
9
.
5
10
.
0
11
.
0
10
.
0
15
.
0
20
.
0
0
.
7
0
.
8
FD
FL
FD
13.5
18
.
5
23
.
5
10
.
0
10
.
0
10
.
5
11
.
0
11
.
5
12
.
0
12
.
5
13
.
0
13
.
5
14
.
0
15
.
0
15
.
5
15
.
5
16
.
0
17
.
0
18
.
0
19
.
5
20
.
5
22
.
0
6
.
0
6
.
5
7
.
0
7
.
5
6
.
0
6.5
7
.
0
7
.
5
8
.
0
8
.
5
9
.
5
10
.
5
8
.
5
9
.
0
10
.
0
11
.
0
12
.
5
13
.
5
15
.
0
10
.
0
15
.
0
20
.
0
0
.
7
0
.
8
FD
FL
FD
13.5
18
.
5
23
.
5
9
.
5
10
.
0
9
.
5
10
.
0
9
.
5
10
.
0
10
.
5
11
.
0
12
.
0
11
.
5
13
.
0
13.5
14
.
0
15
.
0
15
.
5
14
.
5
15
.
0
16
.
0
16
.
5
17
.
5
18
.
5
19
.
5
20
.
5
22
.
0
23
.
5
25
.
0
6
.
0
6
.
5
7
.
0
7
.
5
8
.
0
6
.
0
6
.
5
7
.
0
8
.
0
8
.
5
7
.
5
8
.
0
8
.
5
9
.
5
10
.
5
11
.
0
12
.
5
13
.
5
15
.
0
16
.
5
18
.
0
10
.
0
15
.
0
20
.
0
0
.
7
0
.
8
FD
FL
FD
FL
FD
(mm)
■品番ご指定法/
HOW TO SPECIFY ITEM NUMBER
2
A QMPNS □□
301
H E
環境対策品記号/
Environment Friendly Symbol
静電容量許容差/
Capacitance Tolerance
静電容量記号/
Capacitance Symbol
形状記号/
Style Symbol
シリーズ名/
Series Name
定格電圧/
Rated Voltage
Page 84
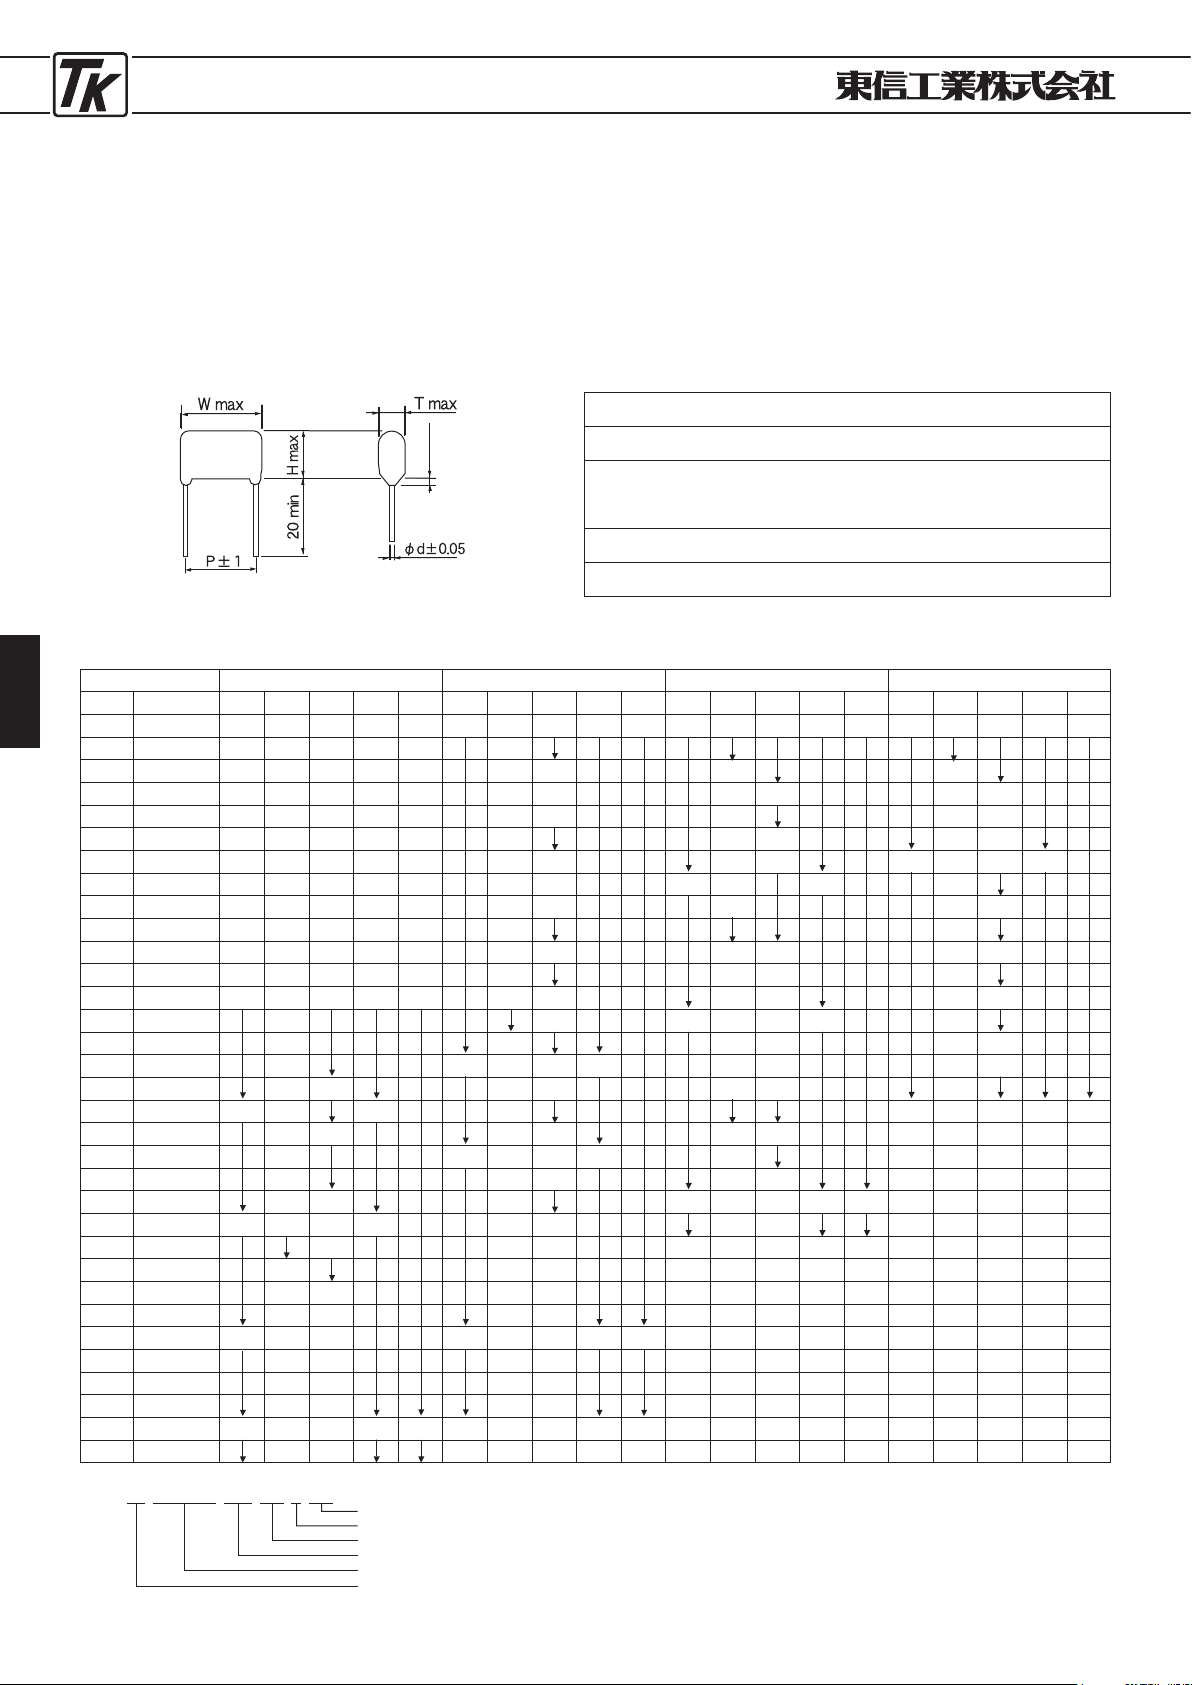
PLASTIC FILM CAPACITORS
84
●
メタライズド・ポリエステル・フィルム・コンデンサ
●
METALLIZED POLYESTER FILM CAPACITORS
■特 徴
MMSSDCシリーズ
TYPEMMSSDC
・小形軽量である。
・自己回復作用があるため信頼性に優れています。
・外装は難燃性エポキシ粉体樹脂により、一定の厚さ
に被覆されています。
■
FEATURES
・
This type is small size and light weight.
・
High reliability is assured due to self-healing performance.
・
Enclosure is covered with Flame-Retardant epoxy resin to a
cirtain thickness by dipping into powdered resin.
■寸法図
/DIAGRAM OF DIMENSIONS
■性 能
/PERFORMANCE SPECIFICATIONS
■寸法表
/DIMENSIONS
・使用温度範囲/
Temperature range :
−40℃〜+85℃
(+
105℃)
・誘電正接/
Dissipation factor
≦1.0%
(at
20℃, 1
kHz)
・絶縁抵抗/
Insulation resistance
9,000MΩ
Min (C≦0.
33μ
F at
20℃)
3
,
000Ω
F Min (C
>0.33μ
F at
20℃)
・耐電圧/
Withstand voltage : WV
×175% (1〜5
sec)
・許容差/
Capacitance tolerance :
±5%
(J) ,
±10%
(K)
μ
F
100
VDC(2A
)
W H T P
φ
d
250
VDC(2E
)
W H T P
φ
d
400
VDC(2G
)
W H T P
φ
d
630
VDC(2J
)
W H T P
φ
d
0.01
0
.
012
0
.
015
0.018
0
.
022
0
.
027
0.033
0
.
039
0.047
0
.
056
0
.
068
0.082
0
.
1
0.12
0
.
15
0
.
18
0.22
0
.
27
0.33
0
.
39
0
.
47
0.56
0
.
68
0
.
82
1.0
1
.
2
1.5
1
.
8
2
.
2
2.7
3
.
3
3.9
4
.
7
10
.
5
13
.
0
18
.
0
18
.
5
24
.
0
9
.
0
8.0
9
.
0
9
.
5
10.0
9
.
5
10.0
11
.
5
12
.
0
11.5
11
.
0
13
.
0
13
.
5
14.0
15
.
0
15
.
5
16.5
17
.
5
16.0
17
.
0
5
.
0
5
.
5
6
.
0
7
.
0
5
.
0
5
.
5
6
.
0
7.0
7
.
5
8
.
0
9.0
10
.
0
9.0
10
.
0
7
.
5
10
.
0
15
.
0
20
.
0
0
.
6
0
.
8
10
.
5
13
.
0
18
.
0
23
.
0
8
.
5
9
.
0
9
.
5
8.5
9
.
0
9
.
5
9.0
9
.
5
8.5
9
.
0
9
.
5
10.0
9
.
5
10
.
0
11
.
0
11.5
12
.
0
12.5
11
.
0
11
.
5
12.0
13
.
5
14
.
0
14.5
15
.
5
16.5
18
.
0
19
.
0
20.0
21
.
0
5
.
0
5
.
5
5.0
5
.
5
5
.
0
5
.
5
5.0
6
.
0
5
.
0
6.0
5
.
5
6.0
6
.
5
5
.
0
6
.
0
7
.
0
6
.
5
7.5
8
.
0
9.5
7
.
5
9
.
0
10.0
10
.
5
7
.
5
10
.
0
15
.
0
20
.
0
0
.
6
0
.
8
10
.
5
13
.
0
18
.
0
23
.
5
9
.
0
9
.
5
8.5
9
.
0
9
.
5
10.0
9
.
5
10.0
10
.
5
11.5
12
.
0
11.0
11
.
5
12
.
0
13.0
14
.
0
15
.
5
16
.
5
16.0
16
.
5
5
.
5
5
.
0
5
.
5
6.0
6
.
5
7.0
8
.
0
5.0
5
.
5
6
.
0
7.5
8
.
5
10
.
0
8.0
9
.
0
7
.
5
10
.
0
15
.
0
20
.
0
0
.
6
0
.
8
13
.
0
18
.
0
9
.
0
9
.
5
10.0
10
.
5
11
.
0
10.0
10
.
5
11.0
11
.
5
12
.
0
12.5
13
.
0
13.5
14
.
5
15
.
5
16.5
5
.
5
6
.
0
6
.
5
7
.
0
5.0
5.5
6
.
5
8
.
0
9
.
0
10
.
5
10
.
0
15
.
0
0
.
6
静電容量
(mm)
記号
103
123
153
183
223
273
333
393
473
563
683
823
104
124
154
184
224
274
334
394
474
564
684
824
105
125
155
185
225
275
335
395
475
■品番ご指定法/
HOW TO SPECIFY ITEM NUMBER
2
E MMSSDC □□
104
K □E
付記コード/
Additional code
静電容量許容差/
Capacitance Tolerance
静電容量記号/
Capacitance Symbol
形状記号/
Style Symbol
シリーズ名/
Series Name
定格電圧/
Rated Voltage
2
max
Page 85
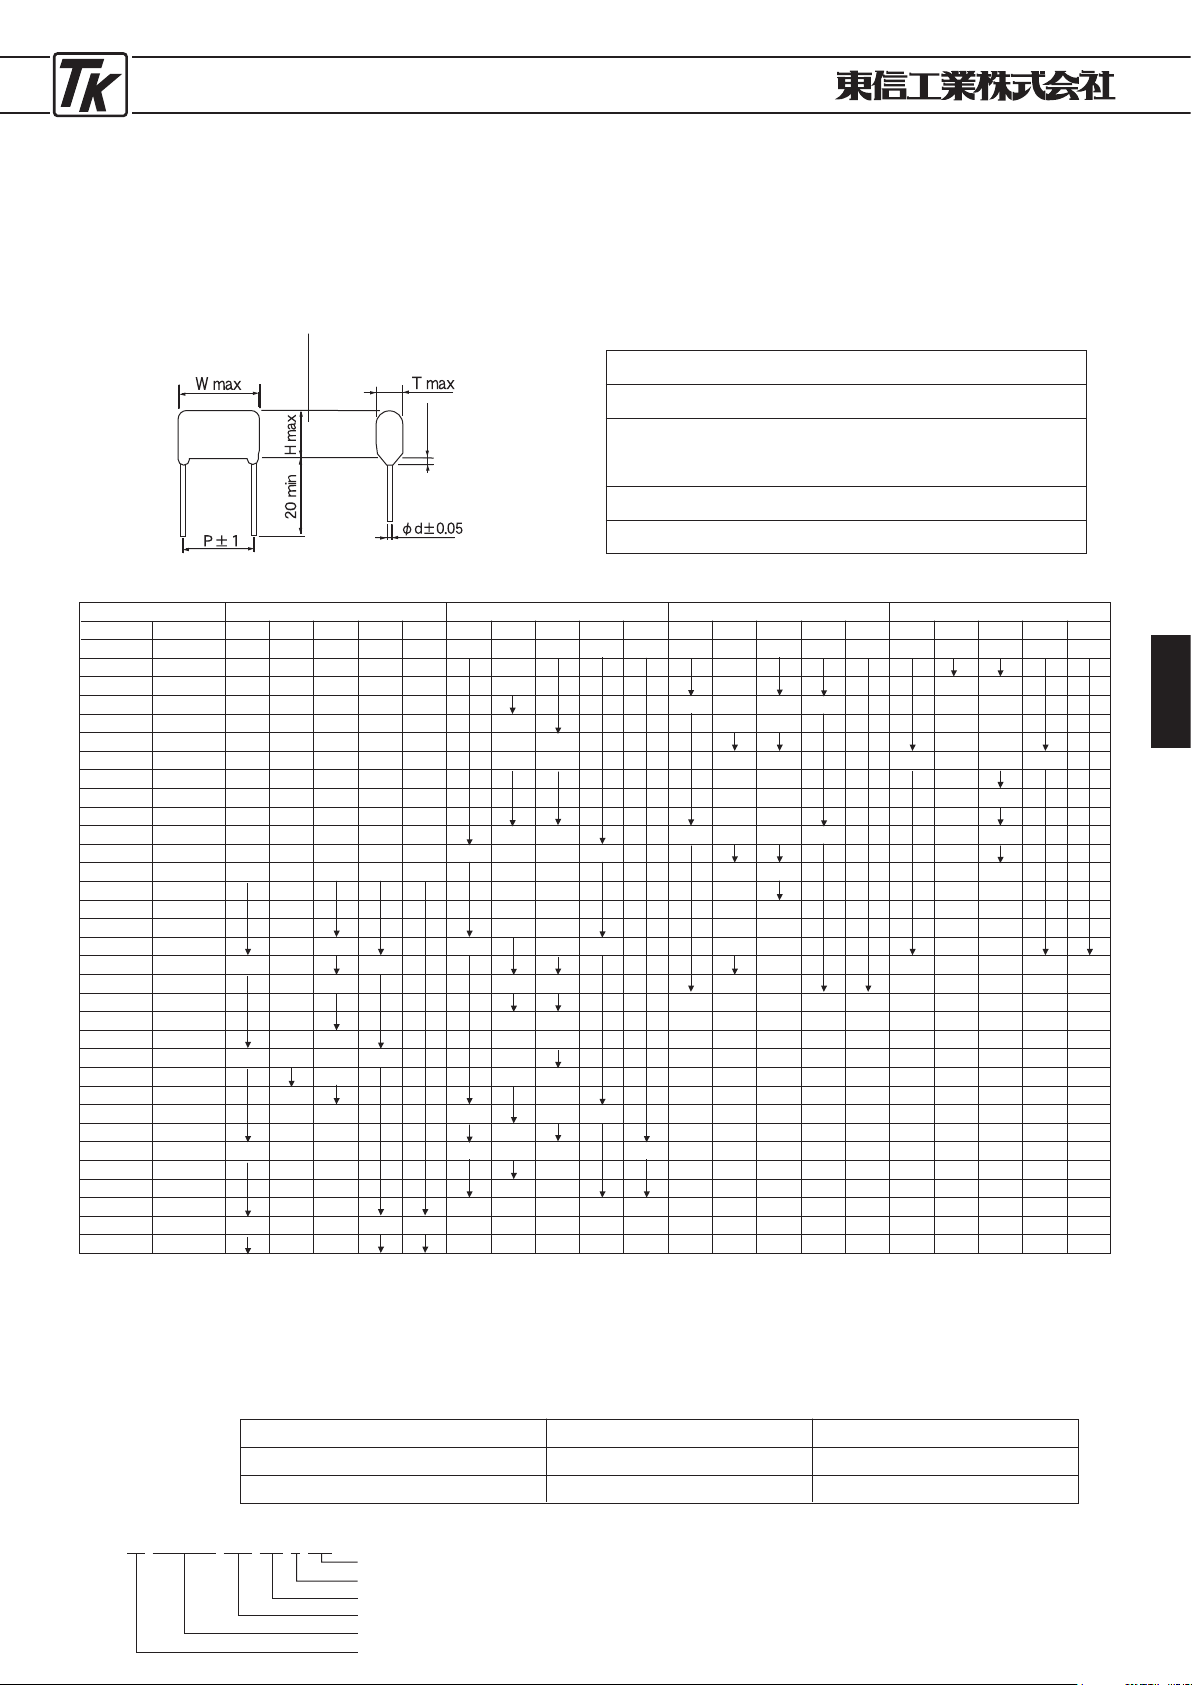
PLASTIC FILM CAPACITORS
85
●
メタライズド・ポリエステル・フィルム・コンデンサ
●
METALLIZED POLYESTER FILM CAPACITORS
■特 徴
MMSSACシリーズ 交流電源雑防用
TYPEMMSSAC
AC power source noise protection
・交流電源の雑音防止用として最適です。
・自己回復作用があるため信頼性に優れています。
■
FEATURES
・
Suitable for preventing noise of AC power source.
・
High reliability is assured due to self-healing performance.
■寸法図
/DIAGRAM OF DIMENSIONS
■性 能
/PERFORMANCE SPECIFICATIONS
■寸法表
/DIMENSIONS
・
使用温度範囲/
Temperature range :
−40℃〜+85℃(+105℃
)
・誘電正接/
Dissipation factor
1.0%
Max (at
20℃, 1
kHz)
・絶縁抵抗/
Insulation rResistance
2,000MΩ
Min (C≦0.
47μ
F at
20℃)
1
,
000Ω
F Min (C
>0.47μ
F at
20℃)
・耐電圧/
Withstand voltage : WV
×230% (1
min)
・許容差/
Capacitance tolerance :
±5%
(J) ,
±10%
(K)
63
VAC(1J
) 125
VAC(2B
) 200
VAC(2D
) 250
VAC(2E
)
W
H
T
P
φ
d W
H
T
P
φ
d W
H
T
P
φ
d W
H
T
P
φ
d
0.01
0
.
012
0
.
015
0
.
018
0
.
022
0
.
027
0
.
033
0
.
039
0
.
047
0
.
056
0
.
068
0
.
082
0
.
1
0
.
12
0
.
15
0
.
18
0
.
22
0
.
27
0
.
33
0
.
39
0
.
47
0
.
56
0
.
68
0
.
82
1
.
0
1
.
2
1
.
5
1
.
8
2
.
2
2
.
7
3
.
3
3
.
9
4
.
7
10
.
5
13
.
0
18
.
0
18
.
5
24.0
9
.
0
8
.
0
9
.
0
9
.
5
10
.
0
9
.
5
10
.
0
11
.
5
12
.
0
11
.
5
11
.
0
13
.
0
13
.
5
14
.
0
15
.
0
15
.
5
16
.
5
17
.
5
16
.
0
17
.
0
5
.
0
5
.
5
6
.
0
7
.
0
5
.
0
5
.
5
6
.
0
7
.
0
7
.
5
8
.
0
9
.
0
10
.
0
9
.
0
10
.
0
7
.
5
10
.
0
15
.
0
20
.
0
0
.
6
0
.
8
10.5
13
.
0
18
.
0
23
.
5
24
.
0
8.5
9
.
0
9
.
5
9
.
0
9
.
5
9
.
0
9.5
9
.
0
9
.
5
10
.
0
10
.
5
11
.
0
12
.
0
12
.
5
13
.
0
15
.
0
15
.
5
18
.
5
19
.
5
20
.
5
5.0
5
.
5
5
.
0
5.5
5
.
0
5
.
5
6
.
0
6
.
5
7
.
0
5
.
5
6
.
0
7
.
0
7
.
5
8
.
0
10
.
0
8
.
5
9
.
0
11
.
5
12
.
5
7.5
10
.
0
15
.
0
20
.
0
0.6
0.8
10.5
13
.
0
18
.
0
8
.
5
9
.
0
9
.
5
8
.
5
9
.
0
9
.
5
10
.
0
10
.
5
11
.
0
10
.
5
11
.
0
12
.
5
13
.
5
14
.
0
14
.
5
15
.
5
5
.
0
4
.
5
5
.
0
5
.
5
6
.
0
6
.
5
7
.
0
5
.
0
5
.
5
6
.
0
6
.
5
7
.
5
9
.
0
9
.
5
7
.
5
10
.
0
15
.
0
0
.
6 13.0
18
.
0
9
.
0
9
.
5
10
.
0
10
.
5
11
.
0
10
.
0
10
.
5
11
.
0
11
.
5
12
.
0
12
.
5
13
.
0
13
.
5
14
.
5
15
.
5
17
.
0
5
.
0
5
.
5
6
.
0
6
.
5
7
.
0
5
.
0
6
.
0
6
.
5
7
.
5
8
.
0
9
.
0
9
.
5
10
.
5
10
.
0
15
.
0
0
.
6
注)アクロス・ザ・ラインコンデンサとして使用する場合は、
下記条件1項目以上を満足するようにして下さい。
1
.
コンデンサと並列にバリスタ電圧が表1以下のバリスタが
入っていること。
2
.
コンデンサの両端に表1以上のパルス電圧が印加されない
こと。
When using these capacitors a across-the-line capacitor it shall
be required to follow either item
1
. or 2. condition.
1
. Capacitor shall be connected with varistor in paralleled
(Specified varistor voltage in table
1
.)
2. Capacitor shall not be exceeded voltage specified in table
1
.
while using these capacitors.
コンデンサ定格電圧
/Cap.Rated voltage
バリスタ電圧
/Varistor voltage
パルス電圧
/Pulse voltage
A C
1 2 5
V
A C
2 5 0
V
2 5 0
V
4 7 0
V
2 5 0
V O- P
6 3 0
V O- P
表 1
.
Table 1.
静電容量
記 号
μ
F
■品番ご指定法/
HOW TO SPECIFY ITEM NUMBER
2
B MMSSAC □□
473
K □E
付記コード/
Additional code
静電容量許容差/
Capacitance Tolerance
静電容量記号/
Capacitance Symbol
形状記号/
Style Symbol
シリーズ名/
Series Name
定格電圧/
Rated Voltage
(mm)
103
123
153
183
223
273
333
393
473
563
683
823
104
124
154
184
224
274
334
394
474
564
684
824
105
125
155
185
225
275
335
395
475
2
max
Page 86
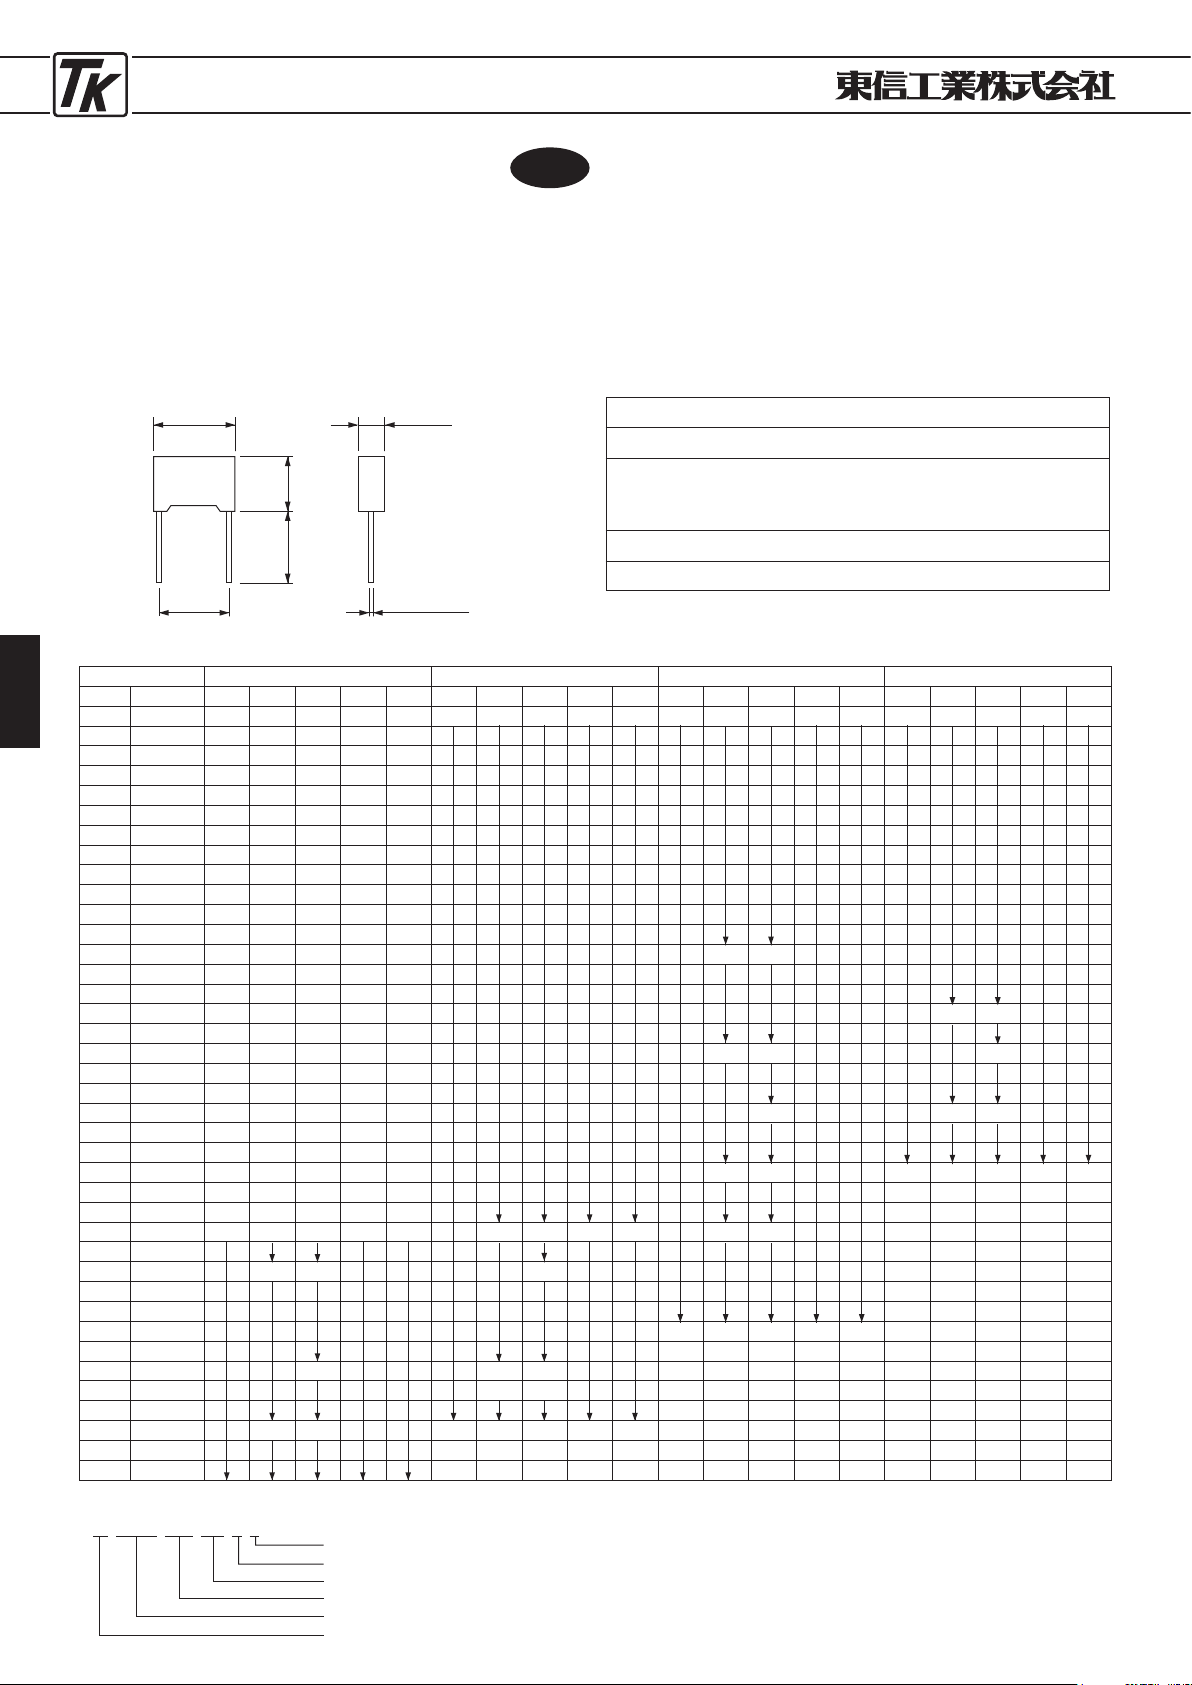
PLASTIC FILM CAPACITORS
86
●メタライズド・ポリエステル・フィルム・コンデンサ
●
METALLIZED POLYESTER FILM CAPACITORS
MMJXシリーズ
TYPEMMJX
■特 徴
・極めて小型化されています。
・自己回復作用があるため、信頼性に優れています。
・樹脂ケース入りでエポキシ樹脂で充填されていますので、
絶縁性に優れています。
■
FEATURES
・Extremely miniaturized.
・
High reliability is assured due to self-healing performance.
・
The resin case is put and it is filled it by epoxy resin.
Excellent in insulation.
■寸法図
/DIAGRAM OF DIMENSIONS
■性 能
/PERFORMANCE SPECIFICATIONS
■寸法表
/DIMENSIONS
・使用温度範囲
/Temperature range : -
40℃~+85℃ (105℃
)
・誘電正接
/Dissipation factor :
1.0
% Max.(at
25℃, 1
kHz)
・絶縁抵抗
/Insulation resistance
3,000MΩ
Min. (C≦0.
33μ
F at
25℃
)
1,000Ω・
F Min. (C
>0.33μ
F at
25℃
)
・耐電圧
/Withstand voltage : WV
×175
% (1~5sec)
・静電容量許容差
/Capacitance tolerance :
±5
%(J)
±10
%(K)
(mm)
静電容量 63
VDC(1J)
100
VDC(2A)
250
VDC(2E)
400
VDC(2G)
記号 μ
F
W H T P φdW H T P φdW H T P φdW H T P φ
d
511 0.00051 7.2 6.5 2.5 5.0 0.6 7.2 6.5 2.5 5.0 0.6 7.2 6.5 2.5 5.0 0.6
681 0.00068
821 0.00082
102 0.001
122 0.0015
152 0.0015
182 0.0018
222 0.0022
272 0.0027
332 0.0033
392 0.0039
472 0.0047
562 0.0056 10.0 5.0
682 0.0068
822 0.0082
103 0.01 7.5 3.5
123 0.012
153 0.015 7.5 3.5 4.5
223 0.022
273 0.027
333 0.033 4.5 10.0 5.0
393 0.039
473 0.047
563 0.056 10.0 5.0
683 0.068
823 0.082
104 0.1 7.2 6.5 2.5 5.0 0.6 7.5 3.5 5.0 0.6 11.0 6.0
124 0.12
154 0.15 7.5 3.5 4.5
184 0.18
224 0.22
274 0.27
334 0.33
394 0.39 4.5 10.0 5.0
474 0.47 11.0 6.0
564 0.56
684 0.68 11.0 6.0
824 0.82
105 1.0
■品番ご指定法/
HOW TO SPECIFY ITEM NUMBER
1
J MMJX □□
104
K E
付記コード/
Additional code
静電容量許容差/
Capacitance Tolerance
静電容量記号/
Capacitance Symbol
形状記号/
Style Symbol
シリーズ名/
Series Name
定格電圧/
Rated Voltage
New
P±0.
5
Wmax. Tmax.
φd±0.05
15±1
.
0
Hmax.
Page 87
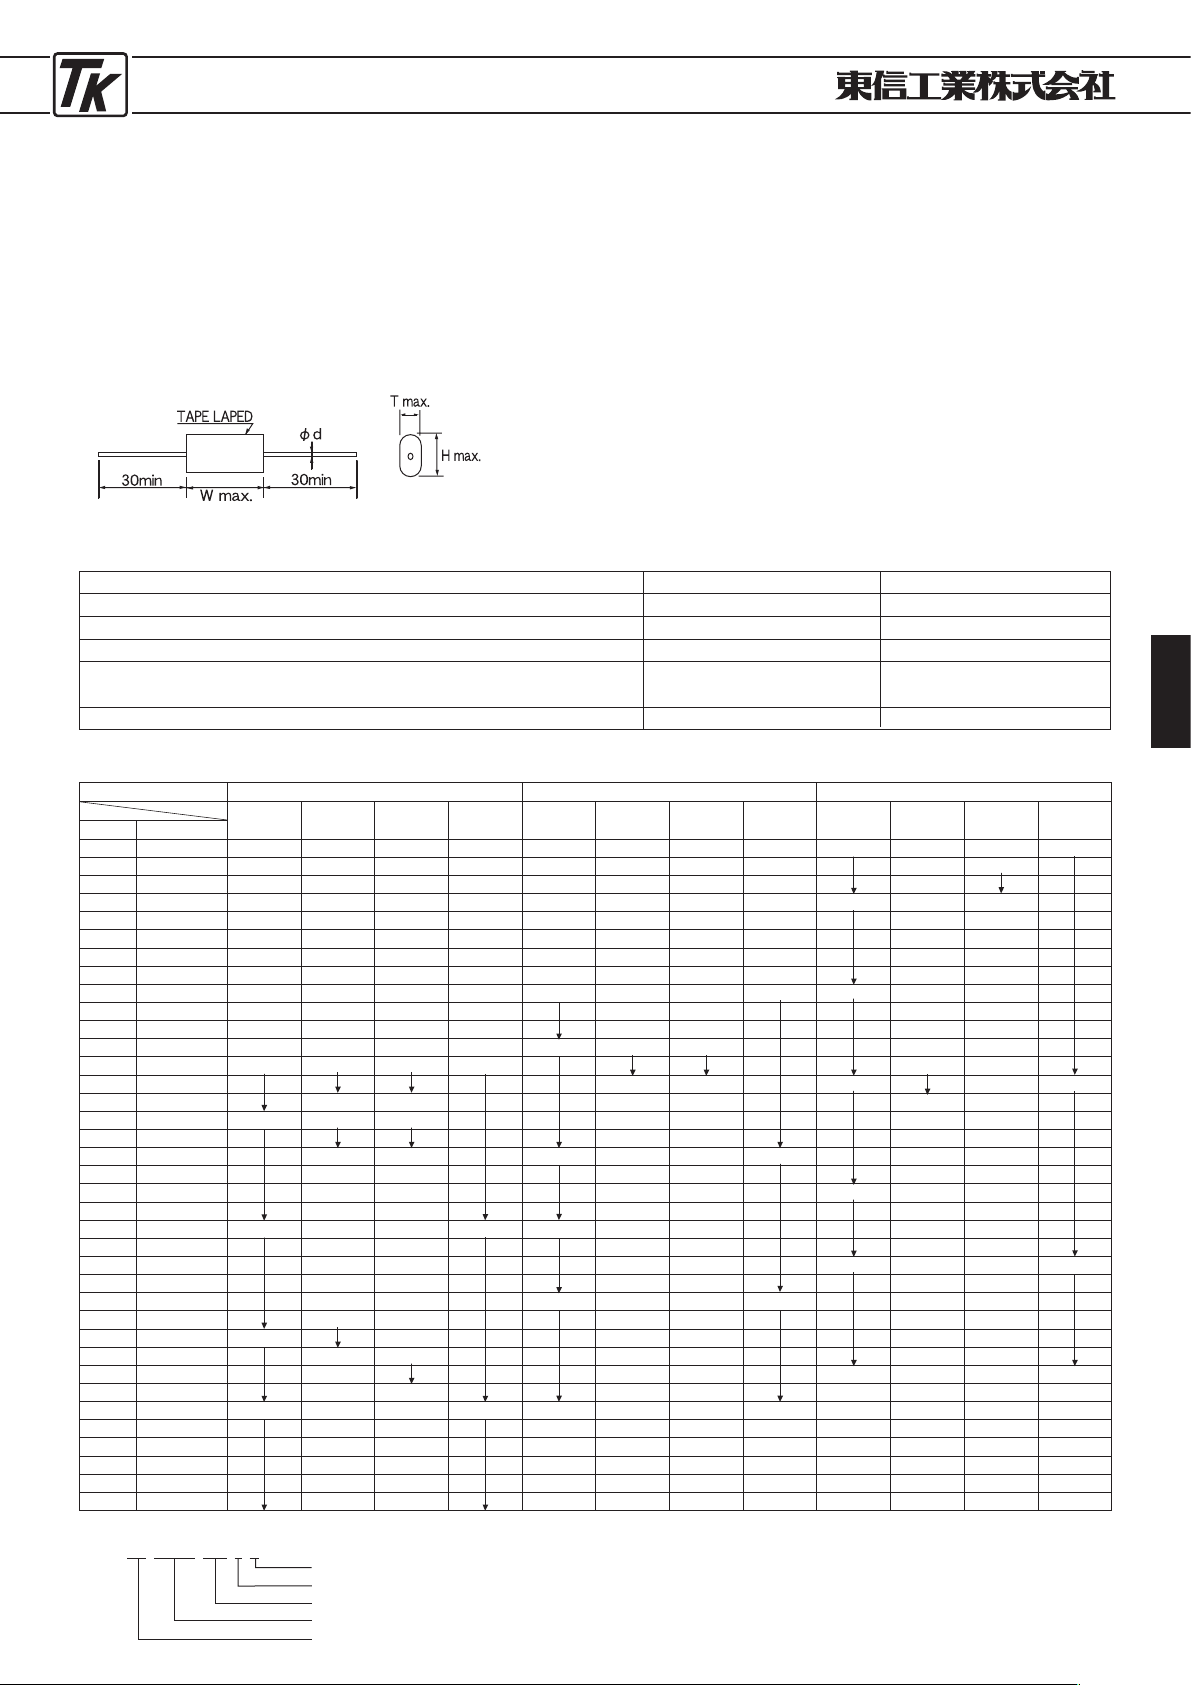
PLASTIC FILM CAPACITORS
87
●
メタライズド・ポリエステル・フィルム・コンデンサ
●
METALLIZED POLYESTER FILM CAPACITORS
■特 徴
TMDCシリーズ
TYPETMDC
・自己回復作用があるため高信頼性である。
・外装は、ポリエステル粘着テープで巻かれ、端面は
エポキシ樹脂を注入してあるので、耐湿性がよい。
■
FEATURES
・
High reliability is assured due to self-healing performance.
・
Enclosure is lapped with polyester adherent tape and the ends
are filled with epoxy resin, therefore this type presents show
excellent moisture proof.
■寸法図
/DIAGRAM OF DIMENSIONS
■性 能
/PERFORMANCE SPECIFICATIONS
使 用 温 度 範 囲/
Operating temperature range
静電容量許容差/
Capacitance tolerance
誘 電 正 接/
Dissipation factor
絶 縁 抵 抗/
Insulation resistance
耐 電 圧/
Withstand voltage
項 目/
ITEMS
性能/
Characteristics
試験条件/
Test condition
−25℃
to
+85℃
±5%
(J)
±10%
(K)
1.0%
Max.
9000MΩ
Min C≦0.
33μ
F
3000Ω
F Min C>0.
33μ
F
No damage
──
──
20℃ 1
kHz
20℃ 100
V.DC
W.V
×1.75(1〜5
sec
)
テープ ラップ タイプ
Tape wrap type
■寸法表
/DIMENSIONS
■品番ご指定法/
HOW TO SPECIFY ITEM NUMBER
2
G TMDC
563
J E
環境対策品記号/
Environment Friendly Symbol
静電容量許容差/
Capacitance Tolerance
静電容量記号/
Capacitance Symbol
シリーズ名/
Series Name
定格電圧/
Rated Voltage
定格電圧 250
VDC (2E)
400
VDC (2G)
630
VDC (2J)
寸法
(mm)
静電容量
W H T
φ
d W H T
φ
d W H T
φ
d
記 号 μF
103 0.01 16 8.0 4.5 0.6
123 0.012 8.5 5.0
153 0.015 10.0
183 0.018 18 10.5 5.5
223 0.022 11.0 6.0
273 0.027 10.5 5.5
333 0.033 11.0 6.0
393 0.039 11.5 7.0
473 0.047 18 10.0 5.0 0.6 23 10.0 5.0
563 0.056 10.5 6.0 10.5 5.5
683 0.068 11.5 6.5 11.0 6.0
823 0.082 23 10.0 5.0 11.5 6.5
104 0.1 18 10.0 5.0 0.6 12.5 7.5
124 0.12 10.5 5.5 29 5.5 0.8
154 0.15 10.5 5.5 11.0 6.0 13.5 6.5
184 0.18 23 10.0 5.0 12.0 7.0 14.5 7.5
224 0.22 12.5 8.0 15.0 8.5
274 0.27 10.5 5.5 29 13.0 6.5 0.8 16.5 10.0
334 0.33 11.0 6.0 14.0 7.5 17.5 11.5
394 0.39 11.5 7.0 15.0 8.5 34 19.0 9.0
474 0.47 12.5 7.5 16.0 9.5 20.5 10.5
564 0.56 29 13.0 6.0 0.8 34 18.0 7.5 21.5 11.5
684 0.68 13.5 7.0 19.0 9.0 23.0 13.0
824 0.82 14.5 8.0 20.0 10.0 44 21.5 11.5 1.0
105 1.0 15.5 9.0 21.5 11.5 23.0 13.0
125 1.2 16.5 10.0 44 20.0 10.0 1.0 26.5 14.0
155 1.5 18.0 12.0 21.5 11.5 29.0 15.5
185 1.8 34 11.5 23.0 13.0 30.5 17.5
225 2.2 19.5 13.0 24.5 15.0 33.0 20.0
275 2.7 23.0 26.5 17.0
335 3.3 25.0 15.0 29.0 19.5
395 3.9 44 22.5 13.0 1.0
475 4.7 24.0 14.5
565 5.6 27.0 16.5
685 6.8 28.0 18.5
825 8.2 32.0 19.0
106 10 34.0 21.0
Page 88
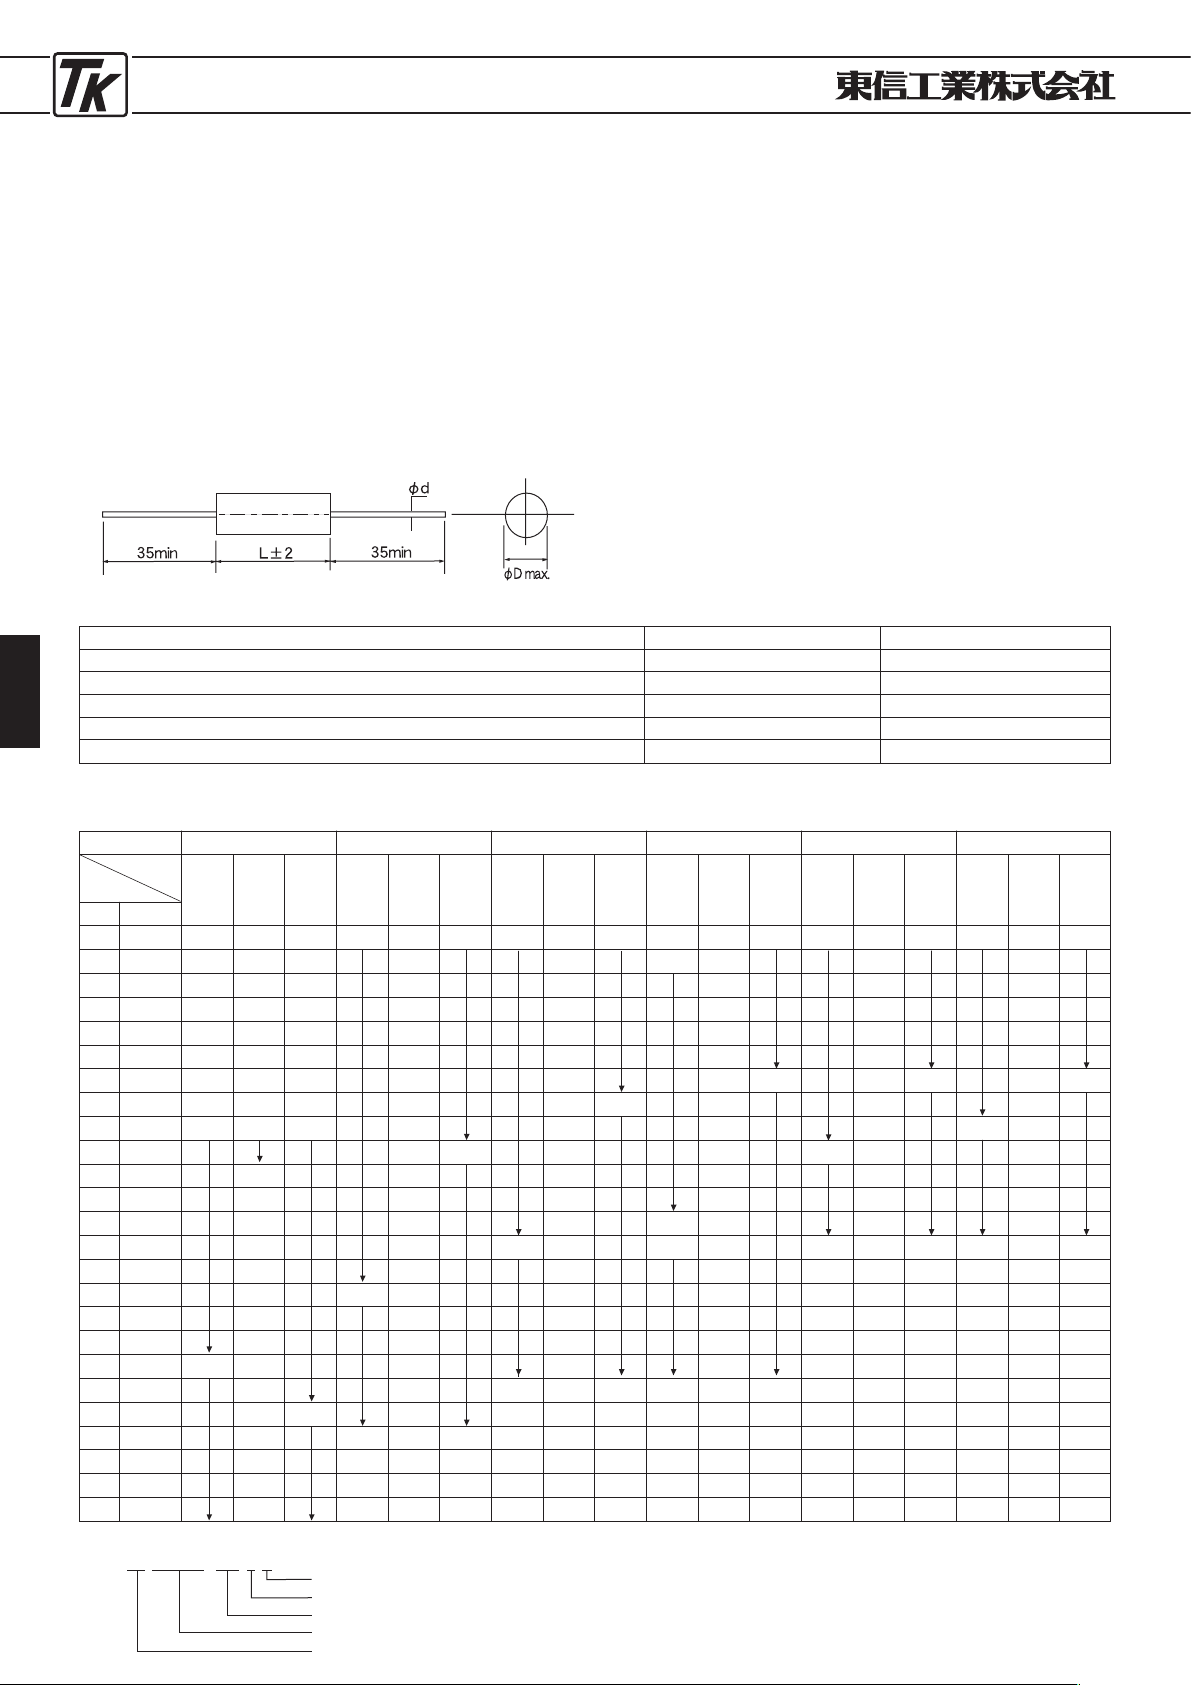
PLASTIC FILM CAPACITORS
88
●プラスチック・フィルム・コンデンサ ●
PLASTIC FILM CAPACITORS
■特 徴
TMHDCシリーズ
高圧回路用
TYPETMHDC
For high voltage circuit
・プラスチックフィルムの優れた特性を有し高圧電源
回路、フォーカス回路等の高電圧小電流回路用とし
て設計したものです。
・内部は特殊樹脂で含浸し高電圧用にしてあります。
・外装は特殊テープの上にポリエステル粘着テープを
巻いた二重構造、端面はエポキシ樹脂を注入してあ
るので耐湿性がよい。
■
FEATURES
・
These capacitoes are designed for use in high voltage small
current circuit such as high voltage supply circuit and focus
circuit by utilizing excellent characteristics of plastic film.
・
They are designed for use at high voltage by impregnating
their interior with special resin.
・
The enclosure shows excellent resistance to moisture because
it has such double layer construction that polyster adhesive
tape is wound on basic layer of special tape and both end
faces are filled with epoxy resin.
■寸法図
/DIAGRAM OF DIMENSIONS
■性 能
/PERFORMANCE SPECIFICATIONS
使 用 温 度 範 囲/
Operating temperature range
静電容量許容差/
Capacitance tolerance
誘 電 正 接/
Dissipation factor
絶 縁 抵 抗/
Insulation resistance
耐 電 圧/
Withstand voltage
項 目/
ITEMS
性能/
Characteristics
試験条件/
Test condition
−25℃
to
+85℃
±5%
(J)
±10%
(K)
1.0%
Max.
9000MΩ
Min
No damage
──
──
20℃ 1
kHz
20℃ 100
V.DC
W.V
×1.75(1〜5
sec
)
■寸法表
/DIMENSIONS
定格電圧 2500
VDC (3E)
静電容量
記号
102
122
152
182
222
272
332
392
472
562
682
822
103
123
153
183
223
273
333
393
473
563
683
823
104
μF
0
.
001
0
.
0012
0
.
0015
0
.
0018
0
.
0022
0
.
0027
0
.
0033
0
.
0039
0
.
0047
0
.
0056
0
.
0068
0
.
0082
0
.
01
0
.
012
0
.
015
0
.
018
0
.
022
0
.
027
0
.
033
0
.
039
0
.
047
0
.
056
0
.
068
0
.
082
0
.
1
33
40
L
9
.
5
10
.
0
10
.
5
11
.
0
12
.
0
12
.
5
13
.
5
14
.
0
16
.
0
13
.
5
15
.
0
15
.
5
16
.
5
18
.
0
20
.
0
21
.
0
φD
0
.
8
1
.
0
φd
4000
VDC (3G)
33
40
L
9
.
5
9
.
5
10
.
0
11
.
0
11
.
5
12
.
5
13
.
0
14
.
0
14
.
5
16
.
0
17
.
0
18
.
0
19
.
5
21
.
5
23
.
5
19
.
0
20
.
5
22
.
5
24
.
0
26
.
0
28
.
0
φD
0
.
8
1
.
0
φd
6300
VDC (3J)
37
50
L
10
.
0
10
.
0
11
.
0
11
.
5
12
.
5
13
.
5
14
.
5
15
.
5
16
.
5
17
.
5
19
.
0
20
.
5
21
.
5
18
.
0
19
.
5
21
.
5
22
.
5
25
.
0
27
.
5
φD
0
.
8
1
.
0
φd
8000
VDC (3K)
37
40
50
60
L
10
.
0
11
.
0
12
.
0
13
.
0
13
.
5
14
.
5
15
.
5
16
.
5
18
.
0
19
.
0
21
.
5
22
.
5
19
.
0
21
.
5
23
.
5
25
.
5
27
.
0
30
.
5
33
.
0
φD
0
.
8
1
.
0
φd
10000
VDC (4A)
40
60
L
10
.
5
10
.
5
12
.
0
12
.
5
13
.
5
15
.
0
16
.
5
17
.
5
19
.
5
16
.
5
17
.
5
18
.
5
19
.
5
φD
0
.
8
1
.
0
φd
12500
VDC (4B)
50
60
L
11
.
0
11
.
5
12
.
5
13
.
0
14
.
5
15
.
5
16
.
5
17
.
5
15
.
0
16
.
5
17
.
5
18
.
5
19
.
5
φD
0
.
8
1
.
0
φd
寸法
(mm)
■品番ご指定法/
HOW TO SPECIFY ITEM NUMBER
3
K TMHDC
563
J E
環境対策品記号/
Environment Friendly Symbol
静電容量許容差/
Capacitance Tolerance
静電容量記号/
Capacitance Symbol
シリーズ名/
Series Name
定格電圧/
Rated Voltage
Page 89
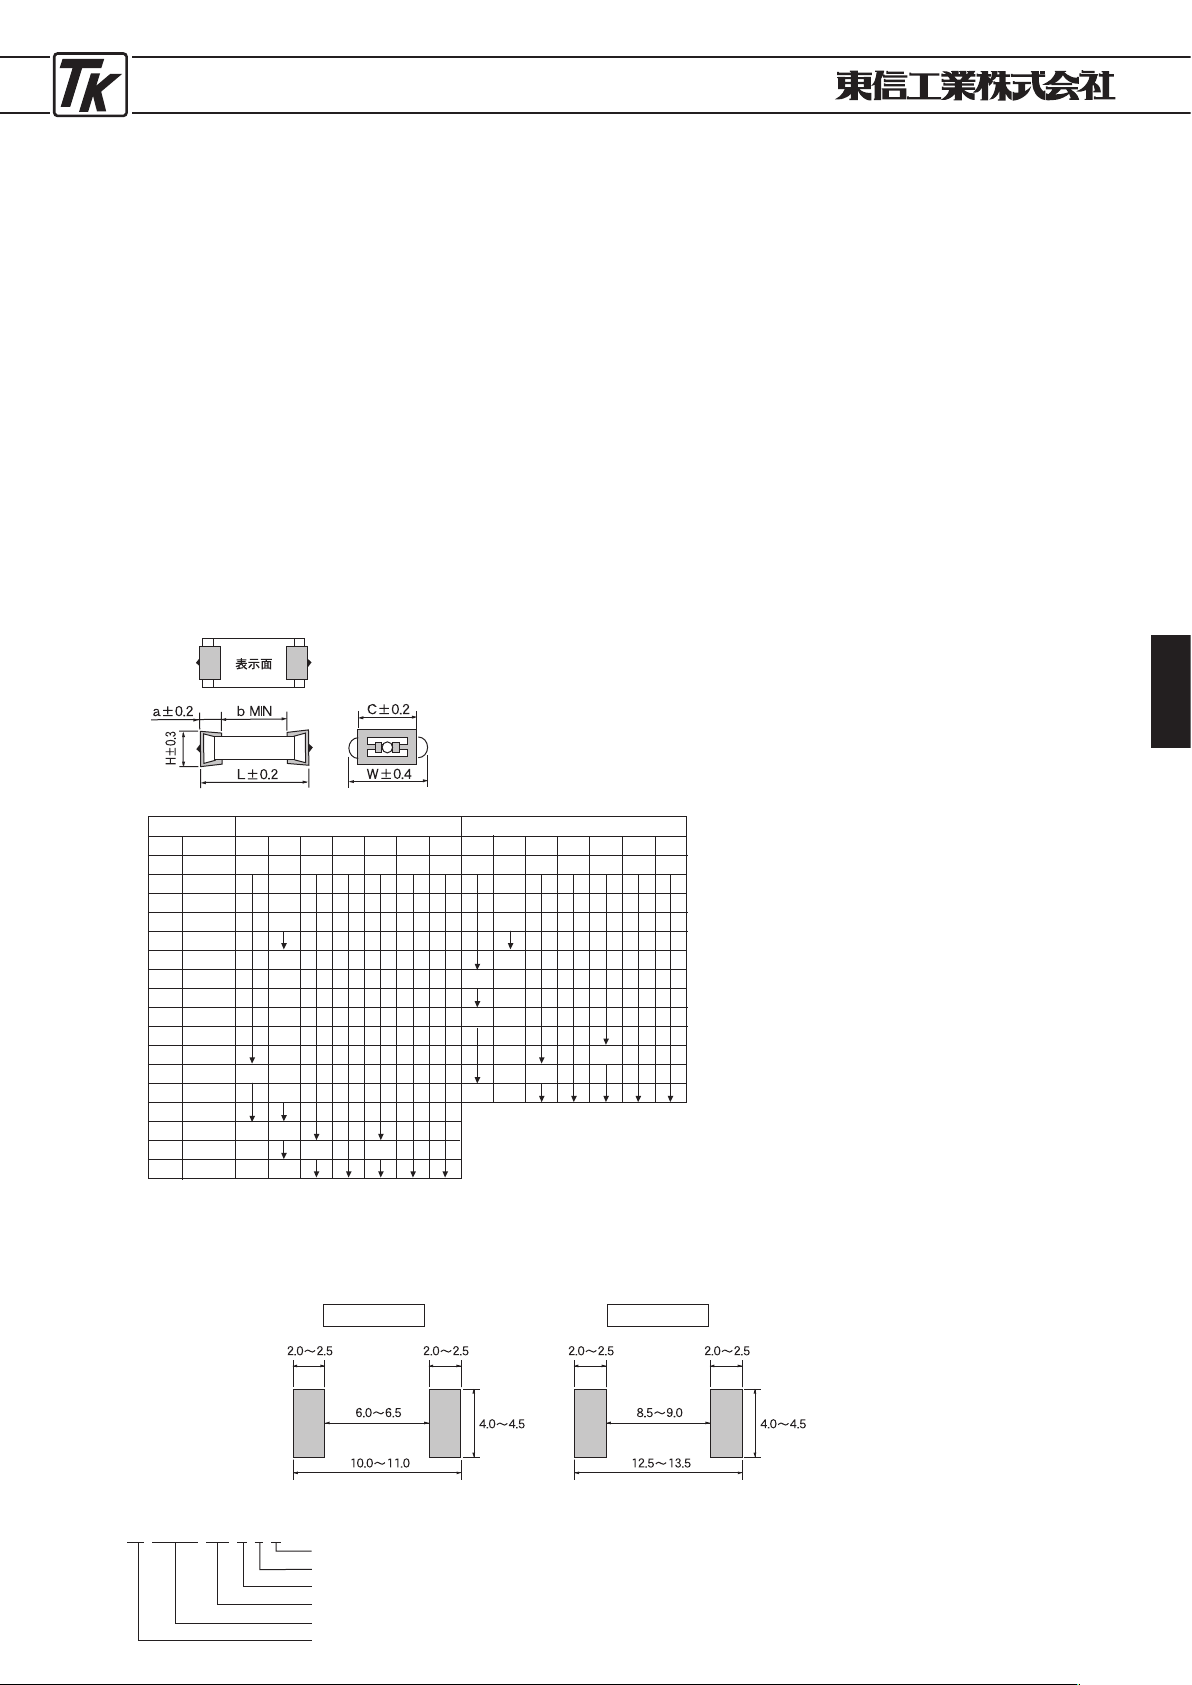
PLASTIC FILM CAPACITORS
89
●
PPS
フィルム・チップ・コンデンサ
●
POLYPHENYLENE SULFIDE FILM CHIP CAPACITORS
■特 徴
MML-Eシリーズ
TYPEMML-E
・小形・軽量
・損失が小さく優れた周波数特性
■
FEATURES
・
Small in size.
・
Low loss excellent frequency characteristics.
■性 能
・使用温度範囲 −40℃〜+125℃
・誘電正接 0
.
15%
Max (at
20℃, 1
kHz)
・絶縁抵抗 15,000MΩ
Min (at
20℃)
・許容差 ±5%
(J),
±10%
(K)
・耐電圧 WV×1.5% (1分
)
■用 途
・液晶バックライトインバーター電源共振回路
■
PERFORMANCE SPECIFICATIONS
・
Temperature range
−40℃〜+125℃
・
Dissipation factor
0.15%
Max (at
20℃, 1
kHz)
・
Insulation resistance
15,000MΩ
Min (at
20℃)
・
Capacitance tolerance
±5%
(J),
±10%
(K)
・
Withstand voltage WV×1.5% (1 min)
■
APPLICATION
・
Resonance circuit for LCD invertor unit.
■寸法図/寸法
DIAGRAM OF DIMENSIONS/DIMENSIONS
■推奨ランド寸法
(mm)/RECOMMENDED LANDING DIMENSIONS
静電容量
記号
103
123
153
183
223
273
333
393
473
563
683
823
104
124
154
184
224
μ
F
0.010
0
.
012
0
.
015
0
.
018
0
.
022
0
.
027
0
.
033
0
.
039
0
.
047
0
.
056
0
.
068
0
.
082
0
.
1
0
.
12
0
.
15
0
.
18
0
.
22
100
V.DC/63V.AC (2A)
250
V.DC/80V.AC (2E)
H
W L a b
c
d H W L
a
b
c
2.5
3
.
0
3
.
3
3
.
0
3
.
3
5
.
4
5
.
5
5
.
4
5
.
5
5
.
7
5
.
5
5
.
7
5
.
4
5
.
6
5
.
8
5
.
9
6
.
1
6
.
5
7
.
0
7
.
9
10
.
4
1
.
2 4.8
7
.
3
4
.
3
d
0.3
2
.
5
3
.
0
3
.
3
4
.
0
5
.
4
5
.
5
5
.
4
5
.
5
5
.
7
6
.
0
6
.
2
6
.
6
7
.
0
6
.
6
6
.
9
7
.
4
7
.
9
10
.
4
1
.
2 4.8
7
.
3
4
.
3
0
.
3
L=7.9 L=10.4
(mm)
■品番ご指定法/
HOW TO SPECIFY ITEM NUMBER
2
A MML-E
224
K T E
環境対策品記号/
Environment Friendly Symbol
梱包方法/
Packing T:Taping
静電容量許容差/
Capacitance Tolerance
静電容量記号/
Capacitance Symbol
シリーズ名/
Series Name
定格電圧/
Rated Voltage
Page 90
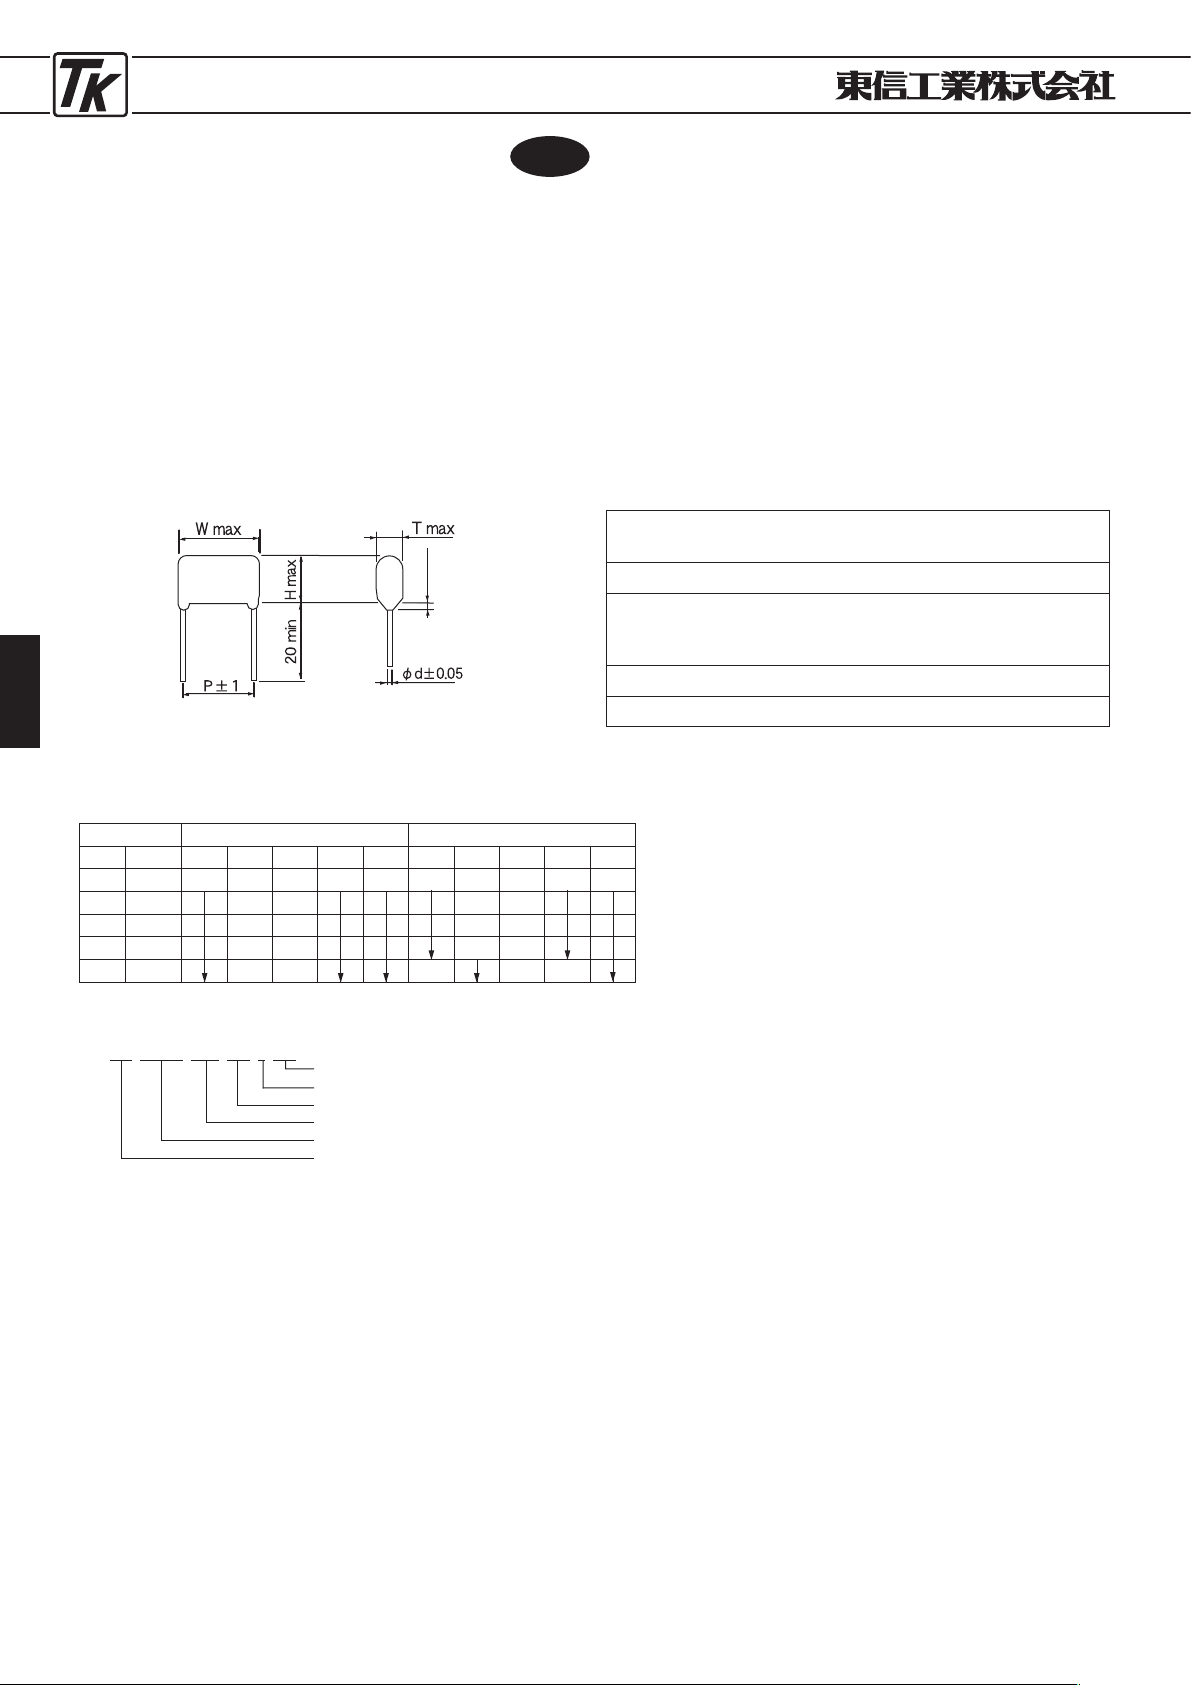
PLASTIC FILM CAPACITORS
90
●メタライズド・ポリプロピレン・フィルム・コンデンサ
●
METALLIZED POLYPROPYLENE FILM CAPACITORS
MMEXシリーズ
TYPEMMEX
■特 徴
・小型で低損失、周波数特性に優れています。
・高周波大電流回路に最適です。
・自己回復作用があるため、信頼性に優れています。
・コンデンサから発生する唸り音を低減しました。
・外装は難燃性エポキシ樹脂により、一定の厚さに
被覆されています。
■
FEATURES
・Small and a low loss. Excellent in the frequency response.
・
Suitable for high frequency, high current circuit.
・
High reliability is assured due to self-healing performance.
・
Enclosure is covered with Flame-Retardant epoxy resin to
a cirtain thickness.
■寸法図
/DIAGRAM OF DIMENSIONS
■性 能
/PERFORMANCE SPECIFICATIONS
■寸法表
/DIMENSIONS
・使用温度範囲
/Temperature range : -
40℃~+105℃(500
VDC)
-
40℃~+85℃(450
VDC)
・誘電正接
/Dissipation factor :
0.1
% Max.(at
20℃, 1
kHz)
・絶縁抵抗
/Insulation resistance
30,000MΩ
Min. (C
≦1μ
F at
20℃
)
30,000Ω・
F Min. (C
>1μ
F at
20℃
)
・耐電圧
/Withstand voltage : WV
×175
% (1~5sec)
・静電容量許容差
/Capacitance tolerance : ±5%(J) ,
±10
%(K)
(mm)
静電容量 450
VDC(2W)
500
VDC(2H)
記号 μFW H T P φdW H T P φ
d
474 0.47 18.5 12.5 7.0 15.0 0.8 18.5 15.0 8.0 15.0 0.8
684 0.68 13.5 8.0 16.5 9.0
105 1.0 15.0 9.0 18.5 10.5
155 1.5 17.0 11.5 20.5 12.5
225 2.2 19.0 13.5 25.0 13.0 20.0
■品番ご指定法/
HOW TO SPECIFY ITEM NUMBER
2
W MMEX □□
105
J □E
付記コード/
Additional code
静電容量許容差/
Capacitance Tolerance
静電容量記号/
Capacitance Symbol
形状記号/
Style Symbol
シリーズ名/
Series Name
定格電圧/
Rated Voltage
New
2
max
Page 91
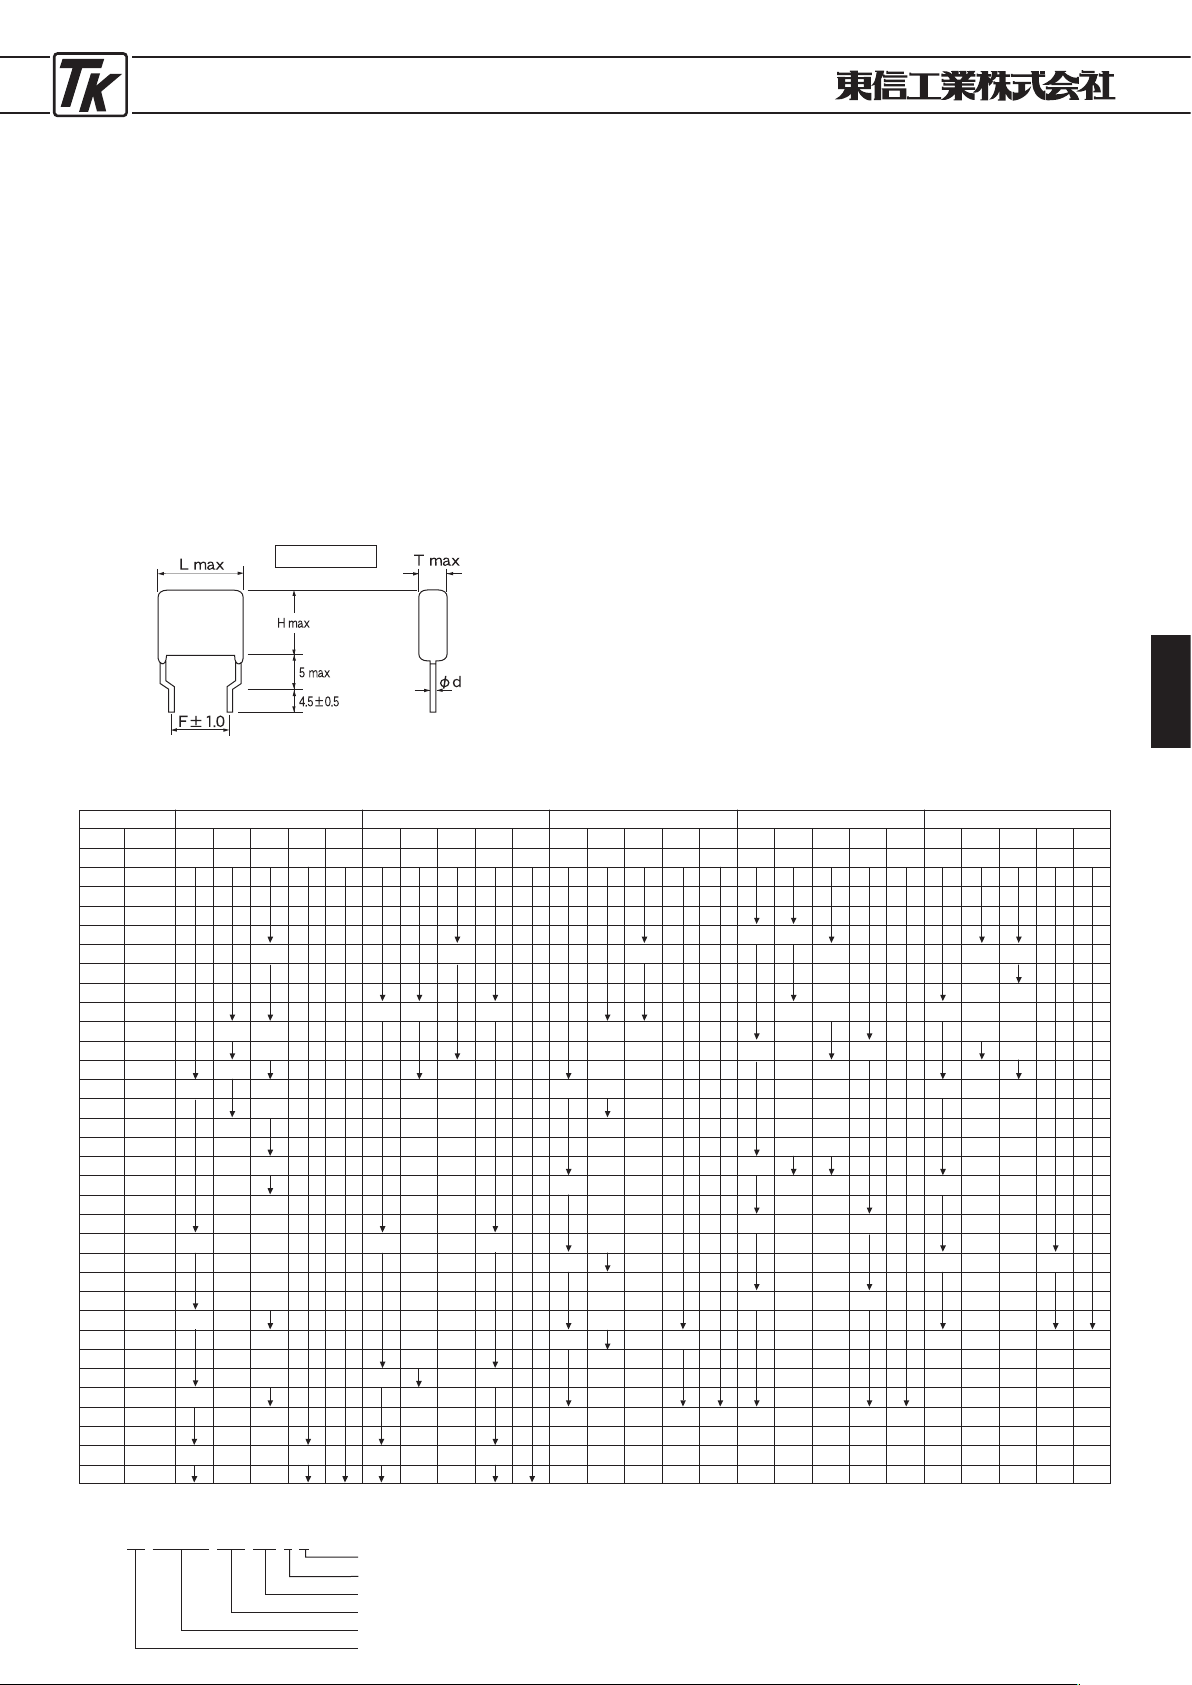
PLASTIC FILM CAPACITORS
91
●
メタライズド・ポリプロピレン・フィルム・コンデンサ
●
METALLIZED POLYPROPYLENE FILM CAPACITORS
■特 徴
MMPGMシリーズ
TYPEMMPGM
・
耐熱性向上PPフィルムを採用し、使用温度範囲を拡大。
−40〜105℃(電圧軽減により125℃まで使用可能)
・電極抵抗軽減設計により、大電流化を実現。
・
小形、高耐熱化対応により、コストパフォーマンスを向上。
■
FEATURES
・
High temperature proof PP film used to expand temperature range.
−40
to
105℃
(Can be used max
125℃
by rated voltage derating)
・
Higher current flows are avaliable by electrode resistance
reduction design.
・
High cost perfomance are achived by compact sized, and high
temperaturs resistance.
■寸法図
/DIAGRAM OF DIMENSIONS
■性 能
/PERFORMANCE SPECIFICATIONS
・使用温度範囲/
Temperature range
−40℃〜+105℃
(+
125℃
)
・定格電圧/
Rated voltage
250
VDC (
250
Vo-p)
・315
VDC (
315
Vo-p)
400
VDC (
400
Vo-p)
・450
VDC (
450
Vo-p)
630
VDC (
630
Vo-p)
・誘電正接/
Dissipation factor
0.08%
Max (at 1kHz)
・絶縁抵抗/
Insulation resistance
30,000MΩ
Min (C≦0.
33μ
F at
20℃
)
10,000Ω
F Min (C
>0.33μ
F at
20℃)
・許容差/
Capacitance tolerance
±5%
(J)
・耐電圧/
Withstand voltage
WV×175% (1〜5
sec)
■
APPLICATION
・
Electronic Ballast.
・
Resonance Switching power supplies.
■寸法表
/DIMENSIONS
※テーピング可能品種 2E(250
VDC)
473~185 2G(400
VDC)
333~474 2J(630
VDC)
103~244
記号
103
123
153
183
223
273
333
393
473
563
683
823
104
124
154
184
224
274
334
394
474
564
684
824
105
125
155
185
225
275
335
395
475
静電容量
250
VDC (2E)
L
13
.
0
13
.
5
15.5
18
.
5
20
.
5
25
.
0
H
10
.
0
10.5
11
.
0
12
.
5
11
.
5
12
.
0
12.5
13
.
0
13
.
5
14
.
0
14.5
15
.
5
16
.
5
16
.
0
17
.
0
18.0
19
.
5
20
.
5
21
.
5
22
.
5
23.0
24
.
5
T
5
.
5
6
.
0
6
.
5
7
.
0
6
.
5
7
.
0
7
.
5
8
.
0
9
.
0
7
.
0
7.5
8
.
5
9
.
5
10
.
0
11.0
12
.
0
13
.
5
15
.
0
14.5
16
.
0
F
7
.
5
15
.
0
d
0
.
8
315
VDC (2F)
L
13
.
5
18
.
0
23
.
0
28
.
0
33
.
0
H
10
.
0
13
.
0
14
.
0
14
.
5
15
.
0
13
.
5
14
.
0
14.5
15
.
0
16
.
0
15
.
0
15.5
16
.
5
17
.
0
18
.
0
19
.
5
21.0
22
.
5
24
.
0
26
.
0
25.5
27
.
0
T
5
.
5
6
.
0
6
.
5
7.0
7
.
5
8
.
5
6
.
5
7
.
0
8.0
8
.
5
9
.
0
8
.
0
8.5
9
.
5
10
.
5
11
.
5
12
.
5
14.0
12
.
5
14
.
0
15
.
5
17
.
0
16.5
18
.
0
F
7
.
5
10
.
0
12
.
5
17
.
5
22
.
5
d
0
.
8
400
VDC (2G)
L
13
.
5
15
.
5
18
.
5
20
.
5
25
.
5
H
10
.
0
10.5
11
.
0
11
.
5
12.5
13
.
5
14
.
0
14
.
5
15.5
16
.
0
16
.
5
17
.
5
18
.
5
19
.
5
20
.
5
22
.
0
23
.
0
24
.
5
T
5
.
5
6
.
0
6
.
5
7
.
0
7
.
5
6.5
7
.
0
7
.
5
7
.
0
7
.
5
8.0
9
.
0
10
.
0
9
.
5
10.5
12
.
0
12
.
5
13
.
5
12
.
0
13.5
14
.
5
15
.
5
F
7
.
5
17
.
5
d
0
.
8
450
VDC (2W)
L
13
.
5
15
.
5
18
.
0
20
.
0
23
.
0
28
.
0
H
10
.
0
12
.
5
13
.
0
13
.
5
13
.
0
13
.
5
14.0
15
.
0
15
.
5
16
.
5
17
.
0
18
.
5
20
.
5
21
.
5
20.0
21
.
5
20
.
5
22
.
0
23
.
5
25.5
27
.
5
29
.
5
T
5
.
5
6
.
0
5
.
5
6.0
6
.
5
7
.
0
7.5
8
.
0
8
.
5
9
.
5
10
.
5
11
.
5
13
.
5
14
.
5
13.0
14
.
5
14
.
0
15
.
0
16
.
5
18.5
20
.
5
22
.
5
F
7
.
5
10
.
0
12.5
17
.
5
d
0
.
8
630
VDC (2J)
L
13
.
5
15
.
5
18
.
5
20
.
5
25
.
5
H
10
.
0
10
.
5
11
.
0
11.5
12
.
5
13
.
0
14
.
0
14.5
15
.
0
16
.
0
16
.
5
17
.
5
18.5
19
.
5
20
.
5
21
.
5
21.0
22
.
5
23
.
5
25
.
0
T
5
.
5
6
.
0
6
.
5
7
.
0
7
.
5
9
.
0
8
.
0
8
.
5
9
.
5
10
.
0
11
.
5
11.0
10
.
5
11
.
5
12
.
5
13.0
14
.
0
15
.
0
16
.
5
F
7
.
5
17
.
5
d
0
.
8
μF
0.01
0
.
012
0
.
015
0.018
0
.
022
0
.
027
0
.
033
0.039
0
.
047
0
.
056
0
.
068
0
.
082
0.1
0
.
12
0
.
15
0
.
18
0
.
22
0.27
0
.
33
0
.
39
0
.
47
0.56
0
.
68
0
.
82
1
.
0
1
.
2
1.5
1
.
8
2
.
2
2
.
7
3
.
3
3.9
4
.
7
※リード長さはバルク時に適用します。
(
mm)
FL type
■品番ご指定法/
HOW TO SPECIFY ITEM NUMBER
2
E MMPGM □□
105
J E
環境対策品記号/
Environment Friendly Symbol
静電容量許容差/
Capacitance Tolerance
静電容量記号/
Capacitance Symbol
形状記号/
Style Symbol
シリーズ名/
Series Name
定格電圧/
Rated Voltage
■用 途
・インバーター照明回路
・共振型
SW
電源
Page 92
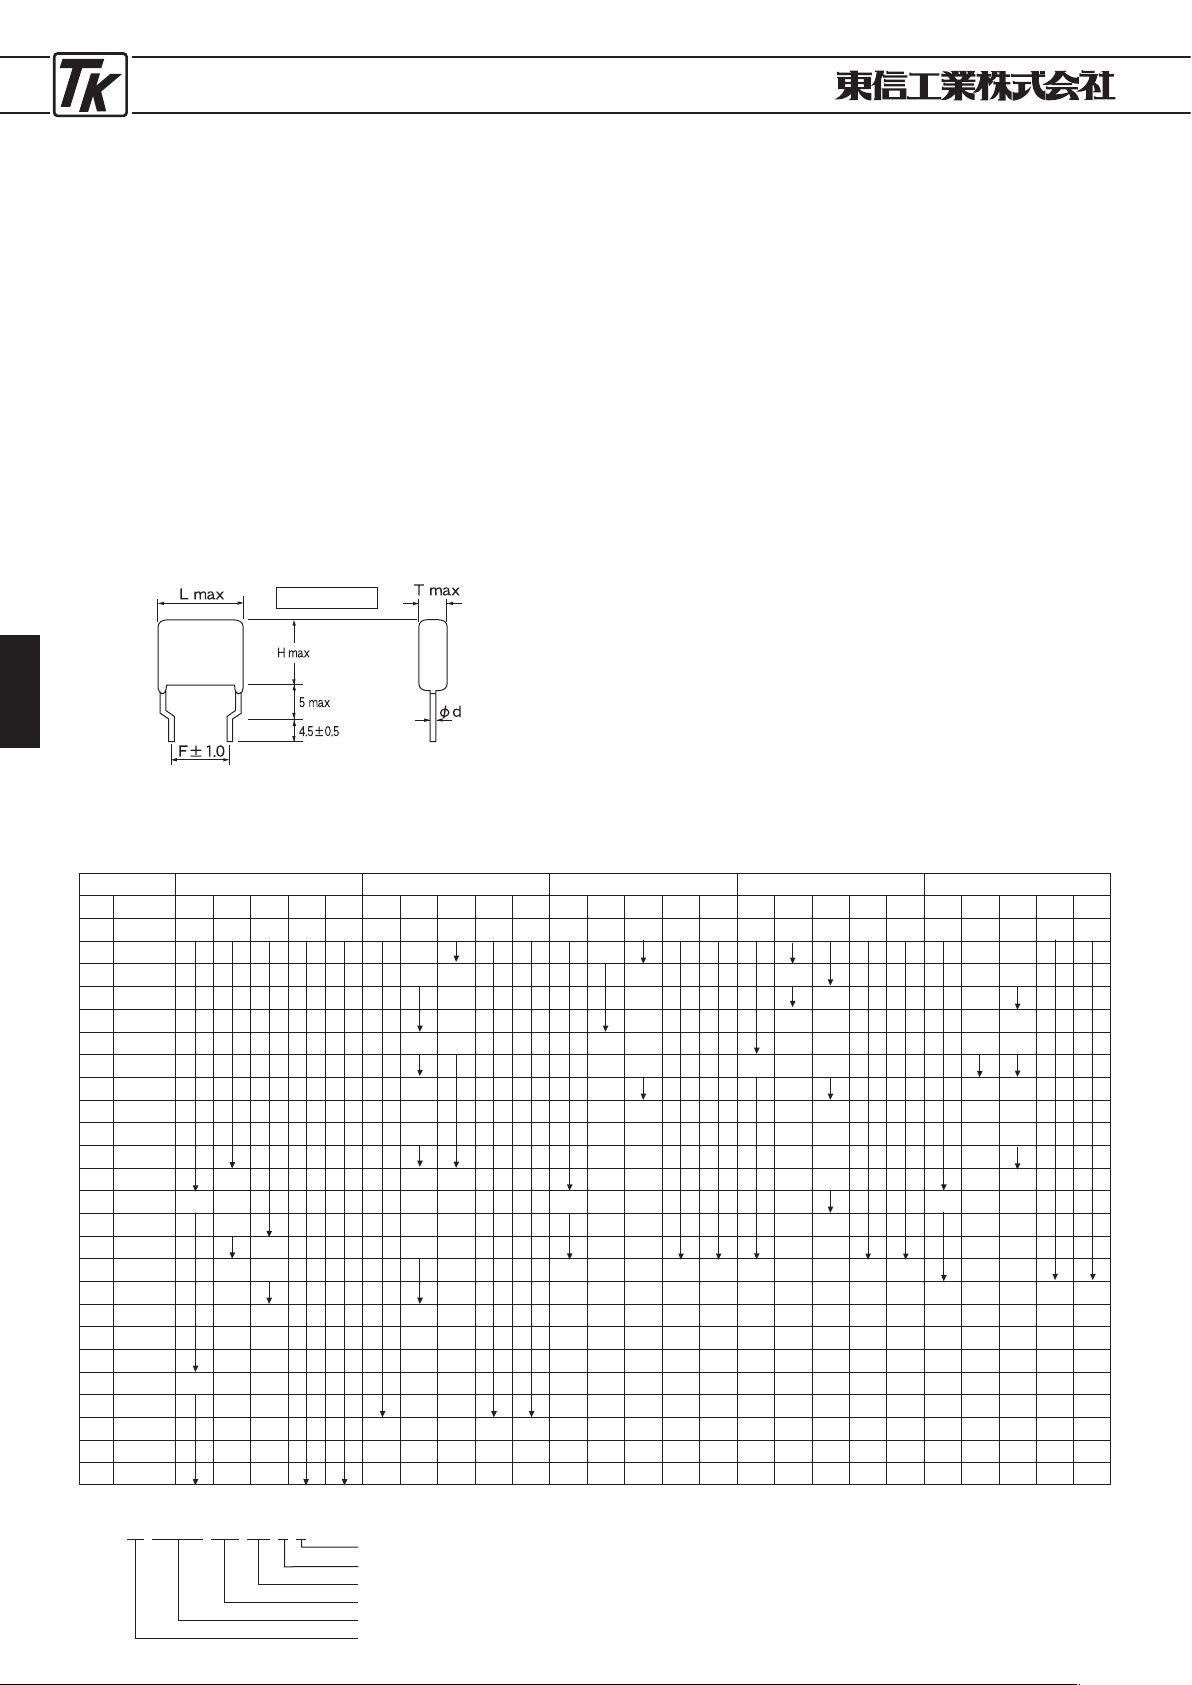
PLASTIC FILM CAPACITORS
92
φ
d
0.8
H
10
.
0
10
.
5
11
.
0
10.0
10
.
5
11
.
0
10
.
5
12
.
0
12
.
5
13
.
0
14
.
0
14.5
15
.
0
16
.
0
17
.
0
18
.
0
●
メタライズド・ポリプロピレン・フィルム・コンデンサ
●
METALLIZED POLYPROPYLENE FILM CAPACITORS
■特 徴
MMPLSシリーズ
TYPEMMPLS
・耐熱性向上PPフィルムを採用し、使用温度範囲を拡大
−40〜110℃(電圧軽減により125℃まで使用可能)
・電機抵抗軽減設計により、大電流化を実現
・小
形、高耐圧化対応により、コストパフォーマンスを
向上
■
FEATURES
・
High temperature proof PP film used to expamd temperature
range.
−40
to
110℃
(Can be used max
125℃
by rated
voltage derating)
・
Higher Current flows re available by electrode resistance
reduction design.
・
High cost performance are achieved by compact sized, and
high temperature resistance.
■寸法図
/DIAGRAM OF DIMENSIONS
■性 能
/PERFORMANCE SPECIFICATIONS
・使用温度範囲/
Temperature range
−40℃〜+110℃(Can be used max
125℃
by rated voltage derating)
・定格電圧/
Rated voltage
800
HP (
800
Vp-p)
・1000
HP (
1000
Vp-p)
・1250
HP (
1250
Vp-p)
1500
HP (
1500
Vp-p)
・1800
HP (
1800
Vp-p)
・誘電正接/
Dissipation factor
0.08%
Max (at 1kHz)
・絶縁抵抗/
Insulation resistance
30,000MΩ
Min (at
20℃
)
・許容差/
Capacitance tolerance
±3%
(H)
・耐電圧/
Withstand voltage
WV×175% (1〜5
sec)
■
APPLICATION
・
Electronic Ballast
・
Resonance Switching power suppliy
(CTV PDP LCDTV etc.)
■用 途
・インバーター照明回路
・共振型
SW
電源(
CTV PDP LCDTV
、その他)
■寸法表
/DIMENSIONS
記号
102
122
152
182
222
272
332
392
472
562
682
822
103
123
153
183
223
273
333
393
473
563
683
823
104
μF
0
.
0010
0
.
0012
0
.
0015
0
.
0018
0
.
0022
0
.
0027
0
.
0033
0
.
0039
0
.
0047
0
.
0056
0
.
0068
0
.
0082
0
.
010
0
.
012
0
.
015
0
.
018
0
.
022
0
.
027
0
.
033
0
.
039
0
.
047
0
.
056
0
.
068
0
.
082
0
.
10
L
14
.
0
16.0
20
.
0
H
11
.
5
12
.
0
11
.
5
12
.
0
13
.
0
14
.
5
15
.
5
16
.
5
17
.
0
16
.
0
16
.
5
17
.
5
18
.
5
20
.
0
T
6
.
5
7
.
0
8
.
0
8
.
5
9
.
5
10
.
5
9
.
0
10
.
0
11
.
0
12
.
0
13
.
0
F
7
.
5
L
18
.
0
T
6
.
0
6
.
5
7
.
0
7
.
5
6
.
0
6
.
5
7
.
0
7
.
5
7
.
0
7
.
5
8
.
5
9
.
0
10
.
0
10
.
5
11
.
5
12
.
5
F
7
.
5
φ
d
0.8
L
18
.
0
23.0
H
10
.
5
11
.
0
10
.
5
11
.
0
12
.
0
12
.
5
13
.
0
13
.
5
14
.
5
13
.
0
14
.
0
15
.
0
T
6
.
0
6
.
5
7
.
0
7
.
5
6
.
0
6
.
5
7
.
0
7
.
5
8
.
5
9
.
0
7
.
5
8
.
5
9
.
5
F
7
.
5
φ
d
0.8
静電容量 1250
HP(3B
)
L
18
.
0
23.0
H
11
.
0
11
.
5
12
.
5
13
.
0
11
.
5
12
.
0
12
.
5
13
.
0
14
.
0
15
.
0
16
.
5
17
.
5
19
.
0
T
6
.
0
6.5
7
.
0
7
.
5
6
.
5
7
.
5
8
.
0
8
.
5
9
.
5
10
.
5
11
.
5
F
7
.
5
φ
d
0.8
1500
HP
(15)
L
23
.
0
28.0
H
12
.
0
12
.
5
13
.
0
14
.
5
15
.
5
16
.
0
16
.
5
17
.
5
18
.
0
20
.
0
21
.
0
20
.
5
21
.
5
23
.
0
24
.
0
T
7
.
0
7
.
5
8
.
0
8
.
5
9
.
0
9
.
5
10
.
5
11
.
5
12
.
5
12
.
0
13
.
0
14
.
5
16
.
0
F
15
.
0
φ
d
0.8
1800
HP
(18)1000HP(3A)800HP(2K)
(
mm)
FL type
■品番ご指定法/
HOW TO SPECIFY ITEM NUMBER
3
A MMPLS □□
103
H E
環境対策品記号/
Environment Friendly Symbol
静電容量許容差/
Capacitance Tolerance
静電容量記号/
Capacitance Symbol
形状記号/
Style Symbol
シリーズ名/
Series Name
定格電圧/
Rated Voltage
Page 93
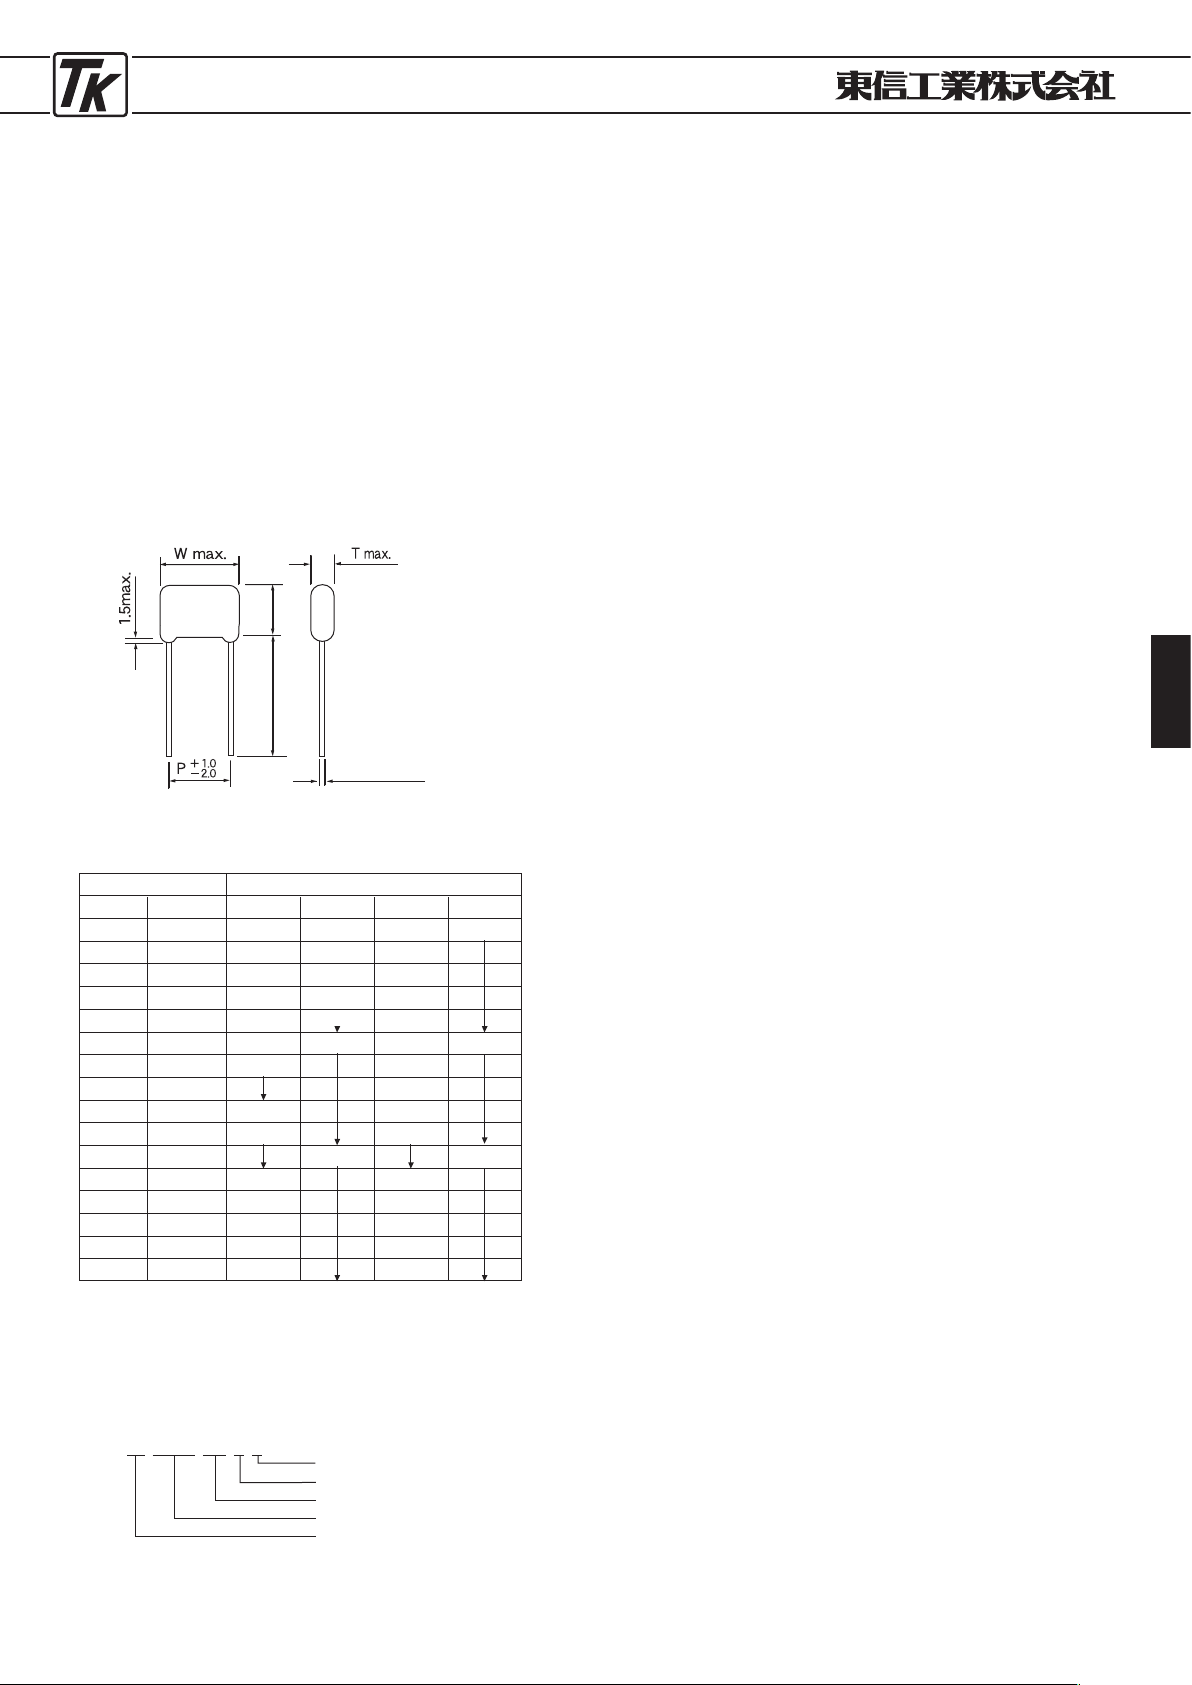
PLASTIC FILM CAPACITORS
93
●
電気機器用金属化ポリプロピレンフィルムコンデンサ
●
METALLIZED POLYPROPYLENE FILM CAPACITORS FOR INDUSTRIAL USE
■特 徴
MHXHシリーズ
TYPEMHXH
・誘電体に自己回復性を有するメタライズドポリプロ
ピレンフィルムを用いた無誘導巻形高信頼性品です。
・外装は難燃性エポキシ樹脂(
UL
規格取得品)を用い
ており、耐炎・耐湿性に優れています。
■
FEATURES
・
Polyester film as dielectric provides high reliability. High reliable
because its self-healing performance. No inductive winding
type.
・
Coated with flame-retardant epoxy resin (UL confirm).
■寸法図
/DIAGRAM OF DIMENSIONS
■性 能
/PERFORMANCE SPECIFICATIONS
・最高許容温度/
Highest temperature of toleration
+85℃
(Z)
・最低周囲温度/
Lowest temperature of circumference
−25℃
(B)
・定格電圧/
Rated voltage
250
VAC
・定格静電容量範囲/
Rated capacitance
0.5〜12μ
F
・定格静電容量許容差/
Rated capacitance tolerance
+10〜−5%
・損失/
Dissipation factor
0.12%
Max (at
20℃ 50/60
Hz
200
VAC)
・耐電圧/
Voltage proof
端子相互間/
Between terminals
定格電圧
(VAC)
×175% (10
sec)
端子一括外装間/
Between terminals and case
2000
VAC (60sec)
・絶縁抵抗/
Insulation resistance
端子一括外装間/
Between terminals and case
1,000MΩ
Min (at
500
VDC)
・外装/
Outer coating
難燃性エポキシ樹脂外装/
Coated with flame-retaedant epoxy resin
・
通電時間区分/
Classification of operation time
40
D (40,
000
h)
・保安機構/
Construction of safety protection
非内蔵/
No provide
■
APPLICATION
・
Motor start and running.
■用 途
・モーター起動、運転。
■寸法表
/DIMENSIONS
記号
504
105
155
205
255
305
355
405
455
505
605
705
805
905
106
126
μF
0
.
5
1
.
0
1
.
5
2
.
0
2
.
5
3
.
0
3
.
5
4
.
0
4
.
5
5
.
0
6
.
0
7
.
0
8
.
0
9
.
0
10
.
0
12.0
静電容量
T
6
.
0
8
.
0
9
.
5
10
.
5
12
.
0
11
.
5
12
.
5
13
.
5
14
.
0
14
.
5
15
.
5
16
.
5
17
.
5
18.5
W
26
.
0
31
.
0
36
.
0
H
16
.
0
17
.
5
19
.
0
20
.
5
22
.
0
21
.
5
22
.
0
24
.
0
25
.
0
25
.
5
27
.
5
28
.
5
29
.
5
30
.
5
31.5
P
22
.
5
27
.
5
32
.
5
250
V (2E)
(
mm)
φ0.8±0.05
25
min. Hmax.
■品番ご指定法/
HOW TO SPECIFY ITEM NUMBER
2
E MHXH
405
H E
環境対策品記号/
Environment Friendly Symbol
静電容量許容差/
Capacitance Tolerance
静電容量記号/
Capacitance Symbol
シリーズ名/
Series Name
定格電圧/
Rated Voltage
Page 94
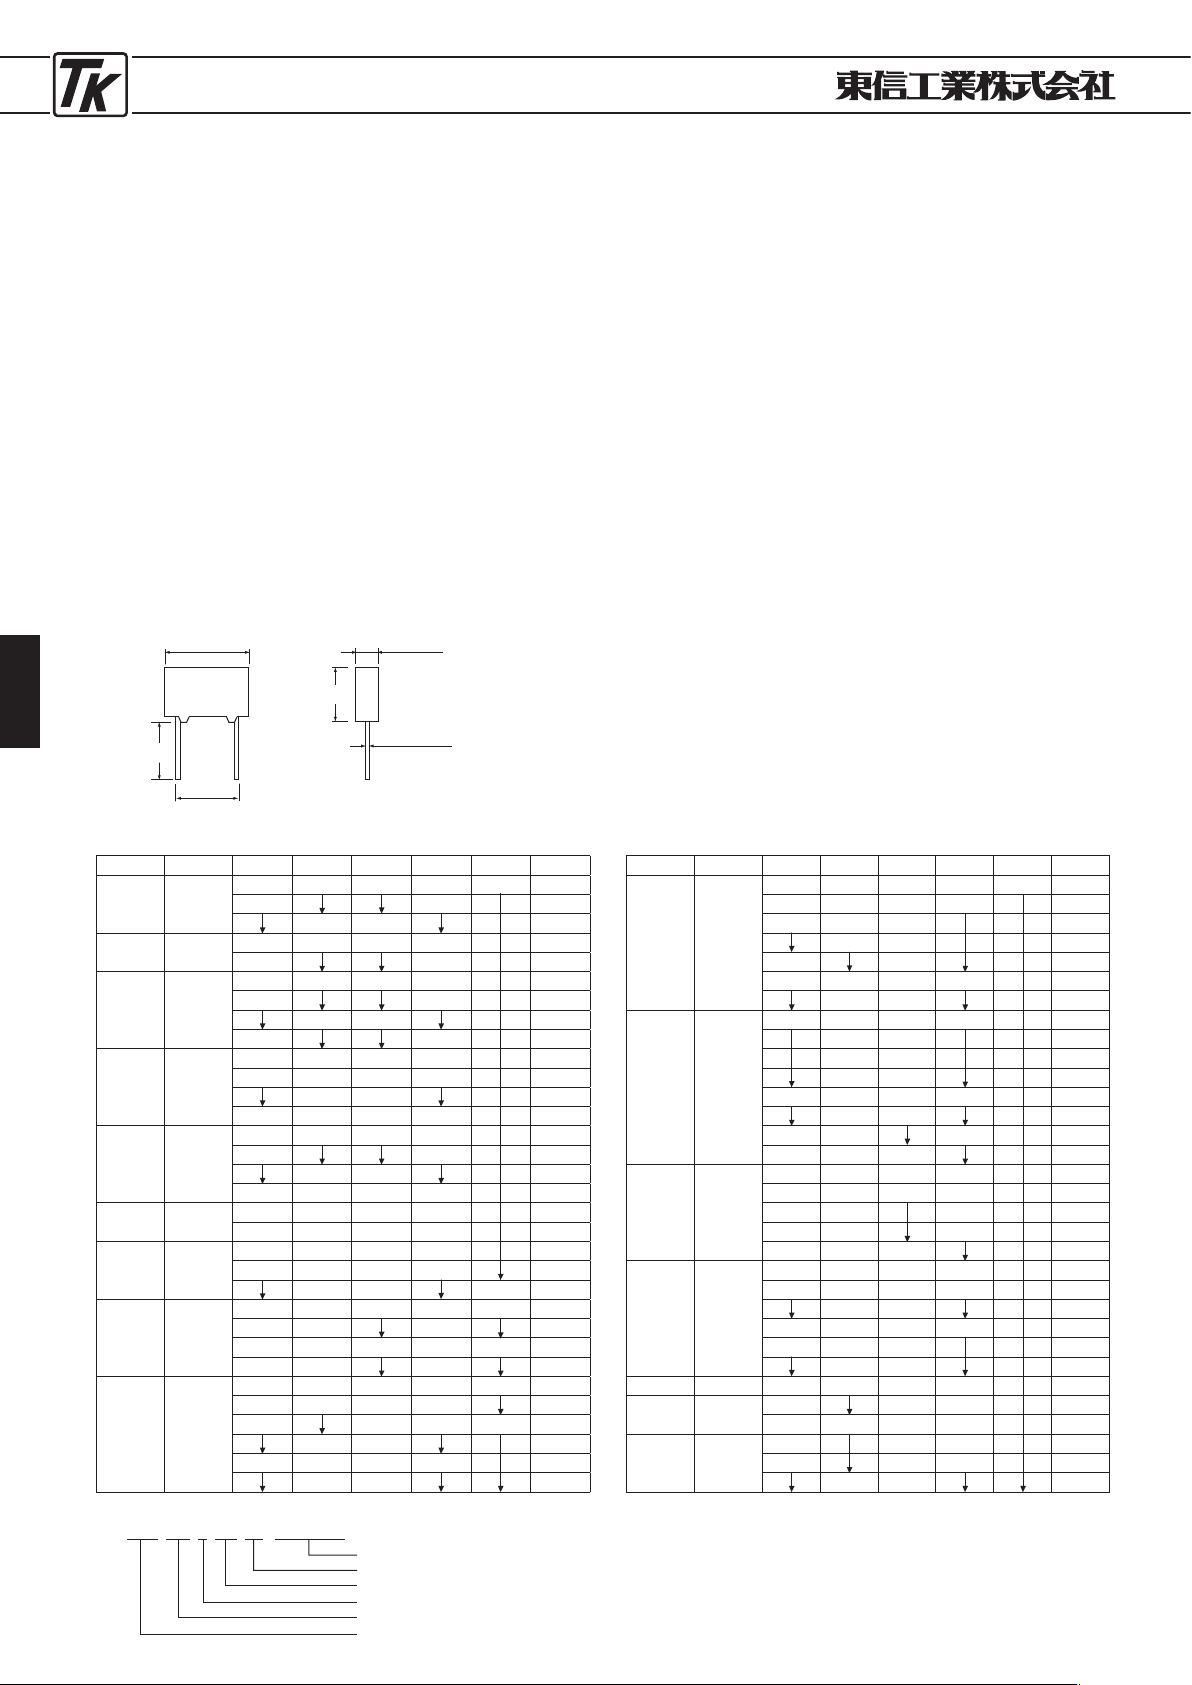
PLASTIC FILM CAPACITORS
94
●
メタライズド・ポリプロピレン・フィルム・コンデンサ
●
METALLIZED POLYPROPYLENE FILM CAPACITORS
■特 徴
MPXシリーズ
TYPEMPX
・UL94V-0 自己消火製ケース収納。
・欧米安全規格認定品。
■
FEATURES
・
Flame retardent plastic case.
・
ENEC, S, UL, CSA, VDE, approved.
■寸法図
/DIAGRAM OF DIMENSIONS
■性 能
/PERFORMANCE SPECIFICATIONS
・使用温度範囲/
Temperature range
−40℃〜+100℃
・誘電正接/
Dissipation factor
≦0.1%
(at 1kHz)
・絶縁抵抗/
Insulation resistance
15,000MΩ
Min (at C
≦0.33μ
F)
5,000MΩ×μ
F Min (at C
>0.33μ
F)
(at
20℃
)
・許容差/
Capacitance tolerance
±10%
(K)
Capacitance tolerance
±20%
(M)
■用途
/APPLICATION
・アクロスザライン/
Across the line
■寸法表
/DIMENSIONS
輸入品(
CARLI
社製)
CARLI PRODUCTS
交流電源雑防用コンデンサ
/INTERFERENCE SUPPRESSORS APPOVED FROM OVERSEAS
Symbol
μ
F W H T P φd
Case
№
103 0.01
10
.
5 9 4 7.5 0.6
B
1
13 10
C
1
11 5
C
2
153 0.015
10
.
5 9 4 7.5
B
1
13 10
C
1
223 0.022
10
.
5 9 4 7.5
B
1
13 10
C
1
11 5
C
2
18 15
D
1
333 0.033
10
.
5 10 4 7.5
B
2
13 11 5 10
C
2
12 6
C
3
18 11 5 15
D
1
473 0.047
10
.
5 11 5 7.5
B
3
13 10
C
2
12 6
C
3
18 11 5 15
D
1
683 0.068
13 12 6 10
C
3
18 11 5 15
D
1
104 0.1
13 12 6 10
C
3
18 11 5 15
D
1
12 6 0.8
D
2
154 0.15
13 12.5 7 10 0.6
C
4
14 11.5 12.5
G
3
18 12 6 15 0.8
D
2
26
.
5 15 22.5
E
1
224 0.22
13 16 8 10 0.6
C
5
14 13.5 8.5 12.5
G
4
18 7.5 15 0.8
D
3
14
.
5 8.5
D
4
26
.
5 15 6 22.5
E
1
16
.
5 7
E
2
W±0.
5
T±0.
5
φ
d±0.
05
H±0.
5
P
±1
L
L=
20±1.0(標準)その他の長さは御相談下さい。
Please consult about other lengths.
■品番ご指定法/
HOW TO SPECIFY ITEM NUMBER
MPX
104
K
3Ⅰ D2 9H
200D9
R
付記記号/
Additional code
ケース
No./Case No.
定格電圧/
Rated voltage
静電容量許容差/
Capacitance tolerance
静電容量記号/
Capacitance symbol
シリーズ名/
Series name
Symbol
μ
F W H T P
φdCase
№
334 0.33
14 15.5 10 12.5 0.8
G
5
17
.
5 17 7.5 15
D
32
18 14.5 8.5
D
4
16 10
D
5
17 9
D
53
26
.
5 16.5 7 22.5
E
2
17 8.5
E
3
474 0.47
18 18.5 7.5 15
D
34
16
.
5 8.5
D
42
16 10
D
5
18
.
5 11
D
6
26
.
5 17 8.5 22.5
E
3
19 10
E
4
30 17.2 27.5
F
0
32 20 11
F
1
684 0.68
18 18.5 11 15
D
6
225 17 10 20
S
3
26
.
5 19 22.5
E
4
30 17.2 27.5
F
0
32 20 11
F
1
105 1.0
22
.
5 20.5 12 20
S
4
26 20 11 22.5
E
5
21
.
5 12.5
E
6
30 17.2 10 27.5
F
0
32 20 11
F
1
22 13
F
2
125 1.2 32 22 13 27.5
F
2
155 1.5
26 13.5 22.5
E
7
32 25 15 27.5
F
3
225 2.2
26 16.5 22.5
E
8
32 15 27.5
F
3
30 18
F
4
Page 95
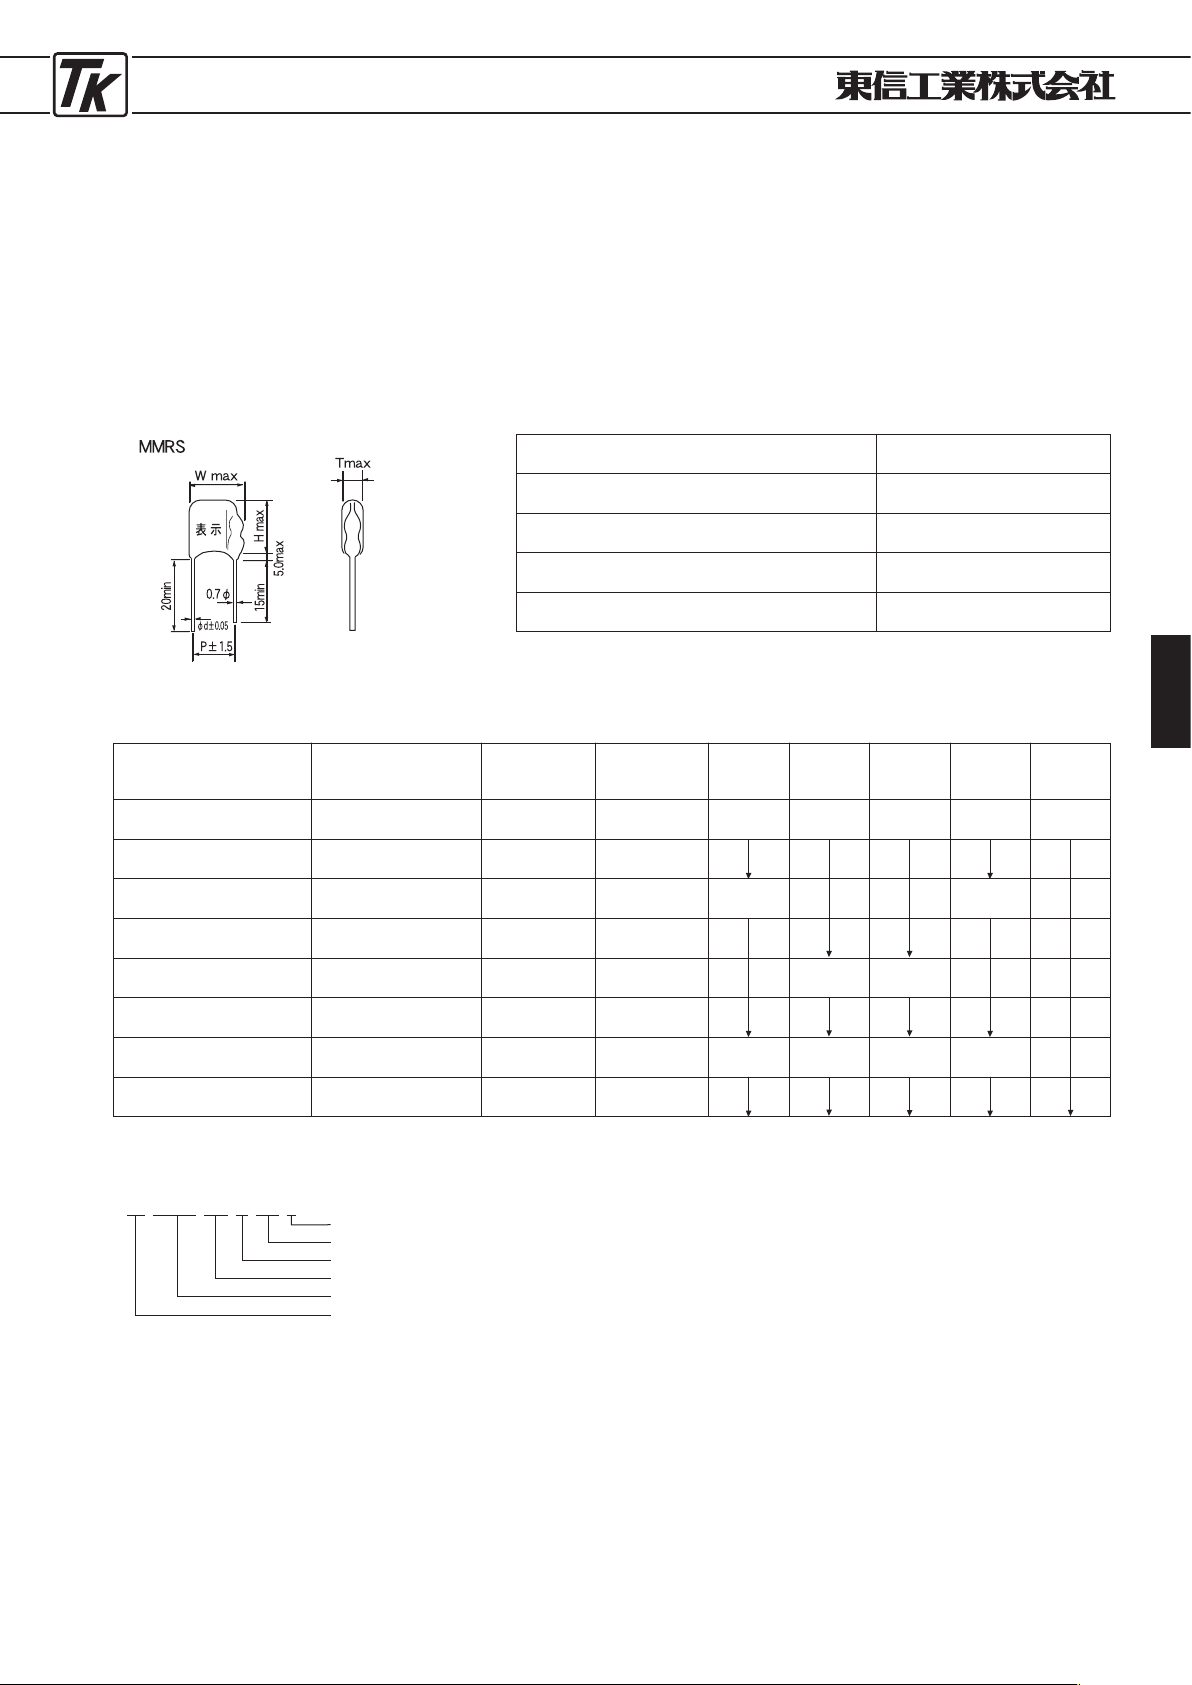
PLASTIC FILM CAPACITORS
95
●CR複合部分 ●
CR COMPOSITE UNIT
■特 徴
MMRSシリーズ
TYPEMMRS
・コンデンサと抵抗を組合わせたスパークキラーで、
スイッチの接点保護、クリック防止と吸収に優れた
効果を発揮できます
。
■
FEATURES
・
This is a spark killer consisting of a capacitor and resistor which
can show excellent effect in protection of switch contacts, and
in prevention and absorption of click.
■寸法図
/DIAGRAM OF DIMENSIONS
■性 能
/PERFORMANCE SPECIFICATIONS
使用温度範囲/
Temp. range
−25℃〜+85℃
AC
125
, AC
250
V
±20%
(M)
±10%
(K)
3000MΩ
min
定格電圧 /
Rated voltage
静電容量許容差/
Capacitance tolerance
抵抗値許容差/
Resistance tolerance
絶縁抵抗 /
Insulation resistance
■寸法表
/DIMENSIONS
型 名
Type
定格電圧(
ACV)
Rated voltage
静電容量
Cap (μF)
抵抗値 (Ω)
Resistance
W H T
φ
d
2
BMMRS
333M047
E
2
BMMRS
333M120
E
2
BMMRS
104M047
E
2
BMMRS
104M120
E
2
EMMRS
333M047
E
2
EMMRS
333M120
E
2
EMMRS
104M047
E
2
EMMRS
104M120
E
AC
125
V
AC
125
V
0.033
0
.
033
47
120
14
.
0 16.0 6.5
0.7
AC
125
V
0.1 47 15.5
AC
125
V
0.1 120
AC
250
V
0.033 47 17.0 7.0
AC
250
V
0.033 120
AC
250
V
0.1 47 17.0 22.5 8.5
AC
250
V
0.1 120
P
8.5
10
.
0
12
.
0
(
mm)
■品番ご指定法/
HOW TO SPECIFY ITEM NUMBER
2
B MMRS
333
M
047
E
環境対策品記号/
Environment friendly symbol
抵抗記号/
Resistance symbol
静電容量許容差/
Capacitance tolerance
静電容量記号/
Capacitance
シリーズ名/
Series name
定格電圧/
Rated voltage
Page 96
PLASTIC FILM CAPACITORS
96
MEMO
Page 97
HANDLING ARTICLES
97
取 扱 商 品
Handling Articles
Page 98
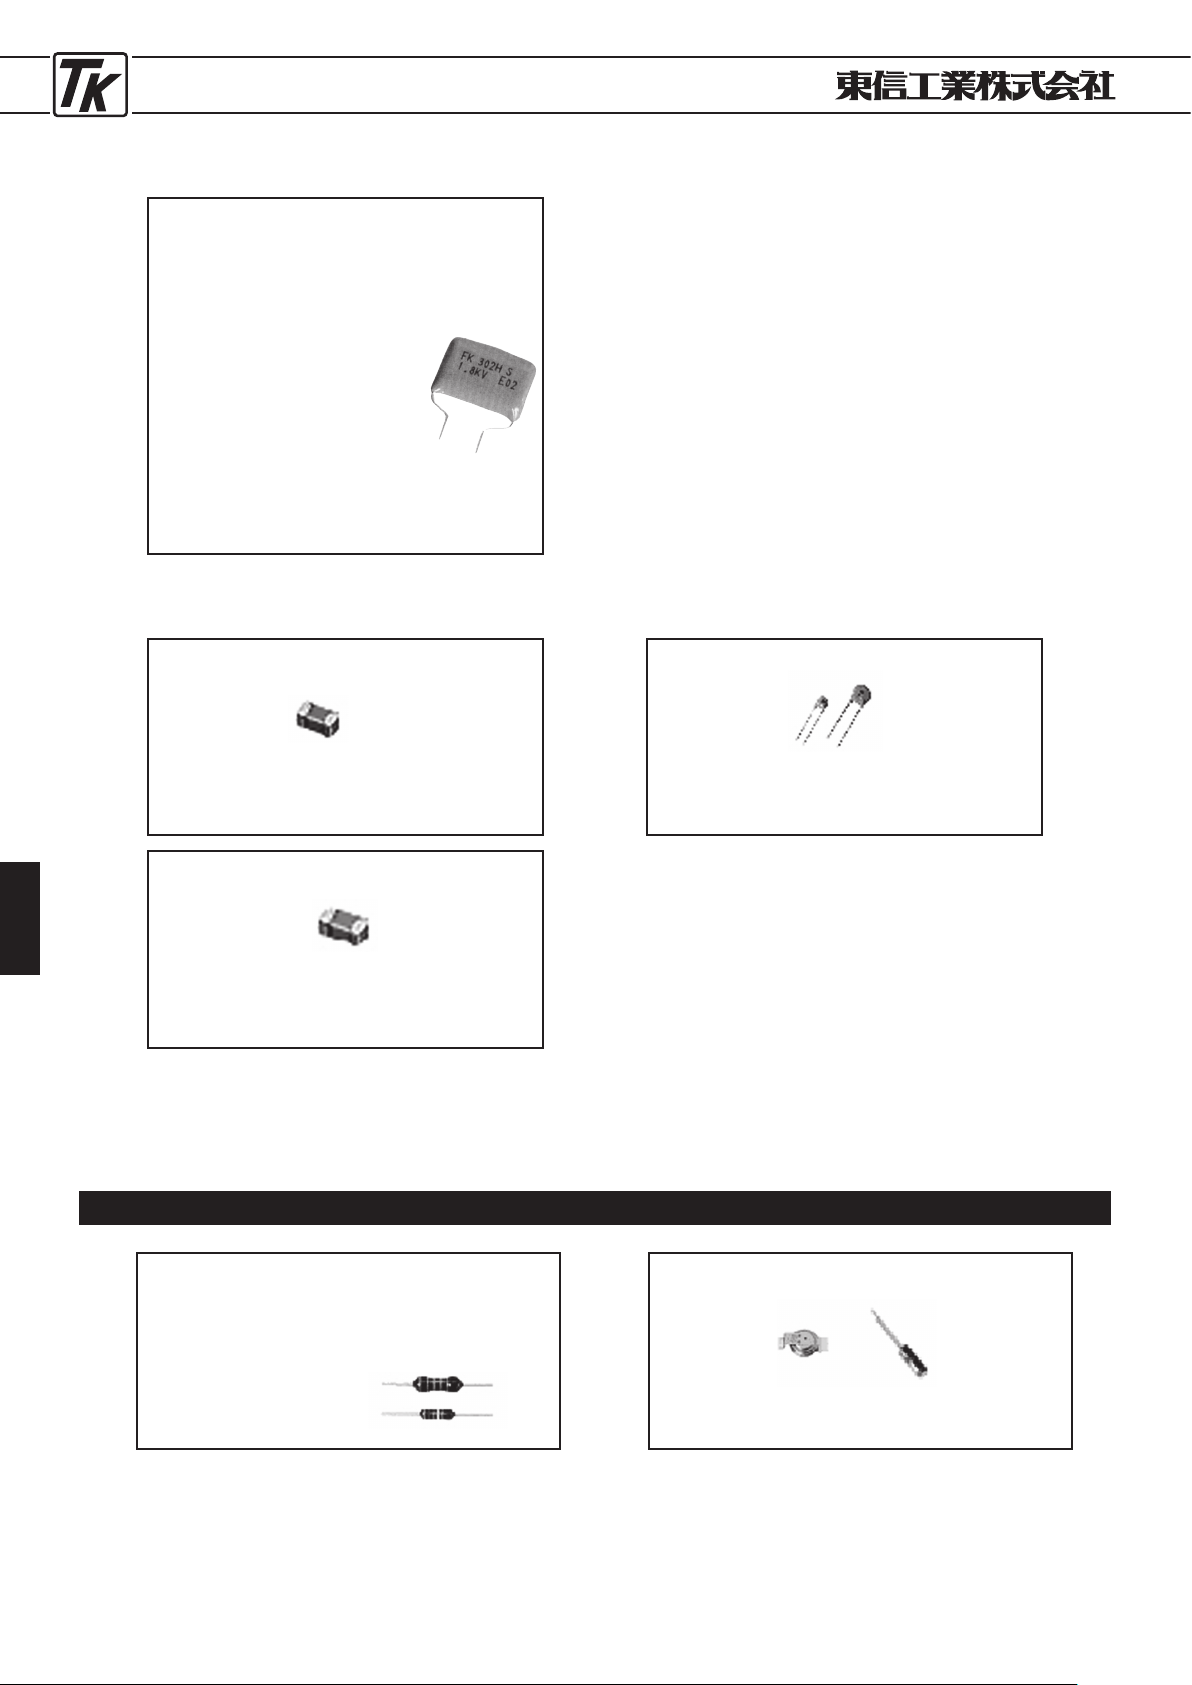
HANDLING ARTICLES
98
・
IH(
高周波大電流
)
用メタライズドポリプロピレンフィルムコンデンサ
Metallized PP Film Capacitors, for Induction
Heating Systems. (High Frequenciy, High Current)
使用温度: −40〜+105℃
(+125℃)
定格電圧:
250
VAC,
500
VAC,
630
VAC
(3シリーズ)
800
VDC,
1000
VDC,
1200
VDC
(1シリーズ)
静電容量:
250
VAC
…105〜226
(3
digits : pF)
500
VAC
…104〜105
630
VAC
…103〜104
800
VDC
…683〜105
1000
VDC
…104〜105
1200
VDC
…103〜564
●フィルムコンデンサ
Plastic Film Capacitors
●セラミックコンデンサ/
Ceramic Capacitors
・積層チップ/
Chip type MLCC
使用温度:−25〜+85℃
,
−55〜+125℃
定格電圧:6
.
3〜50
V
静電容量:221〜105 (3
digits:pF)
・大容量積層チップ/
High Value MLCC
使用温度:−25〜+85℃
定格電圧:6
.3V
静電容量:0.1〜100μ
F
・円板形セラミックコンデンサ/
Disk type
使用温度:−25〜+85℃
,
−25〜+125℃
定格電圧:16〜3000
V
静電容量:010〜224 (3
digits:pF)
そ の 他 取 扱 商 品 /
The others
・炭素皮膜固定抵抗器/
Carbon Film Resistors
・金属皮膜固定抵抗器/
Metal Film Resistors
・金属(酸化物)皮膜固定抵抗器/
Metal Oxide Film Resistors
抵 抗 値:1Ω〜10MΩ
定格電力:1
/
8〜5W
・
電気二重層キャパシタ
/
Electric Double Layer Capacitors
メモリーバックアップ用二次電源
モーター駆動用、エネルギー貯蔵用
☆その他 セラミック応用素子(セラミックフィルター、セラミック発振子)、トランス、電源、インダクタ、コネクタ等の
各商品を取扱っておりますので、ご用命ください。
In addition, each goods, such as ceramic applications, transformers, power supplies, inductors, and connectors, are dealt with.
 Loading...