

Page 1
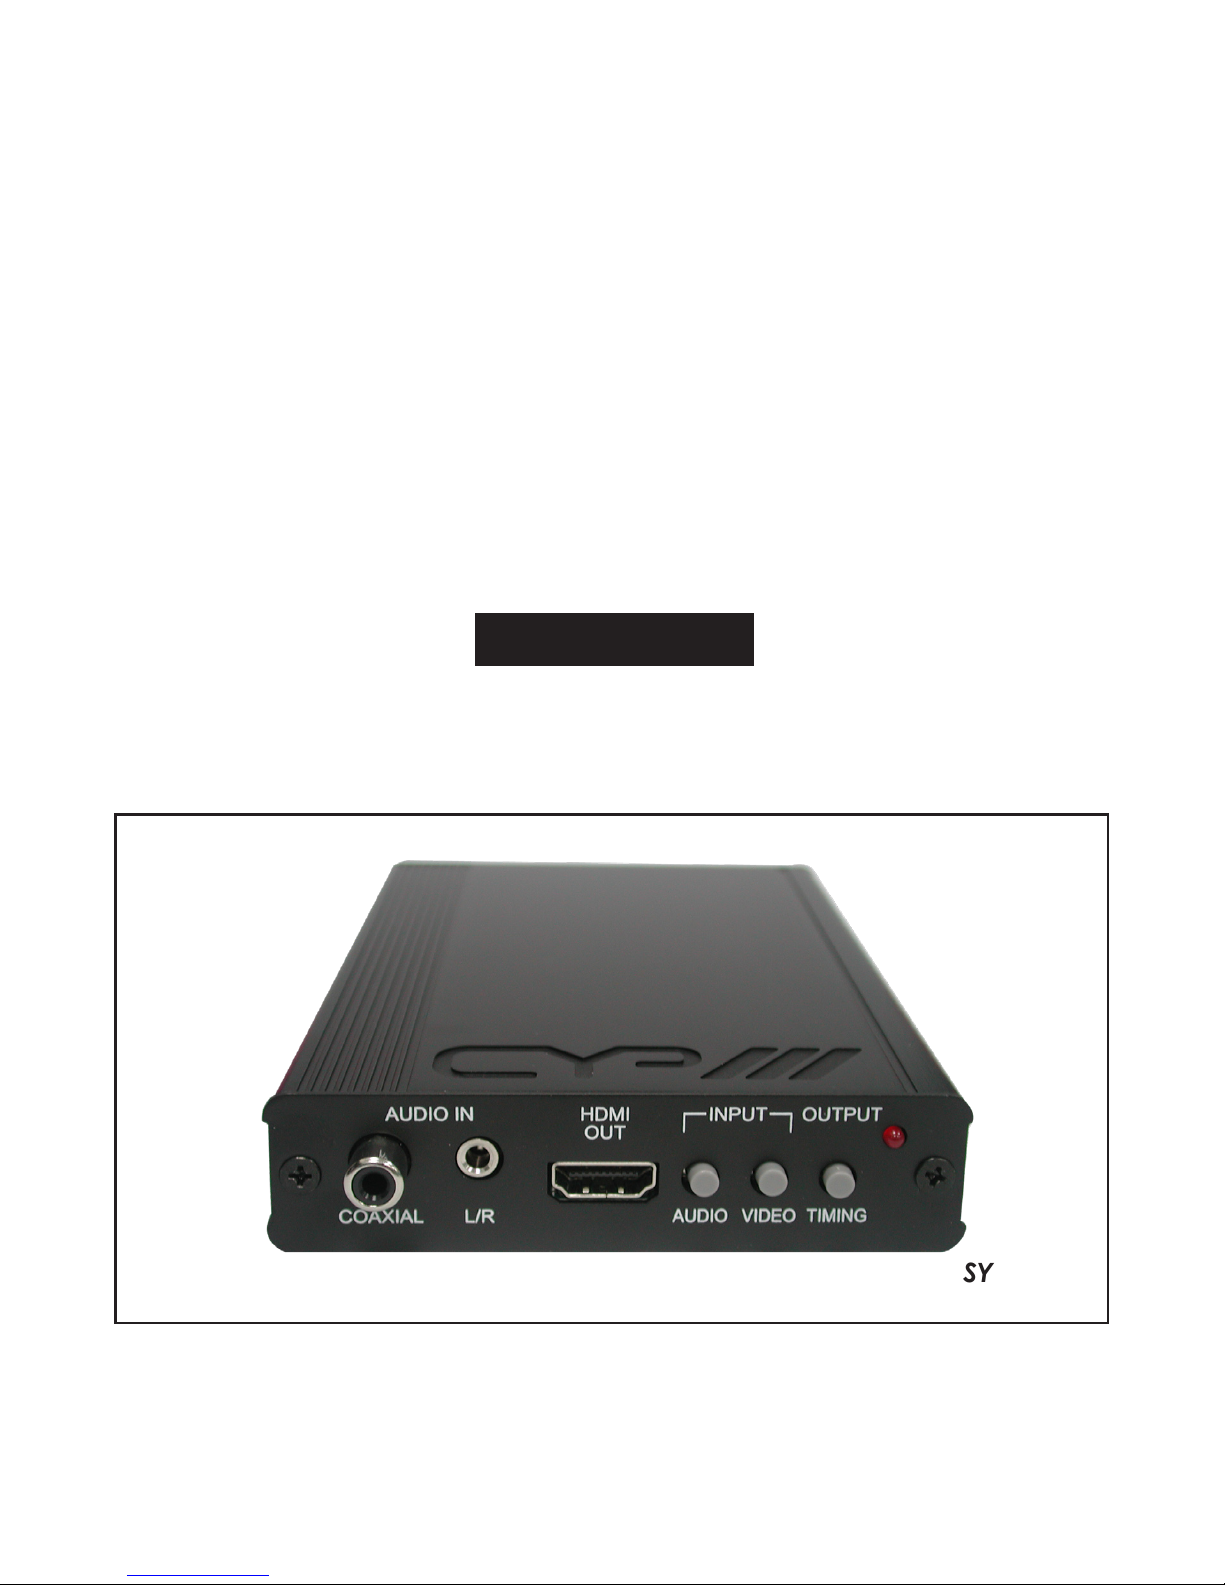
SY-P290
PC/DVI to HDMI
Scaler Box
Operation Manual
SY-P290
Page 2

Revision History
Version No Date Summary of Change
V1 20090106 Preliminary Release
Precaution
Failure to follow the precautions described below may cause damage to
PC/DVI to HDMI Scaler Box and void the warranty.
DO NOT open the case. Doing so will void the warranty. If you find
problem with it, please return back to your retailer or seller who will
assist you or provide you with solution.
DO NOT use third-Party AC adapter or power cord. Doing so may
damage PC/DVI to HDMI Scaler Box.
DO NOT bump, jar or drop contents of the products as it may
damage it and result in warranty void.
DO NOT set any liquids or beverages on the drive as they may
damage PC/DVI to HDMI Scaler Box.
Page 3

Table of Contents
1
1
1
1
2
2
2
3
4
4
1. Introduction…………………………………………………........……….
2. Application…………………………………………………................….
3. Contents……………………………………………….........................…
4. System Require…………………………………….…………........…….
5. Features…………………………………………….......……........………
6. Operation Controls and Functions…………………………………….
6.1 Front Panel ...............................................................................
6.2 Rear Panel ………………………………………….........….….…
7. Specications……………………………………………...........………..
8. Connection and Installation…………………………….........……..…
Page 4

1. Introduction
This Scaler Box is design to display your PC/HD images on the HDTV with better
viewing image. It can upscale PC/DVI input sources to HDMI output for widerange PC/HD resolutions; the resolution support XGA/UXGA/720p/1080p. This
unit allows user to select a variety of output resolutions and adjust for the best
picture quality. Further, it also transfer sounds through HDMI for user to enjoy
both HD images and sounds consistently.
2. Application
Individual home use
Classroom presentation
Meeting demonstration
Gaming entertainment playing
3. Contents
PC/DVI to HDMI Scaler Box
Power adaptor
Operation Manual
4. System Require
PC/DVD and HDTV/Monitor.
D-SUB/ 3RCA to D-SUB, DVI/HDMI to DVI-D cable for linking source input
& image output to TV.
Coaxial or audio phone jack cable for linking the digital or analog
audio sounds.
1
Page 5
5. Features
HDMI 1.2, HDCP 1.1 and DVI 1.0 compliant.
Support PC/HD resolution input:
DVI: VGA~WUXGA
PC: VGA~WUXGA
HD: 480i~1080p50/60Hz
Scale any PC/HD resolutions to XGA/UXGA/720p/1080p resolutions.
Support PC&DVI to HDMI output.
Transfer L/R and coaxial sounds to HDMI.
Input and output selection bottoms for easy and quick function
chose.
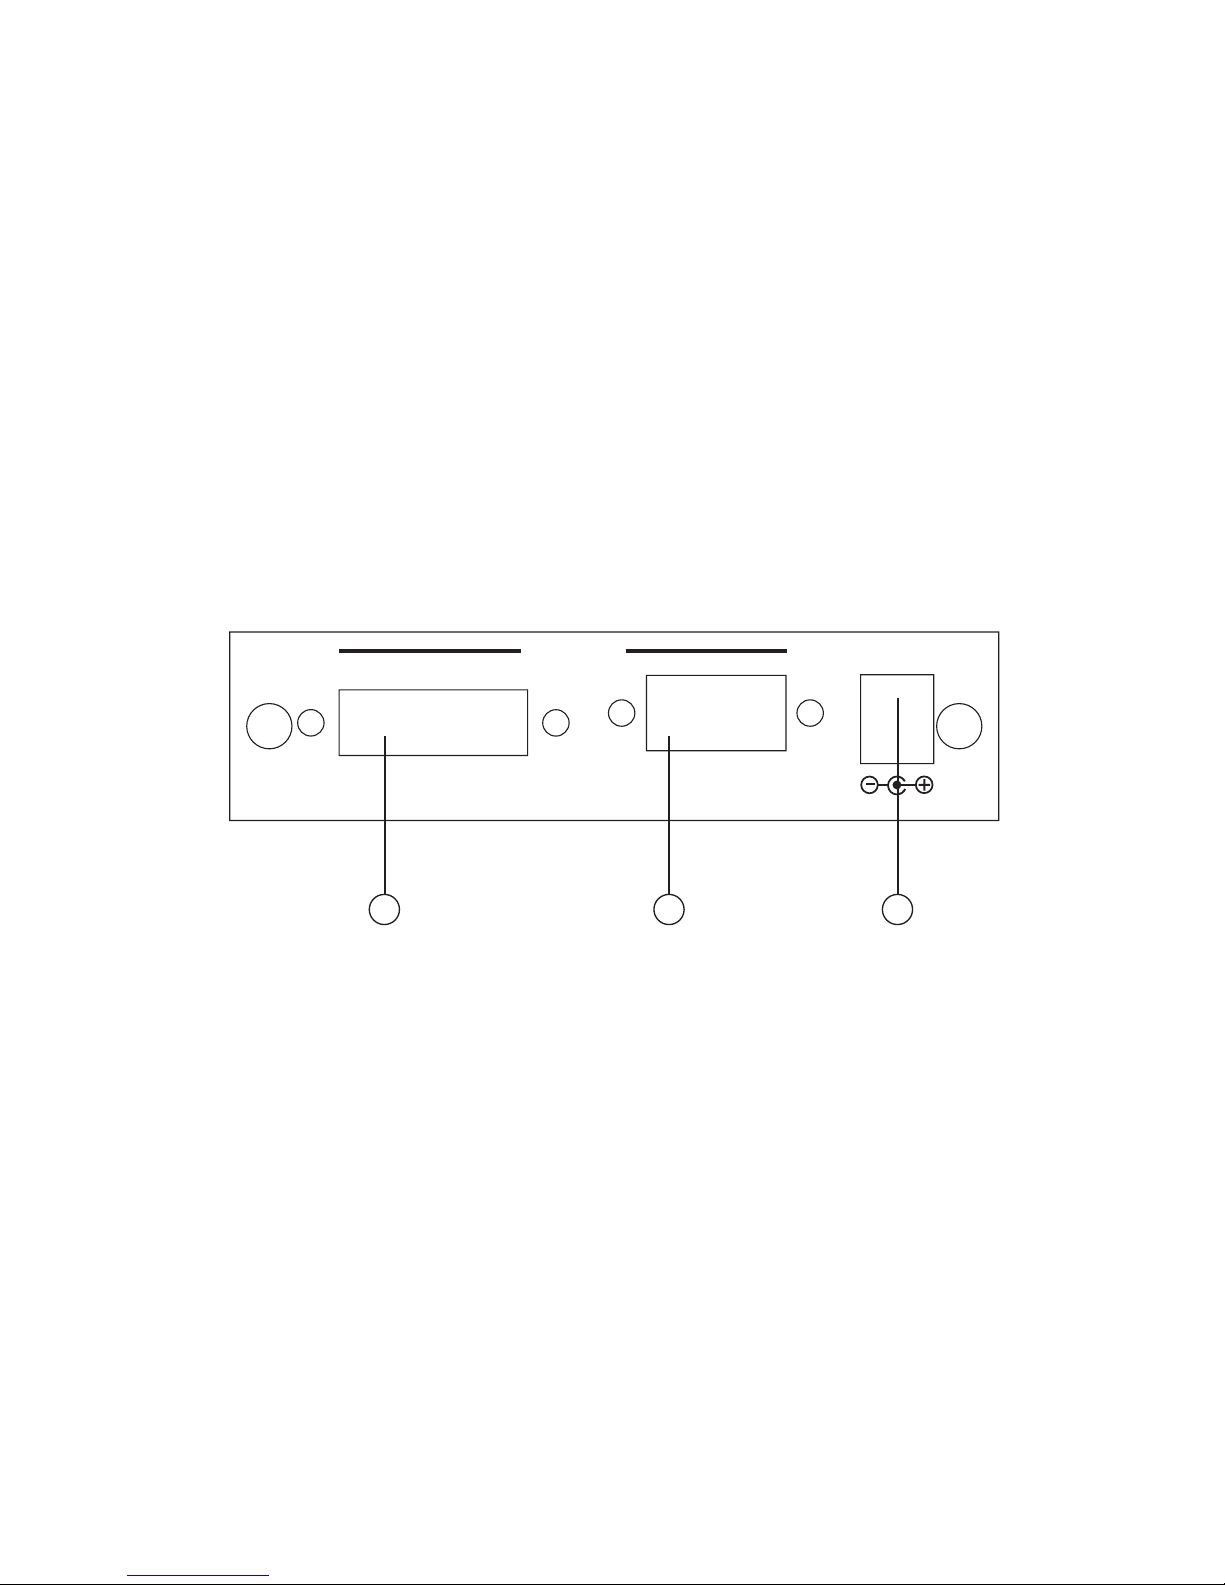
①
DVI-D IN: Connect the PC input DVI (29 pin) port to the DVI output
port of your source equipment such like PC.
Resolution: VGA~ WUXGA
Note: DVI-D input can only take DVI-D signal.
②
PC/HD: Connect the PC input D-Sub (15-pin) port to the D-Sub output
port of your source equipment such like PC or a D-Sub to 3RCA to your
source equipment like DVD player.
PC Resolution: VGA~ WUXGA
Component Resolution: 480i~1080i, 1080P 50/60
Note: Output timing 1080p 50Hz may not be supported by some TV with
input 576i/p50, 720p50 and 1080i/p50.
③
Power: Plug the 5VDC power supply into the unit and connect the
adaptor to AC wall outlet.
6. Operation Controls and Functions
6.1 Front Panel
1 2 3
DVI-D PC/HD
DC 5V
VIDEO IN
2
Page 6
6.1 Rear Panel
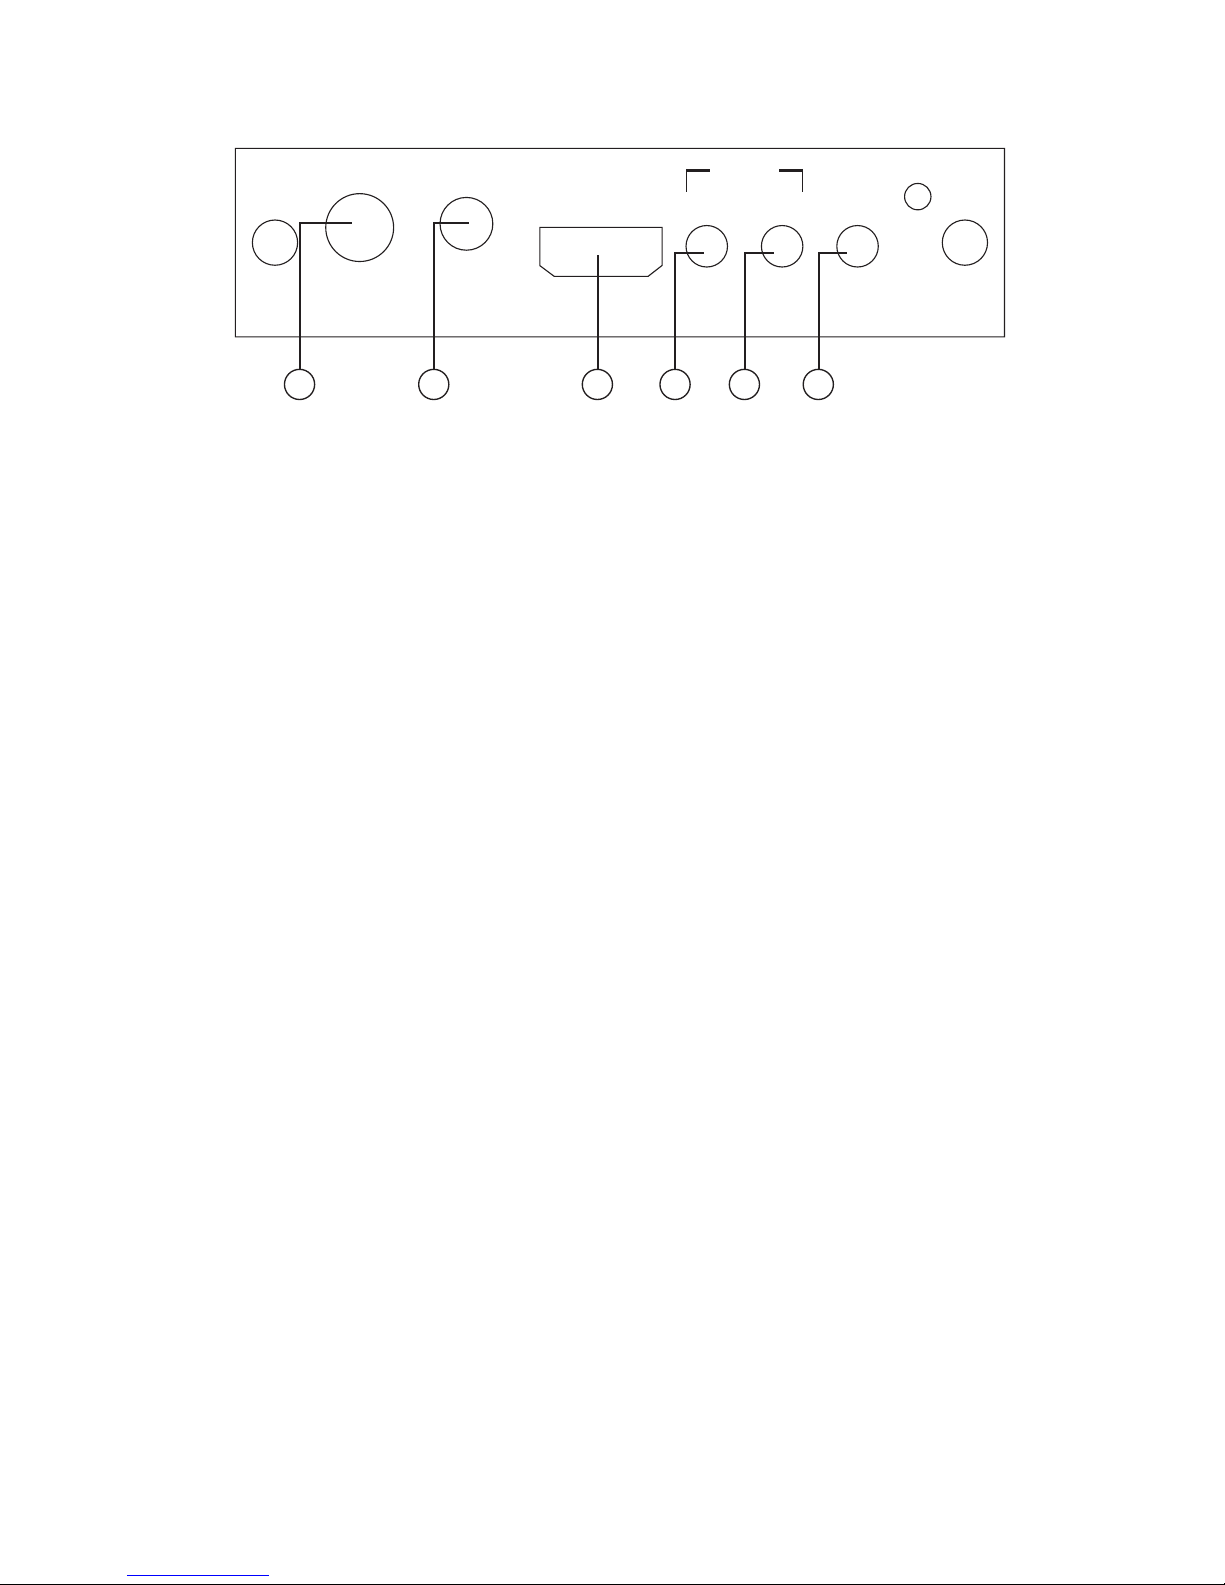
①
Coaxial: Connect the coaxial audio cable from source device.
②
L/R: Connect the L/R phone jack from the source device.
③
HDMI out: Connect the HDMI cable to HDTV of display.
④
Audio: input audio switching bottom for selecting coaxial or L/R audio
signal. Simply push the bottom and the selection menu will display on the
TV.
⑤
Video: input video switching bottom for selecting DVI or PC/HD video
signal. Simply push the bottom and the selection menu will display on the
TV.
⑥
Output Timing: output resolution selectable on 720p / 1080p / XGA /
UXGA. Simply push the bottom and the selection menu will display on the
TV.
Note: A. Only when HDMI signal is send the selection of audio under HDMI
will appear on the display and the audio will support PCM2ch.
B. By pushing both Audio & Video bottoms the output will switch to XGA.
C. By pushing both Audio & Timing bottoms the output will switch to 720p.
1
COAXIAL
AUDIOVIDEO TIMING
L/R
AUDIO IN INPUT OUTPUTHDMI
OUT
2 3 4 5 6
Input ports 1 x PC/HD
1 x DVI-D
1 x Coaxial/Audio
1 x L/R Audio
Output port 1 x HDMI
Power Supply 5V/1A DC (US/EU standards, CE/FCC/UL certified)
Dimensions (mm) 160(D) x 102(W) x 25(H)
Weight(g) 332
Chassis Material Aluminum
Silk Skin Color Black
Operating Temperature Operating from 0°C ~ 40°C
7. Specications
3
Page 7
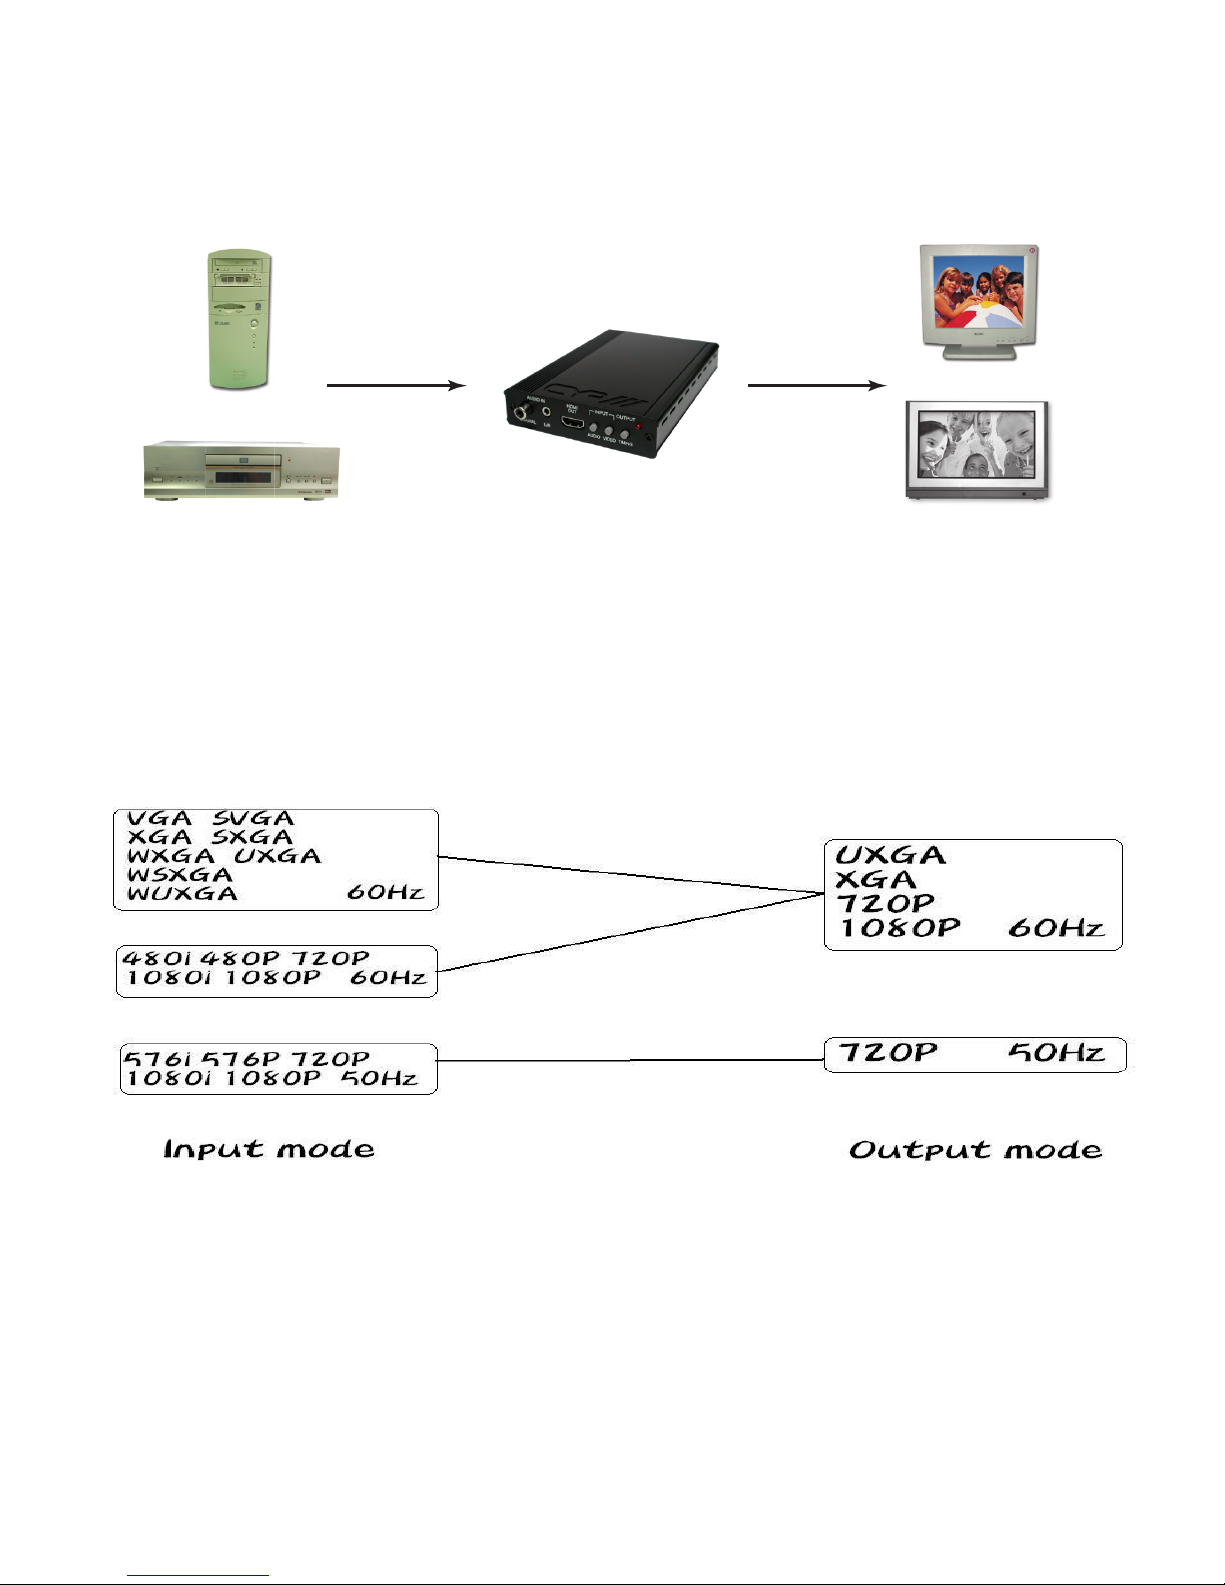
8. Connection and Installation
PC MONITOR
DVD
LCD TV
or
or
9. Support Resolution
4
Page 8

 Loading...