

Page 1
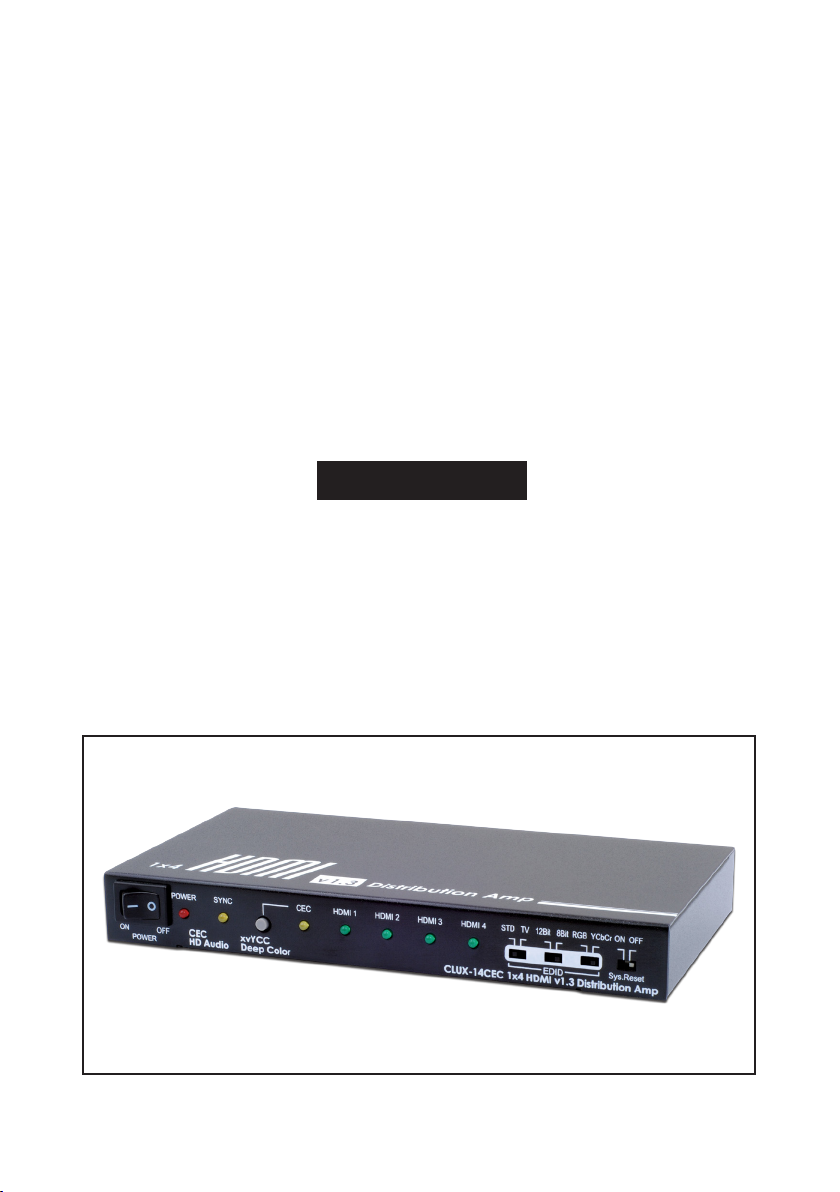
CLUX-14CEC
1x4 HDMI 1.3 Splitter
with CEC Function
Operation Manual
CLUX-14CEC
Page 2

Disclaimers
The information in this manual has been carefully checked and
is believed to be accurate. Cypress Technology assumes no
responsibility for any infringements of patents or other rights of third
parties which may result from its use.
Cypress Technology assumes no responsibility for any inaccuracies
that may be contained in this document. Cypress also makes
no commitment to update or to keep current the information
contained in this document.
Cypress Technology reserves the right to make improvements to this
document and/or product at any time and without notice.
Copyright Notice
No part of this document may be reproduced, transmitted,
transcribed, stored in a retrieval system, or any of its part translated
into any language or computer file, in any form or by any means
- electronic, mechanical, magnetic, optical, chemical, manual,
or otherwise - without express written permission and consent from
Cypress Technology.
© Copyright 2009 by Cypress Technology.
All Rights Reserved.
Version 1.0 October 2009
Trademark Acknowledgments
All products or service names mentioned in this document may be
trademarks of the companies with which they are associated.
Page 3

Safety Precautions
Please read all instructions before attempting to unpack or install or
operate this equipment, and before connecting the power supply.
Please keep the following in mind as you unpack and install this
equipment:
Always follow basic safety precautions to reduce the risk of
fire, electrical shock and injury to persons.
To prevent fire or shock hazard, do not expose the unit to rain,
moisture or install this product near water.
Never spill liquid of any kind on or into this product.
Never push an object of any kind into this product through
module openings or empty slots, as you may damage parts.
Do not attach the power supply cabling to building surfaces.
Do not allow anything to rest on the power cabling or allow it to
be abused by persons walking on it.
To protect the equipment from overheating, do not block the
slots and openings in the module housing that provide
ventilation.
Revision History
Version No Date Summary of Change
V1 20091027 Preliminary Release
Page 4

Table of Contents
1. Introduction…………………………………………………........……….
2. Applications……………………..…………………………................….
3. Package Contents…………………………......…………….............…
4. System Requirements……...…………………..….…………........…….
5. Features…………………………………………….......……........………
6. Specications..………………………………………...........………...….
7. Operation Controls and Functions………………...……........………
7.1 Front Panel ...............................................................................
7.2 Rear Panel ………………………………………….........….….…
8. Connection and Installation …….…………………..........…..…..…...
9. Acronyms …….…………………..........…..…..….................................
1
1
1
1
2
3
4
4
5
6
7
Page 5

1. Introduction
This HDMI v1.3 Splitter is an impressive device that can handle all of your HDMI
signal distribution needs. From a single HDMI input it can transfer Deep Color
(10-bit and 12-bit) video and new lossless compressed (Dolby TrueHD, Dolby
Digital Plus and DTS-HD Master Audio) digital audio with high bandwidth up
to 225MHz (6.75Gbps) to four HDMI outputs. Besides splitting and distributing,
it also amplifies and equalizes your signal, providing high I/O performance
on both audio and video. On top of that, this device provides additional
features like CEC, EDID and a system reset function for maintaining superb
image quality.
2. Applications
Show one HDMI source on four displays
Show room display control
Educational demo
Installation usage
3. Package Contents
1 x 4 HDMI 1.3 Splitter
5V DC Power supply adaptor
Operation Manual
4. System Requirements
Input source equipments with HDMI output connector(s)
Output displays with HDMI input connector(s)
1
Page 6

5. Features
HDMI 1.3, HDCP1.1 and DVI1.0 compliant Receiver
Deep color video up to 12bit, 1080p@(24/60)Hz
Simultaneously displays one HDMI source on four displays
HDCP keysets that allow each output to work independently when
connected to an HDMI display
Splits a single HDMI source into four outputs(max.) without signal loss
Supports DVI source and display via an HDMI to/from DVI adaptor
cable.
Supports LPCM 7.1CH, Dolby TrueHD, Dolby Digital Plus and DTS-HD
Master Audio transmission (32-192kHz Fs sample rate)
Supports a wide range of PC and HDTV resolutions from VGA to UXGA
and 480i to 1080p
HDMI cable distance testing showed that with 1080p/8bits resolution the
Input/Output source can reach up to 20/15 meters away, and at
1080p/12bits the I/O source can reach up to 10/10 meters.
Note:
A. Cable tested with CAT-6E /23AWG/Solid, using cables of another type
may result in a different operating distance.
B. Cable distance test included the following: PS3 120G and 37" Samsung
12-bit LCD TV.
C. Figures provided in this manual are for reference only, actual
figures may depend on the source and display used along with the
type of cable.
Supports EDID functionality and settings for Deep Color and color space.
When EDID is switched to TV mode, the system will automatically detect
Deep Color (8 bits or 12 bits) and color space (RGB or Y/Cb/Cr) settings
from the source's EDID and record it into the unit. (For more detail please
refer to section 7.1)
Supports xvYCC and CEC bypass and also system reset functions
Has CEC functions such as one touch play & record, a programmable timer,
menu language, deck & device menu control, OSD display, device OSD
transfer, remote control pass through, system audio control and system
standby.
System standby will only be actived once the last TV is switched to standby
2
Page 7

6. Specications
Frequency Bandwidth 2.25Gbps (single link)
Input Port 1x HDMI female port (Type A connector)
Output Ports 4x HDMI female ports (signal link)
HDMI Cable In 1080p 8-bit (20M), 12-bit (15M)
HDMI Cable Out 1080p 8-bit (10M), 12-bit (10M)
ESD Protection Human body model:± 10kV (air-gap discharge)
6kV (contact discharge)
±
PCB Stack - up 4-layer board impedance control – differential 100
– Single 50
Input TMDS Signal 1.2 Volts (peak-to-peak)
Input DDC Signal 5 Volts (peak-to-peak, TTL)
HDMI Output Resolution 480i ~ 1080p, 1080p24, VGA ~ UXGA
Power Supply 5VDC/2.6A (US/EU standards, CE/FCC/UL certified)
Dimensions (mm) 200(W) x 104(D) x 25(H)
Weight(g) 572
Chassis Material Metal
Silkscreen Color Black
Operating Temperature 0°C ~ 40°C / 32°F~ 104°F
Storage Temperature -20°C ~60°C / -4°F ~ 140°F
Relative Humidity 20% ~ 90% RH (non-condensing)
Power Consumption 5.5W (max)
Ω
Ω
3
Page 8
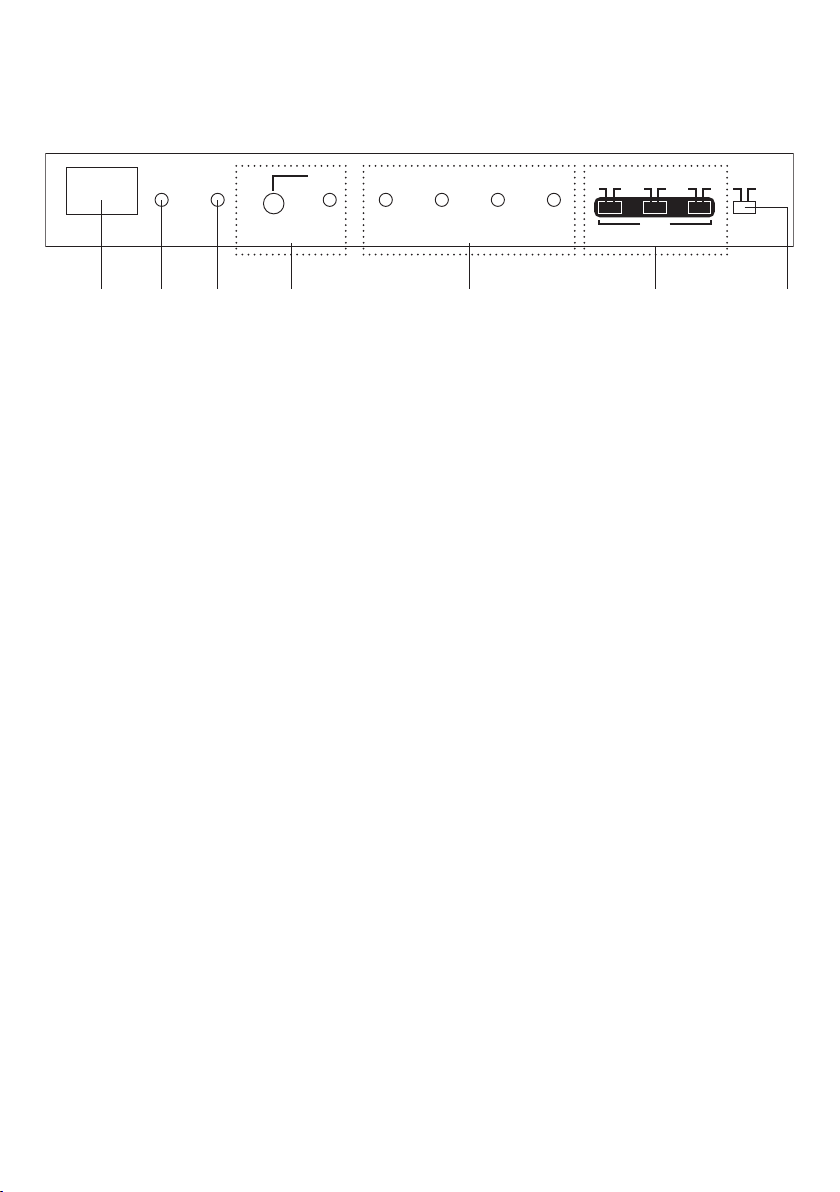
7. Operation Controls and Functions
7.1 Front Panel
POWER
ON OFF
POWER
Power Switch: This switch turns the system on and off.
①
Power LED Indicator: This LED is green when power is on and red when
②
SYNC CEC HDMI 1 HDMI 2 HDMI 3 HDMI 4
CEC
HD Audio
xvYCC
Deep Color
CLUX-14CEC 1x4 HDMI v1.3 Distribution Amp
③②① ⑤④ ⑥
STD TV 12Bit 8Bit RGB YCbCr ON OFF
EDID
Sys.Reset
⑦
the power is OFF.
Sync LED: When an HDMI source is connected to the input port, this
③
LED will turn on only when the splitter has established a link.
CEC button & LED: Press this button to switch the CEC function on or off.
④
The LED will turn yellow when the CEC is switched on. The factory default
setting is on.
Note:
1. In order to perform the CEC function, both source and display must
have CEC support.
2. The standby mode will only be activated when the last display has
been switched to standby.
3. All four HDMI outputs support CEC.
Output LED: When the HDMI display has been connected to the output
⑤
ports and a signal is being sent the LED will switch on.
EDID switch STD/TV: When switched to STD, EDID's manual settings of
⑥
Deep Color (12 or 8 bits) and color space (RGB or YCbCr) are allowed.
When switched to TV, the splitter will use the external EDID. If the EDID is
switched to STD users can then change the EDID's Deep Color value
between 8 or 12bits, under the condition that all outputs have the
same number of bits. For example, the EDID is switched to 12 bits but
only 3 output displays support 12 bits and one supports 8 bits. The 8 bit
display will not be able to display any media. Therefore it is reccomened
to choose settings compatible with all connected displays. Users can
also switch between RGB or YCbCr for the EDID's color space. But again,
all output displays need to comply with the selected settings. Most TV
monitors support both RGB and YCbCr but some monitors only support
RGB. When the EDID color space is set to YCbCr some monitors may not
display any image and/or display a "reddish" image. In cases like this
switching the EDID to RGB is a must. Factory default is set as YCbCr.
When the EDID is switched to TV, the unit will detect the first HDMI output
4
Page 9

EDID and record/save it in the unit. If the display attached to the first
output source is DVI it will skip to next output until the first HDMI is
detected.
Sys. Reset switch: It is suggested to always turn this setting OFF, unless
⑦
performing a system reset. By turning it to on, the system will reset
all connected displays to HDMI input 1 once every 8~10 minutes. Factory
default is set as OFF.
Note:
The system reset switch only functions on displays with a built-in CEC
feature.
7.2 Rear Panel
HDMI IN
4 3 2 1
HDMI OUT
DC 5V
③②①
HDMI Input: This slot is where you connect the output port of your HDMI /
①
DVI source (i.e., DVD, set-top box) using a HDMI / HDMI to DVI adaptor
cable.
HDMI output 1/2/3/4: These slots connect from the splitter to the input
②
ports of the HDMI displays. If there's more than one output connected, all
HDMI outputs will display an identical image.
Power: This is the slot where you insert the 5V DC power supply for
③
electrical power from an AC outlet.
5
Page 10

8. Connection and Installation
DVD
LCD TVLCD TVLCD TV LCD TV
6
Page 11

Acronyms
Acronym Complete Term
CEC Consumer Electronics Control
DTS Digital Theater Systems
DVI Digital Visual Interface
EDID Extended Display Identification Data
HDCP High-Bandwidth Digital Content Protection
HDMI High-Definition Multimedia Interface
PC Personal Computer
PCB Printed Circuit Board
SYNC Synchronize
TMDS Transition Minimized Differential Signaling
TTL Transistor-Transistor Logic
UXGA Ultra Extended Graphics Array
VGA Video Graphics Array
A
7
Page 12

CYPRESS TECHNOLOGY CO., LTD.
Home page: http://www.cypress.com.tw
20091029 MPM-CLUX14CEC
 Loading...