DATASENSOR SCS1 Instruction Manual

Phone: 800.894.0412 - Fax: 208.368.0415 - Web: www.ctiautomation.net - e.mail: info@ctiautomation.net
SCS1 SERIES
Smart Camera Sensor
INSTRUCTION MANUAL

Phone: 800.894.0412 - Fax: 208.368.0415 - Web: www.ctiautomation.net - e.mail: info@ctiautomation.net
Y
Y
T
T
I
I
M
M
R
R
O
O
F
F
N
N
O
O
C
C
F
F
O
O
N
N
O
O
I
I
We
DATASENSOR S.p.A.
Via Lavino, 265
40050 Monte San Pietro
Bologna - Italy
declare under our sole responsibility that the product(s)
SCS1-XX-XXXX-XXX, SMART CAMERA SENSOR AND ALL ITS MODELS
To which this declaration relates in conformity with the following
standard(s) or other normative document(s)
EN 55011, MAY 1999:
CEI
I
NDUSTRIAL, SCIENTIFIC AND MEDICAL (ISM) RADIO-FREQUENCY EQUIPMENT
RADIO DISTURBANCE CHARACTERISTICS
LIMITS AND METHODS OF MEASUREMENT
CEI EN 50082-2, JUNE 1997:
ELECTROMAGNETIC COMPATIBILITY. GENERIC IMMUNITY STANDARD.
PART 2: INDUSTRIAL ENVIRONMENT
CEI IEC 60947-5-2, MARCH 1999:
LOW-VOLTAGE SWITCHGEAR AND CONTROLGEAR. PART 5: CONTROL CIRCUIT
DEVICES AND SWITCHING
Following the provision of the Directive(s):
. SECTION 2: PROXIMITY SWITCHES
T
T
A
A
R
R
A
A
L
L
C
C
E
E
D
D
89/336 CEE AND SUCCESSIVE AMENDMENTS, 92/31 CEE, 93/68 CEE;
Monte San Pietro, 12/10/2004
Gianni Stradiotti
Quality Assurance Manager
UNI EN ISO 14001

Phone: 800.894.0412 - Fax: 208.368.0415 - Web: www.ctiautomation.net - e.mail: info@ctiautomation.net
Instruction Manual SCS1 Series
1. GENERAL INFORMATION
1.1. General description of SCS1 Smart Camera Sensor
SCS1 is an user-friendly vision sensor equipped with advanced inspection capability that assures very
precise quality controls on industrial manufacturing and automatic materials handling lines.
Quality control is based on vision techniques that consist in acquiring a reference image of the targetobject and configure the sensor in order to compare the template with the target-object images.
SCS1 can be configured either using the sensor integrated user interface, based on display and pushbuttons, or using the SCS1 graphic interface with PC connection.
The SCS1 sensor has been developed to function in a stand-alone mode. Even with PC configuration,
the digital outputs are activated only when the inspection is performed by the sensor.
SCS1 mounting and positioning are easy and immediate, thanks to a fixing bracket set that
guarantees precise regulation.
Interchangeable optics are supplied as accessories, together with integrated and external illuminators
that make SCS1 extremely flexible and suitable to many different applications.
The sensor integrated interface guarantees quick and easy setting of the main basic sensor functions.
The PC interface allows the user to fully exploit all the more advanced functions of the SCS1 sensor.
1.2. Available models
Six SCS1 models are available with the following characteristics:
SCS1 with integrated illuminator
- with RS232 serial protocol
- with RS485 serial protocol
- without serial protocol, with two supplementary digital inputs for inspection selection
SCS1 without integrated illuminator
- with RS232 serial protocol
- with RS485 serial protocol
- without serial protocol, with two supplementary digital inputs for inspection selection
1

Phone: 800.894.0412 - Fax: 208.368.0415 - Web: www.ctiautomation.net - e.mail: info@ctiautomation.net
SCS1 Series Instruction Manual
1.3. Typical applications
Typical SCS1 applications consist in quality and integrity controls of assembled products on an
industrial manufacturing line.
Some examples:
Label presence on phials / bottles
Marking control
Presence of mechanical parts
Contour control (contour match)
Component control on PCBs
Similarity check with a template
2

Phone: 800.894.0412 - Fax: 208.368.0415 - Web: www.ctiautomation.net - e.mail: info@ctiautomation.net
Instruction Manual SCS1 Series
1.4. Components
The system is composed of:
- compact sensor housing with reduced dimensions and weight;
- standard industrial connectors (M8, M12);
- 16 mm C-mount lens with 5 mm adapter ring to make it compatible with the sensor’s CS-
mount;
- RJ45 connector with Ethernet PC connection;
- LED function indicators and 4-digit display;
- fixing bracket set to facilitate sensor positioning;
- integrated ring light illuminator with deactivation option: composed of coloured LEDs able to
generate both continuous as well as pulsed light (with adjustable interval) to obtain
maximum efficiency;
- external illuminators powered through an M8 connector are available to generate pulsed
light: ring light, spot light, back light and laser light. Illuminators dedicated to particular
applications can be developed upon request.
3
/
Phone: 800.894.0412 - Fax: 208.368.0415 - Web: www.ctiautomation.net - e.mail: info@ctiautomation.net
SCS1 Series Instruction Manual
2. ELECTRICAL CONNECTION
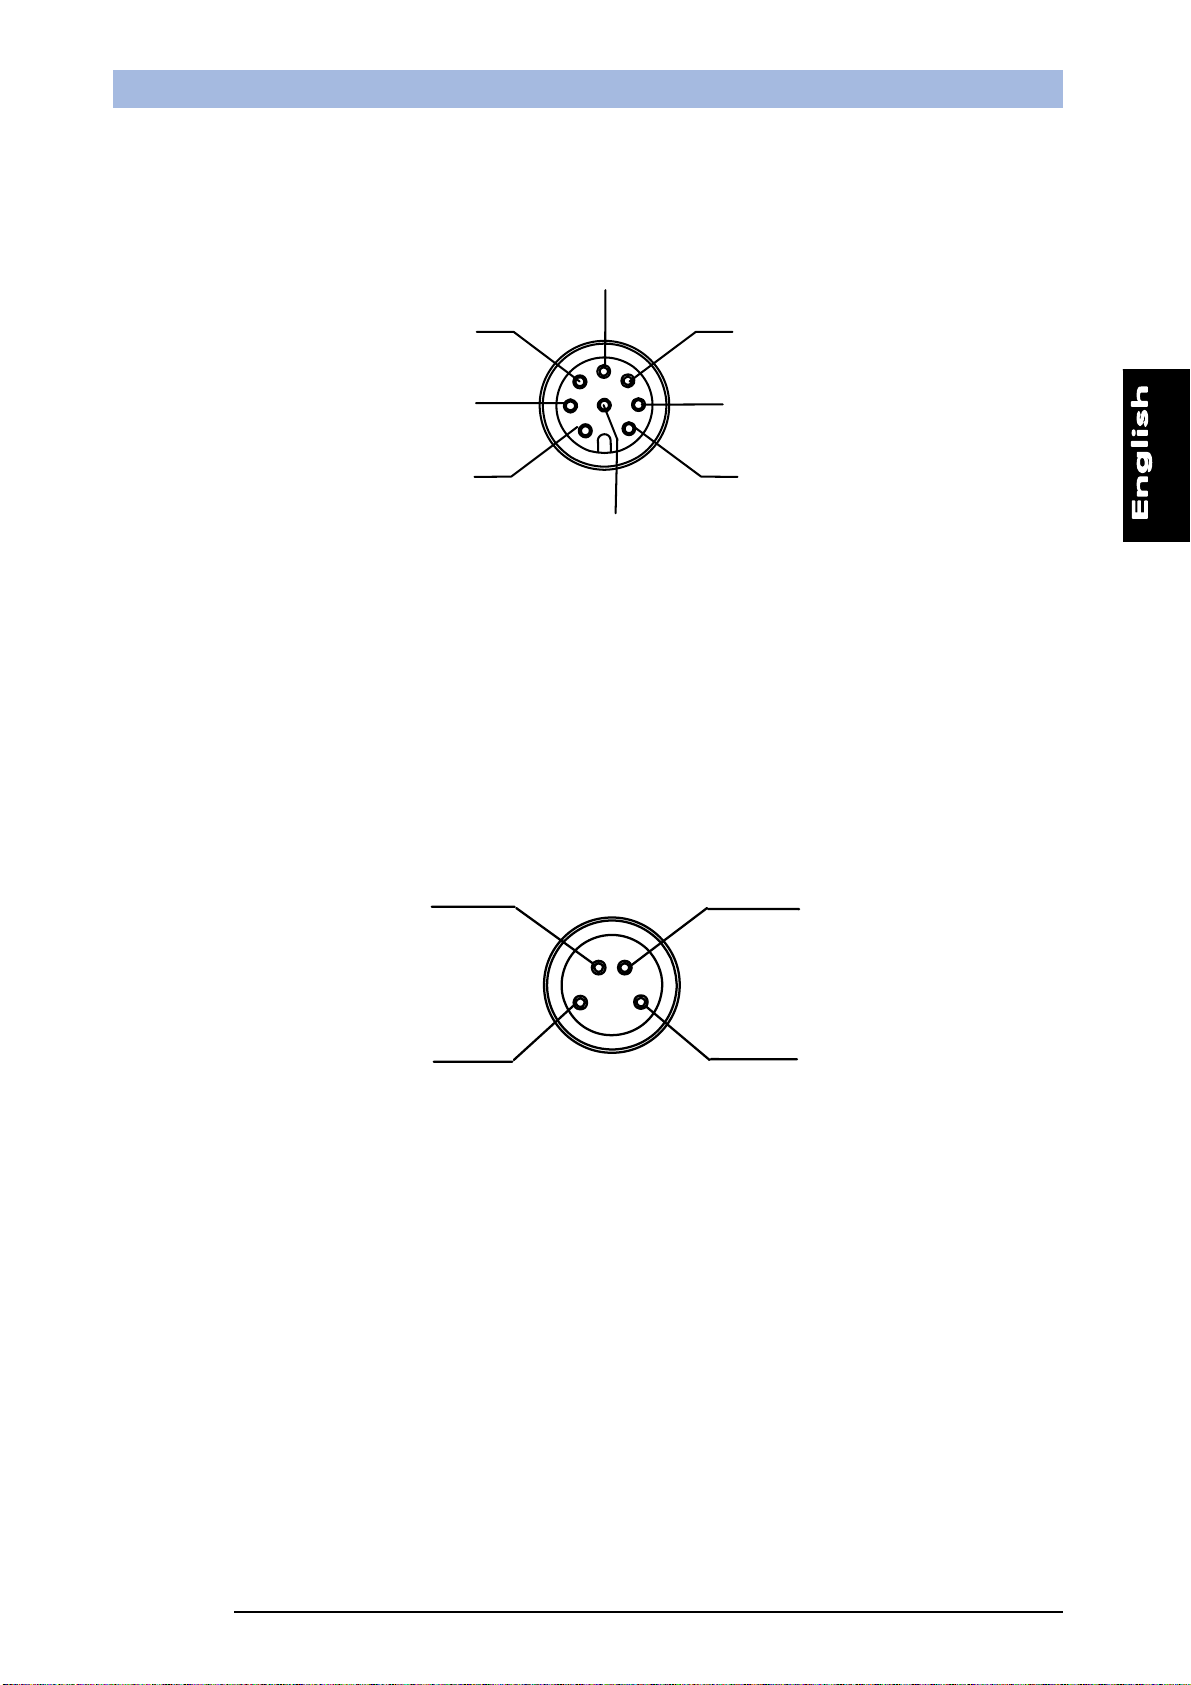
M12 connector
OUTPUT 2
RS232 RX / RS485 +
INPUT2
GND
7
1
RS232 TX / RS485 - /
INPUT1
EXTERNAL TRIGGER
1 = white = RS232 TX / RS485 -/ Input1
2 = brown = 24 Vdc power supply
3 = green = Configurable input
4 = yellow = Output 1
5 = grey = Output 2
6 = pink = RS232 RX/ RS485 +/ Input2
7 = blue = GND
8 = red = External trigger signal input
M8 connector
Strobe
5
6
4
3
OUTPUT 1
CONFIGURABLE
INPUT
2
8
4
2
+ 24 Vdc
N.C.
GND
1 = brown = 24 Vdc
2 = white = Not connected
3 = blue = GND
4 = black = Strobe TTL signal
RJ45 connector
This connector is used for sensor and PC communication using Ethernet 10/100 Mbps network.
4
3
1
+24Vdc

Phone: 800.894.0412 - Fax: 208.368.0415 - Web: www.ctiautomation.net - e.mail: info@ctiautomation.net
Instruction Manual SCS1 Series
3. INSTALLATION
3.1. Hardware connection
Check the following necessary components:
- SCS1 sensor;
- 16mm C-mount lens and adapter compatible with the sensor’s CS-mount. Alternatively, any
optics with CS mounting or C mounting with adapter;
- cable with M12 8-pole connector;
- 24 Vdc power supply.
And if necessary:
- cable with M8 4-pole connector (if an external illuminator is used);
- Ethernet 10/100 Mbps cable (if the SCS1 graphic interface is used).
- Thread optics onto the sensor.
- Power the cable with the M12 8-pole connector.
- Assure that the brown wire (pin 2) is connected to the positive 24 Vdc pole and the blue wire
(pin 7) to the negative pole (GND).
5) Connect the cable with M12 8-pole connector to the sensor.
5
Phone: 800.894.0412 - Fax: 208.368.0415 - Web: www.ctiautomation.net - e.mail: info@ctiautomation.net
SCS1 Series Instruction Manual
6) Optional: connect external illuminator to the sensor using the M8 4-pole connector.
- Optional: connect the sensor to the PC using the Ethernet 10/100 Mbps cable.
6

Phone: 800.894.0412 - Fax: 208.368.0415 - Web: www.ctiautomation.net - e.mail: info@ctiautomation.net
Instruction Manual SCS1 Series
3.2. Installation and activation of SCS1 graphic interface
3.2.1.
Minimum system requirements:
- Celeron
®
700 Mhz processor
- 128 MB RAM
- super VGA monitor (800x600 pixel)
- Ethernet 10/100 Mbps card
- 20 MB of available space on hard disc
- CD-ROM drive
Recommended system:
- Pentium
®
4 2 Ghz processor
- 256 MB RAM
- monitor with 1024x768 pixel resolution
- Ethernet 10/100 Mbps card
- 20 MB of available space on hard disc
- CD-ROM drive
3.2.2. SCS1 graphic interface installation
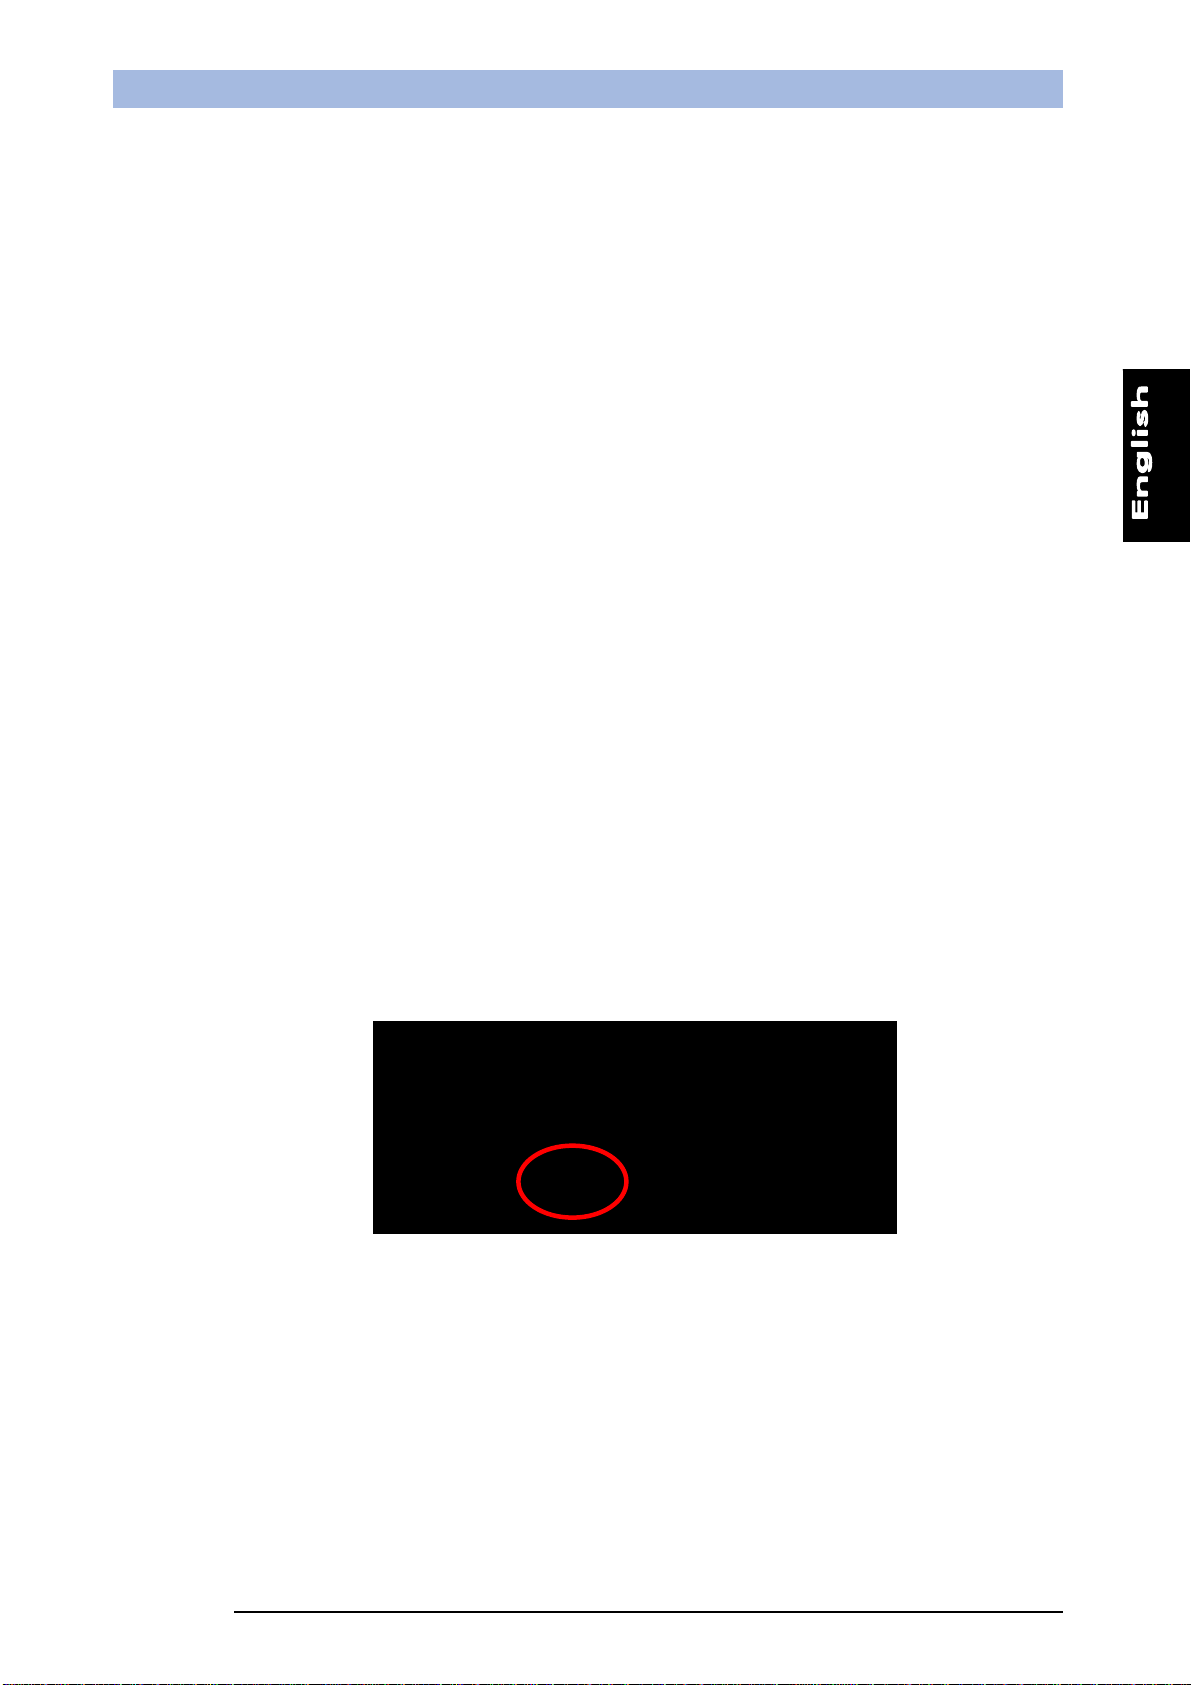
To install the SCS1 graphic interface, insert the CD-ROM supplied with the sensor. The following
window will appear automatically:
Figure 1
Note: if the CD-ROM does not automatically run, choose “Run” from the Start menu and type
D:\setup.exe (substitute the appropriate drive letter of your CD-ROM drive for D) and press
“Enter”.
The guided installation of the software will begin selecting “Install SCS1 Graphic User Interface”.
Follow then the installation instructions provided on the window.
7

Phone: 800.894.0412 - Fax: 208.368.0415 - Web: www.ctiautomation.net - e.mail: info@ctiautomation.net
SCS1 Series Instruction Manual
3.3. Communicating with the sensor
The PC and sensor communicate using the Ethernet network and require compatible IP addresses.
Note: an IP address is equivalent to a telephone number. The PC connects itself to the sensor only
when the sensor’s IP address is known, just like the phone number of the person to contact.
Differently from a telephone number, not all IP addresses are compatible among themselves and
a few rules, illustrated successively, must be respected.
All SCS1 present the following default standard communication parameters:
IP address 172. 27. 101. 209
Subnet mask 255. 255. 0 0
3.3.1.
PC configuration
The following steps have to be followed to configure correctly the PC:
1. Open the “Network Neighbourhood” clicking the desktop icon (Figure 2) and select
“Properties”.
Figure 2
or, alternatively, use the following route:
Start Æ settingsÆ control panel
Double-click “Networks and Dial-up connections” and the following window will show up:
Figure 3
Right-click the LAN icon and then select Properties
8
Phone: 800.894.0412 - Fax: 208.368.0415 - Web: www.ctiautomation.net - e.mail: info@ctiautomation.net
Instruction Manual SCS1 Series
2. Select “TCP/IP protocol” in the visualised window
and click “Properties” (Figure 4).
3. Configure the requested fields as follows (Figure
Figure 4
5):
4. Click “OK” to confirm.
Figure 5
IP address:
172.27.101.1
Subnet mask:
255.255.0.0
9
Phone: 800.894.0412 - Fax: 208.368.0415 - Web: www.ctiautomation.net - e.mail: info@ctiautomation.net
SCS1 Series Instruction Manual
3.3.2. Sensor configuration
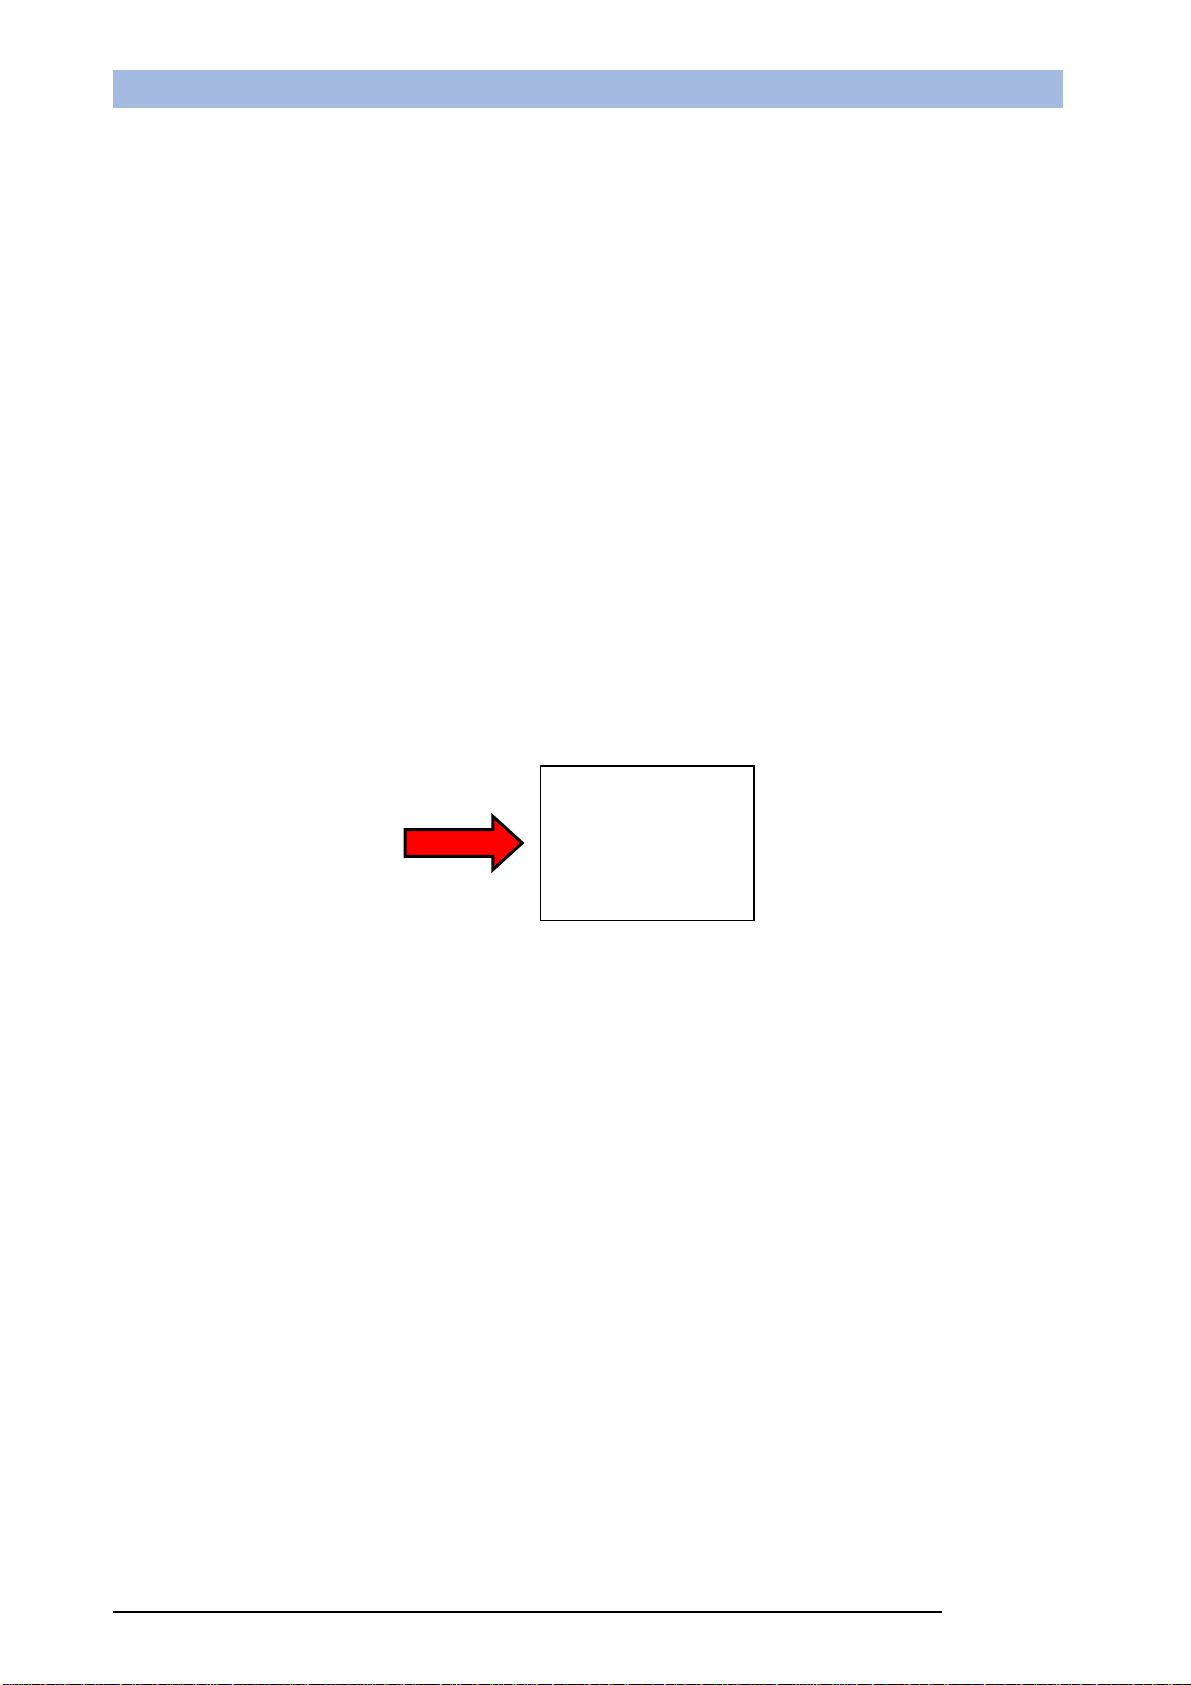
The integrated push-button interface has to be used to configure the
sensor’s IP address.
The display options can be visualised using the + and – push-buttons,
while SET is used to confirm the selected option.
1. Press SET to access the sensor configuration menu. The display visualises the
SET again to access the Setup menu.
2. Scroll down using + or – until the
text is visualised.
3. Press SET to access the communication parameters.
4. Scroll down using + or – until the
text is visualised, then press SET.
5. The display visualises a 3-digit number which represents the first field of the sensor IP address.
The 4 fields of the IP address can be visualised by using + and -. The field currently visualised can
be selected by pressing SET. Pressing again + and –, the numeric value of the selected field can
be changed. A continuous pressure on the push-button allows to proceed more rapidly. Press SET
to confirm changes (Figure 6).
6. Once checked all 4 fields of the sensor’s IP address, scroll down the menu until the
visualised on the display. Press SET to return to communication parameter configuration menu.
7. Scroll down menu using + or – until the
text is visualised. Press SET to return to general
menu. Alternatively, if the new configuration does not have to be saved, continue to scroll the down
the menu until reaching
and press SET to exit without saving.
Note: the changes made are effective only after sensor re-booting.
text, press
text is
to change the
number
Figure 6
10
Press and

Phone: 800.894.0412 - Fax: 208.368.0415 - Web: www.ctiautomation.net - e.mail: info@ctiautomation.net
Instruction Manual SCS1 Series
The PC and sensor connection can be established directly or using a LAN network.
3.3.3.
Direct connection
An Ethernet crossover cable (with TX and RX crossed
wires) has to be used in presence of a direct PC and
sensor connection and the sensor and PC IP addresses
must be configured
3.3.4.
LAN network connection
Crossover
Ethernet Cable
A traditional Ethernet cable has to be used in
presence of a PC and sensor connection using a LAN
network. Assure that the sensor IP address is
compatible with the existing network.
Ethernet Cable
If PC and sensor are connected directly, the user has
more freedom in configuring the IP address. On the
contrary, if the PC is connected to the sensor using a
local LAN network, intrinsic constraints regarding the
existing network configuration have to be respected.
For this reason the sensor’s IP address can be changed using push-buttons and thus guaranteeing
improved system flexibility.
If the PC’s IP address is unknown, the user can find it as follows:
1. open a DOS window (from the
OK);
2. type “ipconfig”;
3. press “Enter”.
The necessary information is then shown:
menu and select “Run”, type “cmd” and click on
Figure 7
11
Phone: 800.894.0412 - Fax: 208.368.0415 - Web: www.ctiautomation.net - e.mail: info@ctiautomation.net
SCS1 Series Instruction Manual
3.4. Software activation and sensor connection
Start the SCS1 graphic interface using a double click on the desktop icon.
Otherwise select SCS1 from the programme menu following the route:
Start > Programmes > Datasensor > SCS1.
The following window appears:
Important: the SCS1 graphic interface can function either connected to the sensor in on-line mode,
or not connected in off-line mode.
3.4.1.
On-line mode
To connect the sensor, set the communication parameters and then click “Connect”. The default
parameters are:
The “IP address” refers to the IP address associated to the sensor.
The programme will try to connect itself to the sensor. Two situations can occur:
- correctly connected sensor: the main programme window is visualised and the operating
functions of the on-line mode are activated;
- connected sensor and wrong communication parameters: the sensor does not respond.
12

Phone: 800.894.0412 - Fax: 208.368.0415 - Web: www.ctiautomation.net - e.mail: info@ctiautomation.net
Instruction Manual SCS1 Series
3.4.2. Solution of connection problems
If the connection between the sensor and PC is not established correctly, an error message is
visualised on the screen. Click “OK” to continue. Before changing the communication parameters,
please assure that the sensor is powered and the physical connection between the sensor and PC
is correct. If properly installed, the sensor’s IP address compatibility with the PC’s IP address has to
be then checked (refer to paragraph 3.2.2).
3.4.3.
Off-line mode
The program is set to function also in the off-line mode, operating on images previously saved by
the sensor and saved on the PC or on any other compatible image (bitmap format with 256 grey
levels, 640x480 or 320x240 resolution).
The off-line mode can be accessed by clicking on “Off-line” instead of “Connect” after starting the
programme.
The off-line mode offers all the options necessary for an inspection configuration (naturally with the
exception of acquiring new images and checking the correct functioning, that are available only in
the on-line mode).
13

Phone: 800.894.0412 - Fax: 208.368.0415 - Web: www.ctiautomation.net - e.mail: info@ctiautomation.net
SCS1 Series Instruction Manual
4. SENSOR CONFIGURATION
The term “inspection” refers to all the operations the sensor carries-out to control object characteristics
and control the respect of specific conditions.
The user has two possibilities to set correctly the sensor for inspection configuration:
- sensor integrated interface;
- SCS1 graphic interface.
4.1. General considerations
Some general conditions have to be respected when configuring an inspection:
- decide exactly what to detect;
- assure correct and constant lighting
- assure a good contrast between target-object and background;
- acquire a good reference image
The reference image is used as a template to determine the specifications to be respected by the
images acquired during the inspection.
It is thus very important to acquire a high-quality image, where the target-object presents well-defined
edges and evident main characteristics:
- choose carefully the tools to use for the elaboration to guarantee the best result possible in the
easiest manner (particularly in the software inspection where a wider range of tools is available);
- regulate precisely the parameters of the tools selected;
- test the inspection choices made on different variations of the same object, trying to carefully
distinguish the constraints within which inspection results can be considered correct and which
tolerance can be accepted without passing the constraints;
- compare results to discover any incongruence;
- re-configure tools to reduce incongruence;
- run inspection.
, minimising ambient light conditioning on working area;
.
14

Phone: 800.894.0412 - Fax: 208.368.0415 - Web: www.ctiautomation.net - e.mail: info@ctiautomation.net
Instruction Manual SCS1 Series
4.2. Inspection configuration using the sensor integrated interface
The sensor integrated interface consists in 3 push-buttons (SET, +, -) and a 4-digit display presenting
four LEDs.
The important steps to configure an inspection using the display are three:
1 – inspection parameter regulation;
2 – background and reference image acquisition (Teach-in);
3 – inspection saving and starting.
4.2.1.
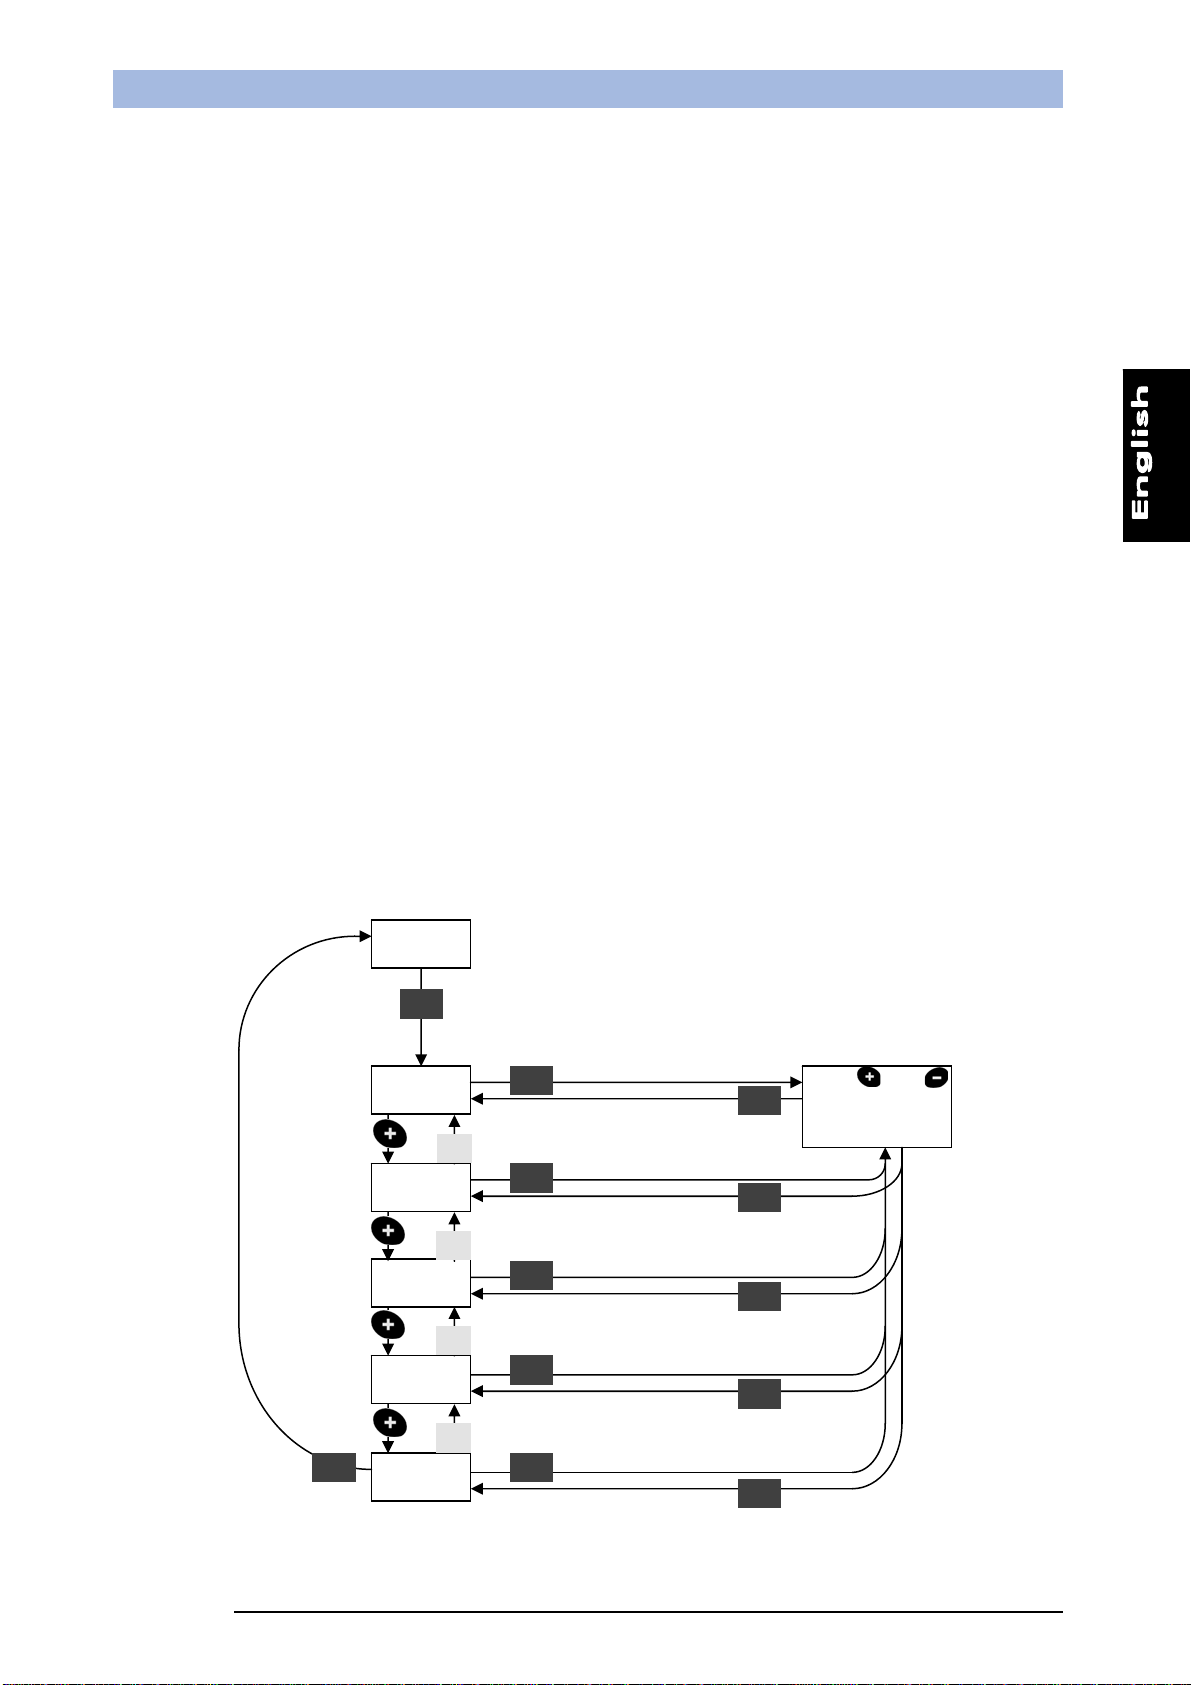
Sensor configuration menu
The menu options can be visualised using the + and – push-buttons.
Press SET to select an option and the relative submenu is opened.
At powering, the device initialisation process lasts approximately 25 sec during which the “SCS1”
text is visualised.
At the end, the display visualises the system status.
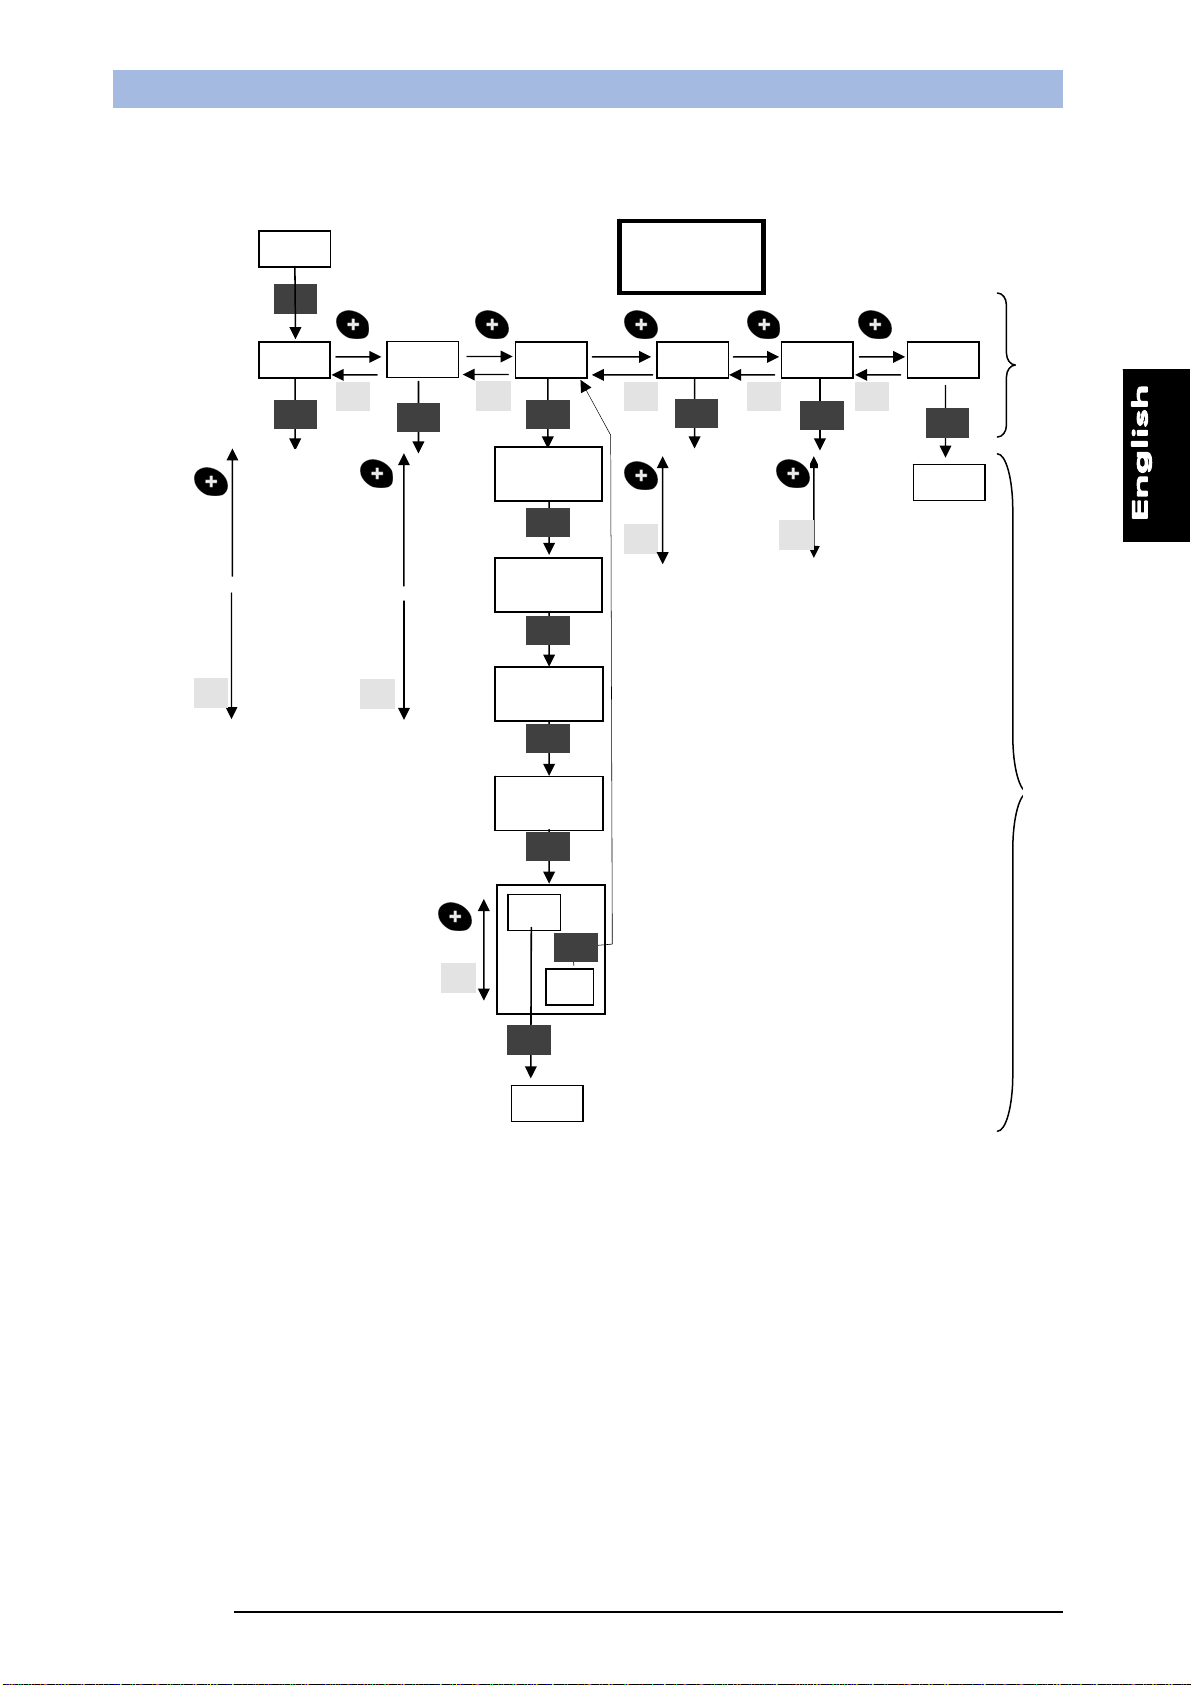
The main menu is accessed by pressing SET (Figure 8), offering the following options:
15
Setup: allows to access the parameters that control sensor functioning and inspection
process.
Registers: visualises and modifies the numeric values of the tool parameters set using the
PC interface in the 16 sensor registers.
Teach-in: self-acquisition process necessary to acquire the template used for comparison
during inspection.
Save: allows to save inspection and automatically enter in the Run mode;
Network: allows to access communication parameters.
Display: allows to change text orientation on the display.
Start inspection: allows to return to the Run mode, carrying-out the previously active
inspection, without memorising new settings.
Phone: 800.894.0412 - Fax: 208.368.0415 - Web: www.ctiautomation.net - e.mail: info@ctiautomation.net
SCS1 Series Instruction Manual
4.2.2. Sensor configuration diagram
Status
Setup
Registers
Teach-in
-Illuminator
-Autoexposure
- Focus
- Resolution
- Trigger
- Mode
- Output
- Save
- Esc
- reg0
- reg1
- reg2
- reg3
- …
- reg16
- Save
- Esc
BKGD
Acquisition
Target
Acquisition
Pass / Fail
Threshold
adjustment
Sensor
Configuration
Menu
Network
- Ip Address
- Net Mask
- Save
- Esc
Display
- Direct
-
Reverse
- Esc
S_IN
Run
M
A
I
N
M
E
N
U
S
U
B
M
E
N
U
Save
Esc
Run
Figure 8
16

Phone: 800.894.0412 - Fax: 208.368.0415 - Web: www.ctiautomation.net - e.mail: info@ctiautomation.net
Instruction Manual SCS1 Series
4.2.3. Inspection parameter regulation
The options that control the sensor and inspection mode parameters are present in the Setup menu:
•
•
•
•
•
•
•
•
Light
Autoexposure
Focus
Resolution
Trigger
Mode
Save
Exit
The following are only the basic instructions necessary for inspection configuration. For a more
detailed explanation of each option refer to paragraph 5.4.
1. Select
to activate ( ) or deactivate ( ) the integrated illuminator.
2. Select
to begin sensor autoexposure. Assure that, during the autoexposure process,
the target-object and background to inspect are in front of the sensor. At the end of the process,
the display will visualise
, in case of a successful result or , in case of failure. In
both cases press SET to return to previous menu.
- Select
to focus the image. The user has to act on the sensor optics to increase the
number that appears on the display. Press SET to return to previous menu.
- Select
to choose the necessary resolution. The possible resolutions are given
below:
•
•
•
¼ VGA (320x240 pixels)
full VGA (640x480 pixels)
exit from resolution setting submenu
Scroll down the options using + and –. Press SET to select the option.
- Select
•
to choose the Trigger mode. The possible modes are given below:
continuous
•
•
external
exit from trigger mode selection submenu
17

Phone: 800.894.0412 - Fax: 208.368.0415 - Web: www.ctiautomation.net - e.mail: info@ctiautomation.net
SCS1 Series Instruction Manual
Scroll down the options using + and –. Press SET to select option.
- Select
•
•
•
•
to choose inspection method. The possibilities are given below:
Blob count
Pattern count
Contour match
Exit
Scroll down the options using + and –. Press SET to select option.
Selecting Blob count and Pattern count, a number appears on the display that can be changed
using + and –. The number corresponds to the number of objects expected to be found during
inspection. Press SET to return to previous menu.
- Select
to save present configuration or to exit without saving.
4.2.4.
Registers
The Register menu consents the configuration, through the PC interface, of the value associated to
the 24 registers representing the parameter tool values set for the current inspection. These values
can be modified in the Register menu (refer to specific section at page
54).
The numeric value can be modified choosing the specific register:
•
•
• …
•
The <register>/<parameter type > association (e.g reg1/blob count threshold) is not expressed in
the register menu, but has to be remembered by the user that has set the current inspection.
To change the value of a register press
the value press
or . To save press or to leave unchanged the value press once
. The current register value is visualised. To change
and re-press it without modifying anything.
The sequence has to be repeated to modify each single value/register.
To save the new configuration press
or press to cancel modifications made.
18

Phone: 800.894.0412 - Fax: 208.368.0415 - Web: www.ctiautomation.net - e.mail: info@ctiautomation.net
Instruction Manual SCS1 Series
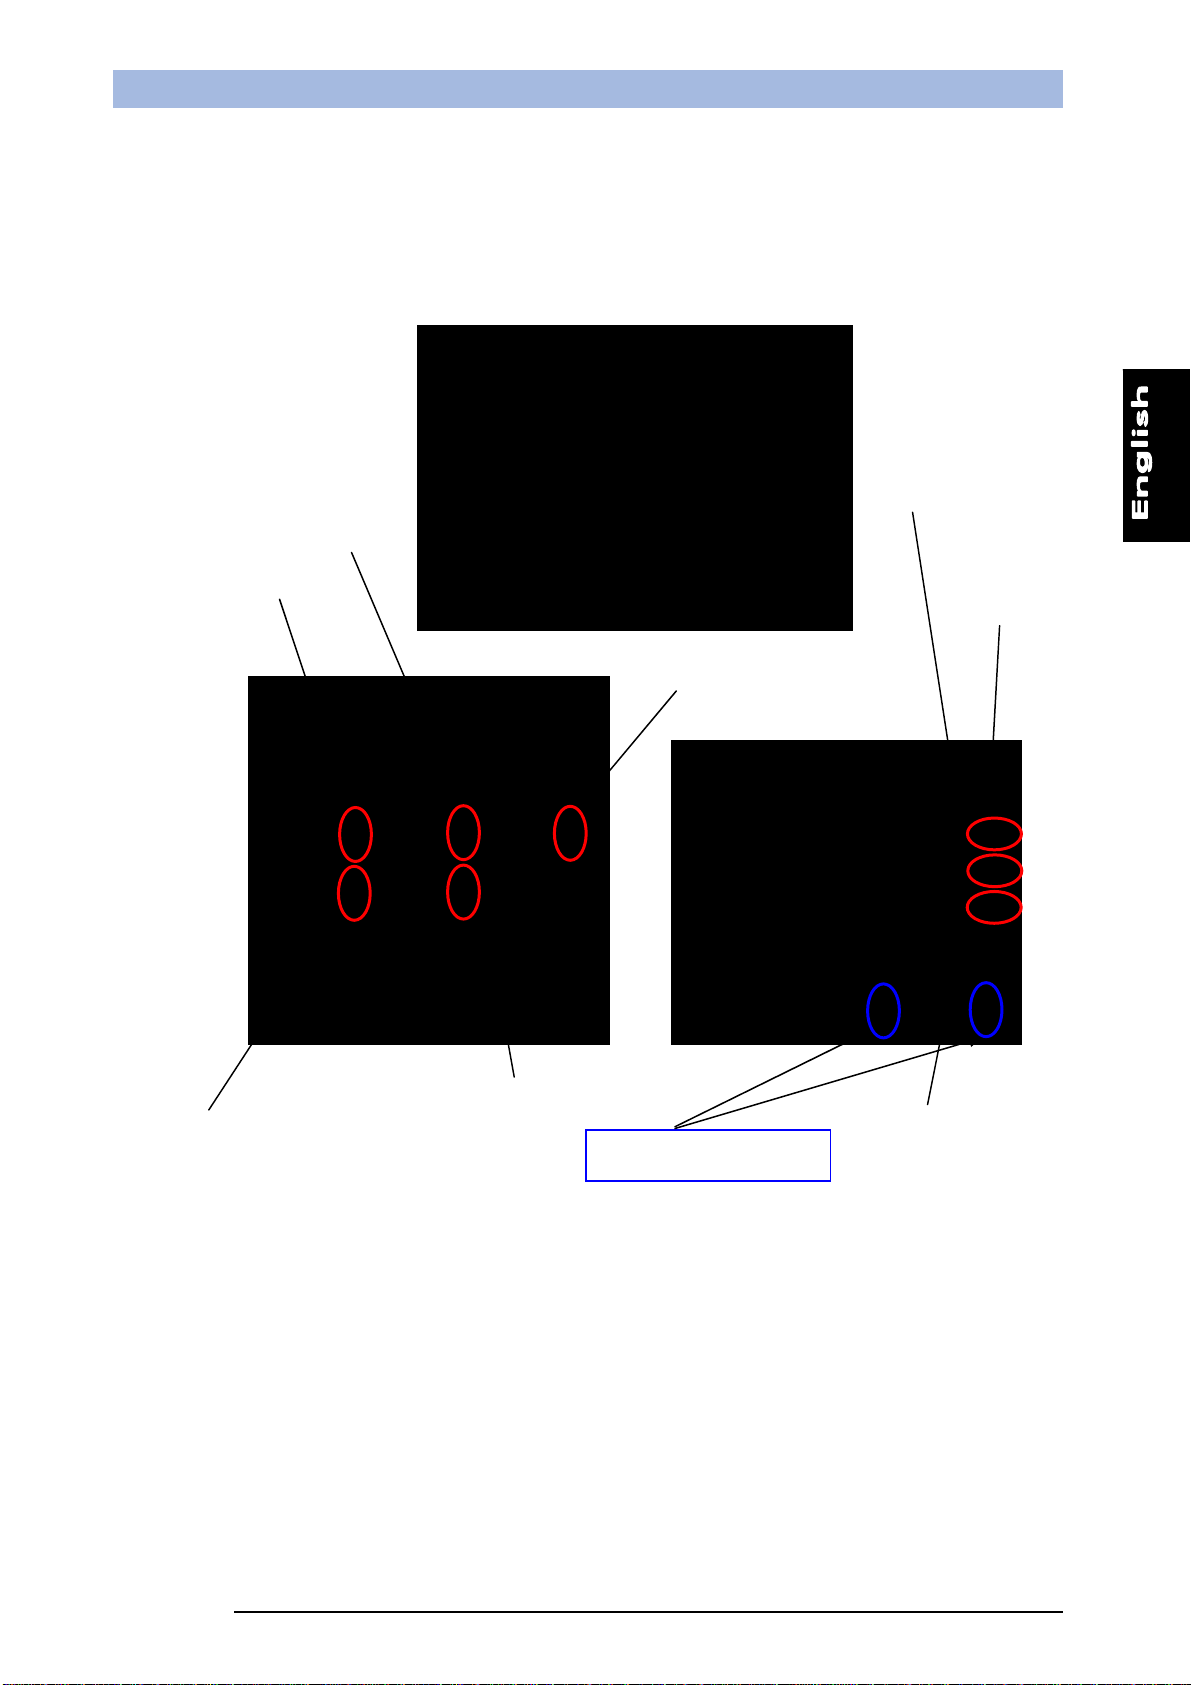
To associate a parameter to a register, the following 4 simple steps have to be followed using the
graphic interface provided:
1.
Click on the grey box on the left of each parameter.
2.
A window appears.
3.
Select the register to be associated to the parameter (e.g. register 2).
4.
The R2 text will appear inside the grey box signalling that the parameter has
been associated to register 2.
19
g
Phone: 800.894.0412 - Fax: 208.368.0415 - Web: www.ctiautomation.net - e.mail: info@ctiautomation.net
SCS1 Series Instruction Manual
Example:
An example is provided of how to use parameters in order to better understand their functioning. An
inspection will be created using the Edge locator tool and some parameters will be associated to
different register tools. Then, the control and change of the register values will be shown using the
SCS1 integrated interface (numeric button).
Barycentre in register
Y in register 1
6
X in register 0
threshold in
Angle in register 2
Thickness in register 4
Length in register 3
Parameter not associated
Absolute threshold in re
The above images show the configuration of an inspection containing an Edge locator and how the
parameters are associated to the different SCS registers.
In particular, the following associations have been made:
• The ordinate value of the intersection point of the position vector with the edge to register 0.
• The value of the intersection point of the position vector with the edge to register 1.
• The angle value formed by the direction vector of the shape tool with the horizontal axis to
register 2
• The length value of the tool vector to register 3
• The thickness value to register 4
• The search threshold value to register 5
• The barycentre value to register 6
• The absolute threshold value to register 7
Search
register 5
ister 7
20

Phone: 800.894.0412 - Fax: 208.368.0415 - Web: www.ctiautomation.net - e.mail: info@ctiautomation.net
Instruction Manual SCS1 Series
Note: the user configuring the inspection has to remember the association between the particular
register and the relative parameter as this information is not given in the display of the
integrated interface.
Once save the inspection on the device, the register values can be then controlled without using the
graphic interface setting the sensor in the Run mode. The values can be modified using the
integrated device interface in the following manner:
1. In Run mode press
.
2. Using
3. Select the menu using
4. The name of the first
5. Using
6. Once chosen the register (e.g.
- the Y parameter value of the Edge locator tool).
7. To modify the value press
confirm (to leave the value unchanged press
anything).
8. Repeat 5, 6 and 7 steps when changing the registers.
9. To save each change choose
to main menu.
4.2.5. Teach-in setting
The device self-acquisition or Teach-in is
activated by selecting “TEAC”.
The following operations are sequential. The user
proceeds step by step pressing SET.
Step 1 “BAC”. Background acquisition.
Press SET to acquire background and pass to
next step.
Step 2 ”TARG”. Reference image acquisition.
Position target-object in front of the sensor and
press SET to acquire and then pass to next step.
Step 3 “SUCC”/”FAIL”. Depending on the
success or failure of the acquisition the “SUCC”
or “FAIL” text is visualised. In case of failure
press SET and return to main menu. In case of a
positive result press SET to pass to next step.
Step 4 “Threshold Regulation of the acceptance
threshold. The value visualised represents the
acceptance threshold that will be visualised
during inspection. The lower the threshold, the
more template and target-object have to correspond to reach a successful inspection. Use + or - to
and choose the menu.
.
register will appear.
and choose the register amongst the 16 available ÷ .
) press to visualise value (in this case
. Using and set the new value. Re-press to
once and re-press it without modifying
or to cancel changes choose and so return
21

Phone: 800.894.0412 - Fax: 208.368.0415 - Web: www.ctiautomation.net - e.mail: info@ctiautomation.net
SCS1 Series Instruction Manual
change the threshold. Press SET to reconfirm the Teach-in sequence.The lower the threshold, the
more template and target-object have to correspond to reach a successful inspection. User + or – to
change the threshold.
Press SET to reconfirm the Teach-in sequence.
Step 5 “Confirm”. Press SET to confirm Teach-in sequence. The inspection can now be saved or
exit from the menu pressing respectively SAVE or ESC (using + or -).
The sensor is now configured and inspection can begin. If it’s necessary, press S_In to make the
inspection run.
22

Phone: 800.894.0412 - Fax: 208.368.0415 - Web: www.ctiautomation.net - e.mail: info@ctiautomation.net
Instruction Manual SCS1 Series
4.3. Inspection configuration using the SCS1 graphic interface
The SCS1 graphic interface can be used to configure an inspection. Then the user has to choose
“Connect” in the window to enter in the system’s on-line mode (Paragraph 3.4).
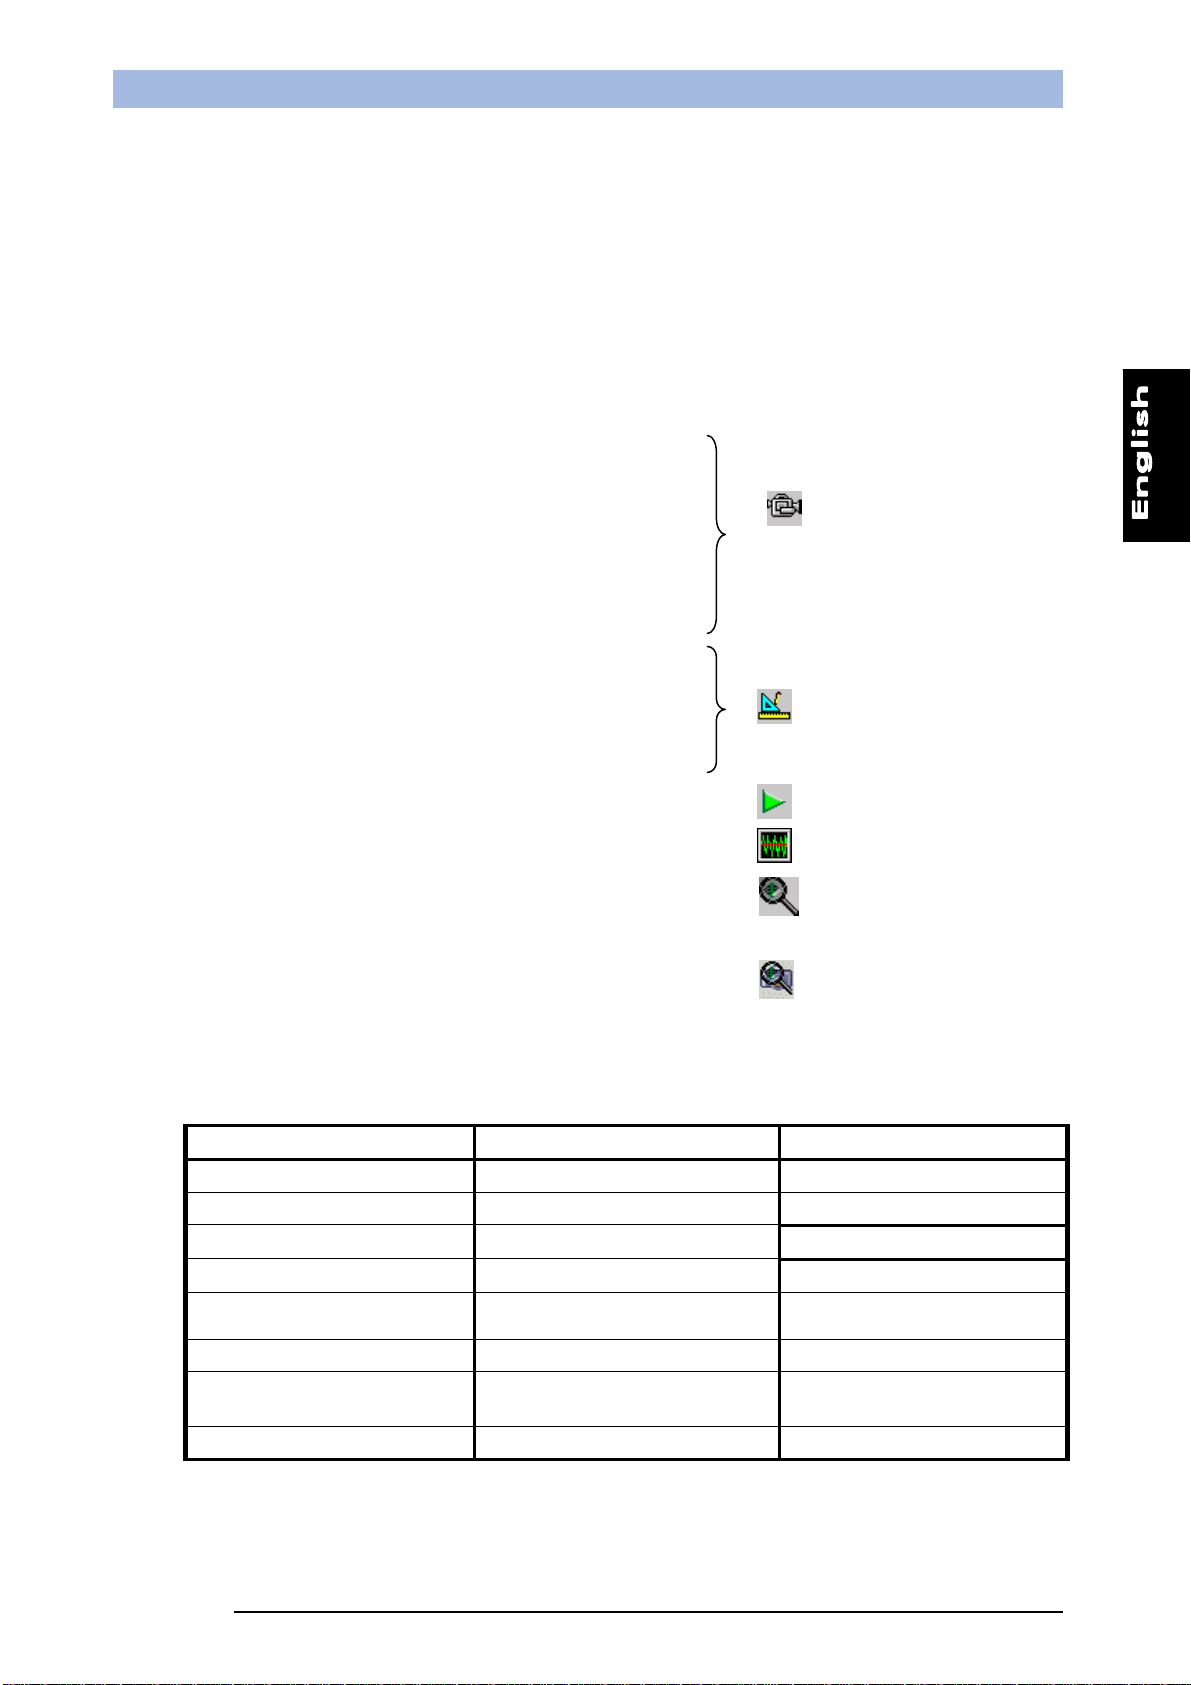
The main window of the SCS1 graphic interface is visualised (Figure 9) and the system enters in an
“IDLE” status awaiting instructions.
Toolbar
Toolbox
Main menu
Parameters
Graph
Status bar
The inspection configuration can now begin in one of the following ways:
Operation
list
Figure 9
1. Free new inspection creation (for advanced users): all the available options are active and the
user has complete freedom in developing inspections.
- Wizard-guided new inspection creation (recommended to new users): the SCS1 graphic
interface suggests some steps to follow and guides the user in the creation of a new
inspection.
23
Phone: 800.894.0412 - Fax: 208.368.0415 - Web: www.ctiautomation.net - e.mail: info@ctiautomation.net
SCS1 Series Instruction Manual
4.3.1. Free new inspection creation
The SCS1 graphic interface functioning is characterized by different operating steps (Live mode,
Setup mode, Test mode, Run mode, Monitor mode). Each operation carries-out specific functions.
Please refer to chapter 6 for complete details of each function. The creation of a new inspection
follows a logic order that can be summarised as follows:
- Open a new inspection
- Target positioning
- Resolution selection
- Lighting check
- Exposure time setting
- Image focussing
- Discarded image selection
- Output configuration
- Saving of reference images
10. Trigger selection
11. Locator insertion
12. Control insertion
13. Analysis tool insertion
14. Test tool insertion
15. Inspection saving
16. Functioning check of tools used
17. Inspection time check
18. Visualises the last 10 images elaborated by the
the current scritp.
19. Visualises the last image saved showing the tool
status
Table 1 summarises the actions to carry-out during each operating status:
Live mode Setup mode Run mode
1) Target positioning 1) Trigger selection Tool check
2) Resolution selection 2) Locator insertion
3) Lighting check 3) Control insertion Inspection time check
Live mode
Setup mode
Run mode
Monitor mode
Test Mode
Test Mode da telecamera
Monitor mode
4) Exposure time 4) Analysis tool insertion
5) Image focussing 5) Test insertion
6) Test image saving 6) Serial Output Insertion
Visualises the last image
saved showing the tool status
Test mode from telecamera
Test Mode
7) Output configuration 7) Inspection saving Visualises the last image
saved showing the tool status
8) Reference image saving
Table 1
Note: the SCS1 graphic interface is only a means that enables the user to fully exploit all the more
advanced sensor functions. Once configured and saved the inspection on the sensor, the
24

Phone: 800.894.0412 - Fax: 208.368.0415 - Web: www.ctiautomation.net - e.mail: info@ctiautomation.net
Instruction Manual SCS1 Series
device can function in the stand-alone mode and can be disconnected from the PC. Moreover,
the digital outputs can be activated only if the sensor is disconnected from the PC or runs in
Monitor mode.
25

Phone: 800.894.0412 - Fax: 208.368.0415 - Web: www.ctiautomation.net - e.mail: info@ctiautomation.net
SCS1 Series Instruction Manual
1. Opening a new inspection
The creation of a new inspection can be selected either from the menu or from the toolbar.
Toolbar Menu
Once the “New Inspection” is selected, the system enters automatically in the Live mode. The
images acquired by the sensor are visualised in this mode.
An application example is herein provided.
The application consists in the counting of tablets in a blister and integrity control. Figure 10 shows
the image visualised during the Live mode phase.
Figure 10
The user can control what the sensor acquires during Live mode and so all aspects concerning the
quality of the acquired image have to be optimised.
This is a key operation to guarantee the success of the application.
2. Positioning
Position the target-object inside the field of view.
3. Resolution
Select the resolution of the image to visualise.
Different resolutions are available: VGA (640x480 pixel) and ¼
VGA (320x240 pixel).
A larger working field is obtained by selecting VGA while ¼ VGA
favours inspection speed, reducing the image acquisition time.
26
Phone: 800.894.0412 - Fax: 208.368.0415 - Web: www.ctiautomation.net - e.mail: info@ctiautomation.net
Instruction Manual SCS1 Series
4. Lighting
Ensure that lighting is uniformly distributed on the entire field of
view (FOV), paying attention to reflective surfaces.
The integrated illuminator can be activated or deactivated,
selecting or not the option. External illuminators are available as
accessories.
5. Exposure time
Start the sensor autoexposure process clicking on the
“Autoexpose” push-button. The user can control the period in
which the image-acquiring device (CMOS) is exposed to light.
The longer the exposure times, the more light enters into the
device and consequently the image is brighter. If the result
obtained is not satisfying, the regulation can be made manually,
changing the “Exposure” parameter.
The results obtained by increasing the exposure time are obtained also by increasing the sensor’s
gain value. The user must be careful as gain increase generates electric noise increase in the
amplifying circuit and the image quality is reduced.
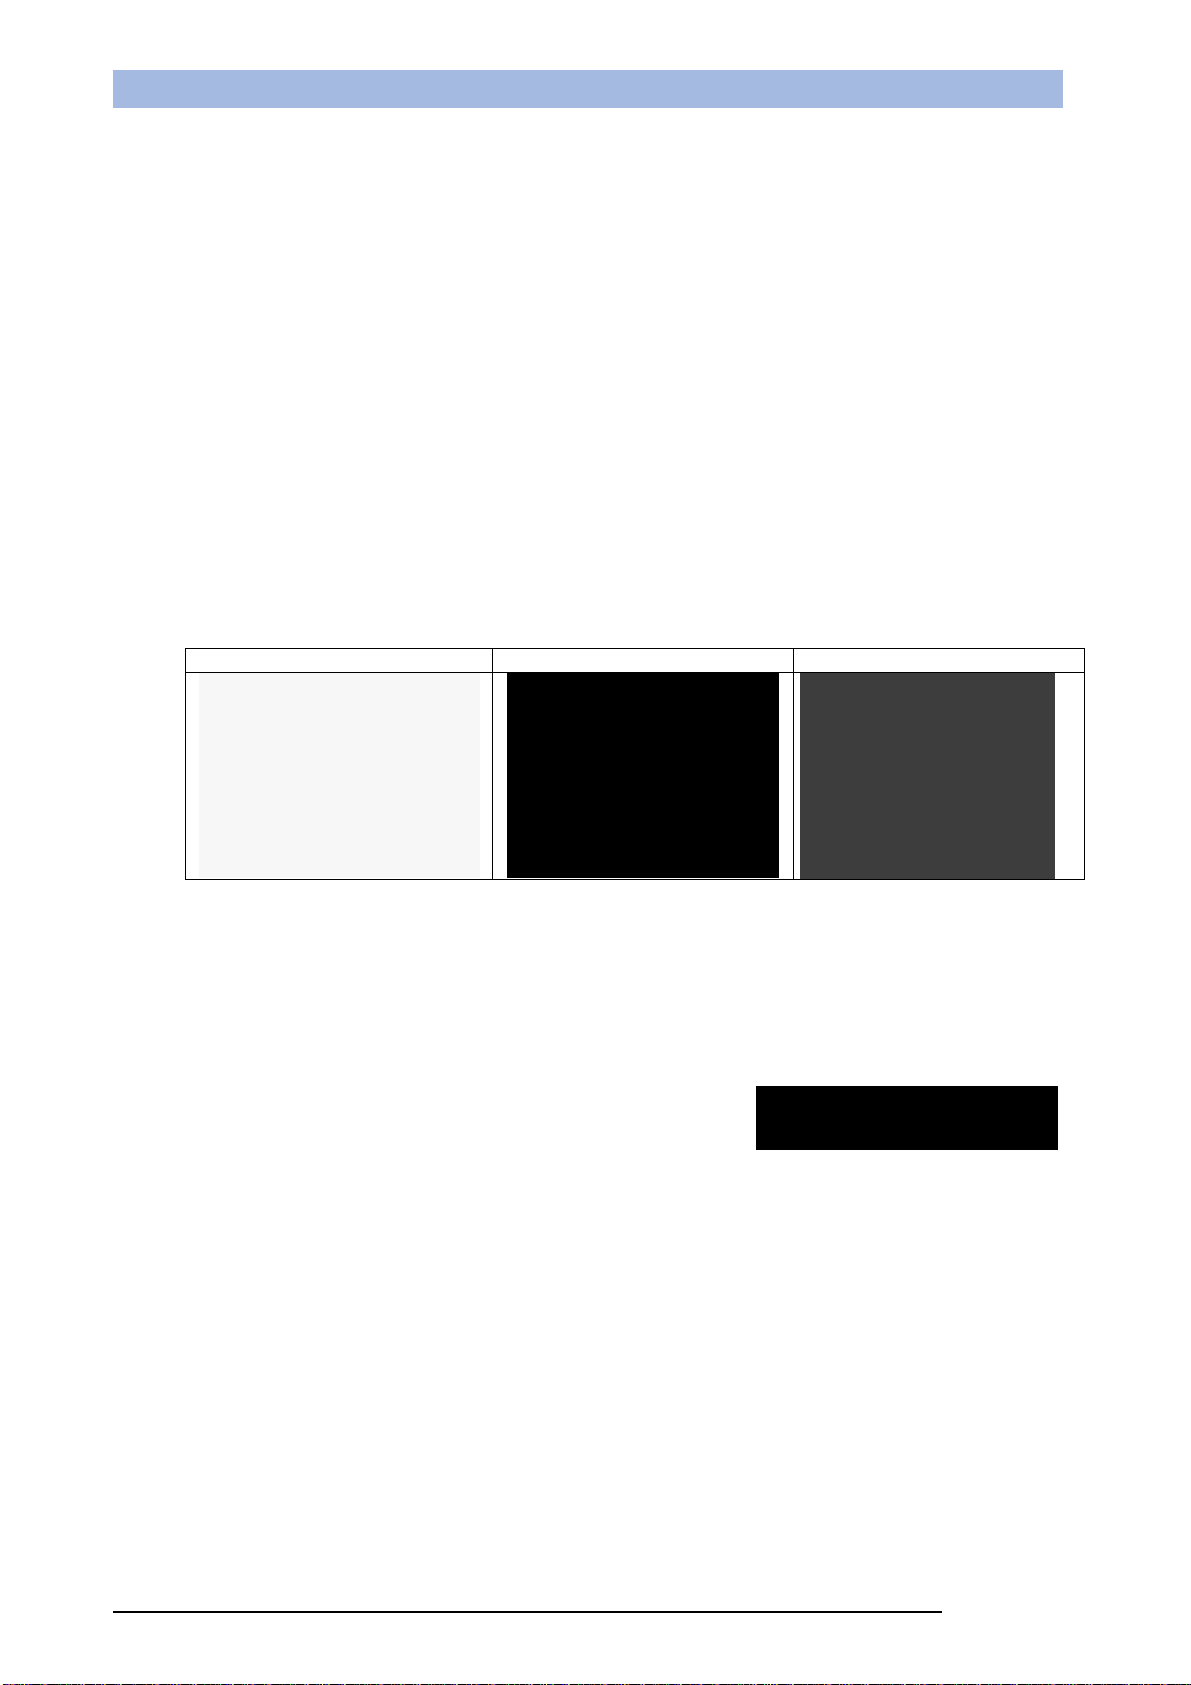
Low exposure time Correct exposure time High exposure time
6. Image focusing
Correct focusing is indicated by:
- numeric value
To maximise focus, turn the sensor lens’ ring trying to increase the focus value (or level indicator).
7. Acquisition mode
Configures the reference image using the trigger hardware, if set in the trigger mode. For example,
if a dynamic scene is controlled, a particular phase is difficult to obtain by pressing the “saving the
reference image” icon. The acquisition of the reference image in the trigger mode and, using a
trigger hardware, has to be set and then save the singular phases of the inspected scene until
reaching the necessary configuration. In this case, pressing “saving the reference image” and
providing another trigger pulse, a particular image can be saved as our template.
8. Image saving
The elaborated images can be stored in the sensor memory
during inspection and visualised successively in Test mode to
check tool elaboration functioning. Different saving modes can
be selected: saving all elaborated images, only those which
have generated an inspection failure or none. Up to 10 images can be saved. Surpassed this limit,
the new images are saved over the existing ones, following a FIFO logic: the oldest image is
replaced by the latest image.
27
p
Phone: 800.894.0412 - Fax: 208.368.0415 - Web: www.ctiautomation.net - e.mail: info@ctiautomation.net
SCS1 Series Instruction Manual
9. Output configuration
Two digital outputs are available to gather inspection
information.
The outputs can be configured as follows:
- Normal functioning: the output switches according to
the inspection results (OK/Failure), if the tools have
been configured correctly.
- Toggle mode: the output switches each time the
inspection cycle is completed.
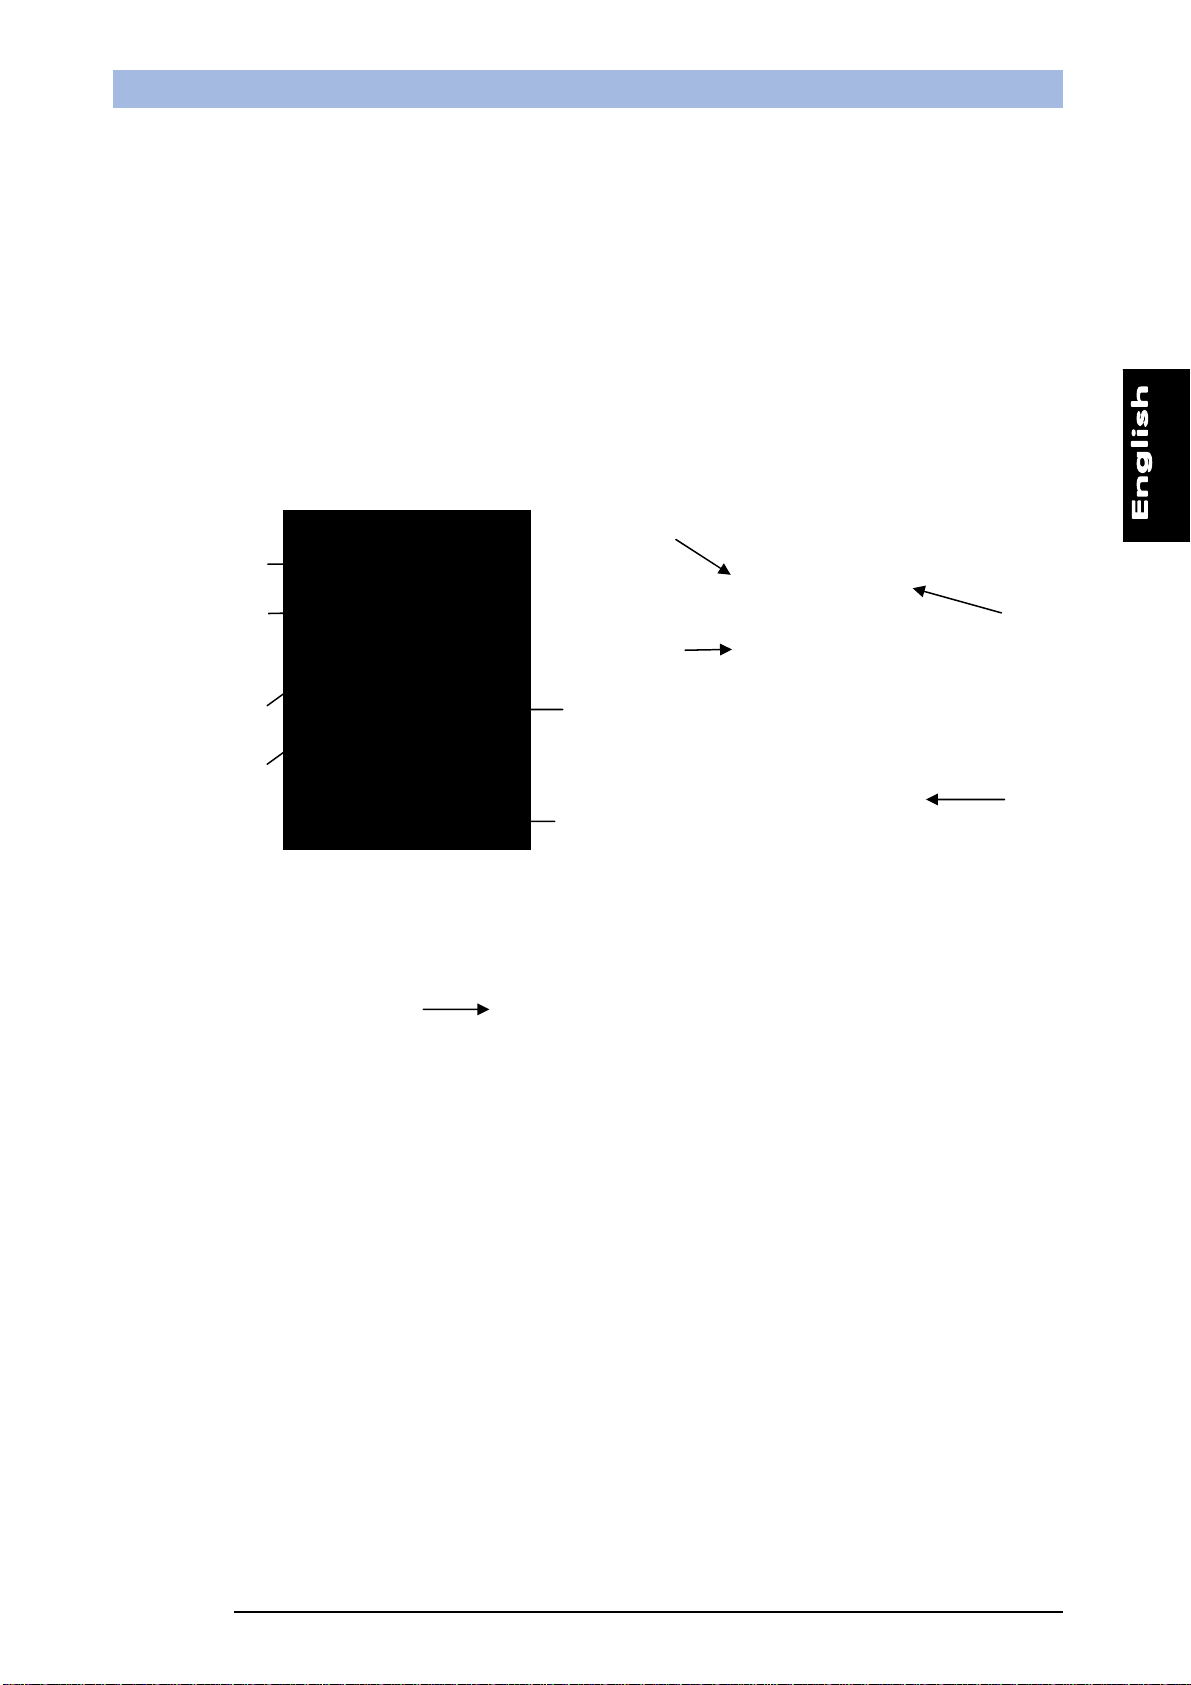
Live mode panel parameters
Resolution
Exposure
time
Integrated /
external
illuminator
activation
Strobe
activation
Trigger
arameters
Gain
Focussing
indicators
Outputs
Autoexposure
Reference
image saving
Elaborated
image saving
28
 Loading...