

Page 1
DAP-CV2830
Digital to Analogue audio converter
DAP-CV2830
DIGITAL TO ANALOGUE AUDIO CONVERTER
USER MANUAL
Contents
1.0 Features ......................................................................... 2
2.0 Specifications ................................................................. 2
3.0 Package Contents ........................................................... 3
4.0 Panel Descriptions .......................................................... 3
5.0 Connection and Operation ............................................. 4
6.0 Connection Diagram ...................................................... 4
Page 2
DAP-CV2830
Digital to Analogue audio converter
Thank you for purchasing this Audio Converter. For optimum performance
and safety, please read these instructions carefully before connecting,
operating or adjusting this product. Please keep this manual for future
reference.
1.0 Features
Converts SPDIF Optical (TOSLINK) or Coaxial digital PCM audio input
to analogue stereo L/R RCA and 3.5mm outputs simultaneously.
Supported sample rates including 32kHz, 44.1kHz, 48kHz, 96kHz and
192kHz, up to 24-bit resolution
Ultra low jitter and high fidelity design using new receiver & D/A
converter chips
Auto sensing input selection with priority given to SPDIF. Disable or
disconnect SPDIF input for coaxial Input application.
2.0 Specifications
Input Audio
Coaxial and TOSLINK digital audio
Output Audio
2x RCA or 3.5mm
Input audio connector
1 x TOSLINK Optical, 1 x RCA (Coaxial)
Output audio connector
2 x RCA, 1x 3.5mm
Sampling rate
32KHz, 44.1KHz, 48KHz and 96 KHz
Size(L-W-H)
65mm x 55mm x 20mm
Weight (Net)
40g
Limited Warranty
1 Year
Operating Temperature
0 ℃ to +70℃
Operating Humidity
10% to 85 % RH (no condensation)
Storage Temperature
-10℃ to +80℃
Storage Humidity
5% to 90 % RH (no condensation)
Power Consumption
0.5 watts (max)
Regulatory Approvals
FCC , CE
Note: Specifications are subject to change without notice.
Page 3

DAP-CV2830
Digital to Analogue audio converter
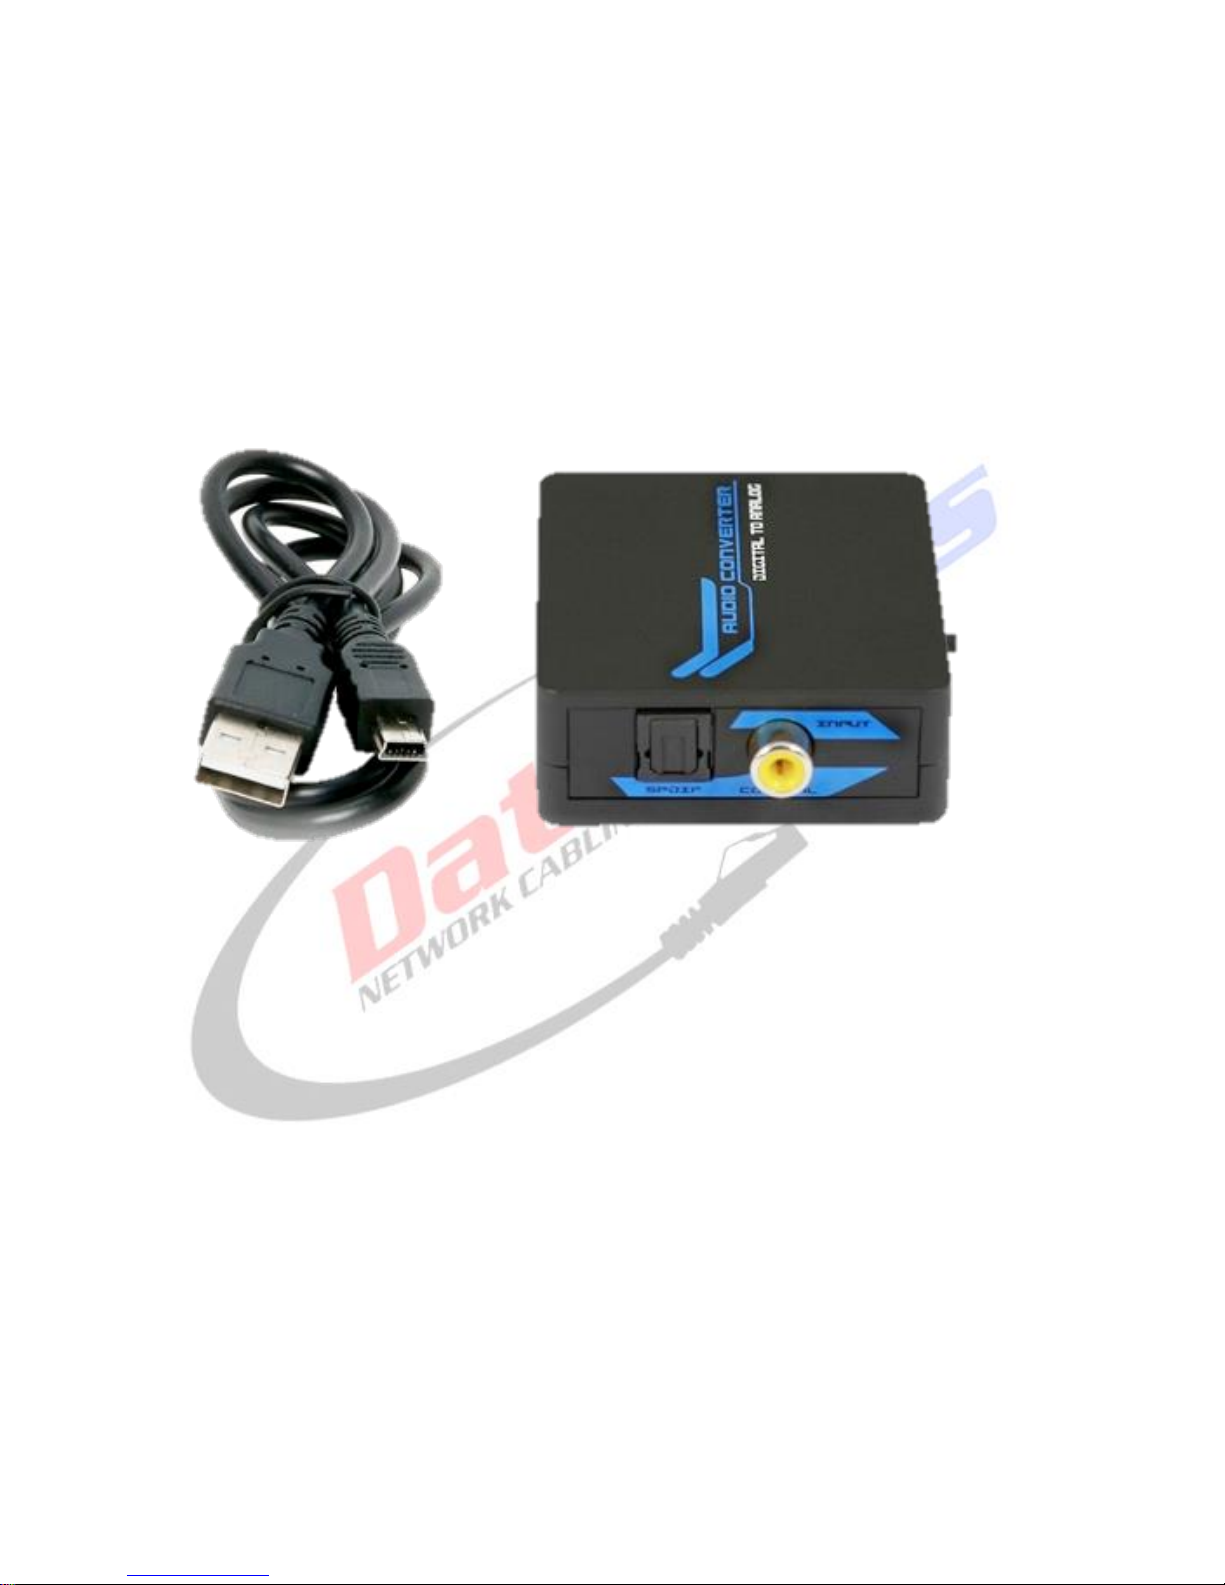
3.0 Package Contents
1) Main unit (Digital to Analogue Audio Converter).
2) USB Power Cable.
3) This user Manual.
4.0 Panel Descriptions
Page 4
DAP-CV2830
Digital to Analogue audio converter
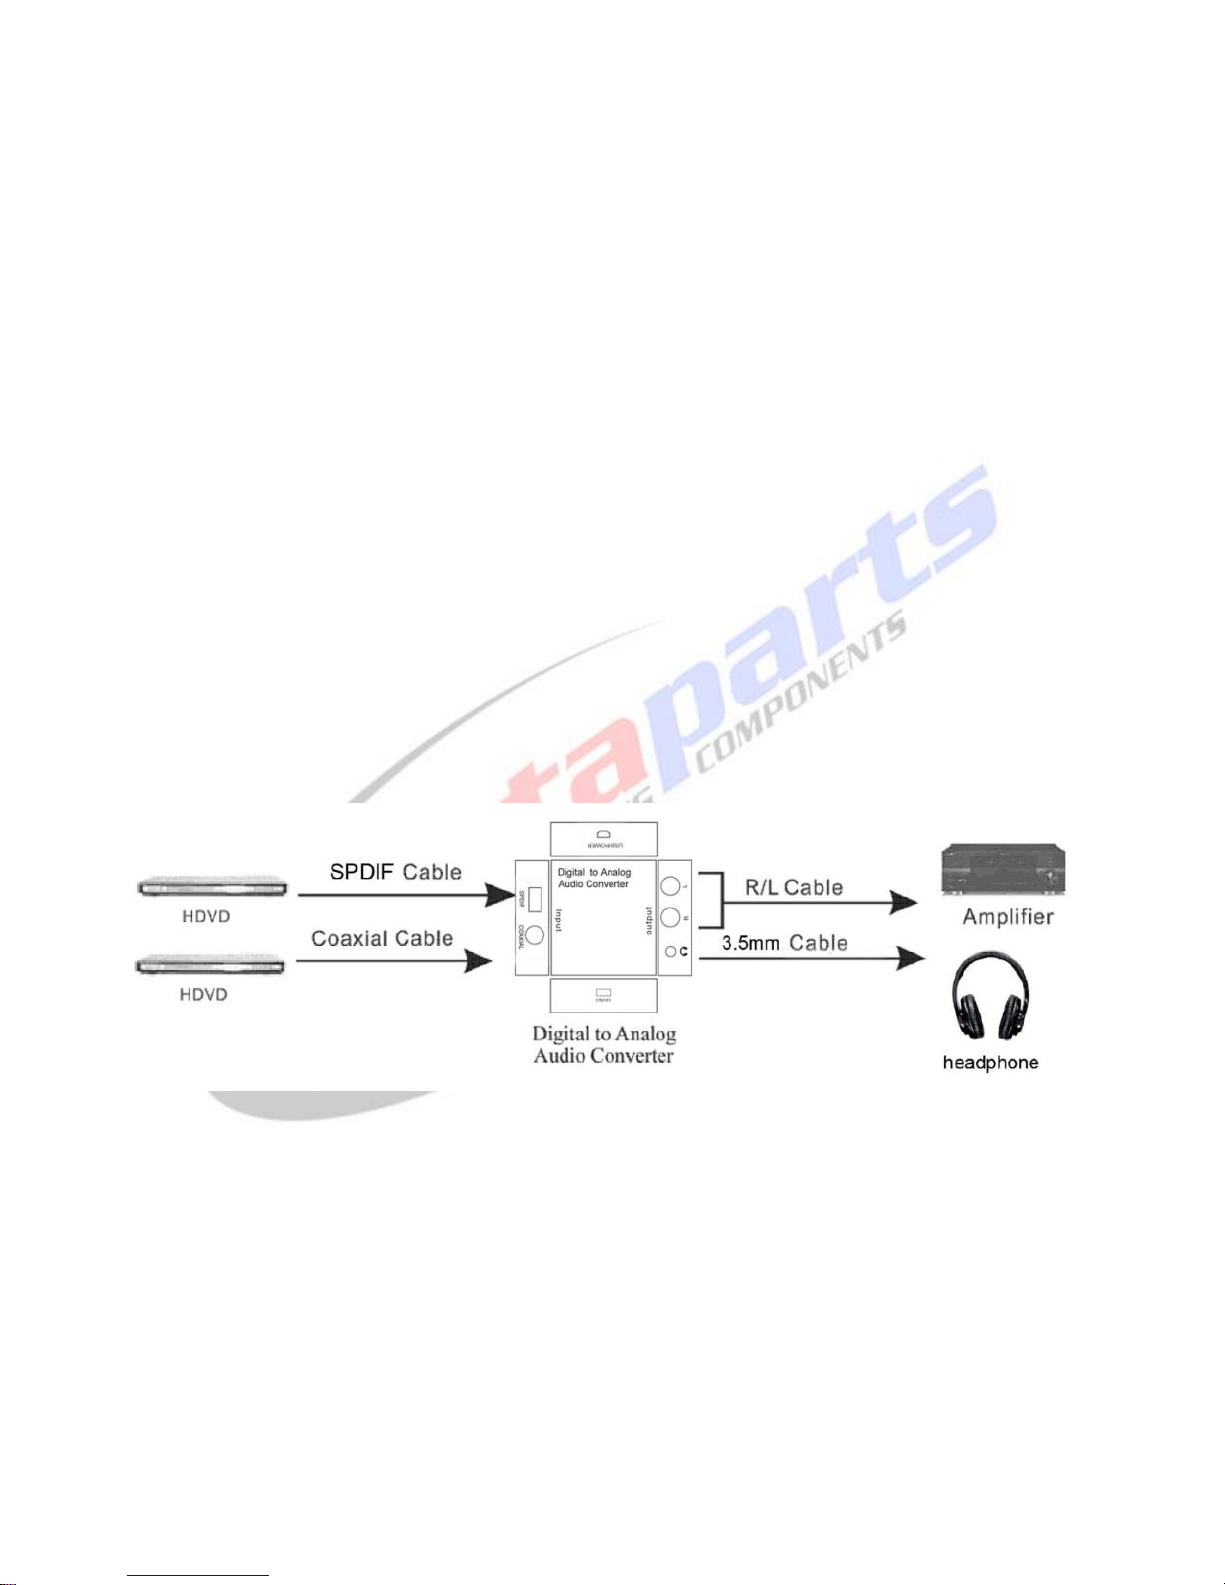
5.0 Connection and Operation
Before installation, please make sure all devices you wish to connect have
been turned off.
1) Connect the audio source device to the Converter using appropriate
TOSLINK or Coaxial cables.
2) Connect the A/V Receivers or Amplifiers to the Converter using
appropriate analogue RCA or 3.5mm audio cable.
3) Insert the USB Power Cable into the 5V USB power source.
Note: When connected to the TOSLINK and Coaxial cables at the same time,
the product will give priority to TOSLINK input
6.0 Connection Diagram
 Loading...