

Page 1

O’Neil Windows CE 5.0
Thermal Printer Driver
1 Overview
This driver allows you to print from your Windows CE 5.0 device to an O’Neil thermal printer
via the standard Windows printing mechanism.
2 Installation
To install the print driver to your device, copy the “ONeil PrinterDriver.CAB” file to the device
and double click on it. You will be asked for the location you want the driver files installed to.
Figure 1: Instillation Directory Prompt
Once you have chosen the location, the files will be copied and the registry entries will be added
so that the next time you print the “O’Neil Thermal” printer will be presented along with the
other printer drivers installed on your system.
Page 2
3 Configuration
After the driver has been installed you must configure it to work with your current system setup.
The following screens will show how to configure the driver for use on Serial, Bluetooth, and
Wireless printers. After these settings have been made they are stored in the registry so they
don’t have to be set again unless the device’s configuration changes. To access the configuration
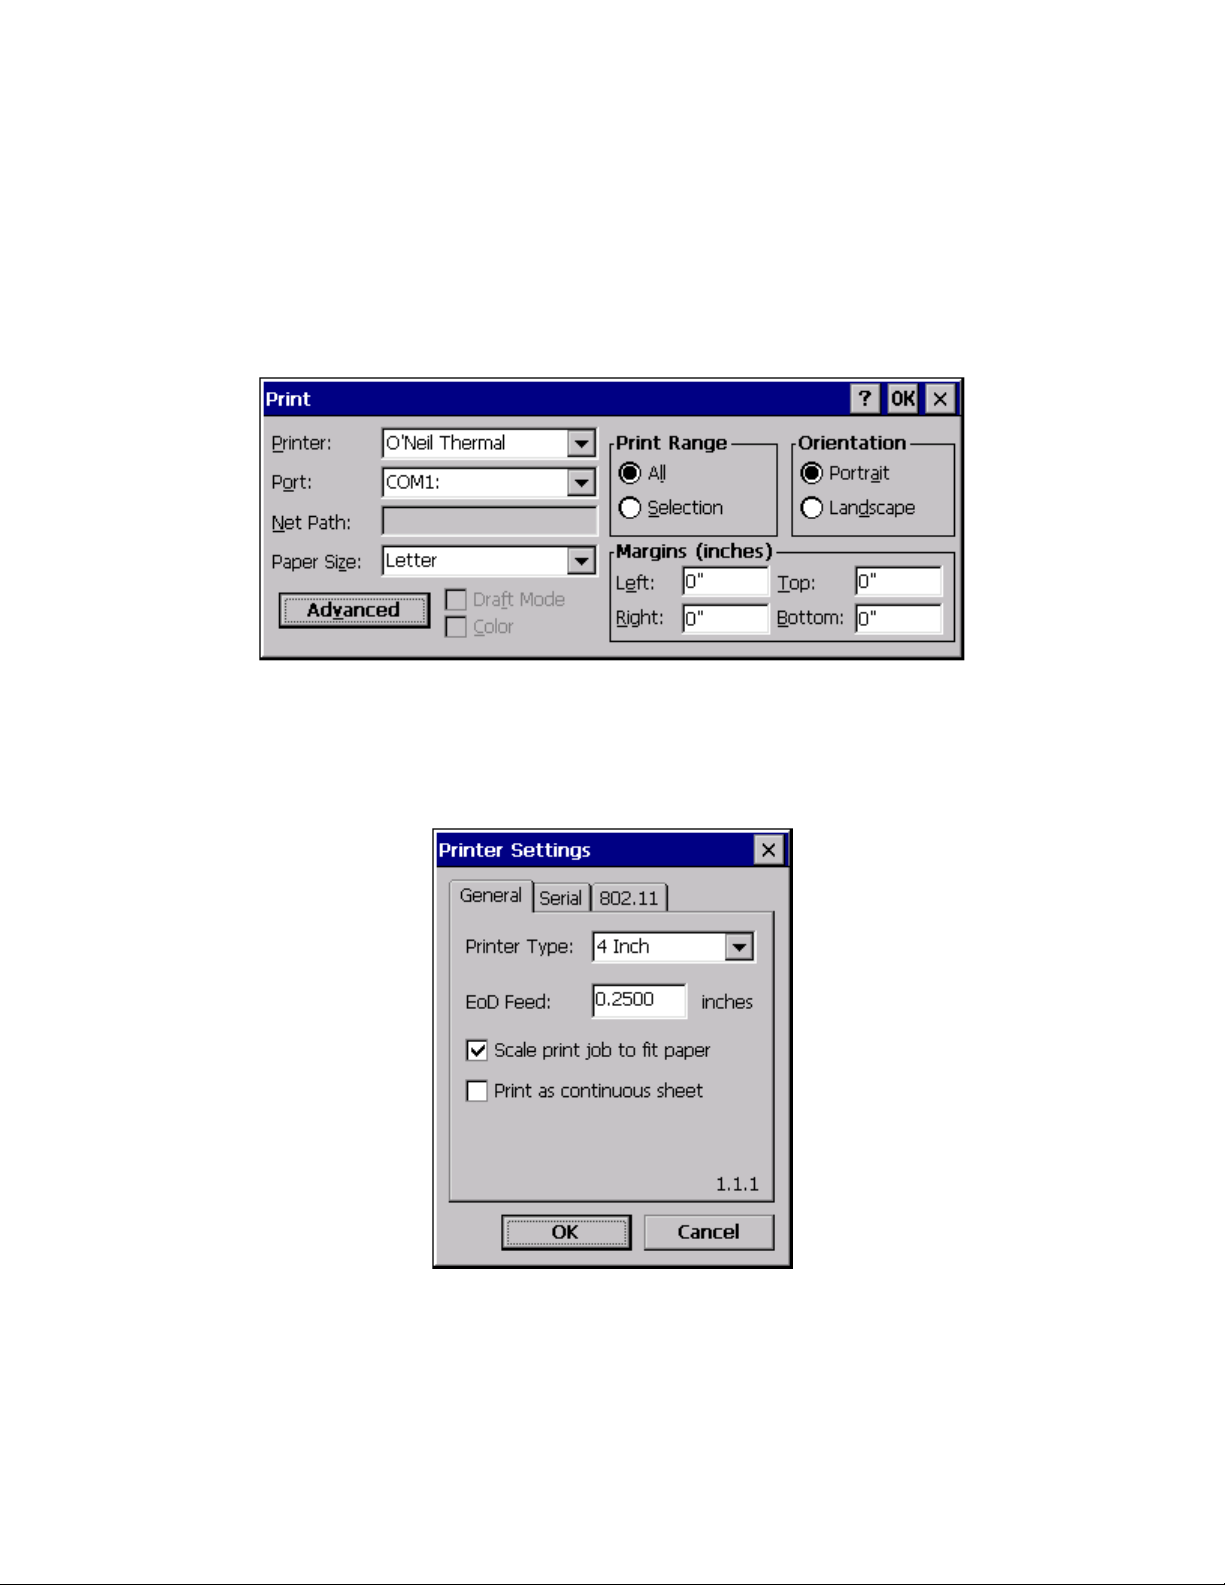
screen press the “Advanced” button on the Main Print Dialog displayed when you go to print
from most applications:
Figure 2: Main Print Dialog
3.1.1 General Settings
General settings apply to all styles of printing. They consist of the Printer Type, to determine the
width of the printer, how much paper you want to feed at the end of the document, if you want
the image scaled to fit the paper, and if you want the paper to act as a continuous sheet.
Printer Type:
The most important setting for the printer driver is the Printer Type. Printer Type
specifies how many “dots wide” the printer is. The different choices are:
o 2 Inch (384 dots)
Figure 3: General Printer Settings Dialog
Page 3
o 3 Inch (576 dots)
o 4 Inch (832 dots) - default
EoD Feed:
The value represents the amount the paper will be advanced after the end of a print job.
Because WindowsCE does not contain the concept of continuous feed paper, this setting
was added to allow the paper to be advanced an appropriate amount such that it can be
torn from the printer without losing text or wasting paper.
Scale print job to fit paper
Depending on the application you are printing from, some printer output sent to a “Paper
Size” greater than the width of the printer’s paper may be truncated. Checking this box,
checked by default, will cause the pages image to be scaled to fit the printer’s paper.
This will also scale the margins specified on the Print Dialog.
Print as continuous sheet
To avoid pagination check this box when printing in portrait mode. This will cause the
entire print job to print on a “single page”. In landscape mode this setting is ignored.
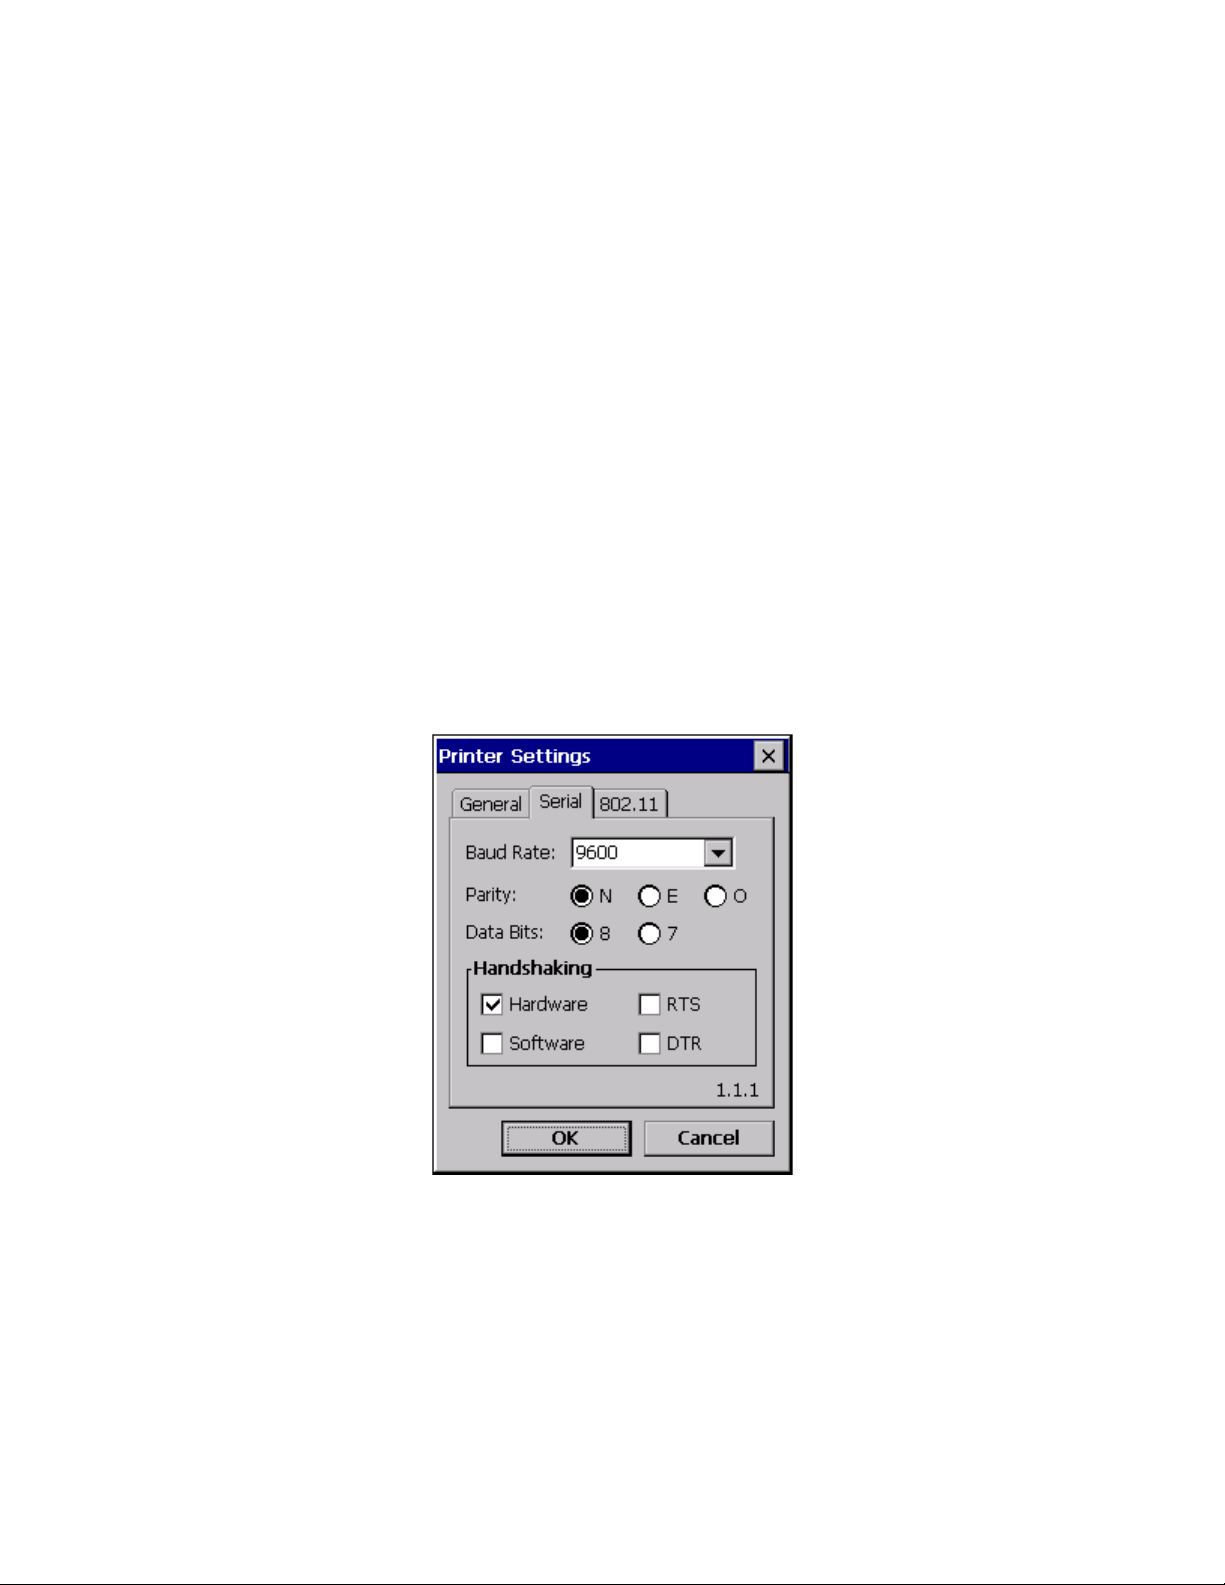
3.1.2 Serial Settings
The serial settings apply to RS232 communications as well at Bluetooth communications that are
mapped through COM ports. Most of the settings here can be left to the defaults except Baud
Rate. The Baud Rate value is often changed to speed up the transfer of information to the printer
and the value here must correspond to the printer’s setting if using RS232 or printing will fail.
Figure 4: Serial Printer Settings Dialog
Baud Rate:
Baud rate is the speed at which data is transferred over the serial, RS232, cable. If this
value is incorrect, printing will seem to go fine according to your application, but usually
nothing will happen on the printer end. The available Baud rates are 1200, 2400, 4800,
9600, 19200, 38400, 57600, 115200. With 9600 being the default.
Parity:
Parity is a method of error detection in serial connections. It can be used to try to look
Page 4

for bit flip errors. It can detect errors if 1, 3, 5 or 7 bits were altered, but not if 2, 4, 6 bits
were. The default is to leave this off.
o N – None (default)
No parity checking is done.
o E – Even
Even parity is where the parity bit is set to “1” if and only if the number of 1 bits
in a given value are odd. This would make the total number of 1 bits even when
parity is included.
o O – Odd
Odd parity is where the parity bit is set to “1” if and only if the number of 1 bits in
a given value are even. This would make the total number of 1 bits odd when
parity is included.
Data Bits:
Data bits are the number of bits used to transfer the data. Normally 8-bits are used so an
entire character, 0-255, can be represented in a single frame. The choices are 8 bits and 7
bits, with 8-bits being the default.
Handshaking:
Handshaking is how the flow of information is controlled. It makes sure that you aren’t
sending data faster than the device can process it. There are four different methods that
can be used with Hardware only being the default. They can be used in any combination
or not at all. Thought the latter is only suggested if you are feeling particularly lucky.
o Hardware (RTS/CTS): - default
Hardware flow control uses the wires in the serial cable to carry the handshaking
information to indicate when to and not to send information. This is the default
and is superior to software flow control.
o Software (XON/XOFF):
Software flow control uses the XOFF (0x13) and XON (0x11) to send the
handshaking information. Because handshaking is done via actual characters the
XON or XOFF transmissions can be lost by a receiver that is already flooded or in
a noisy environment.
o RTS (Ready to Send):
This sets the RTS line to 0 when it is ready to send data.
o DTR (Data Terminal Ready):
This sets the
DTE line to 0 to indicated that the device is ready to be connected to.
3.1.3 Wireless Settings
Most of the wireless settings don’t need to be considered by the user and are all set with the
printer when it is setup. The only thing the user needs to configure is the port to connect on if it
has been changed from the default of 515.
Page 5

Figure 5: Wireless Printer Settings Dialog
Port:
The port for the printer can have a value from 1-65535 and its default value is 515.
Page 6

4 Printing
Now that the printer is configured, printing can be done by selecting print from your application
and then pressing the “OK” button. The item you are printing will be scaled from the current
“Paper Size” and “Orientation” to the printer’s paper size depending on the value of “Scale print
job to fit paper”. If this is checked the full page will be scaled to fit. If it is unchecked the actual
paper size will be given to the application and it will decide on how to print. Section A at the
end of this document has some sample outputs showing the different orientations based on
different Scaling and Portrait/Landscape settings.
*Note: The “Margins” will apply to the printer paper. So if left and right margins of 1.25” are
used on a 4 inch printer, with “Scale print job to fit paper” unchecked, then only the middle 1.5”
will be printed on. Having top and bottom margins will also add leading and trailing whitespace
between pages.
4.1 RS232/Bluetooth
Printing via these serial methods is done by selecting the appropriate Com Port. For Bluetooth
printing, depending on your particular device, the printer might need to be mapped/associated to
the Com port you selected.
Figure 6: RS232/Bluetooth Configurati o n
4.2 Wireless
To print wirelessly select the “Network” port. When this is done the “Net Path” edit box will be
enabled and you can type in the IP of the printer you wish to print to.
Page 7

Figure 7: Wireless Configuration
Page 8

A. Output Samples (all margins at 0.5”)
N
Layout
Portrait Landscape
Scale to fit
Y
 Loading...