

Page 1
Quick Start Guide
Guía rápida
Snelstartgids
Guide de démarrage rapide
Kurzanleitung
Guia de Início Rápido
Guida rapida all'uso
1 2
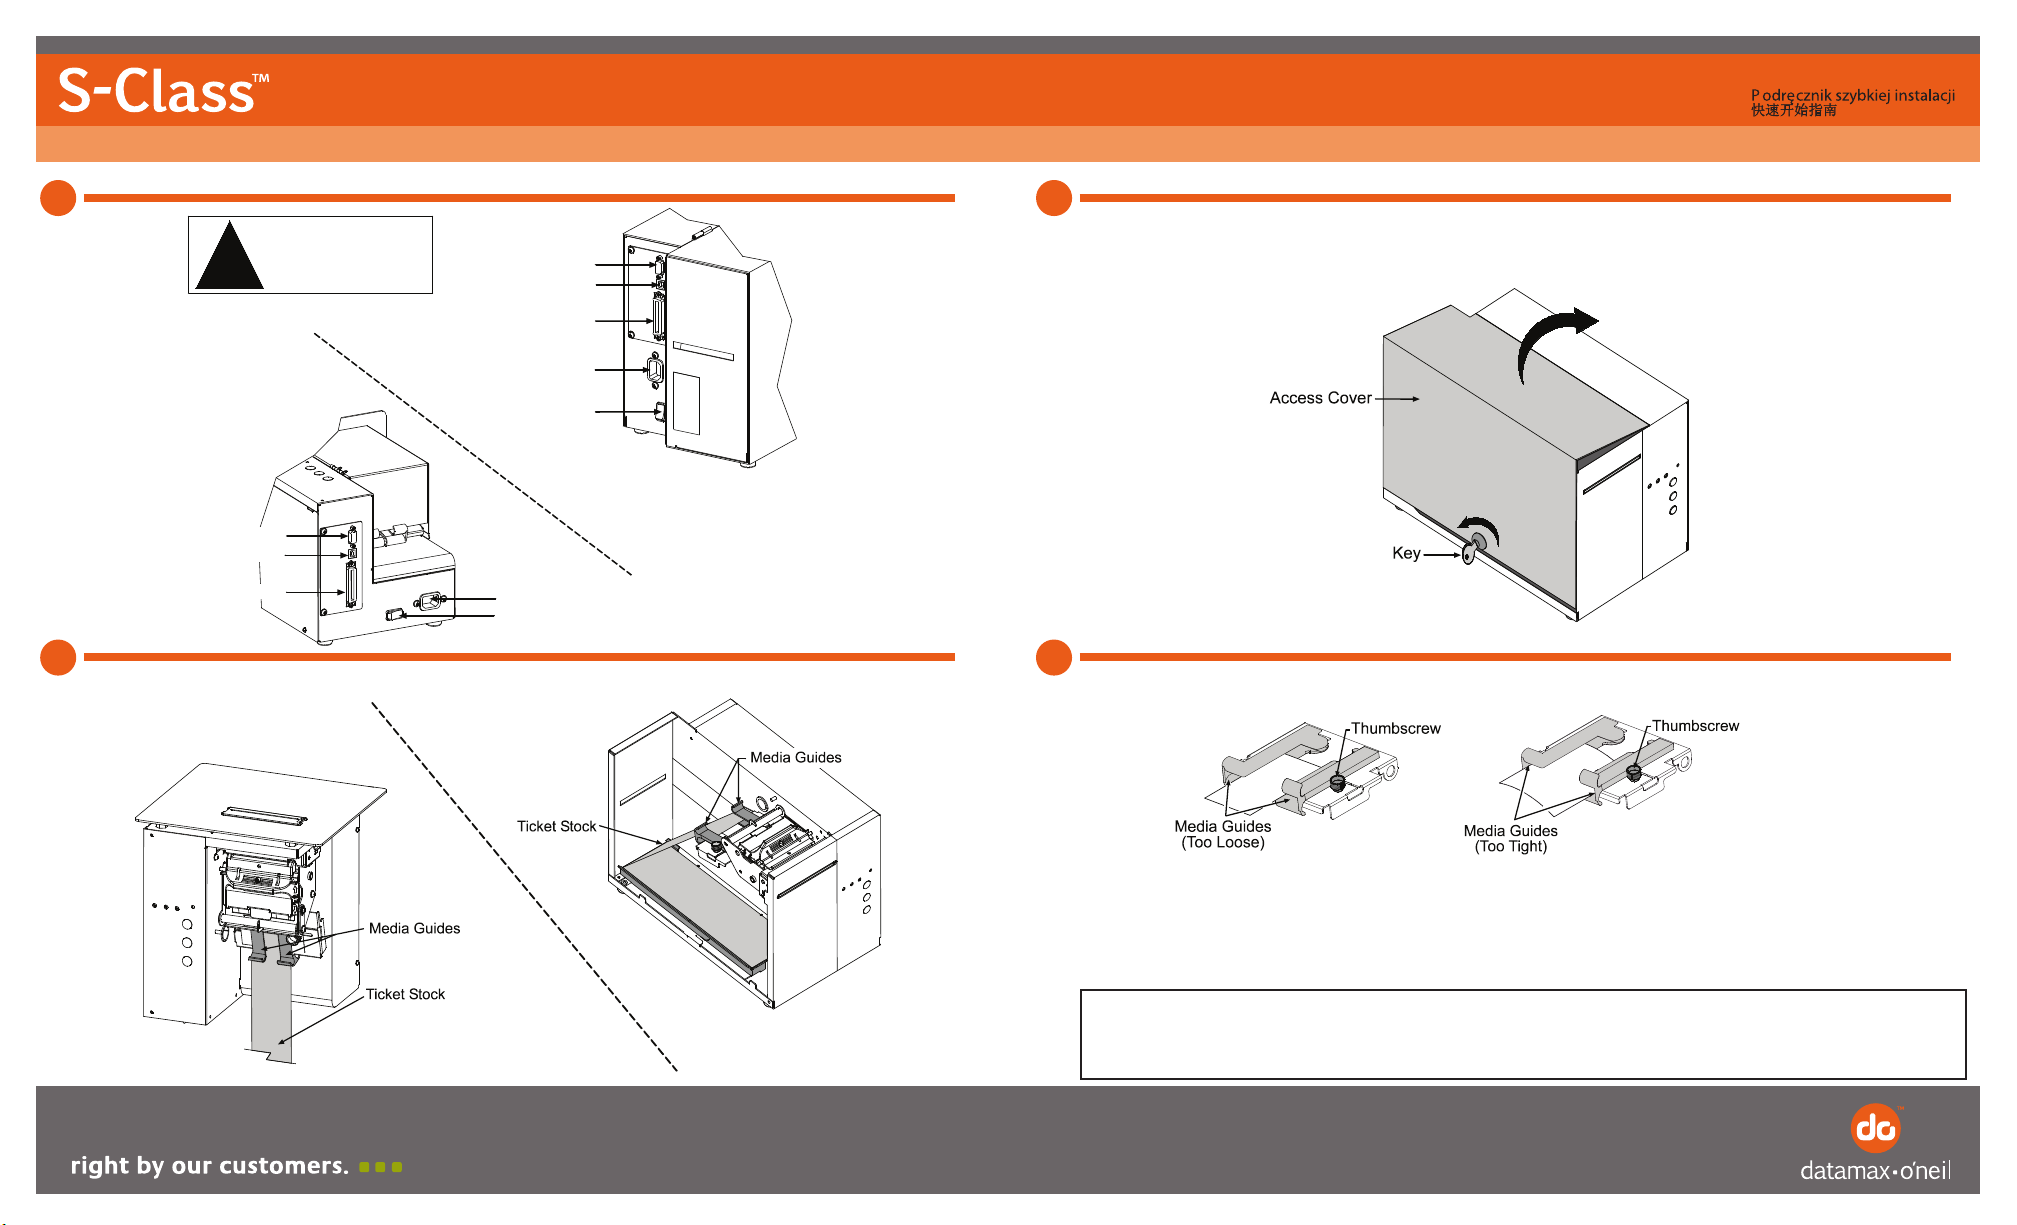
Serial Port
!
Turn off the printer before
connecting cables
AC Power Connector
Parallel Port
Power On/Off Switch
USB Port
AC Power Connector
Serial Port
Parallel Port
Power On/Off Switch
USB Port
ST Models only: Unlock the Access Cover then lift to open (for convenience, the cover may be
removed by sliding it forward and then lifting up).
Install Ticket Stock and insert it between the Media Guides. Adjust the Media Guides to fit the Ticket Stock, then tighten the Thumbscrew to secure.
Turn 'On' the Power Switch.
Slide the media through the Media Guides, continue until the printer grabs the media
and automatically completes the loading process.
Note: When loading, ensure that the black marks on the ticket stock face away from you. If the
ticket stock does not feed to the proper position, the Media Sensor may need adjustment (see
Section 4 of the Operator's Manual for instructions).
3 4
Page 2
Be sure to follow and perform the suggested Cleaning Schedule listed in
the Operator's Manual.
For more information on custom programming or any of the topics
referred to in this guide, see the Operator's Manual and Programmer's
Manual on the CD-ROM provided.
Asegúrese de seguir y llevar a cabo el plan de limpieza recomendado
descrito en el Manual del operador.
Para obtener más información sobre la programación personalizada o
cualquiera de los temas expuestos en esta guía, consulte el Manual del
operador y el manual del programador que se encuentran en el CD-ROM
suministrado.
Befolgen Sie bitte genau den im Benutzerhandbuch empfohlenen
Reinigungsplan.
Weitere Hinweise zu benutzerspezifischen Einstellungen oder in dieser
Anleitung erwähnten Themen finden Sie im Benutzerhandbuch und im
Programmierhandbuch auf der mitgelieferten CD-ROM.
Veillez à effectuer les nettoyages selon l'échéancier prévu dans le Manuel de
l'utilisateur.
Se reporter au Manuel de l'utilisateur et au Manuel du programmeur fournis sur
le CD-ROM pour plus d'informations sur la programmation personnalisée ou
tout autre sujet abordé dans le présent document.
Assicurarsi che vengano eseguite regolarmente le procedure di pulizia
secondo i tempi indicati nel manuale dell'operatore .
Per ulteriori informazioni sulla programmazione personalizzata o su qualsiasi
altro argomento contenuto in questa guida, consultare il manuale dell'operatore
ed il manuale del programmatore sul CD-ROM in dotazione.
92-2558-01 Rev. A
5
6
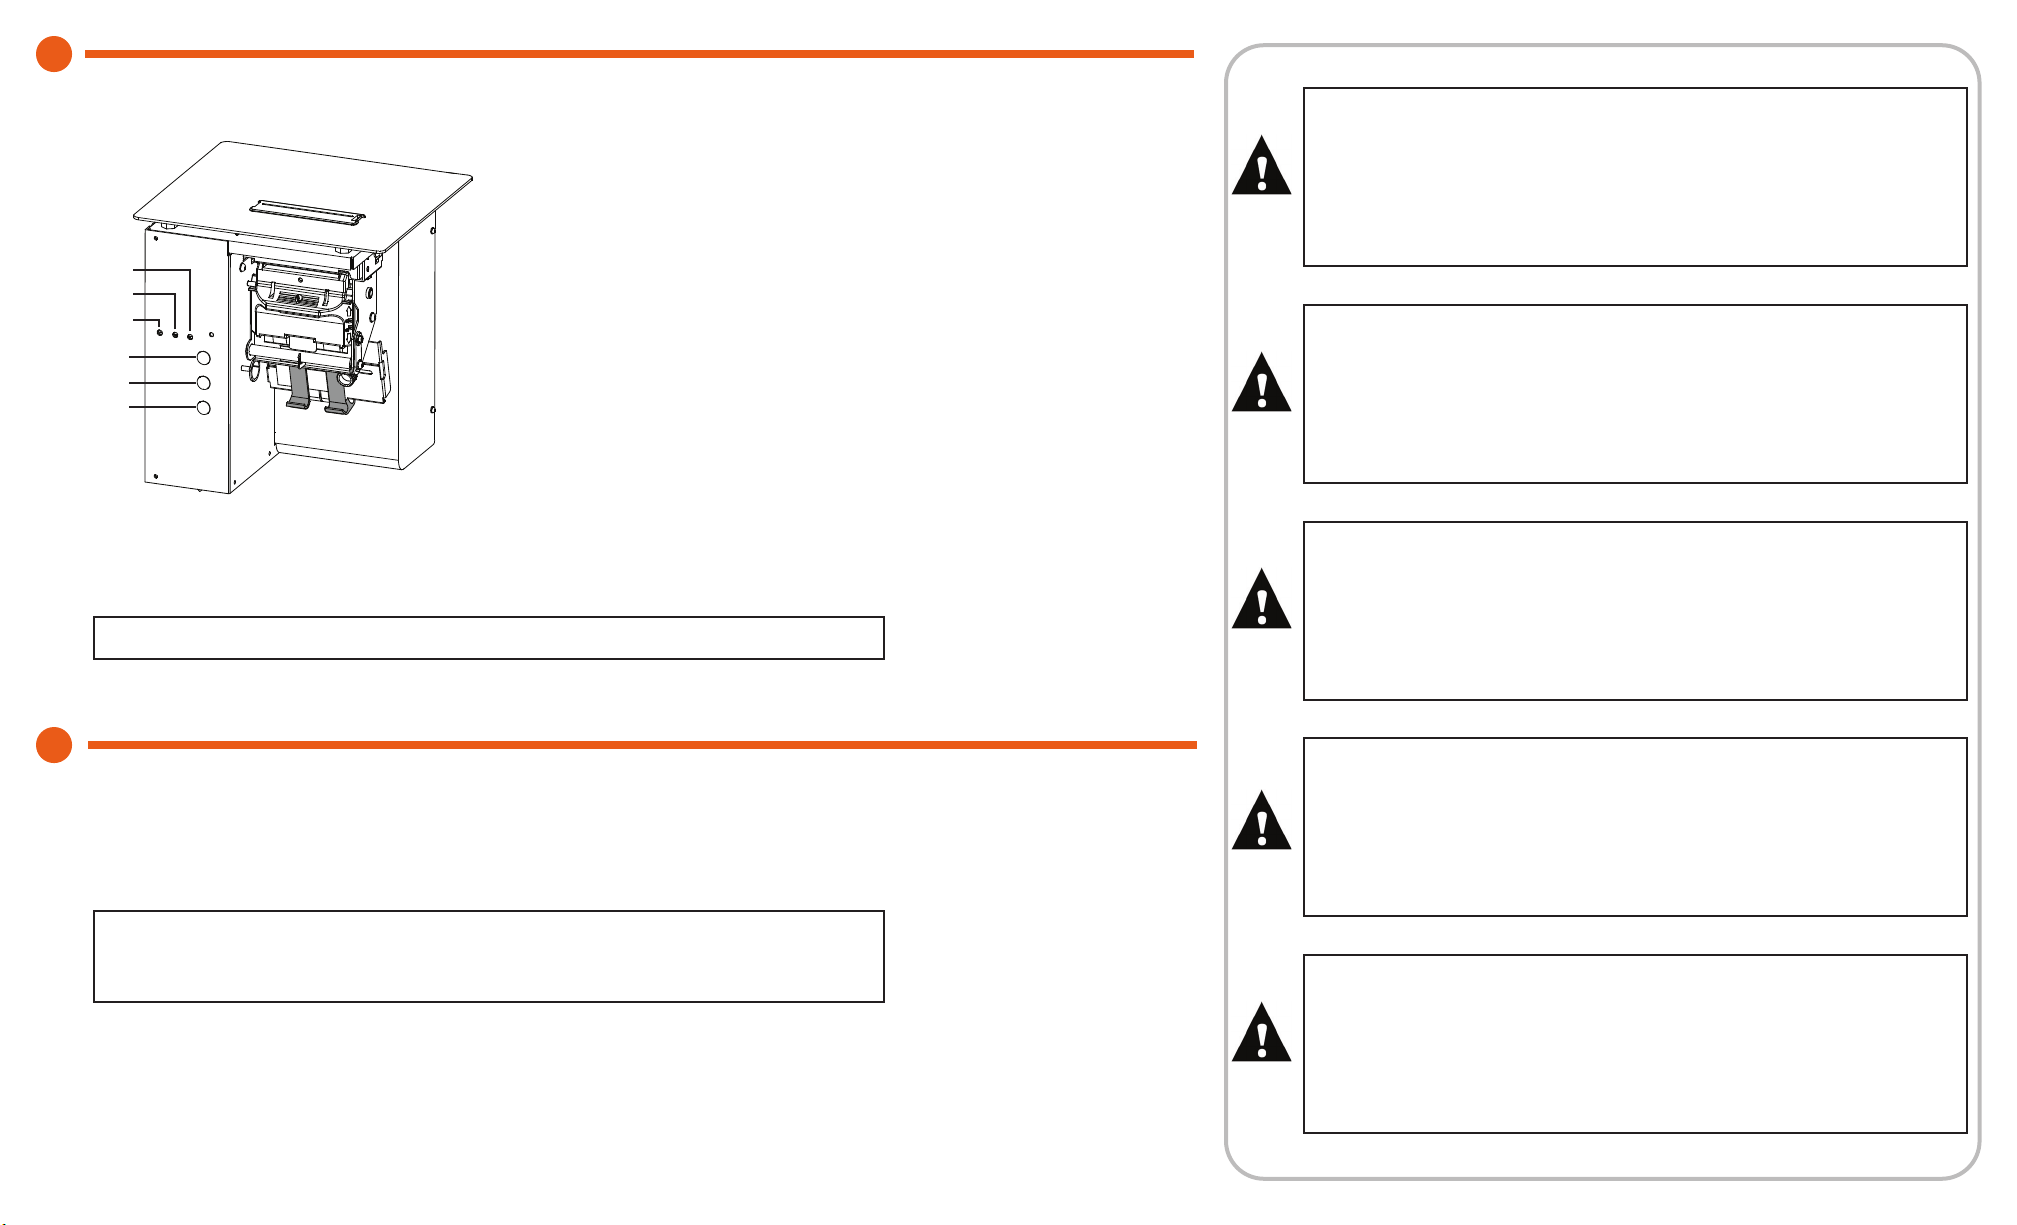
Indicator Lights:
Online: Indicates the printer is ready to accept data.
Fault: Indicates no ticket stock is detected or that a mechanical
malfunction has occurred.
Power: Indicates that main power to the printer is 'On.'
Buttons:
Pause / F1: Allows the operator to temporarily stop printing (pause
mode) or to enter off-line mode.
Feed / F2: Allows the operator to advance the ticket stock to the next
print position.
Test / F3: Allows the operator to print test tickets when the printer is
in off-line mode.
Note: More information on the Front Panel can be found in the Operator's Manual.
With the Power Switch turned 'Off' and ticket stock loaded, press and hold the FEED Button while turning the Power Switch
'On.' Continue to depress the FEED Button until printing begins.
After printing is complete, cycle the Power Switch 'Off' and 'On' to return the printer to the normal operating mode
Note: The printer maintains a selection of user-modifiable ticket setups, each with a
specific print width, start of print position, and cut/tear position. The default setting for
these setups is Stock ID 5 (see Section 4 of the Operator's Manual for details).
Fault
Online
Power
Feed/F2
Pause/F1
Power/F3
 Loading...