

Page 1
110271-001 Rev.2
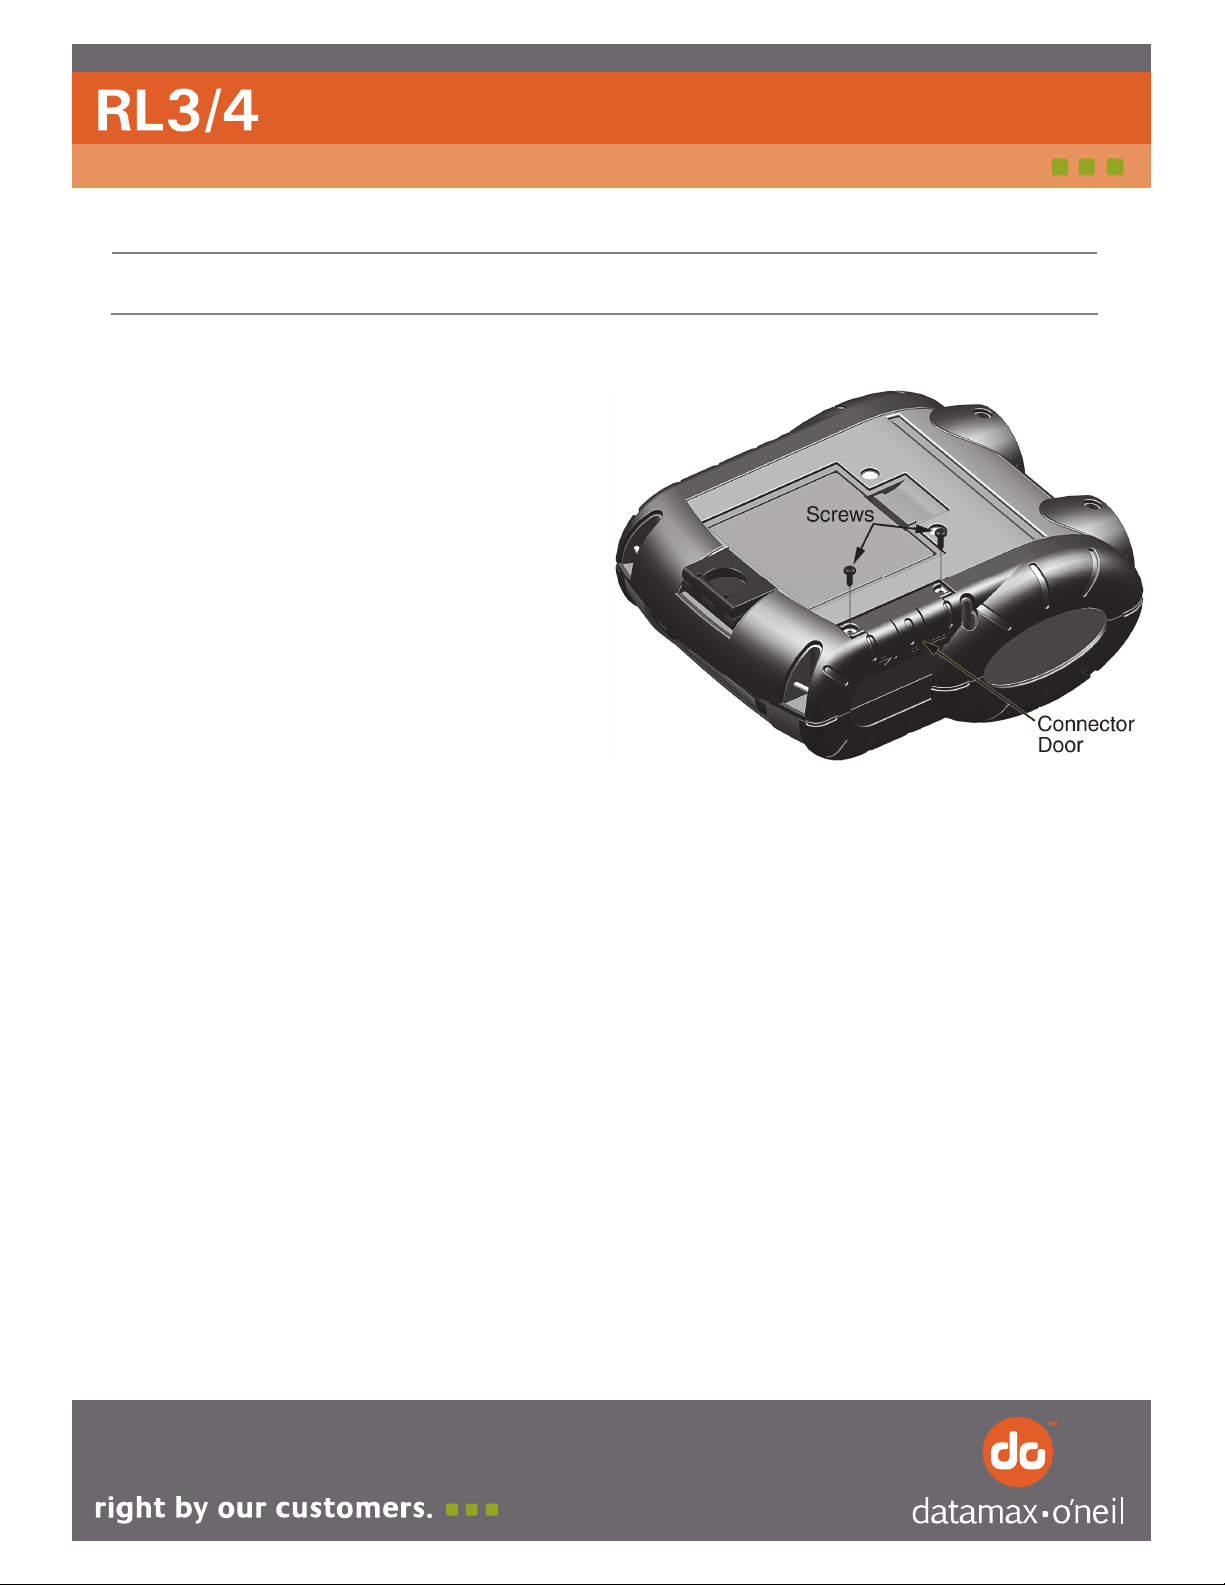
Removal:
This procedure should only be performed by a qualified service technician.
1. Remove any cables and installed media from the
printer.
2. With the printer bottom side up, remove the old
Connector Door by removing the two screws
securing it to the printer.
Connector Door Replacement
Installation:
(reverse of removal, refer to the previous illustration if necessary)
1. With the new Connector Door in position, reinstall the
two previously removed screws.
No Liability for Negligent Use
In no event shall Datamax-O'Neil be held liable for any damages whatsoever (including, without limitations, damages for loss of profits, business interruption, loss of
information, or other pecuniary loss) arising out of negligence in use and care of the product.
 Loading...