

Page 1
92-2553-01 Rev.A
Cutter Option
Page 2
Overview
This document describes the contents, installation, and use of the Cutter option for the MP Compact
printers. After verifying the contents of the kit and the tools needed, follow the steps below to install and
begin using the option.
For your safety and to avoid equipment damage, always turn ‘Off’ power and unplug the
CAUTION
printer’s power cord before beginning this installation and when performing service.
Contents of the Cutter Kit
This kit contains the following item:
• 1 x Cutter Unit
• 1 x Screws (PZ M3x10)
• 1 x Washer
• 3 x Screws (MRX M3x12)
• 4 x Screws (K6S M5x14)
Tools Required
To install this option, you will need
• Allen Key, 3mm
• Phillips Screwdriver
1
Page 3

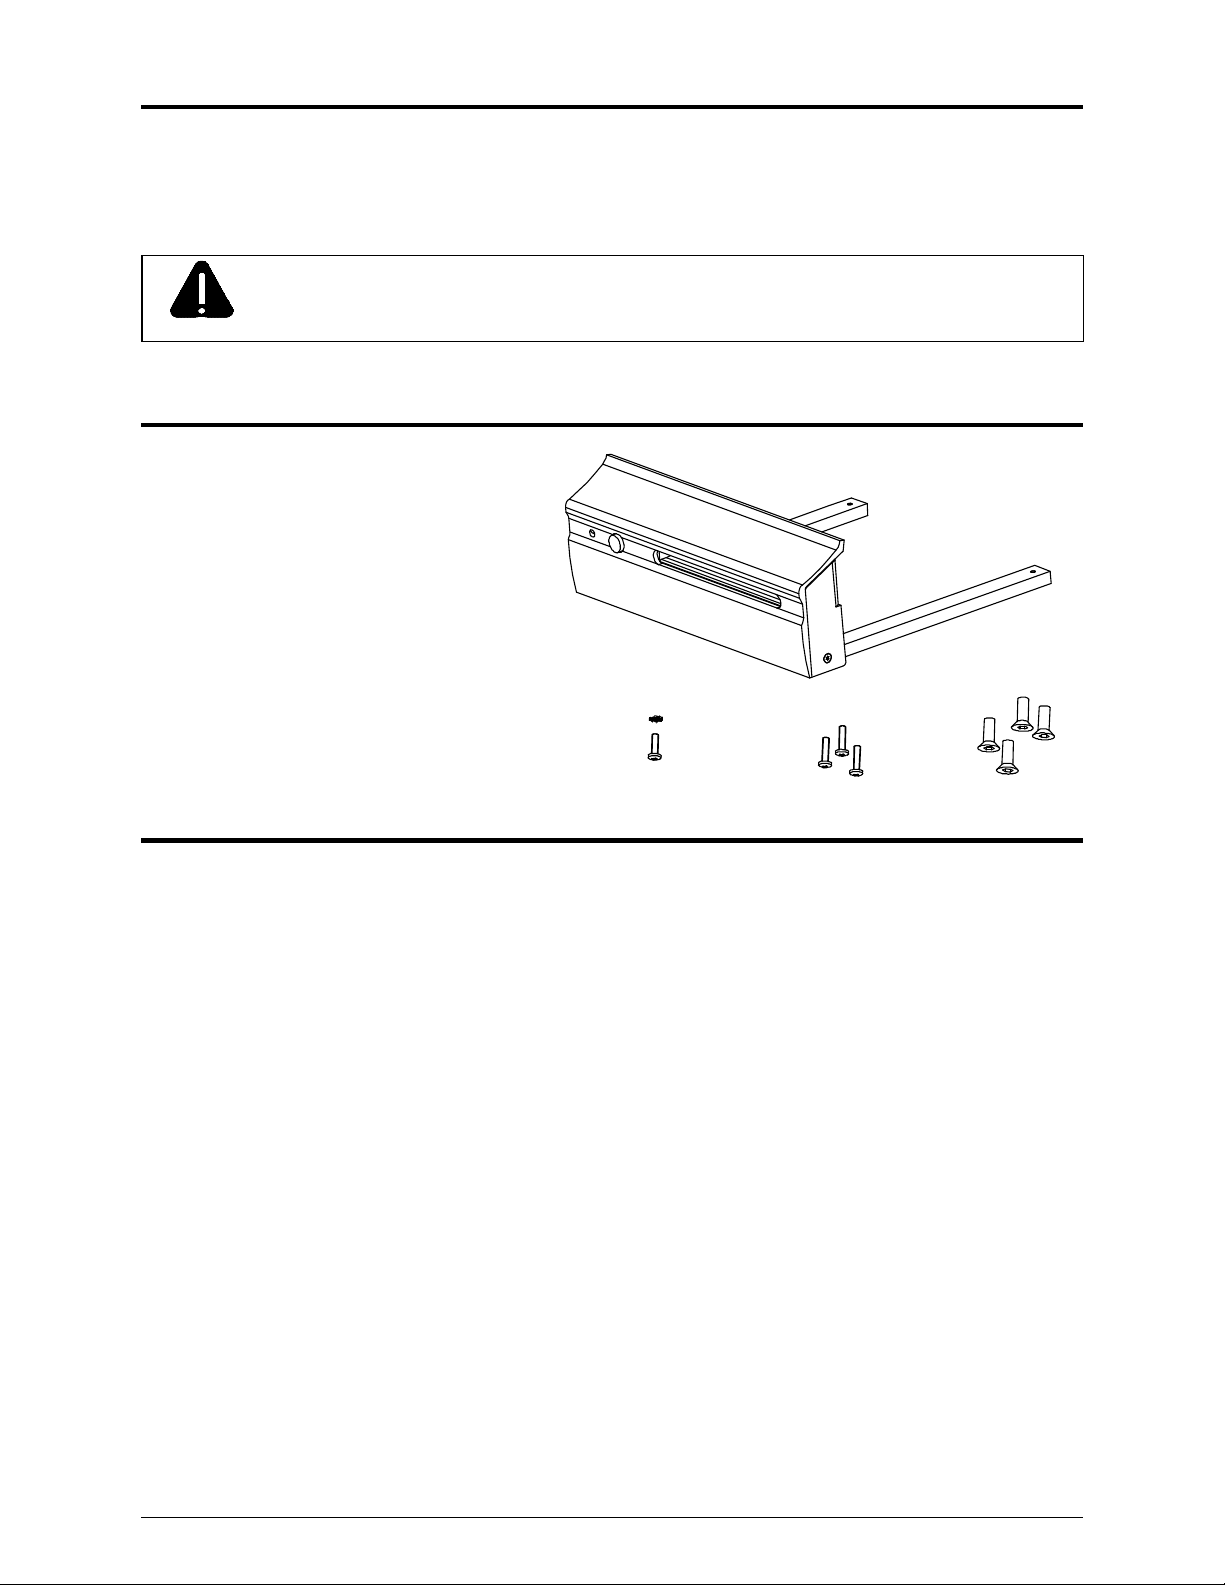
Installation
1. Move the right front rubber foot with screw from the printer to the front right on the cutter.
2. Mount the washer and the screw, to old foot position on the printer.
3. Remove the other feet. Mount the three feet on the cutter with the 3 new M3x12 screws.
4. Remove the front lid by pulling out the front lid shaft. Insert the shaft again.
5. Place the cutter holder under the printer and fasten with the four M5x14 screws.
6. Attach the cutter cable to the contact in the middle.
6
1
4
2
1
5
3
3
5
3
2
Page 4
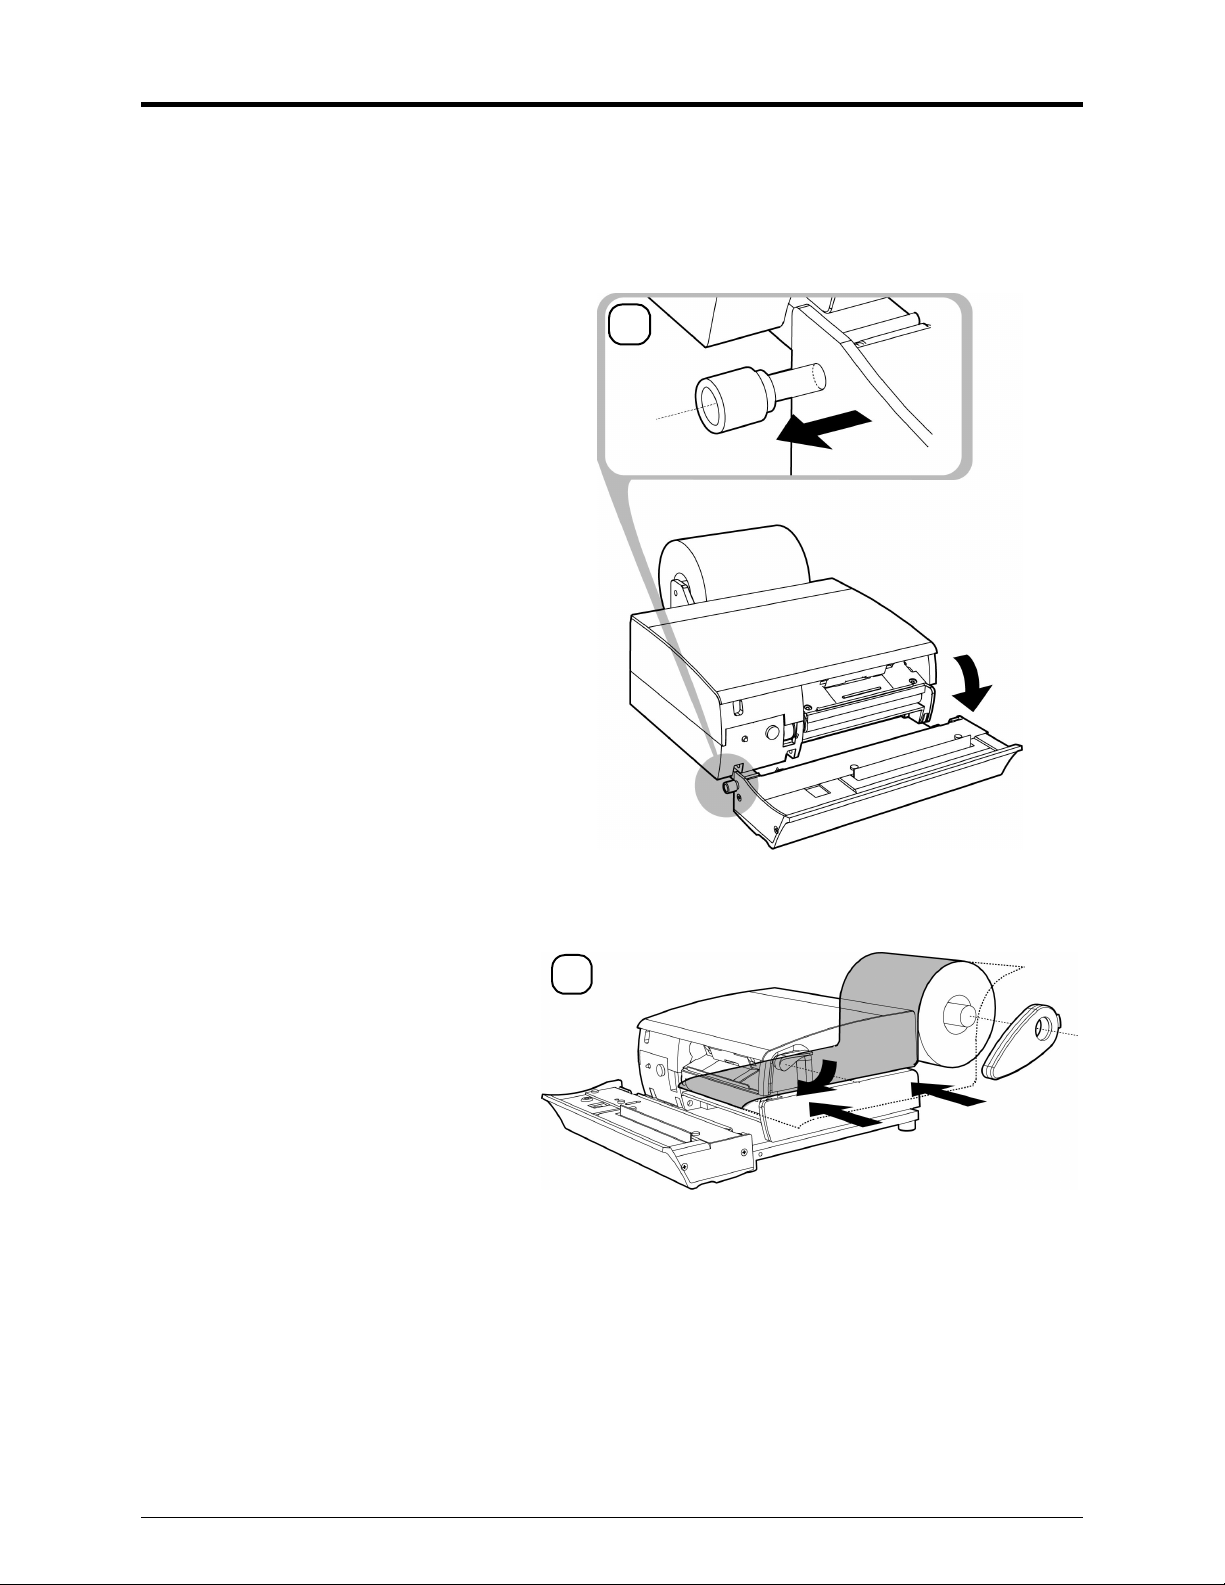
Setup and Loading
By default the cutter is set to operate automatically every time a label is printed out. It will cut between
each label.
Host configuration utilities such as DMXConfig and Tera Term can be used to adjust the feed and reverse
feed rate and if needed, to adjust the cutting position. The cutting function can also be changed to cut on
command instead of automatically.
1. Set the lever to release.
2. Pull out the locking screw to open the
cutter.
3. Load the media from the side and
then through the cutter.
4. Lock the cutter to the printer again
and set the lever to print.
2
3
3
 Loading...