

Page 1

Standard Swivel Lock (210216-000)
Locking Lever
(3) Mounting Holes
Swivel Lock Head
Figure 1
Swivel Lock Base
Locking Lever
Swivel Lock Base
(3) Mounting Holes
Swivel Lock Head
Figure 2
(2) Bumpers
Locking Lever
Swivel Lock Base
(3) Mounting Holes
Swivel Lock Head
Figure 3
(2) Bumpers
Figure 4
Figure 5
Locking Lever
Swivel Lock Base
Swivel Lock Head
(3) Mounting Holes
(2) Charging points
Use the Standard Swivel Lock bracket for the 2t and
4t printers (all makes and models).
Parts List:
(1) Standard Swivel Lock
(3) #10 pan head screws [not included; screw length
to be determined by user]
SlimCard Reader Swivel Lock
(210217-000)
Use the SlimCard Reader Swivel Lock bracket for 2t
and 4t SlimCard Reader printers manufactured after
01/01/2004 (all makes and models).
SlimCard Reader Retrofit Swivel Lock
(210222-000)
Use the SlimCard Reader Retrofit Swivel Lock
bracket for 2t and 4t SlimCard Reader printers
manufactured before 01/01/2004.
Parts List:
(1) SlimCard Reader Retrofit Swivel Lock
(3) #10 pan head screws [not included; screw
length to be determined by user]
(2) Bumpers (pre-installed)
Removing the Bumpers
If you are using the 4t SlimCard Reader printer, you
must remove the bumpers from the swivel lock
base. Use the following procedure to remove the
bumpers from the swivel lock base:
1. Remove the bumpers from the swivel lock base
by pulling the bumpers down toward you
(Figure 4).
Charger Swivel Lock (210216-001)
Use the Charger Swivel Lock bracket with printers
that are equipped with two charging contact points
(located on the back of the printer's case). When a
printer is attached to the Charger Swivel Lock
bracket, the printer's batteries are automatically
charged.
Parts List:
(1) Charger Swivel Lock
(3) #10 pan head screws [not included; screw
length to be determined by user]
Selecting a Location
General Guidelines
• If you are using the charger swivel lock, do not
short contacts.
• Use only an Datamax-O’Neil approved power
supply.
• If you are using the charger swivel lock, do not
allow the charging points to come in contact
with metal objects.
• Position the bracket and/or printer with enough
room to properly open and close the printer.
• Position the bracket and/or printer so it is
protected from environmental elements such
as moisture, tools, and boxes.
• Position the bracket and/or printer in a secure
area in normal traffic patterns.
• Do not position the bracket above, near, or
relative to, the driver's position as to interfere
with normal driving operations.
• Mount the bracket and/or printer away from the
driver's head to eliminate potential injury in the
event of an accident.
• Hole centers:
Left to right = 2.324"
Up and down = 1.162" on center
• Only use #10 pan head screws for mounting.
• Datamax-O’Neil does not accept liability for
improperly mounted or poorly placed swivel
locks and/or printers.
Parts List:
(1) SlimCard Reader Swivel Lock
(3) #10 pan head screws [not included; screw length
to be determined by user]
(2) Bumpers (pre-installed)
Page 2
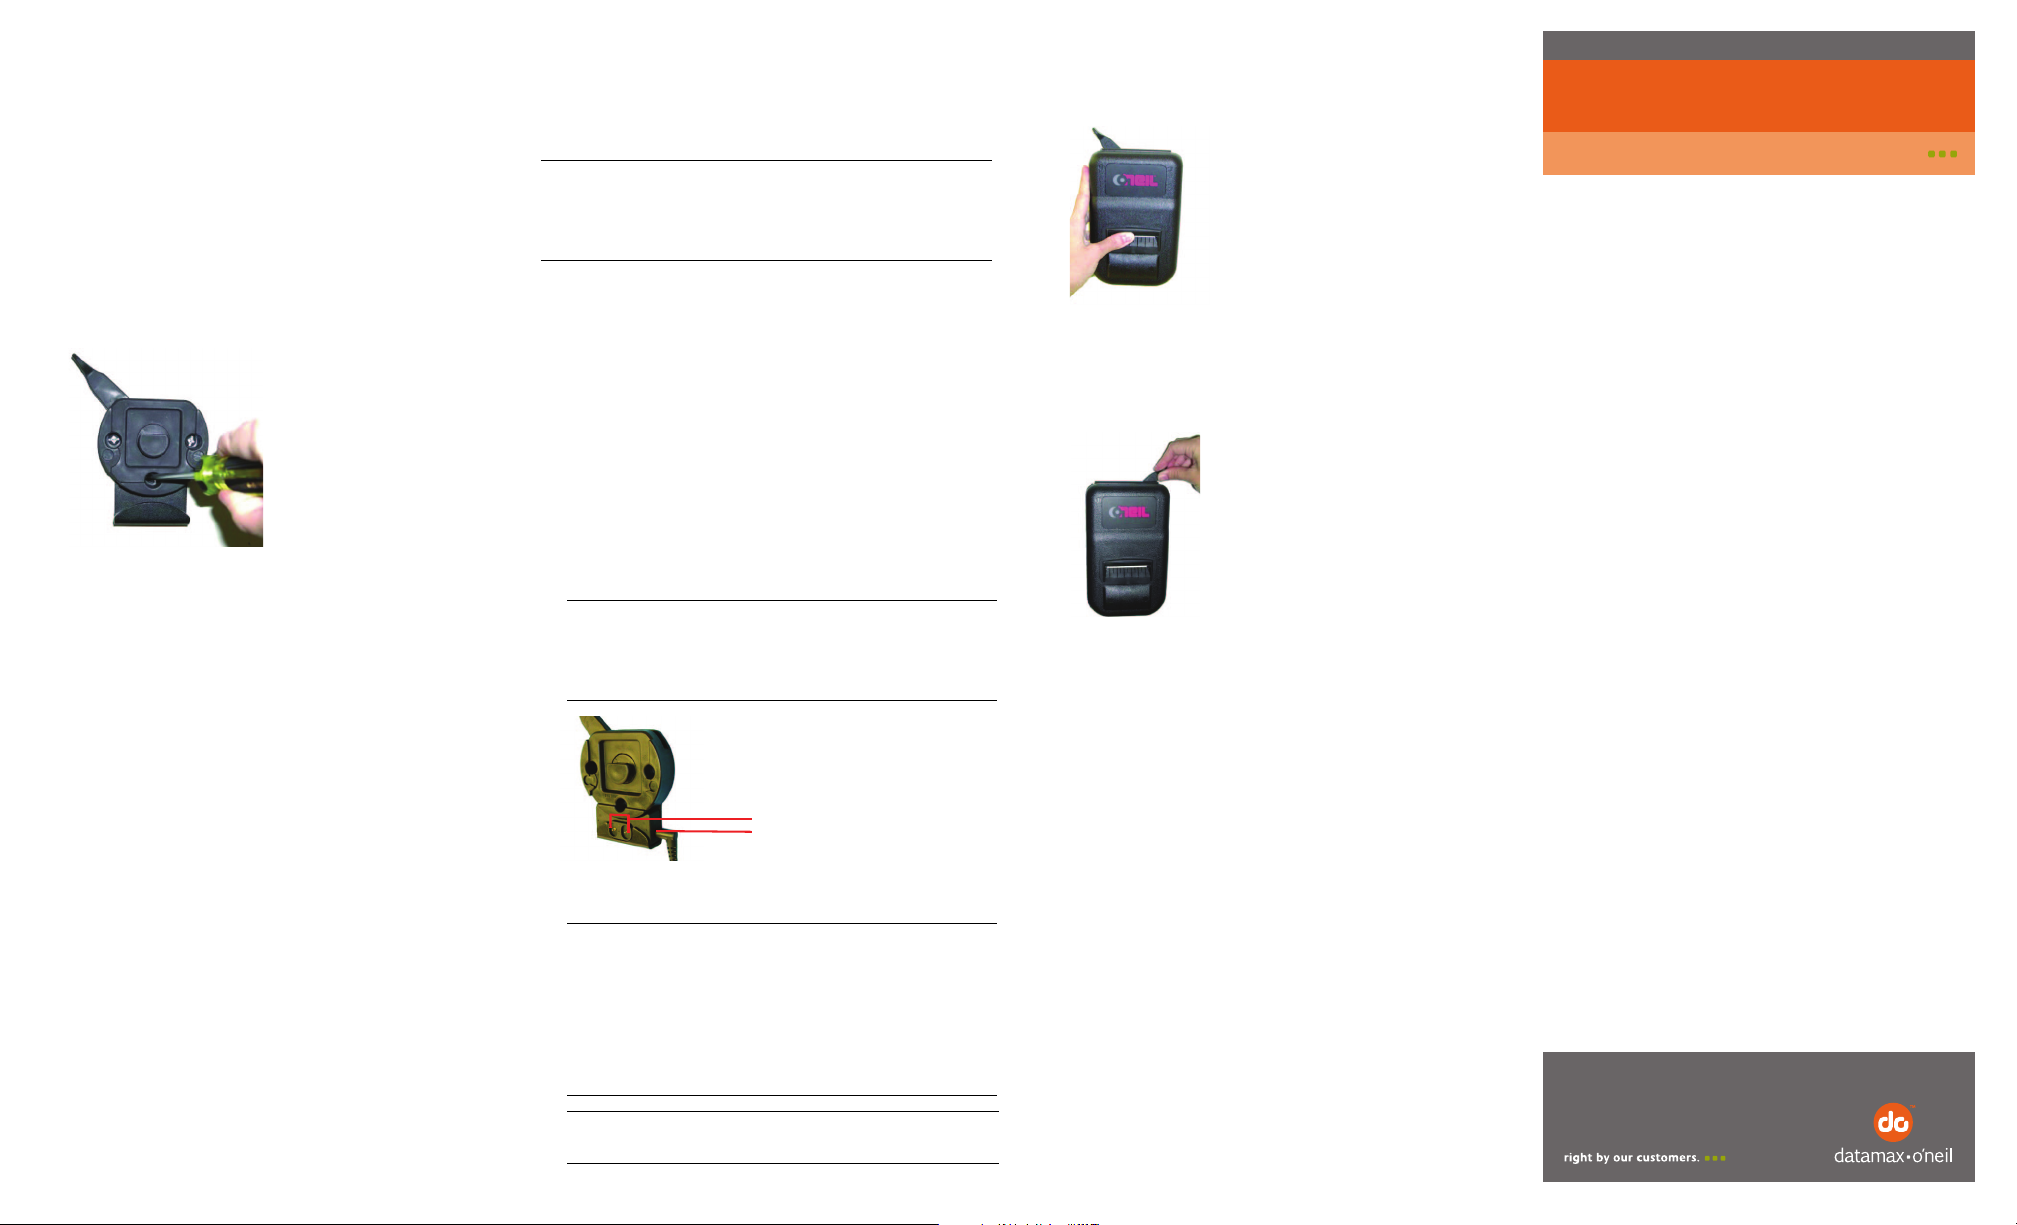
Figure 8
Figure 9
Swivel Lock Brackets
110119-005
Instruction Sheet
(2) Charging contact points
Charger's socket (5.5 mm
DC jack, center pin positive)
Figure 7
Step 1: Mounting the Swivel Lock
Figure 6
1. Use the swivel lock base as a template to mark
the three mounting holes on the mounting
surface. For guidelines on mounting and/or
installation, see Selecting a Location.
2. Drill the mounting holes at the marked
locations.
3. Attach the bracket to the mounting surface
using #10 pan head screws. Thread the screws
through the swivel lock and mounting holes
(Figure 6).
4. Tighten securely.
5. If needed, use additional mounting hardware to
secure the bracket to the mounting surface.
6. Proceed to Attaching the Printer or, if you
mounted a charger swivel lock, proceed to
Connecting the Power Supply.
Step 1a: Connecting the Power
Supply (Optional)
Perform the following procedure only if you
mounted a charger swivel lock bracket
(P/N 210216-001):
Warning: Use only the equipment and parts
specified in this instruction sheet. DatamaxO’Neil does not accept liability for improperly
connected swivel locks and/or printers.
1. Mount the charger swivel lock bracket. For
more information, see Mounting the Swivel
Lock in the previous section.
2. Connect the power supply as follows:
a. Vehicle Mounted Printers: If you mounted
your charger swivel lock bracket to a vehicle,
connect your vehicle's cigarette adapter plug
to the swivel lock charger's socket (Figure 7).
b. Stationary Mounted Printers: If you mounted
your charger swivel lock bracket to a
stationary surface, connect your wall
adapter’s plug to the swivel lock charger's
socket (Figure 7).
Note: The cigarette adapter must have a
5 amp fuse and be Datamax-O’Neil approved.
The wall adapter's voltage cannot exceed 1.5
amps (1 amp recommended).
3. Proceed to Attaching the Printer.
Note: Make sure you regularly clean the
charging contact points on your printer's case
to ensure your printer's batteries are properly
charged and avoid damage to printer or
charger. To clean the charging contact points,
unplug the charger from the wall and clean
using alcohol and a clean rag.
Step 2: Attaching the Printer
1. Place the printer's swivel mount block over the
unlocked swivel lock bracket (Figure 8).
2. Facing the printer, move the swivel lock's lever
from left to right until it “clicks” into the locked
position (Figure 9).
Warranty
The Company warrants that Datamax-O’Neil products are free from
defects in manufacturing materials and workmanship for one (1) year
from date of original purchase to Buyer/Distributor (OEMs 90 days
from the date of purchase). Batteries, cables, power supplies, and
other accessories will be warranted for ninety (90) days. DatamaxO’Neil makes no other warranties, expressed or implied, including
implied warranties of merchantability and fitness of purpose.
If you try to repair, disassemble, or change the product in any way, or
use parts not provided by Datamax-O’Neil without prior, written
authorization, all warranties are void. For complete warranty and
service information, see the Warranty Card included in your printer's
original packaging.
No Liability for Negligent Use
In no event shall Datamax-O’Neil be held liable for any damages
whatsoever (including, without limitations, damages for loss of
profits, business interruption, loss of information, or other pecuniary
loss) arising out of negligence in use and care of the product.
Warning: Do not allow the charging points to
come in contact with metal objects.
COPYRIGHT © 2010, DATAMAX-O’NEIL
 Loading...