

Page 1
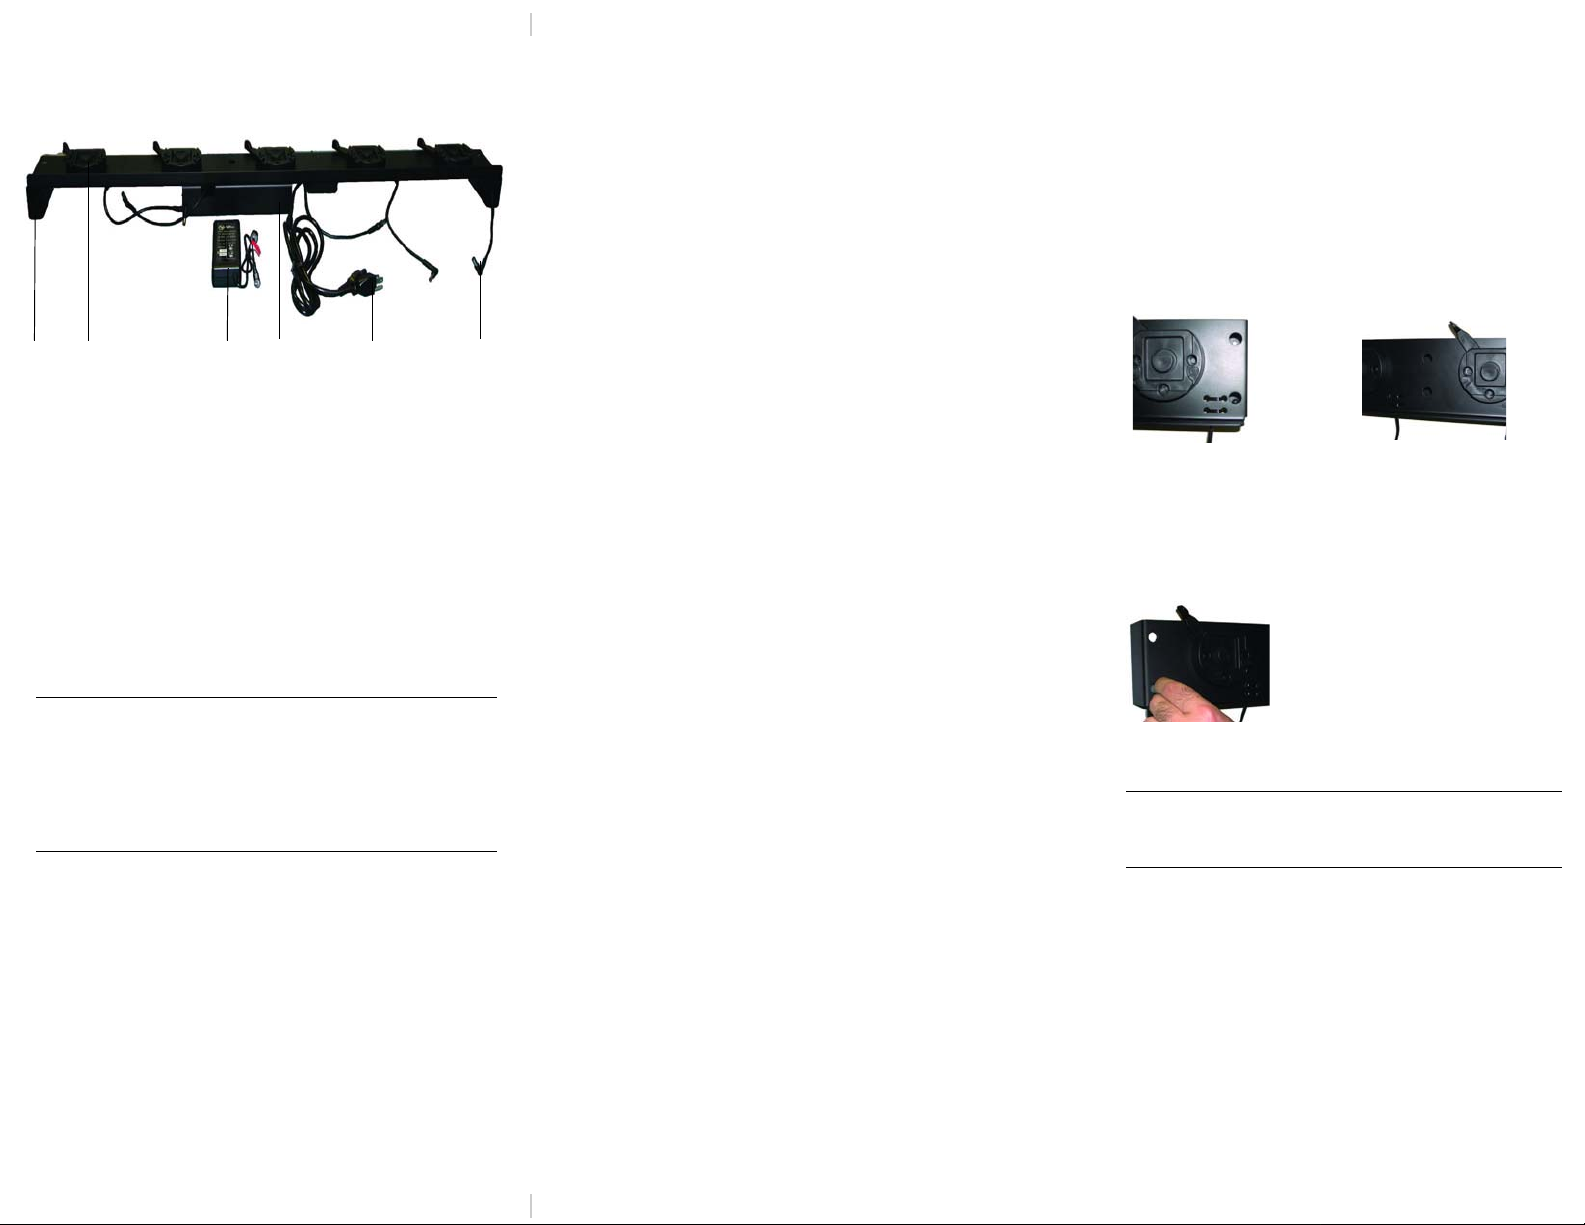
Figure 3
Figure 4
Figure 5
MF4 Depot Charger
DC
Power
Jack
Grounded
AC Power
Supply
Cord
AC
Adapter
AC
Adapter
Cradle
Swivel
Lock
Foot
Figure 1
(220226-000)
Parts List
(1) MF4 Depot Charger
(1) High capacity AC adapter
(1) Grounded AC power cord
(7) #10 x 1¼” wood screws (not shown)
(7) #10 flat washers (not shown)
#8 - #10 toggle bolts [not included; length to be
determined by the user
Note: Use #10 x 1¼” wood screws to mount the
charging dock to wood surfaces only. The
#10 x 1¼” wood screws cannot be used to m ount
the depot charger to any other type of surface.
Use #8 - #10 toggle bolts if you are mounting the
depot charger to drywall.
Guidelines
General Guidelines
• The MF4 Depot Charger is designed to be used as a
desktop or wall mounted unit.
• Keep the charging dock in a cool, dry place, away from
direct sunlight, high temperature, and moisture.
• The depot charger takes approximately 3-4 hours to
charge each printer. If multiple printers are attached, the
charge time remains at approximately 3-4 hours per
printer; however, charge times may vary.
• The depot charger is not recommended for use with the
MF2t Smart CardReader (SCR) or MF4t Smart
CardReader (SCR) printers.
• When connected to the depot charger, the printer(s) may
not print.
Safety Guidelines
• Position the depot charger with enough room to properly
open and close the printer(s); position the depot charger
so it is protected from environmental elements such as
moisture, tools, and boxes; and position the depot
charger in a secure area in normal traffic patterns.
• Do not operate the depot charger if it appears damaged.
• T o reduce risk of electric shock, unplug the depot charger
before cleaning.
• Batteries become warm to the touch during charging. If
the battery becomes too hot to touch, disco n ti n ue
charging and contact Datamax-O’Neil.
• Use of any charger or battery not approved by DatamaxO’Neil for use with their printers could cause damage to
the batteries or printer and will void the warranty.
• Datamax-O’Neil does not accept liability for improperly
mounted or poorly placed printers and/or depot charger.
Mounting the Depot Charger
If the depot charger will be mounted on a vertical
surface or on a wall, use the following procedure to
mount the charging dock:
1. Remove rubber bumpers from the
feet's and AC Adapter cradle.
2. Locate the mounting holes. There are two
mounting holes on either end of the
(Figure 3) and two mounting holes in the middle
of the
depot charger (Figure 4).
3. Use the
depot charger as a template to mark the
mounting holes on the mounting surface
(Figure 5). For information on mounting, see the
Guidelines in the previous section.
4. Drill the mounting holes at the marked locations.
Warning: Use caution when drilling the
mounting holes and when mounting the
charger
onto a wall.
depot charger
depot charger
depot
5. Attach the
depot charger to the mounting surface
as follows:
Drywall Surface: Use #8 - #10 toggle bolts (not
included).
Wood Surface: Use #10 x ¼” wood screws.
#10 x ¼” wood screws cannot be used on any
other type of surface.
6. Verify the
depot charger is level.
7. Thread the screws through the washe r s,
charger
, and mounting holes and tighten securely.
8. Proceed to Attaching the Power Supply.
depot
Page 2
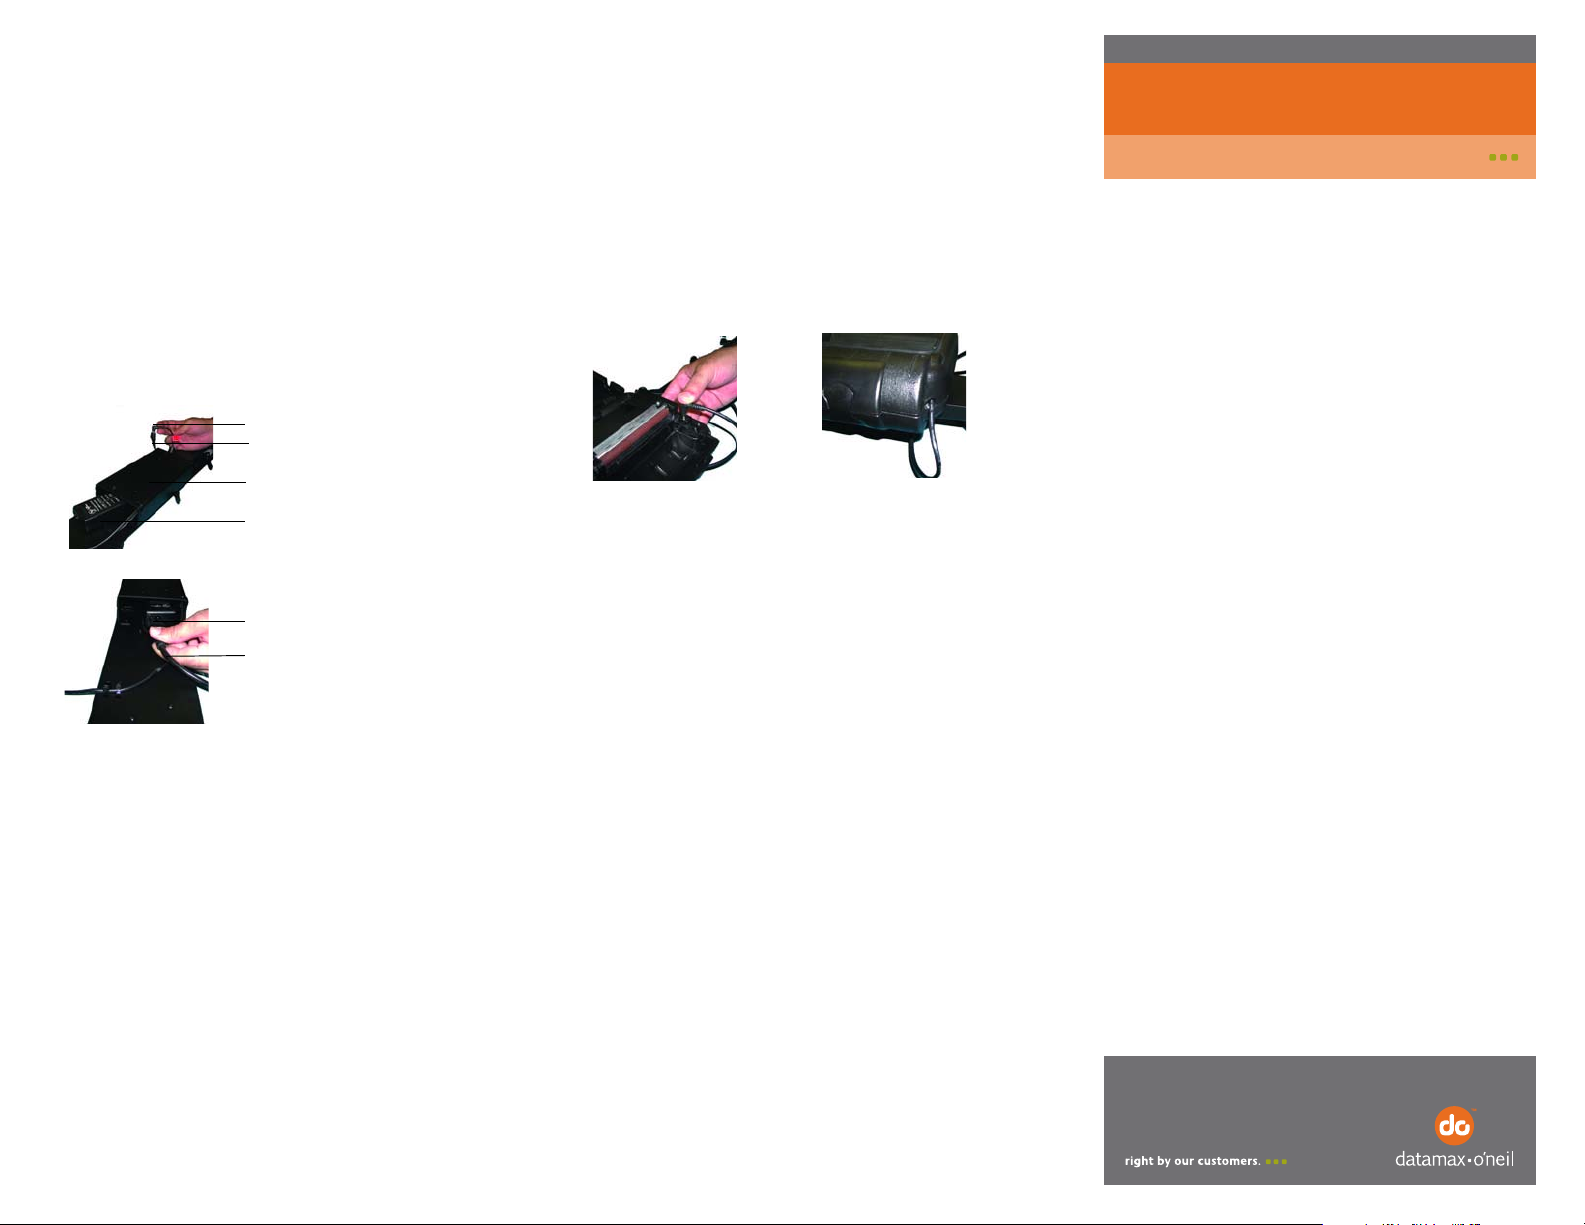
Figure 8
Figure 9
Attaching the Power Supply
Figure 6
Figure 7
Depot charger's power supply
cable socket
Depot charger's AC Adapter
cradle
AC Adapter
Grounded AC Adapter
AC Adapter 3-prong socket
AC Adapter's connector
MF4 Depot Charger
110148-003
Instruction Sheet
Use the following procedure to attach the power
supply to the
depot charger. If the power supply is
already attached to the
Attaching the Printer(s).
1. Insert the AC Adapter into the
depot charger, proceed to
depot charger's AC
Adapter cradle (Figure 6).
2. Plug the AC Adapter's connector into the
charger
's power supply cable socket (Figure 7).
depot
3. Plug the Grounded AC Adapter’s connector into
the AC Adapter's socket (located on the AC
Adapter cradle). Verify the 3-prongs of the
Grounded AC Adapter's connector match the AC
Adapter's socket (Figure 7).
4. Plug the Grounded AC Adapter cord to an outlet.
5. Proceed to Attaching the Printer(s).
Attaching the Printer(s)
1. Place the printer's swivel mount block over the
unlocked swivel lock bracket.
2. Facing the printer, move the swivel lock lever from
left to right until it “clicks” into the locked position.
3. Open the printer's cover.
4. Connect the depot charger's DC power jack to the
printer's power port (Figure 8).
5. Close the printer's cover. Verify the cable exits
through the notch in the printer's cover (Figure 9).
Warranty
The Company warrants that Data max-O’Nei l pr oduct s are f re e from def ect s in
manufacturing materials and workmanship for one (1) year from date of
original purchase to Buyer/Distributor (OEMs 90 days from the date of
purchase). Batteries, cables, power supplies, and other accessories will be
warranted for ninety (90) days. Datamax-O’Neil makes no other warranties,
expressed or implied, including implied warranties of merchantability and
fitness of purpose.
If you try to repair, disassemble, or change the product in any way, or use
parts not provided by Datamax-O’Neil without prior, written authorization, all
warranties are void. For complete warranty and service information, see the
Warranty Card included in your printer's original packaging.
No Liability for Negligent Use
In no event shall Datamax-O’Neil be held liable for any damages whatsoever
(including, without limitations, damages for loss of profits, business
interruption, loss of information, or other pecuniary loss) arising out of
negligence in use and care of the product.
COPYRIGHT © 2010, DATAMAX-O’NEIL
 Loading...