

Datamars ISOMAXV User Manual
ANIMAL ID
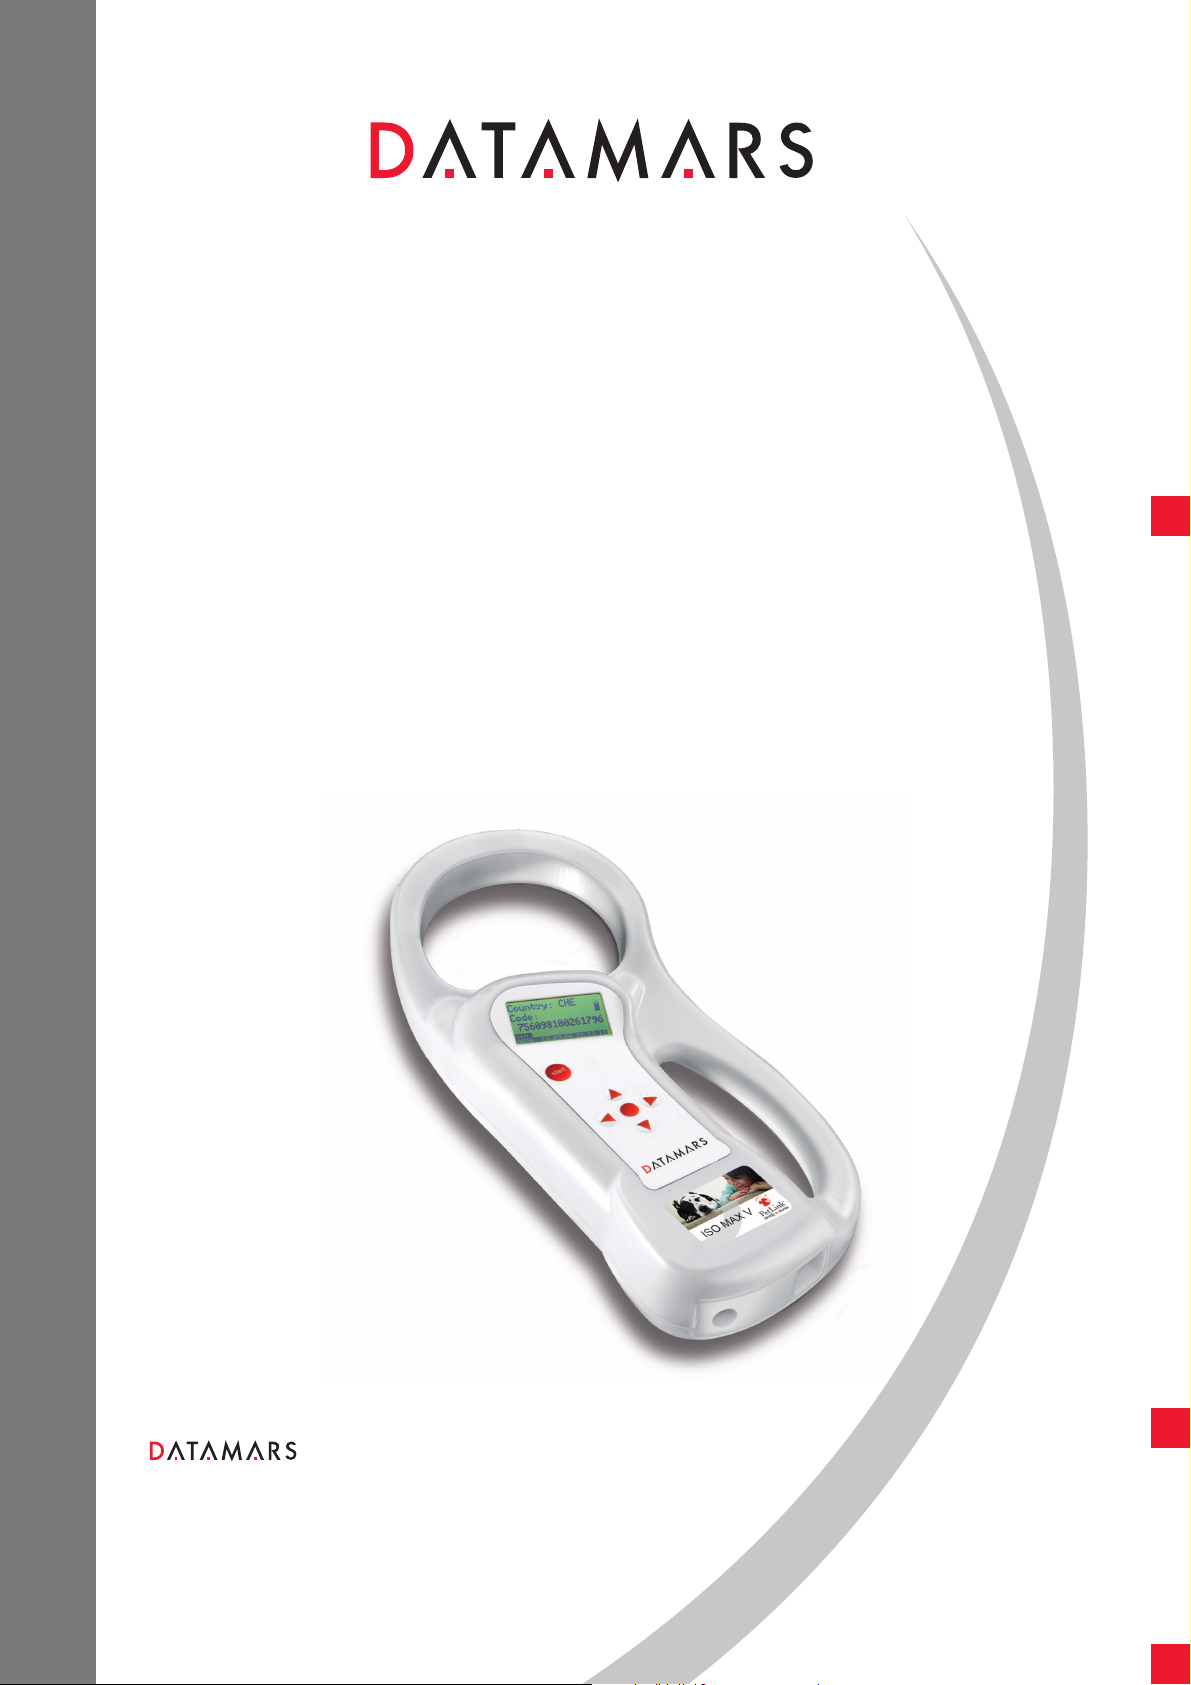
ISO MAX V
USER MANUAL
Version 1.0
Universal portable reader
Corporate Headquarters:
Via ai Prati
6930 Bedano-Lugano
Switzerland
Phone: +41 91 935 73 80
Fax: +41 91 945 03 30
animal-id@datamars.com
www.datamars.com
Americas Headquarters:
8433 South Av. Bldg., 4-2
Youngstown, OH 44514 USA
Phone: +1 330 758 1240
Fax: +1 330 758 3805
Asia Headquarters:
Northern Region Industrial Estate
1/179 Moo 4, T. Ban Klang, A. Muang
Lamphun, Thailand 51000
Phone: +66 53 582 021
Fax: +66 53 582 680
© 2008 DATAMARS

Contents:
1 Description …………………………………………………………………………………………….. 3
2 Operation ………………………………………………………………………………………………. 4
2.1 Switch on the ISO MAX V………………………..……………………………………………. 4
2.2 Read a transponder ……………………………..……………………………………………. 5
3 Managing the menu ………………………………………….………………………………………. 6
3.1 Find your way in the menu ………….……….…….……….………………………………… 6
3.2 Browse memory ………….……….……….……………….………………………………… 6
3.3 Memory functions ……….……….……………….……………..…………………………… 7
3.3.1 Store in memory ……….……….……………….…………………………………... 7
3.3.2 Memory hit ……………………………………………………………………………. 7
3.3.3 Selected hit ………………..………….……………………………………………… 8
3.3.4 Clear all memory ……………………..……………………………………………… 9
3.3.5 Data download ……………………..………………………………………………… 9
3.4 Date & Time …………...……………………………….……………………………………… 9
3.5 Set-up …………………………….…………………….……………………………………… 10
3.5.1 Reading beeps ……………………………….……………………………………… 10
3.5.2 Key beep ………….…………..……………….……………………………………… 10
3.5.3 Reading timeout ………………….………….……………………………………… 10
3.5.4 Shutdown timeout …………………………………………………………………… 10
3.5.5 Serial baud rate ……..…………………….….……………………………………… 10
3.6 Bluetooth ……………….……………………………….……………………………………… 11
3.6.1 Act as a server ……………………………….……………………………………… 11
3.6.2 Act as a client ……………………………….……………………………………… 11
4 Connect your ISO MAX V to a PC ………..…………………………….…………………………… 11
4.1 Where to find the USB driver …………………………………………………………….…… 11
4.2 USB driver installation guide for Windows OS ……..………….…………………………… 12
4.3 USB driver installation guide for MAC OS …………………….…………………………… 13
4.4 RS-232 installation guide …………………………………….….…………………………… 14
4.5 Bluetooth installation guide for Windows XP OS ………….….…………………………… 14
4.5.1 Configure ISO MAX V for the Bluetooth connection …………………………… 14
4.5.2 Search for and recognize the ISO MAX V (R-PO7470) by a host PC ………… 14
4.6 Real-time communication …………..………….…………….….…………………………… 18
5 Battery management ………………………………………………….….…………………………… 19
5.1 Battery level indicator ………………………………………….….…………………………… 19
5.2 How to recharge the battery……………………..…………….….…………………………… 19
6 Take care of your reader ……………….…………………………….….…………………………… 19
7 Specifications ………………..………….…………………………….….…………………………… 20
8 Software to remote control the reader……..…………………………….…………………………… 20
8.1 Introduction……………..……………………………………………….………………….…… 20
8.2 How to install WinMax …………………………………………...…………………………… 20
8.3 How to use WinMax ……………………………….…………….…………………………… 21
8.4 Tip to automatically select the port number ……………….……………………..………… 22
9 Do you have a problem identifying an animal ……….….…………….…………………………… 23
9.1 The reading distance is too short …………..……………………….………………….…… 23
9.2 The reader does not read the transponder ……….…..…………………………………… 23
9.3 The reader doe not work…………………… …………………….…………………………… 23
10 Advanced user’s instructions ……..……………….………………….….………………………….. 23
10.1 Console commands description ..…………………………………….………………….…… 23
11 Certifications ………………..………….………..…………………….….…………………………… 30
ISO MAX V Manual – v. 1.0 – july 2008 2
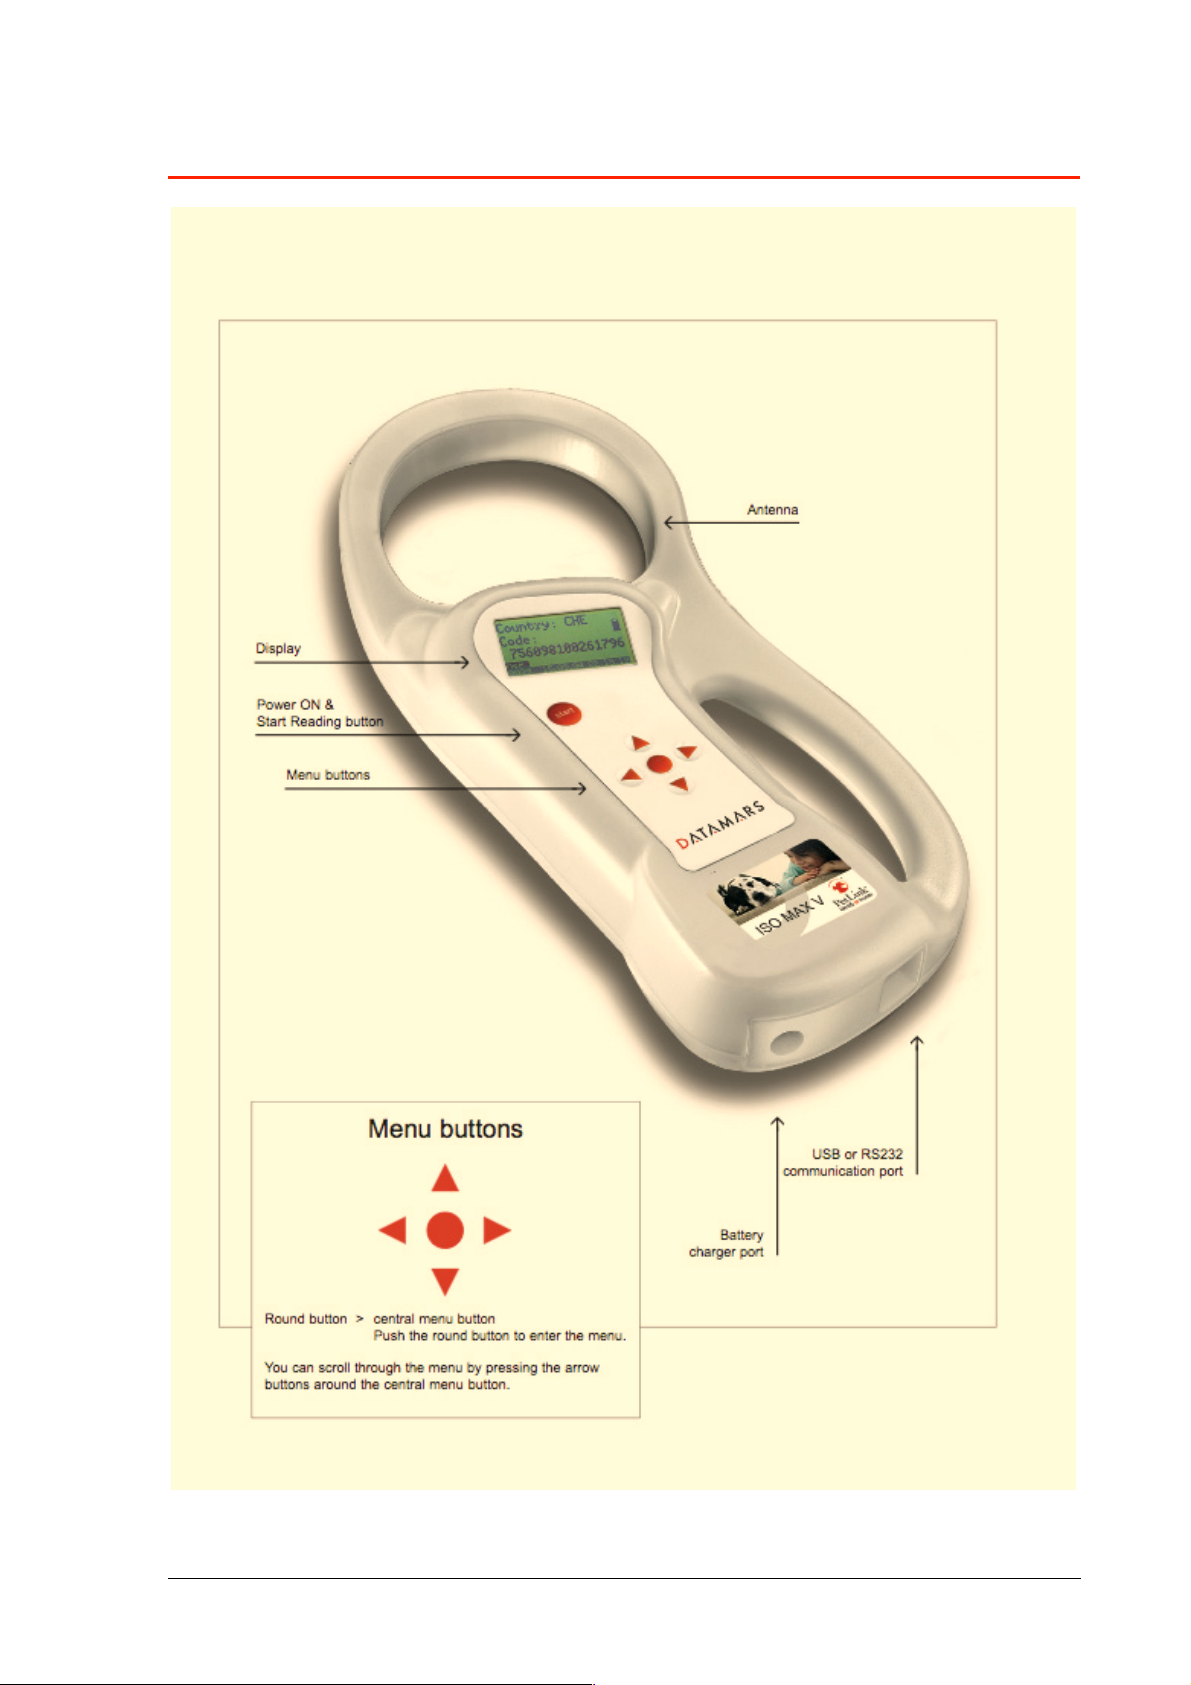
1 Description
ISO MAX V Manual – v. 1.0 – july 2008 3
2 Operation
Although the ISO MAX V has been designed to plug and play, we recommend you read this manual
carefully in order to take advantage of all its useful features and functions.
2.1 Switch on the ISO MAX V
Slide your hand between the base unit and the handle. Use your thumb to press the START
button, which is located on the upper left corner of the panel.
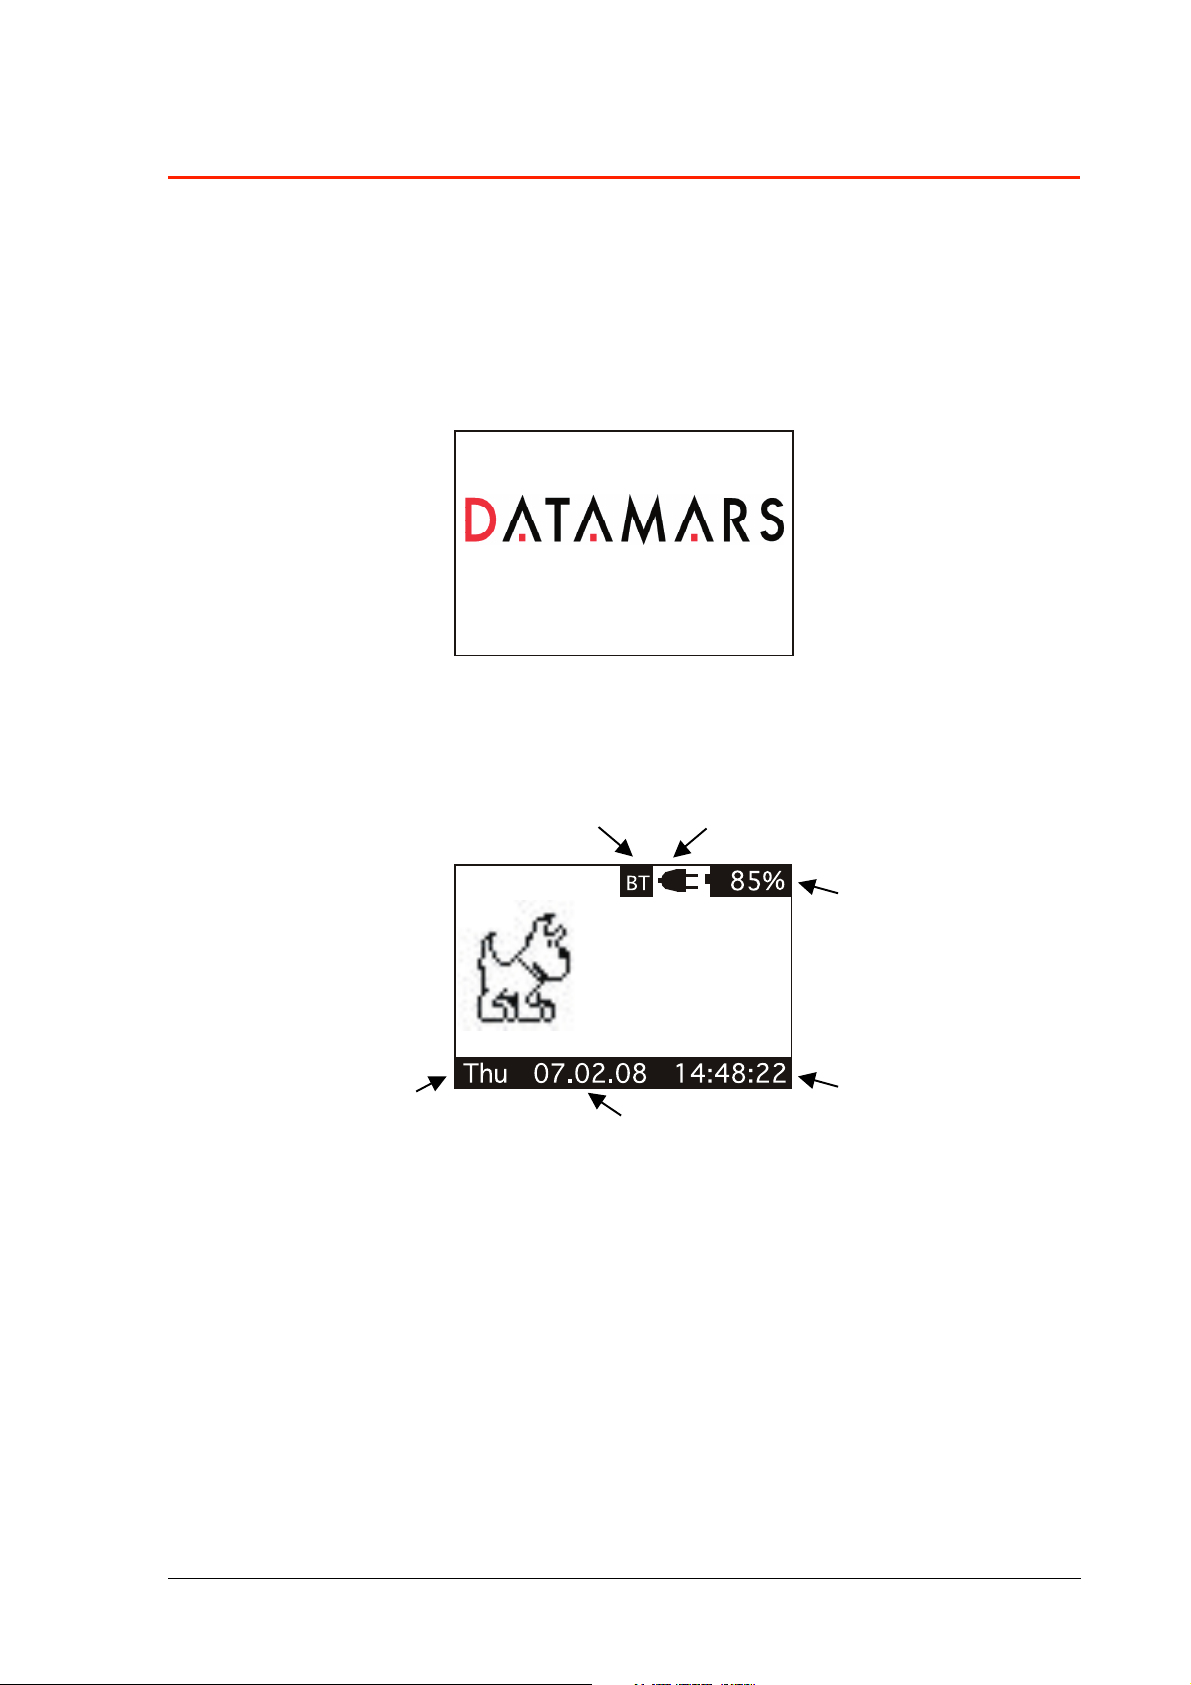
The display shows the following start-up figure:
ISOMAX V V1.0
Under the Datamars logo, you can see the name of the reader and the firmware version.
After a few seconds the main screen shot appears:
2. Connected to power net 6. Bluetooth connection OK
1. Battery level
5. Week Day
4. Date
3. Clock
1. Check the battery level, which should be more than 6% vitality to read a transponder.
The battery level shows the discharge level as well as the charge level during charge mode.
2. While the reader is connected to the power net, in charging mode, the reader disables the
reading mode; therefore is not possible to read a transponder. The other functions are fully
active.
3. Clock time is in 24 hour mode.
4. Date format can be selected between EU/US.
5. Week day.
6. Bluetooth connection established and ready to use.
ISO MAX V Manual – v. 1.0 – july 2008 4
2.2 Read a transponder
Place the ISO MAX V near the animal to be read, then press the START button in order to
activate the reading mode.
During the reading mode, move the reader along the animal to scan the transponder ID.
To stop the reading mode press the START button again.
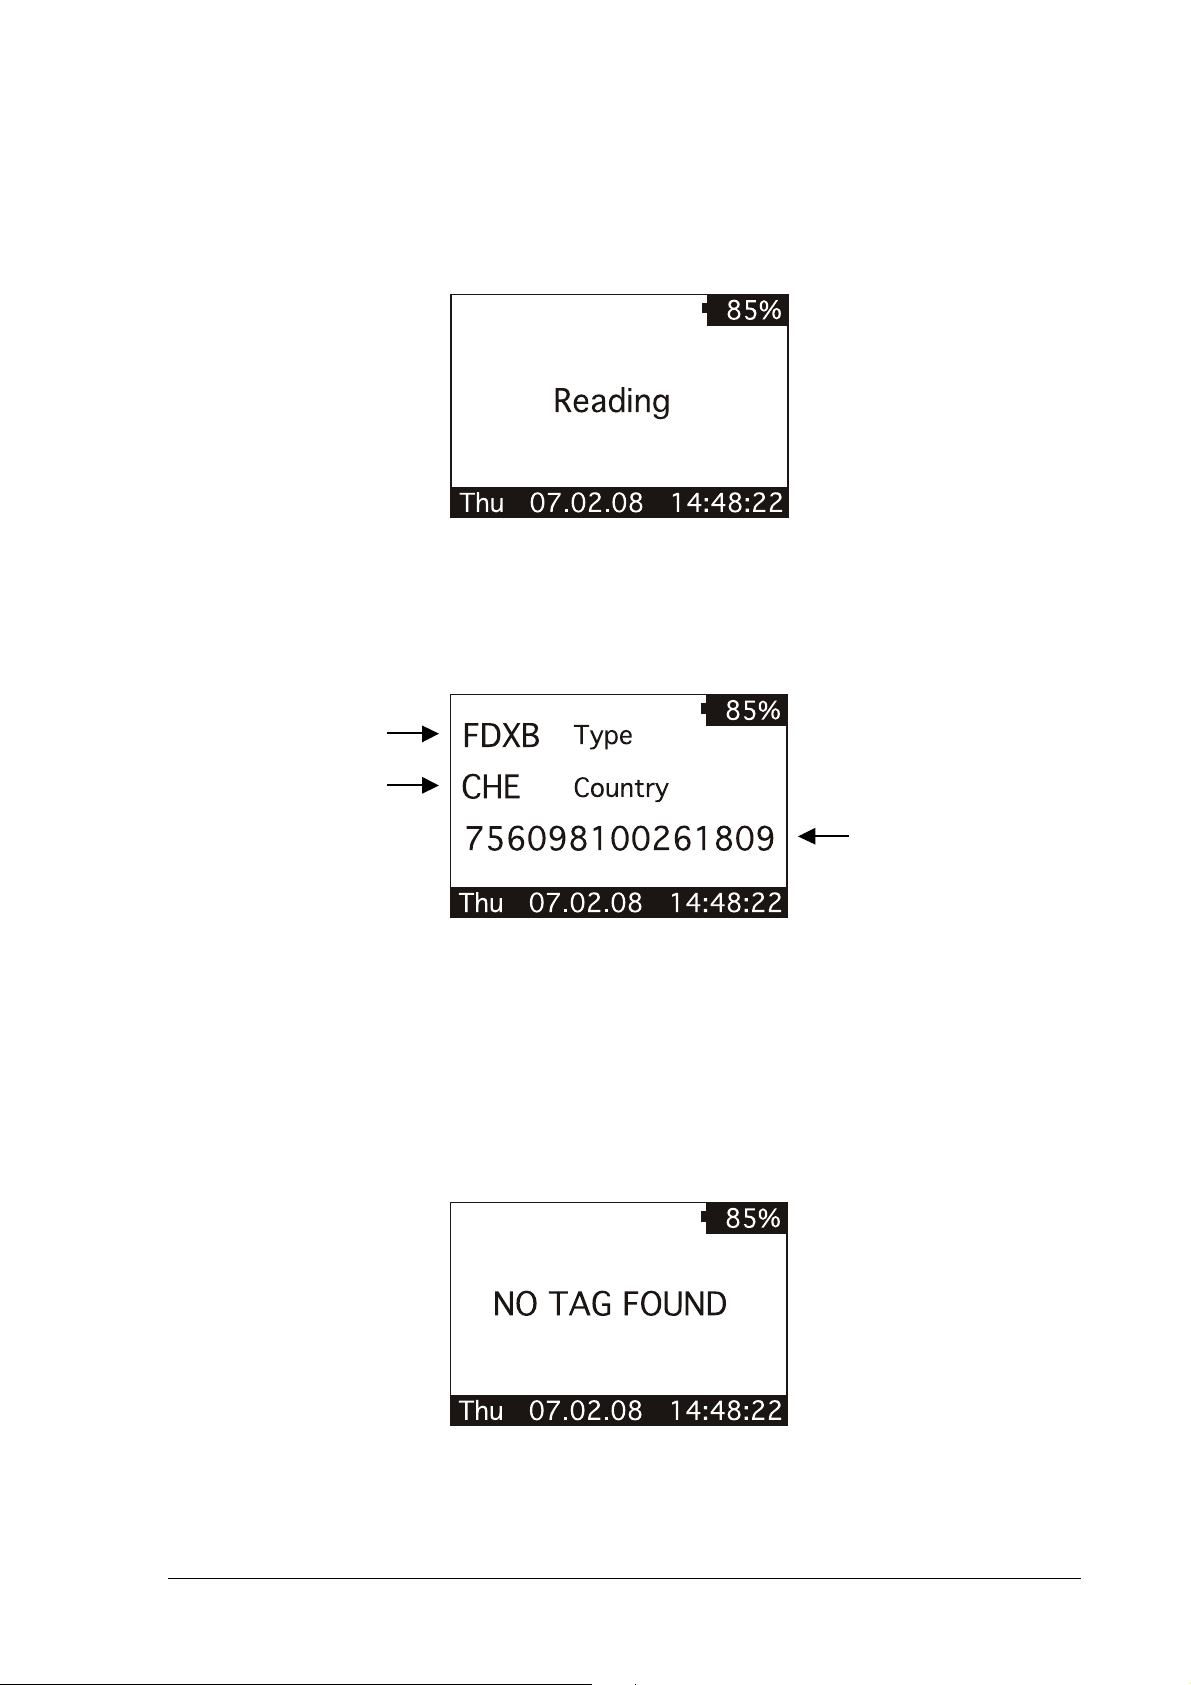
The following figure shows the result of a successful reading session:
1. Transponder type
2. Country code
3. ID code
1. There are four main types of transponder: FDX-B and HDX are the ISO standard 11784/5. IDI
stands for Destron, Avid, and PETRAC. The last type is TVN which stands for Trovan, AEG and
similar transponders. When the reader displays the word “Industry” as transponder type, it
means that this transponder is not coded for animals.
2. The Alpha country code is according to ISO 3166, ISO 11784/5.
3. The Identity Code number is according to ISO 11784/5.
The following figure shows the result of an unsuccessful reading session:
After a while the reading mode times out. The reader stops and shows the message “NO TAG
FOUND”.
ISO MAX V Manual – v. 1.0 – july 2008 5

3 Managing the menu
3.1 Find your way in the menu
Switch on the reader by pressing the START button (please refer to chapter 2.1).
Press the ENTER button which is the round button in the centre of the arrows pad.
The display shows the following figure:
You can scroll through the menu by pressing the UP or DOWN buttons which are the arrows
around the central ENTER button. The arrows located on the right of the display means that this
menu contains a sub menu. In order to enter the sub menu, you have to press the RIGHT arrow
button while it is highlighted.
Generally the ENTER round button is used to confirm the changes made through the
parameters of the menu. The START button is used to cancel the changes and go back to a
previous menu level to exit the main menu.
3.2 Browse memory
In the browse menu you find the ID code stored in the memory of the reader.
The following figure shows the browse memory menu:
1. ID code highlighted
highlighted ID code
You can scroll through the ID codes by pressing the UP or DOWN buttons, or skip a page by
pressing the LEFT or RIGHT arrow button. You can scroll quickly through the ID codes by
holding down one of the arrow buttons.
You can select an ID code by pressing the ENTER button while it is highlighted. This action
stores the corresponding ID code in the selected ‘hit function’ (please refer to chapter 3.3.3 for
more details).
You can exit the current menu by pressing the START button.
ISO MAX V Manual – v. 1.0 – july 2008 6
2. Time stamp of the
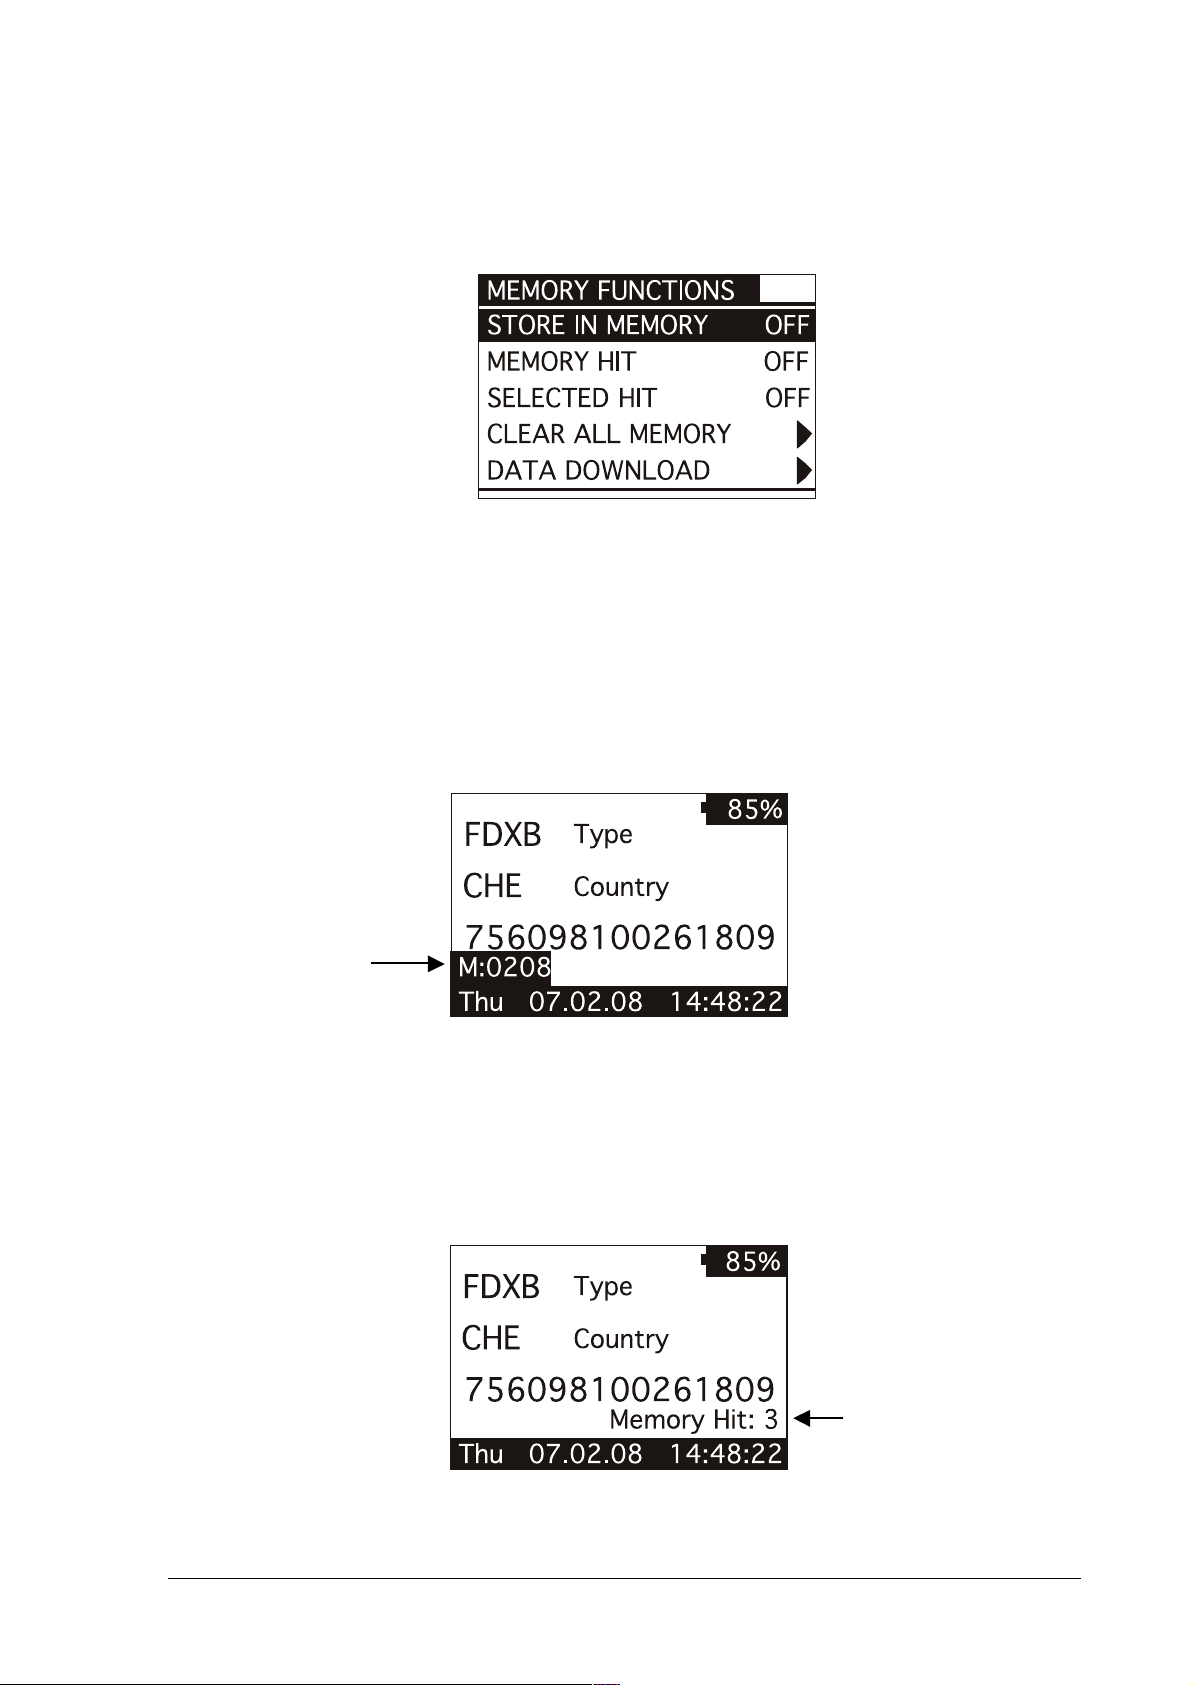
3.3 Memory functions
In the ‘memory functions’ menu you find various features and functions.
The following figure shows the ‘memory functions’ menu:
You can scroll through the ‘memory functions’ by pressing the UP or DOWN button. You can
change the parameter highlighted by pressing the LEFT or RIGHT button.
3.3.1 Store in memory
The ‘store in memory’ function enables or disables the function to store ID codes read in the
memory. When this function is OFF the reader does not record an ID code in the memory.
While is ON, it stores the data into the memory.
The following figure shows the store in ‘memory function’ enabled:
At the moment the
memory contains
208 ID codes
3.3.2 Memory hit
The memory hit function counts and shows on the display how many times the current ID code
read is present in the memory. When this function is OFF the reader does not show anything.
While it is ON, it shows the ‘memory hit’ counter on the display.
The following figure shows the memory hit function enabled:
This ID code has been
found 3 times in the
memory
ISO MAX V Manual – v. 1.0 – july 2008 7

3.3.3 Selected hit
The ‘selected hit’ function checks and displays the current ID code read present in the memory.
This function is useful to identify a specific animal in a large group of animals. When this
function is OFF the reader does not show anything. While is ON, it shows the message “TAG ID
FOUND” when the tag read is already present in the memory, or it shows the selected tag ID to
be found, when the tag ID does not match.
The following figure shows the selected hit function enabled:
No ID code is selected
from the memory
In this case, the message “NO TAG SELECTED” appears: this means that you have to select
an ID code using the ‘browse memory’ function (refer to chapter 3.2 for details). Therefore press
the round ENTER button to enter the main menu, then press the RIGHT button to enter the
browse menu: scroll through the ID codes list until you find the needed ID code. When
highlighted, press the ENTER button so that it is selected for the ‘selected hit’ function.
BROWSE MEMORY
0001 756 098100261808
FDXB
0002 756 098100261793
0003 756 098100261706
0004 756 098100261824
CHE
756098100261809
0005 756 098100261211
Thu 07.02.08 14:48:22
At this point you are ready to search the selected ID code in the large group of animals. When
you read an ID code that matches the selected one, the reader displays the message “TAG ID
FOUND!” and beeps three times.
Thu 07.02.08 14:48:22
85%
Type
Country
756098100261706
85%
FDXB
CHE
Type
Country
756098100261706
TAG ID FOUND!
Thu 07.02.08 14:48:22
ISO MAX V Manual – v. 1.0 – july 2008 8

3.3.4 Clear all memory
This function clears all the memory contents. Press the LEFT button to highlight the Yes
answer. Then press the ENTER button to confirm the action to clear the memory.
Are you sure you want
to clear the memory?
Yes
3.3.5 Data download
This function downloads the data stored in memory through the USB or Bluetooth interface.
First plug the reader into a PC with the USB cable (refer to chapter 4). Then run the
HyperTerminal session in order to receive data on this program. At this point enter the ‘data
download’ function by navigating through the menus. When the following message appears,
press the ENTER button.
Cancel
Press enter to start
the data download.
3.4 Date & Time
This menu allows you to adjust the date and time including the date format (EU format if you
prefer to have the day before the month, US format if you prefer to have the month before the
day).
Press the LEFT/RIGHT button to move the highlighted field. Press the UP/DOWN button to
change the highlighted parameter.
DATE & TIME
DATE: 31 . 01 . 08Fri
TIME: 15 : 46 : 55
Format: EU
ISO MAX V Manual – v. 1.0 – july 2008 9
 Loading...