

USER MANUAL
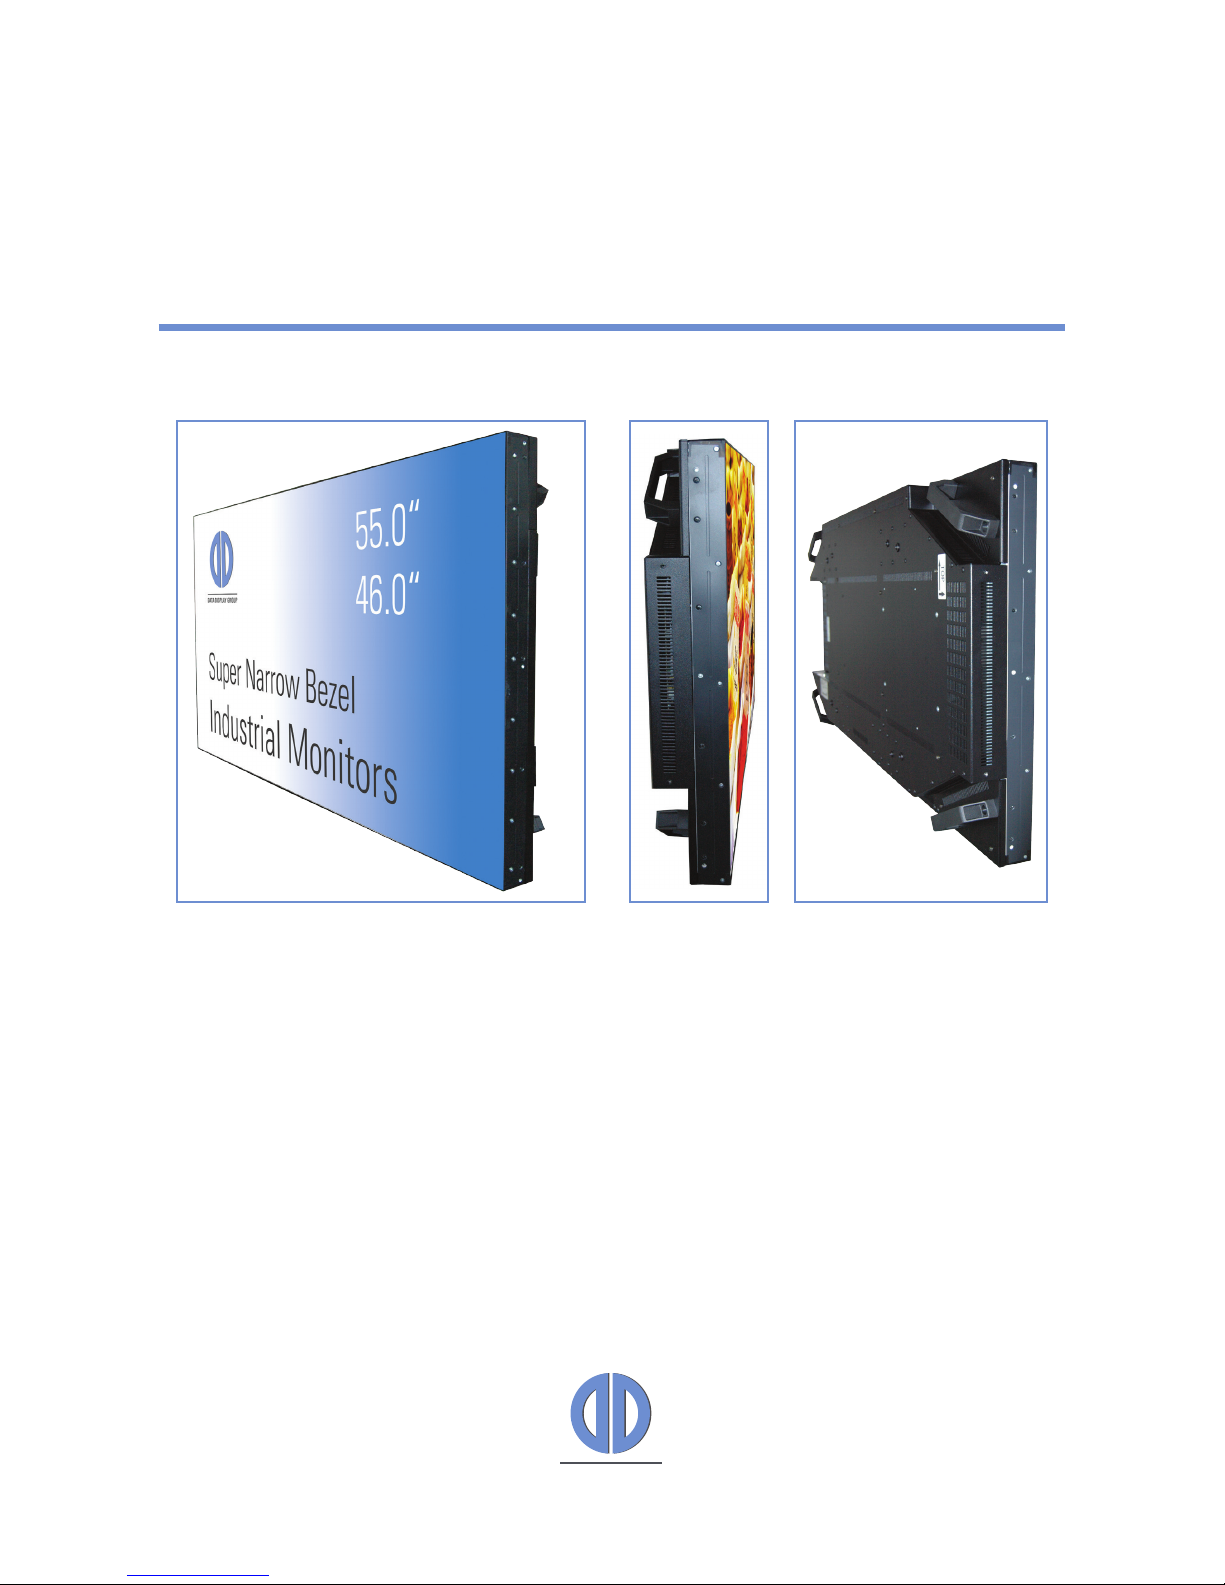
Super Narrow Bezel Monitors 46“/ 55“ LAV
SNB Monitor (46“/ 55“)
with VGA, HDMI, DVI, RS 232
201505_manual_SNB_LAV_EN
DATA DISPLAY GROUP

2
Copyright
The contents of this manual are subject to change without notice.
© 2015 Data Display Group. All rights reserved.
Reproduction of this manual in parts or entirely without the previous authorization of Data Display Group is prohibited.
Data Display Group is not liable for errors and collateral or subsequent damage which result from supply, deployment or any other utilisation of this document.
All product names mentioned in this document are trademarks or registered trademarks of their due owners.

3
Table of Content
1. GeneralSpecications ............................................................................... 4
2. Scope of Delivery .......................................................................................5
3. General Safety Regulations .......................................................................6
4. First Installation .......................................................................................... 9
5. Super Narrow Bezel Video Lavinia ........................................................... 12
6. Maintenance ............................................................................................28
7. Guarantee / Service .................................................................................28
8. Disposal .................................................................................................... 30
9. Declaration of Conformity ........................................................................ 31

General Specications
4
1. General Specications
Scope of Document
This user manual is valid for Super Narrow Bezel 46“ and 55“ monitors. Article numbers: DS-91-235; DS-91-303
Important note: This user manual is complemented by other additional documents when indicated.
All documents are also available for download from Data Display Group web site: www.datadisplay-group.com.
Monitor versions:
SNB 46“/ 55“ Lavinia: Monitor with integrated AD converter board, 1 x VGA, 1 x HDMI, 1 x DVI, 1 x RS232.
Scope of Delivery
5
2. Scope of Delivery
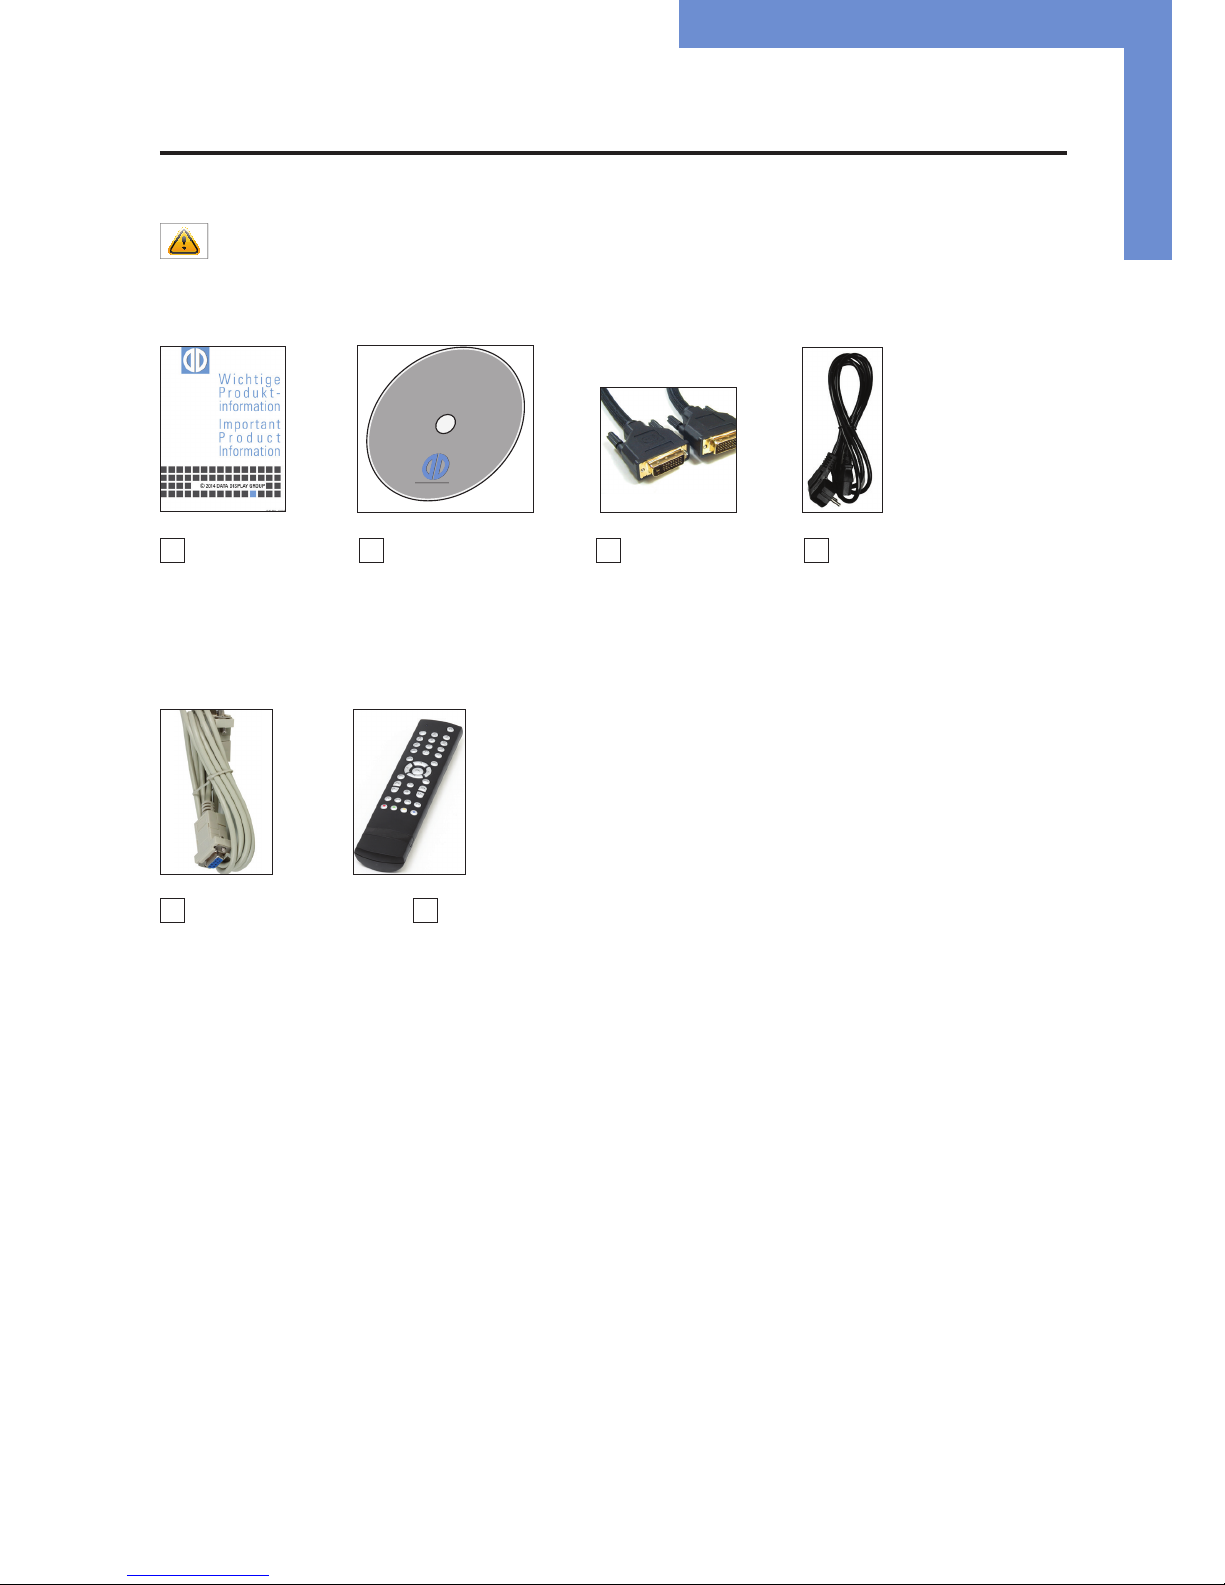
When unpacking the monitor, please check if the following accessories are included in the shipment:
Note: Pictures can differ from actually supplied products.
Product information* Accompanying DVD* DVI cable* Power cable*
(Manuals, Datasheets,
Driver, Drawings)
RS232 modem cable* Remote control incl. Batteries per video wall*
* The representation is a representation only.
DATA DISPLAY GROUP

General Safety Regulations
6
3. General Safety Regulations
Safety information
Please read this safety information carefully for your personal safety and for the prevention of property damage.
In case of a malfunction immediately disconnect the power plug and contact your dealer or the next Data Display Group service center.
A malfunction is also considered if the housing, a control element or cable is damaged or if liquids or other objects penetrate the
monitor.
Please read the safety information carefully before intalling devices. If you have any doubts about whether the device may be used in
a particular environment, please contact our service partner.
Repairs
Repairs may only be carried out by authorized technical personnel. Unauthorized access or improper repairs might cause serious property damage or cause danger to the user. In addition to that, any legitimate warranty claim expires.
Electrical connection
Disconnect the monitor from mains before carrying out any work. Do not touch or connect data cables or power cables during thunderstorms.
System start-up
Before system start-up slowly adjust the monitor temperature to the ambient temperature. Do not expose device to direct heat radiation. In case of condensation, please wait minimum 12 hours before setting the monitor into operation. The monitor may only be
installed and operated as described in this documentation or the corresponding data sheets. Only qualied personnel may carry out
the initial installation and system start -up.
Qualied personnel
Qualied personnel, in terms of the safety information of this documentation, are persons who are qualied to activate, ground and
label devices, systems and circuits according to the safety standards.
Operation
For a trouble-free and safe operation of the product, adequate transportation, storage, installation and assembly as well as careful
handling and maintenance are essential. The device is only certied for in-door operation. Avoid extreme ambient conditions. Protect
the monitor from dust, humidity and heat. Do not expose the monitor to direct sunlight.
Transport
Unpack the monitor at place of installation. Use only original packaging for transportation. Please observe these rules for any later
transport.
Condensation
Avoid condensation during transport at low temperatures or at extreme uctuations of temperature.
General Safety Regulations
7
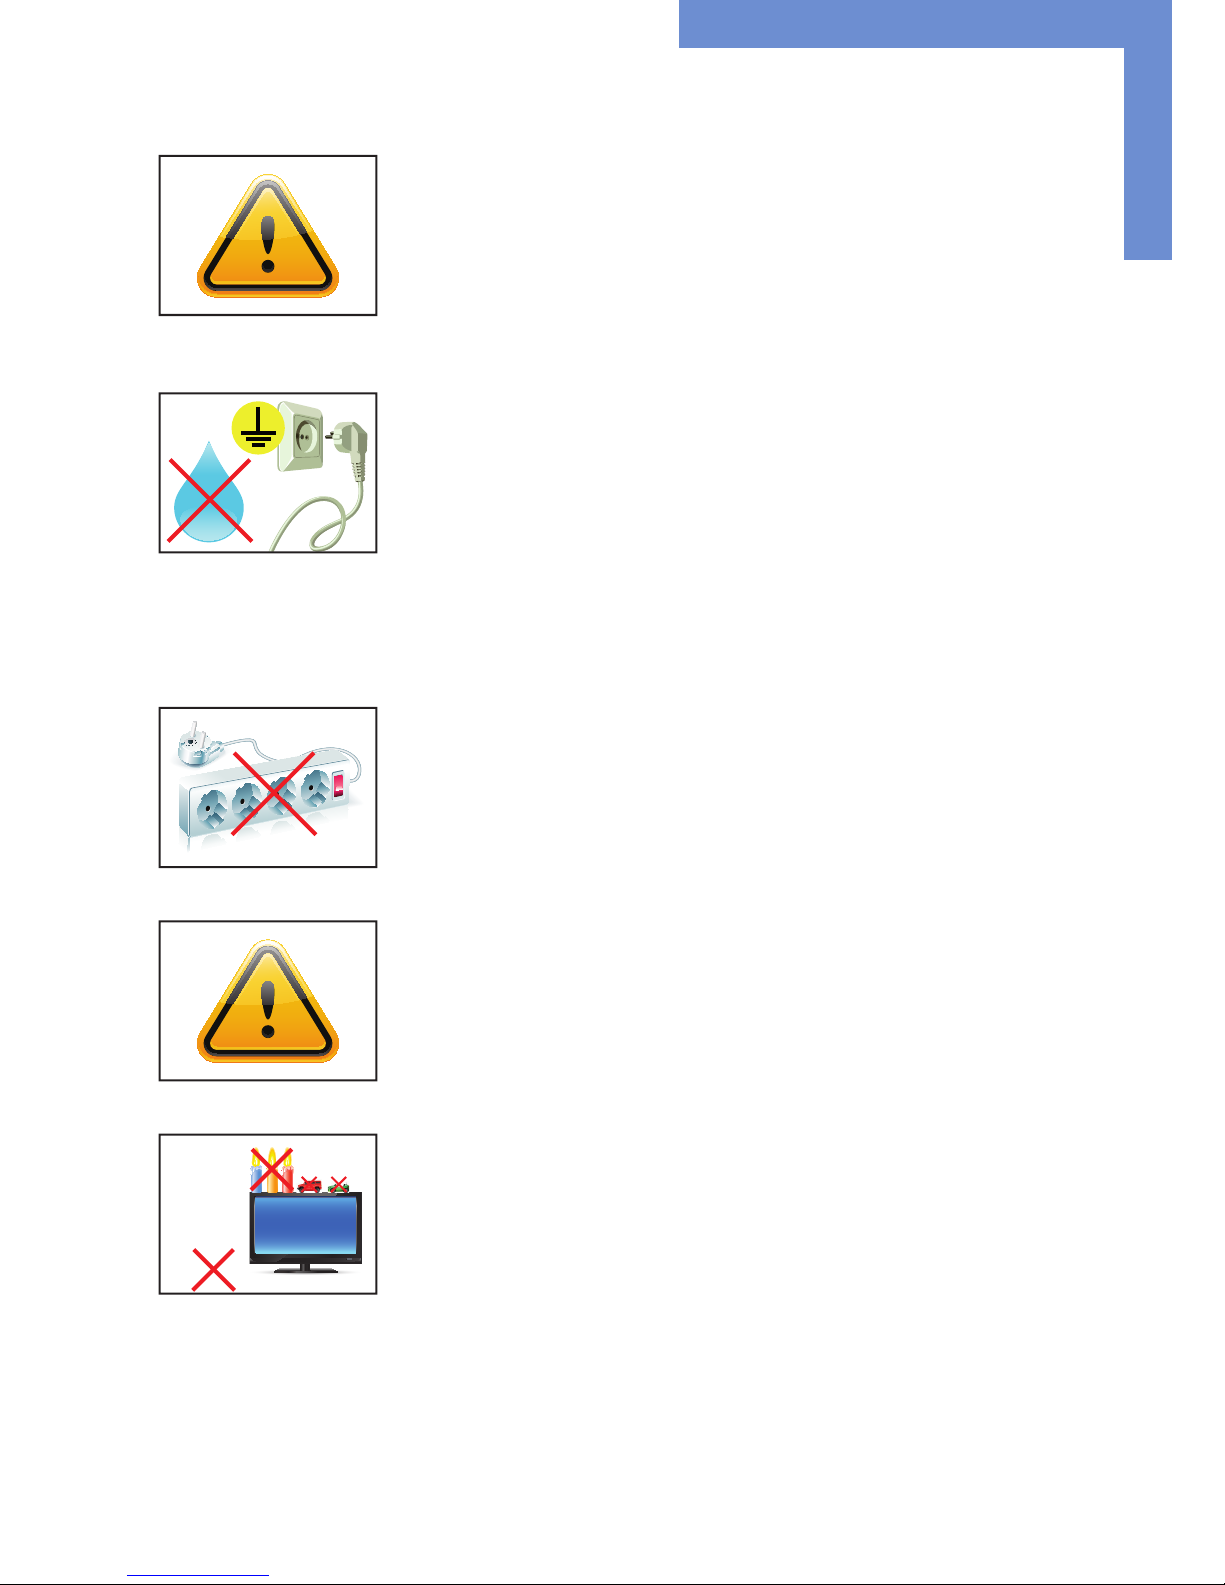
• Do not put objects onto the device.
• Do not place candles, heaters or humidier near the device.
• Keep the device away from replaces and ammable materials.
• According to size, devices may be difcult to handle and very heavy. Ensure that at least
two people lift and carry the device.
• Put down the device slowly and carefully to avoid damaging the LCD screen. Ensure that
the device stands stable.
• Keep packaging away from children. Danger of suffocation!
• Use our specied and professionally mounted wall mounting only.
• Do not use multiple sockets to plug several devices into a single socket.
• Do not use damaged or loose sockets to plug in the device.
• Plug the device in earthed sockets only.
• Operate the device with our power cables included in the delivery only.
• Use undamaged power cables only.
• When plugging in and out, do not touch the power cable with wet hands.
• Ensure that the power cable is plugged in the socket safely and correctly.
Safety guidelines for the handling of LCD monitors
• If the device is not in use over a longer period of time, unplug the power cable.
• To unplug the device without problems, sockets have to be easily accessible.
• Do not unplug the power cable while the device is powerd on, except for emergencies.
• Ensure that the power cable does not get pinched or kinked.
• Do not place heavy objects on the power cable.

General Safety Regulations
8
• Caution high voltage! Never open the device yourself.
• In case of unusual noises, burnt smell or smoke unplug the power cable.
• Do not insert objects into the device through the ventilation slots.
• If the same picture is displayed over a longer period of time, an after-image may arise.
• When exchanging batteries, pay attention to the polarity. Keep batteries away from
children and ensure an environmentally correct disposal.
• Protect your device from splash water.
• When cleaning, please make sure that no liquids get into the device.
• Screens and surfaces can be scratched easily. Therefore, please use the prescribed
cloth only.
• Please use a soft, moist cloth for cleaning.
• For cleaning the screen, please only use commercially available screen cleaner. Do not
spray the cleaner onto the device directly but onto a cloth.
• Please clean ventilation slots regularly to ensure a good air circulation.
• Do not install the device in places where it is exposed to environmental impacts such
as rain or direct sunlight.
• Do not install the device in places where it is exposed to high humidity, dust or smoke.
In case of doubt, please contact your sales partner.
• Ensure sufcient ventilation of the device.
• Keep a minimum distance of at least 10 mm devices to the wall, for devices with integrated PC of at least 40 mm.
• Pay attention to the compliance with the operating temperature.
First Installation
9
4. First Installation
Position of connectors and controls
All connectors for power and cables are located at the bottom of the back side of the display.
Connection elements for data cables, keys of the OSD menu,
power cable and on-/ off-switch
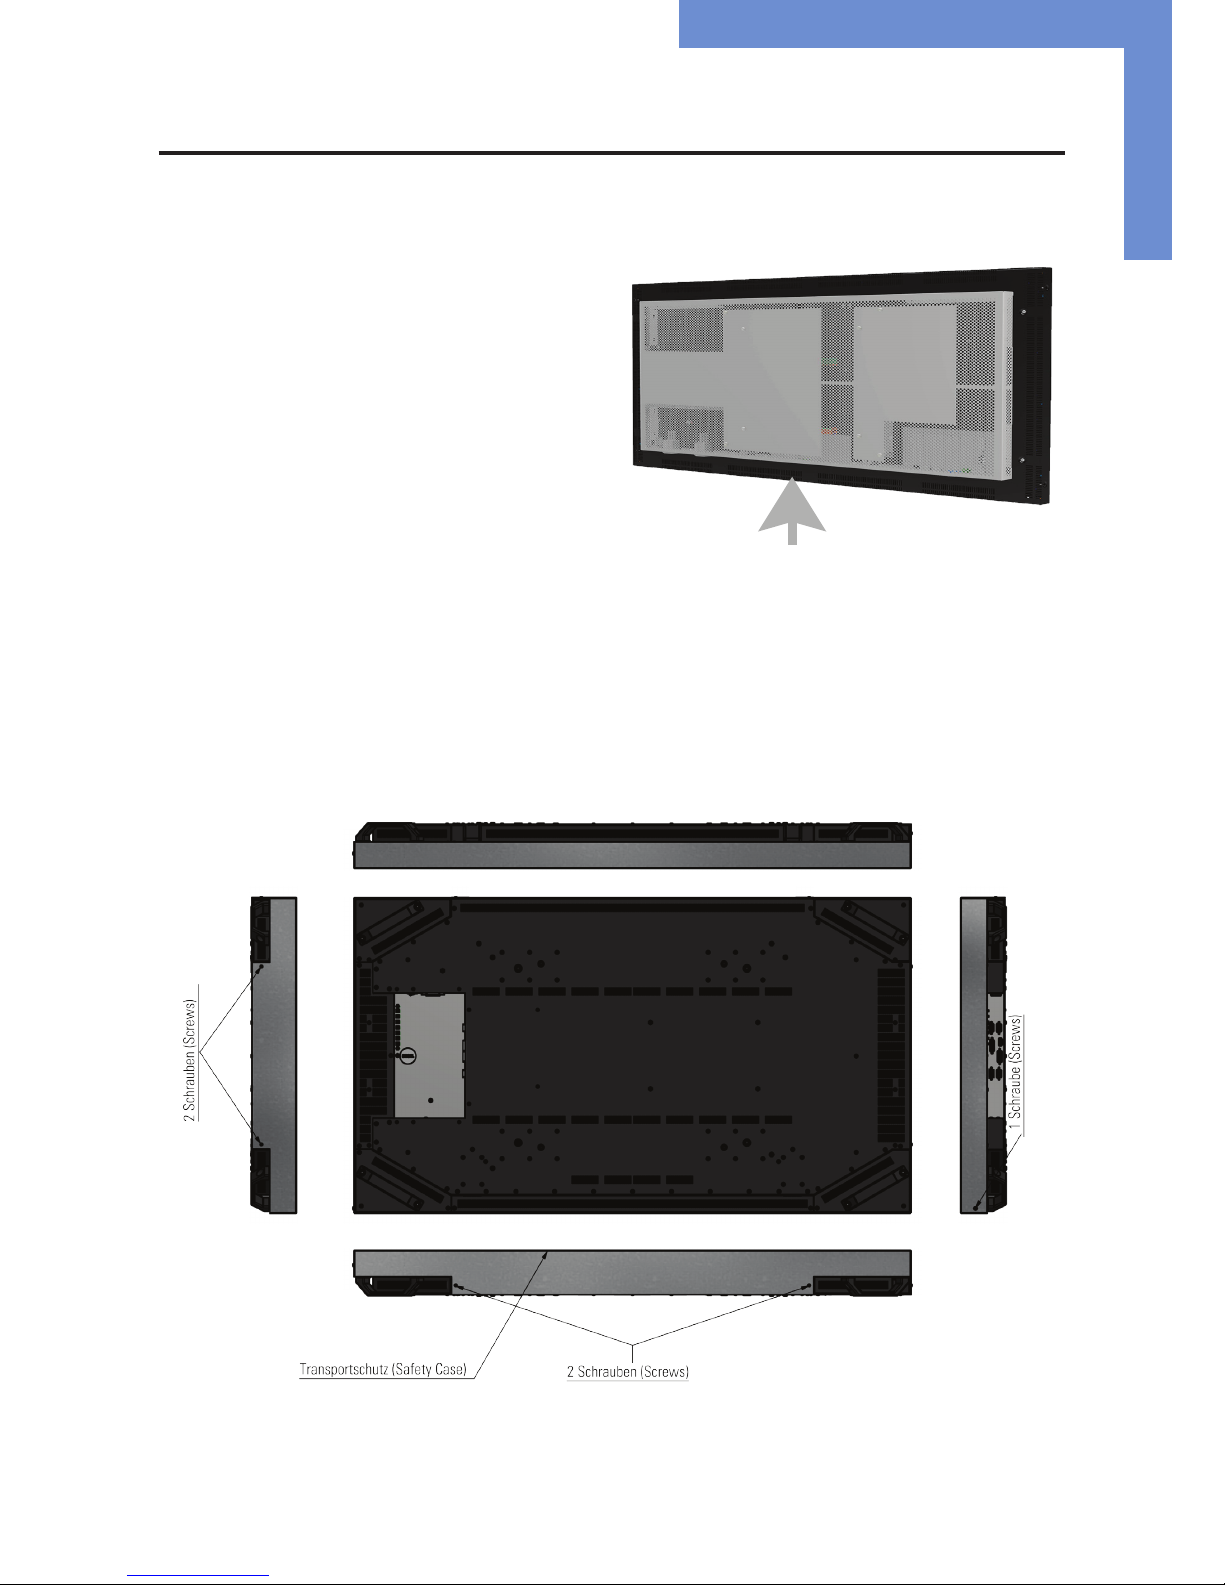
Removing the transport lock
Please solve the indicated screws of the transport lock and remove the transportation lock carefully. An operation with
transport security is not provided. Please note that the panel is highly sensitive. Look for acceptance of the transport safety
of the one we have provided handling instructions. Warranty claims due to mechanical damage will not be accepted.

First Installation
10
Exercise caution when installing
It is only allowed to lift and transport the device by the handles. The frame of the panel-casing is only 0,3 mm. By lifting the
device at the frame of the panel-casing, breakage of the glass, defaults of the slots or buckle of the case could be possible
results. It is also not allowed to get the panel under pressure at the frontside.
Defects (especially of the panel), which are made by faulty handling, are not covered by a warranty.
1. grip and transport correclty:
- at rear of the device-sides, only in the area of the casing and handholds
- transport only by twos
2. Avoid:
- press on the panel
- press on the panel-frame
- grip or lift on both sides on the panel-frame/ panel
Mounting with brackets
The monitor can be mounted in landscape format and portrait format. The operating position of the device is perpendicular (90 degrees
to the oor). Pay attention to the permissible tilt angle for wall mounting.
The device can be operated both in landscape mode and in portrait mode. The information is for positioning to note on the back of the
device, always.
VESA-standards: MIS-F 400 x 400 mm (M6)
500 x 380 (Endless Mounting Rail Distec)

First Installation
11
0˚ to -180˚
0˚ to +180˚
tilt angle
monitor
Stromversorgung
On/O Button
Power Supply
Allowed tilt angle for mounting
Attention! All monitors are not allowed to be mounted with a tilt angle of
0° - +180°.
The following monitors may be mounted only with a tilt angle of 0˚ to -180˚:
• All monitors without safety glass, true-at glass or touchscreen
Connecting to power
The SNB displays require a voltage of 110V - 230V AC. The standard model includes a matching power cable is included for connecting
the power supply.
Note: Install all data cables to external devices before connecting the display to power.
• Switch the on/of switch in position off.
• Connect the power cable to the display.
• Connect the power cable to a power socket.
• Switch the display on.

Super Narrow Bezel Video Lavinia
12
5. Super Narrow Bezel Video Lavinia
SNB Video Lavinia monitors have the following connectors and OSD buttons.
Connecting to a PC with VGA cablel
Connecting to a PC with DVI cable
VGA (RGB)
Stromversorgung Ein/Aus Schalter
Down Up Left Right Enter Power
OSD Tastatur
Menu
VGA (RGB)
HDMI
Input
Output
DVI
DVI
RS232
RS232
VGA (RGB)
VGA (RGB)
DVI DVI

Super Narrow Bezel Video Lavinia
13
Connecting to a PC with HDMI cable
Connecting the remote OSD to a PC with RS232 cable
Remote OSD Control
To control the OSD menu of the display remotely from a PC, use a RS2342 cable and connect the display to your PC as described above.
The OSD menu can then be operated via the remote control.
OSD Keyboard
OSD functions of the monitor can be controlled via OSD key pad or via remote control. The OSD allows selection of input source and
ne tuning of various functional parameters like brightness, contrast etc..
HDMI HDMI
RS232 RS232
Down Up Left Right Enter Power
OSD Tastatur
Menu

Super Narrow Bezel Video Lavinia
14
Key Operation
Power Power On/ Off
Menu • Activates main OSD menu
• Navigates higher menu in main OSD menu
• Stops auto frequency searching
• Exits OSD menu
Enter • Activates OSD menu of input source selecting
• Changes input source by selecting
• Executes functions (by OSD help commands) in main OSD menu
• Activates Child menu
Up • Navigates input source
• Executes function (by OSD help commands) in main OSD menu
• Navigates previous menu in main OSD menu
Down • Navigates input source
• Executes function (by OSD help commands) in main OSD menu
• Navigates next menu in main OSD menu
Left • Decreases sound volume of speaker/headphone
• Executes function (by OSD help commands) in main OSD menu
• Decreases values of user menu in main OSD menu
Right • Increases sound volume of speaker/headphone
• Executes function (by OSD help commands) in main OSD menu
• Increases values of user menu in main OSD menunü
Operating the OSD menu via keyboard
Operating the OSD menu via remote control
Key Operation
Power Power On/ Off
Menu • Activates main OSD menu
• Navigates higher menu in main OSD menu
• Stops auto frequency searching
• Exits OSD menu
Enter • Activates OSD menu of input source selecting
• Changes input source by selecting
• Executes functions (by OSD help commands) in main OSD menu
• Activates Child menu
Up • Navigates input source
• Executes function (by OSD help commands) in main OSD menu
• Navigates previous menu in main OSD menu
Down • Navigates input source
• Executes function (by OSD help commands) in main OSD menu
• Navigates next menu in main OSD menu
Left • Decreases sound volume of speaker/headphone
• Executes function (by OSD help commands) in main OSD menu
• Decreases values of user menu in main OSD menu
Right • Increases sound volume of speaker/headphone
• Executes function (by OSD help commands) in main OSD menu
• Increases values of user menu in main OSD menu

Super Narrow Bezel Video Lavinia
15
Key Operation via remote control continuation
Exit Exit OSD menu
Info Displays input source information
Sleep • Set minimum sleep timer value more than current sleep timer value when
sleep timer OSD activated
• If sleet timer is maximum value, disables sleep timer
Mute Toggles sound status of speaker/headphone in mute
Source • Activates OSD of source change
• Deactivates OSD of source change
PSM
(Picture
Standard Mode)
• Activates OSD of picture standard mode
• Deactivates OSD of picture standard mode
SSM
(Sound
Standard Mode)
• Activates OSD of sound standard
• Deactivates OSD of sound standard
ARC • Activates OSD of aspect ratio control
• Deactivates OSD of aspect ratio control
Still Toggles picture status between motion and still image
Pre_Ch not used
Dual I-II/ MTS • Activates OSD of MTS sound format
• Deactivates OSD of MTS sound format
PIP Toggles PIP status
PIP Input Change PIP input sources when PIP is on
PIP Size Change PIP image size when PIP is on
PIP Position Change PIP position when PIP image size is not double screen
Swap Swap main input source and PIP input source
S.Select Select main/PIP sound source when PIP is on
PC Selects input source of PC
TV not used
0 ~ 9 Enter digit value to Active SET ID
Blue Set Active SET ID
Red Delete Active SET ID
Mix Activates Neptune OSD menu
TTX On Enter File List

Super Narrow Bezel Video Lavinia
16
In this menu system, there are several ways to customize the menu settings provided.
Most menus consist of three levels to set up the options, but some require greater depth for the variety of settings. If you press the
MENU button, only the rst and second level of the menu system will appear on the monitor screen. The third level can be displayed
by pressing SELECT (or ). If a menu has more than three levels, the pop-up dialogue box will be displayed as the fourth or fth
level.
1) To show and remove the Menu
Press the MENU button on the Remote Control to display the menu. A second press of the MENU button or a press of the EXIT button
will take you back to monitor viewing.
2) To go to the next level
Press SELECT (or ) on the Remote Control.
3) To go back to the previous level
Press MENU (or ) on the Remote Control.
4) Typical Menu Operation
• Press MENU button: The main menu will appear.
• Use / to select the desired menu option (icon).
• While the desired menu option is selected, press or (SELECT) to move to the second level.
• Use / to select the second menu option.
• Press or (SELECT) to move to the third level: Some menu options require additional steps.
• Press MENU to return to the previous menu or press EXIT on the Remote Control to return to monitor viewing.
Basic Operation
Turning On the Monitor
• First, connect power cord correctly. At this moment, the monitor switches to standby or power on mode. In standby mode, in
order to turn monitor on, press the POWER button on the remote control.
• Select the viewing source by using SOURCE button on the remote control.
OSD-Menu

Super Narrow Bezel Video Lavinia
17
On Screen Menus Language Selection
• Press the MENU button and then use / button to select the SETUP icon.
• Press the button and then use / button to select Menu Language menu.
• Press the button and then use / button to select your desired language: From this point on, the on-screen menus will
be shown in the selected language.
• Press EXIT button to return to monitor viewing or press MENU button to return to the previous menu.
On Screen Menus Selection and Adjustment
• Press the MENU button and then / button to select each menu.
• 2. Press the button and then use / and/ or / button to display the available menus.
Your monitor‘s OSD (On Screen Display) may differ slightly from what is shown in this manual.

Super Narrow Bezel Video Lavinia
18
Video Input
Press the SOURCE button and then / button to select each video source.
Press the / SELECT button to go to desired video source
.
Picture Mode
Select the picture appearance to suit your preference and viewing situations.
Press the MENU button and then / button to select the PICTURE icon.
Press the button and then use / button to select the desired picture option.
• User, Dynamic, Standard, Movie, Mild
Press EXIT button to return to monitor viewing or press MENU button to return to the previous menu.
.
User Control
Adjust the picture appearance to suit your preference and viewing situations.
Press the MENU button and then / button to select the PICTURE icon.
Press the button and then use / button to select the desired picture option.
• Contrast, Brightness, Color, Sharpness (All Sources), Phase(Component), Tint(Video)
Press button and then use / button to make appropriate adjustments.
Press EXIT button to return to monitor viewing or press MENU button to return to the previous menu.

Super Narrow Bezel Video Lavinia
19
Color Temperature Control
Choose one of ve automatic color adjustments. Set to warm to enhance hotter colors such as red, or set to cool to see less intense
colors with more blue.
Press the MENU button and then use / button to select the PICTURE icon.
Press the button and then use / button to select Color Temperature menu.
Press the button and then use / button to select desired option:
• Cool2, Cool1, Normal, Warm1, Warm2
Press EXIT button to return to monitor viewing or press MENU button to return to the previous menu.
Aspect Ratio
Selects the screen format
Press the MENU button and then use / button to select the PICTURE icon.
Press the button and then use / button to select Aspect Ratio menu.
Press the button and then use / button to select desired option.
Press EXIT button to return to monitor viewing or press MENU button to return to the previous menu.
Video Wall
For quick reset of all the Video menu options to their original factory preset values.
Press the MENU button and then use / button to select the PICTURE icon.
Press the button and then use / button to select Video Wall menu.
Press / button to make appropriate adjustments.
Press EXIT button to return to monitor viewing or press MENU button to return to the previous menu.

Super Narrow Bezel Video Lavinia
20
Video Wall Layout Settings
X Max: Maximum number of column tiles to divide video image.
Y Max: Maximum number of row tiles to divide video image.
Set X: Coordinate of video image’s column position.
Set Y: Coordinate of video image’s row position.
Setting the Bezel Corrections for Natural Tiled Image
X Gap: Proportional Value of Vertical Bezel to Panel size by Per-mil unit.
Y Gap: Proportional Value of Horizontal Bezel to Panel size by Per-mil unit.
Y Axe/ Y MAX = 3
X Axe/ X MAX = 3
Bezel Corrections for Natural Video
Wall Settings
X Gap (‰) = 1000 x BezelX/ Panel X
Y Gap (‰) = 1000 x Bezel Y/ Panel Y
Panel X
Panel Y
Bezel X
Bezel Y

Super Narrow Bezel Video Lavinia
21
PC Menü
Press the MENU button and then use / button to select the PICTURE icon.
Press the button and then use / button to select PC Menu.
Press button and then use / button to make appropriate adjustments.
Press EXIT button to return to monitor viewing or press MENU button to return to the previous menu.
Reset
Resets user setting values as default
Press the MENU button and then use / button to select the SETUP icon.
Press the button and then use / button to select the Reset menu.
Press the or SELECT button and then monitor’s user settings are reset as default.
Time Settings
Enable the user to set up the clock information.

Super Narrow Bezel Video Lavinia
22
Clock
If current time setting is wrong, reset the clock manually.
Press the MENU button and then use / button to select the SETUP icon.
Press the button and then use / button to select Time.
Press the button and then use / button to select Clock.
Press the button and then use / button to select the Hour, Minute.
Use / button to adjust clock.
Press EXIT button to return to monitor viewing or press MENU button to return to
the previous menu.
On Timer
Timer function operates only if current time has been set.
Press the MENU button and then use / button to select the SETUP icon.
Press the button and then use / button to select Time.
Press the button and then use / button to select On Timer.
Press the button and then use / button to select the Hour, Minute,
Activation.
Use / button to adjust on time schedule and activation
Press EXIT button to return to monitor viewing or press MENU button to return to the previous menu.
O Timer
Timer function operates only if current time has been set.
Press the MENU button and then use / button to select the SETUP icon.
Press the button and then use / button to select Time.
Press the button and then use / button to select Off Timer.
Press the button and then use / button to select the Hour, Minute,
Activation.
Use / button to adjust off time schedule and activation.
Press EXIT button to return to monitor viewing or press MENU button to return to the previous menu.
OSD Tone Control
Disable blending OSD background with video image
Press the MENU button and then use / button to select the SETUP icon.
Press the button and then use / button to select the OSD Tone menu.
Press the button and then use / button to select the desired option: Off, On.
Press EXIT button to return to monitor viewing or press MENU button to return to the previous menu.

Super Narrow Bezel Video Lavinia
23
Sreen Saver
Enables screen saver functions to avoid panel burning
Press the MENU button and then use / button to select the SETUP icon.
Press the button and then use / button to select the Screen Saver Menu.
Press the button and then use / button to select the desired functions.
Press the button and then use / / button to set Screen Saver
options.
Press EXIT button to return to monitor viewing or press MENU button to return to the previous menu.
Advanced Menu - Heat Control
Automatic Fan controls by internal/external temperature sensor in Dimming menu
Press the MENU button and then use / button to select the SETUP icon.
Press the button and then use / button to select the Advanced Menu.
Press the button and then use / button to select the Heat Control Menu.
Press the button and then use / / button to set Heat Control options.
Press EXIT button to return to monitor viewing or press MENU button to return to the previous menu.
Heat Control - Hysteresis
Adjusts fan driving hysteresis temperature by Celsius degree
Press the MENU button and then use / button to select the SETUP icon.
Press the button and then use / button to select the Advanced Menu.
Press the button and then use / button to select the Heat Control Menu.
Press the button and then use / button to select the Hysteresis Menu.
Use / button to set fan driving hysteresis temperature by Celsius degree unit.
Press EXIT button to return to monitor viewing or press MENU button to return to
the previous menu.
Heat Control - Shutdown
Adjusts shutdown mode temperature by Celsius degree. When current temperature reaches the shutdown temp, the monitor enters shutdown mode.
Press the MENU button and then use / button to select the SETUP icon.
Press the button and then use / button to select the Advanced Menu.
Press the button and then use / button to select the shutdown Menu.
Use / button to set fan driving shutdown temperature by Celsius degree unit.
Press EXIT button to return to monitor viewing or press MENU button to return to the previous menu.

Super Narrow Bezel Video Lavinia
24
Advanced Menu - X768 Mode
When PC input resolution is x768 series, x output resolution
Press the MENU button and then use / button to select the SETUP icon.
Press the button and then use / button to select the Advanced Menu.
Press the button and then use / button to select the X768 Mode Menu.
Press the button and then use / button to set output resolution options.
Press EXIT button to return to monitor viewing or press MENU button to return to the previous menu.
Advanced Menu - Message OSD
When source change, source OSD display option
Press the MENU button and then use / button to select the SETUP icon.
Press the button and then use / button to select the Advanced Menu.
Press the button and then use / button to select the Message OSD Menu.
Press the button and then use / button to set Off, On options.
Press EXIT button to return to monitor viewing or press MENU button to return to the previous menu.
Advanced Menu - Pivot OSD
Control angle of OSD when panel is portrait mode
Press the MENU button and then use / button to select the SETUP icon.
Press the button and then use / button to select the Advanced Menu.
Press the button and then use / button to select the Pivot OSD Menu.
Press the button and then use / button to set Off, On options.
Press EXIT button to return to monitor viewing or press MENU button to return to the previous menu.

Super Narrow Bezel Video Lavinia
25
Advanced Menu - Auto Source Change
When present mode is no signal(not connect cable), auto detect other source and display
Press the MENU button and then use / button to select the SETUP icon.
Press the button and then use / button to select the Advanced Menu.
Press the button and then use / button to select the Auto Source Change Menu.
Press the button and then use / button to set Off, On options.
Press EXIT button to return to monitor viewing or press MENU button to return to the previous menu.
Advanced Menu - Information
Show present F/W information
Press the MENU button and then use / button to select the SETUP icon.
Press the button and then use / button to select the Advanced Menu.
Press the button and then use / button to select the Information Menu.
Press the button and then check information.
Press EXIT button to return to monitor viewing or press MENU button to return to
the previous menu.
SET-ID
If use video wall and control each Board, must set ID numbers of each Board(01~99).
Press the MENU button and then use / button to select the SETUP icon.
Press the button and then use / button to select the Advanced Menu.
Press the button and then use / button to select the SetID Menu.
Press the button and then use / button to SetID numbers.
Press EXIT button to return to monitor viewing or press MENU button to return to the previous menu.
SET-ID and Active SET-ID
Set Active SET ID number Before Control each Board by Remote control or RS-232.
If control only 15th Board, Active SET ID must set 15.
Press the BLUE button and then use 0~9 button to select the Active SET ID.
If Press the RED button, delete ID number.

Super Narrow Bezel Video Lavinia
26
PIP - Picture in Picture
Watch two programs or source at the same time. And set up PIP size and position.
PIP On/ O
Press the MENU button and then / button to select the PIP icon.
Press the button and then use / button to select the desired PIP option: On, Off.
Press EXIT button to return to monitor viewing or press MENU button to return to the previous menu.
PIP - Input Source
Press the MENU button and then use / button to select the PIP icon.
Press the button and then use / button to select the Input Source Menu.
Press the button and then use / button to select the desired Input Source option.
Press EXIT button to return to monitor viewing or press MENU button to return to the previous menu.
PIP - Size
Press the MENU button and then use / button to select the PIP icon.
Press the button and then use / button to select the Size Menu.
Press the button and then use / button to select the desired Size option.
Press EXIT button to return to monitor viewing or press MENU button to return to the previous menu.

Super Narrow Bezel Video Lavinia
27
PIP - Position
Press the MENU button and then use / button to select the PIP icon.
Press the button and then use / button to select the Positione Menu.
Press the button and then use / button to select the desired Position option.
Press EXIT button to return to monitor viewing or press MENU button to return to the previous menu.
PIP - Swap
Using Swap option, you can exchange two programs or source at the same time.
Press the MENU button and then use / button to select the PIP icon.
Press the button and then use / button to select the pip Swap Menu.
Press the button to select the PIP Swap option.
Press EXIT button to return to monitor viewing or press MENU button to return to
the previous menu.
PIP - Sound Select
Using Sound Swap option, you can exchange the sound of two programs or source at the same time.
Press the MENU button and then use / button to select the PIP icon.
Press the button and then use / button to select the Sound Swap Menu.
Press the button and then use / button to select the desired Sound Swap option.
Press EXIT button to return to monitor viewing or press MENU button to return to the previous menu.

Maintenance
28
6. Maintenance
Systems with active cooling require cleaning of ventilation slots every 6 months. Systems with passive cooling must be cleaned every
12 months.
7. Guarantee / Service
Guarantee
Data Display Group grants a manufacturer‘s guarantee of two years from the date of delivery.
The performance of guarantee claims shall cause neither an extension nor a restart of the guarantee period.
During the guarantee period, Data Display Group shall correct product faults based on material or production defects. The guarantee
service is executed at Data Display Group‘s discretion through repair, replacement of defective parts or by exchanging a product for a
product of equal quality without charging the customer for material or labor.
Guarantee claims are only accepted, if Data Display Group receives notication of a defective product within the guarantee period
and the product is presented to the Data Display Group Service Centre together with all information as specied in the RMA process.
Guarantee Exclusions and Limitations
This guarantee does not apply to any defect for which Data Display group is not responsible and which include but are not limited to
the following:
• Unauthorized opening or disassembling of the product
• Faulty maintenance by non-observation of maintenance instructions
• Inappropriate storage or cleaning of the product
• Unauthorized modication of the product
• Incorrect use or misuse
• Non-observation of operating and installation instructions
• Permanent display of xed images (causing image retention or image sticking)
• Operating the product in conditions which exceed the limitations of the specication
• Use of inappropriate boxes, packaging or modes of shipment
• Force majeure like re, acts of war, acts of violence, chemical or biological impacts, lightning strikes, over voltage or
similar events
• Fault resulting from the use of software which was not originally supplied with the product or which is incorrectly installed
• Normal wear and tear and wearing parts (i.e. LCD panel)
Mechanical damage like scratches, pressure or break points are excluded from this guarantee.
This guarantee does not include accessory parts which are not integral part of the product like boxes, batteries).
Pixel errors only constitute a fault under the terms of this guarantee if they deviate from the product specication (i.e. ISO 9241-307
pixel failure class II).

Guarantee / Service
29
Display Quality - Prevention of after image burn in eects
After image burn-in means that an image or part of an image (i.e. logo) remains visible on the screen even if the image on the screen
is changed. This should not occur if the LCD panel is operated in normal conditions with changing content To prevent burn-in effects
please follow the following guidelines.
• Don‘t display xed patterns for an extended time period of more then 12 hours.
• Power-off the monitor for 4 hours after using it for 20 hours, and for 2 hours after using it for 12 hours.
• Use the power scheme and power management of the PC.
• Use plain-colored screen savers.
• Avoid patterns with a strong difference in brightness and contrast.
• Avoid gray colors.
• Change images and logos regularly. Show animated pictures for 60 seconds after 4 hours of operation.
• The best way to protect your display is to switch the monitor off when not in use or to use screen savers.
Non-observance of these guidelines may have effects on warranty.
Guarantee Processing
Group RMA process. In order to avoid unnecessary charges, it is important to adhere to the RMA regulations.
Products must be packed appropriate and professional for a safe return to toe Data Display Group Service Centre. Products with panel
sizes equal or larger 81 cm (32“) must be shipped on pallets in upright position.
Data Display Group does not assume liability for any customer data stored on products which are returned to Data Display Group.
Limitations of Liability and Benets
With this guarantee declaration, Data Display Group exclusively guarantees that the product is free of material and manufacturing
faults.
Data Display Group does not issue any other guarantee or similar statements other than this declaration.
This guarantee does not impair or affect a buyer‘s statutory claims against the seller due to material damage. Such claims can be
asserted instead of guarantees agreed to here at the buyer’s discretion.
Mandatory legal rights and mandatory claims under the German Product liability remain unaffected.
Applicable Law and Place of Jurisdiction
The laws of the Federal Republic of Germany apply.
Place of jurisdiction is Munich.

Disposal
30
Service addresses
Germany
Distec GmbH
Augsburger Str. 2b
D-82110 Germering
T +49 (0)89 / 89 43 63 0
B support@distec.de
Great Britain
Display Technology Ltd.
5 The Oaks Business Village
Revenge Road, Lordswood
Chatham, Kent, ME5 8LF
T +44 (0)16 34 / 67 27 55
B info@displaytechnology.co.uk
USA
Apollo Corp.
87 Raynor Avenue, Unit 1
Ronkonkoma NY 11779
T +1 (1)631 / 580-4360
B info@apollodisplays.com
Please go to the following web address for further information about our RMA regulations and RMA forms:
Http://www.datadisplay-group.com/service
8. Disposal
Disposal of old devices
If the acquired Distec product is to be disposed of, must be implemented into national law the Directive
“2012/19 / EU”.
Disposal of batteries
Applicable in all countries of the EU and in countries with separate battery collection systems.
The Batteries in this product should not be disposed with other household waste. The chemical symbol
Pb, CD or Hg indicate that the battery contains lead, cadmium or mercury above the reference level in EC
directive 2006/66.
Batteries which are not disposed correctly can cause harm environment and health.
Our environment is close to our hearts. Please help us to protect our environment and recycle empty batteries with the free battery
collection system.

Declaration of Conformity
31
9. Declaration of Conformity
C
EC Declaration of Conformity
Address: Distec GmbH
Augsburger Str. 2B
82110 Germering, Germany
Product: Super Narrow Bezel Lavinia 117 cm (46“) / 140 cm (55“)
Model: DS-91-235; DS-91-303
The product is in compliance with the requirements of the following European directives:
Main Unit:
2004/108/EG Electromagnetic Compatibility (EMC)
2006/95/EG Low Voltage Directive (LVD)
2011/65/EU Restriction of the use of certain hazardous substances in electrical
and electronic equipment (RoHS)
The compliance with the requirements of the European Directives was proved by the application of the following harmonised
standards:
Main Unit
EMV EN 55022:2010 +AC:2011
EN 55024:2010
EN 61000-3-2:2006 +A1:2009 +A2:2009
EN 61000-3-3:2008
NSR EN 60950-1:2006 +A11:2009 +A1:2010 +AC:2011 +A12:2011
RoHS EN 50581:2012
Year of CE marking 2013
The object of the declaration described above is in conformity with Directive 2011/65/EU of the European Parliament and of the
Council of 8 June 2011on the restriction of the use of certain hazardous substances in electrical and electronic equipment.
Germering, 20.04.2014 _________________________________________
Werner Schubert, Managing Director
FCC-Declaration of conformity
This equipment has been tested and found to comply with the limits for a Class A digital device, pursuant to Part 15 of the FCC Rules.
These limits are designed to provide reasonable protection against harmful interference when the equipment is operated in a commercial environment. This equipment generates, uses and can radiate radio frequency energy and, if not installed and used in accordance

Declaration of Conformity
32
with the instruction manual, may cause harmful interference to radio communications. Operation of this equipment in a residential area
is likely to cause harmful interference in which case the user will be required to correct the interference at his own expense.
Canadian Department of Communications Compliance Statement
This Class A digital apparatus meets all requirements of the Canadian Interference-Causing Equipment Regulations.
Observation des normes-Class A - Cet appareil numérique de la classe B est conforme à la norme NMB-003 du Canada.
FCC Information:
• Changes or modications not expressly approved by Distec GmbH could void the user’s authority to operate the equipment.
• Use the attached specied cables with the POS-Line monitor so as not to interfere with radio and television reception.
• Please use the supplied power cord or equivalent to ensure FCC compliance.
• Please use the supplied shielded video signal cable, Mini D-SUB 15 pin to Mini D-SUB.
 Loading...