

Datacom NextG 007GTi PRO Instruction Manual
NextG
007GTi
PRO
USB-Yagi
TurboTenna
Jan 18
2015
This manual walks though the steps of setting up the USB-Yagi Plug & Play WiFi
antenna from quick start followed by detailed explanation of what each
parameter does. It talks about the STATION mode for accessing a remote
hotspot, and using the USB-Yagi as a local ACCESS POINT for sharing the
Internet with other WiFi computer clients
Instruction
Manual
Version 0.215.7

NextG 007GTi PRO USB-Yagi Instruction Manual
© 2015 by danets Datacom Network Ltd. All rights reserved. DN-WLAN-035 Page 2
Copyright© by danets Datacom Network Ltd. all rights reserved.
No part of this publication may be reproduced, transmitted, transcribed, stored in a retrieval system, or
translated into any language or computer language, in any form or by any means, electronic,
mechanical, magnetic, optical, chemical, manual or otherwise, without the prior written permission of
this Company .This company makes no representations or warranties, either expressed or implied, with
respect to the contents hereof and specifically disclaims any warranties, merchantability or fitness for
any particular purpose. Any software described in this manual is sold or licensed "as is". Should the
programs prove defective following their purchase, the buyer (and not this company, its distributor, or
its dealer) assumes the entire cost of all necessary servicing, repair, and any incidental or consequential
damages resulting from any defect in the software. Further, this company reserves the right to revise
this publication and to make changes from time to time in the contents hereof without obligation to
notify any person of such revision or changes. The software and specifications are subject to change
without notice. Please visit our web site www.danets.com for the update. All rights reserved including all
brand and product names mentioned in this manual are trademarks and/or registered trademarks of
their respective holders
Linux Open Source Code
Certain danets products include software code developed by third parties, software code is subject to
the GNU General Public License ("GPL") or GNU Lesser General Public License ("LGPL"). Please see the
GNU (www.gnu.org) and LPGL(www.gnu.org) Websites to view the terms of each license. The GPL Code
and LGPL Code used in danets products are distributed without any warranty and are subject to the
copyrights of their authors. For details, see the GPL Code and LGPL Code licenses. You can download
the firmware-files at http://www.danets.com under "Support" page.

NextG 007GTi PRO USB-Yagi Instruction Manual
© 2015 by danets Datacom Network Ltd. All rights reserved. DN-WLAN-035 Page 3
Table of Contents
1. PACKING LIST .................................................................................................................................................................... 4
2. QUICK START ..................................................................................................................................................................... 5
2.1 INSTALLATION AND DEVICE CONNECTION ............................................................................................................................. 5
2.2 CHOICE OF LOCATION ............................................................................................................................................................... 5
2.3 ADJUSTMENT ............................................................................................................................................................................ 6
3. SCANNING THE WIFI SIGNAL – A QUICK GUIDE ............................................................................................... 7
3.1 MEDIATEK WIRELESS UTILITY (MEDIATEK) OR WINDOWS ZERO CONFIGURATION (WZC) ................. 7
3.2 WORKING WITH WINDOWS ZERO CONFIGURATION (WZC) ............................................................................................ 8
3.2.1 Configuration of NIC by using WZC under Windows 7 and VISTA ....................................................... 8
3.2.2 Configuration of NIC by using WZC under Windows XP .......................................................................... 9
3.3 WORKING WITH MEDIATEK ................................................................................................................................................. 13
4. ADVANCED MEDIATEK FEATURES ON WINDOWS 8 AND 7 .................................................................... 15
4.1 TURN ON/OFF RF................................................................................................................................................................. 15
4.2 SECURITY ................................................................................................................................................................................. 15
4.3 SIGNAL STRENGTH ................................................................................................................................................................. 15
4.4 SITE SURVEY........................................................................................................................................................................... 16
4.5 LINK INFORMATION ................................................................................................................................................................. 16
4.6 PROFILE .................................................................................................................................................................................... 17
4.6.1 Example to Add a PROFILE with encryption ................................................................................................. 18
4.6.2 Example to Add a PROFILE without encryption .......................................................................................... 19
4.6.3 Example to setup an Ad-Hoc wireless connection .................................................................................... 20
PC1:............................................................................................................................................................................................ 21
PC2:............................................................................................................................................................................................ 22
5. APPLE MAC OS X DRIVER INSTALLATION ......................................................................................................... 25
5.1 LOCATE THE DRIVER IN THE CD-ROM ............................................................................................................................... 25
5.2 MAC OS X DRIVER INSTALLATION.................................................................................................................................... 25
5.3 RUNNING THE WIRELESS UTILITY ...................................................................................................................................... 29
5.4 SITE SURVEY .......................................................................................................................................................................... 30
5.4.1 Connecting to a Wireless Network ................................................................................................................. 30
5.4.2 Keying in the Authentication\ Encription Password ............................................................................... 31
APPENDIX I ............................................................................................................................................................................. 33

NextG 007GTi PRO USB-Yagi Instruction Manual
© 2015 by danets Datacom Network Ltd. All rights reserved. DN-WLAN-035 Page 4
1. Packing List
Installation of the USB-Yagi is straight forward. As soon as you open up the box, you will be able to find
the following items:
A USB-Yagi High Power Plug & Play antenna with a tripod
A USB2.0 extender cable
A CD-ROM software drivers for Windows 8/7/VISTA/XP, Linux and MAC OS X
An installation guide
If you plan to build the Universal WiFi Repeater using the +35dBm NextG USB-Yagi Plug & Play
Antenna, you could purchase the USB-Omni kit online from the link below.
http://www.danets.com/turbotenna/UsbOmniApRepeater.php
Add the Power RF Amplifier Kit from the link below if extra horse power is required.
http://www.danets.com/turbotenna/PowerAmpKit.php

NextG 007GTi PRO USB-Yagi Instruction Manual
© 2015 by danets Datacom Network Ltd. All rights reserved. DN-WLAN-035 Page 5
2. Quick Start
2.1 Installation and Device Connection
Install the CD-ROM software driver before you plug in the USB-Yagi antenna to you PC or laptop
computer. This avoids the antenna being recognized by another existing WiFi software driver which
might not be fully compatible with the antenna’s original software driver.
Before making any device and cable connection to the computer, you have to install the CD software
driver and utility from fresh.
Your CD should have the most current software version. Otherwise, you could obtain the latest software
driver and utility in the link below.
For Apple MAC OS X 10.8 Mountain Lion
http://www.danets.com/download/RTUSB_D2870-4.2.6.0_UI-4.0.8.0_2012_09_28.dmg
For Windows 7 and VISTA
http://www.danets.com/support/Windows7DriverMediatek.exe
For Windows 8
http://www.danets.com/support/Windows8DriverMediatek.exe
For Windows XP
http://www.danets.com/support/WindowsXpDriverMediatek.exe
Insert the CD-ROM into the CD/DVD drive of your computer.
As soon as the AutoPlay window appears, double click “SETUP.EXE” to install the software driver. If the
AutoPlay window does not pop up, you could also go to the CD/DVD drive under “My Computer” and
double click the SETUP icon.
Reboot your computer.
Once completed, you could plug in the USB-Yagi antenna to any spare USB port of your computer using
the USB2.0 cable supplied in the kit.
2.2 Choice of Location
You may either setup the antenna on a table or a tall wooden book shelf near the ceiling. Extend the legs
of the tripod to maintain stability. Never put the antenna on a metal cabinet or behind a metal structure.
If you intend to setup the antenna outdoor such as roof top, balconies, poles or towers, be sure to install
an arrestor for lightning protection.
Once you have chosen the location, make sure that your RF cable is long enough to each your wireless
router or WLAN client adapter device. Point the antenna in the direction of the signal source.
NextG 007GTi PRO USB-Yagi Instruction Manual
© 2015 by danets Datacom Network Ltd. All rights reserved. DN-WLAN-035 Page 6
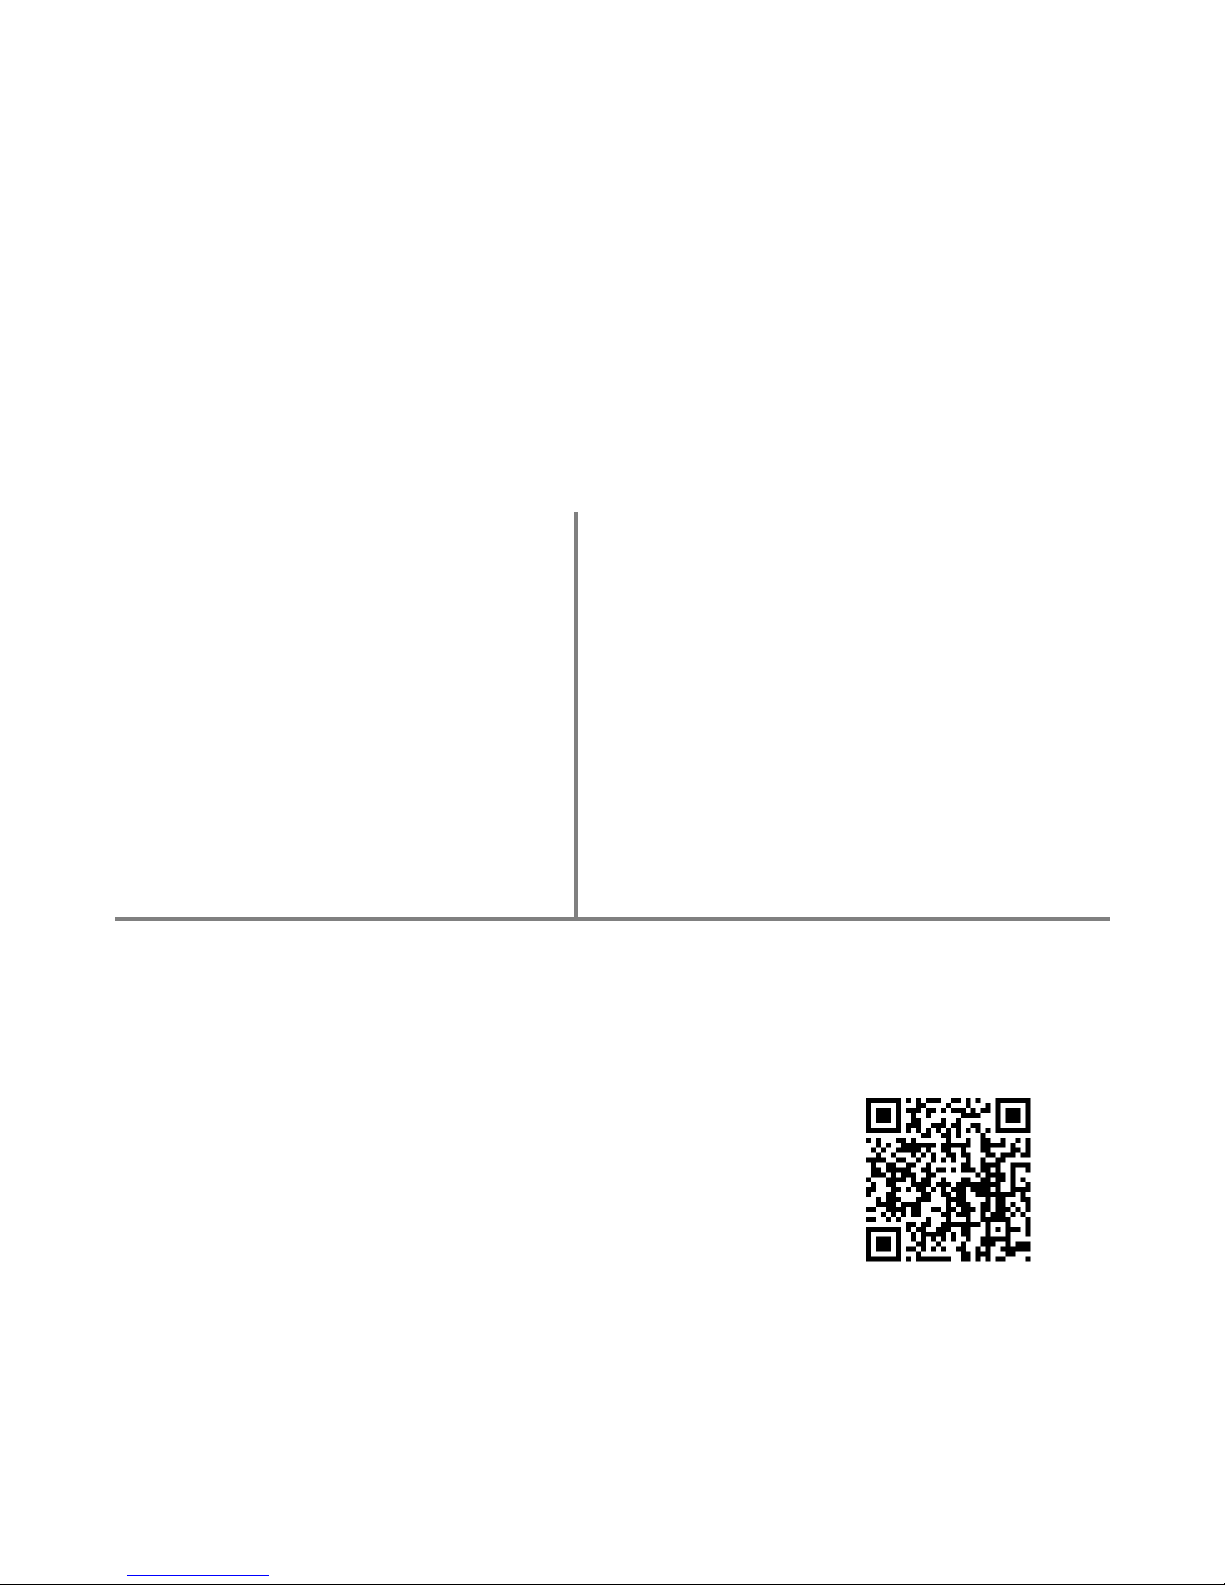
2.3 Adjustment
Ideally the antenna should be pointing at the signal source whitout any
obstructions. If there is a wall getting in the way, try to veer the antenna in
other directions until you find the sweet spot with the best signal strength.
Because the antenna has linear polarization, you may find that you get a
better signal by rotating it slightly clockwise or anti-clockwise on the tripod
along its cylindrical axis.
Since the RF cable is pretty rigid, special attention is required for connecting
the RP-SMA end of the cable to the Repeater in order not to break off the
connector from the Repeater’s casing.
Cable tie is recommended to fix the cable before fitting it in the Repeater.
Figure 1 Rotate to change the
angle of polarization for optimal
signal reception.
NextG 007GTi PRO USB-Yagi Instruction Manual
© 2015 by danets Datacom Network Ltd. All rights reserved. DN-WLAN-035 Page 7
3. Scanning the WiFi Signal – A Quick Guide
3.1 MEDIATEK WIRELESS UTILITY (Mediatek) OR WINDOWS ZERO
CONFIGURATION (WZC)
As the title suggests, two types of wireless utilities are possible. The Windows Zero Configuration
provides the basic wireless networking configuration whose user interface is consistent across various
Windows Operating Systems from XP, VISTA to Windows 7; and the more sophisticated Mediatek
Wireless Utility (Mediatek) with the WPA supplicant functionality.
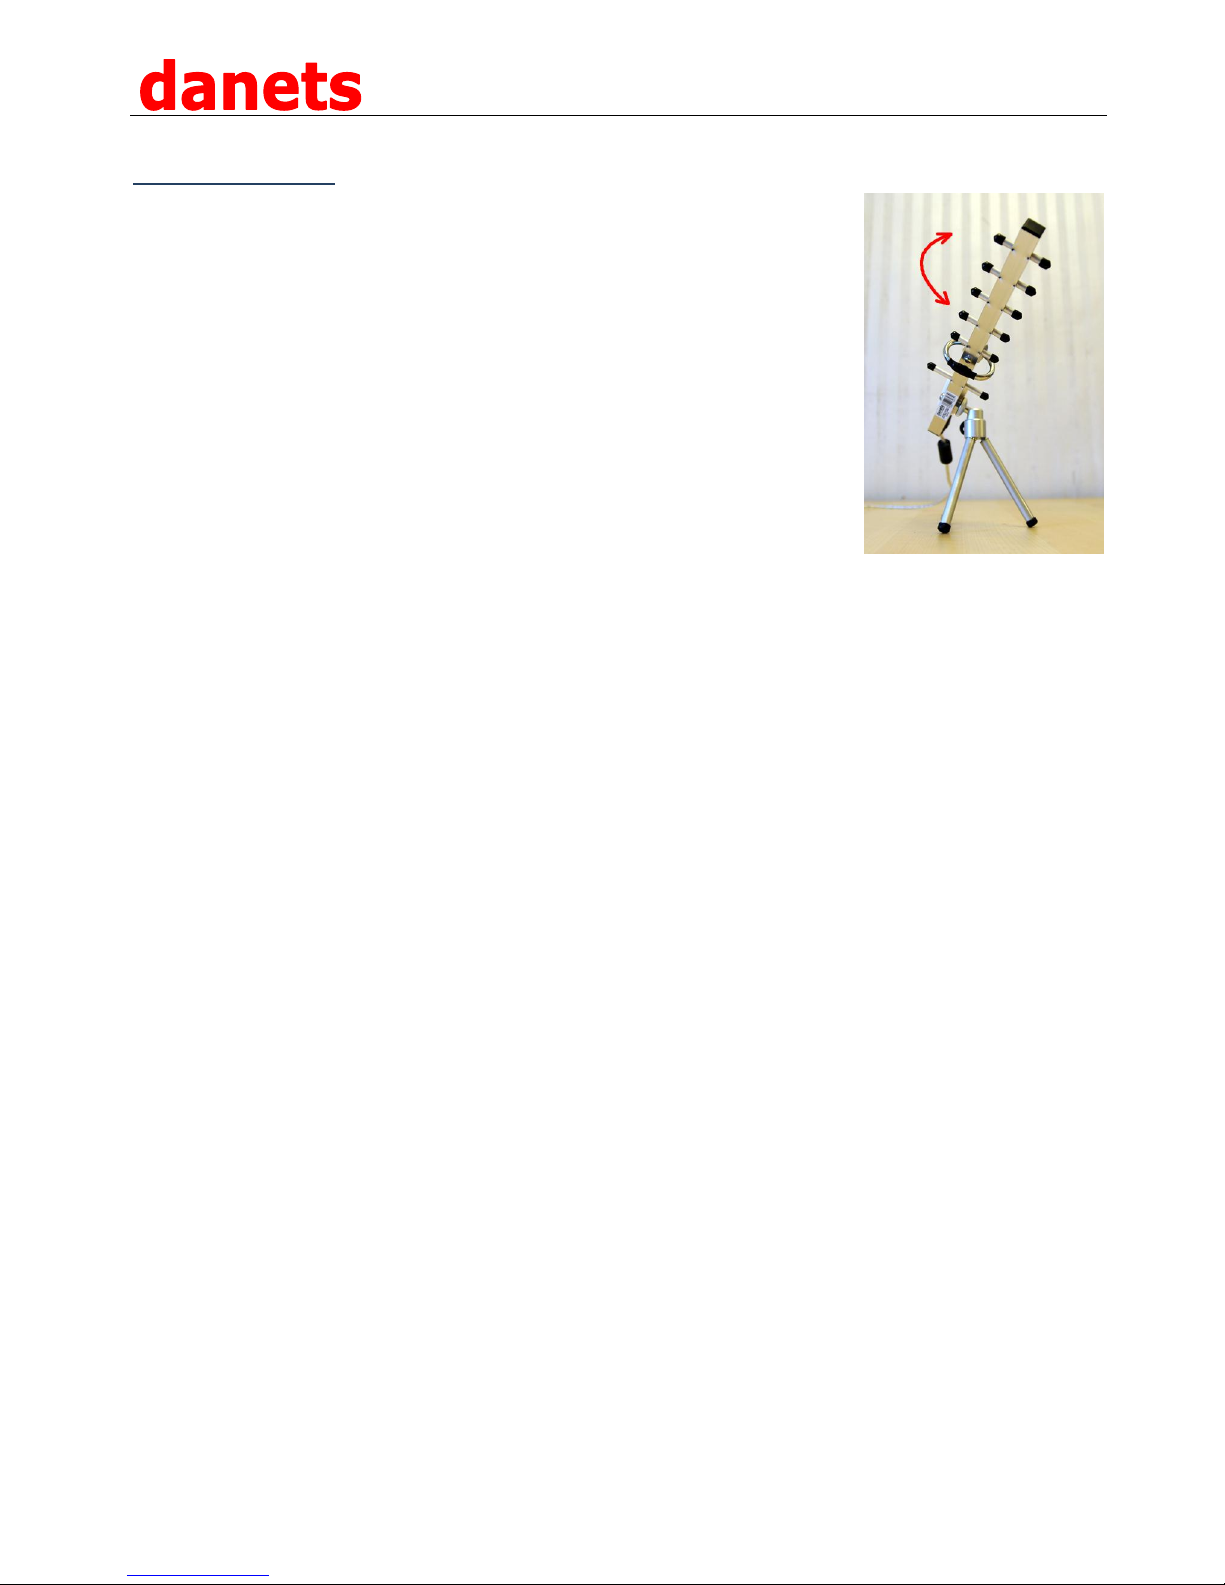
As soon as Windows starts, you could invoke the Mediatek Wireless Utility from the “All Programs”
Start Menu (see above) so that the Mediatek icon appears at the lower right hand corner of the
computer screen.
Mediatek
Or you may setup the network connection using the Windows Network and Sharing Center (also known
as Windows Zero Configuration, WZC). Windows 7 is used for the purpose of illustration.
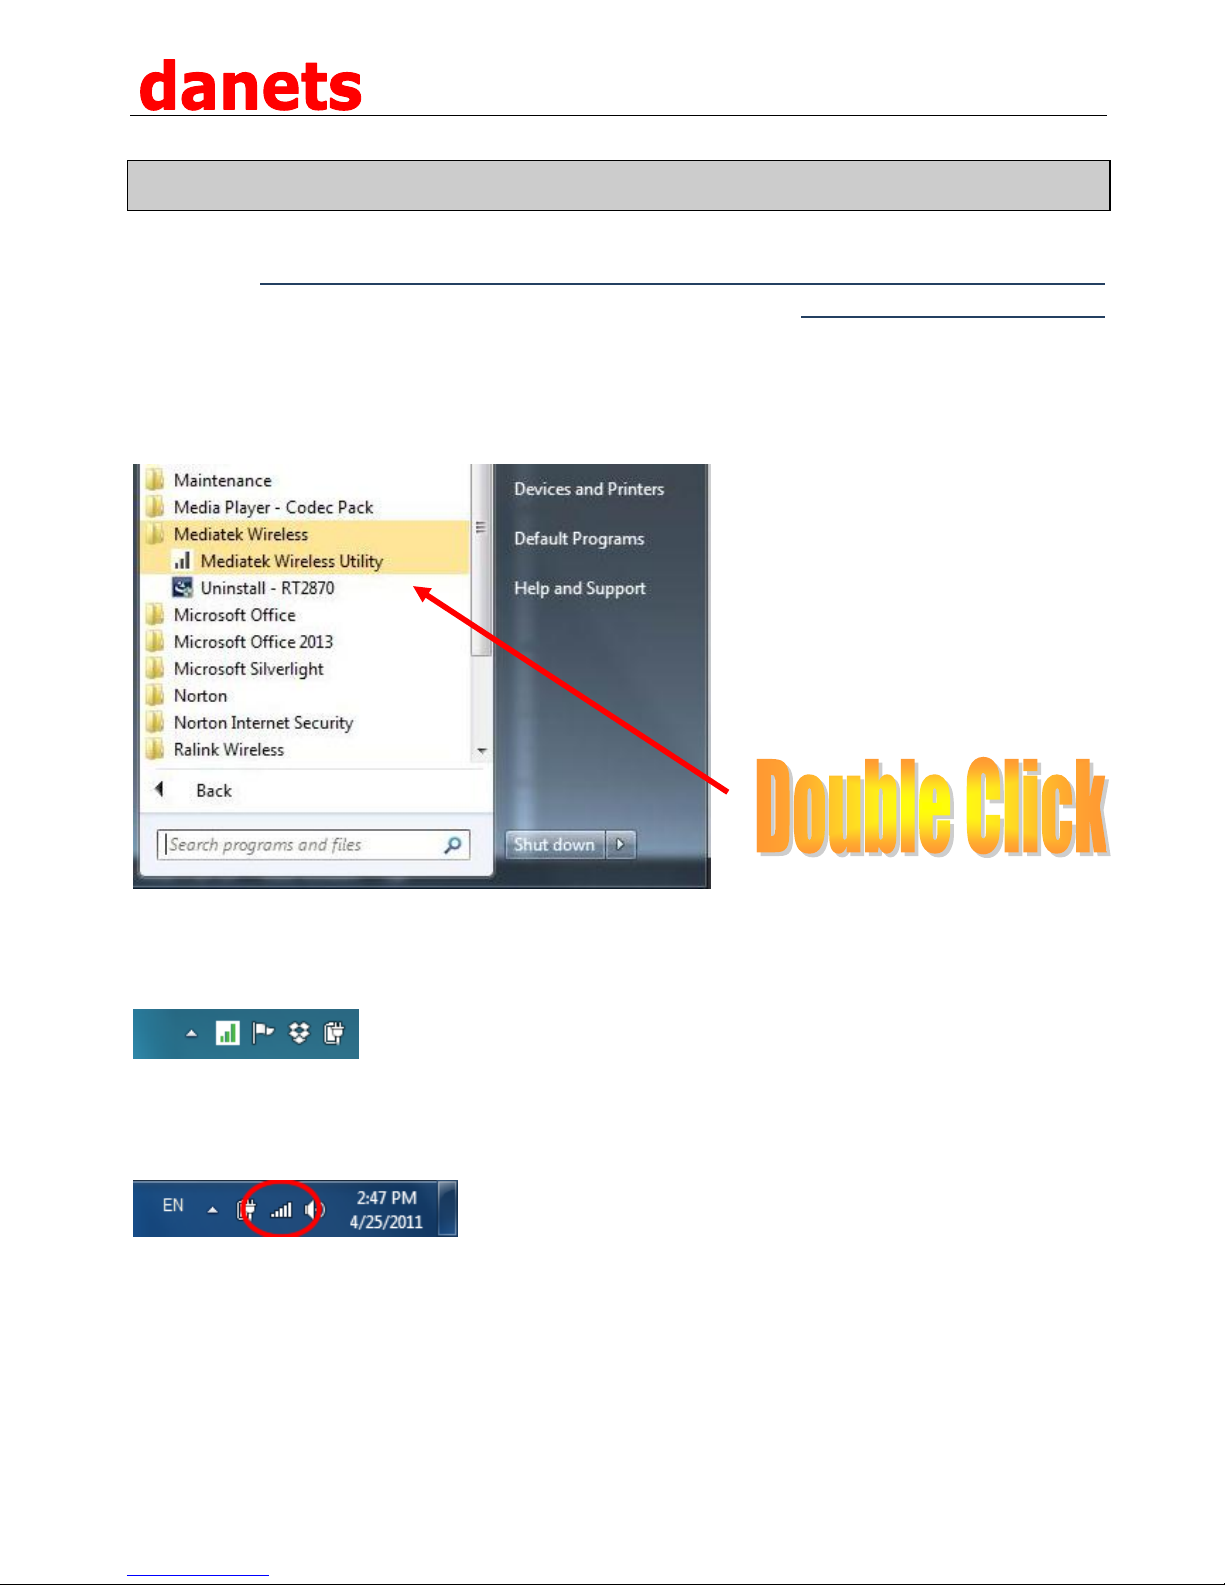
Mediatek works in parallel with WZC. When WZC is active, Mediatek provides only the monitoring
function, such as showing the link stats, network status, statistic counters, advance feature status,
WMM status and WPS status. It won’t interfere with WZC’s configuration or profile functions.
NextG 007GTi PRO USB-Yagi Instruction Manual
© 2015 by danets Datacom Network Ltd. All rights reserved. DN-WLAN-035 Page 8
3.2 Working with Windows Zero Configuration (WZC)
Go to Section 3.3 if you want to use Mediatek instead.
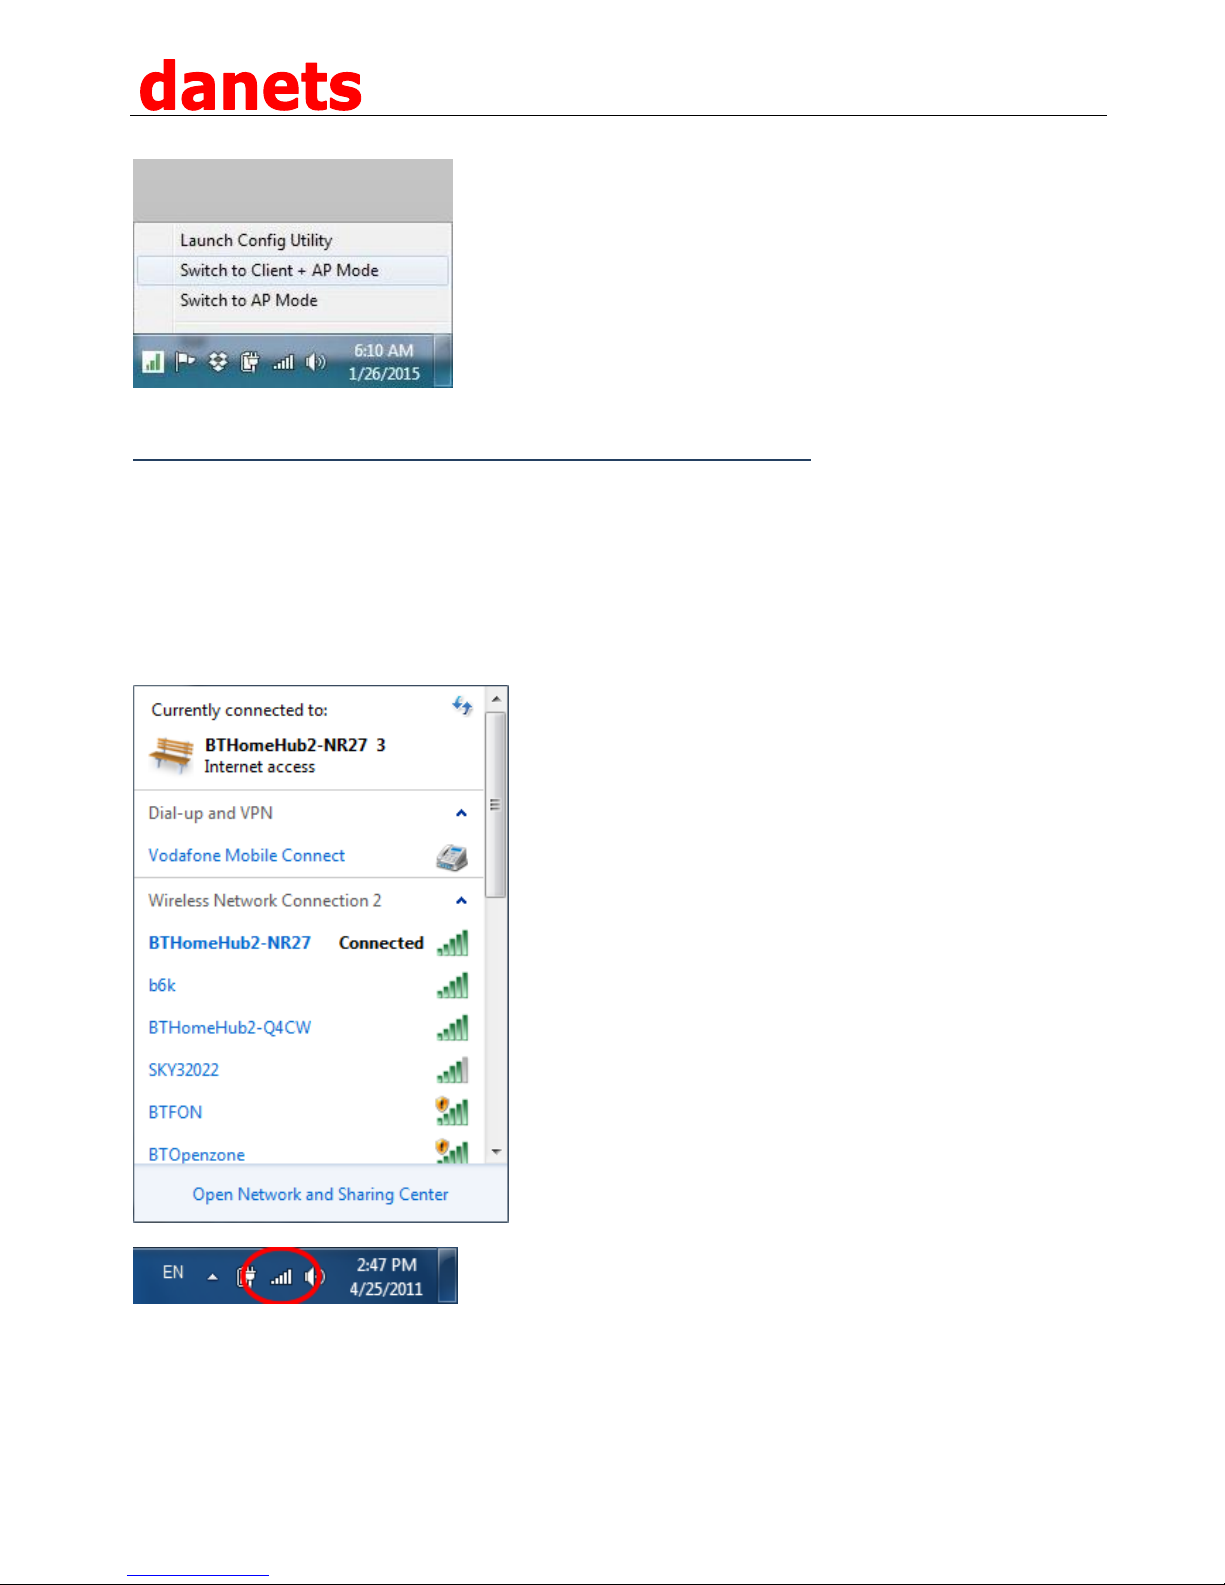
3.2.1 Configuration of NIC by using WZC under Windows 7 and VISTA
When WZC is activated, you could attempt to connect to one of the wireless networks picked up by the
antenna. If the wireless network is encrypted, a pop-up box will appear prompting you to key in its
security password.
NextG 007GTi PRO USB-Yagi Instruction Manual
© 2015 by danets Datacom Network Ltd. All rights reserved. DN-WLAN-035 Page 9
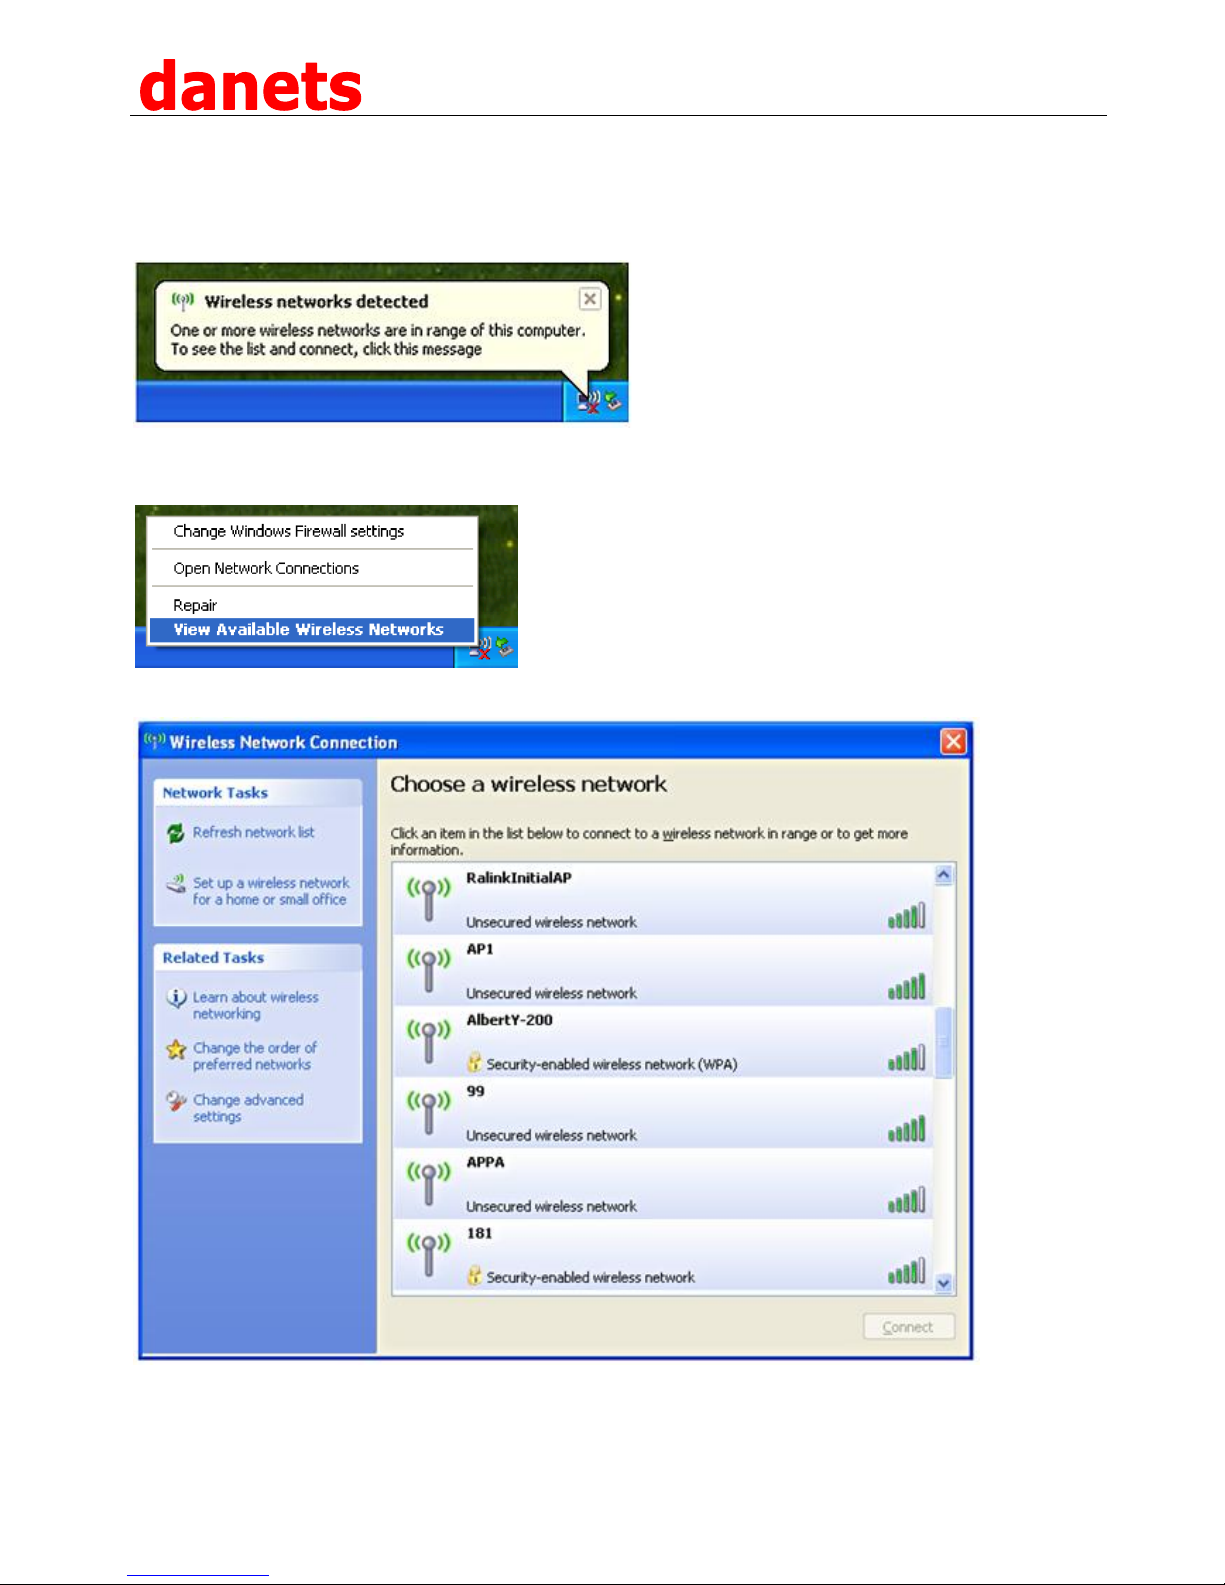
3.2.2 Configuration of NIC by using WZC under Windows XP
Before you connect to any wireless network, the status prompt pops up like this:
Right click the Network Connection icon in the task bar, and select “View Available Wireless Networks:
A new window pops up showing the list of Access Points (or APs) available for connection.
You may either double click the SSID or highlight it with the mouse pointer followed by clicking “Connect
Anyway”.

NextG 007GTi PRO USB-Yagi Instruction Manual
© 2015 by danets Datacom Network Ltd. All rights reserved. DN-WLAN-035 Page 10
NextG 007GTi PRO USB-Yagi Instruction Manual
© 2015 by danets Datacom Network Ltd. All rights reserved. DN-WLAN-035 Page 11
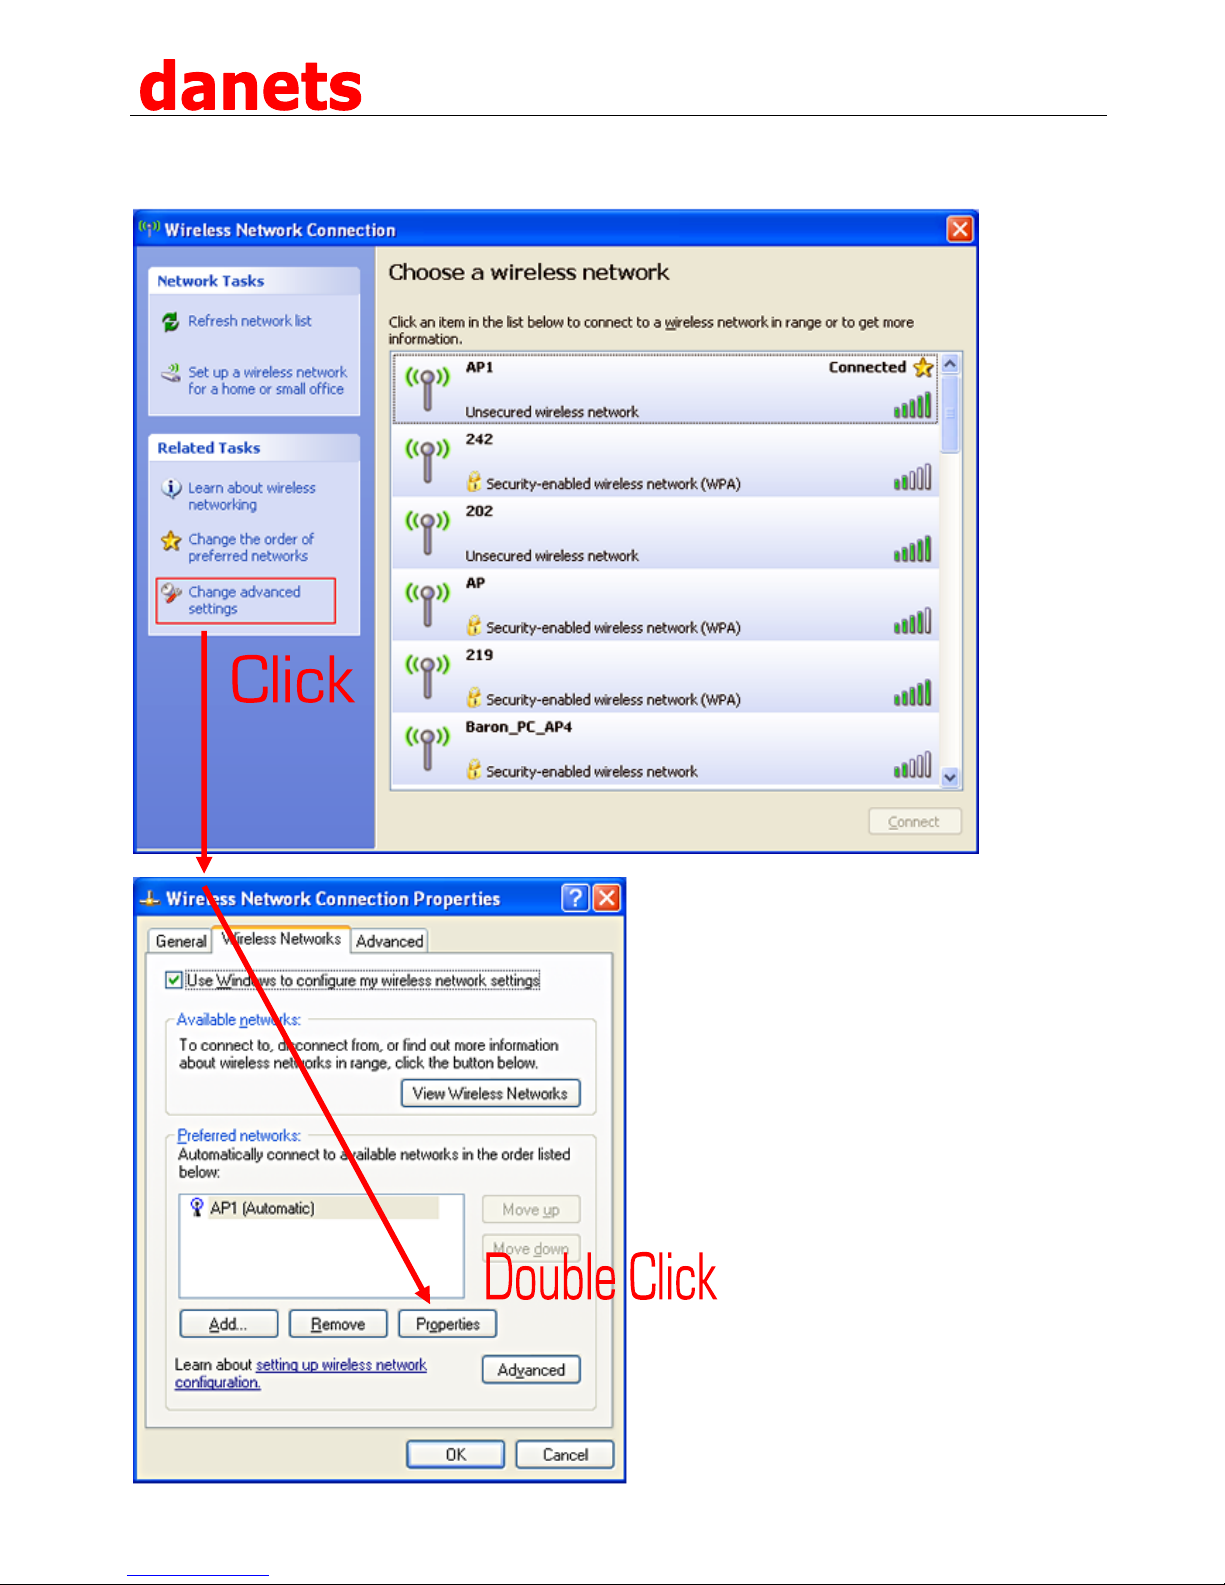
If you want to update the AP attributes, click “Change Advanced Settings”, then chose the “Wireless
Networks”.
 Loading...