

Page 1
Service guide
Vane pump upgrade kit 180F4161
iSave 21 ERD
Disassembling and assembling
hpp.danfoss.com
Page 2
Service guide | Disassembling and assembling iSave 21 vane pump with upgrade kit 180F4161
Table of Contents
Contents
1. General Introduction........................................................................2
1.1 Parts included in the vane pump upgrade kit 180F4161 .....................................2
2. Disassembling the iSave ................................................................3
2. Disassembling the vane pump ..........................................................4
3. Assembling the vane pump - with parts from the vane pump upgrade kit ................6
4. Assembling the iSave....................................................................9
5. Exploded view vane pump .............................................................10
6. Exploded view iSave ...................................................................11
1. General Introduction
This document covers the instructions for
installing the vane pump upgrade kit 180F4161.
Important: It is essential that the iSave and
vane pump are serviced in conditions of absolute cleanliness.
For a better understanding of the vane pump and
iSave, please see the exploded views in the sections 5 and 6.
The weight of the iSave is 65 kg / 143 lb
and it must be lifted with suitable lifting
equipment.
To prevent cold welding, lubricate threads of
screws with grease; screw them into the component and tighten them by the hand. Use PTFE
lubrication type.
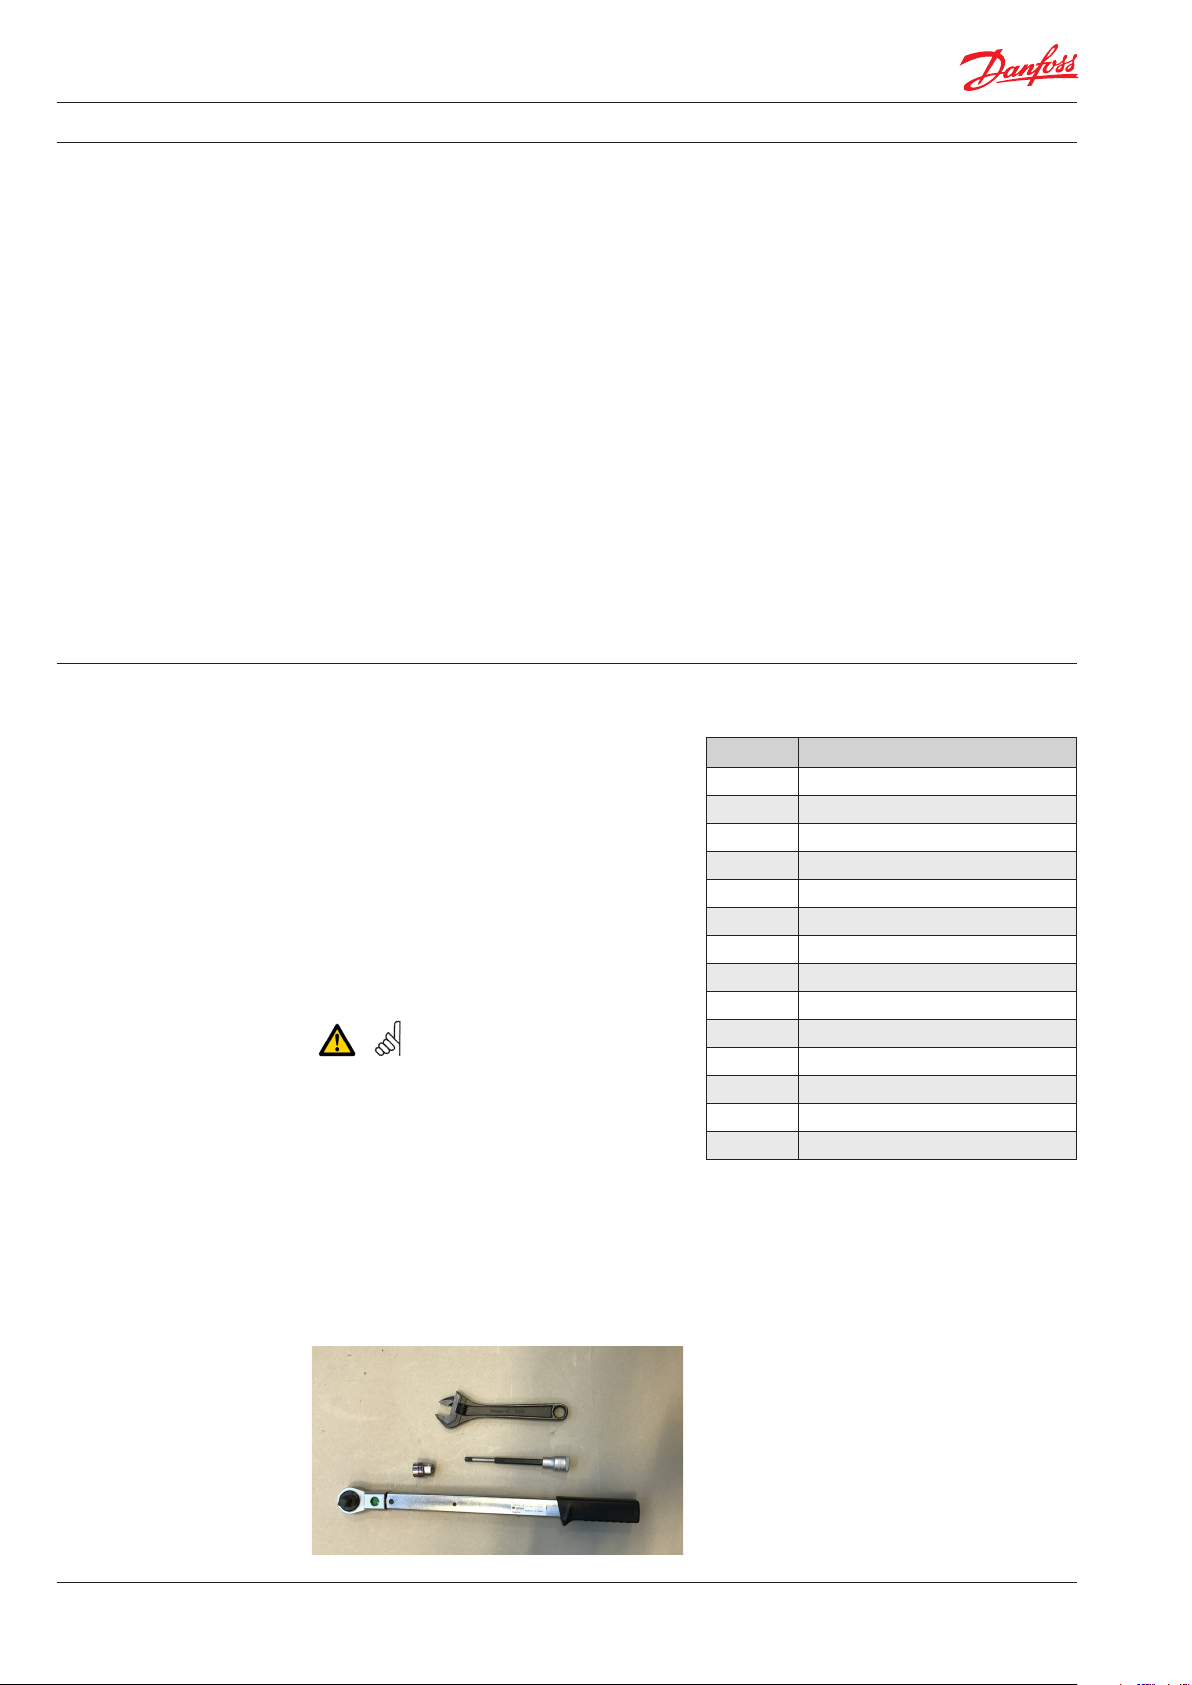
Tools needed for upgrading vane pump::
- 10 mm socket
- Torque wrench
- Adjustable spanner
- Loctite 270
- 6 mm allen key socket (160 mm long)
1.1 Parts included in the vane pump
upgrade kit 180F4161
Qt y. Description
1 Stator ring
8 Vanes
1 Side plate out
1 Side plate in
4 Peek pin Ø6.9
2 Pin Ø6x10
2 Pin Ø4x9
3 O-ring 112x2.5
1 O-ring 44x3
1 O-ring 80x2
2 Steel location pin for stator ring
10 Screws for M8x16
10 Screws for M8x25
8 Screws for M8x65
2
180R9402 | 521B1455 | DKCFN.PI.0 03.T1.02 | 10.2017
Page 3
Service guide | Disassembling and assembling iSave 21 vane pump with upgrade kit 180F4161
2. Disassembling the
iSave
1. Place the iSave on a clean table.
3. Remove the vane pump.
2. Unscrew the bolts in the flange.
180R9402 | 521B1455 | DKCFN.PI.0 03.T1.02 | 10.2017
3
Page 4
Service guide | Disassembling and assembling iSave 21 vane pump with upgrade kit 180F4161
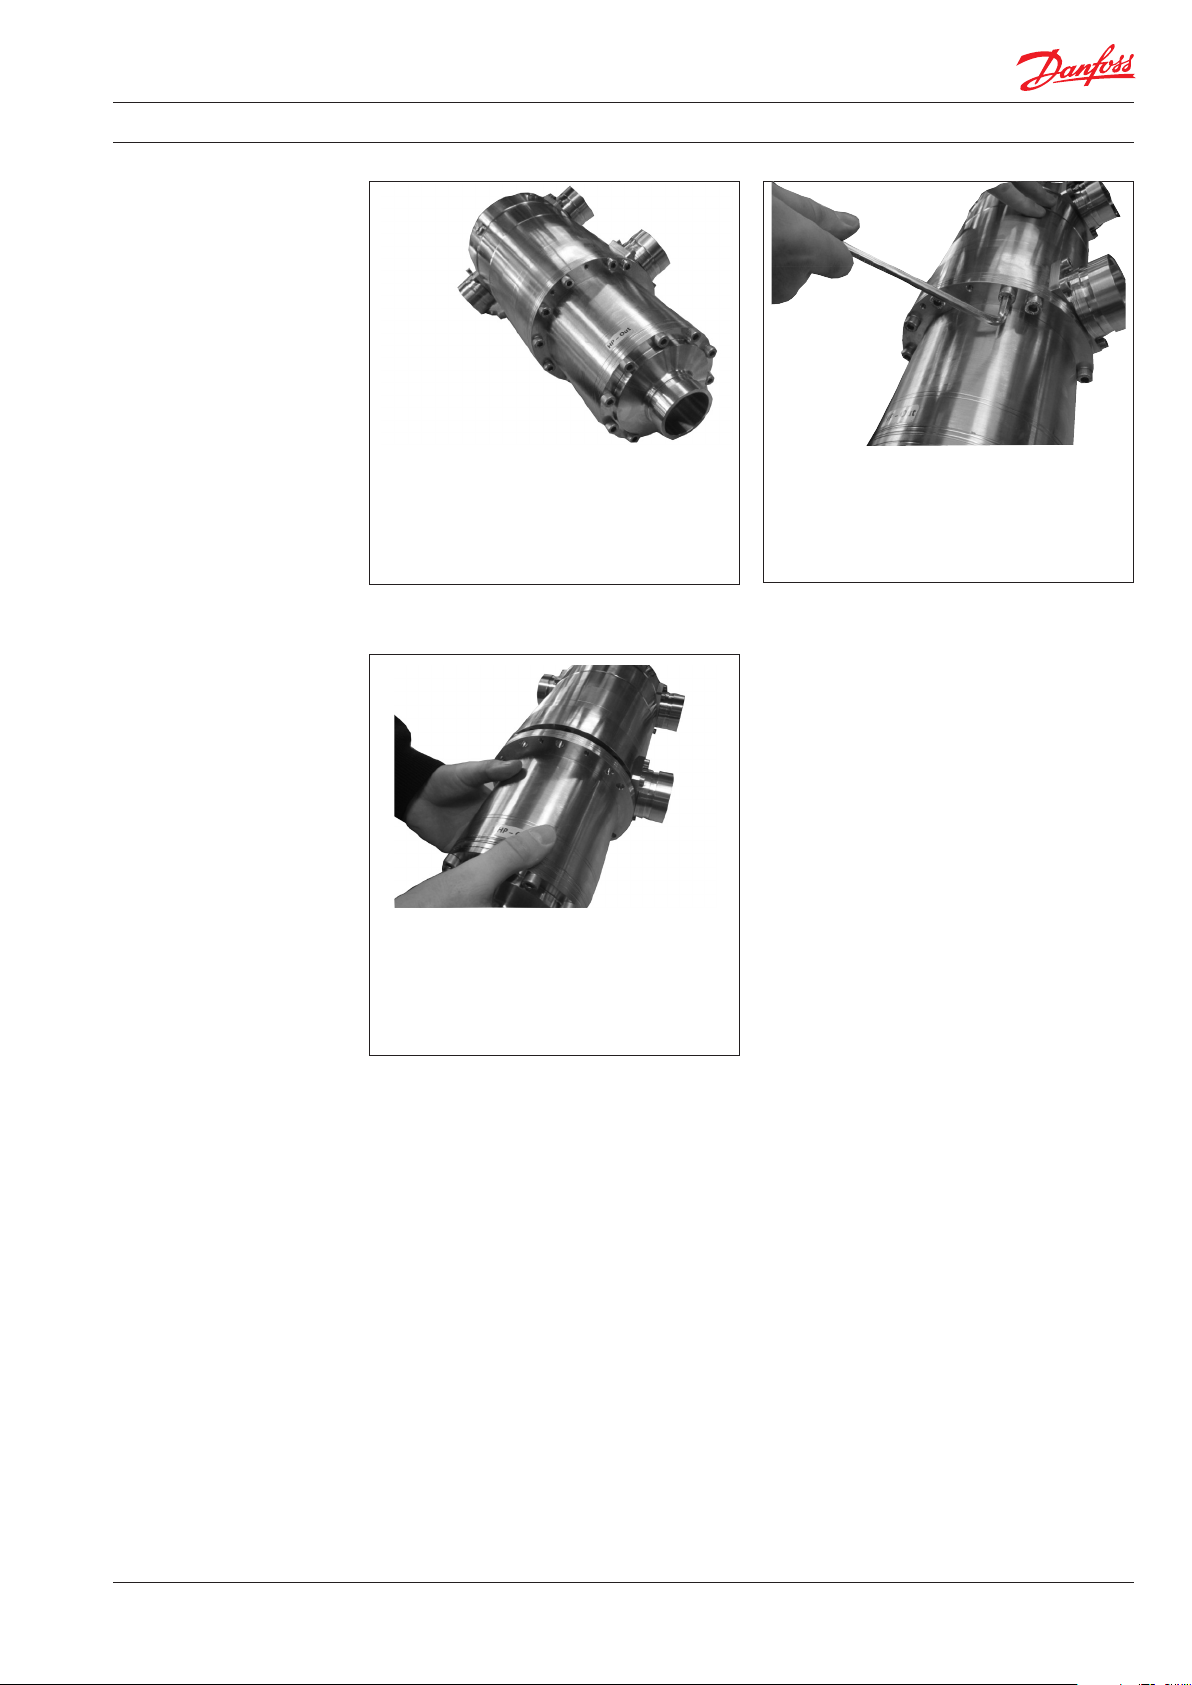
2. Disassembling the
vane pump
1. Gently adjust the spanner wrench around
the coupling and use it as back stop.
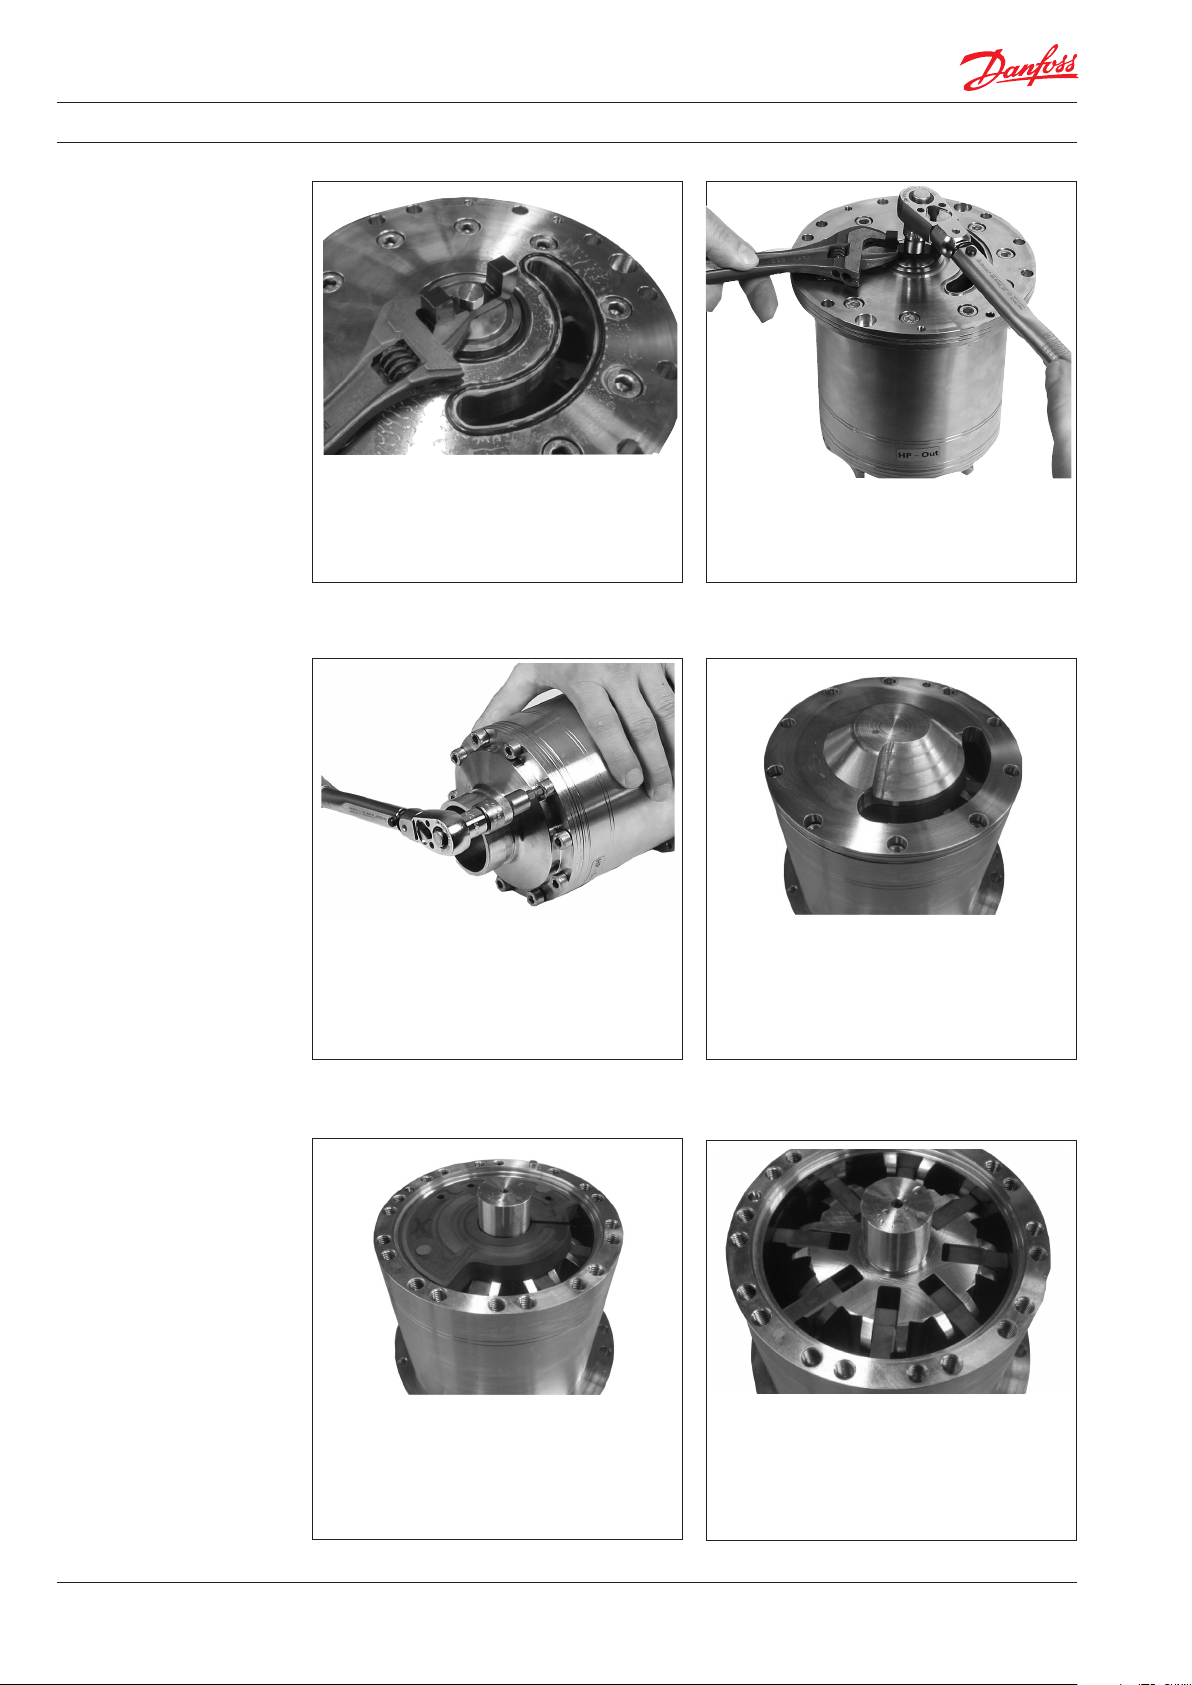
3. Remove all bolts in the HP out connection
flange.
2. Unscrew the bolt in the middle of the
coupling and remove the coupling.
4. Remove the flange.
5. Remove side plate and pin
4
180R9402 | 521B1455 | DKCFN.PI.0 03.T1.02 | 10.2017
6. Side plate removed.
Page 5

Service guide | Disassembling and assembling iSave 21 vane pump with upgrade kit 180F4161
7. Gently remove the rotor.
Note: Loose parts inside the rotor.
9. Gently remove side plate and pin.
8. Remove vanes.
10. Remove the int. flange
180R9402 | 521B1455 | DKCFN.PI.0 03.T1.02 | 10.2017
5
Page 6

Service guide | Disassembling and assembling iSave 21 vane pump with upgrade kit 180F4161
3. Assembling the vane
pump - with parts from
the vane pump
upgrade kit
1. Place the new O-ring and guide pin in
the int. flange.
3. Side plate mounted correct.
2. Place the new side plate on the int.
flange.
4. Place new stator ring on the int. flange.
5. Turn the vane pump around, so the int.
6. Place the 4 new pins in the rotor.
flange faces up. Fasten screws with a
torque according to exploded view.
6
180R9402 | 521B1455 | DKCFN.PI.0 03.T1.02 | 10.2017
Page 7

Service guide | Disassembling and assembling iSave 21 vane pump with upgrade kit 180F4161
7. Gently place the rotor in the bearing.
9. Check that all vanes are positioned
correctly.
8. Position the 8 new vanes in the rotor.
The pins may be moved by using a
screwdriver.
10. One vane is NOT positioned correctly.
11. Replace the new O-ring on the flange and
wet the flange properly with clean filtered
water.
180R9402 | 521B1455 | DKCFN.PI.0 03.T1.02 | 10.2017
12. Position the new side plate over the guide
pin.
7
Page 8

Service guide | Disassembling and assembling iSave 21 vane pump with upgrade kit 180F4161
13 Make sure that the new guide pin is located
in the locating hole in the side plate. See
#12.
15. Make sure that the guide pin is located in
the location hole.
14. Place the pump housing with the pin
orientated upwards. Fit the flange
including side plate into both the bearing
in the flange and in the stator.
16. Change the new O-ring in the HP out
connection flange.
Ten new
screws
17. Bolt the flange onto the vane pump.
Tighten the bolt witha torque according
to exploded view.
18. Fit the coupling into the pump.
Glue the threat on the bolt with “Loctite
270” and tighten the bolt with a torque
according to exploded view.
8
180R9402 | 521B1455 | DKCFN.PI.0 03.T1.02 | 10.2017
Page 9

Service guide | Disassembling and assembling iSave 21 vane pump with upgrade kit 180F4161
4. Assembling the
iSave
19. Change the two new O-rings in the
flange.
1. Fit the steel coupling onto the shaft of the
pressure exchanger.
20. Install the 2 new labels on top of each
product label to cover the old code no. as
illustrated above.
Spare parts must be ordered according to
the new code no. 180F7018
Correct
positions
2. Fit the polymer coupling insert on the
steel coupling. Note correct position of
the hole in the insert.
3. Orient both the steel coupling and the
2 guide holes on the vane pump to fit into
the pressure exchanger.
180R9402 | 521B1455 | DKCFN.PI.0 03.T1.02 | 10.2017
4. Mount the bolts into the flange and tighten
them a torque according to exploded
view,
9
Page 10

Service guide | Disassembling and assembling iSave 21 vane pump with upgrade kit 180F4161
5. Exploded view
vane pump
Dimensions without tolerances acc. To ISO 2768-1 designation C.
10
180R9402 | 521B1455 | DKCFN.PI.0 03.T1.02 | 10.2017
Page 11

Service guide | Disassembling and assembling iSave 21 vane pump with upgrade kit 180F4161
6. Exploded view iSave
Dimensions without tolerances acc. To ISO 2768-1 designation C.
180R9402 | 521B1455 | DKCFN.PI.0 03.T1.02 | 10.2017
11
Page 12

Danfoss A/S
High Pressure Pump
Nordborgvej 81
DK-6430 Nordborg
Denmark
© Danfoss | DCS (im) | 2017.10
180R9402 | 521B1455 | DKCFN.PI.003.T1.02 | 06 | 12
 Loading...