

Page 1
User Instructions
Electronic Programable Room Thermostats
HC8000 Series Heat/Cool & HP8000 Heat Pump Thermostats
Product Features
• 7-day , 5/2-day or 24 hour programing, set by installer
• 2, 4 or 6 programed events each day , set by inst aller ( can
also be set up as regular non-programable thermostat)
• AM/PM or 24 hour clock display set by user
• Fahrenheit or Centigrade temperature display , set by user
• Easy to use Daylight saving time change, set by user
• Electronic memory for retention of settings
• Factory preset programs which can be edited by user
• Available in battery and 24 V olt versions
• Available in heat / cool versions, 1 heat / 1 cool & 2 heat /
2 cool models
• Available in heat-pump versions, 2 heat / 1 cool & 3 heat /
2 cool models, each with emergency heat
Note 1: Where “plus” is shown between two buttons, both buttons must be
Note 2: Where “or” is shown between two buttons, either buttons can be
Note 3: Where “then” is shown between rows of buttons, follow
Note 4: When using ▲, ▼, + or - buttons during programing, a single
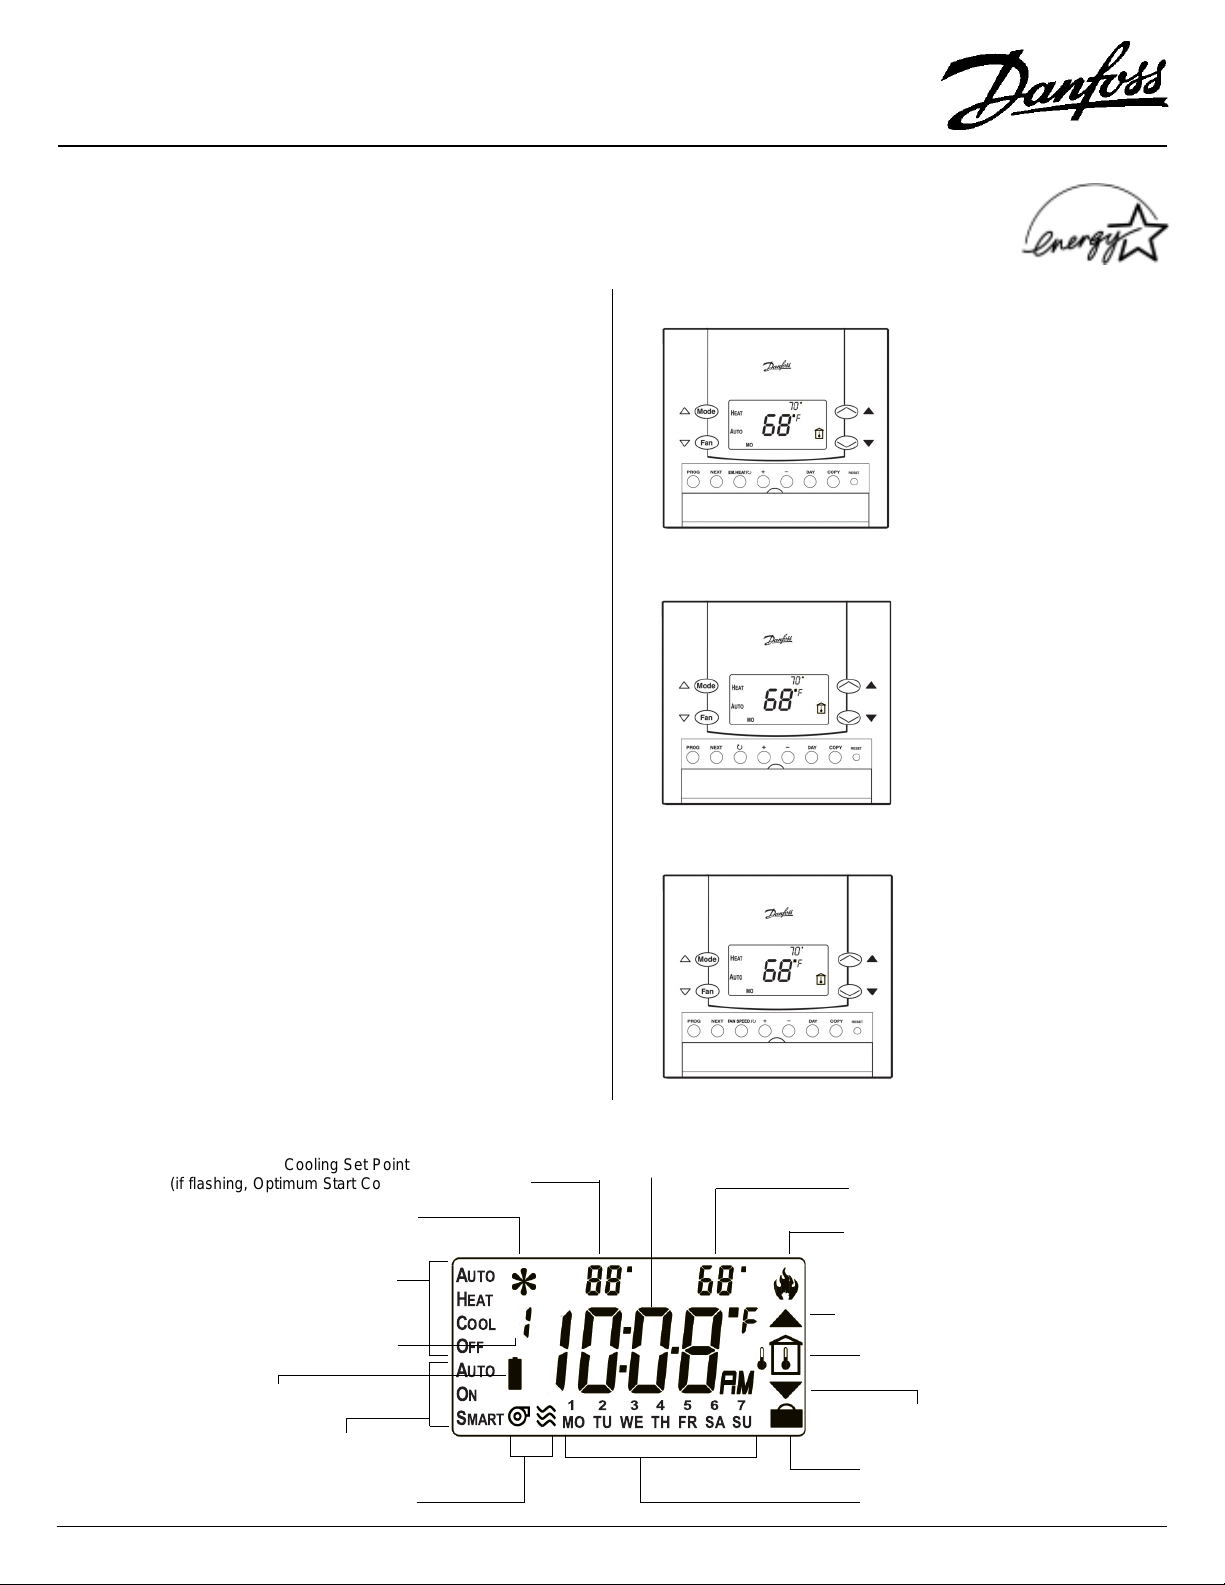
LCD DISPLAY
pressed together
pressed to either increase or decrease setting
instructions for top row first before moving on to instructions for
second row
press of the button changes the value by one unit, if the button is
held down the value will continue to change until the button is
released.
Cooling Set Point
(if flashing, Optimum Start Control is in operation)
Cooling Output Indicator (if flashing,
cooling delay operating)
Thermostat
Mode Select
Event Number Indicator
when programing
Low Battery
(flashing)
Fan Mode
Select
Fan Output & Speed Indicator
(if flashing, fan about to come on)
A
H
C
O
A
O
S
UTO
EAT
OOL
FF
UTO
N
MART
Clock Display/Measured
1 2 34567
MO TU WE TH FR SA SU
Temperature Display
HP8000 Heatpump
Thermostat (cover
flap removed)
HC8000 Heat/Cool
Thermostat (cover
flap removed)
HC8000 Heat/Cool
Thermostat 3 Speed
fan (cover flap
removed)
Heating Set Point
(if flashing, Optimum Start Control is
in operation)
Heating Output Indicator (if flashing,
heating delay operating)
Increase Temperature
Room/Outdoor Temperature (if flashing
remote sensor is faulty
Decrease
Temperature
Vacation Mode
Day of Week
1
Page 2
A) USER PREFERENCES
6:30
68
77
AM
69
A
UTO
F
74
79
6:30
68
77
AM
MO TU WE TH FR
Before programing the thermostat it is recommended that the user preferences, as regards
clock display and temperature scale, are set. Details of the available user preferences are
shown below:
A.1. Display Time: to permanently display time press both NEXT and COPY and hold for
2 seconds. Repeat to return to temperature display
LCD DISPLAYS
NEXT
BUTTONS
COPY
plus
A.2. Clock display: press both NEXT and DAY buttons and hold for 2 seconds to change
display between AM/PM & 24 hour. Repeat to return to original setting
A.3. Temperature scale: press both DAY and COPY buttons and hold for 2 seconds to
change temperature scale between Fahrenheit and Centigrade. Repeat to return to
original setting
NOTE: If Fahrenheit is selected, Days of Week shown as MO, TU, WE, TH, FR, SA & SU
If Centigrade is selected, Days of Week shown as 1-7, with 1 being MONDAY
B) SETTING THE TIME OF DAY AND DA Y OF WEEK
B.1. Press PROG button to enter programing mode
B.2. Press + or – buttons to adjust time of day. If in AM/PM mode remember to ensure
that AM/PM setting is correct
B.3. Press DAY button repeatedly until correct day of week is displayed.
Note: If Centigrade scaling has been selected, Day 1 is Monday and Day 7 is Sunday
B.4. Press PROG button to advance to “Programming event times and temperatures”
C) PROGRAMING EVENT TIMES AND TEMPERATURES
The thermostat can be set by the installer to provide the following programing options:
C.1. 7-day option: This provides a different program for each day of the week
77
68
6:30
Clock in 7-day mode
AM
MO
NEXT
plus
DAY
plus
PROG
+ -
or
DAY
PROG
DAY
COPY
C.2. 5-day / 2-day option: This provides one set of programs for days 1-5, (Monday to
Friday), and another set of programs for days 6-7, (Saturday and Sunday)
C.3. 24 hour option: This option repeats the same program each day
C.4. 2, 4 or 6 program events per day: In addition to the above, the installer can also set
the thermostat to provide either 2, 4 or 6 events each day
C.5. Non-programable option: The thermostat can also be set up as a regular non-
programable thermostat. (See section J)
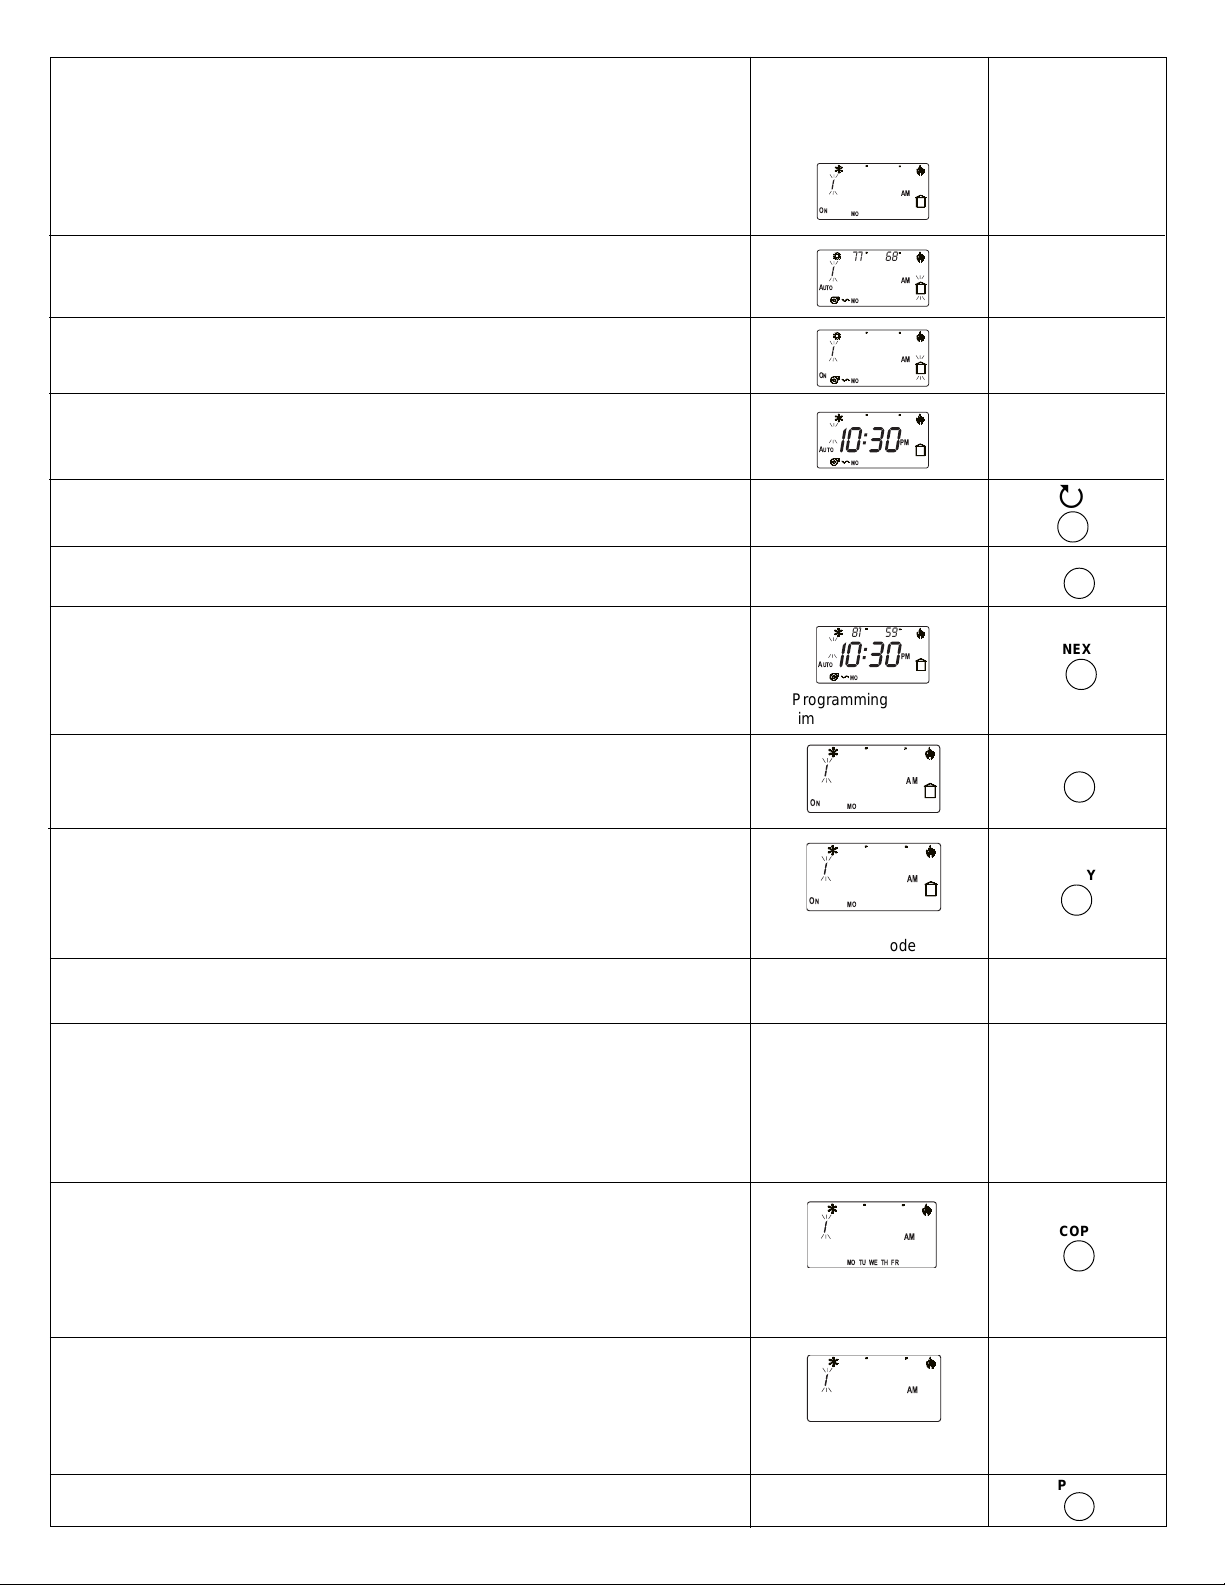
D) SETTING THE EVENTS - UNIT IN 7 DAY MODE
D.1. Press + or – to adjust event time, use ▲ or ▼ to select required heating temperature
and U or V to select required cooling temperature
D.2. OPTIONAL - Heat or cool not required: If heating is not required, “Off” can be
selected below 43°F, (6°C), or minimum allowable heating set temperature if
restricted. If cooling is not required, “Off” can be selected above 104°F, (40°C), or
maximum allowable cooling set temperature if restricted.
2
Clock in 5/2 day mode
Clock in 24 hour mode
77
68
6:30
O
N
Programming Event 1
time and temperature
AM
MO
+-
or
then
or
▲▼
then
or
U
V
Page 3
D.3. OPTIONAL - programable fan/occupancy operation : If the programable fan/
6:30
68
77
AM
MO TU WE TH FR
A
UTO
59
81
PM
MO
6
occupancy option has been enabled by the installer, the operation of the fan can be set for
each event. Additionally each event can be programed as building occupied or unoccupied. This feature is often tied in to the operation of fresh air dampers. Optimum Start
Control, if set by the building owner or installer, will also be applied to each occupied event
- please refer to installer. The available options are:
a) Building occupied: Fan On, runs continuously (FAN ON symbol displayed, HOUSE
symbol displayed and static)
b) Building unoccupied: Fan Auto, turns on and off with heat or cool demand (FAN AUTO
symbol displayed, HOUSE symbol displayed but flashing)
c) Building unoccupied: Fan On, runs continuously (FAN ON symbol displayed, HOUSE
symbol displayed but flashing)
O
N
A
UTO
O
N
77
68
6:30
MO
77
68
6:30
MO
77
68
6:30
MO
BUTTONSLCD DISPLAYS
AM
AM
AM
d) Building occupied: Fan Auto, turns on and off with heat or cool demand (FAN AUTO
symbol displayed, HOUSE symbol displayed and static)
To select Fan Mode and Occupancy options, press 3 button to toggle to the required setting.
Press NEXT button to move onto event 2 programing and repeat steps D1 and D3 above
D.4. Press NEXT button to move onto events 3, 4, 5 and 6, repeating steps D1 – D3 until all
events are programed
! Reminder - If thermostat has been set by the building owner or installer for 2 or 4
events per day, only 2 or 4 events can be programed, otherwise 6 events can be
programed
D.5. Press DAY button to advance to the next day. Repeat steps D1-D4 for each available day
(see 6 below)
D.6. OPTIONAL: Copy program from previous day into current day :
a) Press COPY button to copy program forward from previous day
b) Repeat as necessary for other days
! Reminder - Copying Restrictions: Programs can only be copied forward from the
previous day. For example from day 1 to day 2, not from day 1 to day 3
81
59
6
A
UTO
PM
MO
Programming Event 6
time and temperature
77
68
AM
MO
77
68
AM
MO
ON
O
N
6:30
6:30
Copying program
7 day mode
3
NEXT
NEXT
DAY
COPY
! Reminder - Thermostat may have restricted temperature settings : In some
installations the building owner or installer may have restricted the temperature
range of the heating and/or cooling. Please refer to the installer
Setting Template
! Advice – Program setting template: A setting template is provided at the rear of this
document to record program settings
D.7. REMINDER - THERMOSTAT SET IN 5/2-DAY MODE: If the thermostat has been set by the
building owner or installer in 5-day / 2-day mode, display will be as opposite.
Programming: one set of programs for Days 1-5, another for Days 6-7
Copying: limited to copying from days 1-5 to days 6-7 or vice-versa
D.8. REMINDER - THERMOSTAT SET IN 24 HOUR MODE: If the thermostat has been set by
the building owner or installer in 24 hour mode, display will be as opposite.
Copying: not available
Programming: one program repeated each day
D.9. To return the thermostat to Run mode press PROG button
Copying program
5/2 day mode
77
68
6:30
AM
Copying not available
in 24 hour mode
COPY
PROG
3
Page 4

E) DAILY USE INSTRUCTIONS
BUTTONSLCD DISPLAYS
SELECTING
THE THERMOSTAT OPERATING MODE USING MODE BUTTON
The operating mode of the thermostat can be changed by pressing the MODE button. The
available modes are as follows:
· Auto: The thermostat selects heat or cool as required
! Reminder - This mode is only available if the building owner or installer has set
the thermostat to allow auto change-over mode
· Heat: Only heating is operated, cooling is switched off
· Cool: Only cooling is operated, heating is switched off
· Off: Both heating and cooling are turned off
! Caution – there is no freeze protection in “Off” mode
F) SELECTING THE THERMOSTAT FAN OPERATING MODE USING THE FAN
BUTTON
The operating mode of the thermostat fan can be changed by pressing the FAN button. The
available modes are as follows:
· Auto: The fan runs whenever there is a demand for either heating or cooling
· On: The fan runs continuously
· Smart-fan: If programable fan option has not been enabled the fan runs
continuously between events 1 & 6 (6 events), 1 & 4 events (4 events) or 1 & 2
(2 events) but reverts to Auto between events 6 & 1 (6 events), 4 & 1 events (4
events) or 2 & 1 (2 events). If programable fan option has been enabled, the fan
will follow the program when Smart fan is selected.
G) TEMPORARY CHANGES TO PROGRAMED TEMPERATURES
G.1. Use ∧ to temporarily raise temperature
G.2. Use ∨ button to temporarily lower temperature
! Reminder - Limited temperature adjustment: The amount of temperature
adjustment may have been set by the building owner or the installer
! Reminder - Automatic cancellation of overrides: The factory setting for this is at
the next event, however, the building owner or the installer may have selected a
different option
Note: A flashing override arrow indicates an override timer is active and an event
time has been crossed.
AUTO
HEAT
COOL
OFF
Mode select options
Fan Mode Select Options
77
68
f
69
MO
Temporary override
of temperature
Mode
Fan
or
∧∨
H) SELECTING HOLD MODE AND VACATION MODE
! Reminder – This function is not available if the building owner or installer has
locked the keyboard
Hold mode options
H.1. Programs can be permanently overridden by selecting HOLD mode, this feature is
used if fixed temperatures are required for extended periods of operation
H.2. To enter HOLD mode press both ∧ and ∨ buttons together and hold down for 2
seconds
H. 3. Once in HOLD mode it is possible to select the required heating and cooling
temperatures and the thermostat operating mode, see below for setting details
Selecting the required heating temperature
a) Press MODE button to select HEAT mode then use ∧ or ∨ buttons to select required
heating temperature
Selecting the required cooling temperature
b) Press MODE button to select COOL mode then use ∧ or ∨ buttons to select required
cooling temperature
c) Press MODE button twice again to return to AUTO mode. The thermostat will now
operate heating and cooling to maintain the selected temperatures
! Reminder - Auto can only be selected if the building owner or installer has set the
thermostat to allow auto changeover mode.
4
A
UTO
76
67
A
UTO
H
EAT
A
UTO
50
Hold Mode selecting
heating temperature
80
C
OOL
A
UTO
Hold Mode selecting
cooling temperature
A
UTO
80
50
A
UTO
Hold Mode with Auto heat
and cool selected
plus
∧∨
∧
Mode
then
or
∨
∧
Mode then
or
∨
Mode
X 2
Page 5

H.4. Should Heat only or Cool only be required, use MODE button to select required service
50
A
UTO
:
00
80
A
UTO
off
O
FF
50˚
F
80˚
F
50˚
F
F
80˚
50˚
H.5. Should OFF be required, use MODE button to select “Off”
! Caution – Freeze protection is not provided in OFF mode
Selecting the Fan Operating Mode while in Hold mode
H.6. While in Hold mode fan operation can be selected to run in Auto mode, (turns on and off
with heat/cool demand), or On (runs continuously). Press FAN button to select required
mode.
H.7. Advice: HOLD mode can be cancelled at any time by pressing both ∧ and ∨ buttons
together and holding down for 2 seconds
LCD
DISPLAYS
Hold mode with Off selected
80˚
50˚
Fan Mode Select Options
BUTTONS
Mode
Fan
I) VACATION MODE OPTIONS
I.1. When in HOLD mode it is possible to program the duration of the HOLD mode by selecting
VACATION
I.2. Use Mode button to select required mode.
I.3. To select duration of vacation press DAY button then use + or – buttons to select the
number of days for which the HOLD mode is to be sustained. At the end of the period the
thermostat will return to normal programed operation
I.4. OPTIONAL: VACATION mode can be cancelled at any time by pressing both ∧ and ∨
buttons together and holding down for 2 seconds
J) NON-PROGRAMMABLE OPERATION
! Reminder - the thermostat will be permanently in this mode if selected by the
building owner or installer.
J.1. Selecting the required heating temperature
Press MODE button to select HEAT mode then use the ∧ or ∨ buttons to select the
required temperature.
J.2. Selecting the required cooling temperature
Press MODE button to select COOL mode then use the ∧ or ∨ buttons to select the
required temperature.
DAY
Mode then
then
+ -
or
plus
∧∨
77˚
68˚
F
∧
Mode
then
or
∨
80˚
F
Mode
then
∧
or
∨
J.3. Press MODE button twice again to return to AUTO mode. The thermostat will now operate
heating and cooling to maintain the selected temperatures.
! Reminder - AUTO can only be selected if the building owner or installer has set the
thermostat to allow auto-changeover mode.
J.4.Should Heat only or Cool only be required, use MODE button to select the required service.
J.5.Should OFF be required use MODE button to select “Off”.
! Caution - frost protection is not provided in OFF mode.
J.6. Selecting the fan operating mode
Fan operation can be selected to run in AUTO mode (turns of and off with heat/cool
demand) or On (runs continuously). Press FAN button.
Mode
x 2
Mode
Fan
5
Page 6

OTHER FEATURES AND FUNCTIONS
65
AUTO
HEAT
F
68
E
K) DISPLAYING OUTDOOR TEMPERATURE & CLOCK
K.1. All models can be connected with an outdoor temperature sensor. In non-heat-
pump versions this is used solely to provide temperature indication. In heat-pump models
the feature can also be used to improve heat-pump performance
BUTTONSLCD DISPLAYS
K.2. To review outdoor temperature follow the instructions below:
a) Press NEXT button once to read current outdoor temperature
b) Press NEXT button for second time to read lowest outdoor temperature in last 24 hour
period
c) Press NEXT button for third time to read highest outdoor temperature in last 24 hour
period
! Reminder – if the display flashes the measured temperature exceeds the display
limit
d) The display will return to normal setting within 10 seconds or by any button press
! Reminder – If the display shows a row of dashes an outdoor sensor has not been
connected
K.3. To temporarily view the clock, press and hold COPY button. The display will return to
show room temperature when the button is released
NEXT
NEXT
NEXT
COPY
L) TIME CHANGES IN FALL AND SPRING
L.1. If display is showing Temperature, press NEXT and COPY together to display clock
settings.
L.2. To change time in the Fall, press the – button to reset clock back by one hour
L.3. To change time in the Spring, press + button to reset clock forward by one hour
L.4. To return to Temperature display, press NEXT and COPY together.
M) SELECTING EMERGENCY HEAT MODE ON HP8000 HEAT-PUMP
MODELS
! Reminder - Applies only to HP8000 series heat-pump models
M.1. The thermostat will automatically select Emergency Heat if the outdoor temperature falls
to below the setting of the Heat-pump low balance point. The Emergency Heat will
continue to run under the dictates of the thermostat until the outdoor temperature
increases to above the low balance point setting. Please refer to installer for details.
! Automatic selection of Emergency Heat based on outdoor temperature will only
occur when an outdoor sensor has been connected.
M.2.Emergency Heat can be manually selected at any time. When selected the thermostat
turns off all heat-pump derived stages
M.3.To select EMERGENCY HEAT (EM/HEAT), press EM/HEAT button, an “E” will flash in
the display and the thermostat will automatically select HEAT only and revert to
programed settings, canceling any manual temperature overrides.
6
A
UTO
77
68
O
N
H
EAT
E
A
UTO
Auto selected
Emergency Heat mode.
Note E symbol steady
Manually selected
Emergency heat mode.
Note E symbol flashing
68
F
65
NEXT COPY
plus
+
NEXT COPY
plus
EM HEAT /
-
or
33
3
33
Page 7

M.4.To cancel manually selected EMERGENCY HEAT, press EM/HEAT button for a second
70
A
UTO
F
68
A
UTO
80
time
BUTTONSLCD DISPLAYS
EM HEAT /
33
3
33
M.5.When EMERGENCY HEAT cancels the thermostat stays in HEAT mode. To return
thermostat to full automatic operation press MODE button repeatedly until AUTO appears
on the mode display
N) SELECTING FAN SPEED SETTING
! Reminder - Applies only to HC8000 series 3-speed fan models
N.1. To change fan speed, press FAN-SPEED button. Bars on the fan symbol of the LCD
indicate the selected fan speed
O) REPLACING BATTERIES IN BATTERY POWERED MODELS
! Reminder - Applies only to battery powered models
O.1. Batteries will normally last in excess of two years. When approaching the end of their lives
a “Low battery” symbol will flash on the LCD display. Batteries should be changed within 15
days to prevent the thermostat from shutting down
O.2. To replace batteries lower the battery flap and remove the batteries, replacing them with
good quality alkaline cells from a reputable manufacturer
N.3. During battery replacement the diplay will go blank but no settings will be lost as long as
the process is completed within a one minute period
! Caution – dispose of old batteries in approved manner to avoid damage to the
environment
P) RESETTING THE THERMOSTAT MEMORY
P.1. To reset clock and re-start the thermostat’s micro-processor press the RESET button. After
doing this the clock time and day of week will need to be set. All other settings will have
been retained
F
65
Low battery indication
Mode
FAN SPEED /
RESET
33
3
33
P.2. To return the unit to “Factory” setting
a) Press and hold PROG button
b) Press and release RESET button
! Caution – This action returns thermostat to factory settings: This should only be
carried out should the performance of the thermostat become erratic. This is only
likely to happen as a result of severe electro-magnetic interference such as a nearby
lightening strike
c) When LCD display appears again, release PROG button. When this is done all user,
building owner and installer settings are returned to “Factory” settings and the unit will
require total re-programing
! Warning – In some installations the building owner or the installer may have disabled
the reset facility to protect the system.
PROG RESET
plus
7
Page 8

Thermostat setting template, 7-day programing with 6 events each day
Event Setting Time/ temp Day 1 Day 2 Day 3 Day 4 Day 5 Day 6 Day 7
“If the thermostat has been set for
5/2-day operation, use column 1 to
record settings for days 1-5 and
column 6 to record settings for days
6-7”
If the thermostat has been set for
24 hour operation use column 1
to record settings which will be
repeated each day
Factory Time: 6:30AM 6:30AM 6:30AM 6:30AM 6:30AM 7:30AM 7:30AM
1
User Time:
Factory Time: 8:30AM 8:30AM 8:30AM 8:30AM 8:30AM 9:30AM 9:30AM
2
User Time:
Factory Time: 11:30AM 11:30AM 11:30AM 11:30AM 11:30AM 11:30AM 11:30AM
3
User Time:
Factory Time: 1:30PM 1:30PM 1:30PM 1:30PM 1:30PM 1:30PM 1:30PM
4
User Time:
Factory Time: 4:30PM 4:30PM 4:30PM 4:30PM 4:30PM 4:30PM 4:30PM
5
User Time:
Factory Time: 10:30PM 10:30PM 10:30PM 10:30PM 10:30PM 10:30PM 10:30PM
6
User Time:
T emp. Heat: 68.0°F 68.0°F 68.0°F 68.0°F 68.0°F 68.0°F 68.0°F
T emp. Cool: 77.0°F 77.0°F 77.0°F 77.0°F 77.0°F 81.0°F 81.0°F
Fan: On On On On On On On
Occupancy: Occupied Occupied Occupied Occupied Occupied Occupied Occupied
T emp. Heat:
T emp. Cool:
Fan:
Occupancy:
T emp. Heat: 59.0°F 59.0°F 59.0°F 59.0°F 59.0°F 68.0°F 68.0°F
T emp. Cool: 81.0°F 81.0°F 81.0°F 81.0°F 81.0°F 81.0°F 81.0°F
Fan: On On On On On On On
Occupancy: Occupied Occupied Occupied Occupied Occupied Occupied Occupied
T emp. Heat:
T emp. Cool:
Fan:
Occupancy:
T emp. Heat: 68.0°F 68.0°F 68.0°F 68.0°F 68.0°F 68.0°F 68.0°F
T emp. Cool: 77.0°F 77.0°F 77.0°F 77.0°F 77.0°F 77.0°F 77.0°F
Fan: On On On On On On On
Occupancy: Occupied Occupied Occupied Occupied Occupied Occupied Occupied
T emp. Heat:
T emp. Cool:
Fan:
Occupancy:
T emp. Heat: 59.0°F 59.0°F 59.0°F 59.0°F 59.0°F 68.0°F 68.0°F
T emp. Cool: 81.0°F 81.0°F 81.0°F 81.0°F 81.0°F 77.0°F 77.0°F
Fan: On On On On On On On
Occupancy: Occupied Occupied Occupied Occupied Occupied Occupied Occupied
T emp. Heat:
T emp. Cool:
Fan:
Occupancy:
T emp. Heat: 70.0°F 70.0°F 70.0°F 70.0°F 70.0°F 70.0°F 70.0°F
T emp. Cool: 77.0°F 77.0°F 77.0°F 77.0°F 77.0°F 77.0°F 77.0°F
Fan: On On On On On On On
Occupancy: Occupied Occupied Occupied Occupied Occupied Occupied Occupied
T emp. Heat:
T emp. Cool:
Fan:
Occupancy:
T emp. Heat: 59.0°F 59.0°F 59.0°F 59.0°F 59.0°F 59.0°F 59.0°F
T emp. Cool: 81.0°F 81.0°F 81.0°F 81.0°F 81.0°F 81.0°F 81.0°F
Fan: Auto Auto Auto Auto Auto Auto Auto
Occupancy: Unoccupied Unoccupied Unoccupied Unoccupied Unoccupied Unoccupied Unoccupied
T emp. Heat:
T emp. Cool:
Fan:
Occupancy:
Monday Tuesday Wednesday Thursday Friday Saturday Sunday
Column 1 Column 6
✓
✓
✓
8
Page 9

Thermostat setting template, 7-day programing with 4 events each day
Event Setting Time/ temp Day 1 Day 2 Day 3 Day 4 Day 5 Day 6 Day 7
Monday Tuesday Wednesday Thursday Friday Saturday Sunday
Column 1 Column 6
“If the thermostat has been set for
5/2-day operation, use column 1 to
record settings for days 1-5 and
column 6 to record settings for days
6-7”
If the thermostat has been set for
24 hour operation use column 1
to record settings which will be
repeated each day
Factory Time: 6:30AM 6:30AM 6:30AM 6:30AM 6:30AM 7:30AM 7:30AM
1
User Time:
Factory Time: 8:30AM 8:30AM 8:30AM 8:30AM 8:30AM 9:30AM 9:30AM
2
User Time:
Factory Time: 4:30PM 4:30PM 4:30PM 4:30PM 4:30PM 4:30PM 4:30PM
3
User Time:
Factory Time: 10:30PM 10:30PM 10:30PM 10:30PM 10:30PM 10:30PM 10:30PM
4
User Time:
T emp. Heat: 68.0°F 68.0°F 68.0°F 68.0°F 68.0°F 68.0°F 68.0°F
T emp. Cool: 77.0°F 77.0°F 77.0°F 77.0°F 77.0°F 81.0°F 81.0°F
Occupancy: Occupied Occupied Occupied Occupied Occupied Occupied Occupied
T emp. Heat:
T emp. Cool
Occupancy::
T emp. Heat: 59.0°F 59.0°F 59.0°F 59.0°F 59.0°F 68.0°F 68.0°F
T emp. Cool: 81.0°F 81.0°F 81.0°F 81.0°F 81.0°F 81.0°F 81.0°F
Occupancy: Occupied Occupied Occupied Occupied Occupied Occupied Occupied
T emp. Heat:
T emp. Cool:
Occupancy:
T emp. Heat: 70.0°F 70.0°F 70.0°F 70.0°F 70.0°F 70.0°F 70.0°F
T emp. Cool: 77.0°F 77.0°F 77.0°F 77.0°F 77.0°F 77.0°F 77.0°F
Occupancy: Occupied Occupied Occupied Occupied Occupied Occupied Occupied
T emp. Heat:
T emp. Cool:
Occupancy:
T emp. Heat: 59.0°F 59.0°F 59.0°F 59.0°F 59.0°F 59.0°F 59.0°F
T emp. Cool: 81.0°F 81.0°F 81.0°F 81.0°F 81.0°F 81.0°F 81.0°F
Occupancy: Unoccupied Unoccupied Unoccupied Unoccupied Unoccupied Unoccupied Unoccupied
T emp. Heat:
T emp. Cool:
Occupancy:
✓
✓
Fan: On On On On On On On
Fan:
Fan: On On On On On On On
Fan:
Fan: On On On On On On On
Fan:
Fan: Auto Auto Auto Auto Auto Auto Auto
Fan:
✓
9
Page 10

Thermostat setting template, 7-day programing with 2 events each day
Event Setting Time/ temp Day 1 Day 2 Day 3 Day 4 Day 5 Day 6 Day 7
“If the thermostat has been set for 5/2-day
operation, use column 1 to record settings
for days 1-5 and column 6 to record
settings for days 6-7”
If the thermostat has been set for 24 hour
operation use column 1 to record settings
which will be repeated each day
Factory Time: 8:30AM 8:30AM 8:30AM 8:30AM 8:30AM 8:30AM 8:30AM
1
2
User Time:
Factory Time: 5:30PM 5:30PM 5:30PM 5:30PM 5:30PM 5:30PM 5:30PM
User Time:
T emp. Heat: 70.0°F 70.0°F 70.0°F 70.0°F 70.0°F Off Off
T emp. Cool: 77.0°F 77.0°F 77.0°F 77.0°F 77.0°F Off Off
Occupancy: Occupied Occupied Occupied Occupied Occupied Occupied Occupied
T emp. Heat:
T emp. Cool:
Occupancy:
T emp. Heat: 59.0°F 59.0°F 59.0°F 59.0°F 59.0°F Off Off
T emp. Cool: Off Off Off Off Off Off Off
Occupancy: Unoccupied Unoccupied Unoccupied Unoccupied Unoccupied Unoccupied Unoccupied
T emp. Heat:
T emp. Cool:
Occupancy:
Monday Tuesday Wednesday Thursday Friday Saturday Sunday
Column 1 Column 6
✓
✓
✓
Fan: On On On On On On On
Fan:
Fan: Auto Auto Auto Auto Auto Auto Auto
Fan:
10
Danfoss can accept no responsibilty for possible errors in catalogues, brochures and other printed material. Danfoss reserves the right to alter its products without notice. This also applies to
products already on order provided that such alterations can be made without subsequent changes being necessary in specifications already agreed.
Danfoss Comfort and Building Controls
3435 Box Hill Corporate Center Drive
Suite C
Abingdon, Maryland 21009
USA
Tel: 00 1 4435120266 Fax: 00 1 4435120270
Danfoss Mfg Co Ltd
7880 Tranmere Drive
Mississauga
Ontario
Canada
Tel: 001 905 676 6000 Fax: 001 905 676 0279
Part No: 32755 Iss:03 05/05
 Loading...