

Page 1
Installation Guide
Installation of BasicClip
1 Installation of BasicClip
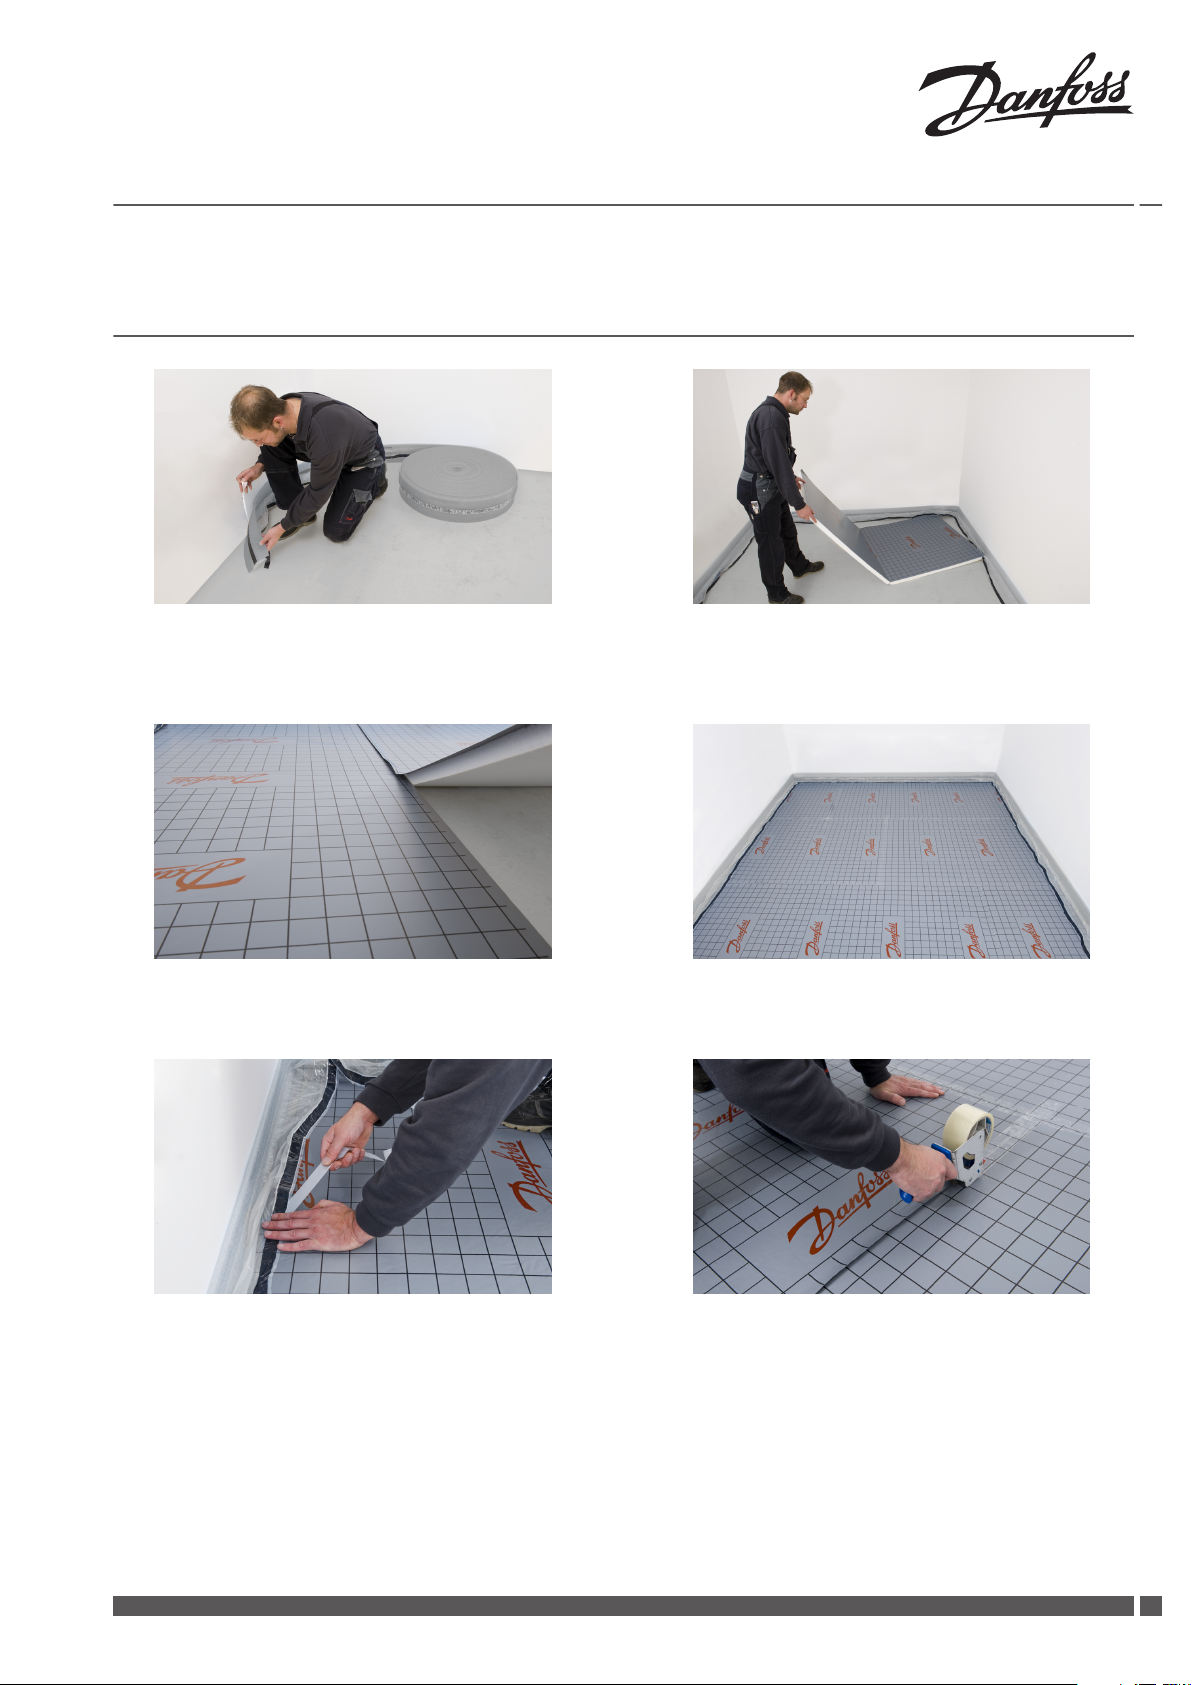
Fig. 1: Attach the perimeter insulation with tape on wall.¹ Fig. 2: Begin laying insulation panels with the overlay flap
upright against the wall.
Fig. 3: Observe the overlap throughout installation. Fig. 4: Install insulation panels throughout all rooms.
Fig. 5: Attach perimeter insulation, tension free, by using the
self adhesive strips.
Fig. 6: Joints without any overlap should be taped up. When
using liquid screed tape overlapping joints.
Danfoss Heating Solutions VICTE302
1
Page 2
Installation Guide Installation of BasicClip
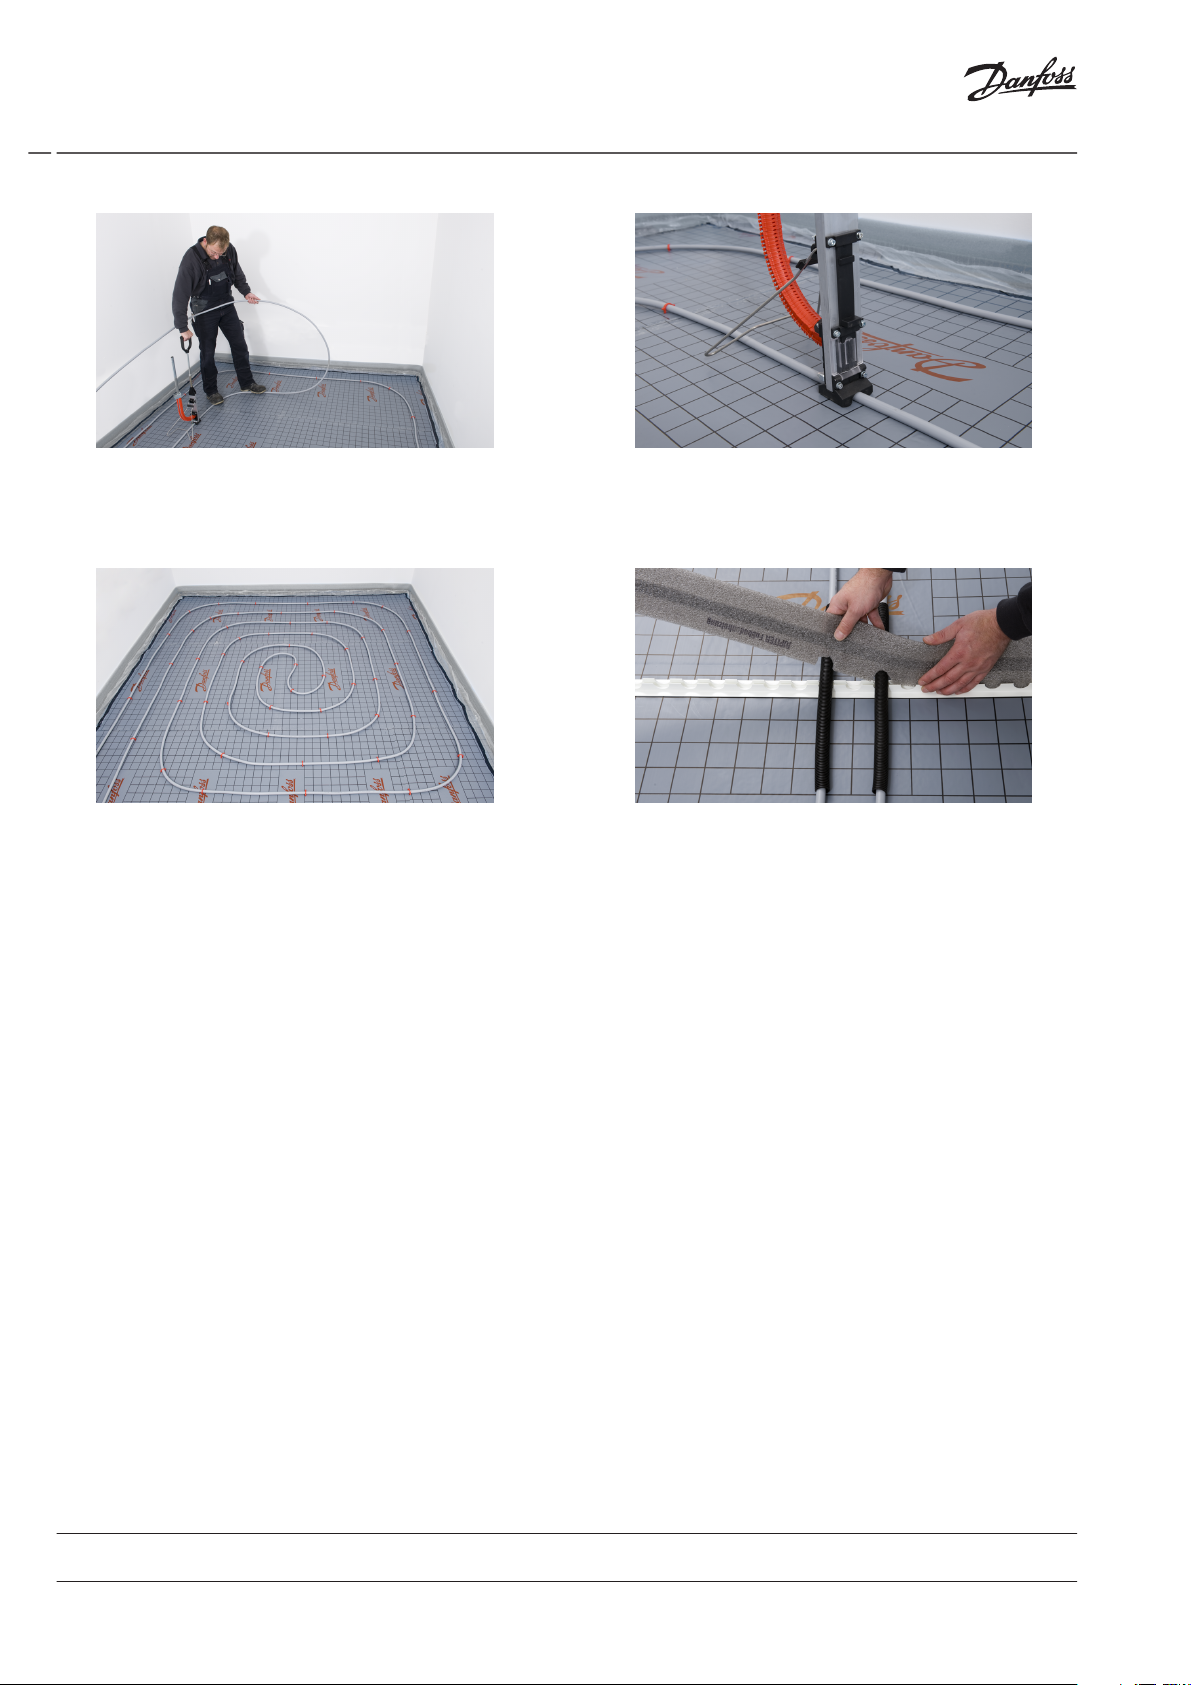
Fig. 7: Tack down Danfoss composite pipe with two BasicClip
clips per metre.
Fig. 8: Position tacker vertically over the required spot and
fasten pipe by pushing down the tacker handle.
Fig. 9: Lay pipes in snail form throughout the room. Fig. 10: Install expansion joint profile e.g. for door thresholds, as
shown, using the Basic movement gap strip.
¹ If additional insulation is 5 cm thick or more, attach the perimeter
insulation on the additional insulation.
Danfoss A/S
Heating Solutions
Haarupvaenget 11
8600 Silkeborg
Denmark
Phone:+45 7488 8000
Fax: +45 7488 8100
Email: heating.solutions@danfoss.com
www.heating.danfoss.com
Danfoss can accept no responsibility for possible errors in catalogues, brochures and other printed material. Danfoss reserves the right to alter its products without notice. This also applies to products
already on order provided that such alterations can be made without subsequential changes being necessary in specifications already agreed. All trademarks in this material are property of the respective
companies. Danfoss and the Danfoss logotype are trademarks of Danfoss A/S. All rights reserved.
VICTE302 Produced by Danfoss Heating Solutions © 04/2011
 Loading...