

Page 1

How do I install the Ximeta(tm)
NDAS Software and Enable
Network-File Transfer Capability
on So Smart Wireless HD Media
Center?
http://www.danedigital.com
Page 2
•Solution
This guide provides step-by-step instructions on enabling and using the NDAS software update. The
NDAS protocol is used to transfer and manage (copy/delete/rename) files on the So Smart HD Media
Center.
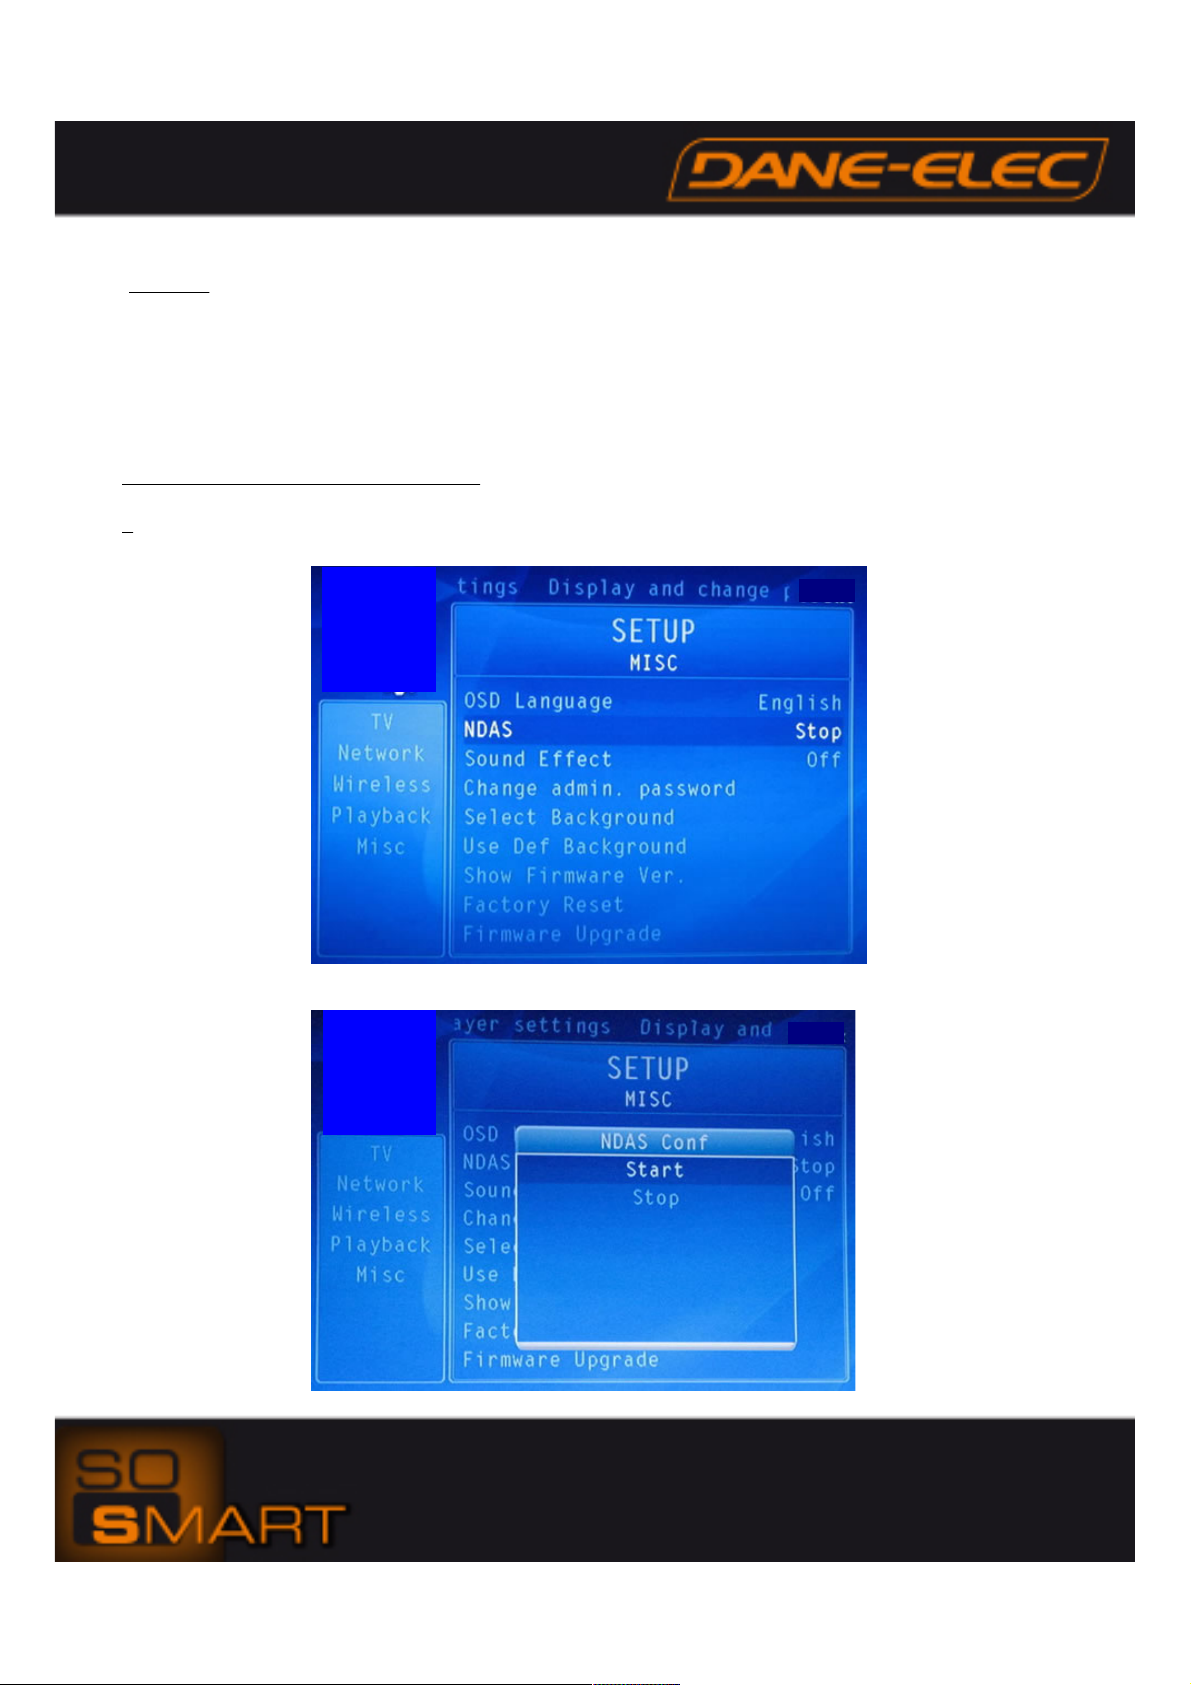
Activate NDAS Firmware on So Smart
1-Turn ON the So Smart and ensure the network is connected successfully.
2- Press SETUP on the remote, scroll to Misc
3-Scroll to NDAS
4- Select NDAS, Select Start, Press Setup on the remote to save the settings
http://www.danedigital.com
Page 3
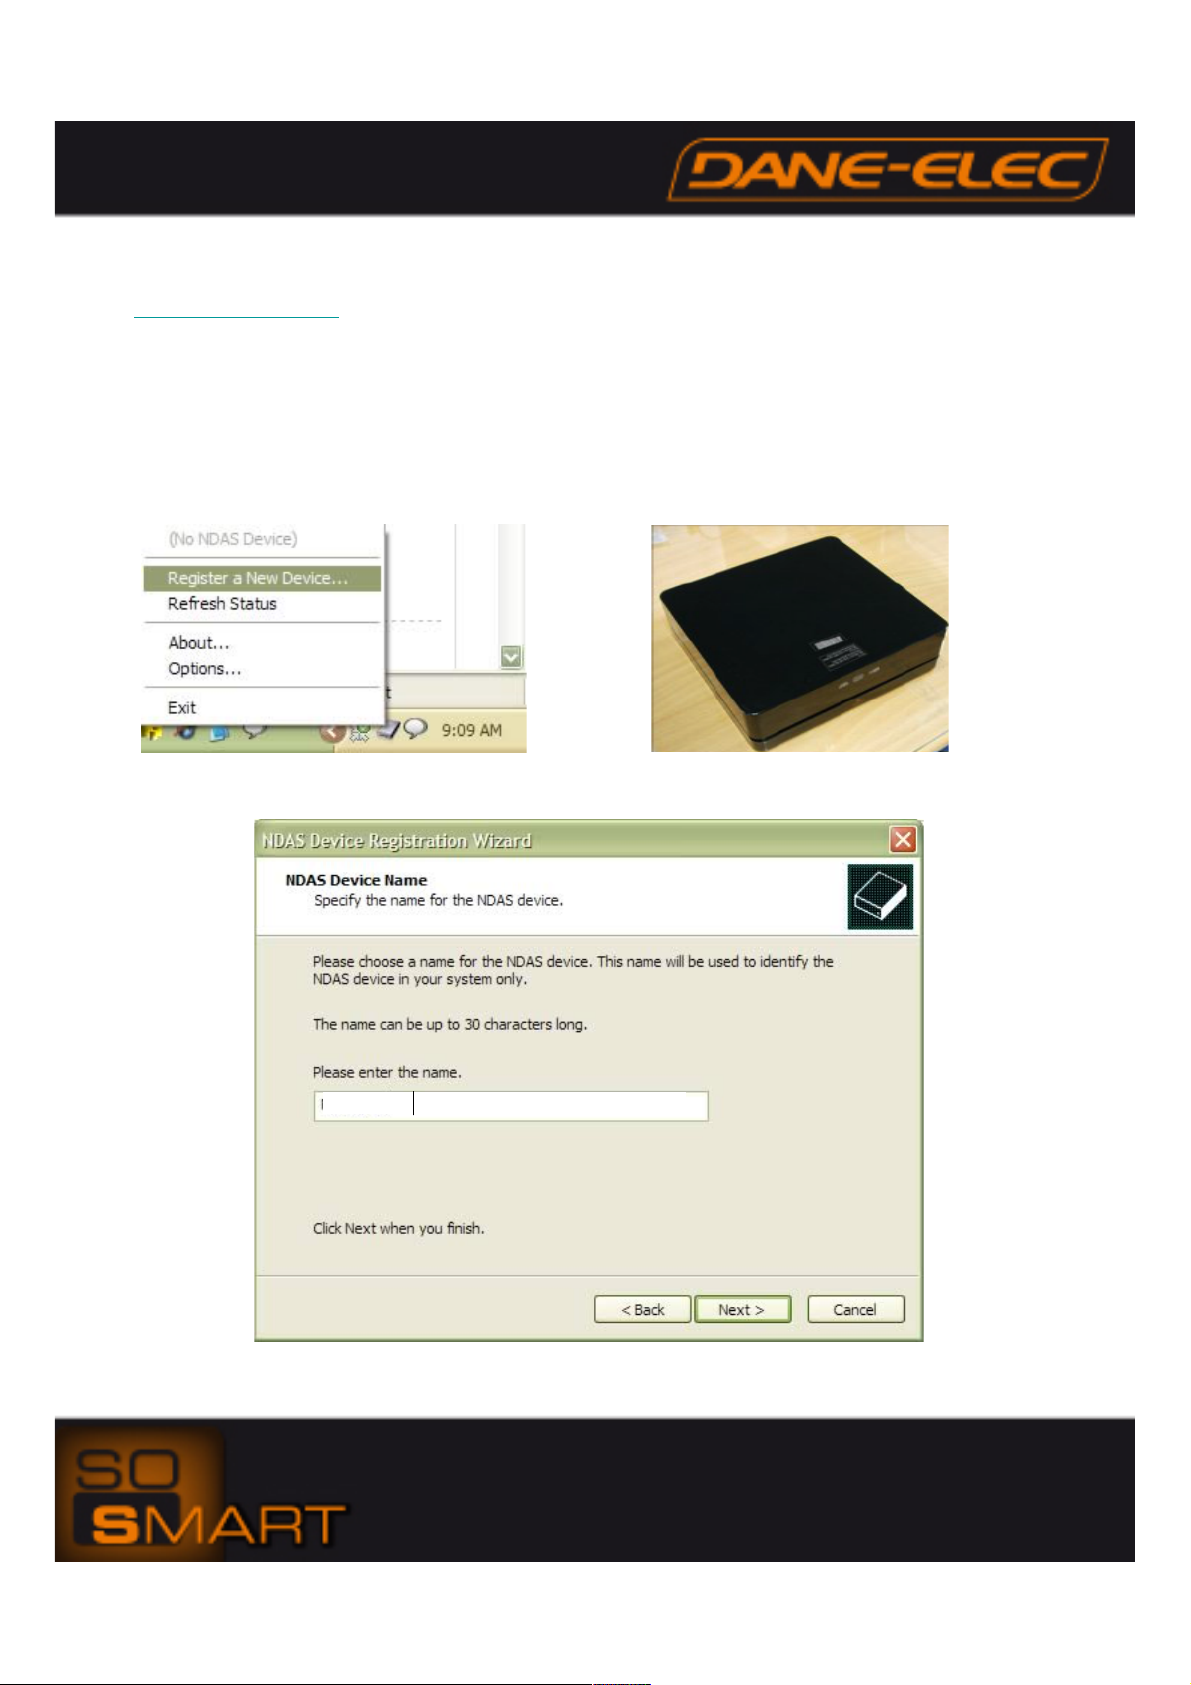
INSTALLATION OF Ximeta(tm) NDAS SOFTWARE (on PC)
1- NDAS Device ID / KEY is pasted on the bottom of So Smart
2- Install NDAS software on your PC from CD So Util (setup.exe in folder NDAS).
3- Restart your computer.
4- On your PC, Right click the "NDAS Device Management" icon in the task bar, and Select "Register a New
Device..." (see below)
5- Type in a name to identify the So Smart, click Next >
SO SMART
http://www.danedigital.com
Page 4
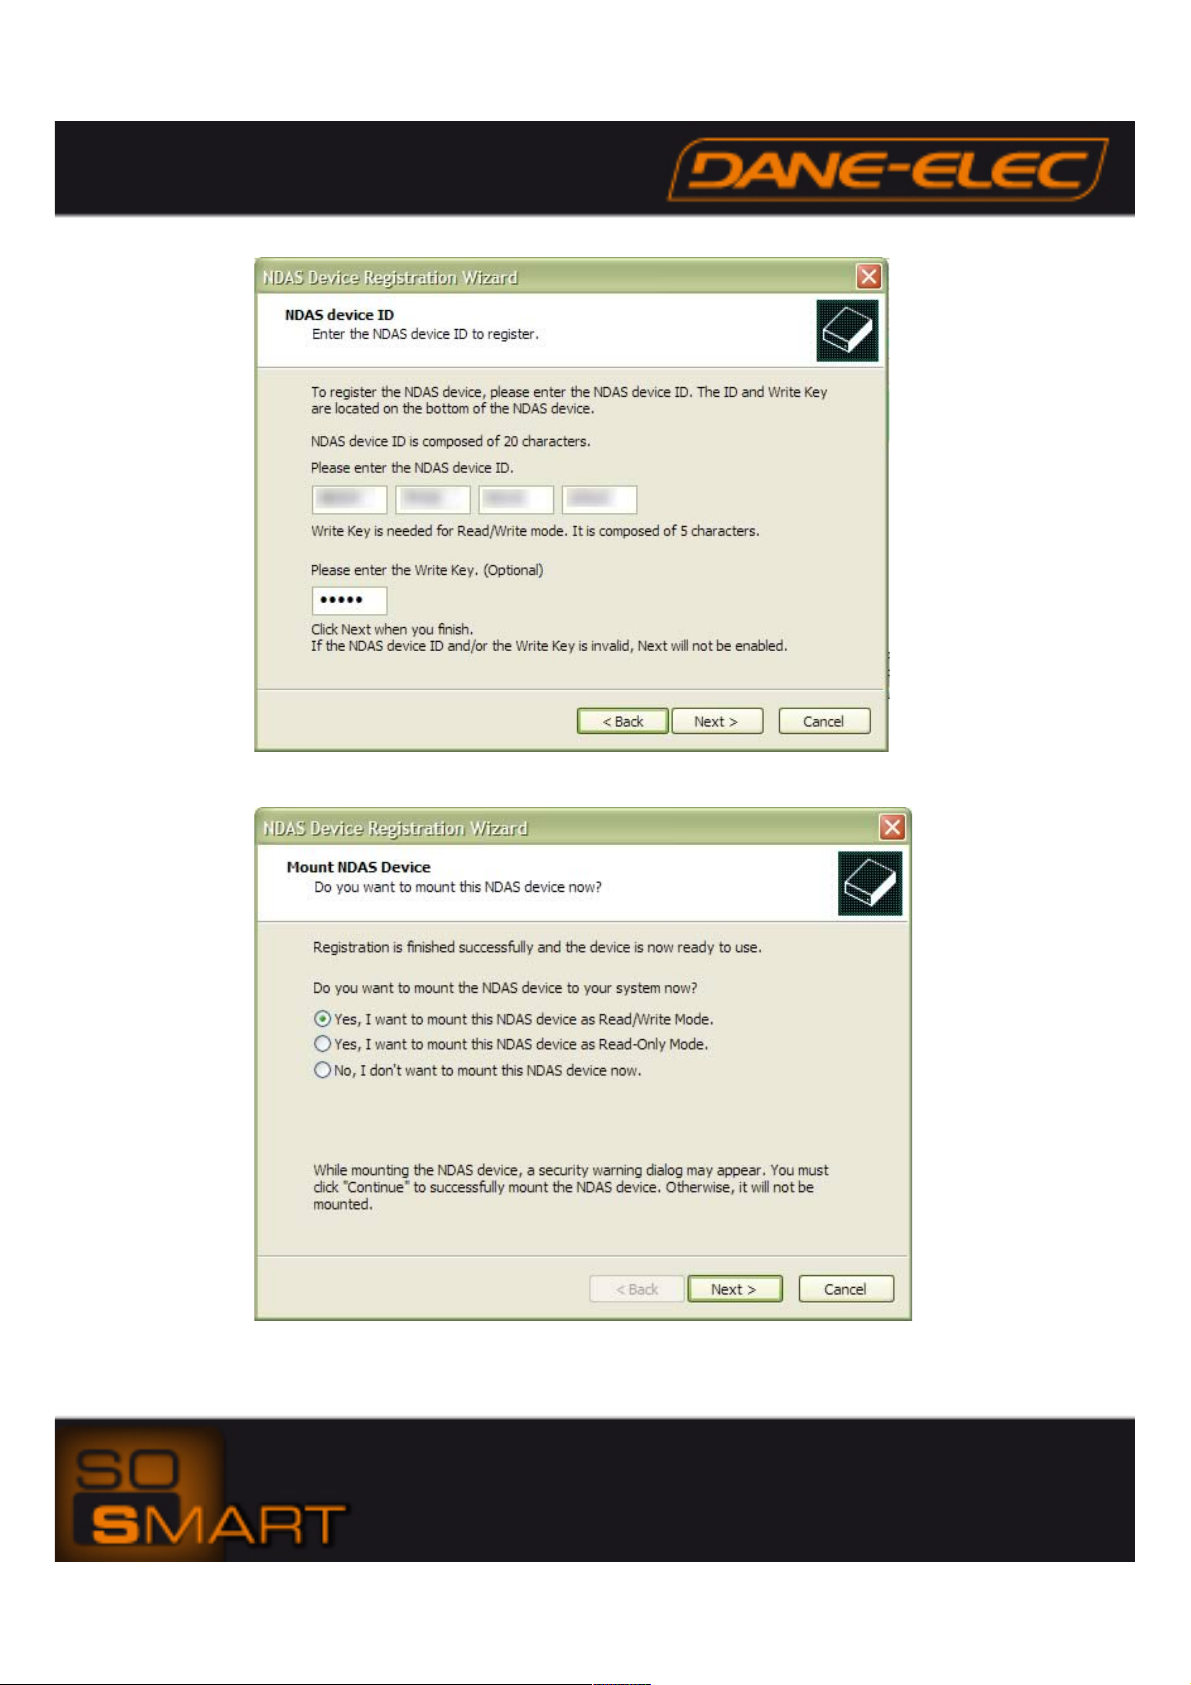
6- Enter in the NDAS DEVICE ID and the KEY and click Next
>
7- Select "Yes, I want to mount this NDAS device as Read/Write Mode", click Next >
http://www.danedigital.com
Page 5
8- NDAS Device Management will display "Mounting the requested NDAS device, please wait..." This process
can take several minutes.
9- "Found New Hardware Wizard" will appear, click "Yes, this time only" and click Next >
10- Click "Install the software automatically (Recommended)" and click Next>
11- The "Found New Hardware Wizard" will search for the "NDAS SCSI Controller", this may take several
minutes
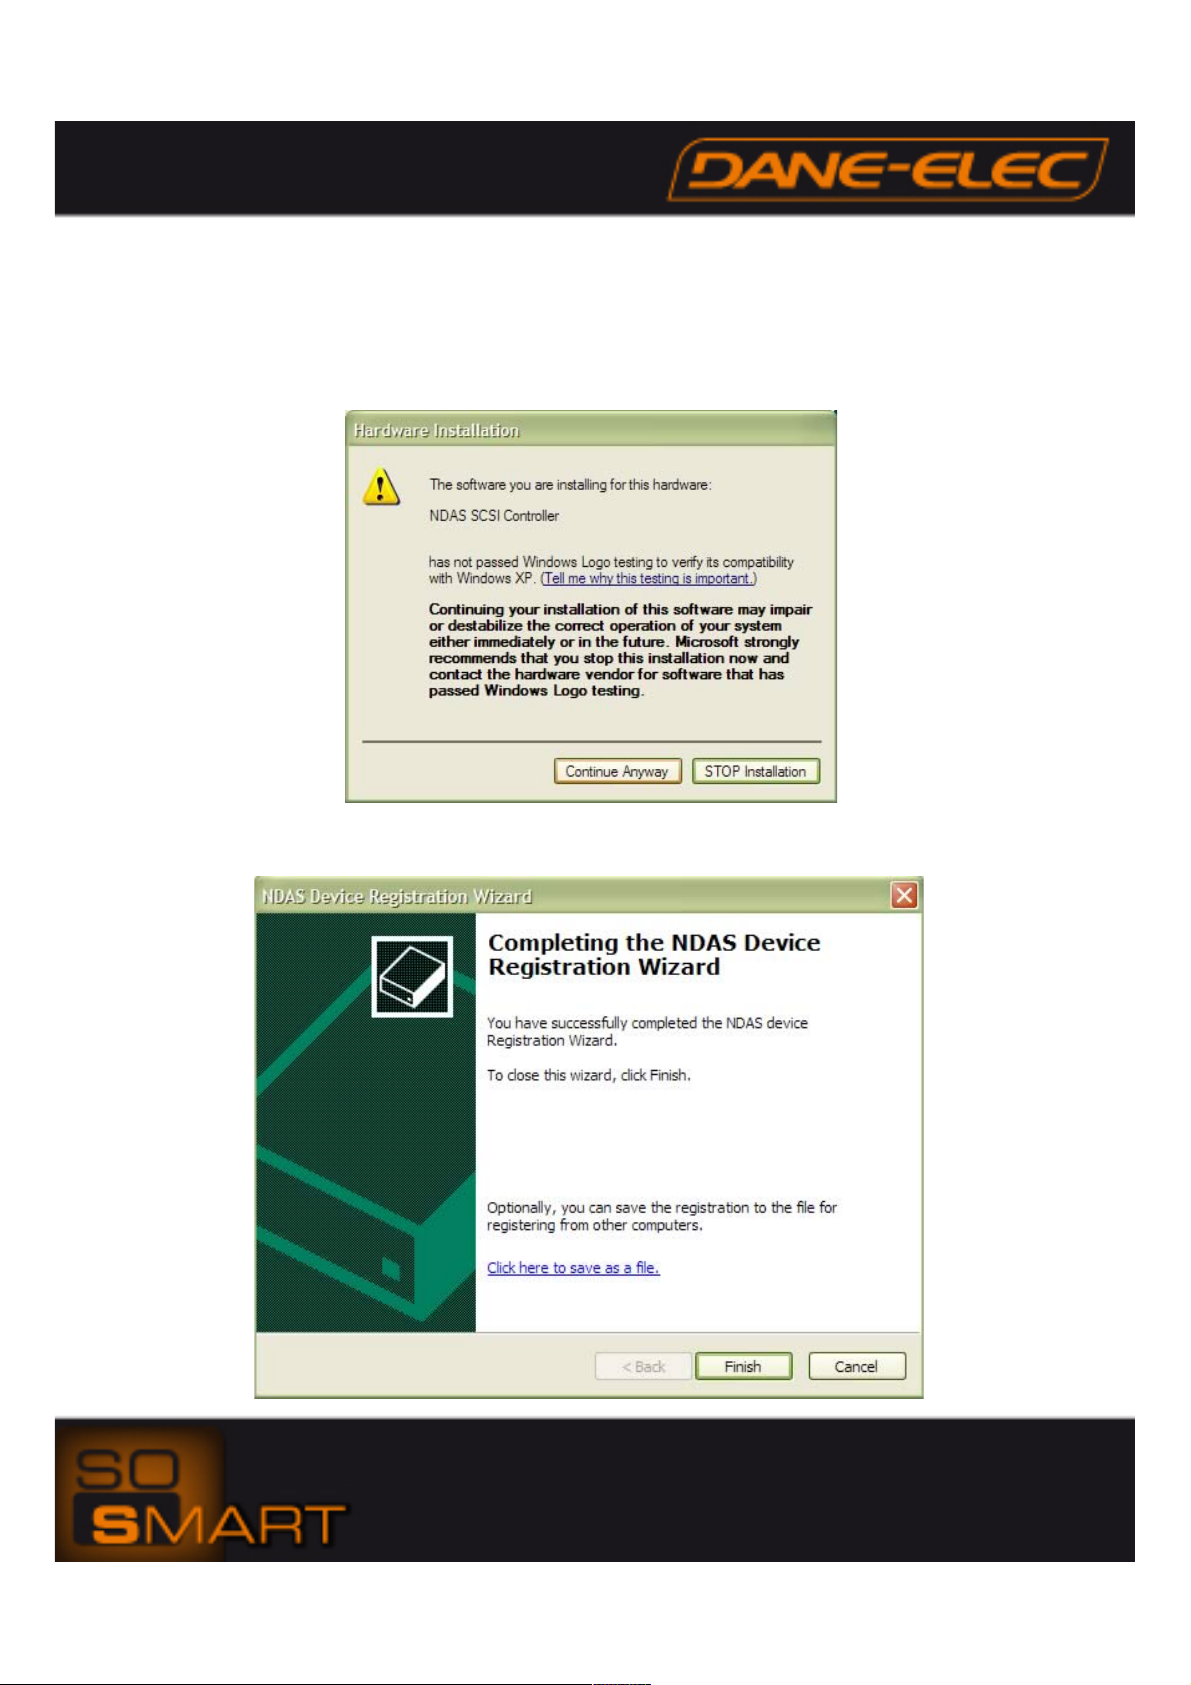
12- A warning message will appear (see below), click "Continue Anyway"
13- The "Found New Hardware Wizard" will finish. Click Finish
14- The "NDAS Device Registration Wizard" is now complete, Click Finish
http://www.danedigital.com
Page 6
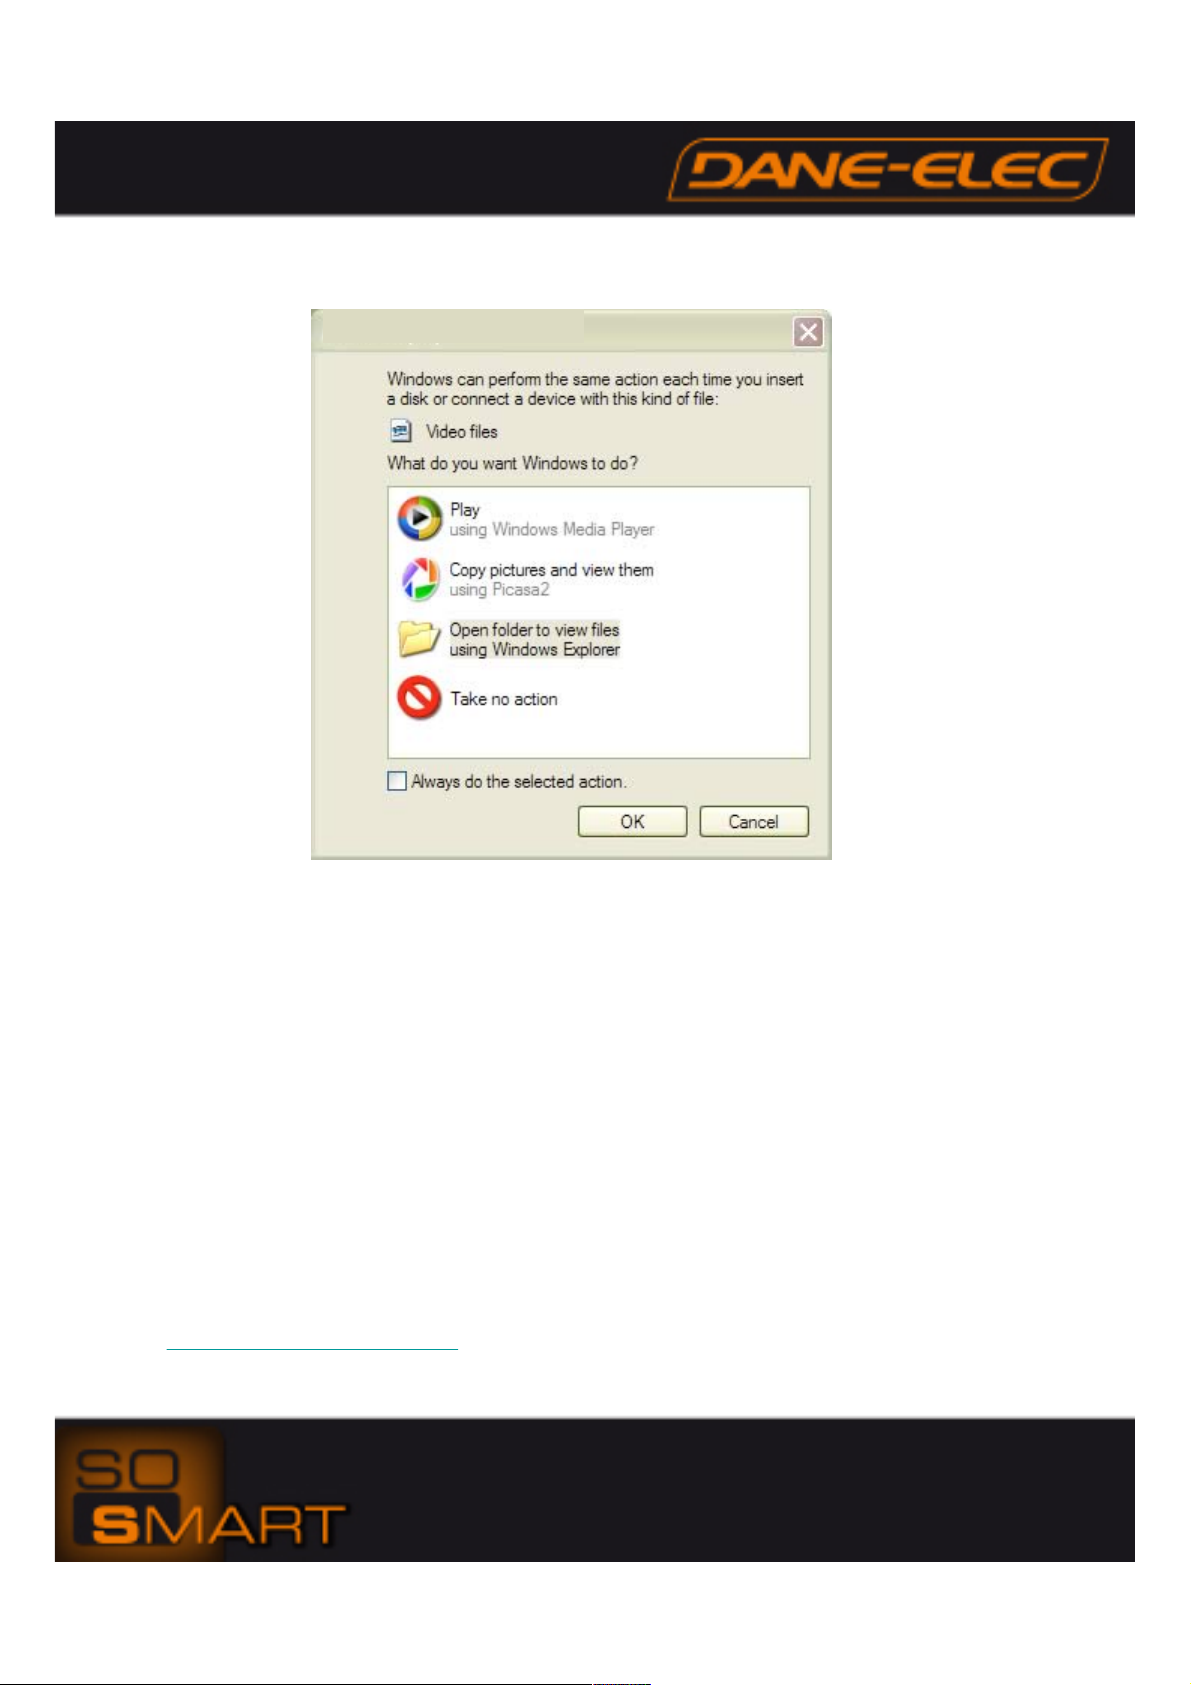
15- The So Smart internal hard drive will be automatically detected and the following will display. Click "Open
folder to view files using Windows Explorer." If this dialogue box does not display, access the internal hard drive
via Windows Explorer.
16- Files can now be renamed/moved/deleted all through Windows Explorer
Troubleshooting Windows XP/Vista Firewall
1- Click on Start
2- Click on Control Panel
3- Click on Security
4- Select "Allow Program Through Windows Firewall"
5- Add the Ximeta(tm) program by clicking browse
(usually located at: c:\program files\ndas\system\ndasmgmt)
6- Click "OPEN" once you have located the ndasmgmt file
7- Click OK and OK
8- Right click the NDAS icon
9- Click "Mount Read/Write"
NDAS (Network Direct Attached Storage) is Ximeta(tm)'s patented technology which enables all digital
storage devices (HDD, ODD, Memory, Tape Drives) direct connection into standard Ethernet networks. All
users or systems on the network can directly control, use and share those devices.
Dane-elec
http://www.danedigital.com
 Loading...