

Page 1
Multimedia Hard Disk Player & Recorder
PC/MAC
User Manual
Page 2

Table of Contents
1. BRIEF INTRODUCTION 3
Feature and performance 3•
Basic performance 3•
Specification 3•
2. PRODUCT DETAILS 5
Packing list • 5
Front view 6•
Back view 7•
Remote controller 7•
3. BASIC OPERATION 9
Initiation Setup 9•
Power connection 9•
Connect and disconnect the So Speaky PVR 10•
Connection of TV audio output 12•
Composite output mode 12•
Component YPbPr output connection 12•
HDMI output mode 12•
Connection of recording 13•
Connection and setup of network 14•
Operation of sharing file under Windows XP 14•
Procedure of file sharingunder Windows XP 14•
Operation of sharing file under Windows Vista 17•
Procedure of file sharing under Windows Vista 17•
Usage of starting od record and play 21•
Playback function 22•
Connect to PC 24•
4. OPERATION OF PRODUCT USAGE 25
Browser 26•
File range function 26•
File edit 26•
Network 27•
Video in 27•
Time shift 27•
Time rec 28•
File Copy 29•
Copy operation 29•
Setting Menu 30•
Changing photos settings 30•
Changing HDMI settings 30•
Changing Network settings 31•
Changing System settings 31•
HD Format 33•
5. MAINTENANCE NOTICE 33
6. OTHERS 34
2
www.danedigital.com
Page 3

1. BRIEF INTRODUCTION
Feature/performance•
The So Speaky PVR is a new kind of family recording product. Via our So Speaky
PVR, individuals can record favorite program randomly and store it in the device,
avoiding the inconvenience brought by change tape frequently. The So Speaky PVR
can provide long recording and good watching. Meanwhile, it can also store and
play many kinds of video files. The So Speaky PVR, which facilitated with many
port and HDMI, can show you picture and video with high definition. It is really your
desirable entertainment products.
Basic performance•
Image resolution-MPEG2,supports (720 X 480@30fps or 720 X 576@25fps)•
support 5 standard
Recording-support one –key backup, Time rec and Time shift recording •
Video-MPEG1/2/4,Xvid,IFO,VOB,DAT,AVI,MPG,TS.•
Audio- MP3,WMA,WAV,ACC,OGG(no DRM),AC3•
Image-JPG/JPEG(720p/1080i)•
Card 5 in 1 card(SD/MMC/XD/MS/MS RRO)•
USB HUB-USB storage•
Internet-RJ45 port,10/100M,can connect to local internet and play video files•
USB2.0-high speed USB2.0, backup when connect to PC•
HDMI-HDMI high definition port•
Specification•
USB connection Support multiple USB storage
USB port USB 2.0 high speed port
Network connection RJ45 10/100M connect
Simulated video output Composite video AV/color difference YPbPr/HDMI(1080i)
Image definition max: 1080i (interlaced)
Audio output Stereo/digital HDMI/optical
3
www.danedigital.com
Page 4
Input
Card CF, SD, MMC, XD, MS, SDHC, MS PRO, MS DUO, MS, PRO DUO
Audio
audio: stereo(L/R)
video: composite(AV)
Format: MP3, WMA, WAV, ACC, OGG(no DRM)AC3
Speed: MP3 32kbps - 320kbps
WMA: 32kbps - 192kbps
Video
Subtitle SSA, SMI, SRT, SUB
Picture JPG/JPEG( 720p/1080i)
Picture play mode Slide show
Device USB device
Video recording Surport 5 recording mode, max : 20,000 mins
Video record rate and format HQ/SP/LP/EP/SLP Format: MPEG2
Audio record rate and format HQ/SP/LP/EP/SLP Format: MP2, 2
Record image Max:720 X 480@30fps or 720 X 576@25fps
Spec for video output
Video decode: MPEG 1/2/4, Xvid
Format: IFO, VOB, DAT, AVI, MPG, MPEG, TS
Composite output : AV: 1Vpp@75 Ohm
Heft output: Y:1Vpp@75 Ohm
Pb:0.7Vpp@75 Ohm
Pr:0.7Vpp@75 Ohm
DA Converter 24-bit/192kHZ
AD Converter 24-bit/96kHZ
Signal-Noise (1kHZ) ≥ 90dB
Spec for Audio
Power adapter
Dimension 217.5×48×163.5mm
Weight 1455g or 3.208lbs
Note : Up to the improvement, the appearance and specification will be changed accordingly
without notice.
4
Dynamic Range ≥90dB(1kHZ)
Separation Channel ≥95dB
Total Harmonic
Distortion (1kHZ) ≤1%
AC input: 100V~220V, 50/60HZ
DC output: 12V, 3A
www.danedigital.com
Page 5
2. PRODUCT DETAILS
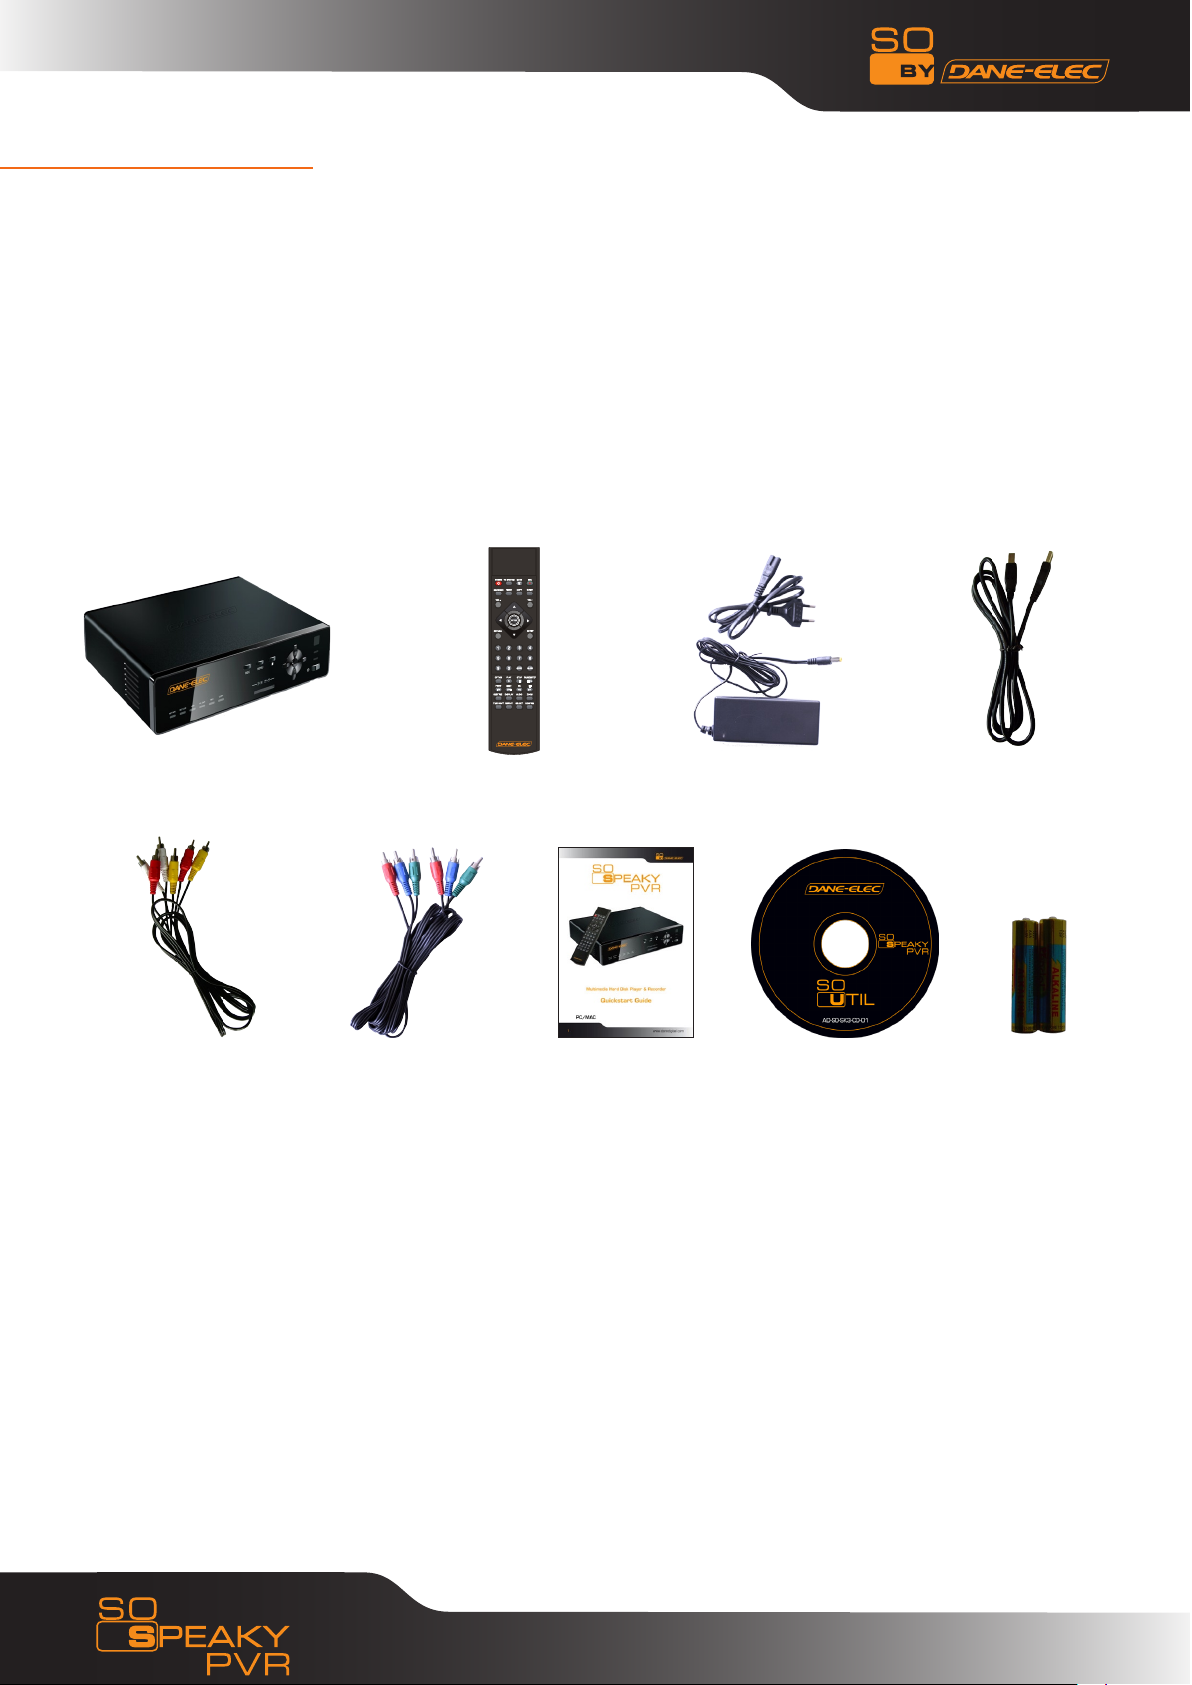
Packing list•
Check the accessories after receive the So Speaky PVR. If there are some missing,
please contact immediately with your supplier to insure your consumer’s right.
So Speaky PVR
Audio/ Video cable
(Red, Yellow, White)
Remote control
YPbPr cable
( Red, Blue, Green )
Quick Start Guide CD-ROM
A/C adapter USB cable
Batteries
Note: Up to the model and specification of the So Speaky PVR, some of the below accessories
may not appeared in your packing, please take note. Or can consult your supplier.
5
www.danedigital.com
Page 6
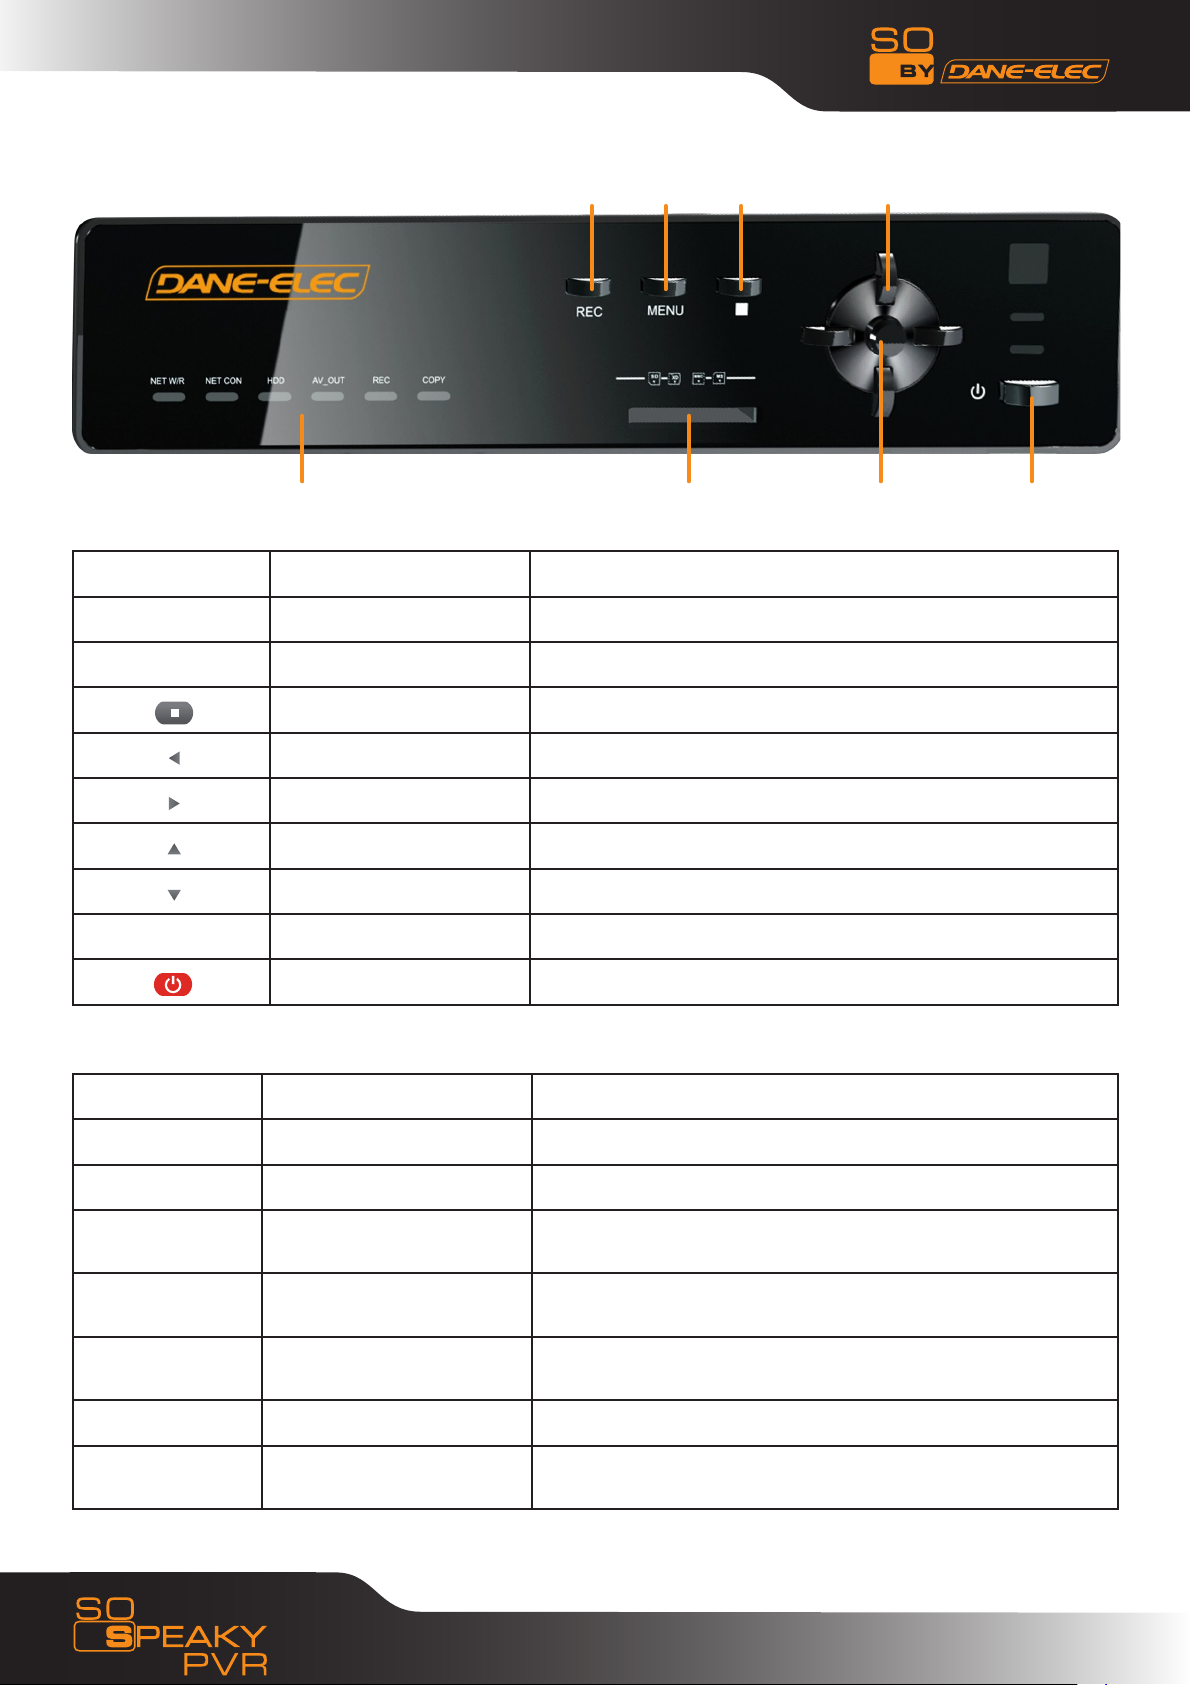
Front view•
Button definition:
Button button definition instruction
REC REC button Press shortly to enter record mode. choose the Rec time
MENU Menu button Press shortly to return the first menu
REC MENU STOP DIRECTION KEY
POWERENTERCARD READERLED
Stop button Press shortly to stop current operation
Left button Press shortly to move cursor left
Right button Press shortly to move cursor right
Up button Press shortly to move cursor up
Down button Press shortly to move cursor down
OK OK button Press shortly to confirm the current operation
Power button Press shortly to switch on/off the power
LED definition:
LED LED definition Instruction
Rec Rec LED Turns red when record video
Copy Copy LED Turns on when copy
Status TV output LED
Read-write Read-write LED
For any kind of composite video, color difference, HDMI,
the LED is on
LED lights when connect to USB, twinkles when data
transmit.
Network Status Internet connection LED
Power Power LED Green light when switch on, red light when stand-by.
Network readwrite
Network read-write LED Twinkling of light when internet transmits.
6
LED lights when connect to network. be off when
disconnect.
www.danedigital.com
Page 7

Back view•
AUDIO INPUT
COMPONENT VIDEO OUTPUT
AUDIO OUTPUT
POWER INPUT
VIDEO INPUT
COMPOSITE VIDEO OUTPUT
HDMI output USB
Port definition:
Port Port definition Instruction
USB USB port via this USB port for PC communication
USB connection Outside USB port Can read outside USB storage via USB port
Video output Video output port
Video input Video input port Can input audio when connected to video device
HDMI High definition port Can output digital signal via HDMI port
Optical Fine output port Can output 5.1 audio via optical port
Network network port Can connect to network via LAN port
DC Power port Can input power
Can output audio and video when connected to video
device
USB HOSTOPTICAL LAN
5 in 1 card 5 in 1 card port Can read data from SD,MMC,MS,XD
Remote control:
7
www.danedigital.com
Page 8
Key Function
Power Turn on and off in the stand by mode
Video Switch output mode
Mute Turn on or shut audio output
REC Start recording in REC mode and repeat pressing to select recording time
Browser Enter the browser menu
Timer Enter the Time menu to edit, add, delete recording schedule
copy Enter the copy mode
Guide Return to first menu
vol﹢ Press to increase the volume
vol- Press to decrease the volume
Returm Return to the previous menu
Setup Enter the menu
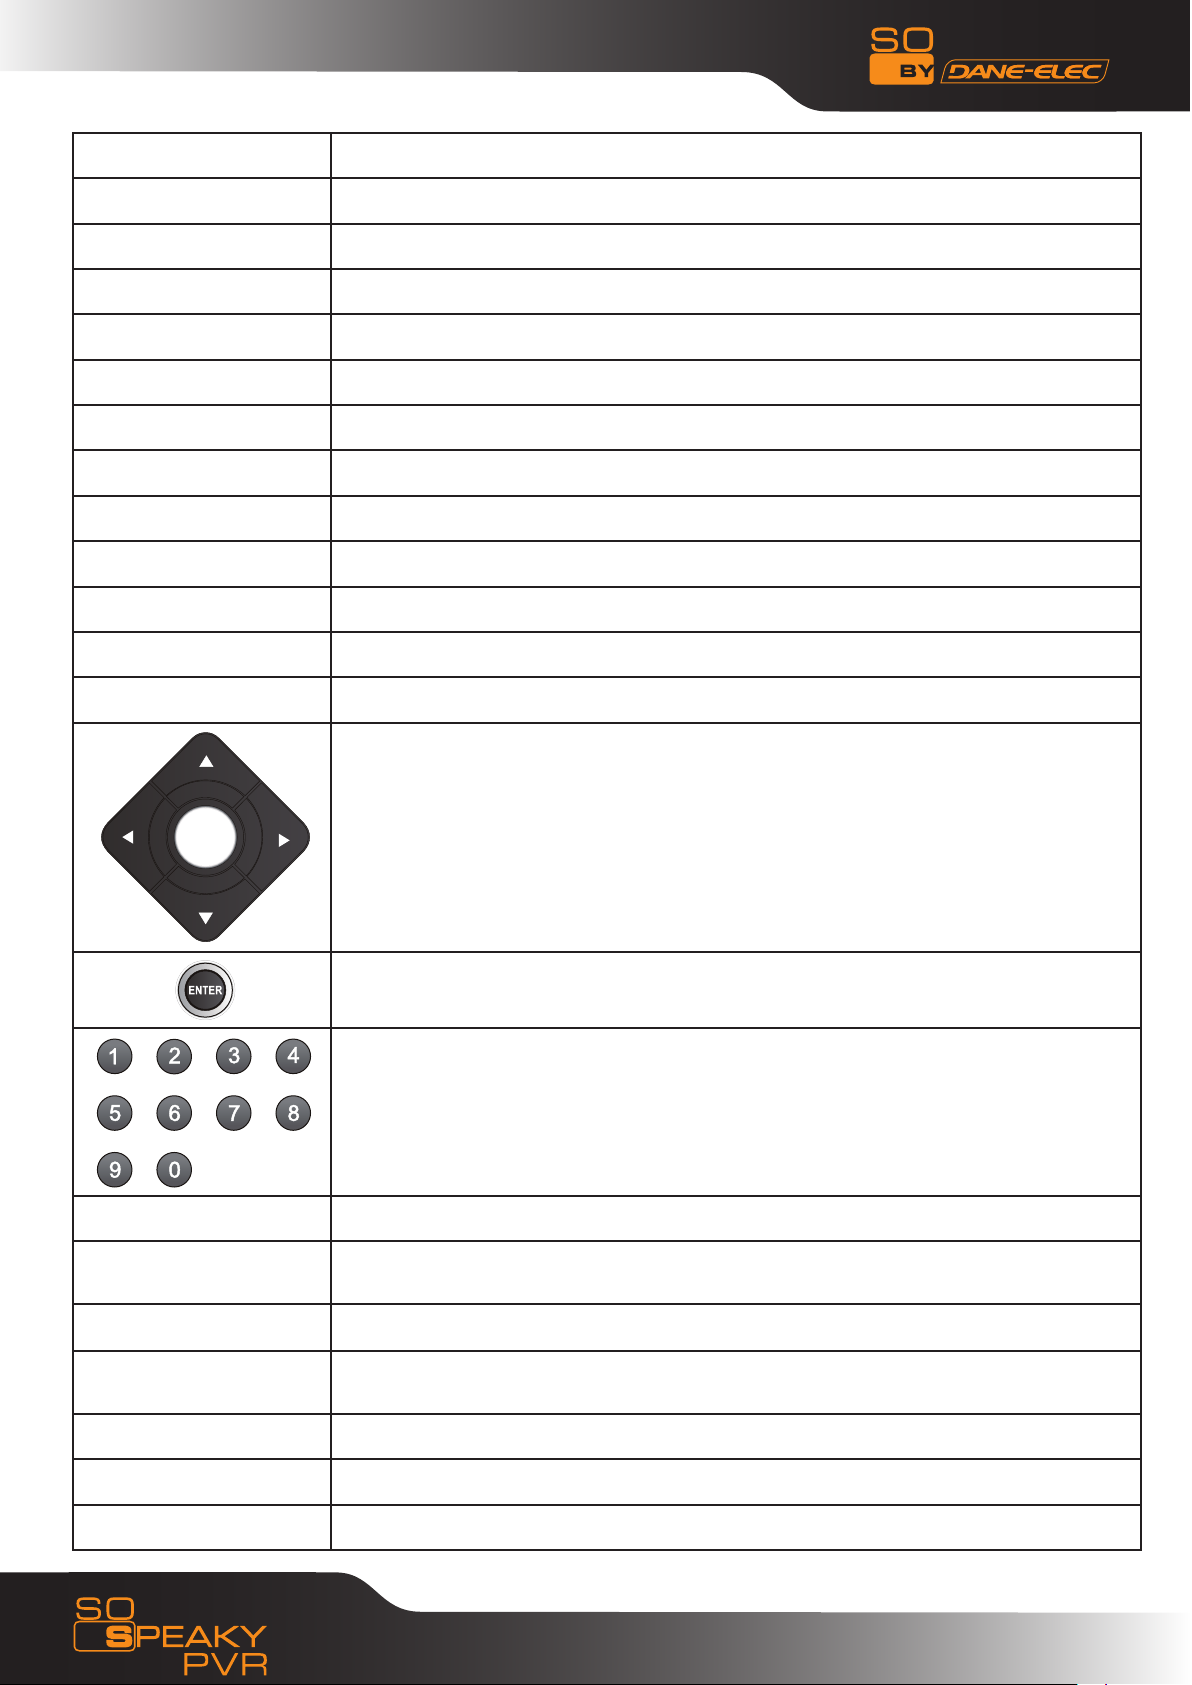
Navigation key for up, down, left and right
Press to confirm
Press to input digital
GOTO Press to play the video at the chapter after setting schedule
SLOW
Edit Press the key at selected file to rename or delete the file in the option window
Play
Press to have slow motion: (3/4, 1/2, 1/4, 1/8, 1/16X)
Press PLAY to resume regular play mode.
Press to play file.
Or play recording file under time shift mode.
Stop Press to stop play/recording
Pause/Step Press to pause play/recording, and again for step playing
Previous Press to return to previous file
8
www.danedigital.com
Page 9
Next Press to go to next file
Fast forward Press to fast forward from current play and again to select the speed
Fast rewind Press to fast rewind from current play and again to select the speed
Subtitle Switch the subtitle if the file supported
Display Press to display time, title, information of chapter when play video and photo.
Audio Switch audio track
Press to zoom when playing back photos or Video programs.
Zoom
Time shift
Repeat Press to set repeat option: chapter, Title or off
Photo zoom levels:2X,4X,8X,16X;
Video zoom levels:2X,3X,4X,8X.
Press to activate time shift in recording mode.
Operation as follow:
Press ”Time shift” and wait until the screen display, Press “pause/step” to pause
program, press “Play” to resume playback, and press “Stop” to stop time shift
function.
Select
Confirm Press to add or delete option in playlist
3) BASIC OPERATION
Initiation setup •
Please set the current time of the product according to the prompt or go to the setup menu directly and
select “Time setup” when the first time use.
Usage preparing
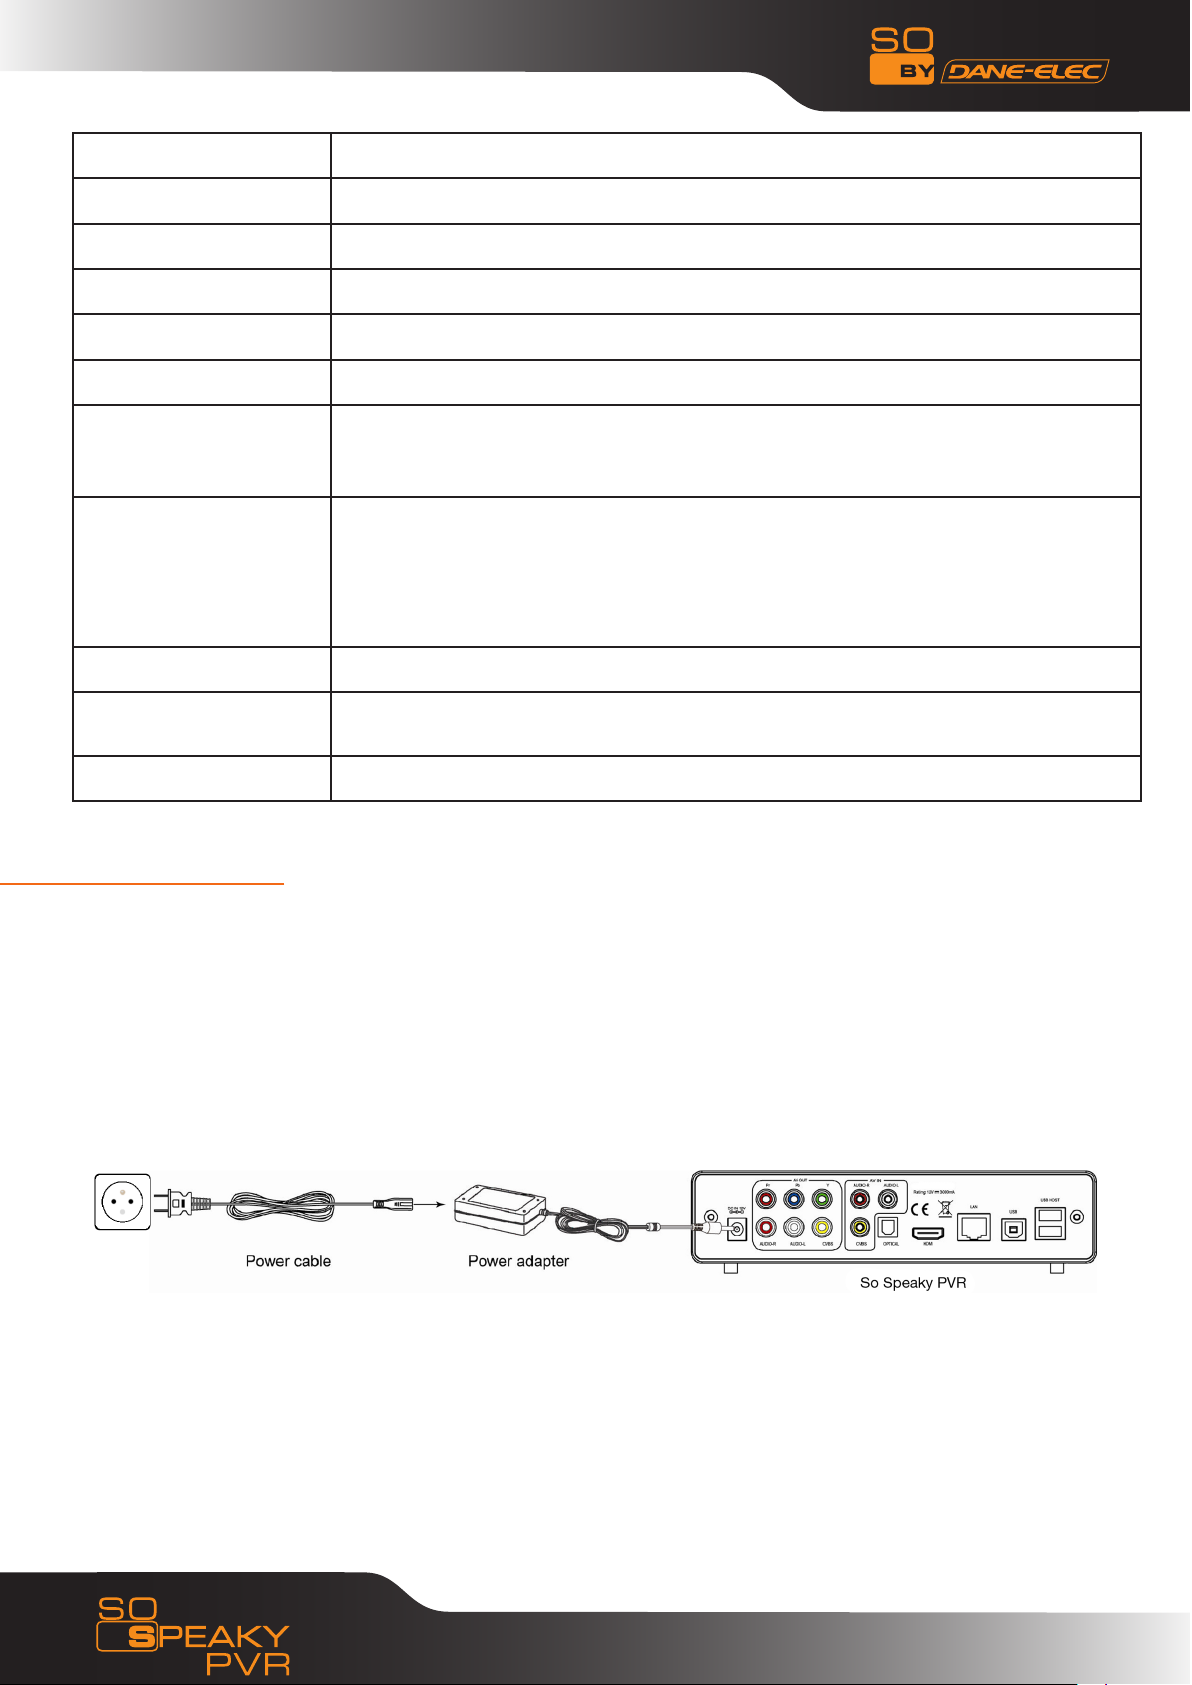
Power connection •
Take out power adapter and power core from the package and connect it as follow illustration:
Press to select the file or folder and then press “confirm” to add or delete file or
folder in the playlist
9
www.danedigital.com
Page 10

Connect and disconnect the So Speaky PVR•
The first time it is used as a peripheral storage device, a driver must be installed if the computer’s
storage system is an older one.
For the first use, turn the So Speaky PVR on, and connect it to the computer via the USB cable. The
installation process will begin on the computer.
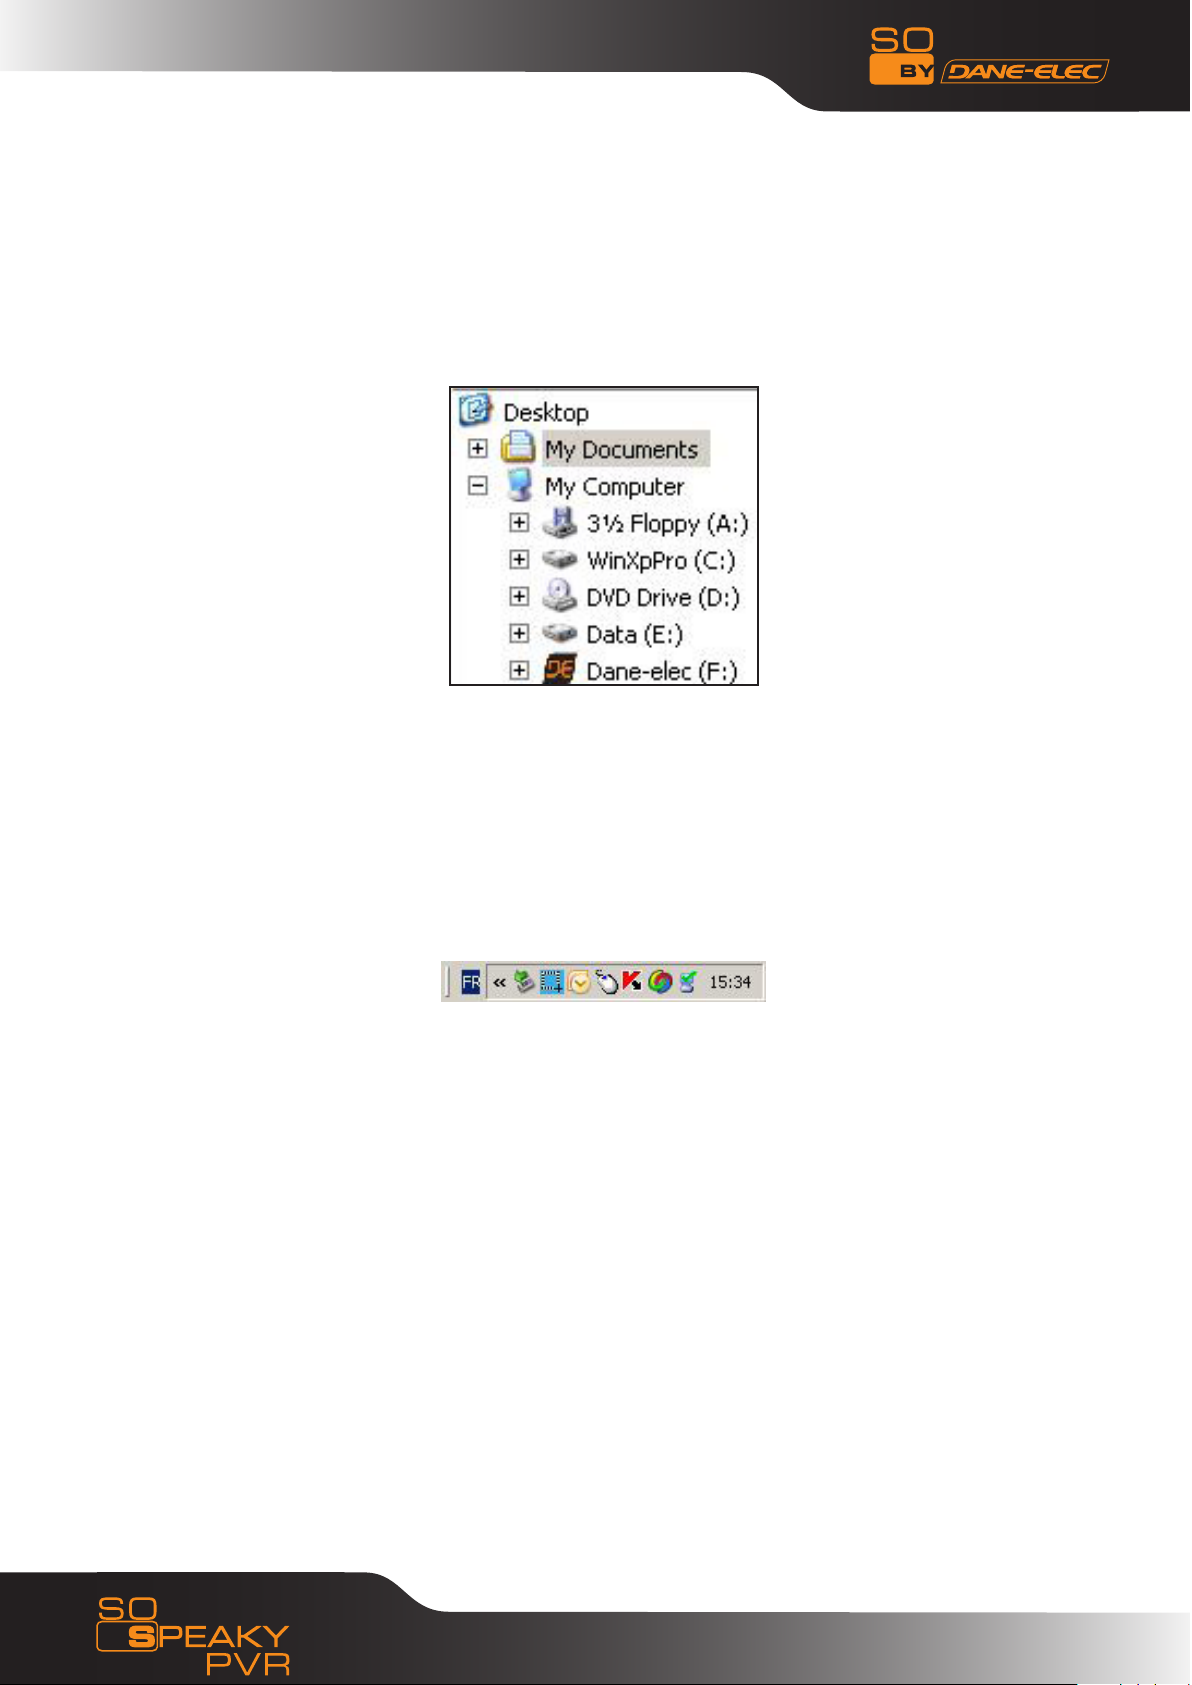
Then, in a Windows® Explorer, the Black&Orange “DE” Dane-Elec logo will be displayed, followed by
letter in parentheses that corresponds to your So Speaky PVR’s address.
A green arrow-shaped icon shaped will appear in the task bar. The media player can now be used as an
external peripheral storage device
Comment: Your So Speaky PVR’s hard disk was pre-formatted in FAT32, so it can be used right away.
Reservation percentage total disk for :
1) Recording : 50%
2) FAT 32 : 50%
10
www.danedigital.com
Page 11
Step-by-Step:
- Turn on your computer and launch Windows
- Connect the So Speaky PVR
- Let Windows® search for and automatically install the driver.
- Open “My Computer” to view your external hard drive.
If the system does not recognize the player before the cable has been connected, connect the device
before launching your operating system.
Extraction Procedure :
For the security of your player and to ensure that no data is lost, please always follow the procedure
below to disconnect your device. Otherwise, an error message will appear on the screen.
- Turn off all applications
- Click on the Task Bar icon for external storage devices
- Select your external hard disk and confirm that you would like it to be stopped
- Disconnect the USB cable that connects the So Speaky PVR to the computer.
Note: Before disconnecting any cables from your So Speaky PVR, turn it off.
11
www.danedigital.com
Page 12

Connection of TV audio output •
The So Speaky PVR is designed with multi-output, including composite(AV),component(YPbPr) and HDMI.
Individuals can select different interface according various need. The product can detect video output
automatically, making the operation friendly and convenient. Please refer to the following instruction for
connection to avoid any problem.
Composite output mode• :
Plug the yellow connector into the AV output of So Speaky PVR and AV input of TV, and plug the red and
white connector into the audio input of TV or HIFI. Turn on the TV and select AV mode. Turn on the So
Speaky PVR and TV displays the interface of initiation.
Component YPbPr output mode•
Component output mode: Plug the YPbPr cable into the output of So Speaky PVR and input of TV. Because
the cable is only for video signal, another AV cable is necessary. Plug the red and white connector of AV
cable into the audio output of So Speaky PVR and audio input of TV or HIFI. Turn on TV and select YPbPr
mode. Turn on the So Speaky PVR and TV displays the interface of initiation.
HDMI output mode•
12
Cable not
included
www.danedigital.com
Page 13

HDMI is a output with best audio and video effect which outputs digital video and audio composited at
the same time. Connect HDMI cable to output of So Speaky PVR and display device with HDMI input. Select
HDMI mode in TV until it displays the interface of initiation.
Connection of recording•
Important notice: The So Speaky PVR supports TV recording from set-top box or satellite TV receiver. Only
the individuals with set-top box or satellite TV receiver are able to record. Please refer to the following
illustration to connect the So Speaky PVR.
For set-top box or satellite TV receiver with two signal outputs, please refer to below connection:
For set-top box or satellite with only one signal output, please refer to the below connection:
There are AV in, AUDIO-R,AUDIO-L and optical output in the back of So Speaky PVR. Connect AV IN and
set-top box or satellite TV receiver and make sure the output of set-top box or satellite TV receiver works
well. Turn on TV and select AV mode. Turn on the So Speaky PVR and select video in after enter the men.
The TV program displays on screen and is ready to recording.
13
www.danedigital.com
Page 14

Connection and setup of network•
The So Speaky PVR can play the files stored in the PC directly through network. Please connect the RJ45
cable according to the following illustration. The network connects well when the LED of network status
and W/R blinks.
DC IN 12V
AV OUT
Pr Pb Y
AV IN
OPTICAL HDMI
Rating12V 300mA
LAN
USB HOST
USB
Connect one end of the RJ45 cable to the So Speaky PVR like the PC does and connect the video output.
Press “setup” key or select “setup” menu in the initiation interface. Select “Network” option in the setup
window and press “OK” to confirm. It is available for both automatic and manual IP setup. Press “setup”
key again to exist after setup. Before access the PC through network by the So Speaky PVR, the media
files must be shared in the network.
Following is the setup of media file sharing in PC
Operation of file sharing under Windows XP•
Two conditions are necessary for a successful play of network connection.
Folder sharing and safety setup •
Set the same gateway and subnet mark address.•
Procedure of file sharing under Windows XP:•
1. Select the folder need to be shared, right click mouse and select the option” Sharing and safety”, lift
click the mouse.
14
www.danedigital.com
Page 15

2. Select “sharing” in the property option and select “share this folder on the network” and click “Apply”
for confirming to exist.
3. Open” Control panel- Management tool-Computer management-Local users and groups” and click
“Users” option. Right click Guest and select “Properties”.
15
www.danedigital.com
Page 16

4. Select ‘users can not change your password’ and ‘password never expires’. keep the other checkboxes
unchecked.
5. Open” Control panel- Network connection”, and select “Local Area connection” and right click to select
“Properties”.
16
www.danedigital.com
Page 17

6. In the Pop-up window, select ‘Internet protocol (TCP/IP)’
7. Set up the relevant IP address, subnet mask and gateway, can also choose to automatically design.
8. Completion of Windows XP network sharing.
9. Finally, please close the Windows Network Connection Firewall
Operation of file sharing under Windows Vista•
1. Please make sure that the Vista operation system is installed as Administrator supper user.
2. From the desktop select ”start- setup-control panel-select user account”
17
www.danedigital.com
Page 18

3. Open User account and select” open a new account” and name it “Guest”
4. Select the folder need to share and right click the mouse, then select the “sharing” option.
18
www.danedigital.com
Page 19

5. Open the shared folder and add guest account to the list
6. Give the right to all the users after adding the Guest into the list.
19
www.danedigital.com
Page 20

7. Select “sharing”, and then the folder is shared.
8. Finish sharing
20
www.danedigital.com
Page 21

Usage of starting Record & play•
Usage of one key recording function
After correct connection of the AV-in signal, power on the set-top box (or satellite television receiver), TV
and our recorder, switch the signal of TV to AV-in signal, following menu appears:
If individuals only want to watch TV, do not power on the recorder and keep the input signal of TV with
the set-top box signal
Select “Video-in” menu to enter the TV screen, you can select the TV channel through set-top box (or
satellite television receiver)
Press “ REC ” key on the Device or remote control, the “REC” LED on front panel of recorder turns red which
shows the starting of recording. Press the “ ”key on remote control or device to stop recording.
Usage of Timer Rec
The TV Recorder & Player has the “Timer Recording” function, making individuals can plan recording schedules. The device powers on automatically according to the schedule set and then begin to record and
power off after recording finished. It brings individuals more convenience.
Steps of “Timer REC” set up:
Enter “Timer REC” in the main menu
21
www.danedigital.com
Page 22

Select “Edit” from menu and select “Add a New Schedule”, then press “OK” button to enter.
In “Recording schedule set up” menu, find the rest available recording time according to different recording
quality level.
Press the navigation buttons to set up the recording time, length, quality level, place to save the recorded
files and repeat recording time.
After set up finished, press “OK” button to confirm, you can select “confirm” or “cancel” to finish the recording schedule set up.
You can set up one or more recording schedules and edit them.
Warning: After set up the “Timer REC” schedule, please make sure that the set-top box or satellite television receiver is power on, and keep the TV with the channel you want to record programs, otherwise, the
recording programs will not be what you want to record.
22
www.danedigital.com
Page 23

All the recorded files are recorded in a file folder named “My recordings”. Enter the “Browser” in the main
menu and select the “HDD”, you will find this folder and recorded videos were saved in this folder named
according to system time.
It is available to preview the recorded files and press “ENTER” button to play.
Playback function•
With this HDD Recorder & player, individual can browse movie, photo and music files stored in HDD, USB,
card and net work. Please enter “browser” to select the media and press “ENTER” button to enter.
It is available to preview the selected media and press “ENTER” button to play. Connect to the PC.
23
www.danedigital.com
Page 24

Connect to the PC:•
This So Speaky PVR HDD Recorder & Player is also a personal multimedia files storage device and can be
used by connecting to the PC.
1) Connect to the power supply
While using the So Speaky PVR HDD recorder & player with PC, power supply is also needed.
2) Connect to PC with USB cable
Connect the So Speaky PVR HDD Recorder & player to PC with USB cable then you can copy and transfer
data.
Follow the instruction of the above picture and connect the device to PC.
Power on the PC and enter the system
The PC detects the device automatically and then the device can be used as an external USB storage
device.
After data transfer finished, please remove the USB storage device safely (click the USB device icon to stop
the USB device and then pull out the USB cable).
Notes:
Please don’t power off when it connect to PC for reading and writing. •
If there is no USB detected after connected with USB cable, maybe the PC is operating other •
program, please pull off the USB cable and wait about 10 seconds then connect again.
This So Speaky PVR HDD Recorder & Player is also a personal multimedia files storage device and can be
used by connecting to the PC. Individuals can browse and copy files easily.
24
www.danedigital.com
Page 25

4. OPERATION OF PRODUCT USAGE
Power on the So Speaky PVR HDD Recorder & Player, the system shows guide menu after a few seconds.
There will be five function options, or individuals can enter this guide menu by press “Guide” button on
the remote control.
Note: While connect the power supply for the first time, the device will power on automatically and
appear the below menu:
Please read the following instructions carefully to understand the function of each option.
Browser: Browse and play the media files.
With this function, individuals can browse movie, photo and music files stored in HDD, card, net work and
USB by pressing the “Up” and “Down” navigation buttons to choose the source devices and press “ENTER”
button to confirm, also individuals can press the “Browser” button on the remote control to enter this
function directly.
Video in: Select the input source to be recorded.
Connect the device of the recording resources such as the set-top box or satellite Television receiver with
AV output, enter “Video in” menu, then individuals can watch or record the current TV program.
Timer REC: Plan recording schedules
With this function, individuals can create, edit or delete the schedule and view status and history.
File copy: Copy files from one device to another
With this function, individual can copy files from Hard Disk, NET, USB or Card from a media to another.
Setup: Enter the setup menu
With this function, individuals can configure System, movie, music, photo, network and record settings.
25
www.danedigital.com
Page 26

Browser•
Select “Browser” in the guide menu or press “Browser” button on the remote control, then individuals
can browse movie, photo and music files stored in HDD, card, network and USB by pressing the “Up” and
“Down” navigation buttons to choose the source devices and press “OK” button to confirm and play the
files in the selected device.
Select the file or folder by pressing “Up” and “Down” navigation button and press “OK” button to enter
and play the files, press “Return” key you can return to previous list.
File Range function •
To make file browsing and playing easier, there is a function to range all files into different folders named
“All”, “Music”, “Photo” and “Movie”, individuals can switch to any folder by pressing the “left” and “right”
navigation button.
File Edit menu•
Select the file or folder by pressing the navigation buttons and display Edit, individual can rename and
delete files, press “OK” button to confirm.
26
www.danedigital.com
Page 27

Return
Rename
Delete
Select to return the first menu
Please refer to following procedure to rename file:
1.Select Rename
2.The edit window appears after press ”Enter” key
3. Use the navigation arrows to select letters and numbers. CAPS to toggle between
uppercase and lowercase letters. Press <- to delete, -> to insert a space, press
ENTER to confirm.
4. Once you finish the new name input, select OK to confirm. If you want to cancel
the naming during the process, press ENTER to return
Please refer to follow procedure to delete title
1. Press and to select the Delete tab.
2. Press ENTER to confirm and delete the file.
3. Confirmation message will appear. Press or and select OK.
4. Press ENTER to confirm the delete. Select return to cancel delete.
Network •
My shortcut
Select a PC in the menu or add one available IP address, individuals can access the media files in network
through ”My shortcut”.
Video in•
Select “Video In” and press ENTER or “REC” on panel control to get in. Then individuals can enjoy and
record the video which input from other video in sources.
In Video In, press “REC” on remote controller or panel control to start recording. Press “Stop” to stop
recording.
For more information about the recording operation, please refer to “Remote controller button function”,
“Timer Rec Menu” and “Changing Record Settings”.
Timeshift•
Press “time shift” to active the function, and “play” to continue normal play, “pause” to
hold on, “stop” to cancel the “time shift”
Permanent “time shift”, TV channels will be recorded automatically, user could view by “skip forward“,
‘‘fast rewind’‘, ‘‘play‘’ at any time.
Note, system builds one ‘livepause’ folder automatically, recorded files is saved in this folder, and named
with system time.
27
www.danedigital.com
Page 28

Timer Rec•
Timer Rec allows individuals to create, edit and delete recording schedules and view all schedule status
and history. Select Timer Record from the Guide menu, there are four options: Edit, Delete, Status and
History. Please press and button select.
Creating a New Schedule
1. Select “Edit”.
2. Press and to select “Add a New Schedule” and press “ENTER”. The schedule setting screen
appears.
3. There are six options on the screen, please do the settings accordingly.
Source Video in
Start date and time for recording
Length Length for recording
Recording cycle
Save to USB1, USB2, device
Quality
Browser Could see all choose program through this window
Choose any recording cycle, Once, Saturday, Friday, Thursday, Wednesday, Tuesday,
Monday, Sunday, and so on
HQ, SLP, EP, LP and SP. Higher quality requires bigger capacity. It is available to check
the spare capacity and time for each recording in “Local/USB device available capacity
in the left
28
www.danedigital.com
Page 29

File Copy •
The File Copy allows individuals to copy files between USB, CARD, HDD, NET. Select “File Copy” from the
Guide menu or select “COPY” on the remote control .It is very easy to copy files between various devices.
Can only write on FAT or FAT 32 partition and Network (shared folder). This function doesn’t support NTFS
partition.
Copying operation:•
Step 1: Select Source Device
Press and to select the device which need to copy at first after entering the File copy interface,. Then
press to select Destination Device, press to return.
Step 2: Select Destination Device
Press and to select the device of the Destination after go to Destination sector. Then press to next
step, and press to return.
Step 3: Select copy files or folders
At Source sector, press and to select and press “Play” to select file or folders which need to copy.
“√”.appears at right side of selected file or folder.Then press to next step, and press to return.
Step 4: Select the folders of Destination
Press and to select a target folder at the destination sector. Then press to next step, and press
to return.
29
www.danedigital.com
Page 30

Setup menu•
The default language setting on your So Speaky PVR is English. To change the language please follow the
instructions below:
- Turn on your So Speaky PVR
- Go to Setup Menu
- Select the desired language
- Confirm by pressing “Enter”
- The language is amended
30
www.danedigital.com
Page 31

Select” Setup” option or directly press “Setup” button on the remote controller to enter the setup menu.
It is possible to configure Photo, Audio, Video, Rec, Network and System.
Select any option by pressing and on the remote controller, and press ENTER to confirm or press
“Return” to exit. Press “Setup” button again on remote control to exit from setup menu.
Changing Photos Settings•
Slide Show Set time interval of slide show.
Transition Effect
Background Music
Changing Audio Settings•
Night Mode
the music must be in the same folder, choose background music position by the
navigation
There are “On” “off” and “Comfort modes. In comfort mode, it restrict the volume
automatically so that it would not affect the people’s rest or working.
Digital output There are HDMI LPCM,HDMI RAW,SPDIF LPCM and SPDIF RAW
31
www.danedigital.com
Page 32

Changing HDMI settings•
Connect the HDMI cable before usage, adjust TV mode to HDMI, then video appears on TV screen. Please
refer to “changing audio settings” and “changing video settings” if you want to change HDMI settings.
Changing Record Settings
Recording quality setting: HQ, SP, LP, EP, SLP.
Quality
The highest quality is HQ, which requires the most storage capacity also.
The other settings reduce recording quality sequentially but also require less
storage space accordingly.
Permanent time shift
REC Device HDD,USB1,USB2
Changing Network Settings•
Wired Lan Setup
Changing System Settings•
Set the Permanent time shift on or off. Recording is stored in the product
when it is on, or no recording is stored when it is off.
Check the following items before use this function:
Connection between product and network
Network protocol is available
PC firewall must be desactivated
Files are shared
Auto : Automatically set IP address
Manual:select IP address, subnet mark address and default gateway. It
is available through navigation and numeric key and press “enter” for
confirming
Menu Language select to choose the OSD (On Screen Display) language
Text Encoding Change the system language.
Time Select to set the system time.
HDD Format Select to HDD Format
Restore Default To reset the language, time and network.
32
www.danedigital.com
Page 33

HD Format•
Note: format will delete all data, please make a copy at first
Select by navigation, please press “enter” to next step or “ cancel” to exit when highlight confirms.
Operate procedures.
First, FAT32 and NTFS partition: please dispatch FAT32 and NTFS capacity according to instruction information,
press “ok” to next.
Second, press “OK” to confirm format
Third, congratulation screen will be out after the format finished
5. MAINTENANCE NOTICE:
To protect the normal use of all accessories, please kindly make sure understand and pay attention to
following points.
Power input is 12V
Under normal working status, power adapter will keep warming, but body temperature of 40 degree or
under is normal.
Please be sure of aeration under normal working status, do not put the device in bed, sofa, or similar area
where cooling effect is no good.
Please do not teardown personally, but send it back to the pointed service agent, or there will be danger
of electronic shock.
Please pull out the cable and shut the device immediately when cable broken or liquid in, and send to
pointed agent for repair.
FAQ
Q: Can it be turned off when connect to PC?
A: No, it can’t.
33
www.danedigital.com
Page 34

6. OTHERS:
The accessories of products may be different for this series products are various according different series
and models. Please refer to packing list or contact your agent for information. Pleas understand no
advance notice for further product improvement, outlook design and specification update. The illustration
may be a little different from the real product.
How to know the firmware’s version of the So Speaky PVR?•
On the menu select "Video in" in press ENTER, press "Stop" and the "Pause".
34
www.danedigital.com
 Loading...