

Page 1
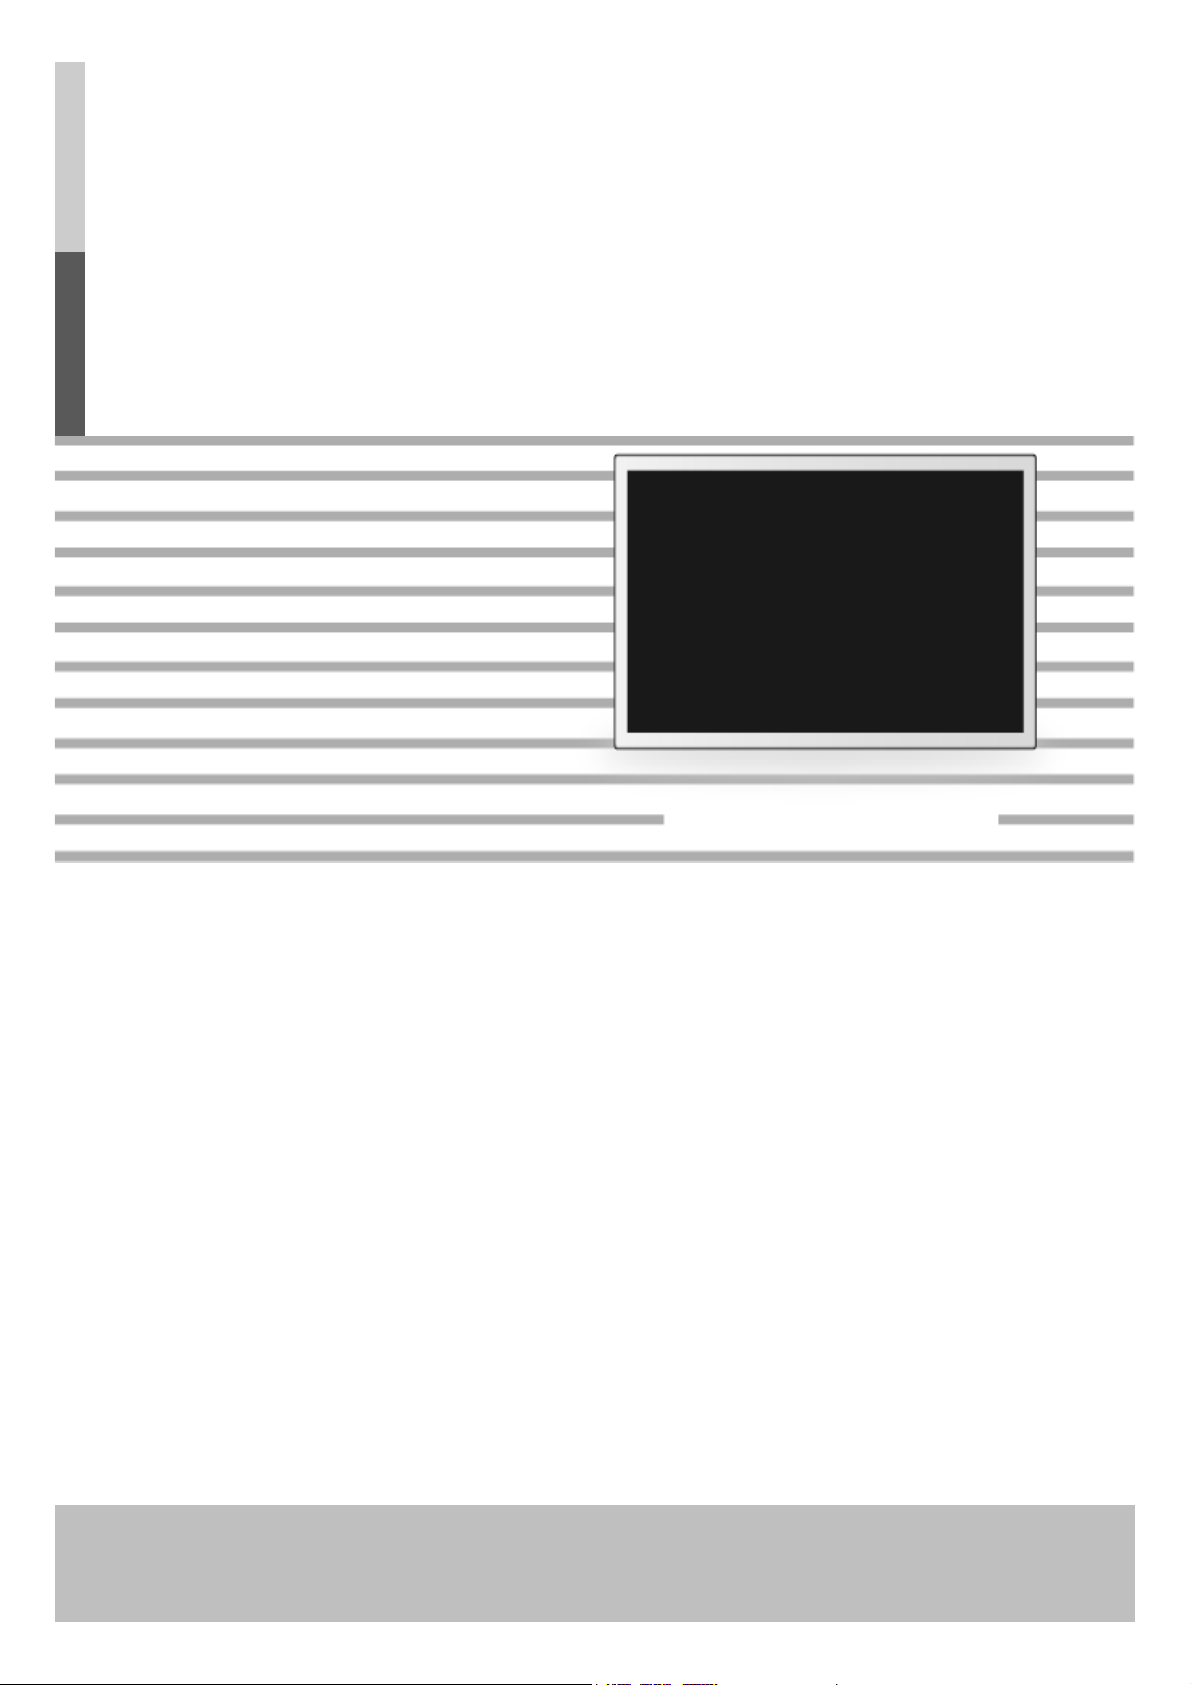
LCD MONITOR
User’s Guide
FS-A4206F/FS-A4206C
Page 2

INFORMATION TO USE :
gp
This equipment has been tested and found to comply with the limits of a Class B digital
device, pursuant to Part 15 of the FCC rules.
These limits are designed to provide reasonable protection against interference. This
monitor can radiate radio frequency energy and, if not installed and used in accordance
with the instructions, it may interfere with other radio communications equipment.
There is no guarantee that interference will not occur in a particular installation. If this
equipment is found to cause harmful interference to radio or television reception, the
user is encouraged to try to correct the interference by carrying out one or more of
the following measures:
1. Reorient or relocate the receiving antenna.
2. Increase the distance between the color monitor and the subject of
interference.
3. Plug the monitor into a outlet on a different electrical circuit than that to which
the subject of interference is connected.
4. Consult the dealer or an experienced radio/TV technician for help.
CAUTION
Modifications not expressly approved by the manufacturer responsible for compliance
could void the warranty of the product. Attempts by the user to disassemble or modify
the monitor will void the warranty.
General Specification
Page 3

Table of contents
1. Part--------------------------------------------------------------------------------------------------- 1
2. Product drawing----------------------------------------------------------------------------------- 2
3. Monitor Connection----------------------------------------------------------------------------- 3
4. Function key--------------------------------------------------------------------------------------- 5
5. OSD adjust --------------------------------------------------------------------------------------- 7
6. Standard signal table ---------------------------------------------------------------------------- 9
7. Signal Connector pin assignments ----------------------------------------------------------- 10
8. Specification ------------------------------------------------------------------------------------- 12
9. Safety instructions ----------------------------------------------------------------------------- 14
General Specification
Page 4

LCD MONITOR
r
Parts
42” LCD Monito
USER MANUAL AC power extension
Cable(Option)
DVI-HDMI Cable
(Option)
Serial Cable
(Option)
1
General Specification
Page 5
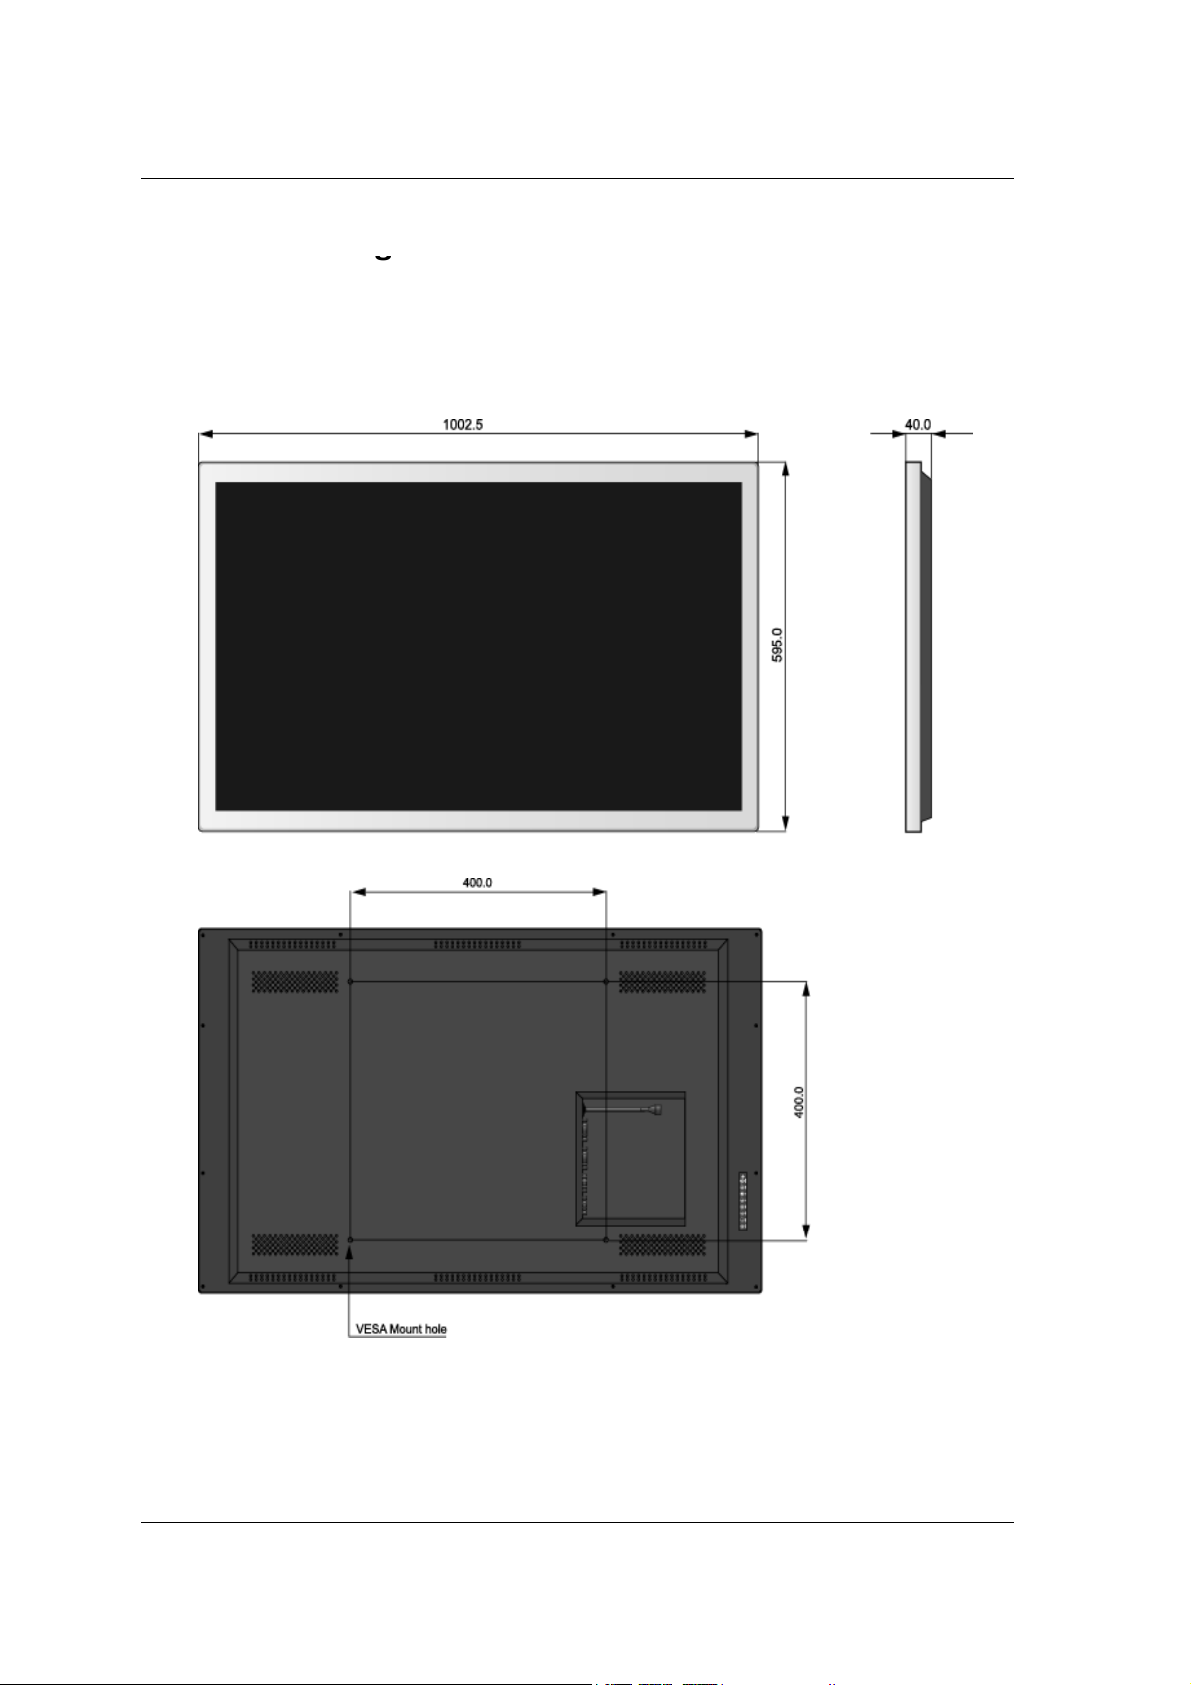
Product drawin
g
g
LCD MONITOR
Unit : mm
2
Page 6

LCD MONITOR
1.AC on/off S
h
Monitor Connection
● FS-A4206C
witc
2. AC Inlet.
3. 29 Pin DVI in connector
4. 29 Pin DVI Out connector
5. 15 Pin VGA connector
6. 9 Pin RS-232 connector
● FS-A4206F
1. AC on/off Switch
2. AC Inlet.
3. 29 Pin DVI in connector
4. 9 Pin RS-232 connector
3
Page 7

LCD MONITOR
g
g
To the AC inlet connector
Power source connection Si
● DVI In,Out put
●VGA Analog
● AC Input
● AC on/off switch
● RS-232
nal cable connection
1. Use 220V or 110V.
2. Connect the DVI Cable to the monitor.
3. Power on the monitor.
4. Done.
General Specification
4
Page 8

LCD MONITOR
y
y
p
ppg
The DC
r
With OSD activated, Exit from main menu or sub menu.
Function ke
An 8 button keypad, located in rear side of the display, allows the user to
make adjustments to various display parameters using the On Screen Display(OSD) system.
● Indicate the
Normal mode : Always green
Standby mode : Blinking green(ex, No signal)
Sleep mode : Always red
Note 1 : LED normal and off mode sign can be changed according to the requirement of the customer
whether normal mode green is on or off
Note 2 : The main AC power switch, on the back panel, should be in the ON position.
● On-Screen Display (OSD) Function Button
1. POWER : Monitor power on and off
2. MENU : With OSD deactivated, Activated OSD menu.
3. UP (▲) : With OSD deactivated, Hot key of the brightness control and increases the brightness.
ower status and input signal status
power button is used to turn on the monito
With OSD activated, move the cursor upward.
4. DOWN (▼) : With OSD deactivated, Hot key of the brightness control and decreases the
brightness.
With OSD activated, move the cursor downward.
5
General Specification
Page 9

LCD MONITOR
With OSD activated, enter sub menu and increases the adjustment of the selected.
5. PLUS(+) : With OSD deactivated, Hot key of the contrast control and increases the contrast.
6. MINUS(-) : With OSD deactivated, Hot key of the contrast control and decreases the contrast.
With OSD activated, decreases the adjustment of the selected function.
7.INPUT : With OSD deactivated, you can see the kind of displayed source on lower right of the
screen.
8. PIP : Picture in picture function will be activated and change the picture layout.
(This function is provided for FS-A4206C Model only)
6
Page 10

LCD MONITOR
j
user to adjust the RED, GREEN or BLUE balance
.
BLUE
OSD adjust
PICTURE
COLOR TEMP
BRIGHTNESS
Increase or decrease the brightness. (Range : 0 ~ 100)
CONTRAST
Increase or decrease the contrast. (Range : 0 ~ 100)
BACKLIGHT
Increase or decrease the backlight. (Range : 0 ~ 100)
MODE
Change the color temperature mode : 6500K, 7200K,
9300K, USER
When USER is selected, a sub-menu displays allowing the
RED
Red balance – Only works on the USER mode. (Range : 0 ~ 100)
GREEN
7
General Specification
Green balance – Only works on the USER mode. (Range : 0 ~ 100)
Blue balance – Only works on the USER mode. (Range : 0 ~ 100)
Page 11

IMAGE
OSD SETUP
LCD MONITOR
IMAGE
Change the image size : FILL ASPECT, FILL ALL, ONE TO ONE
SHARPNESS
Set the sharpness of the image.
(SOFTEST, SOFT, NORMAL, SHARP, SHARPEST)
RESET SETTINGS
Restore all the OSD values to factory out-going status.
UNIT ID
Change the unit identification. (Range : 1 ~ 9)
LANGUAGE
Change the OSD Language. (8 languages – English, German,
French, Spanish, Italian, Chinese, Japanese, Korean)
OSD COLOR
Adjust transparency of OSD background. (Range : 0 ~ 100)
OSD POSITION
Change the OSD position.
DURATION
Adjust OSD display time.(5, 10, 20, 30, 60, 90, 120, 180, 240
seconds)
General Specification
8
Page 12

LCD MONITOR
g
@
1280x720@50H
37.500
50.000
74.250
Standard signal table
PC Supported mode
Resolution Horizontal
Frequency(KHz)
640x480@60Hz 31.469 59.940 25.175
800x600@50Hz 31.500 50.000 35.4375
800x600@50Hz 37.879 60.317 40.000
800x600@75Hz 46.875 75.000 49.500
1024x768@60Hz 48.363 60.004 65.000
z
1280x720@60Hz 45.000 60.000 74.250
1280x720@100Hz 75.000 100.000 148.500
1280x720@120Hz 90.000 120.000 148.500
1280x1024@60Hz 63.981 60.020 148.500
1280x768@60Hz 47.776 59.870 79.500
1360x768@60Hz 47.712 60.015 85.500
1366x768@60Hz 48.320 59.803 87.750
Vertical
Frequency(Hz)
Clock Frequency(MHz)
1400x1050@60Hz 65.317 59.979 121.751
1680x1050@60Hz 64.674 59.883 119.000
1600x1200@60Hz 75.000 60.000 162.000
1920x1080@24Hz 27.000 24.000 74.250
1920x1080@25Hz 28.125 25.000 74.250
1920x1080@30Hz 33.750 30.000 74.250
1920x1080@50Hz 56.250 50.000 148.500
1920x1080@60Hz 67.500 60.000 148.500
1920x1200@60Hz 74.038 59.950 154.000
9
General Specification
Page 13

Signal Connector pin assignments
gpg
p
DVI In,Out (DVI-I 29Pin)
Pin No. Assignment Pin No. Assignment
1 TMDS Data2+ 13 No Connection
2 TMDS Data2+ 14 +5V Power
LCD MONITOR
3 TMDS Data2
Shield
4 No Connection 16 Hot Plug Detect
5 No Connection 17 TMDS Data0-
6 DDC Clock 18 TMDS Data0+
7 DDC Data 19 TMDS Data0 Shield
8 No Connection 20 No Connection
9 TMDS Data1- 21 No Connection
10 TMDS Data1+ 22 TMDS Clock Shield
11 TMDS Data1
Shield
12 No Connection 24 TMDS Clock-
15 Cable connection check
23 TMDS Clock+
RS-232 (D-SUB 9Pin,female)
Pin
No.
Assignment Pin
No.
Assignment
1 Test pin1(Note) 6 No Connection
2 RS-232 RXD
Input
3 RS-232 TXD
Input
4 No Connection 9 No Connection
5 Ground
Note : Please keep these pins to no connection.
General Specification
7 Test pin2(Note)
8 Test pin3(Note)
10
Page 14

LCD MONITOR
VGA (D
SUB 15Pin)
3
Blue11
G
d
6
G
d14V.S
-
Pin No. Assignment Pin No. Assignment
1 Red 9 No Connection
2 Green 10 Ground-Sync
roun
4 Ground 12 DDC Data
5 DDC 5V Standby
Cable Connection
check
round-Re
7 Ground-Green 15 DDC Clock
8 Ground-Blur
13 H.Sync
ync
11
General Specification
Page 15

Specification
p
Horizontal Frequency
135.6 KHz
Power
AC 100
240V~50
60Hz 1.2A Max
Model FS-A4206F
Type A-si TFT Active matrix
Display area 930.4(H) mm X 523.26(V) mm
Maximum Resolution 1920X1080@120Hz
LCD MONITOR
LCD PANEL
Synchronization
Power
Consumption
Approval Marks Approval Mark UL, FCC, Mx CoC, AR-S, CE, Gost-R, SASO,
Pixel pitch 0.4845(H)mm X 0.4845(V)mm
Display colors 1073.7M (RGB 10-bit data)
Contrast Ratio(Typ.) 4000:1
Viewing Angle(Typ.) 89/89/89/89
Response Time(Typ.) 5ms
Luminance(Typ.) 500cd/m2
Vertical Frequency 120 Hz
Maximum 120W
Standby Mode Under 0.5W
-
-
CCC,
South Africa, KC BSMI, Singapore safety, C-Tick,
CB
Energy Efficiency China energy label, E-Standby
Dimension Size and weight 1002.5X40X595 /17Kg(21Kg)
12
General Specification
Page 16

LCD MONITOR
Horizontal Frequency
135.6 KHz
Power
AC 100
240V~50
60Hz 1.2A Max
Model FS-A4206C
Type A-si TFT Active matrix
Display area 930.4(H) mm X 523.26(V) mm
Maximum Resolution 1920X1080@120Hz
LCD PANEL
Synchronization
Power
Consumption
Approval Marks Approval Mark UL, FCC, CB
Pixel pitch 0.4845(H)mm X 0.4845(V)mm
Display colors 1073.7M (RGB 10-bit data)
Contrast Ratio(Typ.) 4000:1
Viewing Angle(Typ.) 89/89/89/89
Response Time(Typ.) 5ms
Luminance(Typ.) 500cd/m2
Vertical Frequency 120 Hz
Maximum 120W
Standby Mode Under 0.5W
-
-
13
Dimension Size and weight 1002.5X40X595 /17Kg(21Kg)
General Specification
Page 17

LCD MONITOR
y
operating instructions
g
g
Safety instructions
Operator Safety Instructions
For your safety, please read these safety instructions completely before you connect the
equipment to the power source.
The information in this summary is intended for operators.
Carefully observe all warnings, precautions and instructions both on the apparatus and in these
.
Retain this manual for future reference.
Water and Moisture
Do not operate the apparatus under or near water - for example near a bathtub, kitchen sink, or
laundry tub, in a wet basement, near a swimming pool or in other areas with high humidity.
Never install jacks for communication cables in wet locations unless the jack is specifically
ned for wet locations.
desi
Do not touch the product with wet hands.
Cleaning
Unplug the apparatus from communication lines, mains power-outlet or any power source
before cleaning or polishing.
Do not use liquid cleaners or aerosol cleaners.
Use a lint-free cloth lightly moistened with water for cleaning the exterior of the apparatus.
Ventilation
Do not block any of the ventilation openings of the apparatus. Never cover the slots and
openings with a cloth or other material. Never install the apparatus near heat sources such as
radiators, heat registers, stoves, or other apparatus
(including amplifiers) that produce heat.
Do not place the product in direct sunlight or close to a surface directly heated by the sun.
Lightning
Never use this apparatus, or connect/disconnect communication cables or power cables during
lightning storms.
Dust
Do not operate the apparatus in areas with high concentration of dust
Vibration
Do not operate the apparatus in areas with vibration or place it on an
unstable surface.
14
General Specification
Page 18

LCD MONITOR
P
d H
The plug connecting the power cord to the product serves as the main disconnect device for
following conditions:
pp
pp
ower Connection an
The product may have hazardous voltage inside. Never attempt to open this product, or any
peripherals connected to the product, where this action requires a tool.
This product should always be powered from an earthed power outlet.
Never connect attached power supply cord to other products.
In case any parts of the product has visual damage never attempt to connect mains power, or
any other power source, before consulting service personnel
this equipment. The power cord must always be easily accessible.
Route the power cord so as to avoid it being walked on or pinched by items placed upon or
against it. Pay particular attention to the plugs, receptacles and the point where the cord exits
from the apparatus.
Do not tug the power cord.
If the provided plug does not fit into your outlet, consult an electrician.
Never install cables, or any peripherals, without first unplugging the device from it's power
source.
Servicing
Do not attempt to service the apparatus yourself as opening or removing covers may expose
you to dangerous voltages or other hazards, and will void the warranty. Refer all servicing to
qualified service personnel.
Unplug the apparatus from its power source and refer servicing to qualified personnel under the
azardous Voltage
If the power cord or plug is damaged or frayed.
If liquid has been spilled into the apparatus.
If objects have fallen into the apparatus.
If the apparatus has been exposed to rain or moisture
If the apparatus has been subjected to excessive shock by being dropped.
If the cabinet has been damaged.
If the a
If the apparatus emits smoke or abnormal odor.
If the apparatus fails to operate in accordance with the operating instructions
Accessories
Use only accessories specified by the manufacturer, or sold with the apparatus.
aratus seems to be overheated.
15
General Specification
Page 19

W
arnin
g
g
LCD MONITOR
When connecting to/disconnecting from a power outlet, push/pull
on the plug itself.
Never pull the cord, in order to prevent fire caused by a short.
In order to prevent electric shock, do not connect/disconnect the
plug with wet or moist hands.
If you see smoke or smell something burning, stop using the unit,
switch off the power, pull out the plug, and then contact your local
service station.
To prevent fire, do not connect a large number of equipments
in a single line.
To prevent fire and electric shock, pull out the plug in case of thunder
and lightning.
To prevent fire and electric shock, do not try to take the monitor
apart or repair it yourself. Contact your local service station or customer
service center for inspection, modification or repair.
16
General Specification
Page 20

General Specification
 Loading...