

DANA Diabecare II SR User Manual

DANA DiabecareⓇIISR User Manual
#다나2SR영문메뉴얼 rev.0 2007.7.3 5:43 PM 페이지1 001 Acrobat™ PDFWriter 300DPI 60LPI
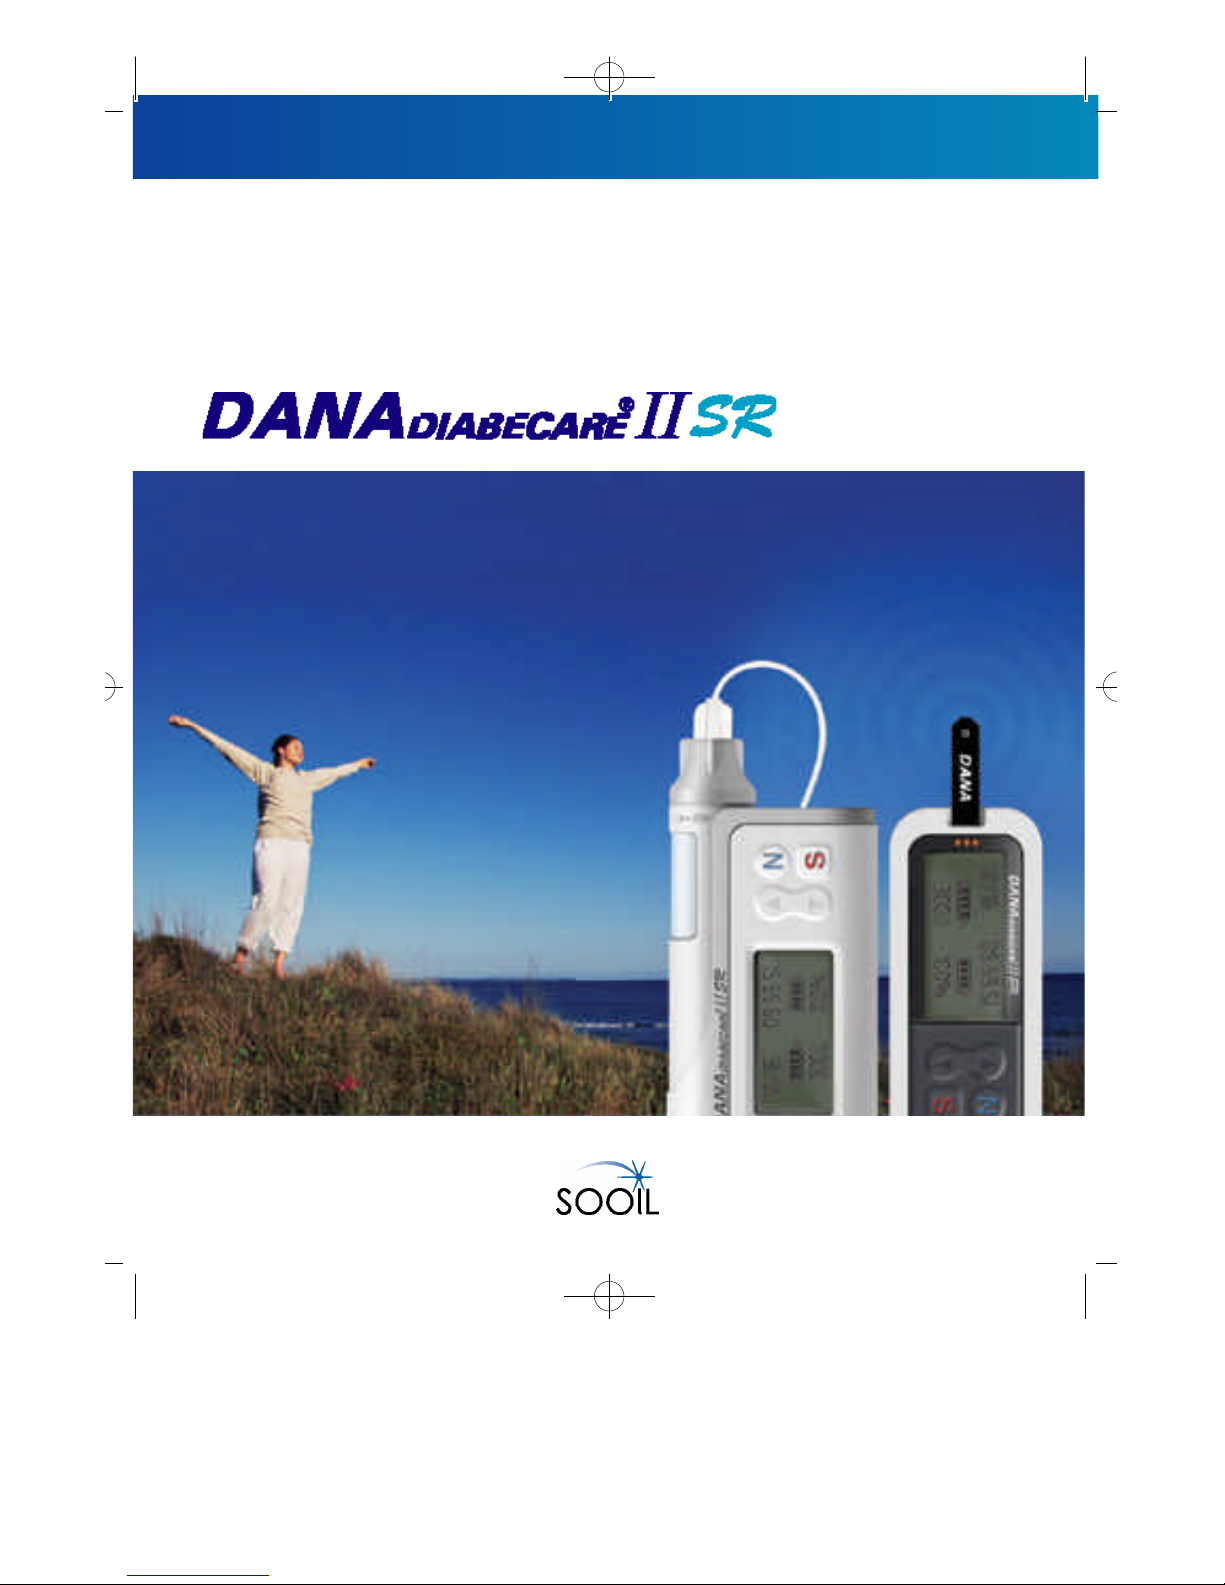
Thank you for choosing the DANA DiabecareⓇIISR Insilin Pump.
SOOIL Development Co., Ltd. has been committed to making scientific advancements in the development
and production of innovative medical solutions for the management, treatment and cure of diabetes
throughout the world since 1979. Your DANA DiabecareⓇIISR has been designed and built with the most
advanced technology available to create a high quality and very reliable device for the subcutaneous delivery
of insulin. When used properly, your DANA DiabecareⓇIISR will give you years of improved blood glucose
control while enhancing your quality of life.
The welfare of the patient has been the cornerstone of our company’s philosophy since 1979 when Dr.
Soo-Bong Choi and his father, Dr. Hyun Choi, designed their first insulin pump for patients in their diabetes
center. There are now more than 50,000 people throughout the world managing their diabetes with the
DANA Diabecare line of insulin infusion pumps.
The DANA DiabecareⓇIISR Insulin Pump is the only pump that adds simplicity to the complex technology of
the device.
We welcome your comments and look forward to being key members of your diabetes team.
SOOIL Development Co., Ltd.
Soo-Bong Choi, M.D., Ph.D.
CEO
SOOIL Development Co., Ltd.
W a r n i n g
Please note, US law restricts this device to use by or on order of a physician.
#다나2SR영문메뉴얼 rev.0 2007.7.3 5:43 PM 페이지2 001 Acrobat™ PDFWriter 300DPI 60LPI
DANA DiabecareⓇIISR User Manual
#다나2SR영문메뉴얼 rev.0 2007.7.3 5:43 PM 페이지3 001 Acrobat™ PDFWriter 300DPI 60LPI

Co n t e n t s
1. Before using your DANA DiabecareⓇIISR insulin pump, infusion set and reservoir
•Indications for use
•Safety precautions
•Cleaning your DANA DiabecareⓇIISR insulin pump
•Explanation of “W a r n i n g”, “C a u t i o n”, and “N o t e ”s y m b o l s
•Contents of DANA DiabecareⓇIISR insulin pump kit
•Identification and description of your pump features
•Infusion Sets
2. Set-up and basic functions
•Explanation of display screens
- Initial display
- Basic display
•Inserting the battery
•Setting bolus doses, basal rates and the clock
- Setting a bolus
- Setting the basal rate
- Setting the clock
•Checking bolus doses, basal rates and reviewing memory data
•Suspending the pump
•User Setting
3. Filling and inserting a new reservoir
•Changing the reservoir
- Preparation
- Filling the reservoir with insulin
- Instructions for use of DANA Easy SETTER
- Inserting the reservoir into the pump
- Connecting the infusion set to your pump
- Priming the infusion set
- Inserting the infusion set
•Infusion sets
- EasyRelease
- EasyRelease II
- Soft-Release-R
4
4
5
5
5
6
7
8
8
8
9
1 0
1 1
1 3
1 4
1 5
1 7
1 8
2 1
2 1
2 2
2 3
2 3
2 4
2 4
2 6
2 7
2 7
3 0
3 3
#다나2SR영문메뉴얼 rev.0 2007.7.3 5:43 PM 페이지4 001 Acrobat™ PDFWriter 300DPI 60LPI

3 6
3 9
4 0
4 6
5 3
5 3
5 4
5 5
5 5
5 6
5 7
5 9
6 0
6 1
6 3
6 4
6 4
6 4
6 4
6 4
6 5
6 5
6 6
6 7
- Soft-Release-ST
•General Precautions for All Infusion Sets
4. Bolusing and temporary basal rates
•B o l u s
•Temporary basal
5. Remote Control
•Synchronize the Remote Control with the Pump
•B o l u s
•Lock Setting
•Setting the Clock
•Disconnect Remote Control and Insulin Pump
•Checking your blood glucose level
•Calculating your bolus dosage
•Glucose meter related error messages and troubleshooting
6. Troubleshooting
•When hypoglycemia (low blood sugar) occurs
•When hyperglycemia (high blood sugar) occurs
•Problem / Correction Action
7. List of alarms and audible signals
•Low reservoir
•ERROR screen
•Daily remainder
•Daily max
•Low battery
8. Specifications, symbols, warranty
•General specifications
•Classification and compliance with standards
•Universal symbols
•Warranty
#다나2SR영문메뉴얼 rev.0 2007.7.3 5:43 PM 페이지5 001 Acrobat™ PDFWriter 300DPI 60LPI

4
1. Before using your DANA DiabecareⓇIISR Insulin Pump,
infusion set and reservoir
Indications for Use
The DANA DiabecareⓇIISR insulin pump, infusion set and reservoir are intended for the continuous delivery of insulin for the
management of diabetes mellitus. It is not intended for the delivery of blood or blood products.
Safety Precautions
1. Patients must not open the pump housing or handle any internal components.
2. The DANA DiabecareⓇIISR insulin pump is intended for use with a proprietary infusion set, reservoir, and other accessories
specified in this booklet. Do not use the pump with any other infusion system or accessories.
3. If you experience any trouble with the pump, switch the pump off immediately and contact your healthcare provider or your
sales representative.
4. Use the pad of your finger to press the buttons. DO NOT use your fingernails or any sharp objects to press the buttons.
5. Avoid the following conditions for safe storage and transport of the DANA DiabecareⓇI I S R :
1) Temperatures below -0.5°C or above 40°C .
2) Atmospheric pressure below 500mmHg or above 1060mmHg.
3) Humidity above 95%.
4) Exposure to excessive dust or a salty environment.
5) Exposure to explosive gas.
6) Exposure to direct sunlight.
7) Environments where an electromagnetic field is generated by a medical device.
6. The pump must not be used in the presence of intense electromagnetic fields, such as those generated by certain
electrically powered medical devices. The pump should be removed prior to the user having a CT Scan, MRI or X-ray.
7. The pump comes with factory default settings for alarms, maximum daily totals, basal and bolus doses. These settings
may be modified by a healthcare professional.
8. Remove the battery for long-term storage.
9. The reservoir and infusion set are intended for single use only. Do not reuse either the reservoir or infusion set.
10. Change the reservoir and the infusion set regularly, as recommended by your healthcare professional. Do not use either
for longer than 72 hours.
11. The shelf life of the reservoir and the infusion set is 3 years. Please check the expiration dates regularly and dispose of
any expired accessories.
#다나2SR영문메뉴얼 rev.0 2007.7.3 5:43 PM 페이지4 001 Acrobat™ PDFWriter 300DPI 60LPI
1. indicates the presence of a hazard which can cause severe personal injury, death or substantial property
damage if the warning is ignored.
2. Caution indicates the presence of a hazard which will or can cause minor personal injury or property damage if
the warning is ignored.
3. Note advises the user of installation, operation or maintenance information which is important but not hazard-
r e l a t e d .
5
1. Before using your DANA DiabecareⓇIISR insulin pump, infusion set and reservoir
Cleaning your DANA DiabecareⓇIISR insulin pump
1. The outside of the pump should be cleaned monthly.
2. When cleaning the pump, use a cloth moistened with water or a neutral pH detergent and wipe it with a dry cloth.
3. Do not use thinner, alcohol, benzene or similar solvents.
Explanation of “W a r n i n g ,”“C a u t i o n ,”and “N o t e”S y m b o l s
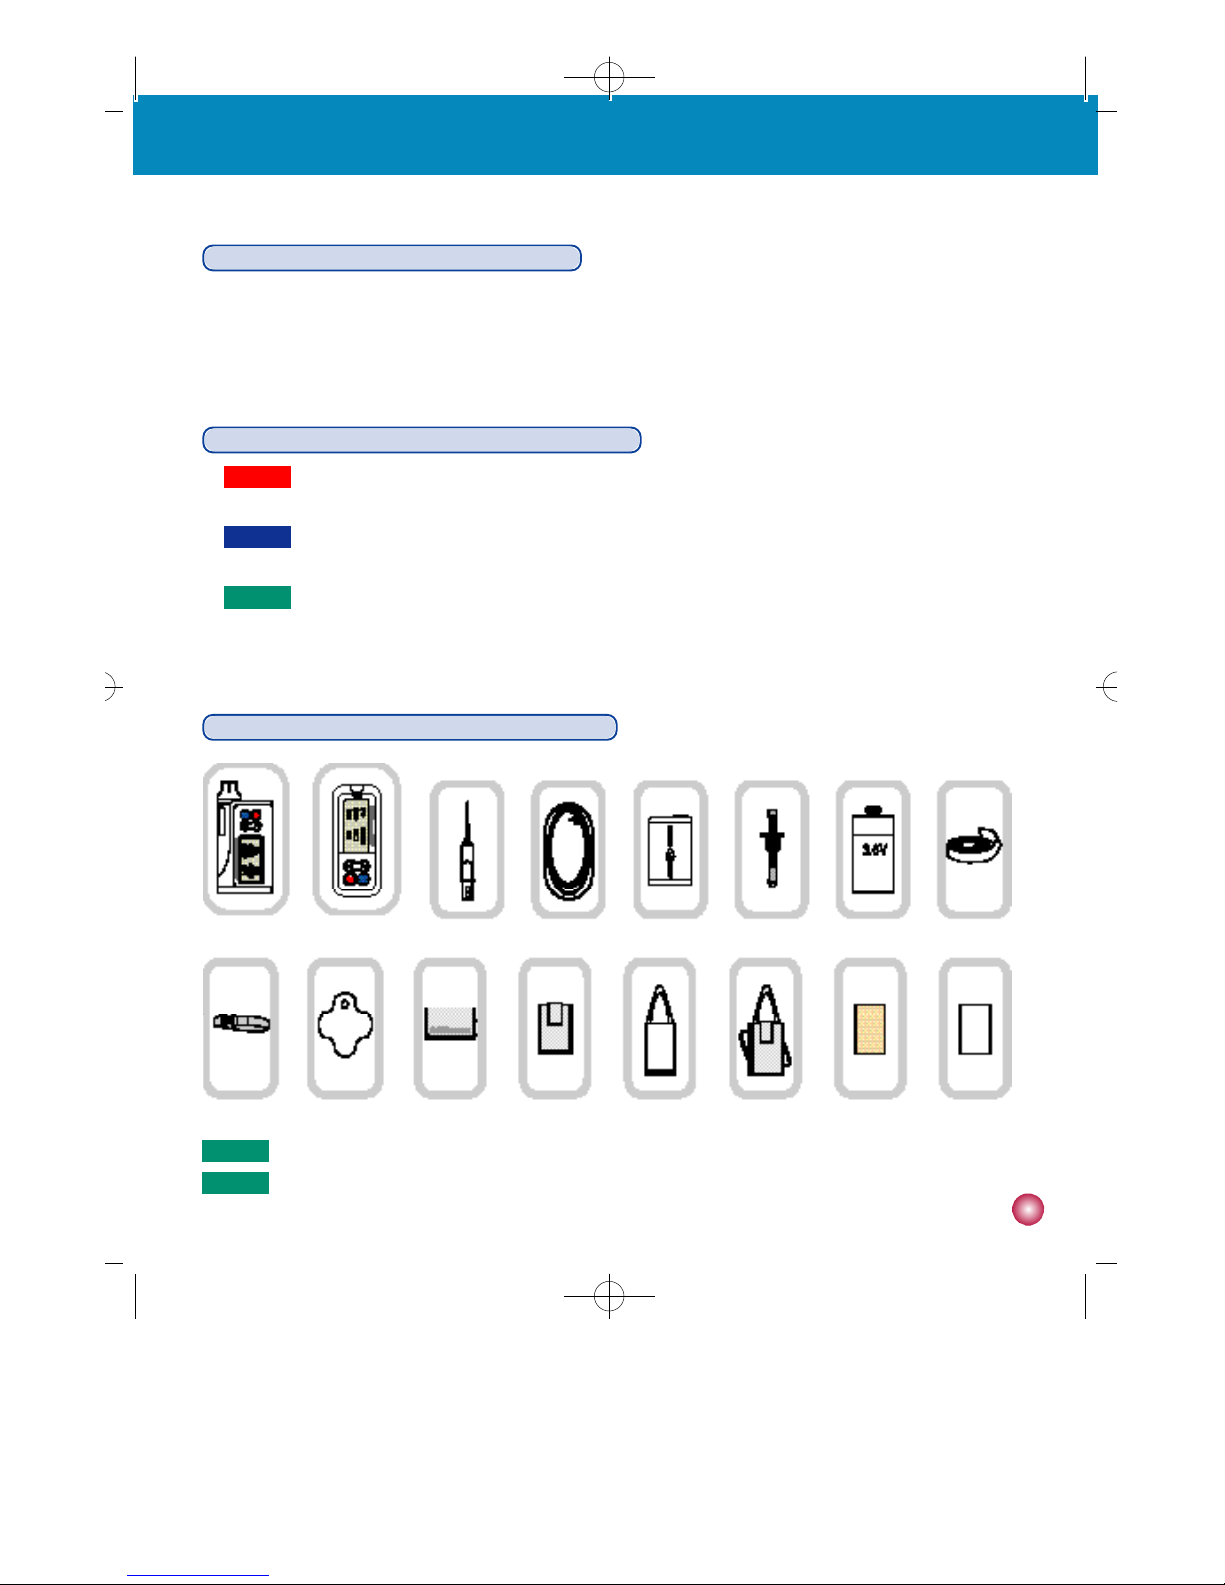
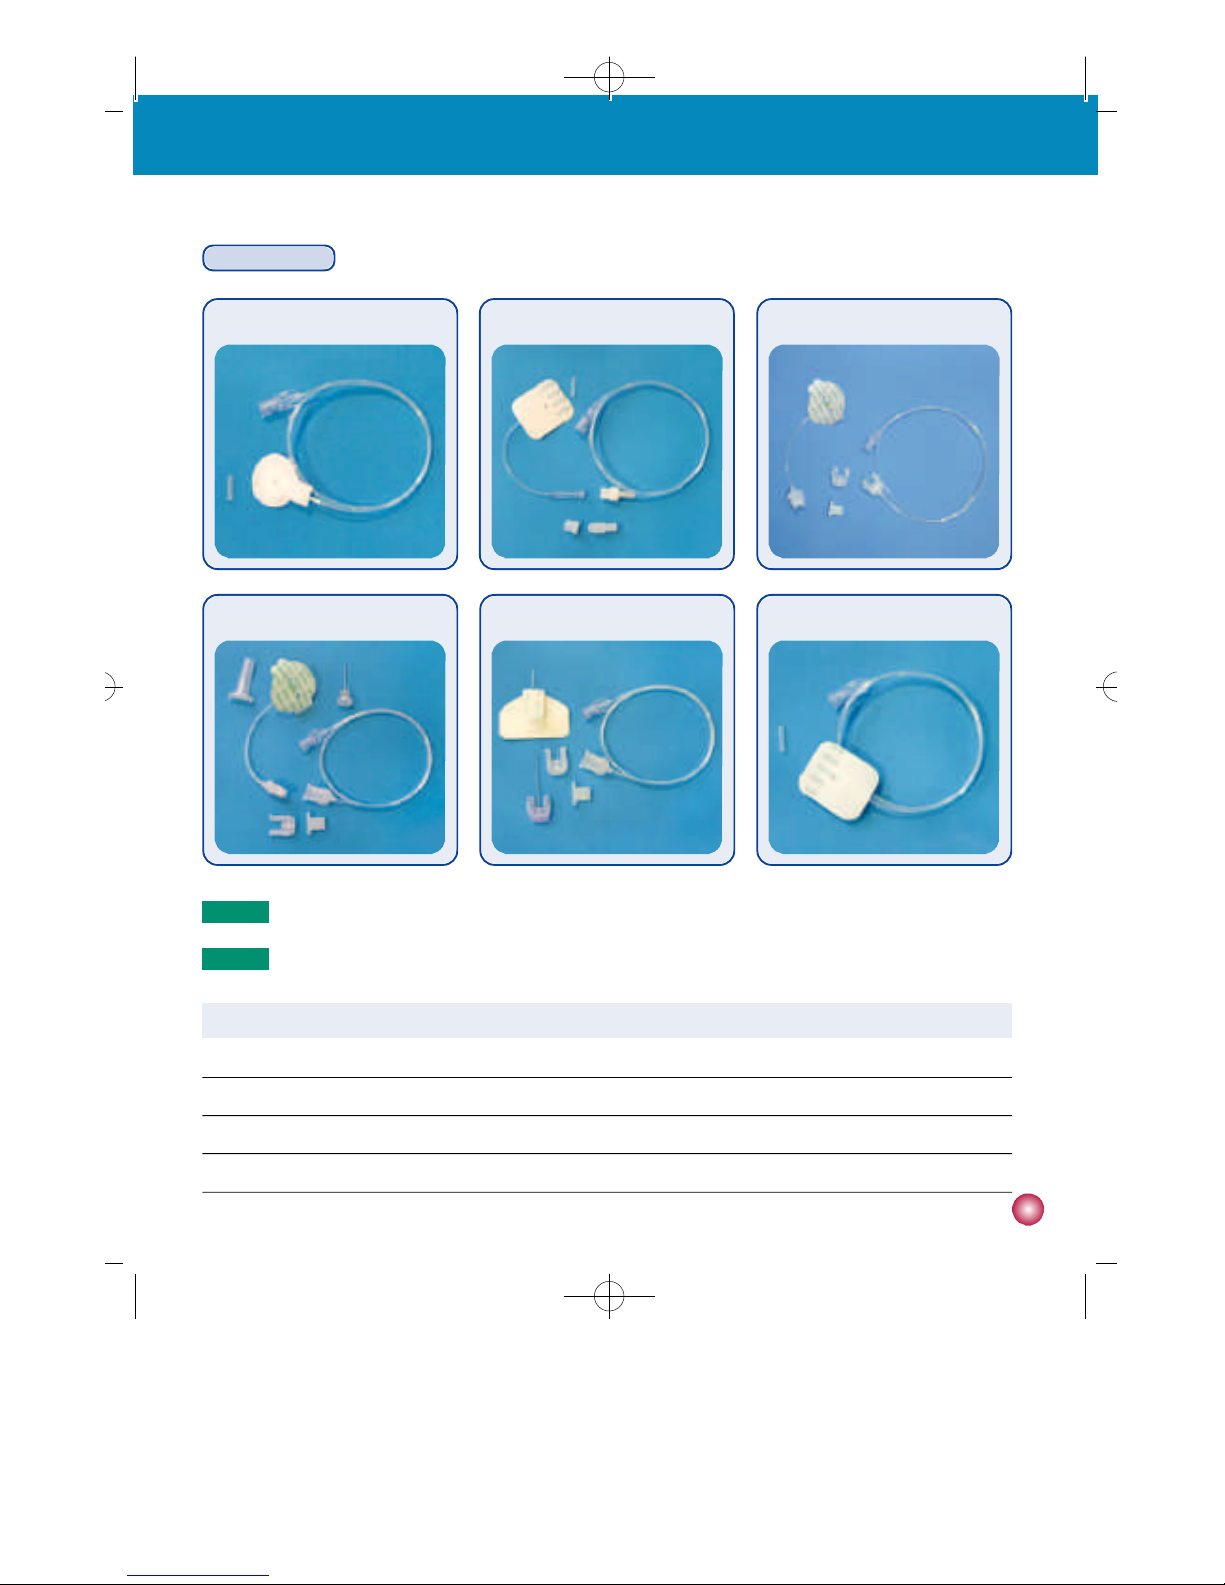
Contents of the Dana DiabecareⓇIISR Insulin Pump Kit
INSULIN PUMP REMOTE CONTROL RESERVOIR (6) INFUSION SETS (6)
DANA EASY SETTER (1)
LINKING SCREW (2) BATTERY (2) ADHESIVE TAPE
B E L T BATTERY KEY (2) LEATHER CASE (2) BRA POUCH SHOWER POUCH SHOULDER POUCH TEGADERM MEFIX
W a r n i n g
C a u t i o n
N o t e
N o t e
Additional accessories may be purchased separately
N o t e
MEFIX is not available in Canada
™
#다나2SR영문메뉴얼 rev.0 2007.7.3 5:43 PM 페이지5 001 Acrobat™ PDFWriter 300DPI 60LPI
6
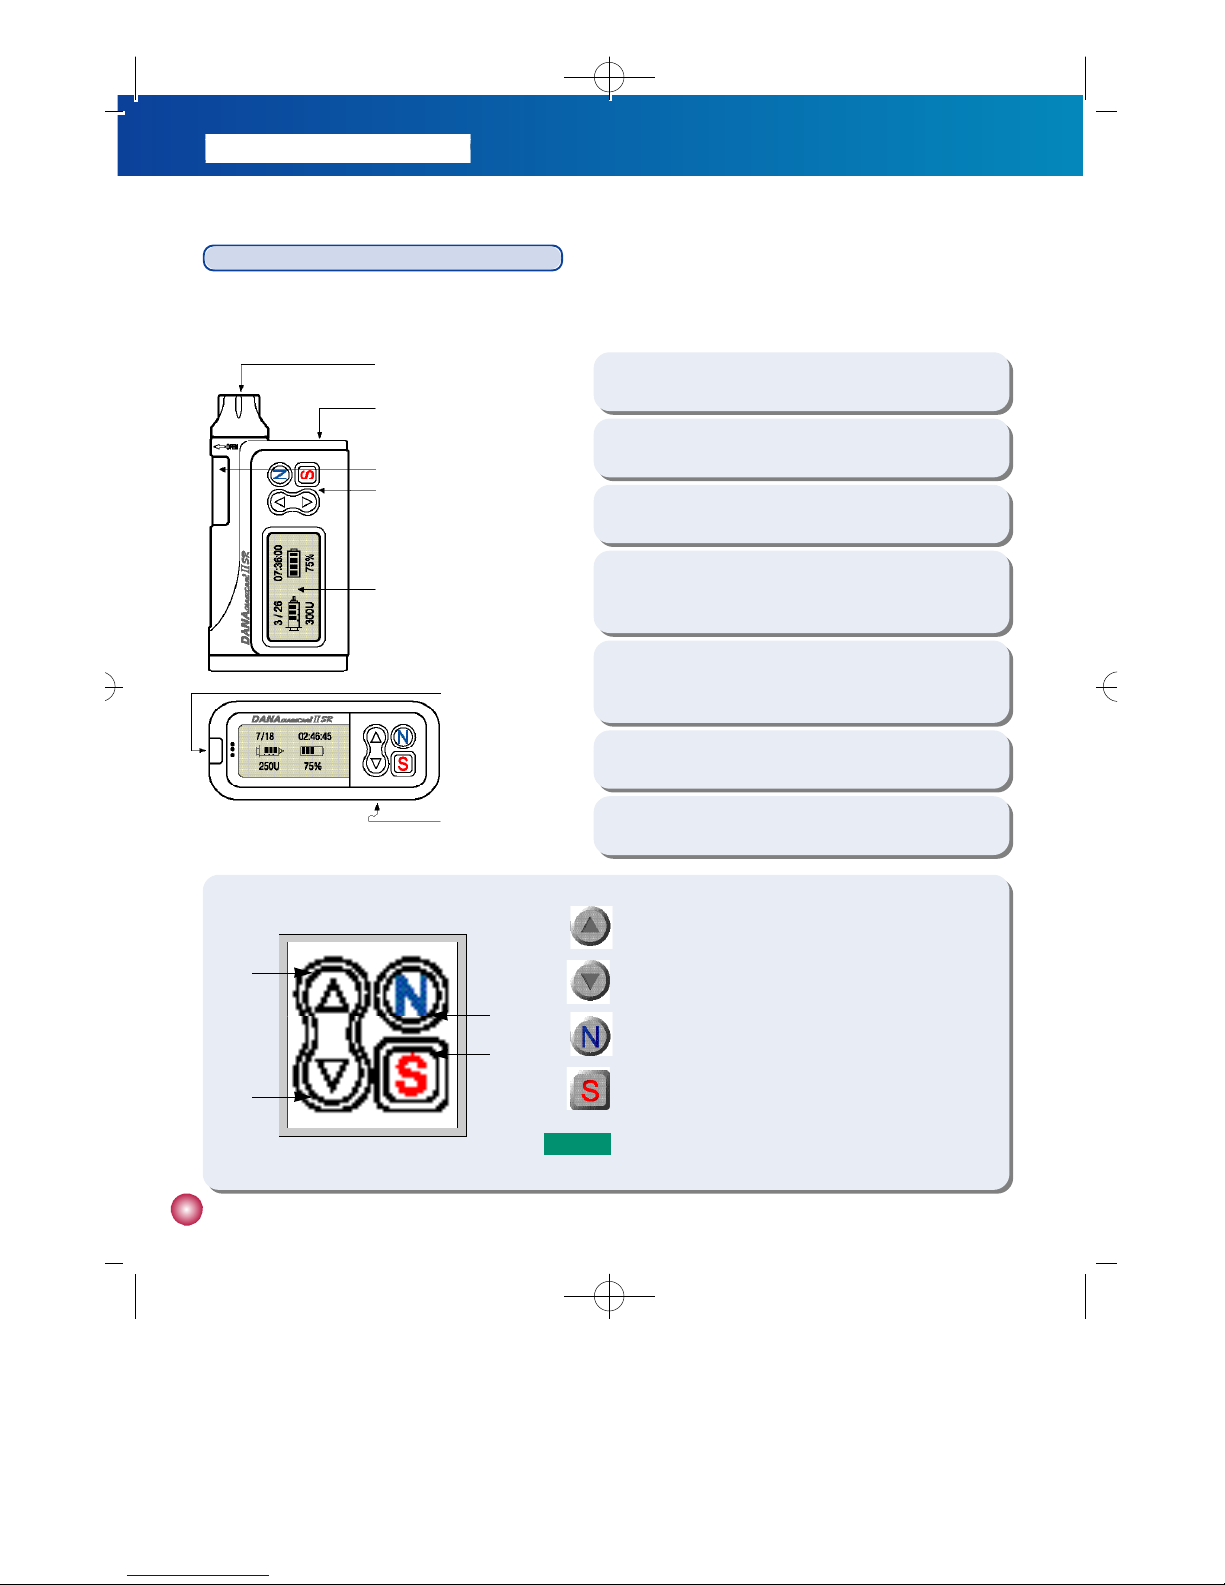
Identification and Description of the DANA IISR
The DANA DiabecareⓇIISR insulin pump, infusion set and reservoir are intended for the continuous delivery of insulin for the
management of diabetes mellitus. It is not intended for the delivery of blood or blood products.
①Reservoir
C o m p a r t m e n t
②B a t t e r y
C o m p a r t m e n t
⑦B a t t e r y
C o m p a r t m e n t
③Reservoir Window
④Control Panel
⑤L C D
⑥Blood Glucose
Meter Test Port
①
Reservoir Compartment: The reservoir and linking screw are
inserted in this compartment. Turn cap clockwise to open.
②Battery Compartment: The battery is inserted in this
compartment. Turn cap counterclockwise to open.
⑦Battery Compartment: Push the cover of the battery to
the arrow direction to open.
③Reservoir Window: Remaining insulin amount can be
visually verified here.
⑥Blood Glucose Meter Test Port: Test strips are inserted
here for glucose monitoring.
④Control Panel: Contains the four buttons which are used
to increase and decrease settings, switch screens and
select functions.
⑤LCD: Displays status of system features and system
messages and serves as the user interface with pump
software. Lights automatically when any button is pressed.
① Press to increase insulin dosages, time and date.
② Press to decrease insulin dosages, time and date.
③ Press to move to the next choice on the LCD.
④ Press to select the function highlighted on the LCD.
①
②
③
④
N o t e
Buttons will beep when pressed.
#다나2SR영문메뉴얼 rev.0 2007.7.3 5:43 PM 페이지6 001 Acrobat™ PDFWriter 300DPI 60LPI
7
1. Before using your DANA DiabecareⓇIISR insulin pump, infusion set and reservoir
Infusion Sets
Superline (90°) E a s y R e l e a s e E a s y R e l e a s e I I S o f t - R e l e a s e - R S o f t - R e l e a s e - S T S u p e r l i n e - S T
Needle gauge 2 7 G 2 7 G 2 7 G 26G 26G 2 7 G
Needle type Stainless Steel Stainless Steel Stainless Steel
Polyurethane(Soft cannula)Polyurethane(Soft cannula)
Stainless Steel
Insertion angle 9 0° 9 0° 9 0° 9 0° 0 ~ 3 0 ° 9 0°
D i s c o n n e c t N o Y e s Y e s Y e s Yes N o
Superline (90°)
S u p e r l i n e - S T
EasyRelease IIE a s y R e l e a s e
S o f t - R e l e a s e - R S o f t - R e l e a s e - S T
N o t e
Infusion set specifications are as follows
N o t e
Product availability varies by country.
#다나2SR영문메뉴얼 rev.0 2007.7.3 5:44 PM 페이지7 001 Acrobat™ PDFWriter 300DPI 60LPI
8
2. Set-up and basic functions
Explanation of the display screens
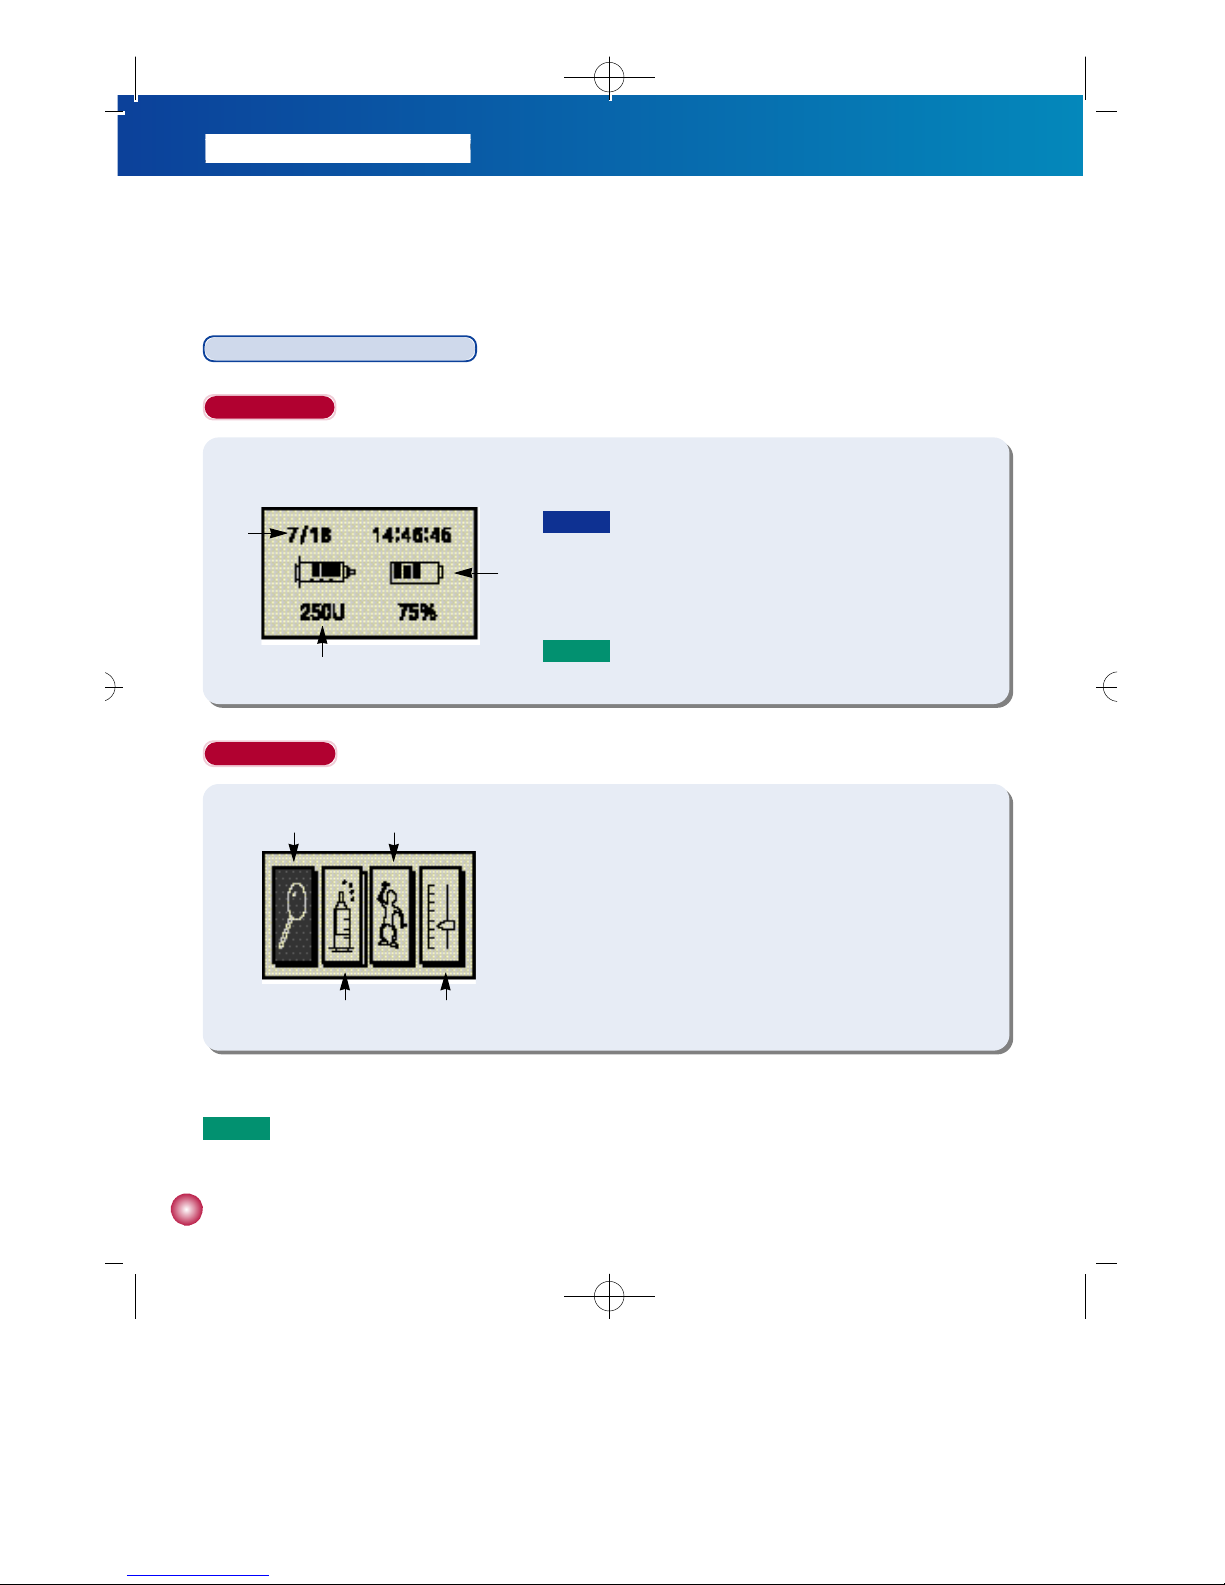
Initial Display
①Displays current time and date.
②Displays remaining battery charge as 100%, 75%, 50%, 25%.
③Displays the amount of insulin remaining in the reservoir in units.
(1ml=100 units).
①
②
③
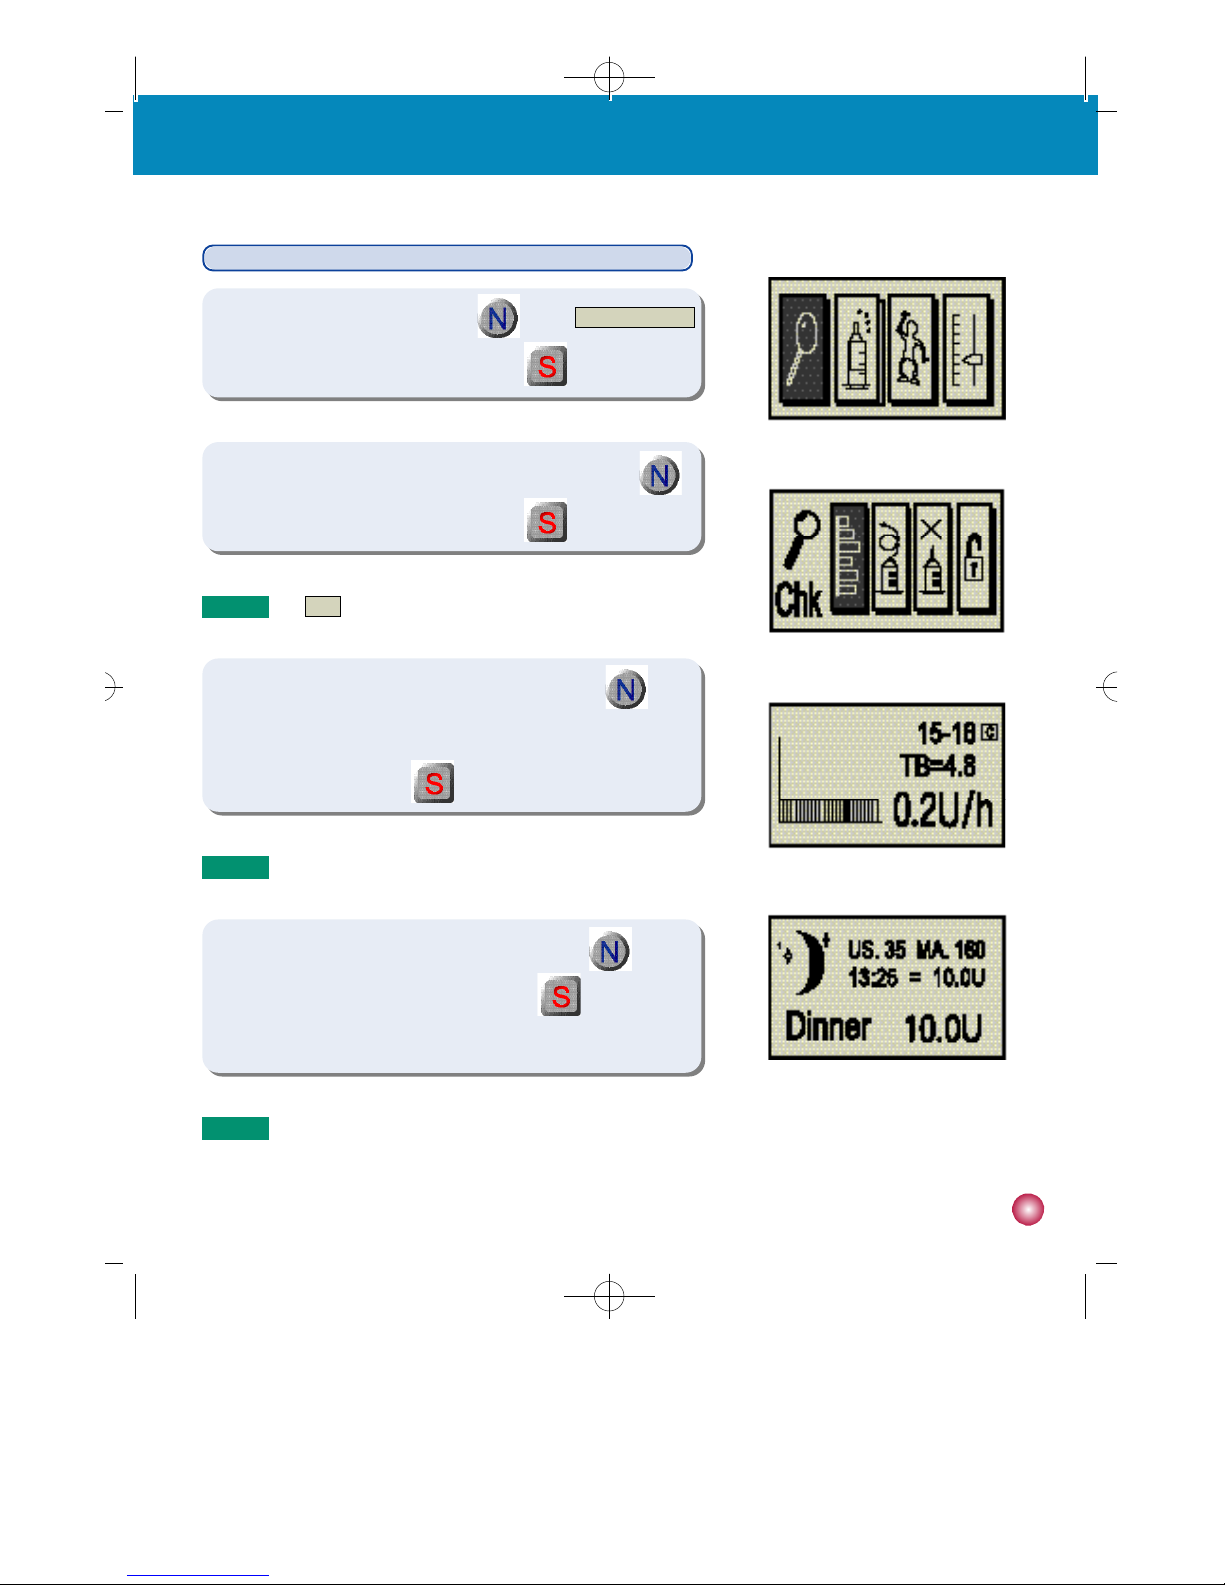
Basic Display
①CHECK/REVIEW icon - Choose the first icon (magnifying glass) to
check basal rates, previous bolus doses, last bolus, previous daily
totals and prime history (see page 15 for reviewing the history).
②
BOLUS icon - Choose the second icon (syringe) to deliver bolus doses.
③TEMPORARY BASAL icon - Choose the third icon (person) for
temporary changes in basal rates for exercising or other events.
④SET/PROGRAM icon - Choose the fourth icon (sliding scale) to
set basal rates, preset bolus doses and set clock.
① ③
② ④
C a u t i o n
For accurate reading of the remaining battery charge,
check the initial display immediately after delivering a bolus
N o t e
Push any button while viewing the initial display to bring
up the basic display screen.
N o t e
The DANA DiabecareⓇIISR LCD screen will automatically go blank after one minute to conserve battery power.
Any button press will also activate the backlight for 10 seconds.
#다나2SR영문메뉴얼 rev.0 2007.7.3 5:44 PM 페이지8 001 Acrobat™ PDFWriter 300DPI 60LPI

9
2. Set-up and basic functions
Inserting the Battery
Follow these steps
1) Open the battery compartment by inserting the battery key into the battery cap and turning counterclockwise.
2) Insert the battery with the positive end down into the pump.
3) Close the battery cap by turning the battery key clockwise until tight and flush with pump.
C a u t i o n
If the O-ring (see graphic ①) on the battery cover appears worn, frayed or torn, please contact your healthcare
provider or your sales representative.
N o t e
The battery cover is correctly inserted and tightened when the battery cover is level with the insulin pump casing.
N o t e
Do not attempt to change the battery while a bolus is in progress.
N o t e
The battery has a shelf life of 3 years. Please note “best before date (xx/xxx)”before use
W a r n i n g
Change the battery in a dry environment to prevent water from entering the casing.
W a r n i n g
Use of battery other than the 3.6V battery manufactured exclusively for SOOIL Development will result in the void
of pump warranty.
O - r i n g
graphic ①
#다나2SR영문메뉴얼 rev.0 2007.7.3 5:44 PM 페이지9 001 Acrobat™ PDFWriter 300DPI 60LPI
1 0
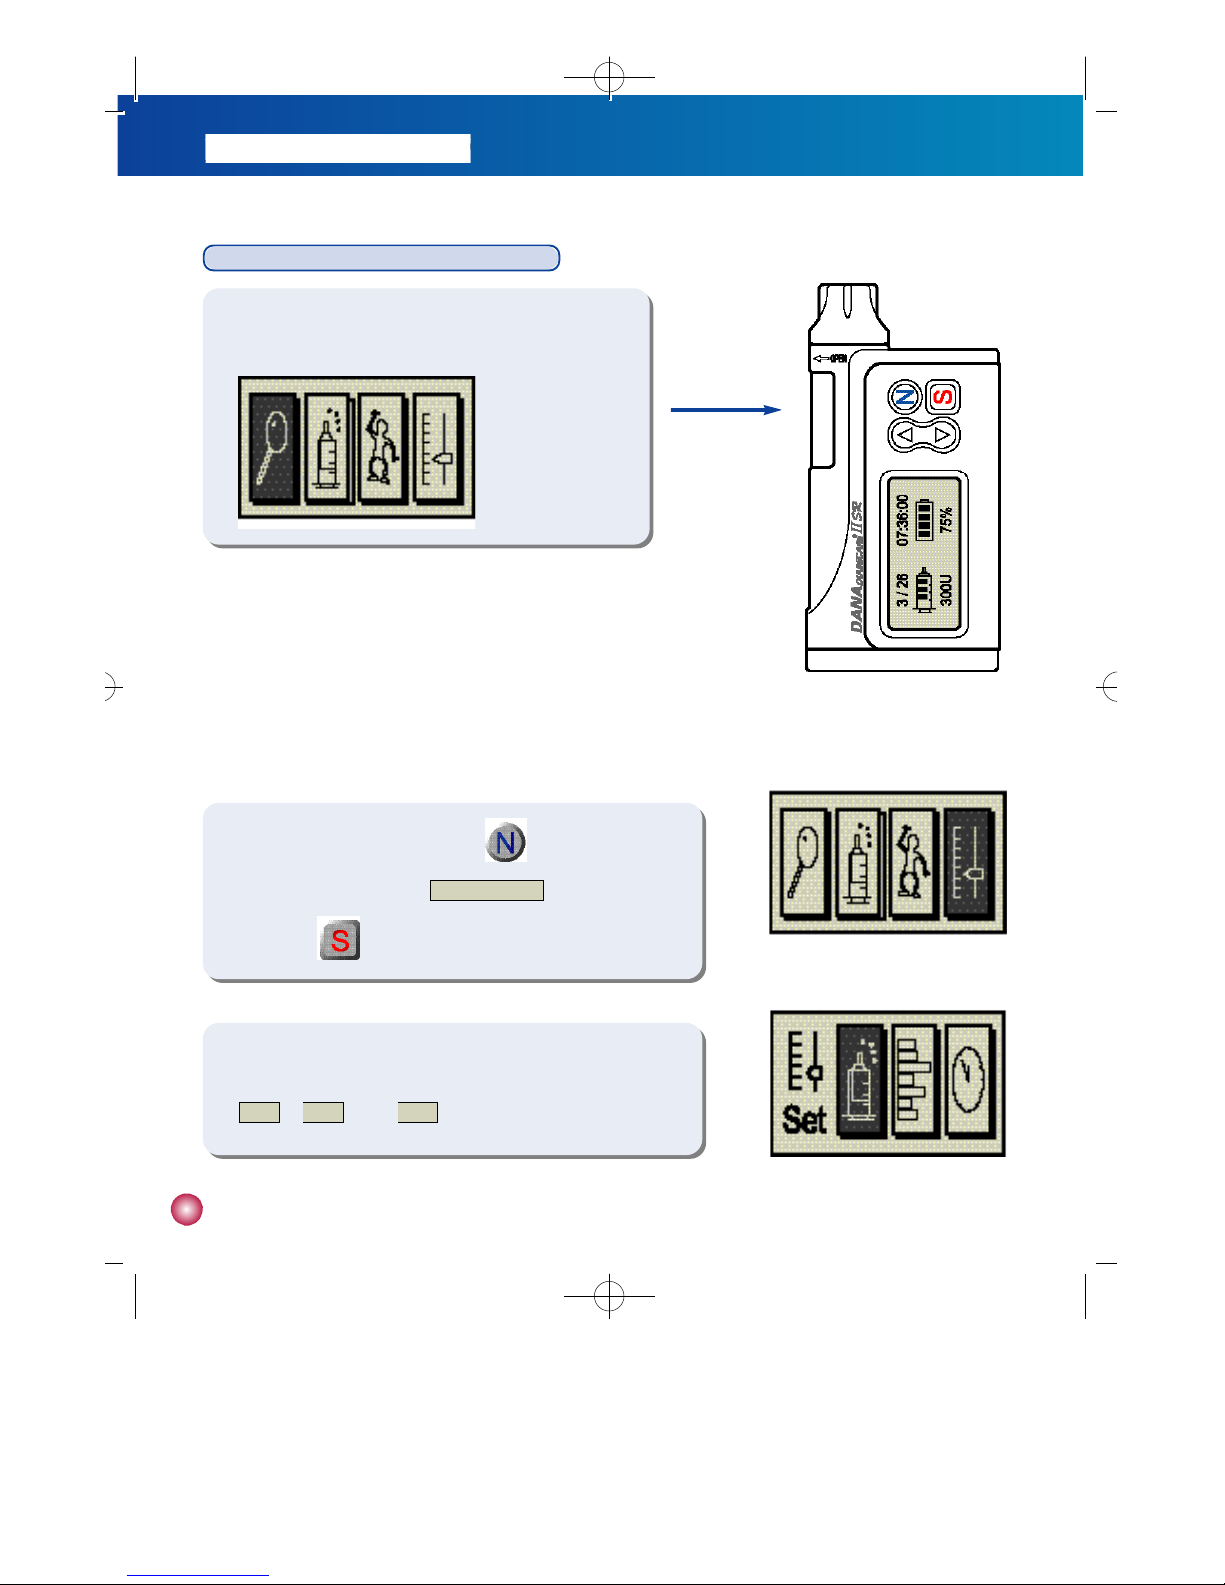
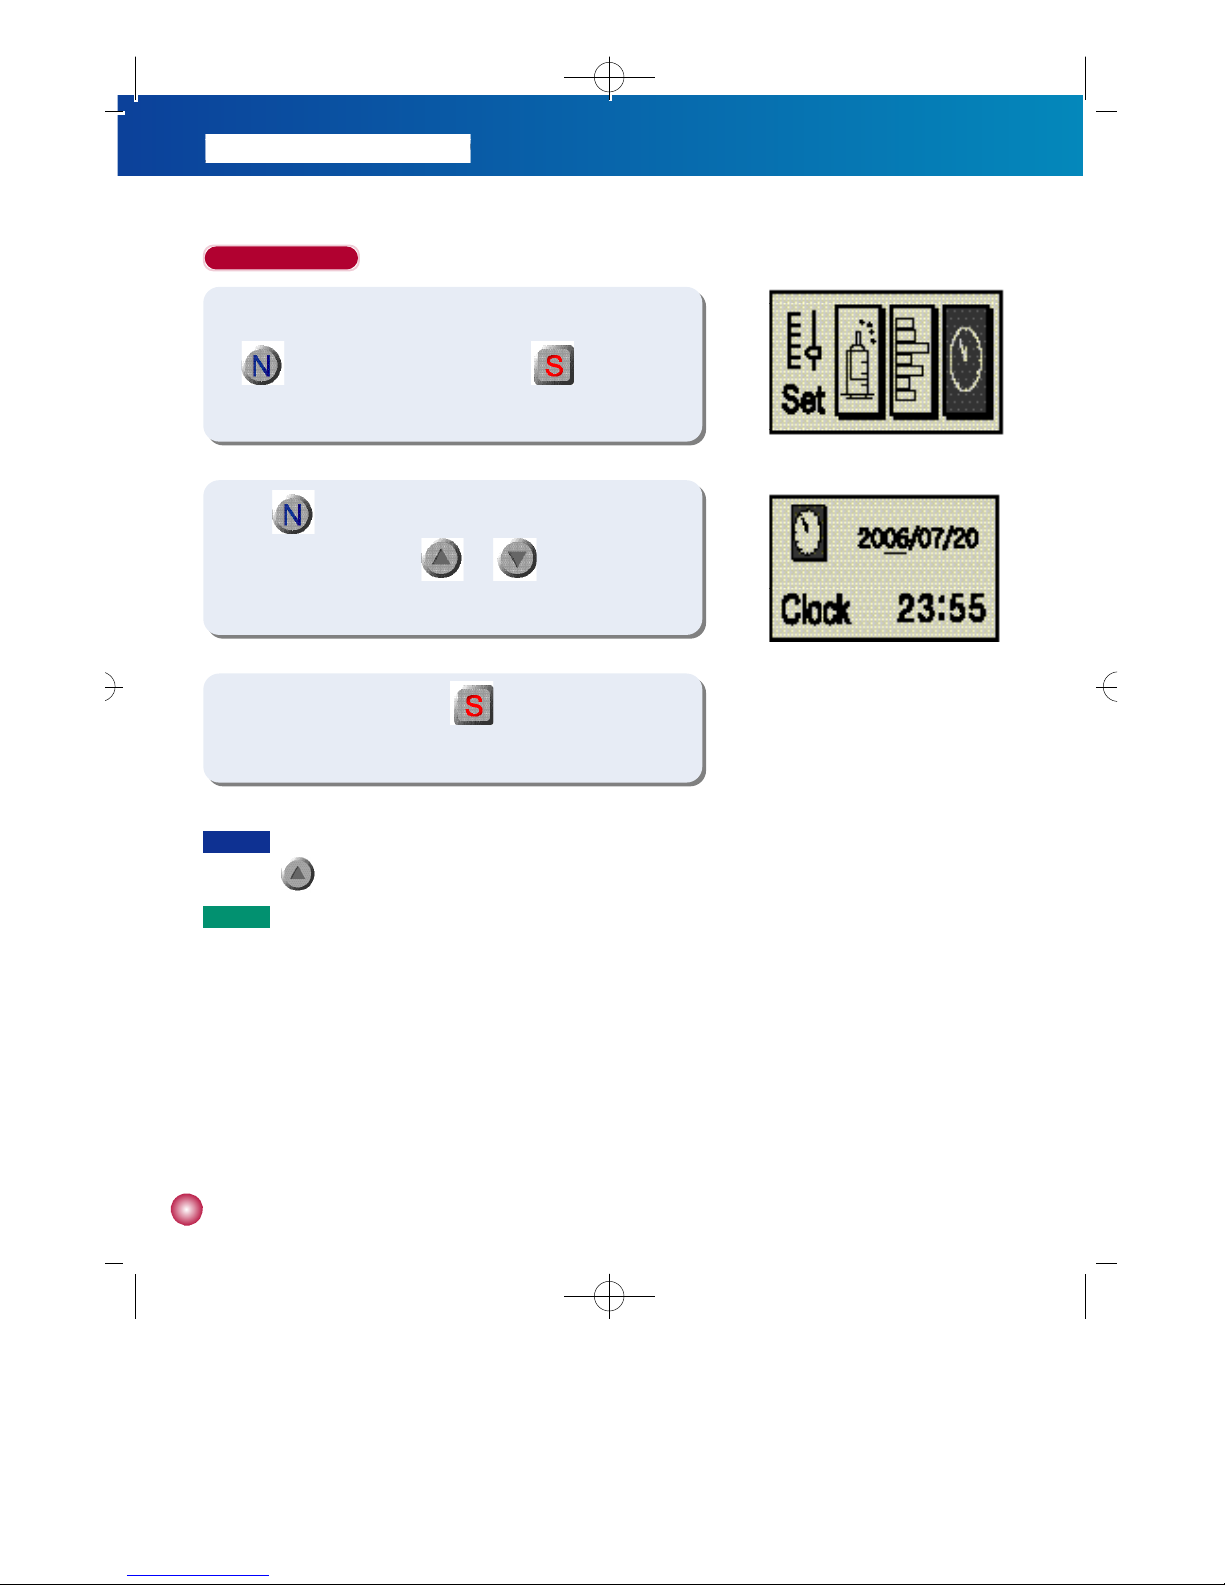
Setting bolus doses, basal rates and the clock
1) From the INITIAL DISPLAY screen, press any of the control
buttons and the BASIC DISPLAY screen will appear.
2) In the BASIC DISPLAY screen, press three times
consecutively to highlight the S E T / P R O G R A M icon in figure 1.
Then press .
(figure 1)
(figure 2)
3) The SET/PROGRAM screen in figure 2 will appear. You can select
b o l u sor b a s a lrate or c l o c k.
#다나2SR영문메뉴얼 rev.0 2007.7.3 5:44 PM 페이지10 001 Acrobat™ PDFWriter 300DPI 60LPI
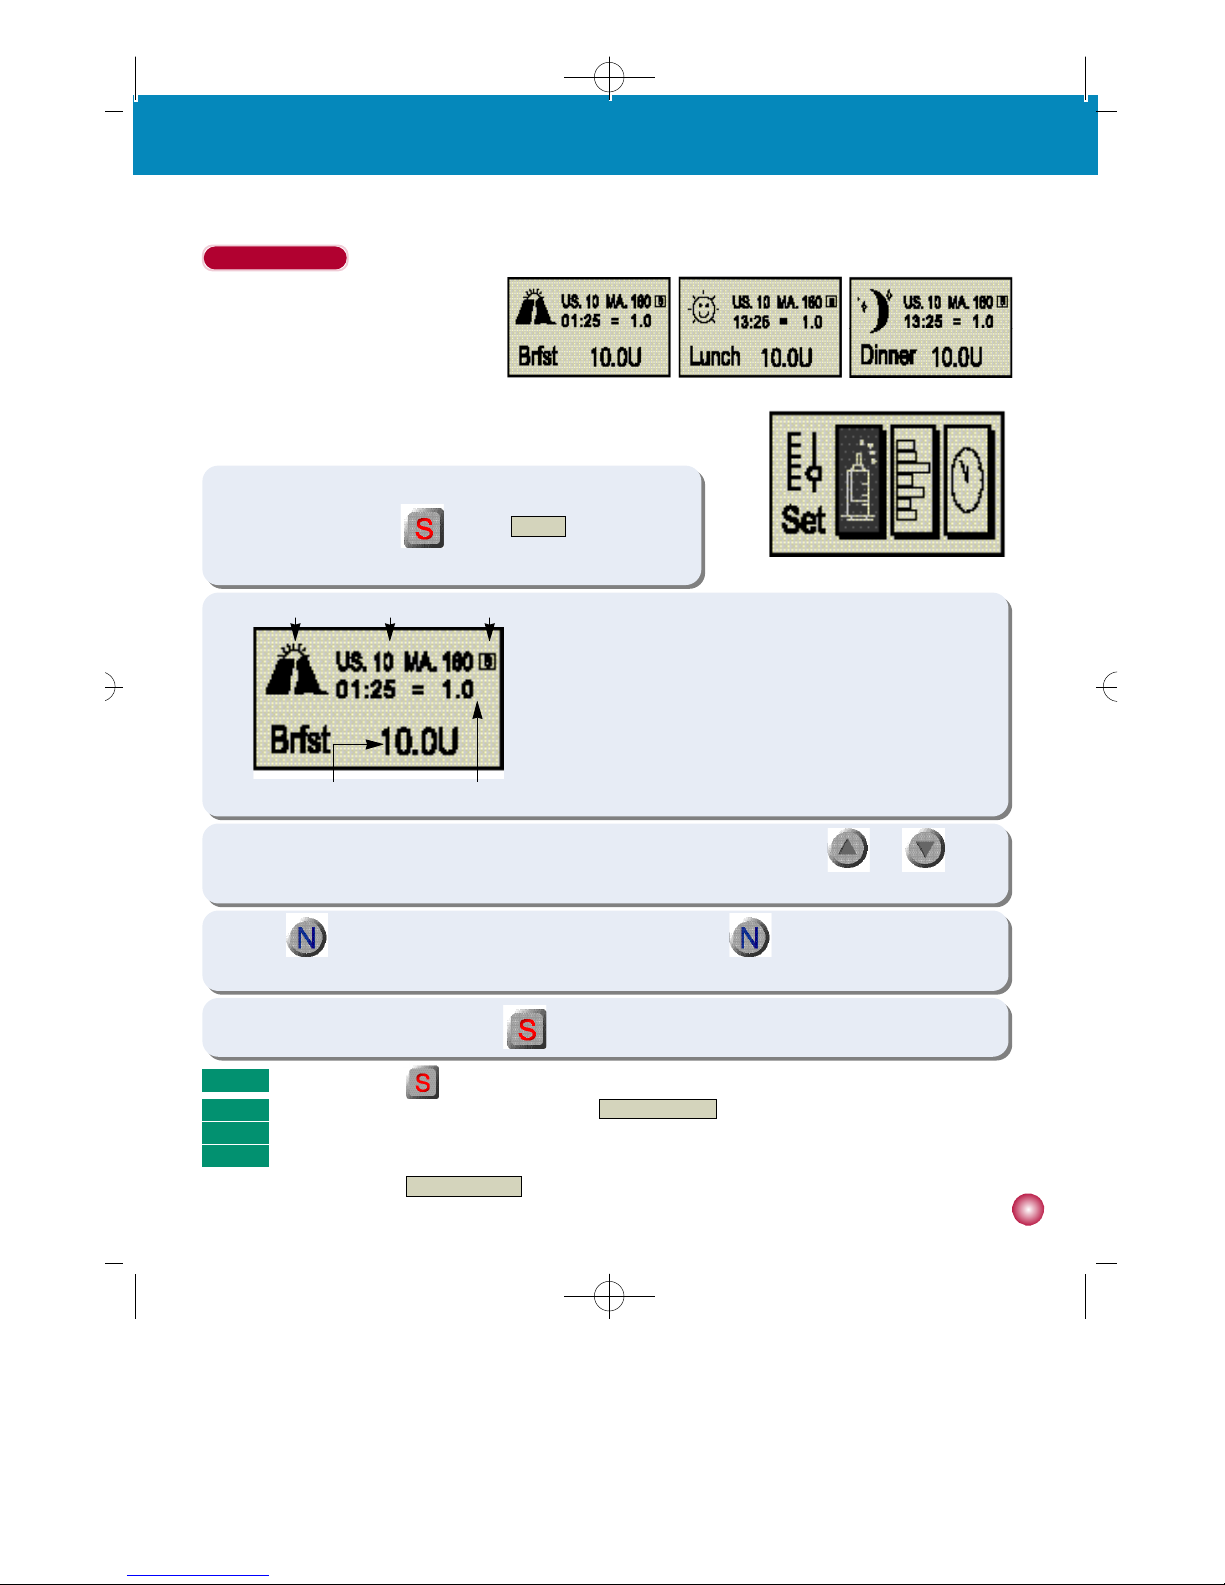
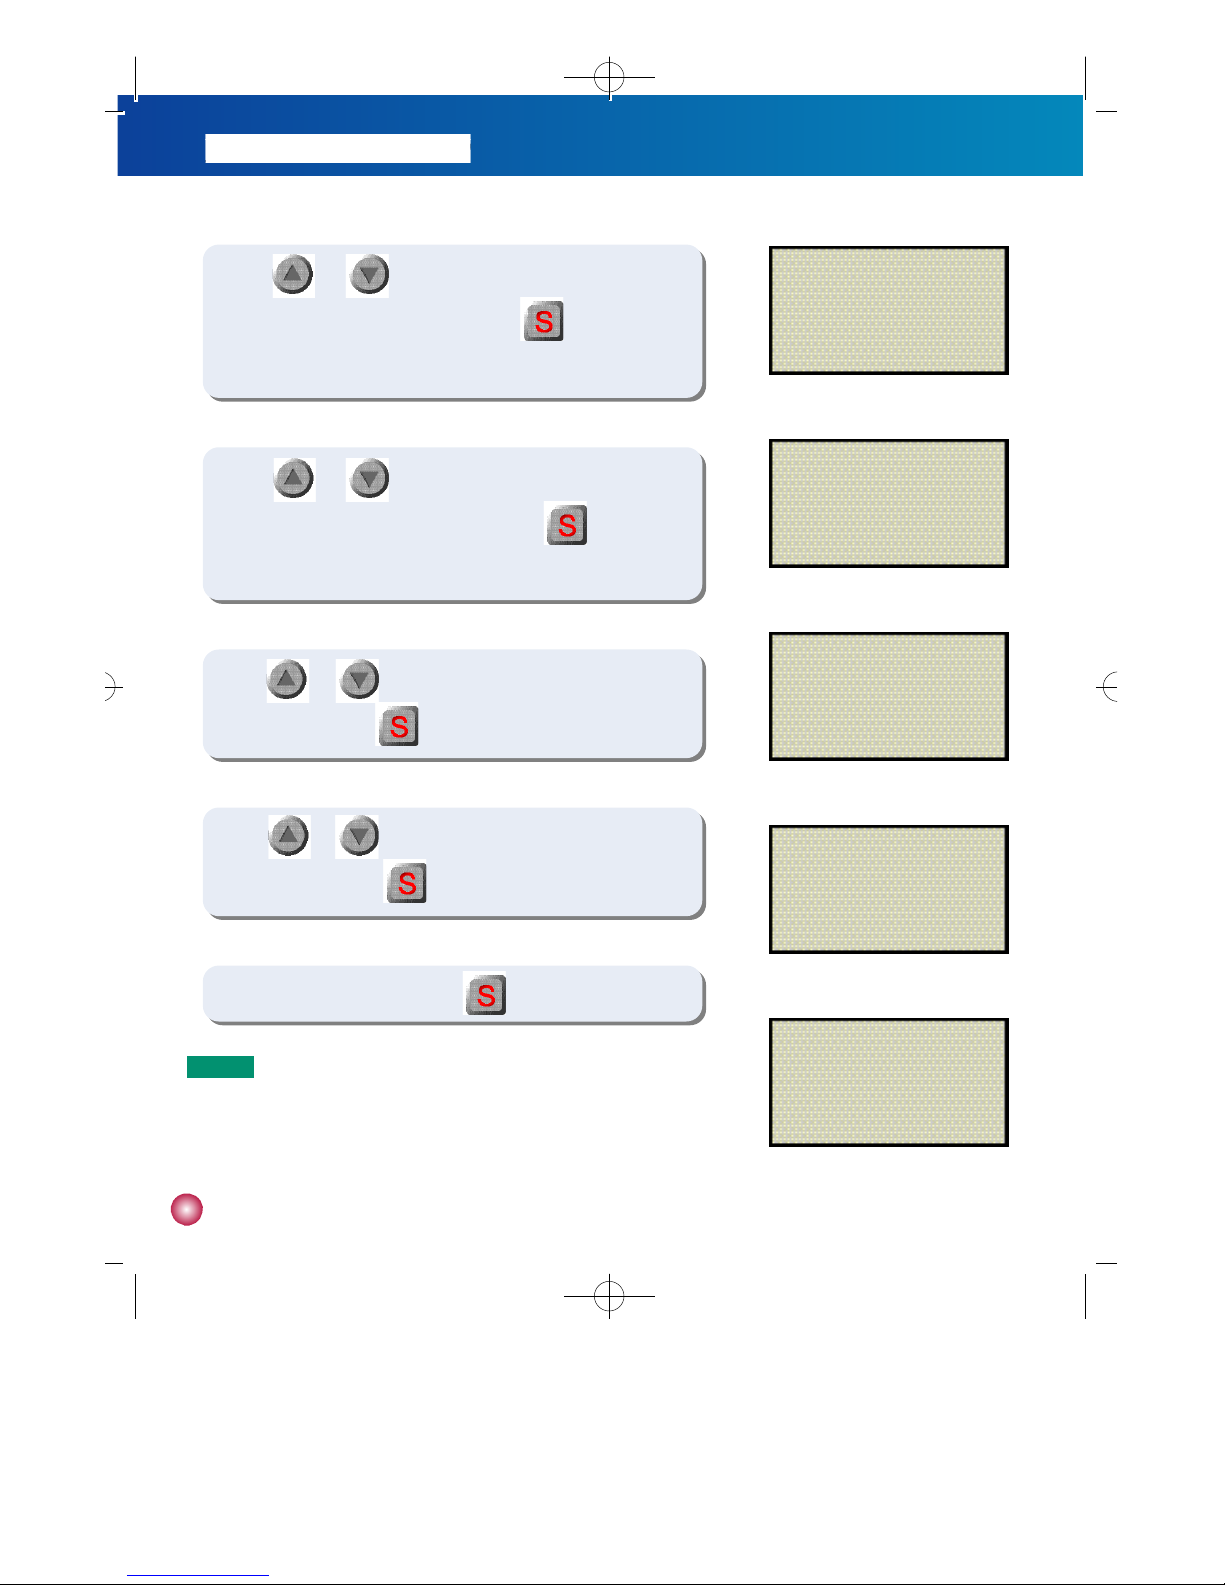
Setting a Bolus
1. Pre-Setting Meal Boluses
If you pre-set meal boluses, the following time
periods correlate to the following schedule:
•Breakfast = 1:00 - 9:59 (1:00 am - 9:59 am)
•Lunch = 10:00 - 14:59 (10:00 am - 2:59 pm)
•Dinner = 15:00 - 00:59 (3:00 pm - 0:59 am)
1 1
2. Set-up and basic functions
B r e a k f a s t L u n c h D i n n e r
(figure 1)
(figure 2)
①Indicates that you are setting a bolus for Breakfast (Brfst), Lunch
or Dinner.
②US indicates the amount of insulin used since midnight. MA
indicates the maximum amount of insulin allowed daily.
③Time and amount of the previous bolus.
④Amount of current bolus.
⑤□indicates set mode.
① ② ⑤
④ ③
2) While in the BREAKFAST BOLUS SETTING screen, select the proper insulin dose by using and . The
insulin dose appears in units in the bottom right hand corner.
3) Press to go to the LUNCH BOLUS screen and repeat step 2. Press
to advance to the DINNER BOLUS
screen and repeat the step 2.
4) After setting all of your meal boluses press to store the meal the meal bolus settings in the DANA memory.
1) From the BASIC DISPLAY screen, go to the SET/PROGRAM screen.
In SET/PROGRAM press when the B O L U Sh i g h l i g h t e d
(figure 1). The bolus setting screen will appear as shown in figure 2.
N o t e
Make sure to press after the bolus dose is set to save the setting.
N o t e
You may confirm your bolus settings by using the C H E C K / R E V I E Wmenu option (see page 15).
N o t e
The settings are the amount of insulin that you will deliver each time you bolus during the time periods indicated above.
N o t e
You may increase or decrease your bolus prior to delivery, but the preset bolus dose setting will not change unless
you change it in the S E T / P R O G R A M screen.
S
#다나2SR영문메뉴얼 rev.0 2007.7.3 5:44 PM 페이지11 001 Acrobat™ PDFWriter 300DPI 60LPI

1 2
2. Setting a Bolus
①Indicates that you are setting a bolus.
②US indicates the amount of insulin used since midnight. MA
indicates the maximum amount of insulin allowed daily.
③Time and amount refers to the previous bolus.
④Amount of the bolus.
⑤□indicates set mode.
(figure 1)
(figure 2)
① ② ⑤
③
④
2) While in the BOLUS SETTING screen select the proper insulin dose by using and . The insulin dose
appears in units in the bottom right hand corner.
3) After setting your bolus press to store the preset meal bolus.
1) From the BASIC DISPLAY screen, go to the SET/PROGRAM screen.
In SET/PROGRAM press when bolus icon is highlighted
(figure 1). The bolus setting screen will appear as shown in figure 2.
N o t e
Make sure to press after the bolus dose is set to save the setting.
N o t e
You may confirm your bolus settings by using the C H E C K / R E V I E Wmenu option (see page 15).
N o t e
This setting is the amount of insulin that the pump will deliver the next time you bolus.
N o t e
Please talk to your health care professional if you wish to preset your meal boluses.
N o t e
You may increase or decrease your bolus prior to delivery but the default bolus setting will not change unless you
change it in the S E T / P R O G R A Mscreen.
S
#다나2SR영문메뉴얼 rev.0 2007.7.3 5:44 PM 페이지12 001 Acrobat™ PDFWriter 300DPI 60LPI

1 3
2. Set-up and basic functions
(figure 1)
①Basal Profile, which shows basal rates in a graph from midnight to
midnight.
②Chronological time which corresponds to the highlighted section
of the basal profile.
③Total basal amount programmed for delivery in a 24 hour period.
④Basal Rate for the time period shown in ②.
⑤□indicates set mode.
(figure 2)
① ② ⑤
④
③
Setting and Adjusting Basal Rates
1) From the BASIC DISPLAY screen, go to the SET/PROGRAM
screen. Press when the B A S A Licon is highlighted (figure 1)
in the SET/PROGRAM screen. The BASAL RATE SETTING screen
will appear as in figure 2.
2) The Basal Profile appears in the lower left side of the screen. Use to move between the 24 rates.
The corresponding chronological time will appear in the upper right corner. Use the and buttons to
change the basal rate for the highlighted time period.
3) After basal rates are set, press to save the settings in the DANA memory.
N o t e
Basal rates can be adjusted in units per hour.
N o t e
Figure 2 shows a basal profile that has been set in units per hour(u/h).
N o t e
You may confirm your basal settings by using the C H E C K / R E V I E Wmenu option (see page 15).
S
#다나2SR영문메뉴얼 rev.0 2007.7.3 5:44 PM 페이지13 001 Acrobat™ PDFWriter 300DPI 60LPI
1 4
Setting the Clock
1) From the BASIC DISPLAY, go to the SET/PROGRAM screen. Press
to highlight the CLOCK icon and press (figure 1). The
CLOCK SETTING screen will appear as shown in figure 2.
2) U s e to move between the year and month and date, as well
as hours and minutes. Use a n d to make the desired
changes.
(figure 1)
(figure 2)
3) After making the changes press to save the setting and return
to the BASIC DISPLAY screen.
C a u t i o n
You must set a.m. and p.m. correctly. If the clock shows 03:00 p.m. and you want 03:00 a.m. you must press
until the screen reflects your desired change.
N o t e
The pump can be programmed in either 12 hour or 24 hour format.
#다나2SR영문메뉴얼 rev.0 2007.7.3 5:44 PM 페이지14 001 Acrobat™ PDFWriter 300DPI 60LPI
1 5
2. Set-up and basic functions
(figure 1)
(figure 2)
(figure 3)
(figure 4)
Checking Bolus Doses, Basal Rates and Reviewing Memory Data
1) In the BASIC DISPLAY screen press until the C H E C K / R E V I E W
icon is highlighted as in figure 1. Then press .
2) The Review icon will be highlighted as in figure 2 (if not, press
to change the highlighted icon). Then press .
3) The BASAL PROFILE screen (figure 3) will appear. Press to
move between basal profiles and confirm settings. To review the
previous meal bolus press .
4) The MEAL BOLUS screen (figure 4) will appear. Press to
move from one meal period to the next. Press to review the
history of the previous 500 boluses.
N o t e
The CHK icon is used for reviewing both basal rates and bolus settings.
N o t e
□indicates check mode.
N o t e
If your bolus and basal dose rate settings are incorrect please return to the BASIC DISPLAY and choose the
SET/PROGRAM icon to make adjustments.
C
#다나2SR영문메뉴얼 rev.0 2007.7.3 5:44 PM 페이지15 001 Acrobat™ PDFWriter 300DPI 60LPI
1 6
(figure 5)
BOLUS HISTORY
1: 1/4 13:00 -4 . 5
2: 1/4 07:30
-
5 . 0
(figure 6)
DAILY TOTAL HIST.
1: 1/4 -1 5 . 0 U
2: 1/3
-
1 4 . 0 U
(figure 7)
PRIME HISTORY
1: 1/4 10:00 -2 3 5
2: 1/1 20:30
-
2 2 5
(figure 8)
CARBO HISTORY
1: 9/24 14:59 80
2: 9/13 12:09 72
(figure 9)
SHIPPING INFO
1. S/N : AGJ00019GF
2. COUNTRY : KOR
3. DATE : 12/SEP, 2006
5) Use and to review the Bolus History including date,
time and amount delivered (figure 5). Press to review the 500
previous Daily Totals.
6) Use and to review the Daily Total History including date
and the total amount of insulin (figure 6). Press to review the
500 previous Prime Amounts.
7) U s e a n d to review the Prime History including date,
time and
amount (figure 7). Press
to review the 500 previous
Carbohydrate amount.
8) Use and to review the Carbo History including date,
time and
amount (figure 8). Press to review
the Shipping info screen.
9) In the Shipping Info(fugure 9)
press to return to the basic display.
N o t e
- Bolus History: Date, time and amount of past bolus deliveries.
-
Daily Total History: Total bolus and basal delivery amount for each day.
- Prime History: Date and time of past primes, including the
amount of insulin left in the reservoir following each prime.
#다나2SR영문메뉴얼 rev.0 2007.7.3 5:44 PM 페이지16 001 Acrobat™ PDFWriter 300DPI 60LPI
1 7
2. Set-up and basic functions
(figure 1)
(figure 2)
(figure 3)
(figure 4)
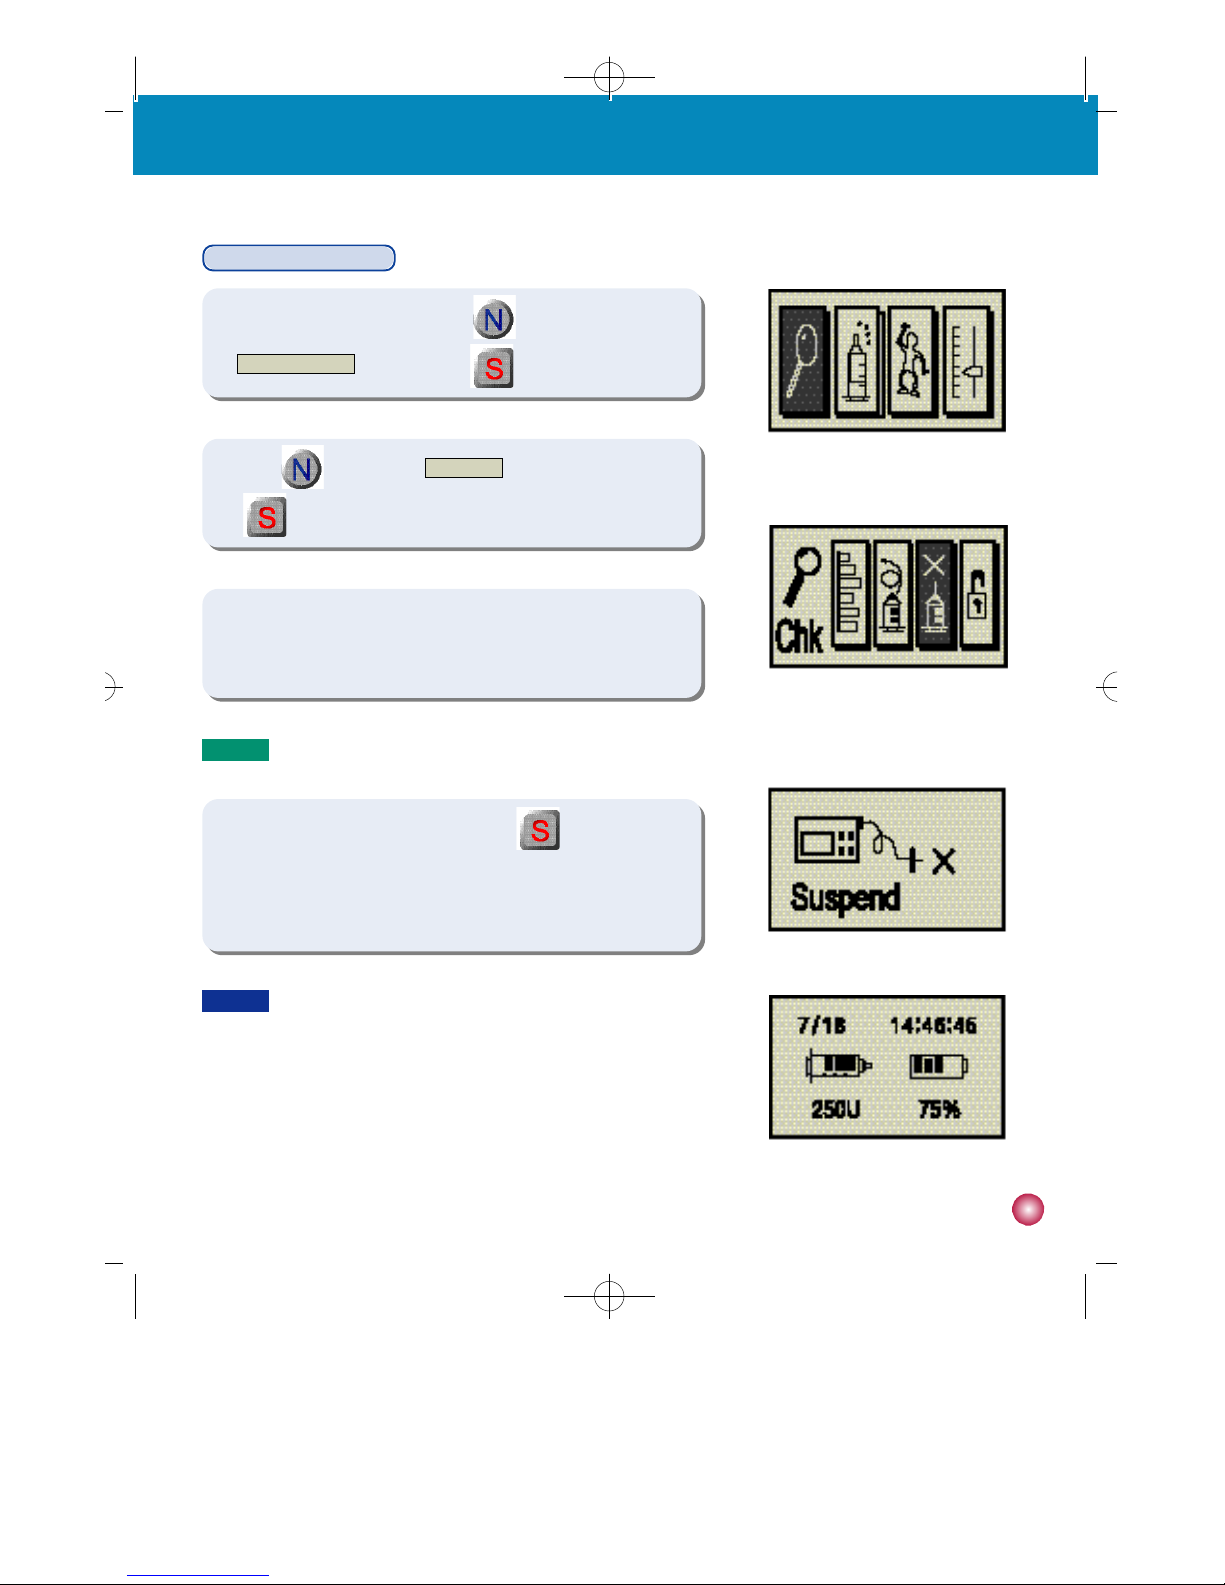
Suspending the pump
선택
선택
1) In the BASIC DISPLAYscreen press to highlight the
CHECK/REVIEW icon. Then press .
2) Press to highlight the S U S P E N Dicon (figure 2). Then press
.
선택
선택
3) The pump will give an audible tone and the screen will indicate the
pump is suspended (figure 3).
선택
선택
4) To take the pump out of SUSPEND, press You will hear an
audible indicator and the BASIC DISPLAY will appear as shown in
figure 4.
C a u t i o n
Always keep at least one power kit (2 batteries) available for backup.
N o t e
When you suspend the pump it will beep 3 times every 4 minutes to remind you insulin is not being delivered.
#다나2SR영문메뉴얼 rev.0 2007.7.3 5:44 PM 페이지17 001 Acrobat™ PDFWriter 300DPI 60LPI
1 8
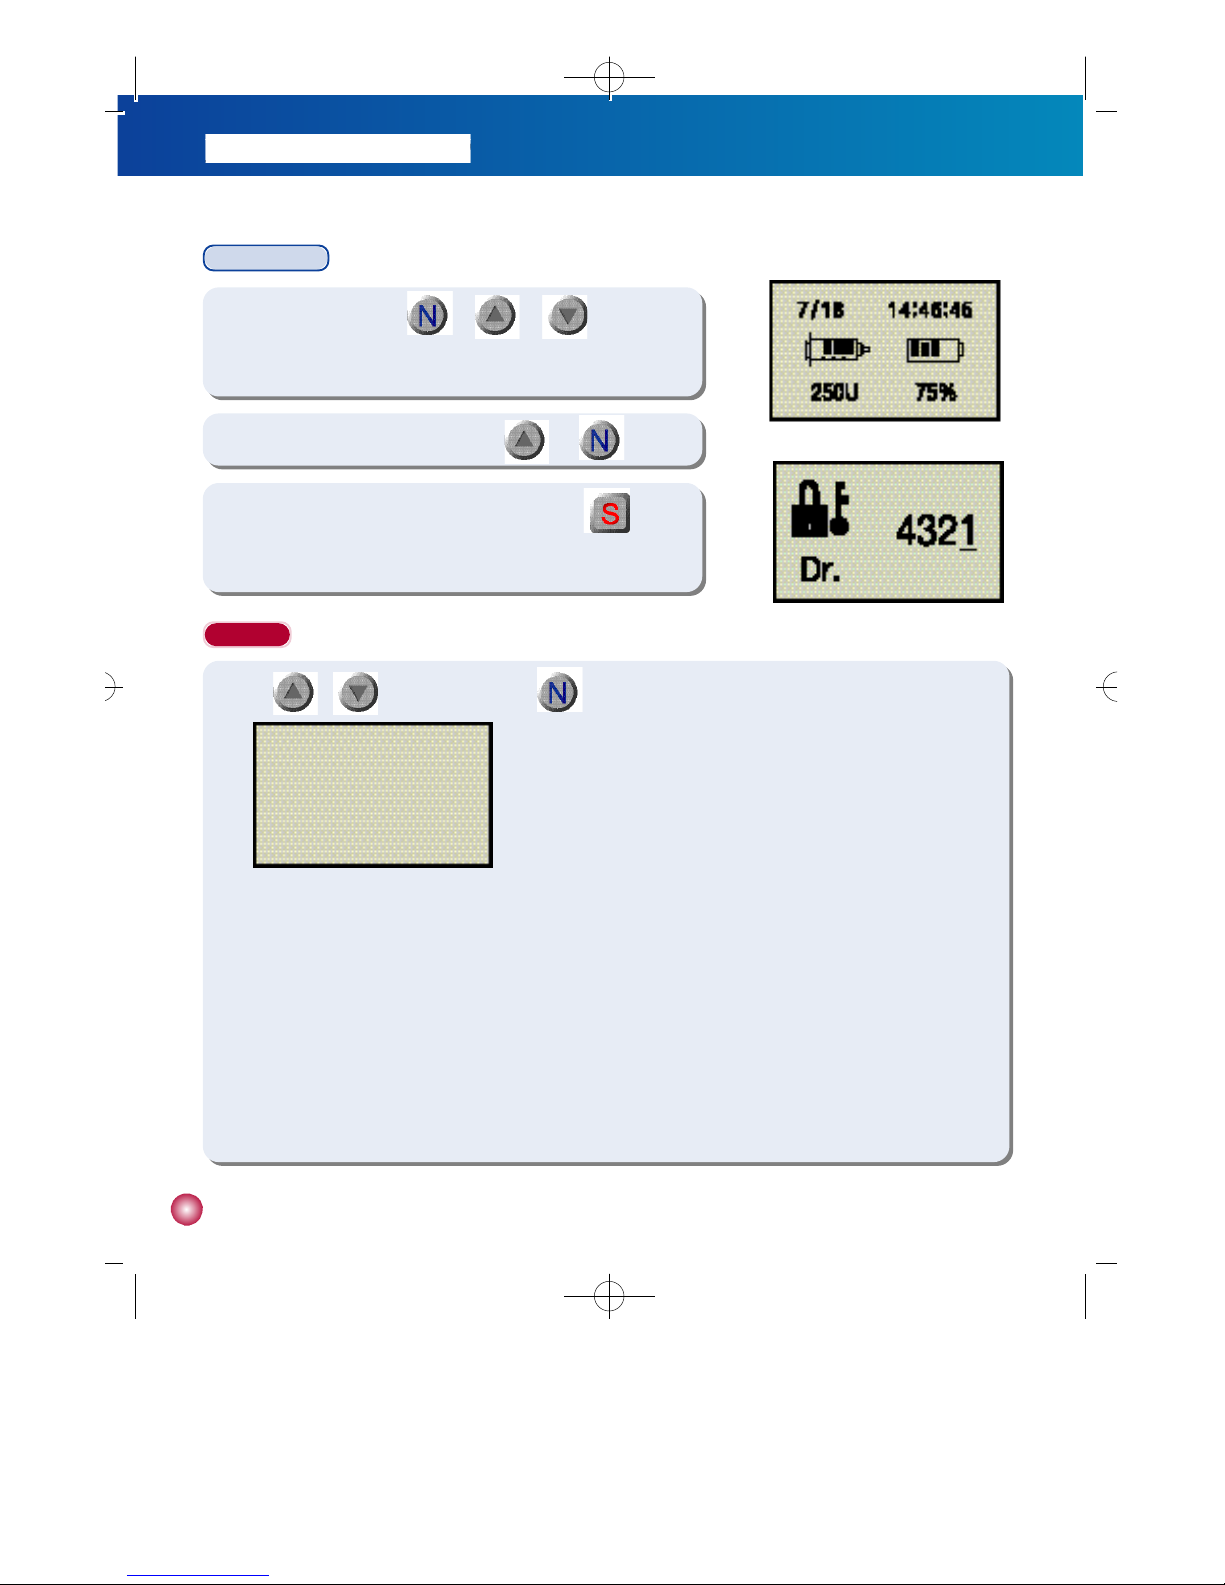
User Setting
(figure 1)
(figure 2)
1) Press the three buttons ( + + ) at once to
enter the PIN code screen for USER SETTING from the initial screen.
2) Input the PIN code “4 3 2 1 ”by the use of a n d b u t t o n s .
3) You can enter the USER SETTING mode by pressing b u t t o n
once the PIN code is inputted.
S e t t i n g
①HOUR DISPLAY TYPE
- You can adjust time display as 12 hour or 24 hour format.
②L O C K
- You can choose whether or not to utilize the key pad lock out function.
- How to unlock(see page 19)
③BUTTON SCROLL
- You can choose whether or not to utilize the button scroll function.
④SOUND MODE
- You can choose the method of alert among sound.
⑤DISPLAY SET(see page 19)
⑥EXTENDED MENU(see page 19)
⑦STRIP CHECK (see page 20)
⑧E X I T
- Saves adjustment and returns to the previous level.
USER SETTING
1. HOUR DISPLAY TYPE : 12
2. LOCK : On
3. BUTTON SCROLL : On
4. SOUND MODE : R/V
5. DISPLAY SET
6. EXTENDED MENU
7. STRIP CHECK 8. EXIT
▶
(figure 1)
1) Use o r to modify settings. Use to advance to the next settings.
#다나2SR영문메뉴얼 rev.0 2007.7.3 5:44 PM 페이지18 001 Acrobat™ PDFWriter 300DPI 60LPI

1 9
2. Set-up and basic functions
N o t e
How to unlock
①If the lock out feature is on, the following screen will appear.(figure 1)
②To unlock the pump, in the exact order press , , , .
③The following screen will appear(figure 2).
④Enter 1, 2, 3, 4 by using the up arrow and next key.
⑤The pump will return to the basic display.
(figure 1)
(figure 2)
⑤DISPLAY SET
1. LCD on time
- Adjust the duration of the LCD display by seconds.
2. EL on time
- Adjust the duration of the Backlight by seconds.
3. Language
- You can choose a language.
4. E X I T
- Saves adjustment and returns to the previous level.
DISPLAY SET
1. LCD ON TIME(S) : 60
2. EL ON TIME(S) : 10
3. LANGUAGE : KO
4. EXIT
⑥EXTENDED MENU
1. EXTENDED BOLUS
- Choose whether or not to utilize the Extended Bolus function.
2. U T I L I T Y
- Choose whether or not to utilize the Utility function.
3. NO CARBO MODE
- If the “NO CARBO MODE”was selected as “O f f ”, a pop-up window
will display to perform the carbohydrate counting function, once you
checked your BG level by the DANA IISG pump. If the “NO CARBO
M O D E ”was selected as “O n”, the pop-up window will not be activated
after the checking BG level.
4. E X I T
- Saves adjustment and returns to the previous level.
EXTENDED MENU
1. EXTENDED BOLUS : On
2. UTILITY : Off
3. NO CARBO MODE : Off
4. EXIT
(figure 3)
(figure 4)
▶
▶
#다나2SR영문메뉴얼 rev.0 2007.7.3 5:44 PM 페이지19 001 Acrobat™ PDFWriter 300DPI 60LPI
 Loading...