

Page 1
ASSEMBLY INSTRUCTIONS FOR
HOLO Screen
Page 2
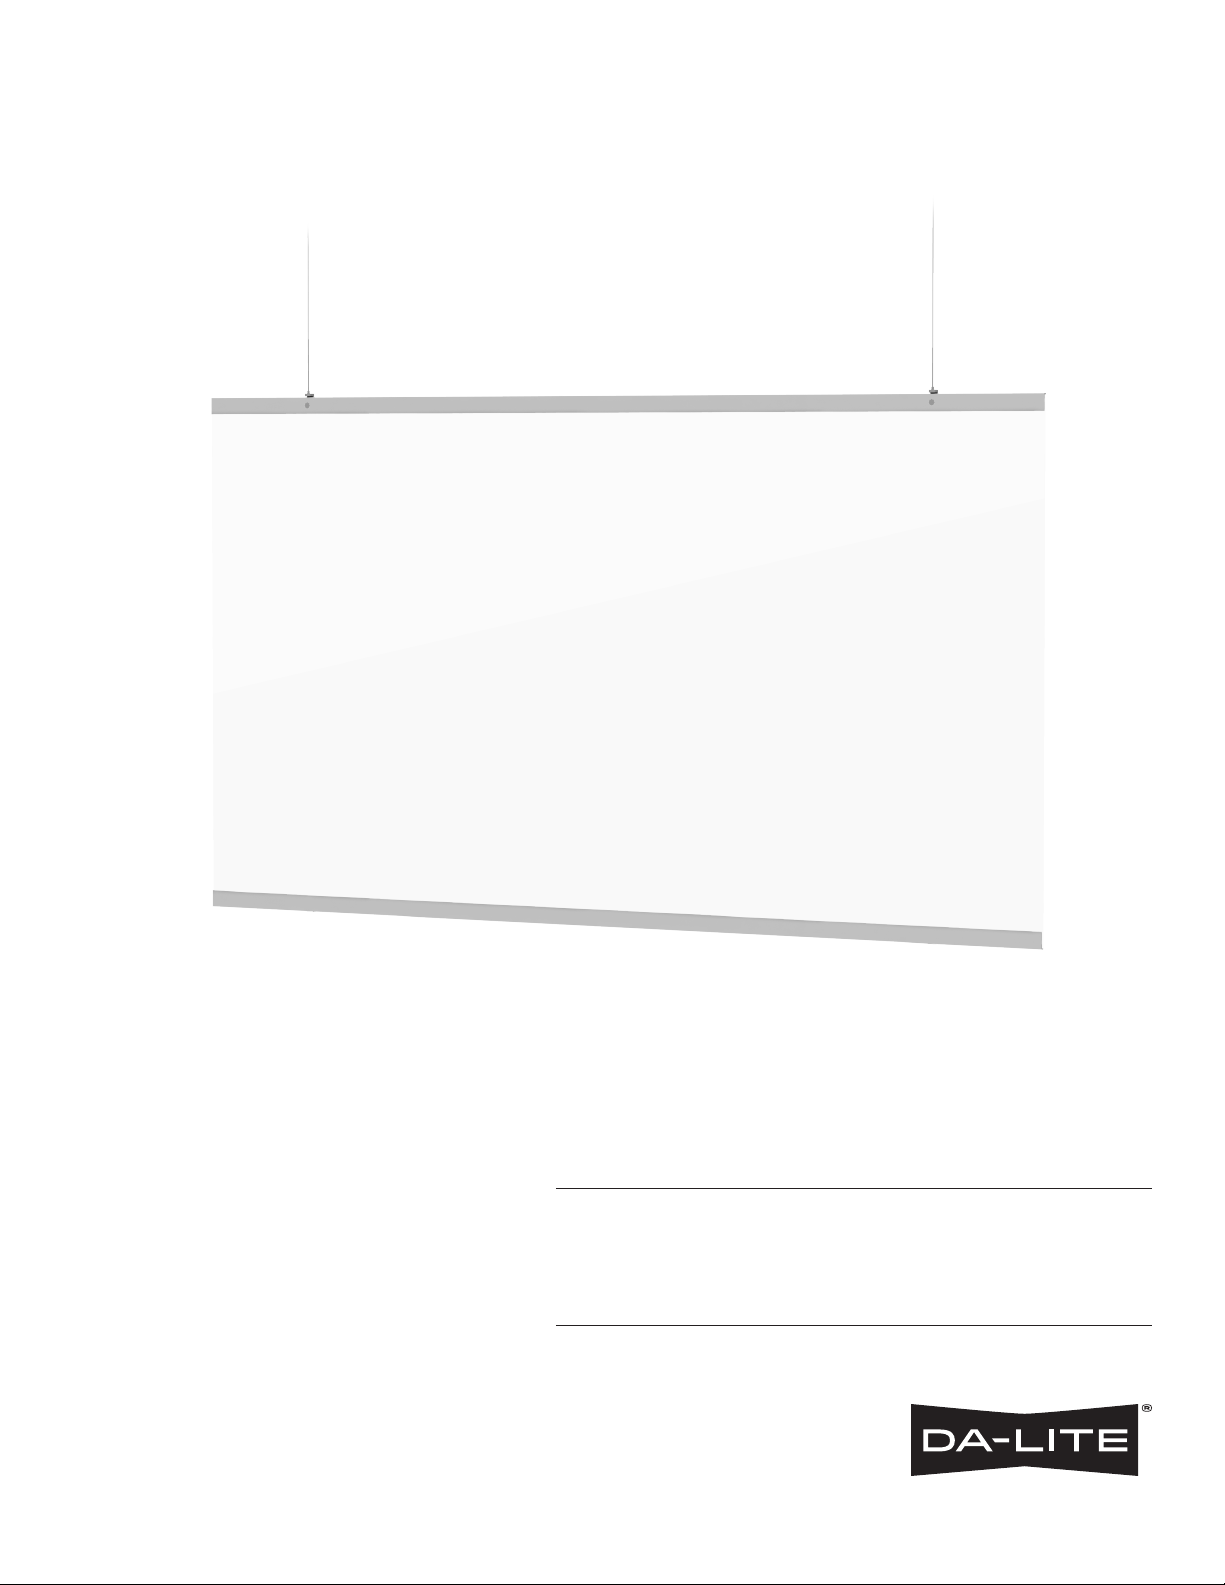
Suggested Methods of Installation
Screen Assembly
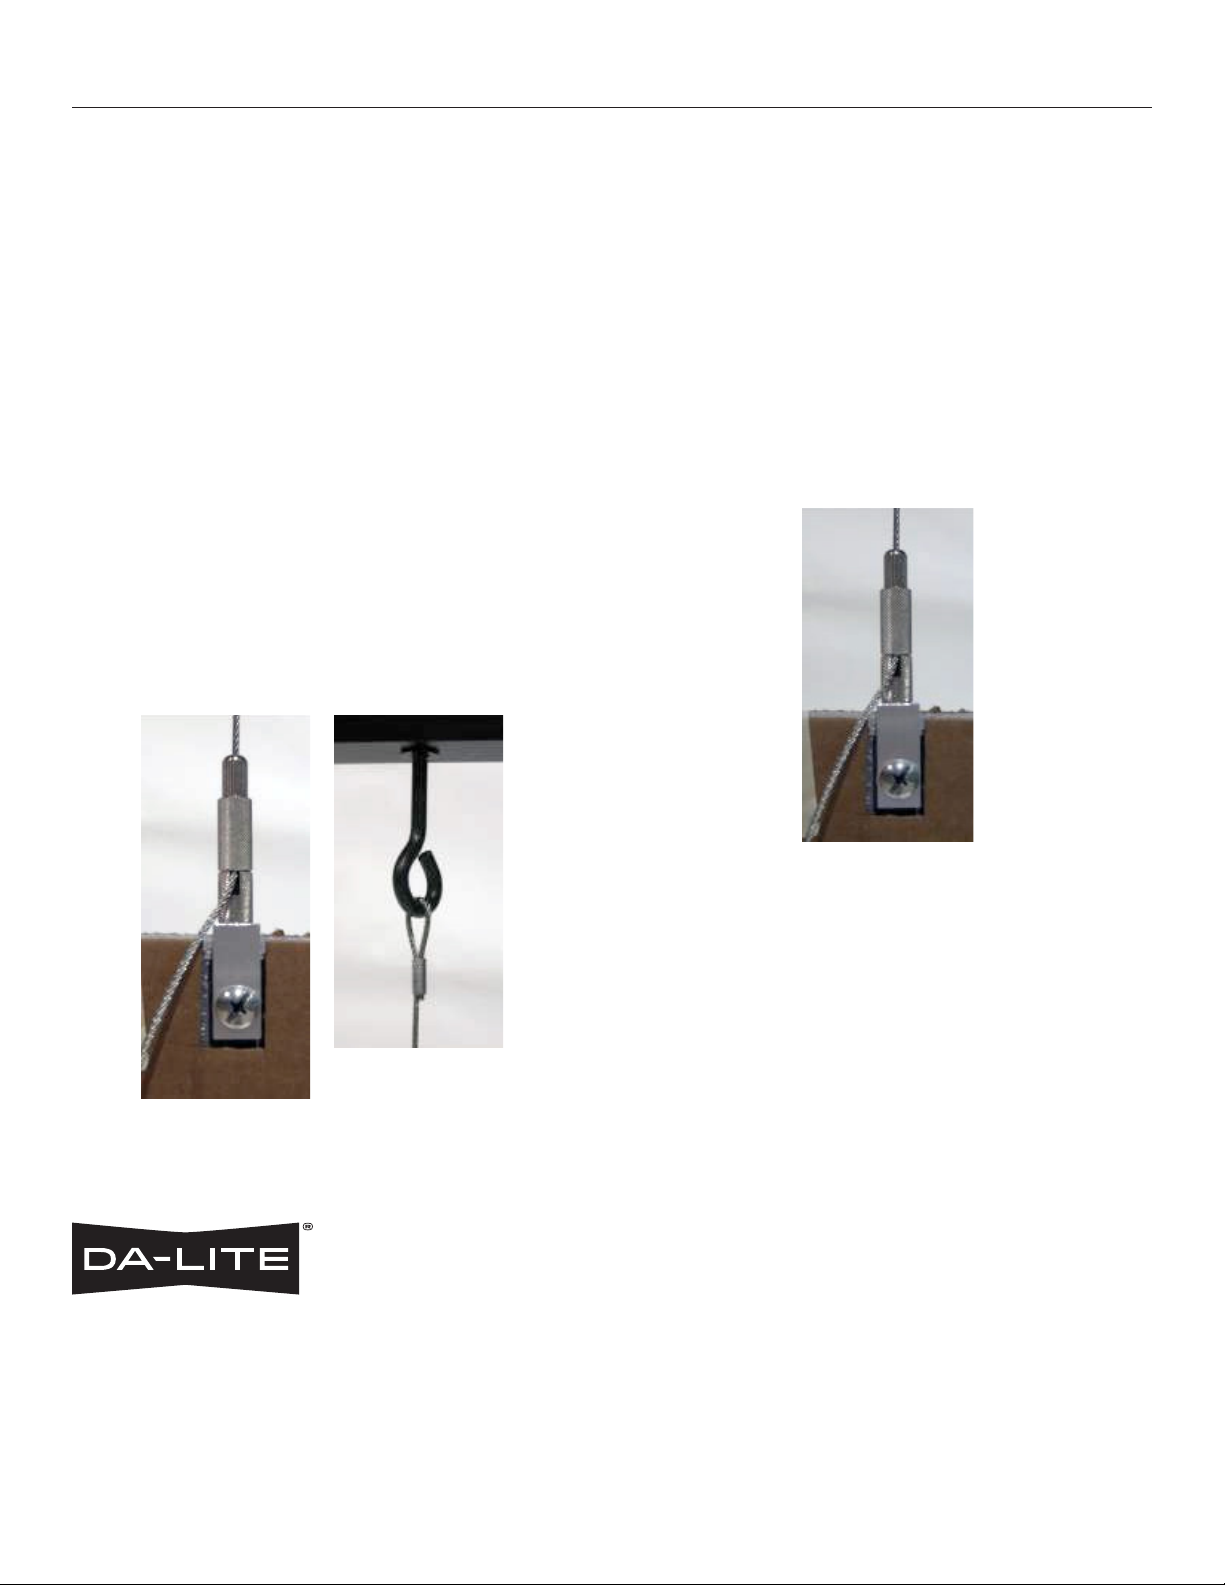
1. Locate the two Griplock Gliders attached to the top
of the screen frame.
2. Unscrew the safety cap on each Glider, but do not remove.
Throughout installation, be sure that the safety cap
remains attached.
3. Into the top of each Glider, thread the straight end of one
galvanized stainless steel cable (included). Ensure the cable
passes at least 1” beyond the body of the Glider.
4. Pull the cables through the Gliders until the remaining length
(the loop end) is at an appropriate distance (depending on
circumstances of setup). Ensure both cables are of approximately
equal distance between the Glider and the loop.
5. Raise the screen to hook each loop around customer
supplied support or structure.
6. Ensure the screen is level by adjusting the length of each
cable through the Gliders.
7. Once screen is in position, tighten the safety cap at the top
of each Glider to secure.
Specifications For The Griplock Glider System
When threading the cable through the Glider, always allow it to
pass at least 1” beyond the body of the Glider. Avoid angled pulls
of the cable in excess of 5° of axis to the Glider. When cutting of
excess cable, always leave at least 1” of cable showing. Cables will
generally not fray when cut, but just in case apply a drop of
superglue. The Griplock System is not recommended for outdoor
use: it should not be exposed to water or wind, or be allowed to
oscillate continuously. Avoid placing ixtures close to HVAC vents
or in chemical-laden environments, such as indoor swimming
pools. To release, unscrew the safety cap and depress to
withdraw the cable.
For more information, please visit www.griplocksystems.com.
A Milestone AV Technologies Brand
3100 North Detroit Street
Warsaw, Indiana 46582
P: 574.267.8101 or 800.622.3737
F: 574.267.7804 or 877.325.4832
E: info@da-lite.com
www.da-lite.com
DL–0396 6.14
© 2014 Milestone AV Technologies LLC. Printed in U.S.A.
 Loading...