

Page 1
Instruction Book For
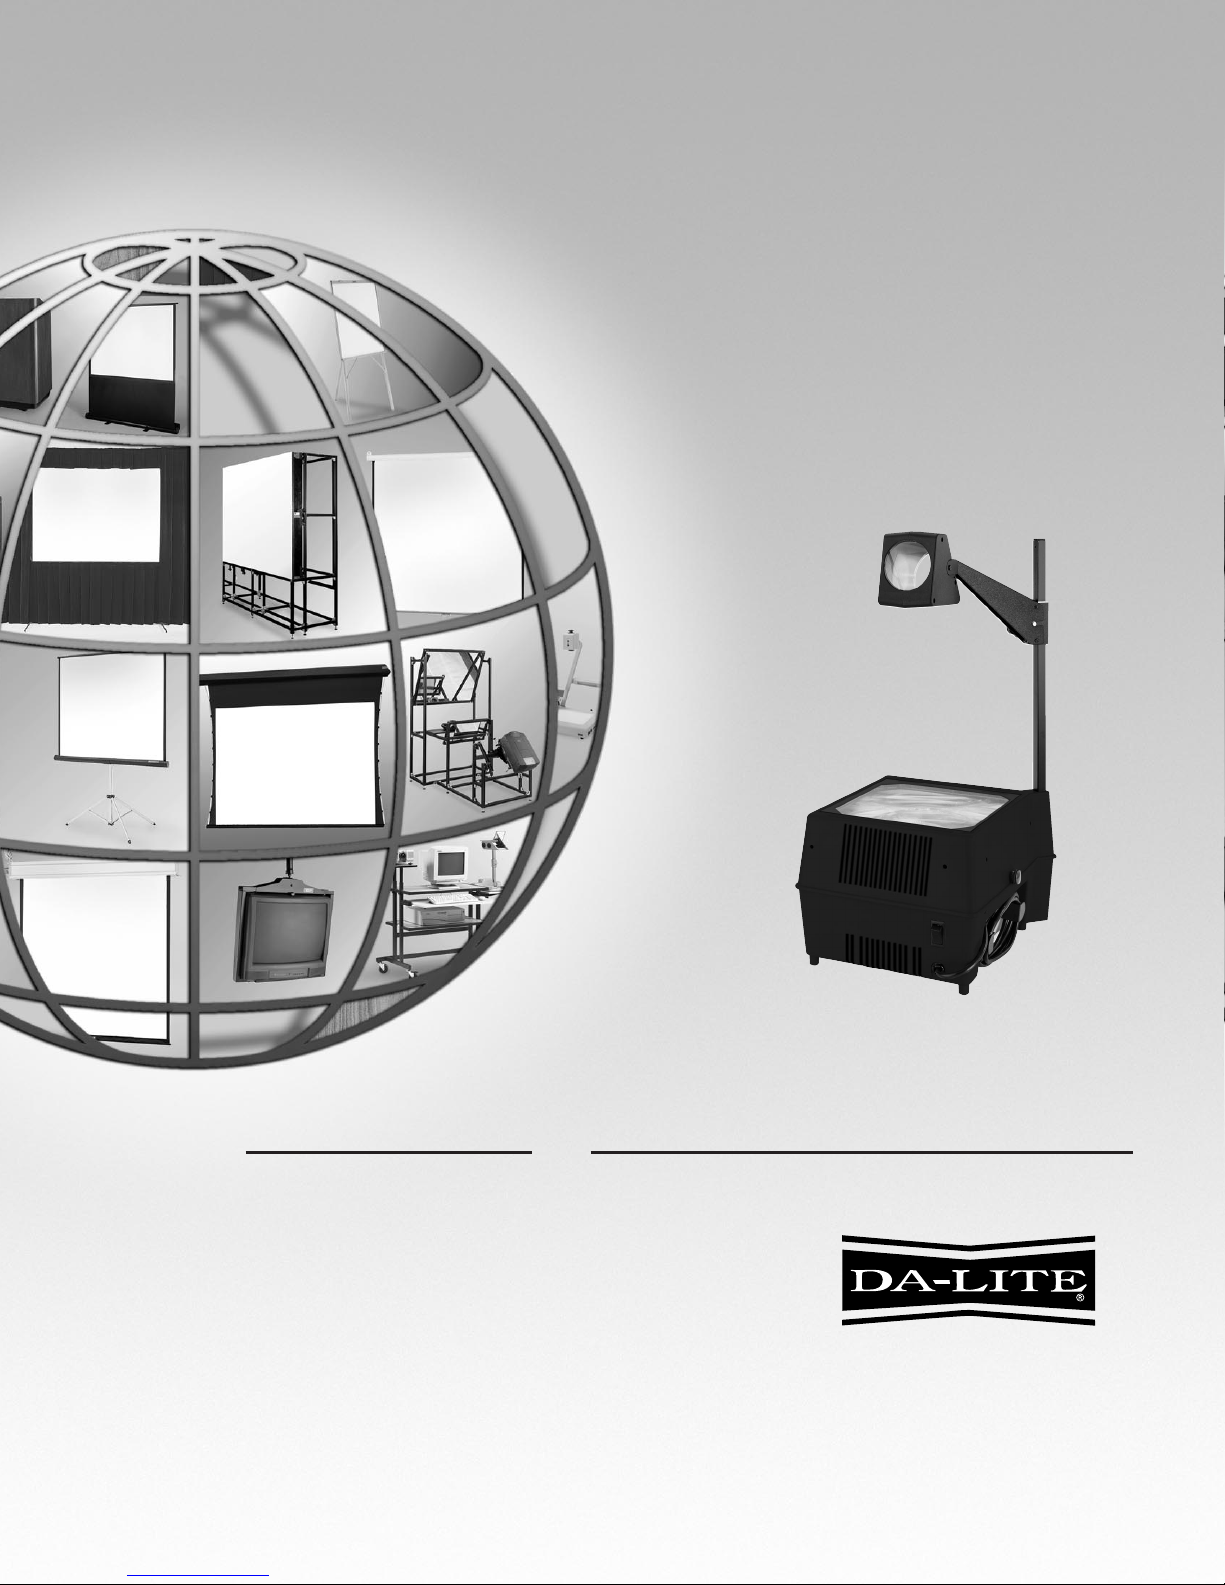
G-200
Overhead Projector
Standard Model (110/120Vac)
The
POWER
In
PRESENTATION PRODUCTS
DA-LITE SCREEN COMPANY, INC.
3100 North Detroit Street
Post Office Box 137
Warsaw, Indiana 46581-0137
Phone: 219/267-8101
800-622-3737
Fax: 219/267-7804
http:// www.da-lite.com
e-mail: info@da-lite.com
Page 2

The “Safeguards” statement reproduced below is in accordance
with Underwriters Laboratories “Standard for Safety, UL 122,
Photographic Equipment.”
IMPORTANT SAFEGUARDS©
IMPORTANT SAFEGUARDS©
When using your photographic equipment, basic safety precautions
should always be followed, including the following:
1. Read and understand all instructions.
2. Close supervision is necessary when any appliance is used by
or near children. Do not leave appliance unattended while in
use.
3. Care must be taken as burns can occur from touching hot parts.
4. Do not operate appliance with a damaged cord or if the appliance has been dropped or damaged—until it has been examined by a qualified serviceman.
5. Do not let cord hang over edge of table or counter or touch hot
surfaces.
6. If an extension cord is necessary, a cord with a suitable current
rating should be used. Cords rated for less amperage than the
appliance may overheat. Care should be taken to arrange the
cord so that it will not be tripped over or pulled.
7. Always unplug appliance from electrical outlet when not in use.
Never yank cord to pull plug from outlet. Grasp plug and pull to
disconnect.
8. Let appliance cool completely before putting away. Loop cord
loosely around appliance when storing.
9. To protect against electrical shock hazards, do not immerse this
appliance in water or other liquids.
10. To avoid electric shock hazard, do not disassemble this appliance, but take it to a qualified serviceman when some service or
repair work is required. Incorrect reassembly can cause electric
shock hazard when the appliance is used subsequently.
SAVE THESE INSTRUCTIONS
© Copyrighted Underwriters Laboratories
“Standard for Safety, UL 122, Photographic Equipment”
Page 3
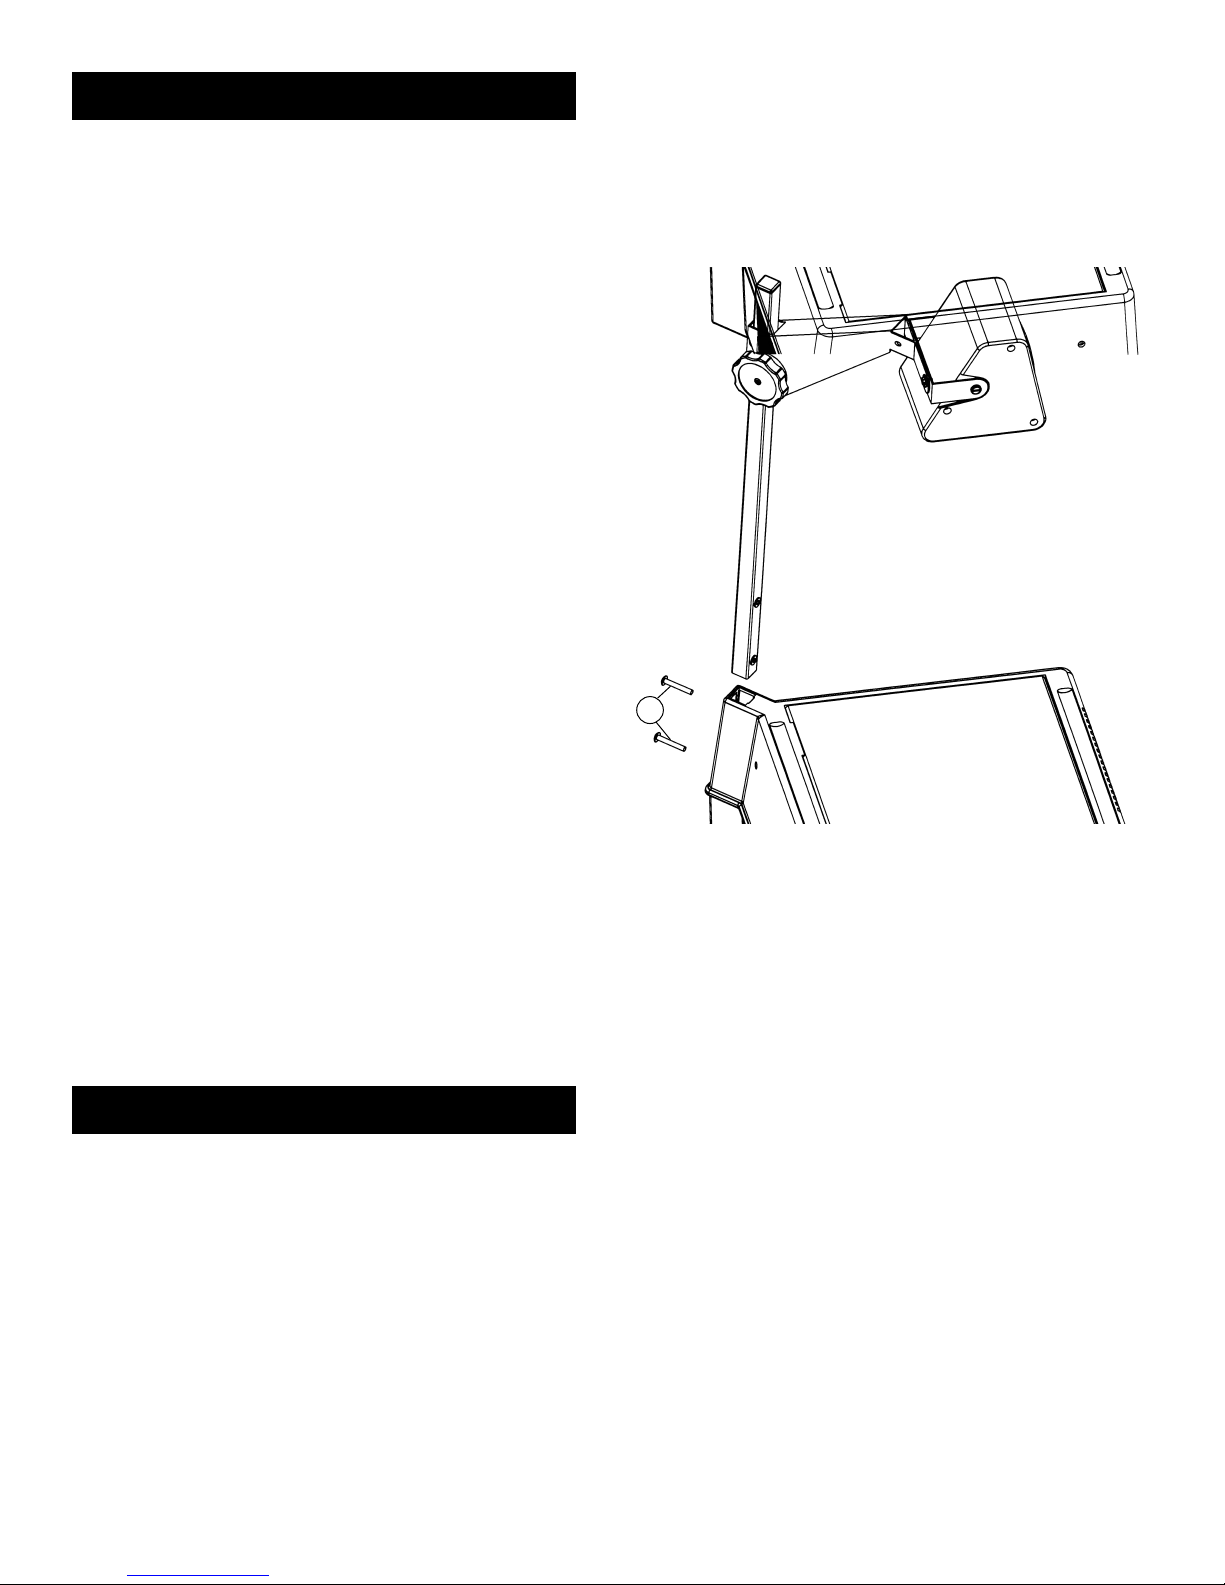
ASSEMBLY INSTRUCTIONS (FIG. 1)
The G-200 overhead projector comes packaged in two
basic assemblies–the projection light box and the post head assembly. Instructions for assembly are as follows:
1. Remove 2 screws (A) from post.
2. Insert post into square hole in projector lid. Align
holes in post with holes on the side of the projector
lid.
3. Insert 2 screws (A) and tighten.
The G-200 overhead projector is now ready for
operation.
OPERATING INSTRUCTIONS
1. Set the projector, with the switch facing the screen,
on a projection table. Make sure the projector is
placed at a projection distance consistent with the
size of the screen, as indicated in the projection table
on page 2.
2. Connect the power cord to a suitable grounded
electrical outlet (refer to nameplate for electrical requirements.)
3. Turn on the switch.
4. Place projection copy on projection stage.
5. Raise or lower image on screen by tilting top portion
of projection head. (Do not touch lens elements.)
A
FIG. 1
6. Focus image on screen by turning the focusing knob,
which raises or lowers the projection head.
7. To turn off the projector, simply push the switch
down.
8. The G-200 is supplied with a safety thermal switch to
prevent fresnel or light box overheating. In the event
of motor malfunction or tampering, the G-200 lamp
will shut off automatically due to temperature rise.
(UL listed system.)
1
Page 4

LAMP REPLACEMENT
CLEANING AND MAINTENANCE
CAUTION: LAMP CAN BE EXTREMELY HOT!
1. Allow the overhead projector to run for four or five
minutes after the lamp burns out. The fan should cool
the burned out lamp and prevent injury when you attempt to replace the lamp.
2. Turn off the projector and disconnect the power cord
from the electrical outlet. Although the G-200 is
equipped with a safety interlock switch that cuts off
current when the projection stage is lifted, it is considered an additional safety precaution to disconnect
the power cord.
3. Remove the cover lock screw on the side of the unit
and lift up the cover to expose the inside of the projector. The bracket located near the cooling fan will
hold the lid open (A) (see Fig.2).
4. Hold bulb by the ceramic base and pull it out of the
socket (see Fig. 2).
5. To install a new lamp, hold lamp by the ceramic base
and insert the two pins on the lamp into the matching
holes in the socket.
NOTE: Make sure the lamp is pushed into the socket
completely, otherwise the filament of the lamp will not
be properly located.
6. Close the projector lid, see Fig. 3.
1. Lift up slightly on lid.
2. Pull up on bracket.
3. Lower lid.
NOTE: Replace lamp with type EYB 360 watt 82 volt bulb
only.
The G-200 overhead projector needs minimal maintenance to keep it operating in peak condition. It is only
necessary to keep the optical elements clean and to replace lamps when necessary. Remove dust from optical
elements with a soft, lint-free cloth.
If the elements are very soiled, carefully remove them
and clean with lens tissue or a soft, water-dampened,
lint-free cloth. Dry thoroughly with a lint-free cloth.
Remove dust from the reflector every time the lamp is
changed.
PULL
A
G-200 Projection Table
Projection
Distance* (Feet) 6 7 8 9 10 11
Size of Screen
Image from 10" x 10" 46 x 46 55 x 55 63 x 63 72 x 72 80 x 80 89 x 89
slide (inches)**
(14" lens)
*Distance is measured from front of projector to screen.
**All dimensions are ±5%.
FIG. 2
2
Page 5

TROUBLESHOOTING
CONDITION
1. Picture not square.
2. Fan not turning. Shaft stuck. Oil in bearings con-
CAUSE
(a) Projector not facing screen
squarely.
(b) Head to arm adjustment not
correct.
holding the head to the arm and tilt
head until screen image is parallel
with floor. Tighten screws.
NOTE: Before making this adjust-
ment be sure the projector is
level with the floor.
(c) Copy not square.
(d) Elevated image on screen (key-
stone).
gealed.
REMEDY
(a) Move projector to face screen
squarely.
(b) Adjust projector to face screen
squarely. Loosen the 2 screws
holding the head to the arm and
tilt head until screen image is parallel with floor. Tighten screws.
NOTE: Before making this adjustment be sure the projector is
level with the floor.
(c) Correct the copy.
(d) Slope top of screen toward the
projector.
Spin fan blade to loosen shaft in selfaligning bearings.
FIG. 3
3
1
3
2
Page 6

G-200 REPLACEMENT PARTS
REF. QTY/ DA-LITE
NO. DESCRIPTION UNIT NUMBER
1 Lens, proj 14" F 3.5 D 2 51639
2 Front surface mirror 1 76715
3 Screws for head assembly 3 77092
4 Nylon washer 2 50948
5 Bow washer 2 77095
6 Shoulder bolt for head pivot 2 77096
7 Head and arm assembly 1 77976
8 Arm assembly only (part of #7) 1 59398
9 Square post plug, black 1 51288
10 Post assembly 1 77975
11 Focus yoke assembly (part of #8) 1 59495
12 Focus knob (part of #8) 1 60077
13 Screw for focus knob (part of #8) 1 50637
14 Focus shaft assembly (part of #8) 1 59395
15 Friction spring (part of #8) 2 49192
Screw for friction spring
16
(part of #8)
2 52703
REF. QTY/ DA-LITE
NO. DESCRIPTION UNIT NUMBER
29 Motor mounting bracket 1 77966
30 Lamphouse assembly 1 77973
31 Thermal switch, overheat safety 1 51551
32 Projection lamp, EYB 360W 82V 1 79523
33 Lamp bracket assembly 1 77967
34 Cord set 1 60001
35 Rocker switch, 12.5 amp tungsten 1 74357
Micro switch
36
(shuts off when lid is opened)
37 Micro switch box 1 77984
38 Micro switch actuator plate 1 72557
39 Strain relief bushing 1 51506
40 Plastic base 1 77969
41 Black piano hinge 1 77849
42 Brown rubber bumper 4 45626
43 Diode, Rectifier 1 51606
44 Roll attachment (optional) 1 42168
1 51541
17 Flush retainer for fresnel lens 6 77888
18 Cover & fresnel assembly 1 77974 .
19 Fresnel lens 1 51659
20 Plastic cover 1 77999
21 Light shield 1 77982
22 Glass retainer clip 2 77866
23 Cover glass 1 77992
24 Knob, black cover lock 1 51227
25 Screw to secure post to cover 2 77990
26 Stop bracket 1 77981
27 Impeller (fan blade) 1 77986
28 Fan motor assembly, 120V 1 77971
12 Knob w/insert 1 60077
13 Screw, mach #6-32 x 1/2" 1 50637
Hardware package
45
for roll attachment
46 Disc washer, 2-1/2" Dia. 2 49209
47 Take up spool 1 51163
48 Acetate roll (optional) 1 42159
49 Roll attachment frame assembly 1 78239
50 Resistor, ceramic 20w 1 51596
Accessory dust cover 1 42173
1 74744
NOTE: For any parts not listed, send complete description. Parts not returnable for credit or exchange. Prices subject to
change without notice. Shipments F.O.B. Warsaw, IN.
4
Page 7

34
43
50
31
32
28
35
36
5
Page 8

LIMITED ONE YEAR WARRANTY ON DA-LITE OVERHEAD PROJECTORS
(Applicable in U.S.A., outside U.S.A. see local distributor)
Da-Lite projectors (except lamps) are warranted against
defects in material and workmanship for a period of one
(1) year from the date of purchase by the original purchaser provided they are properly operated according to
Da-Lite’s instructions and are not damaged due to improper handling or treatment after shipment from the
factory.
This warranty does not apply to equipment showing evidence of misuse, abuse, or accidental damage, or which
has been tampered with or repaired by persons other
than authorized Da-Lite personnel.
Da-Lite’s sole obligation under this warranty shall be to
repair or to replace (at Da-Lite’s option) the defective
part of the merchandise. Returns for service should be
made to your Da-Lite dealer. If it is necessary for the
dealer to return the machine or part to Da-Lite, transportation expenses to and from Da-Lite are payable by
the purchaser and Da-Lite is not responsible for damage
in shipment. To protect yourself against damage or loss
in transit, insure the product and prepay all transportation expenses. Allow at least six weeks for correction of
the defect.
THIS WARRANTY IS IN LIEU OF ALL OTHER WARRANTIES, EXPRESS OR IMPLIED, INCLUDING
WARRANTIES AS TO FITNESS FOR USE AND MERCHANTABILITY. Any implied warranties for fitness for
use, or merchantability, that may be mandated by
statute or rule of law are limited to the one (1) year warranty period. This warranty gives you specific legal
rights, and you may also have other rights which vary
from state-to-state. NO LIABILITY IS ASSUMED FOR
EXPENSES OR DAMAGES RESULTING FROM INTERRUPTION IN OPERATION OF EQUIPMENT, OR
FOR INCIDENTAL, DIRECT, OR CONSEQUENTIAL
DAMAGES OF ANY NATURE.
In the event that there is a defect in materials or workmanship of our audio-visual product, you may contact
our Customer Service Department at P.O. Box 137,
Warsaw, Indiana 46581-0137 (219/267-8101).
IMPORTANT: THIS WARRANTY SHALL NOT BE VALID
AND DA-LITE SHALL NOT BE BOUND BY
THIS WARRANTY IF THE PRODUCT IS
NOT OPERATED IN ACCORDANCE WITH
DA-LITE’S WRITTEN INSTRUCTIONS.
Keep your sales receipt to prove the date
of purchase and your original ownership.
IMPORTANT! KEEP THIS INFORMATION HANDY FOR FUTURE REFERENCE
(Applicable in U.S.A., outside U.S.A. see local distributor)
SERVICE INFORMATION
A Return Authorization is required for ALL service work,
whether the unit is in or out of warranty. Da-Lite will
need the model and serial number in order to issue the
Return Authorization.
If the unit is an obsolete model, you will be advised before you ship the unit, whether or not Da-Lite can make
the repair.
Address your request for a Return Authorization to:
Customer Service Department, Da-Lite Screen
Company, Inc., P.O. Box 137, Warsaw, Indiana 465810137 or phone 219/267-8101 (Fax 219/267-7804).
Should you need service for your Da-Lite equipment
after the warranty has expired, contact your local dealer.
If it is necessary for the dealer to return the machine or
part to Da-Lite, transportation expenses to and from DaLite are payable by the purchaser and Da-Lite is not responsible for damage in shipment. Pack the product in a
sturdy box with plenty of protective packing material. To
protect yourself against damage or loss in transit, insure
the product and prepay all transportation expenses.
Da-Lite will refuse collect shipments. Allow at least six
weeks for correction of the defect.
ENCLOSE complete information showing your name
and address, what is wrong with the equipment, and the
return shipping address. Tape the information to the
equipment to be sure it does not get separated during
the repair.
ADDRESS the package to the address shown on your
Return Authorization.
CHARGES. If Da-Lite determines it will cost over 33% of
current suggested retail price, you will be contacted for
written approval of the estimated charges before the repair is made.
PAYMENT. When unit is repaired, it will be returned
C.O.D. for cost of repair and shipping charges unless
other arrangements have been made in advance.
Printed in U.S.A. 77968 Rev. 4/01
6
 Loading...