

Page 1

INSTRUCTION BOOK FOR
FullVision
Page 2
Disclaimer
Milestone and its ailiated corporations and subsidiaries
(collectively "Milestone"), intend to make this manual accurate
and complete. However, Milestone makes no claim that the
information contained herein covers all details, conditions or
variations, nor does it provide for every possible contingency in
connection with the installation or use of this subject to change
without notice or obligation of any kind. Milestone makes no
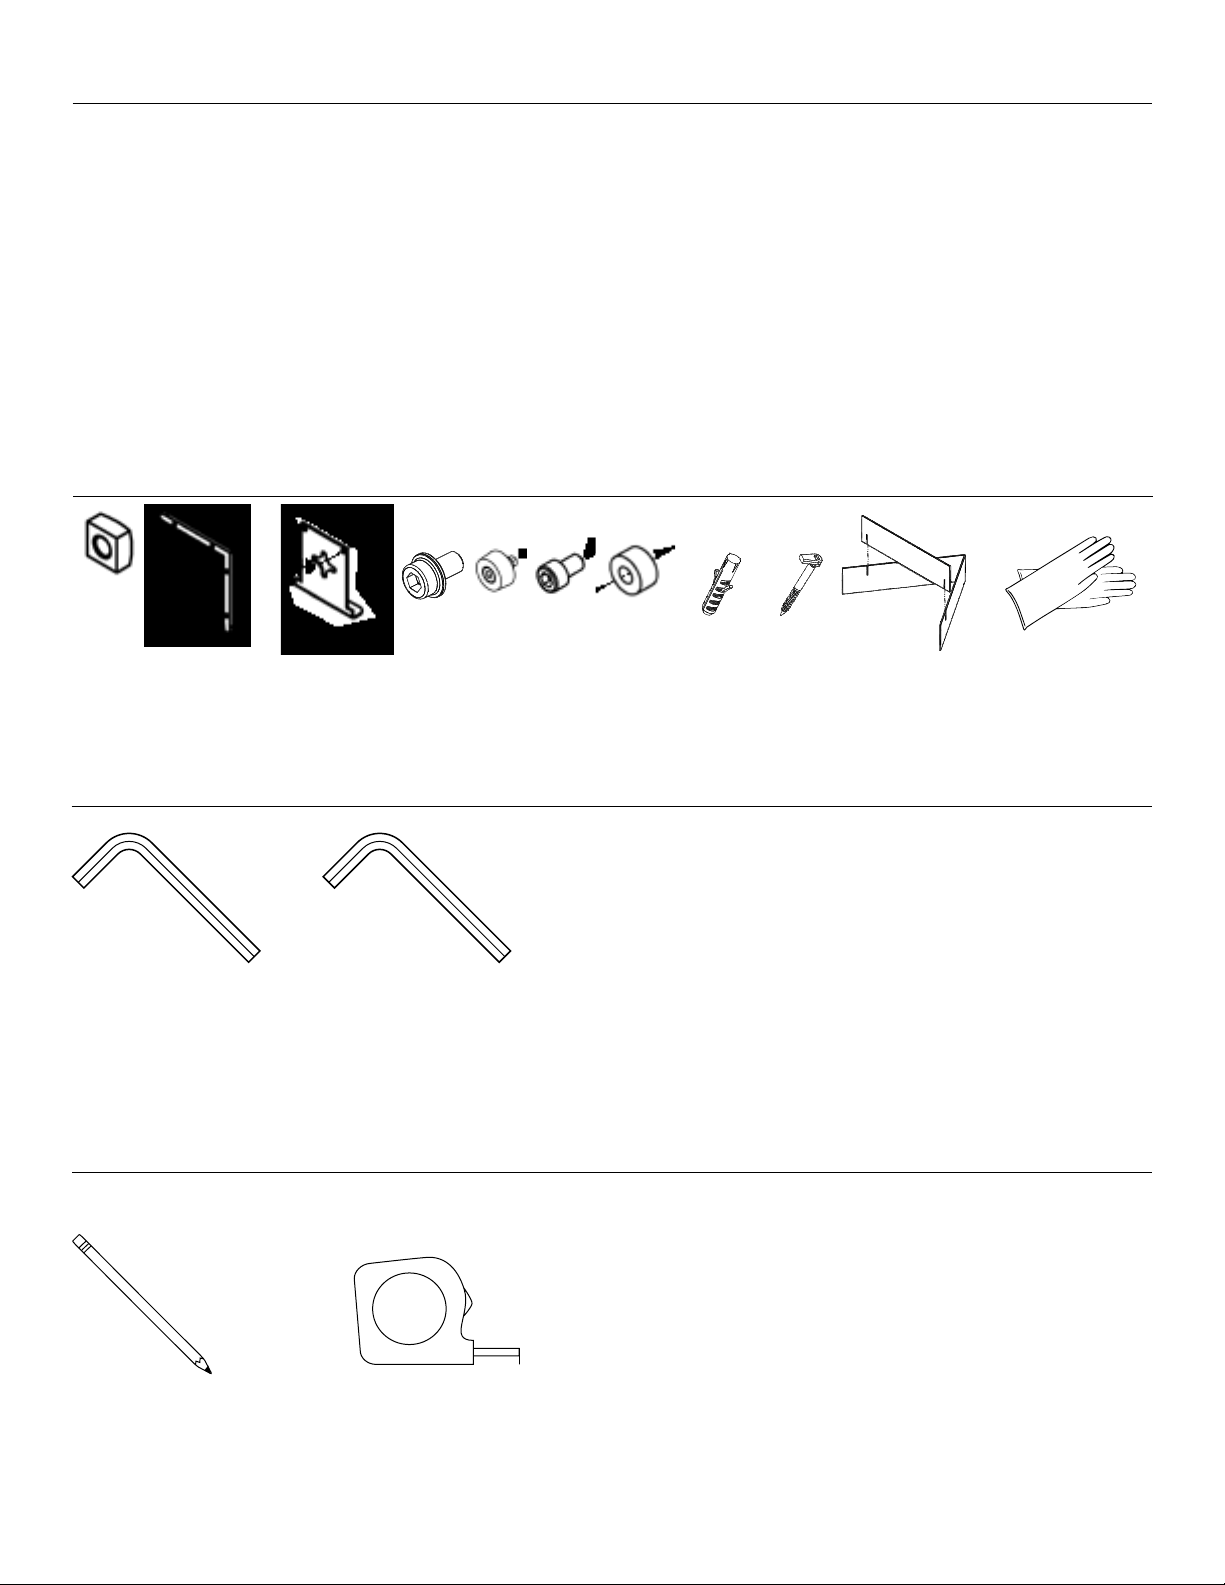
Included Hardware
A
B
C D
E
F
representation of warranty, expressed or implied, regarding the
information contained herein. Milestone assumes no
responsibility for accuracy, completeness or suiciency of the
information contained in this document.
Da-Lite® is a registered trademark of Milestone AV Technologies.
All rights reserved.
G
H
I
J
K
Tools Provided for Installation
3mm Hex Key 5mm Hex Key
Tools Required for Installation (not provided)
Tape MeasurePencil
2
Page 3
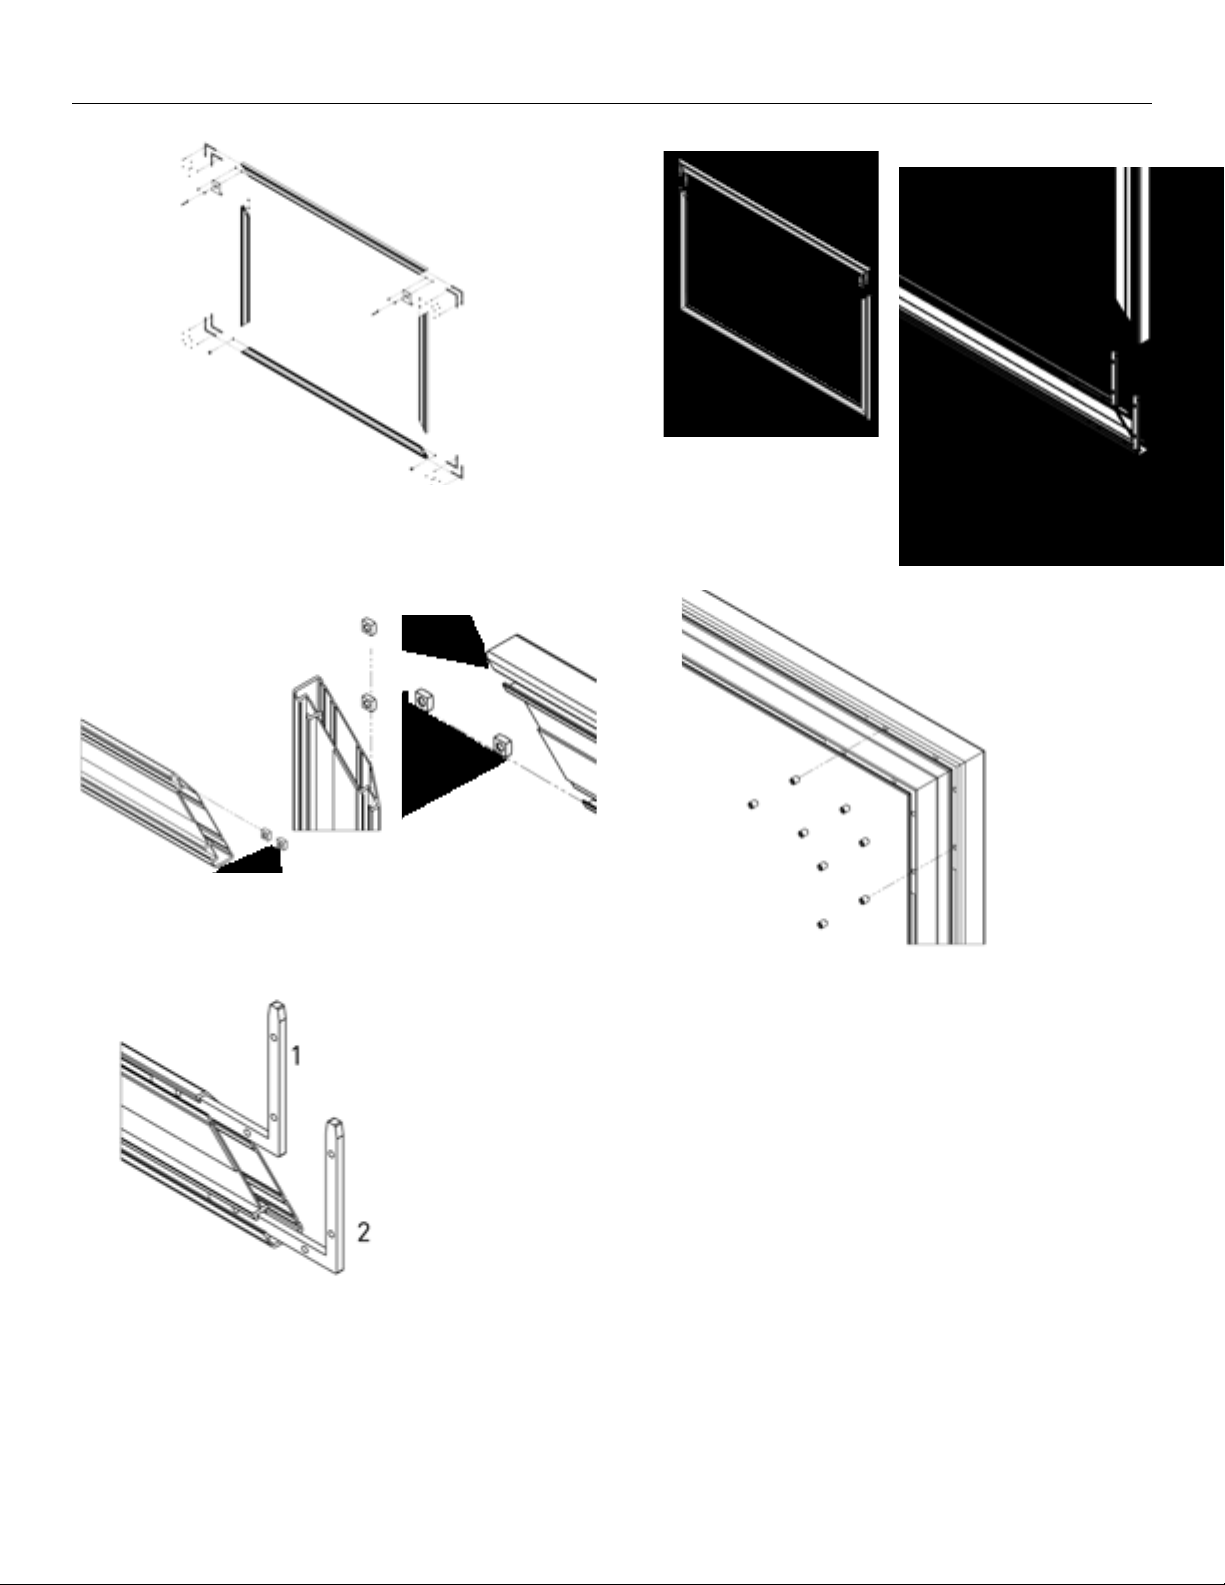
Frame Assembly
1. Unwrap the frame pieces. Before assembling the frame
pieces, add 2 nuts (A) to either end of the top frame section
and the top of the side frame for the mounting bracket and
add 2 nuts to the bottom frame.
3. Slide the frame sections together at the corners.
4. Secure the frame pieces by tightening the hex nut screws
which are already inserted in the frame.
2. Add 2 frame connectors (B) to each corner.
3
Page 4

Installation
Decide on the preferred installation method. You can position
the mounting bracket of the FullVision on the top frame, side
frame, or above the top frame to ly the screen.
NOTE: For screens 160" and wider positioning the brackets on
the side frame sections is not an option.
Top frame
Side frame
5. Secure the mounting bracket (C) with provided screws to the
previously inserted nuts.
Bracket -
top frame standard
Bracket -
top frame to ly
and side frame
G
D
F
E
Top frame (to ly)
6. Measure where to position the brackets. Drill holes and
position the supplied screws (H and I). Install the frame as a
test irst.
Top bracket method
11/16"
11/2"
1/4"
33/4"
Width
1/4 Width 1/2 Width 1/4 Width
Side bracket method
11/16"
11/2"
1/4"
193/4"
97/ 8"
-
Width45/16" 45/16"
Width 811/16"
4
Page 5

Installation (continued)
7. Assemble the frame installation tool (J)
8. Position the frame on the frame installation tool and lean
against the wall.
8.2 Screens 160" and wider require a spreader bar. Connect the
top and bottom frame with the spreader bar and connect this
by using the two supplied screws (D).
8.1 Screens 160" and wider have a top and bottom frame in two
frame pieces. Connect the 2 frame pieces with the supplied
connection bracket and secure this with the inserted hex
screws.
9. Carefully unpack the screen surface and put on the supplied
gloves (K) before handling the surface.
NOTE: Do NOT handle the projection surface without gloves!
Position the roller with the projection surface upright in front
of the frame. Then from left to right, unroll the projection
surface while folding the surface around the frame and
attaching it to the velcro. This will require 2 people.
5
Page 6

Installation (continued)
10. First tension the surface so the end of the surface alligns with
the frame end. After the entire screen is attached, you can
adjust tensioning where necessary.
11. When the fabric is attached on top, attach the fabric on the
sides. Then rotate the frame and attach the remaining surface
at the top.
12. Fold the surface carefully around the corners. First do one
side, then fold over the small rectangular piece of fabric and
then fold over the remaining side.
1
2
3
13. Hang the FullVision brackets over the screws to position it on
the wall.
6
Page 7

7
Page 8

Conditions for Transportation and Storage
• Temperature: Between 40 - 100F (5 - 40C)
• Relative Humidity: 30% to 70%, non-condensing
• Always keep the projection screen horizontal during
• Make sure the entire package is supported when stored
• Do not stack more than six projection screens on top of each other
• Make sure the heaviest package is places at the bottom of the stack
transport and storage
Screen surface should be allowed to air out once every two months, or otherwise used on a regular basis, if the temperature is
above 72F (22C) and at least once every month if the temperature goes above 85F (30C).
LIMITED FIVE YEAR WARRANTY ON DALITE PRESENTATION PRODUCTS
Milestone AV Technologies LLC warrants certain Da-Lite branded products to the original purchaser only, to be free from defects in
materials and workmanship for a period of ive (5) years from the date of purchase by the original purchaser; provided they are properly
operated according to Da-Lite's instructions and are not damaged due to improper handling or treatment after shipment from the
factory.
This warranty does not apply to equipment showing evidence of misuse, abuse or accidental damage, or which has been tampered
with or repaired by a person other than authorized Da-Lite personnel.
Da-Lite’s sole obligation under this warranty shall be to repair or to replace (at Da-Lite’s option) the defective part of the merchandise.
Returns for service should be made to your Da-Lite dealer. If it is necessary for the dealer to return the screen or part to Da-Lite,
transportation expenses to and from Da-Lite are payable by the purchaser and Da-Lite is not responsible for damage in shipment.
To protect yourself against damage or loss in transit, insure the product and prepay all transportation expenses.
TO THE MAXIMUM EXTENT PERMITTED BY APPLICABLE LAW, THIS WARRANTY IS IN LIEU OF ALL OTHER WARRANTIES, EXPRESS
OR IMPLIED, INCLUDING WARRANTIES AS TO FITNESS FOR USE AND MERCHANTABILITY. Any implied warranties of itness for use,
or merchantability, that may be mandated by statute or rule of law are limited to the ive (5) year warranty period. This warranty gives
you speciic legal rights, and you may also have other rights, which vary from state-to-state. TO THE MAXIMUM EXTENT PERMITTED
BY APPLICABLE LAW, NO LIABILITY IS ASSUMED FOR EXPENSES OR DAMAGES RESULTING FROM INTERRUPTION IN OPERATION
OF EQUIPMENT, OR FOR INCIDENTAL, DIRECT, OR CONSEQUENTIAL DAMAGES OF ANY NATURE.
In the event that there is a defect in materials or workmanship of a Da-Lite product, you may contact our Customer Care Specialists at
3100 North Detroit Street, Warsaw, IN 46582, (574) 2678101, (800) 6223737.
IMPORTANT: THIS WARRANTY SHALL NOT BE VALID AND DALITE BRANDED PRODUCTS SHALL NOT BE BOUND BY THIS
WARRANTY IF THE PRODUCT IS NOT OPERATED IN ACCORDANCE WITH THE DALITE WRITTEN INSTRUCTIONS.
Keep your sales receipt to prove the date of purchase and your original ownership.
FOR YOUR IMAGE | legrandav.com
USA P 866.977.3901 E info@da-lite.com
CANADA P 877.345.4329 E canadainfo@milestone.com
EMEA P +31 495 580 840 E emea.sales@milestone.com
APAC P +852 2145 4099 E asia.da-lite@milestone.com
In British Columbia, Milestone AV Technologies ULC carries on business as MAVT Milestone AV Technologie s ULC .
©2018 Milestone AV Technologies. DL0725 (Rev. 1) 7/18 Da-Lite is a registered trademark of Milestone AV
Technologies. All other brand names or marks are used for identiic ation purposes and are trademarks of
their respective owners. All patents are protected under existing designations. Other patents pending.
11816
 Loading...