

Page 1
DA-LITE IS MORE
THAN PROJECTION SCREENS
Da-Lite Tripod, Wall &
Ceiling and Electric Screens
Da-Lite Overhead
Projectors
Da-Lite Lecterns
Communications
Cabinets and
Credenzas
Da-Lite
Project-O-Stands
and Easels
Da-Lite
Model 5000 Portable
80162 Rev. 12/01
POWER
PRESENTATION PRODUCTS
The
In
Operating Instructions
For
Model C
with CSR
(Controlled Screen
Return)
DA-LITE SCREEN COMPANY, INC.
3100 North Detroit Street
Post Office Box 137
Warsaw, Indiana 46581-0137
Phone: 574/267-8101
800-622-3737
Fax: 574/267-7804
http:// www.da-lite.com
e-mail: info@da-lite.com
Page 2
YOU HAVE MADE A WISE
SELECTION…
in choosing a Da-Lite projection
screen, designed and engineered
to produce the sharpest, most
pleasing pictures with maximum
convenience.
WALL MOUNTING
TO OPEN SCREEN
1. Select fasteners of proper type for wall or
ceiling involved.
2. Insert fasteners through proper openings
provided in back side of end caps.
3. Attach screen securely to studding or other
solid surface - never to plaster only.
4. MAKE SURE SCREEN IS MOUNTED LEVEL.
Pull down on pull bail until desired picture area is
obtained. Lock into position as on a window
shade. Be sure surface is locked before
releasing.
NOTE: This screen will not lock into position in
the upper portion of its travel.
SUGGESTED
METHODS
OF
INSTALLATION
FOR WALL
FOR
CEILING
Model C with CSR (Controlled Screen Return) is
a feature offered exclusively by Da-Lite to assist
the quiet controlled return of the screen into the
case.
Page 3

CEILING MOUNTING
1. Heavy screw hooks may be installed into
wood joists. Other types of hooks or chain
may be used for other ceilings or for stage
installations.
2. Insert hooks or chain through proper
openings provided in sides of end caps.
Screen must hang so that flat back of
case is perpendicular to floor.
3. MAKE SURE SCREEN IS MOUNTED
LEVEL.
PRECISION SEAMING
Large screens will have one or more horizontal
seams. Seams are standard and necessary in
large size screens since surfaces are limited to
the available fabric size.
Da-Lite Perma-Sealed seams are made by
butting carefully matched edges of two panels
together and fastening with special tape that is
sealed to the reverse side. These seams are
guaranteed not to separate. Seams in a picture
surface should not be construed as patched or
defective. In use, the seam will be virtually
invisible in the projected picture.
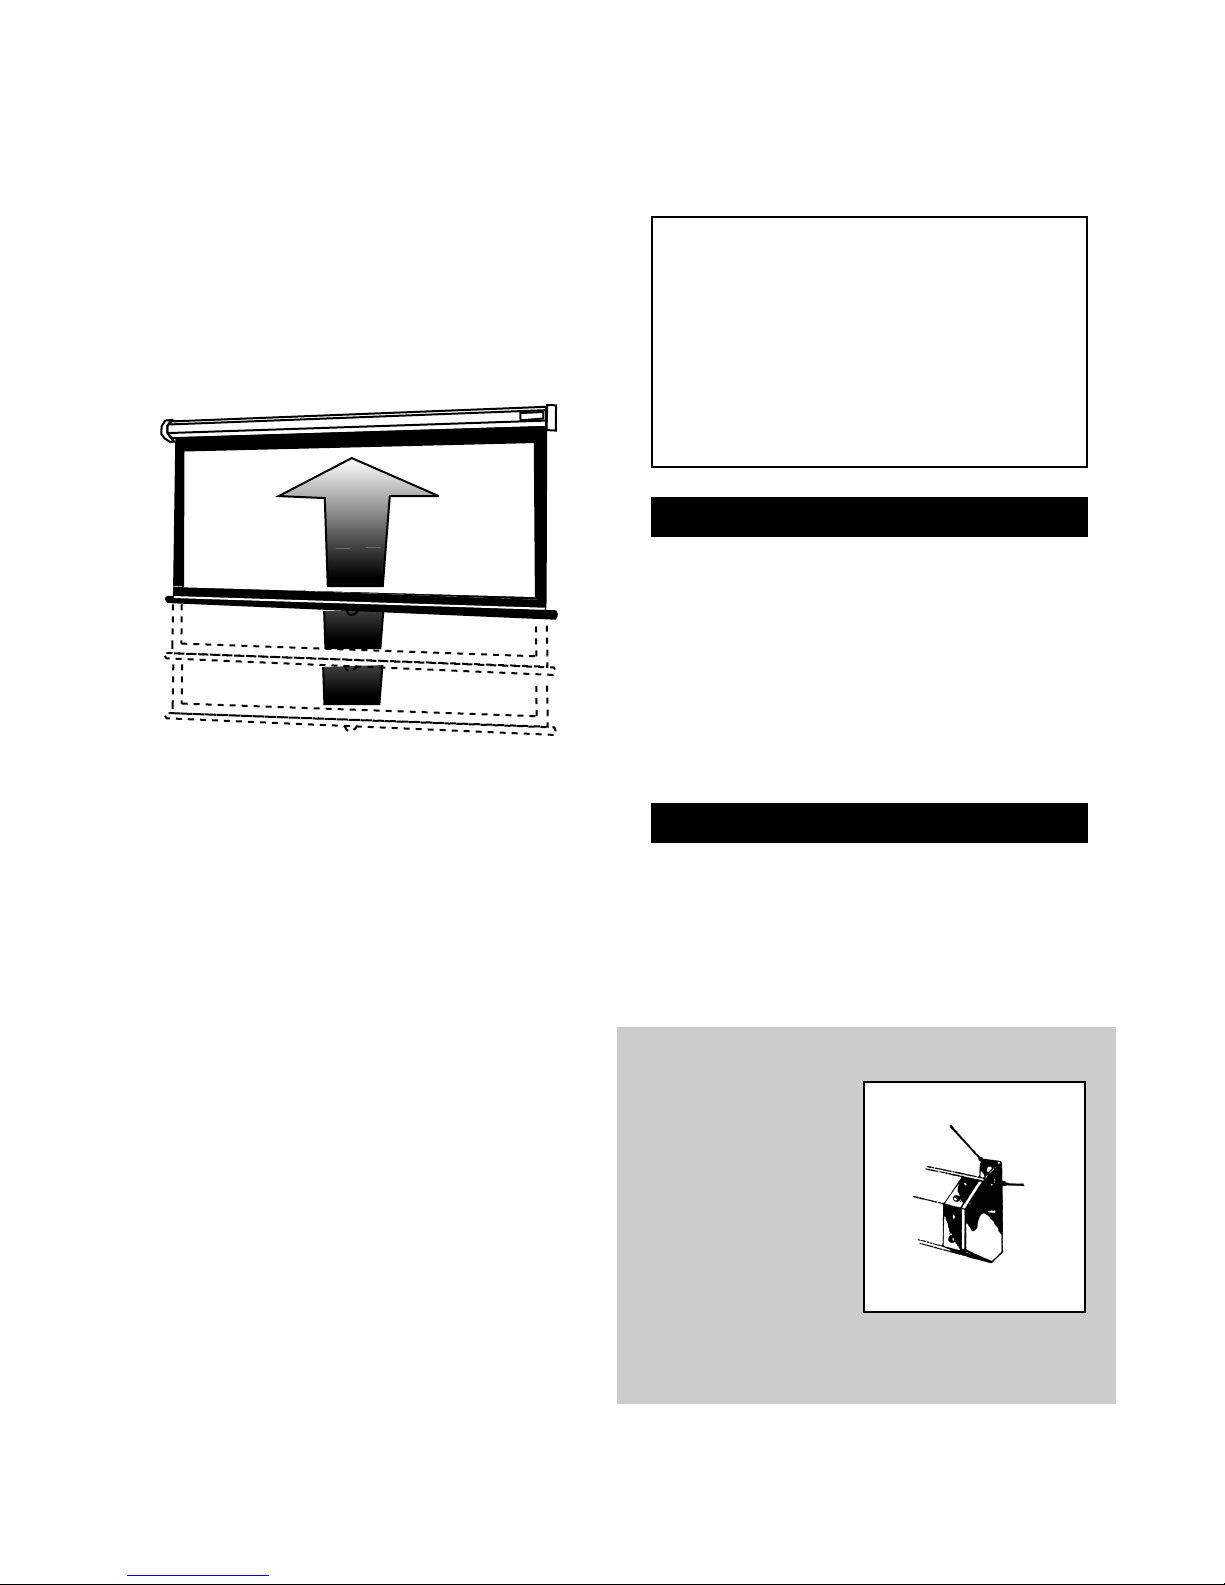
TO RE-ROLL YOUR PICTURE SURFACE
The Model C operates on the same principle
as a window shade. Pull down about 6 inches
to disengage the locking pawl and start the
fabric up firmly and quickly.
Large picture surfaces are heavy and will start
up too slowly to prevent the locking pawl from
catching unless help is provided, so keep
picture surface moving briskly.
Should the locking pawl catch, pull the picture
surface down about 6 inches and start the
surface up rapidly.
The CSR feature of this screen will allow the
screen to stop, as normal, in the bottom portion of its travel. The screen will not stop in the
top portion of its travel, but will continue slowly and gently into the case.
PROTECT YOUR SCREEN
Before re-rolling surface into case, examine
both front and back of surface to be sure they
are free of foreign matter.
WALL MOUNTED
PICTURE SURFACE
PICTURE SURFACE
CEILING HANGING
PICTURE SURFACE
USE No. 6 BRACKETS TO HANG
BEHIND BEAM OR VALANCE
PICTURE
SURFACE
CONCEALED
(ALLOW ROOM FOR ACCESS)
Page 4

MODEL C
EXCLUSIVE FEATURES
• Choice of Glass Beaded or Non-Gloss
Matte White Picture Surfaces
• Easily Installed
• Multi-Purpose End Caps Form Sturdy
Brackets for Wall/Ceiling Installation
• Aluminum Slat Saddle Distributes Uniform
Tension on Picture Surface
• Heavy Duty Grooved Metal Roller Assures
Permanent Fastening of Picture Surface
• Nylon and Ball Bearing Roller Mounting
• Handsome, Rugged, Enamel Steel Case
• Floor Stand Accessory
(optional at extra cost)
HANGING BRACKETS
(Optional at extra cost)
No. 11 Wall Bracket
Non-Adjustable permits
screen to extend 10" or
14" from wall.
No. 6 Wall Bracket
Non-Adjustable permits
screen to extend 6"
from wall.
 Loading...