

Dali Skyline 2000 Owners manual
Dali Skyline 2000
Owners Manual
Design Principals
The Dali Skyline 2000 is a full range dipole
loudspeaker, i.e. it radiates equal energy to the
front and to the rear. The Dali Skyline 2000
combines the superlative musical performance of
our propriety 100cm low-mass ribbon high
frequency driver with two sophisticated 4”
midrange units and a 15” ultra-long throw bass
diver. In order to achieve cohesion between these
drivers, we designed the crossover network that
integrates the drivers across a broad frequency
spectrum, ensuring seamless balance.
Any crossover that integrates across such
a broad frequency band creates a restricted
listening window. FOR THIS REASON THE
INITIAL SETUP OF THE DALI SKYLINE
2000 IS CRITICAL. Please follow the
installation instructions carefully. Should further
assistance be required, please contact your Dali
dealer
To make the initial set-up of your Dali
Skyline 2000 easier and to avoid damage to the
floor or floor covering, we recommend that you
do not mount the spikes until after you have
found the correct position for the speakers.
Correct Placement
Dali A/S
Dali Alle 1
DK – 9610 Norager
Tif 96 72 11 55
Fax 98 55 18 36
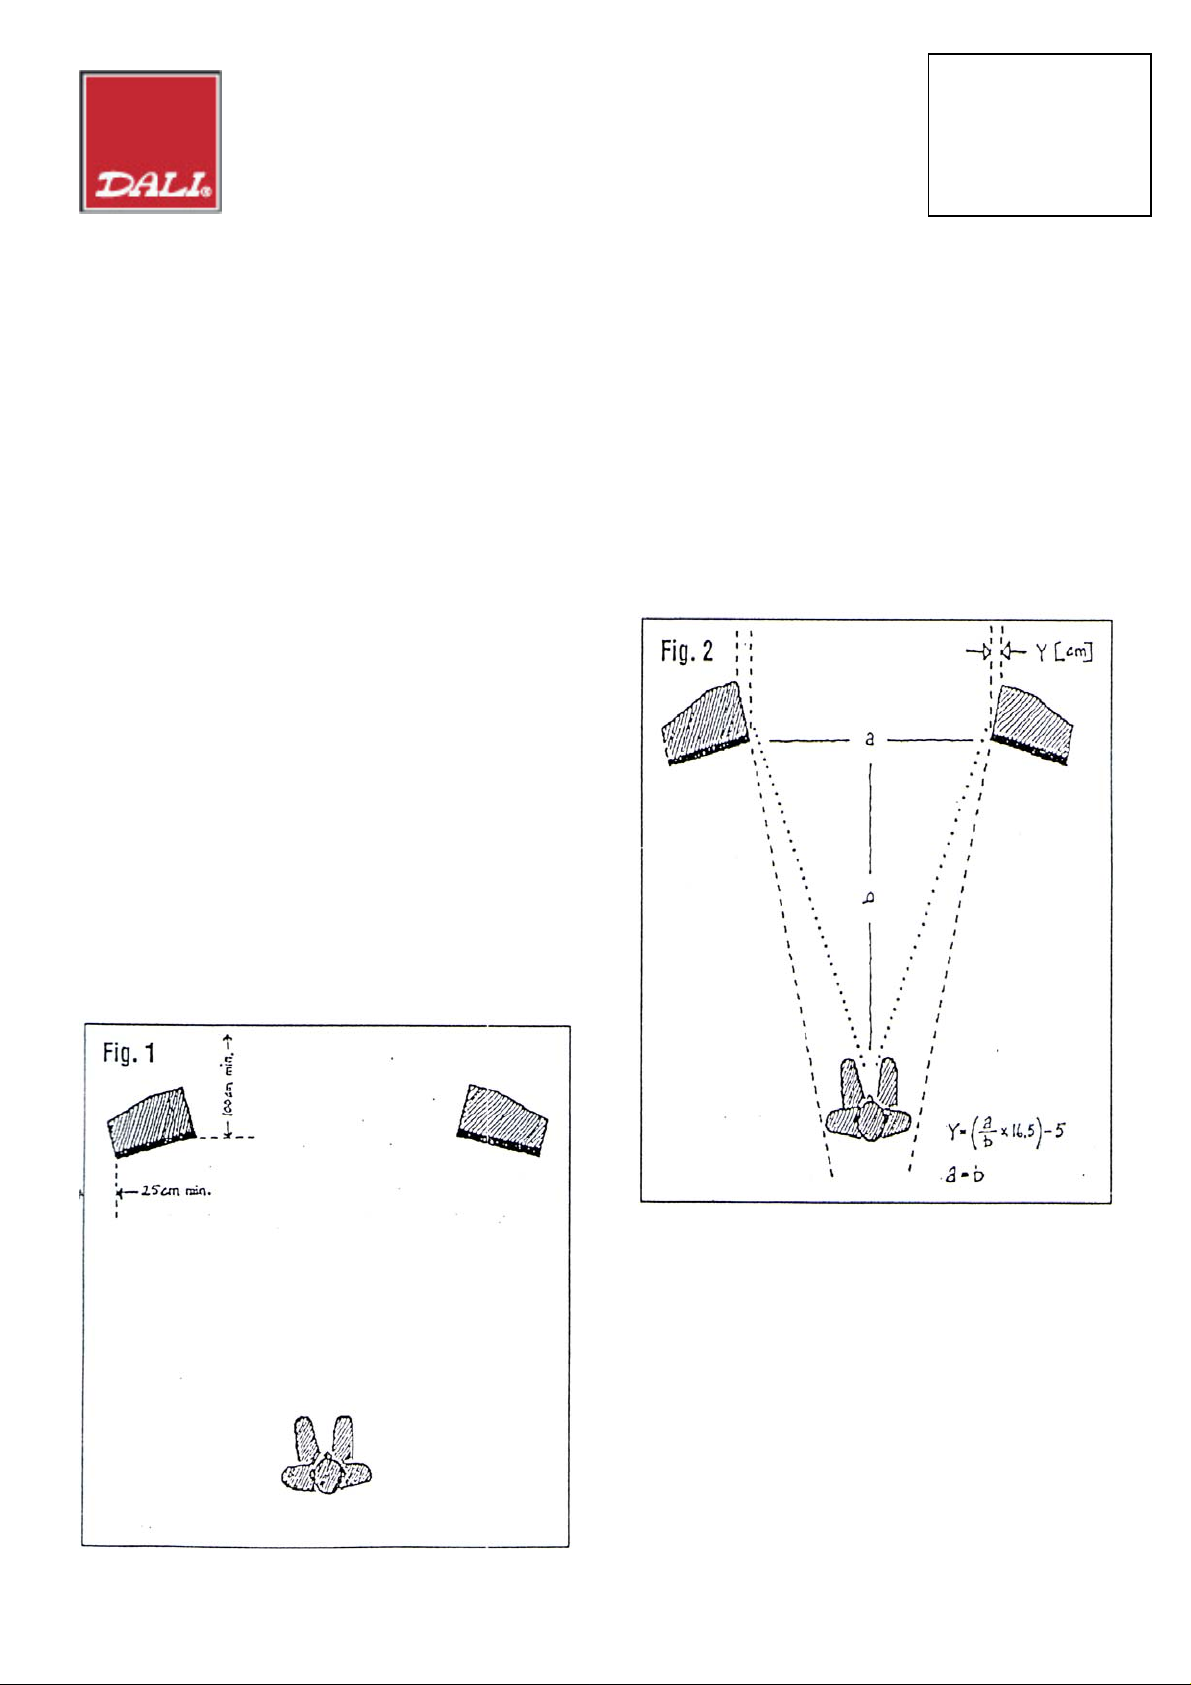
The outside front edge of the loudspeaker should
be at least 25cm from the side wall. The inside
front edge should be at least 100cm from the rear
wall ( See fig 1. )
Recommended Listening Position
The ideal listening position is midway between
the speakers, so that the distance (a) between the
loudspeakers is the same as the distance (b) to the
listener ( See fig.2. )
Recommended angling
For best performance, the Dali Skyline 2000’s
should be angled inward toward the listening
position. ( See fig. 2. )
Imagine a straight line from the inside front edge
of the speaker to the back wall. Imagine another
straight line from inside rear edge of the speaker
to the back wall. The disyence ( Y ) between
these two lines determines correct angling
1. If distance ( a ) is the same as distance ( b ),
Dali Skyline 2000
then the speakers should be angled inward so that
the distance ( y ) between the two lines is 11.5cm
2. If distance ( a ) and distance ( b ) are different
then the value of ( y ) can be found as follows;
divide ( a ) by ( b ) multiply by 16.5 subtract 5.
The result is ( y ) in centimetres.
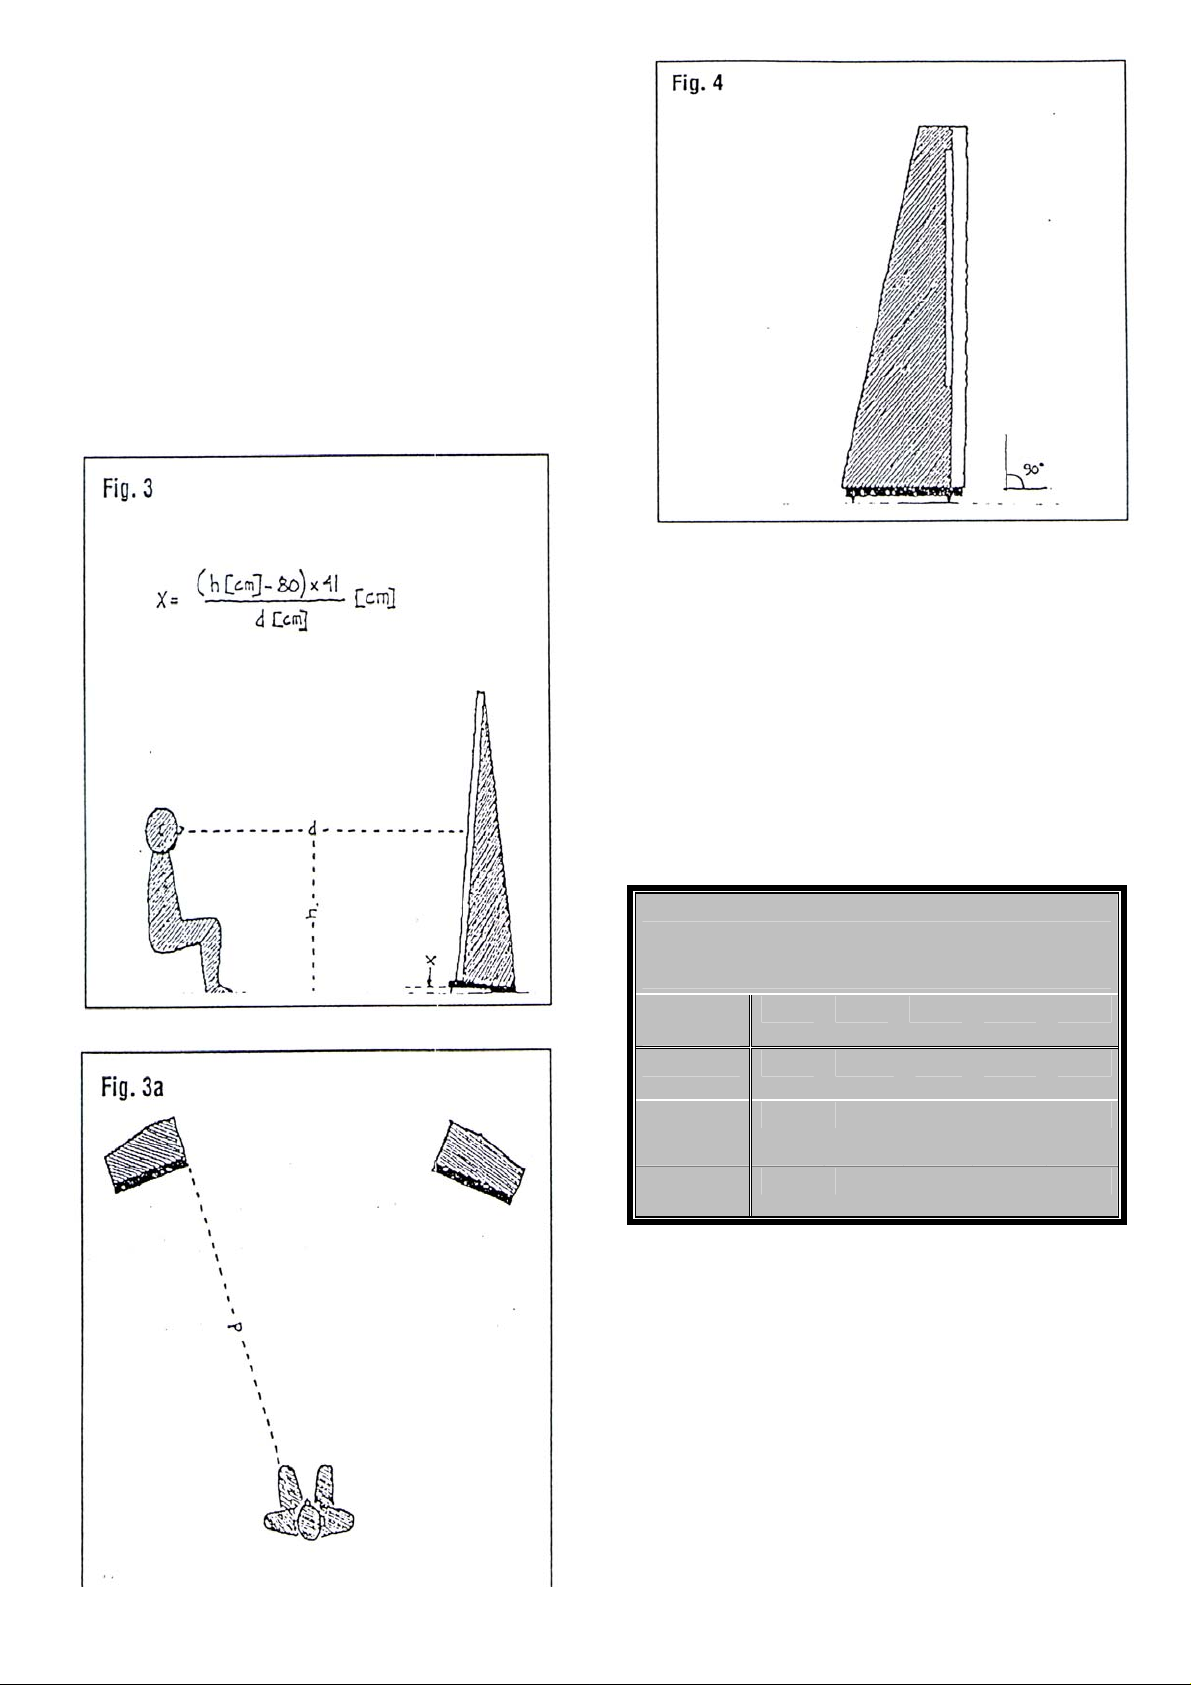
Optimum Tilt
Once you have found the proper position for the
speakers, install the three spikes at the base of
the loudspeaker. Install the long spike at the front
under the base with the large bolt on top of the
base. Install the short spikes with their bolts
under the base at the rear. Adjust the height of the
spikes so that the speaker stands up at a 90 degree
angle, perpendicular to the floor. For best
performance, the speaker should then be tilted
back. Exactly how much tilt depends on listening
distance ( d ) and listening height ( h ).
( See figs. 3, 3a, 4. )
Table 1. Determining Optimum Tilt in CM
Listening Distance
Listening
height
2.0m 2.5m 3.0m 3.5m 4.0m
90 CM 2.0 1.6 1.3 1.1 1.0
100 CM 4.1 3.3 2.7 2.3 2.0
110 CM 6.1 4.9 4.1 3.5 3.0
Table 1 lists the most common combinations. The
number in the table tells you how much longer
the front spike should be in order to achieve
optimum tilt. For instance, if your listening
height is 100cm and listening distance is 3.0m
then you should extend the front spike an
additional 2.7cm.
If you listening height or distance is not listed in
table 1, use the following method: subtract 80
from your listening height ( measured in cm )
 Loading...