

Dali Helicon 400 Owners manual
3
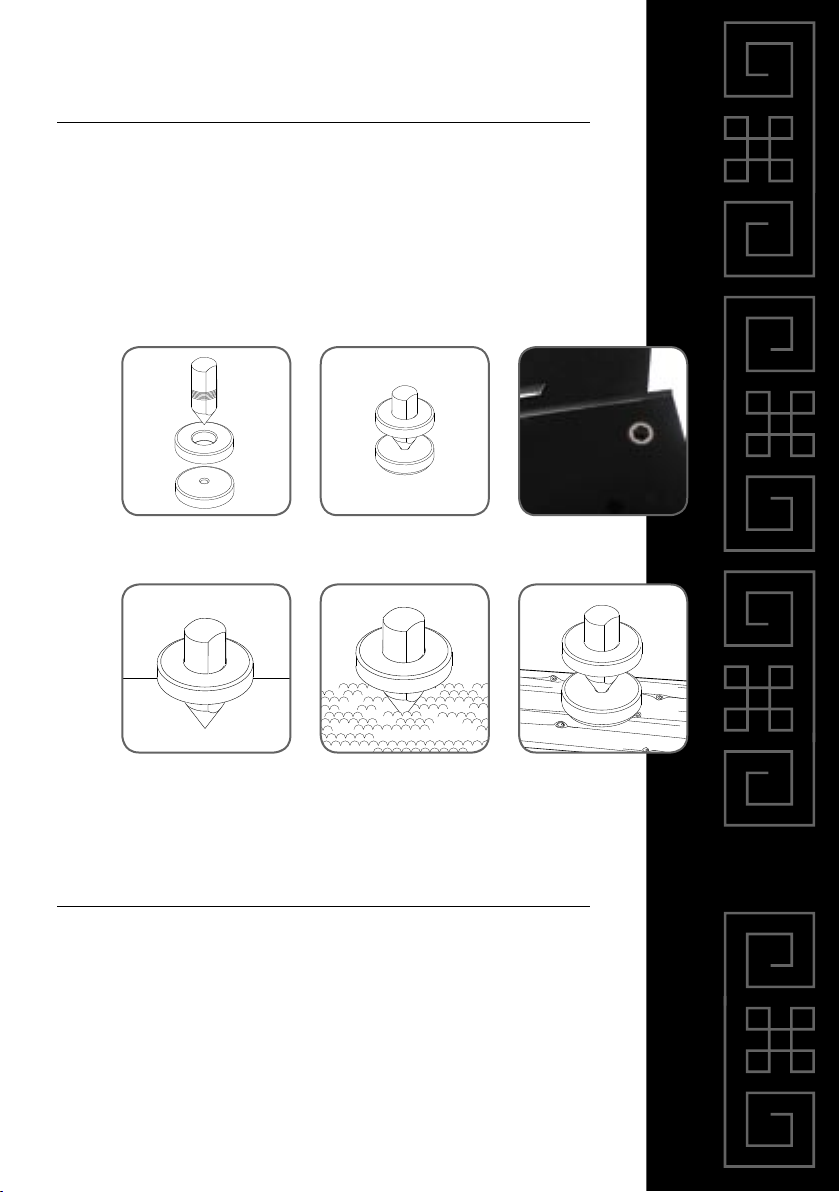
Standard accessories
DALI Helicon fl oor standing loudspeakers comes with 4 spikes for fi tting beneath
the speaker. It is extremely important that these spikes are fi tted correctly to
ensure speaker stability. Remember to tighten the lock nut well once you have
adjusted the height of the four spikes.
Running - in
Like any other mechanical system, a speaker needs to be "run in", so you can
look forward to a gradual improvement in sound quality over the initial period.
Unlike other mechanical systems, a DALI speaker does not wear out - in fact,
regular use will extend its lifetime.
Generally we recommend the use of
spikes without foundation
Installing spikes on a soft surface Installing spikes
on a hard surface
Spike
Contra nut
Foundation
Installation of spikes Screw bushes
integrated in the
plinth

4
Positioning of HELICON 400
Once you have connected your new Helicon speakers, you need to begin the
process of searching for the perfect location for the speakers in relation to your
listening position - and adjusting the surround
amplifi er, if applicable. It is worth spending a
little time experimenting, as the correct set-up
and tuning will provide a signifi cantly better
sound experience. Here are some useful pieces
of advice:
Avoid placing objects between the speakers and
your listening position, as obstructions can cause
incorrect tonal balance.
Try to ensure that the distance between the left
and right speakers is equal to the distance from
your listening position to the speakers.
DALI Helicon has been designed using the Linear
Directivity principle, which means that the tonal
balance will be perfect, even if your listening
position is not quite central. It is not necessary to
angle the front speakers towards your listening
position, unless the front speakers are very far
apart.
Listening position
Min. 25 cm

The listening room
Every room has its own distinctive acoustics, which influence the way we experience the sound from a speaker. In actual fact, it's a matter of how the room
accommodates the sound and then dissipates it. You can influence the acoustics
of your listening room in various ways.
Some of the sound you hear comes not from the actual speakers but from reflections from floor, ceiling and walls. These reflections are dampened by objects such
as furniture, plants and carpets. If the sound is bright, soft items such as curtains
and carpets can help. If the room has large window panes, drawing the curtains
will prevent reflections from the glass surfaces.
Both the amount and quality of the deep bass depend on the size and shape of
the room and the position of the speakers. If positioned near a side or back wall,
this will accentuate the bass. A corner location will accentuate it even more, but
will also increase the reflections. The decision is yours, so experiment with different positions to find which provides the ideal sound for you.
As a general guide, avoid large, hard reflective surfaces immediately around the
speakers, as these will act as a "phantom speaker" and ruin the spatial perspective of the sound image. Try placing a wall hanging behind the speakers, laying a
rug in front or placing a large plant at the side - it's surprising how much this can
affect the precision of the sound image.
Once you are happy with the positioning of your speakers, it is
important to ensure that they are completely stable. For floor
models it is essential that you use the accompanying spikes.
5
6
Connection
The connection to your amplifi er is extremely important for your sound
experience. Always turn off your amplifi er before connecting any cables or
altering any connections.
Always use cables of the same type and length for left and
right speakers. We recommend using special speaker cables
from DALI, available from your dealer.
For the perfect sound experience, the right speaker must be
connected to the output terminal marked "R" or "Right" on
your amplifi er and the left speaker to the terminal marked
"L" or "Left".
A detail that is often overlooked is connection in correct
phase, i.e. the red terminal (+) on the amplifi er should be
connected to the red terminal (+) on the speaker, and the
black terminal (-) on the amplifi er should be connected to
the black terminal (-) on the speaker. If just one speaker in a
stereo or surround sound system is not connected in phase,
the bass will be weak and the overall sound will be diffuse.
The same guidelines apply irrespective of the number of
speakers in your sound system: speakers positioned to the
right must be connected to the amplifi er output terminal
marked "R" or "Right", and any to the left must be connected to "L" or "Left".
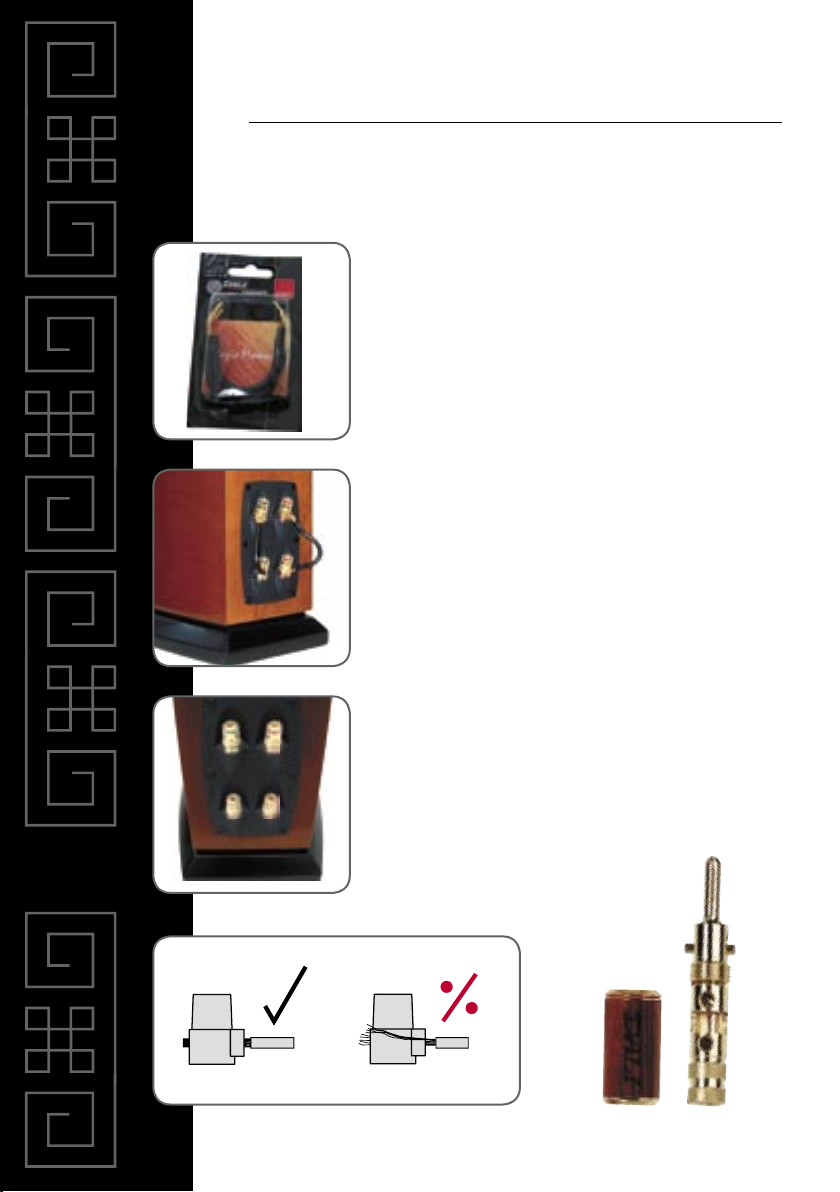
You must ensure that the cable ends are fi rmly pushed into
the terminals, and that there are no loose wires, which could
cause a short circuit and damage the amplifi er.
Fig. 2. Terminal connection
7
We recommend DALI Silver Wave Four for bi-wiring.
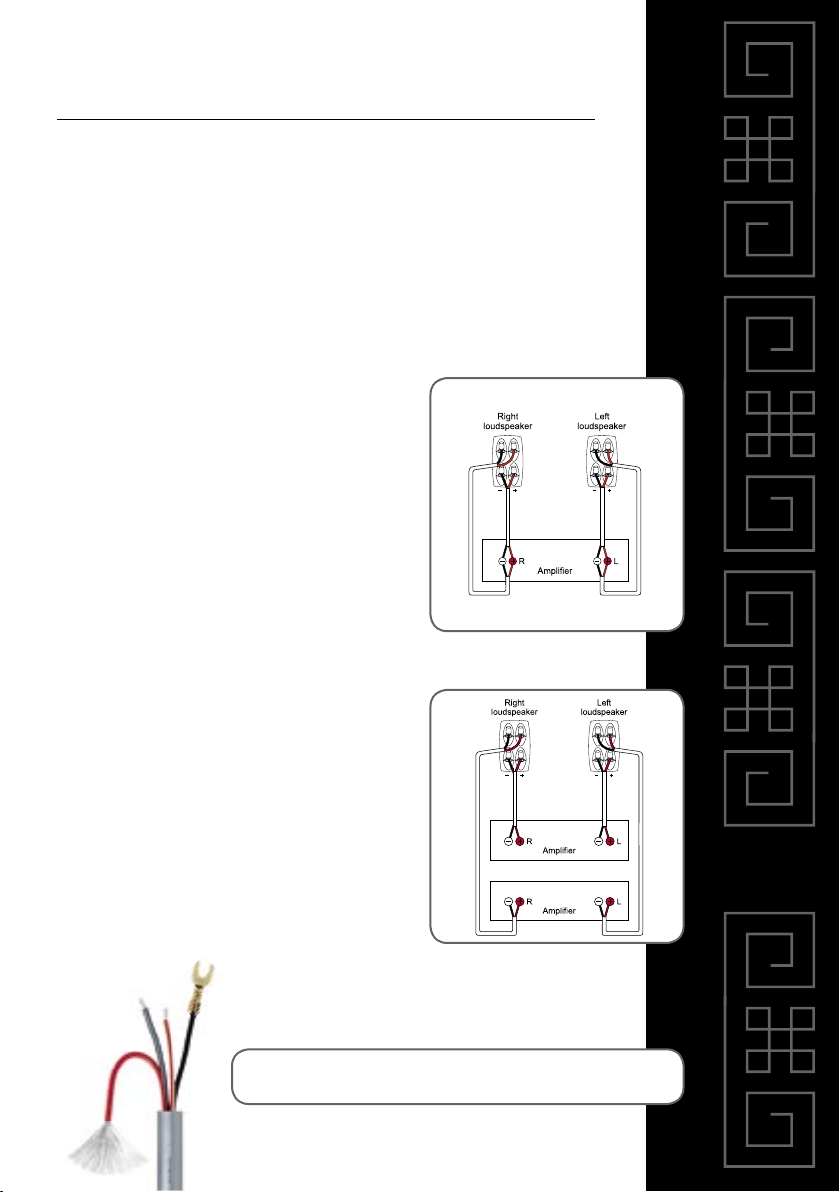
Bi-wiring and Bi-amping
Bi-wiring or bi-amping improves the sound quality signifi cantly and is highly
recommended. Bi-wiring provides greater openness in the sound image and
reduces distortion. Bi-amping provides even greater openness in the sound image
and expanded dynamic range.
Bi-wiring
The top terminal pair are connected to the high frequency section of the crossover
network, and the bottom terminal pair are connected to the bass section of
the crossover network. When employing bi-wiring or bi-amping, the metal links
between the terminals should be removed.
In the case of bi-wiring, the speaker cable is connected via a terminal pair on each speaker to the
respective output terminals on the amplifi er - and
then the cable from the speaker's other terminal pair
is connected to the same output terminals on the
amplifi er (Fig. 3).
Bi-amping
We recommend using identical stereo amplifi ers. One
amplifi er supplies the speakers with the signal for
the high frequency section of the crossover network,
and the other amplifi er supplies the bass section.
The left speaker's bass terminals (the bottom ones)
should be connected to the left channel on one of
the amplifi ers, and the right speaker's bass terminals
to the right channel on the same amplifi er. The same
principle should be followed for connecting the high
frequency terminals of the speakers (Fig. 4).
Fig. 3. Bi-wiring
Fig. 4. Bi-amping
 Loading...