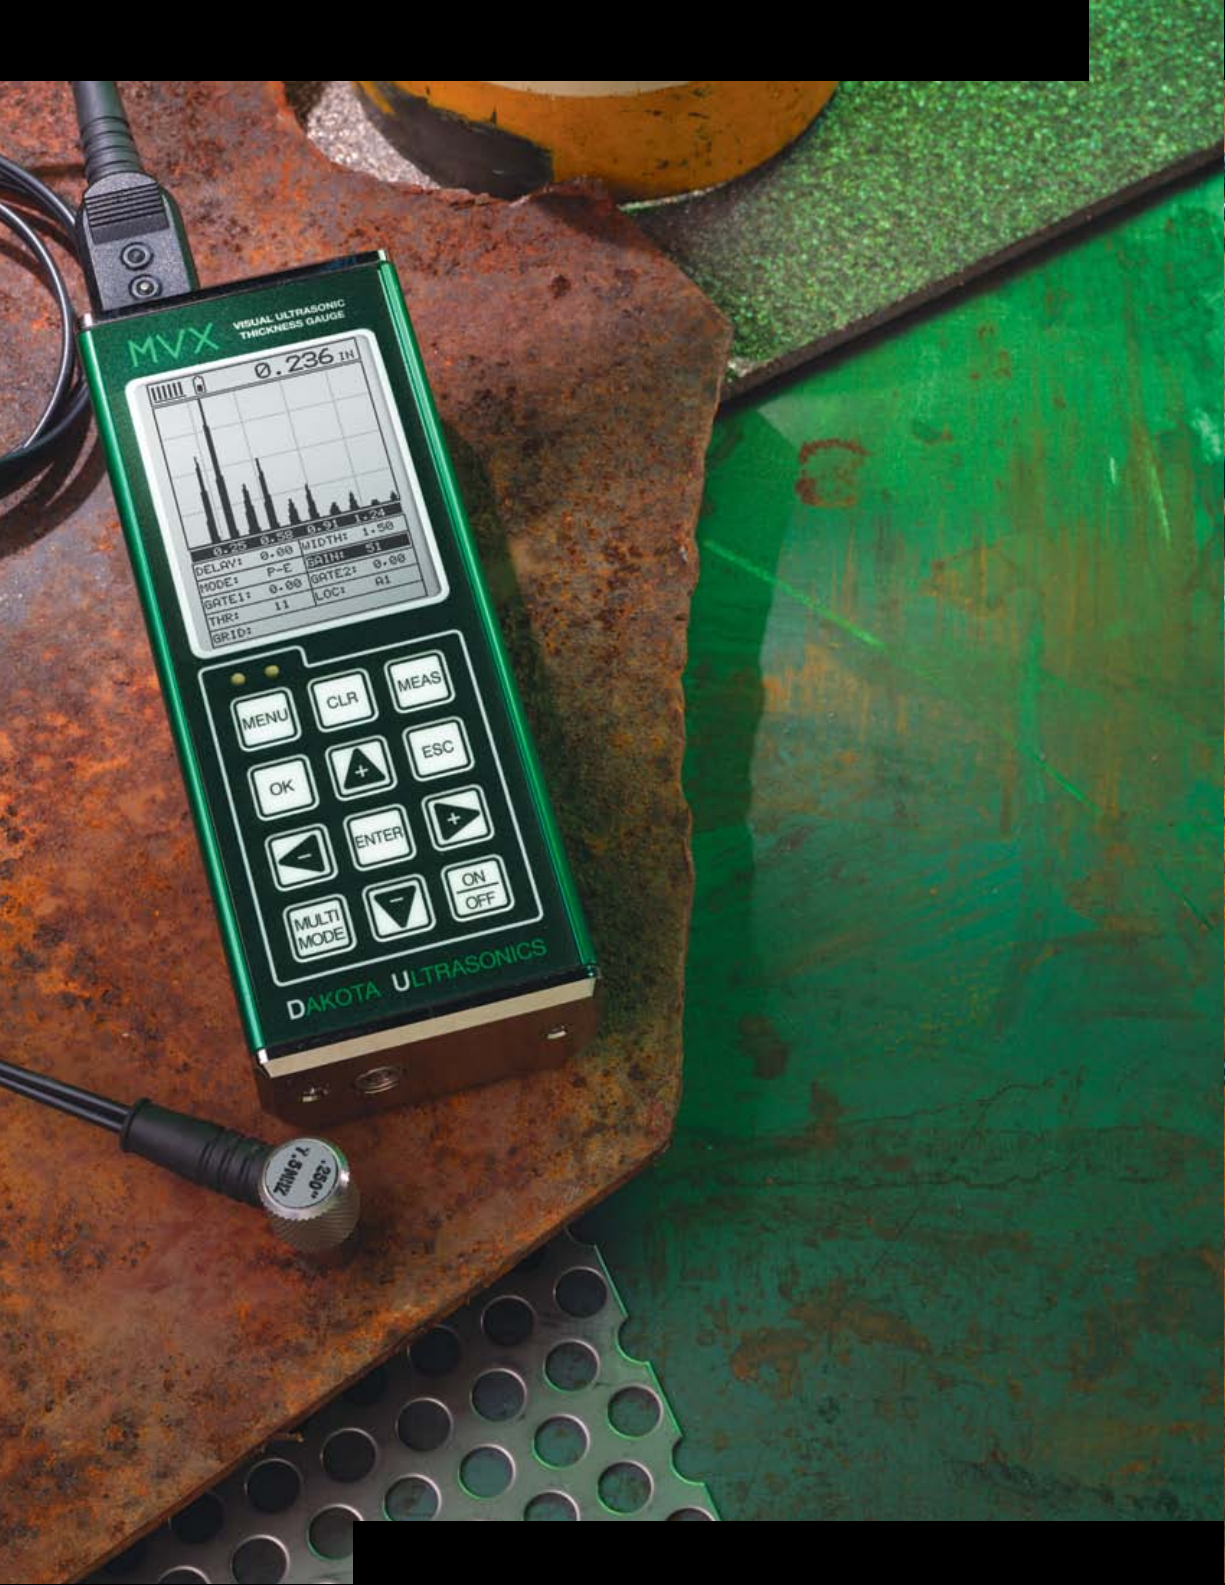
Page 1

D A K O T A U L T R A S O N I C S
MVX v2.0
MVX v2.0
A/B Scan Ultrasonic
A/B Scan Ultrasonic
Thickness Gauge
Thickness Gauge
▶ Powered by a 100MHz DSP platform
using FPGA technology.
▶ 1/8” VGA grayscale display (240 x 160
pixels). Screen Refresh rate of 25 Hz.
▶ Manual or AGC gain, depending
on measure mode selected (50 dB gain
range).
▶ Linear time dependent gain (TDG). built
built into each transducer type.
▶ Display veiws: RF, +/- Rectied, B-Scan
(cross section), or Large Digits.
▶ Two independent gates.
▶ Measure modes: (P-E) pulse-echo (aws
& pits) and (E-E) echo-echo (thru-paint).
▶ Dual element style transducers.
▶ Memory: 4 gigabyte internal SD card.
▶ Windows® PC & OSX interface software.
▶ USB-C connectivity.
S O U N D S O L U T I O N S
Page 2

MVX SPECIFICATIONS
�
Physical
Weight:
13.5 ounces (with batteries).
Size:
2.5 W x 6.5 H x 1.24 D inches
(63.5 W x 165 H x 31.5 D mm).
Operating Temperature:
-14˚ to 140˚F (-10˚ to 60˚C).
Keyboard:
Membrane switch with twelve tactile keys.
Case:
Extruded aluminum body with nickel-plated aluminum end caps (gasket sealed).
Display:
1/8in VGA grayscale display (240 x 160 pixels); viewable area 2.4 x 1.8in (62 x 5.7mm);
EL backlit (on/o/auto invert).
Ultrasonic Specications
Measurement Modes:
Pulse-Echo (aws, pits).
Echo-Echo (thru-paint).
Pulser:
Square wave pulser with adjustable pulse
width (spike, thin, wide).
Receiver:
Manual or AGC gain control with 50dB
range, depending on mode selected.
Timing:
Precision TCXO timing with single shot 100
MHz 8 bit ultra low power digitizer.
Pulse Repetition Frequency - 250 Hz.
Display
Display Views:
A-Scan: Rectied +/- (aw view) RF (full
waveform view). Refresh rate at 25 Hz.
B-Scan: Time based cross section view.
Display speed variable (10 to 200 readings
per second).
Large Digits: Standard thickness view;
Digit Height: 0.700 in (17.78 mm).
Scan Bar: Speed 10 Hz. Viewable in B-Scan
and Large Digit views.
Bar Graph: Indicates stability of measurement.
& Thickness Gauge
Power Source
Line Power: USB-C to PC or power outlet.
Batteries:
Three AA cells. Alkaline - 35 hrs, Nicad - 10
hrs and NI-MH - 35hrs.
Auto power o if idle 5 minutes.
Battery status icon.
Measuring
Range:
Pulse-Echo Mode (P-E) - (Pit & Flaw Detec-
tion) measures from 0.025 in. to 100 ft.
(0.63 mm to 30.48 M).
Echo-Echo Mode (E-E) - (Thru Paint &
Coatings) measures from 0.100 to 6.0 in
(2.54 to 152.4 mm). Range will vary +/depending on the coating.
Resolution: +/- .001 inches (0.01 mm).
Velocity Range:
0.0122 to 0.7300 inches/µs
309.88 to 18542 meters/sec
Single and Two point calibration option, or
selection of basic material types.
Units: English & Metric
Transducer
Transducer Types:
Dual Element (1 to 10 MHz).
Locking quick disconnect LEMO “00” connectors.
Standard 4 foot cable.
Custom transducers and cable lengths
available for special applications.
Memory
Data Structure:
Grid (alpha numeric)
Screen Capture:
Bitmap graphic capture for quick documentation (.tif ).
OBSTRUCT to indicate inaccessible locations.
Capacity:
4 Gb internal SD card.
Data Output:
USB-C 1.1 to PC & OSX connectivity.
Features:
Setups:
64 custom user-denable setups; Factory
setups can be edited.
Selectable Transducers:
Selectable transducer types with built-in
dual path error correction for improved
linearity.
Alarm Mode:
Set Hi and Lo tolerances with audible
beeper and visual LEDs.
Scan Mode:
Takes 250 readings per second and displays
the minimum reading found when the
transducer is removed.
Certication
Factory calibration traceable to NIST & MILSTD-45662A.
Warranty
2 year limited
MADE IN THE USA
Distributed By:
DAKOTA ULTRASONICS
1500 Green Hills Road, #107
Scotts Valley, CA 95066
Ph: (831) 431-9722
Website: www.dakotaultrasonics.com
Fax: (831) 431-9723
Email: info@dakotaultrasonics.com
 Loading...