Page 1

D A K O T A U L T R A S O N I C S
THE
THE
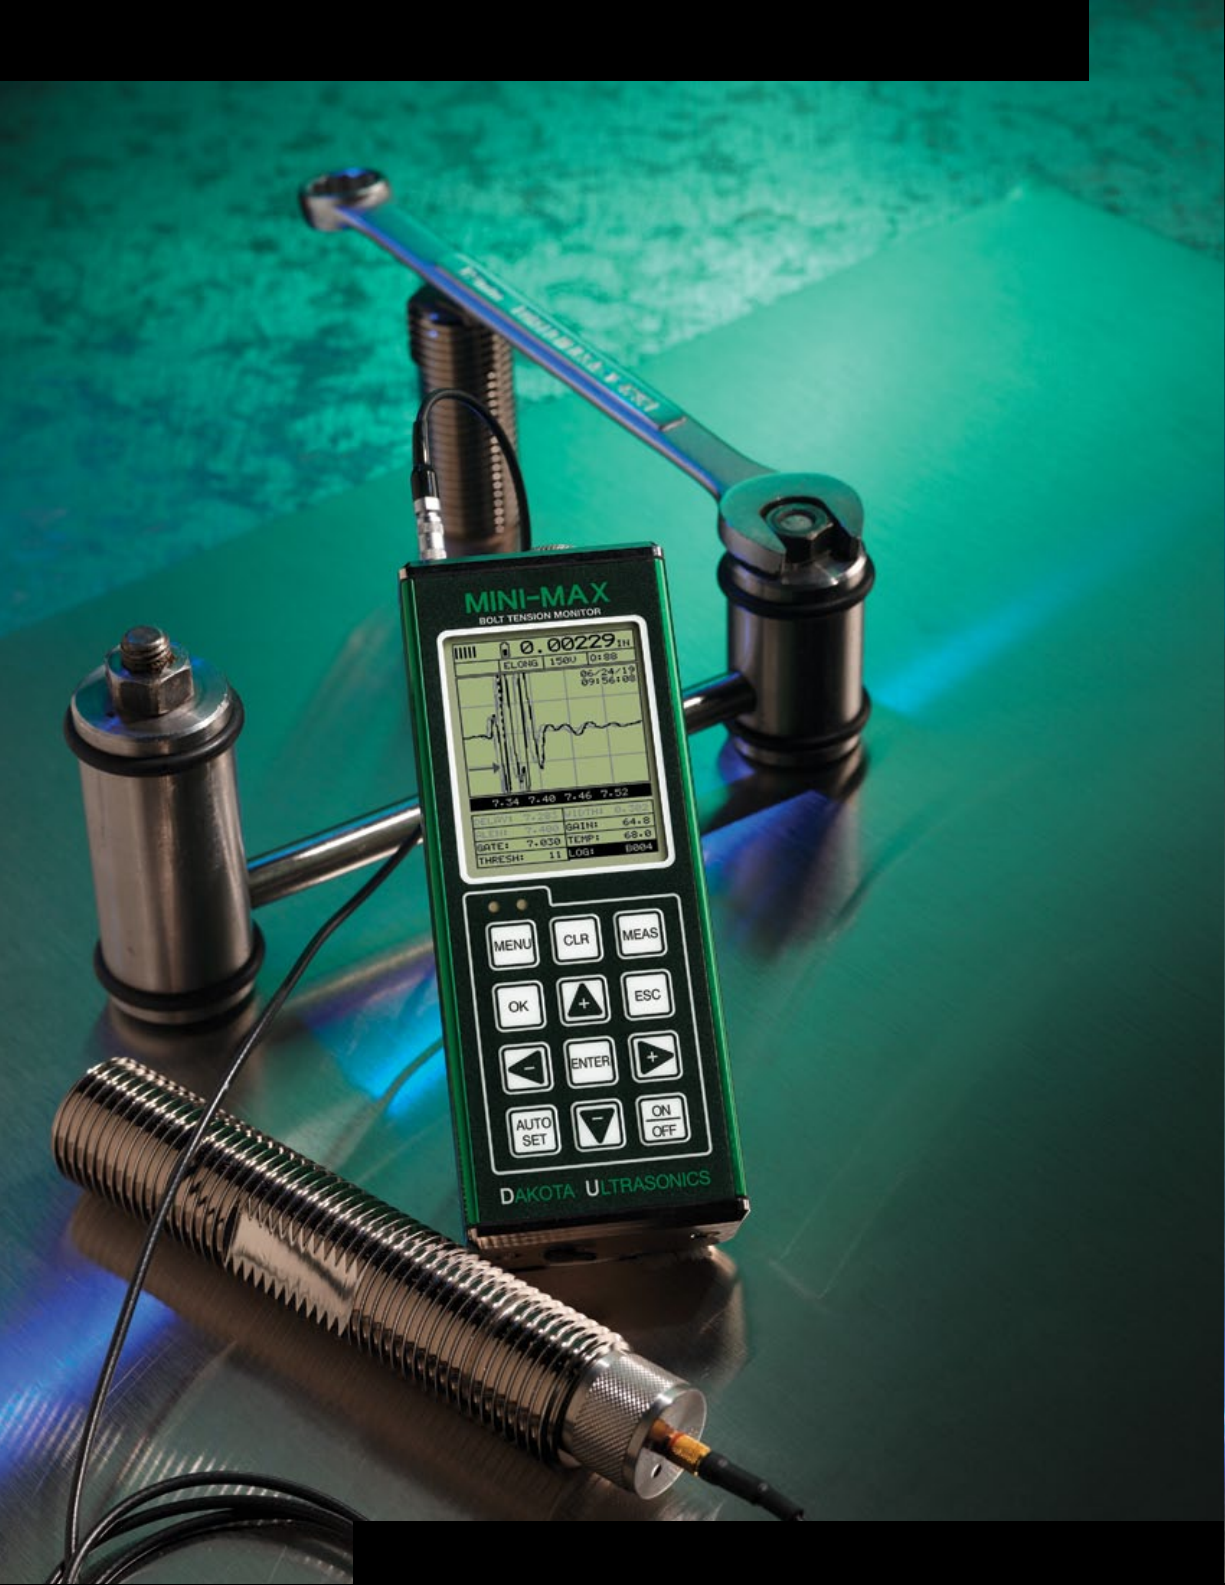
Ultrasonically measures the
elongation produced by
tightening a threaded
fastener.
MINI-MAX
MINI-MAX
Bolt Tension Monitor
Bolt Tension Monitor
v2.0
v2.0
Highlights:
HIghlights:
▶ Precision TCXO timing.
▶ Sunlight readable LCD display
(240 x 160 pixels) .
▶ Adjustable digitizer - Resolution.
▶ Pulse-Echo measurement mode.
▶ Temperature compensation.
▶ Quantities - Elongation, Load, Stress,
Strain and Time (nanoseconds).
to the loaded waveform.
▶ Auto Correlation - transducer
placement.
▶ Auto Calibration.
▶ USB-C connectivity.
▶ 4GB internal SD memory.
▶ PC & OSX reporting software.
▶ 2 year warranty.
S O U N D S O L U T I O N S
Page 2

MINI-MAX SPECIFICATIONS
Physical
Weight: 13.5 ounces (with batteries).
Size: 2.5W x 6.5H x 1.24D in (63.5 x 165 x
31.5 mm).
Operating Temperature: 14˚ to 140˚F
(-10˚ to 60˚C).
Keyboard: Membrane switch with twelve
tactile keys.
Case: Extruded aluminum body with nickel
plated aluminum end caps (gasket sealed).
Environmental: Meets IP65 requirements.
Connections
USB: Direct USB-C 1.1 PC connectivity.
Windows & OSX interface software.
Line Power: USB-C to PC or AC adaptor.
Temperature Sensor: 5 pin Lemo 1.
Transducer Connector: Lemo 00.
Memory
Log Format: Grid (Alpha Numeric).
Capacity: 4GB internal SD memory.
Screen Capture: Tagged interface le (.tif )
capture for quick documentation.
Custom Setups: 64 user congurations.
Power Source
Line Power: USB to PC or power outlet.
Batteries: Three AA cells.
Alkaline 35 hrs, Nicad 10 hrs, NI-MH 35 hrs.
Auto power o after 5 minutes idle.
Battery status icon.
Transducers
Transducer types: Single element - 1
MHz to 10 MHz frequencies, and 1/8” to 1”
diameters.
Glue-On: Available for short bolts with
minimal/short elongations to eliminate
transducer placement errors.
Connectors: Microdot, Lemo 00, or BNC
options depending on the transducer
model selected.
Custom transducers: Available for special
applications.
Temperature probe: Automatic temperature compensation.
Electronics
Display: 1/8in VGA grayscale display (240
x 160 pixels); viewable area 2.4 x 1.8in (62 x
45.7mm); EL backlit (on/o/auto invert).
Screen Refresh Rate: 30 Hz.
Timing: Precision TCXO timing with
single shot 100 MHz 8 bit ultra low power
digitizer.
Pulser Type: Square Wave.
Pulser Voltage: Selectable 100, 150 and
200 volts.
Pulse Width: Selectable options Spike,
Thin, and Wide. 80 to 400 ns.
Damping: 50, 75, 100, 300, 600, & 1500
ohms.
Frequency Band: Broadband 1.8 - 19 MHz
(-3dB) lter.
Horizontal Linearity: +/- 0.4% FSW.
Vertical Linearity: +/- 1% FSH.
Amplier Linearity: +/- 1 dB.
Amplitude Measurement: 0 to 100% FSH,
with 1% resolution.
Delay: 0 - 999.9 in (25,400 mm) at steel
velocity.
Measurement Gate: One gate with audible and visual alarm. Amplitude 5-95%,
1% steps.
Features
Setups: 64 custom user dened setups;
factory setups can also be edited by the
user.
Auto Set: Automates the detection, scope,
and display setting process for each individual bolt.
Alarm Limits: Adjustable Hi/Low tolerances with visual LED’s and audible beeper.
Field Calibration: Vector or Regression
correction curve for increased accuracy using Load & Stress.
Display Views
A-Scan: Rectied +/- (half wave view), or RF
(full waveform view).
Large Digits: Digital display only.
Alarm Limits Bar: Hi & Lo alarm limits for
displaying an acceptable tolerance range.
Measuring
Units: English (in), Metric (mm), or Time
(μs). Farenheit or Centigrade.
Velocity: 0.0492 to .5510 in/μs (1250–
13995 m/s).
Measurement Modes: Pulse-Echo (P-E).
Measurement Range: 1 in to 50 ft (25.4
mm to 15.24 M), dependent on material
type and consistency.
Detection: Zero Crossing.
Resolution: +/- 0.00001 in (0.0001 mm).
Calibration: Automatic, Fixed, Single or
Two-Point zero calibration options.
Quanties:
Time - Nanoseconds.
Elongation - Change in length (inches/mil-
limeters).
Load - Force load applied (pounds KIP, or
megapascals MPa).
Stress - Force for unit area stress applied
(inches per inch or millimeters per millimeter).
%Strain - Ratio of elongation to eective
length.
Bolt Materials: Select types from a preset
or custom list.
Repeatability Bar Graph: Bar graph indicates stability of measurement.
Certication
Factory calibration traceable to NIST & MILSTD-45662A.
Warranty
2 year limited
Distributed By:
MADE IN THE USA
DAKOTA ULTRASONICS
1500 Green Hills Road, #107
Scotts Valley, CA 95066
Ph: (831) 431-9722
Fax: (831) 431-9723
Website: www.dakotaultrasonics.com
Email: info@dakotaultrasonics.com
 Loading...