Page 1

D A K O T A U L T R A S O N I C S
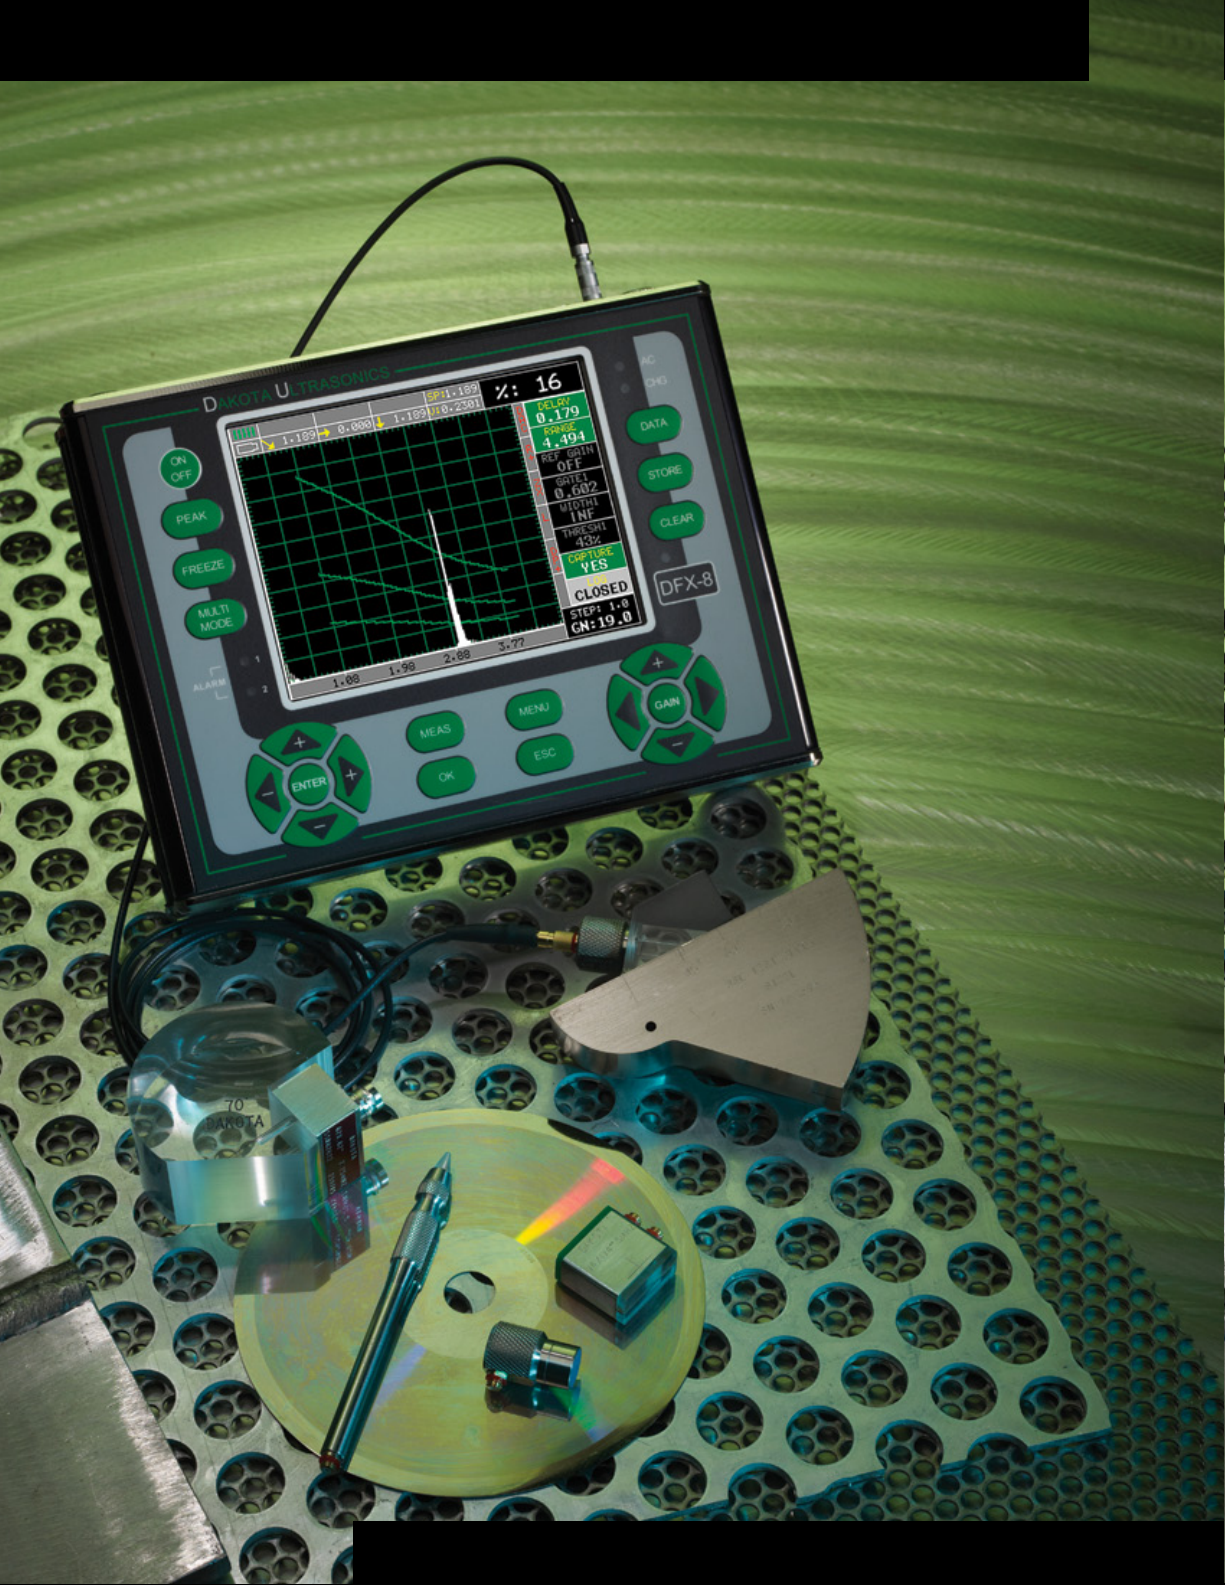
The DFX-8 Series
The DFX-8 Series
Flaw Detector & Thickness Gauge
Flaw Detector & Thickness Gauge
One on hand equals
One on hand equals
two on the job!
two on the job!
Flaw Detector:
▶ Sizing Toolkits: DAC, AWS, TCG, DGS.
▶ Exceptional visibility in sunlight (Blanview)
transmissive color QVGA display (320x240
pixels).
▶ P.R.F. - 8 Hz to 2 kHz, adjustable.
▶ Screen Refresh Rate: 60 Hz.
▶ Detection: Z-Cross, Flank & Peak.
Thickness Gauge:
▶ Automatic: probe zero, probe
recognition, and Temperature
compensation.
▶ Measurement: Variety of modes to
address a number of applications.
▶ Large data storage with multiple
formats: Alpha numeric grid
and sequential w/auto
identier.
▶ Li-Ion pack up to 18 hrs,
emergency backup 6
AA cells up to 12 hrs.
▶ Windows PC
interface software
included.
▶ 2 year
warranty.
S O U N D S O L U T I O N S
Page 2

DFX-8 SERIES SPECIFICATIONS
�
General
Size: 8.5W x 6.5H x 2.5D in (216 x 165 x 70mm).
Weight: 4.5 lbs (2.04 kgs), with batteries.
Case: Extruded aluminum body with nickel plated
aluminum end caps (gasket sealed).
Display: Blanview sunlight readable QVGA TFT color
display (320 x 240 pixels). Viewable area 4.54 x 3.40
in (115.2 x 86.4 mm), or 5.7 in (144.78 mm) diagonal.
16 color pallete, multiple color options and variable
brightness.
Screen Refresh Rate: 60Hz.
Display Views: Flaw Detector: Full wave, +/- Rectied,
or RF. Thickness Gauge: Digits, +/- Rectied, RF, or
B-Scan.
Timing: Precision TCXO timing with single shot 100
MHz 8 bit ultra low power digitizer.
Measurement Gates: Two independent gates (Flaw),
and three gates (thickness). Start & width adjustable
over full range. Amplitude 5-95%, 1% steps. Positive
or negative triggering for each gate with audible and
visual alarms.
Operating Temperature: 14 to 140F (-10C to 60C).
Environmental: Meets IP65 requirements.
Pulser
Pulser Type: DFX-8 Two adjustable square wave puls-
ers. DFX-8+ Two tone burst pulsers.
P.R.F.: 8 to 2000Hz in selectable steps (8, 16, 32, 66, 125,
250, 333, 1000, 2000 Hz).
Pulser Voltage: DFX-8 100 - 200 volt peak amplitude,
rise/fall time < 10ns into 50ohm. DFX-8+ 100 - 400v.
Pulse Width: 40 to 400 ns. Selectable step options 40,
80 & 400 ns (labeled spike, thin & wide).
Receivers
Gain: 0 to 110dB with 0.2dB resolution. Manual and
AGC control.
Damping: 50, 75, 100, 300, 600, & 1500 ohms.
Frequency Bands: DFX-8 & DFX-8+ Broadband 1.8 - 19
MHz (-3dB). Four narrow bands at 1MHz, 2MHz, 5MHz,
10MHz. DFX-8+ Additional narrow bands at .5MHz,
15MHz.
Horizontal Linearity: +/- 0.4% FSW.
Vertical Linearity: +/- 1% FSH.
Amplier Linearity: +/- 1 dB.
Amplitude Measurement: 0 to 100% FSH, with 1%
resolution.
Delay: 0 - 999in (25,375mm) at steel velocity.
Power Source
Lithium Ion Pack: 10.8v, 2 amp hrs, typical operation
18hrs.
Battery Backup: Emergency battery backup. Six 1.5V
alkaline, 1.2V AA Nicad cells, 1.2V AA NI-MH, or other
other equivalent power source. Battery life (continuous
use): Alkaline (12 hrs), Nicad (5hrs), and NI-MH (12hrs),
with default settings.
Connections
USB: Direct USB 1.1 PC connectivity.
Power Connector: 12v @ 2amps, adapter 100-240 VAC,
.7 Amps, 50-60 Hz.
5 Pin Lemo (includes):
RS232Output: RS232 PC serial interface. DFX-8+ For
use with B-Scan encoders (crawlers).
Alarm Outputs: Two independent alarm outputs triggered by the gates.
Analog Out: DFX-8+ Proportional outputs (amplitude
or distance), 0-10 volts.
Transducer Connectors: Two LEMO 00 connectors.
Calibration
Automatic Calibration: Longitudinal (straight), or
Shear (angle).
Probe Types: Single Contact, Dual, Delay, and Angle .
Units: English (in), Metric (mm), or Time (µs).
Velocity: 0.0100 to .6300 in/µs (256–16,000 m/s).
Test Range: 0 to 0.076in (1.93mm) minimum, to 1200in
(30,480mm) maximum at steel velocity. Continuously
variable.
Zero Oset (Probe Zero): 0–999.999 µs.
Material Velocity Table: Contains longitudinal and
shear velocities for a variety of material types.
Memory
Log Formats: Grid (Alpha Numeric), or Sequential (Auto
Identier).
Capacity: 4 Gb internal & up to 64 Gb External SD slot.
Screen Capture: bitmap graphic capture for quick
documentation.
Custom Setups: 64 user congurations.
Video
Remote Commander: Java PC software allows remote
display and control for training/presentation purposes,
and custom system integration.
Flaw Detector Features
TRIG: Trigonometric display of beam path, depth,
surface distance, and curved surface correction. Used
with angle beam transducers.
DAC: Up to 8 points may be entered and used to digitally draw a DAC curve. Reference -2, -6, -10, (-6/-12),
(-6/-14), (-2/-6/-10) dB. Amplitude displayed in %DAC,
dB, or %FSH.
AWS : Automatic defect sizing in accordance with AWS
D1.1 structural welding code.
AVG/DGS: Automatic defect sizing using probe data.
Stores up to 64 custom setups.
TCG: Time corrected gain. 50 dB dynamic range, 20 dB
per microsecond, up to 8 points for curve denition.
Measurement Mode: Pulse-Echo (P-E) measures from
0.025 in to 100 ft. (0.63mm to 3048 cm).
Auto-Cal: Provides automatic calibration with two
reference points.
Detection Modes: Zero Crossing, Flank and Peak.
Flaw Detector Features (Cont’d)
Display Freeze: Holds current waveform on screen.
Peak Memory: Captures peak signal amplitude.
Auto Interface Gate - DFX-8+ Automatic adjustment of
interface gate for immersion testing (water path).
Thickness Gauge Features
Measurement Modes (Dual Element):
Pulse-Echo Mode (P-E) - (Pit & Flaw Detection) mea-
sures from 0.025 in to 100 ft. (0.63mm to 3048 cm).
Pulse-Echo Coating Mode (PECT) - (Material, Coating, Pit & Flaw Detection): Material: 0.025 in to 100 ft.
(0.63mm to 3048 cm). Coating: 0.001 to 0.100 inches
(0.01 to 2.54 millimeters).
Pulse-Echo Temp Comp Mode (PETP) - (Pit & Flaw
Detection) Auto temperature compensation -measures
from 0.025 in to 100 ft. (0.63 mm to 3048 cm).
Echo-Echo Mode (E-E) - (Thru Paint & Coatings) measures from 0.050 to 4.0 inches (1.27 to 102 millimeters).
Will vary based on coating.
Echo-Echo Verify (E-EV) - (Thru Paint & Coatings) measures from 0.050 to 1.0 inches (1.27 to 25.4 millimeters).
Will vary based on coating.
Coating Only Mode (CT) - (Coating Thickness) Measures from 0.0005 to 0.100 inches (0.0127 to 2.54 millimeters). Range will vary +/- depending on the coating.
One and two point calibration option for material &
coating, or selection of basic material types.
Auto probe zero, recognition and temperature compensation.
High speed scan up to 50 readings per second.
Audible alarm with hi/lo limits.
Built-in dierential mode for QC inspections.
64 custom setup congurations.
Transducers
Delay line: High Frequency single element delay line
style for precision testing of thin materials.
Pencil: High Frequency single element delay line style
for testing of materials in tight access areas and dicult
geometries.
Contact: Single element contact style for general purpose longitudinal & Shear wave aw detection.
Dual: Pitch/Catch dual element style for longitudinal &
Shear wave corrosion inspections..
Certication
Thickness Gauge: Factory calibration traceable to NIST
& MIL-STD-45662A.
Flaw Detector: EN12668-1 compliant.
Warranty
2 year limited
MADE IN THE USA
Distributed by:
DAKOTA ULTRASONICS
1500 Green Hills Road, #107
Scotts Valley, CA 95066
Ph: (831) 431-9722
Fax: (831) 431-9723
Website: www.dakotaultrasonics.com
Email: info@dakotaultrasonics.com
 Loading...