

Page 1

2X 8-18 x 3/4” Screws
CAT5 Cable
VLK Clock
Installation Manuals
1. Remove the original clock by
VLC Clock
Or
Your new VLC\VLK-49F kit includes:
VLC\VLK-49F
Dakota Digital Clock Installation
For 1949-‘50 Ford cars
Installation
disconnecting the wiring and removing
two screws behind the dash.
(VLC & VLK)
VLK Switch Harness
VLC Power Harness
(VLC & VLK)
Manual # 650420A
Page 2
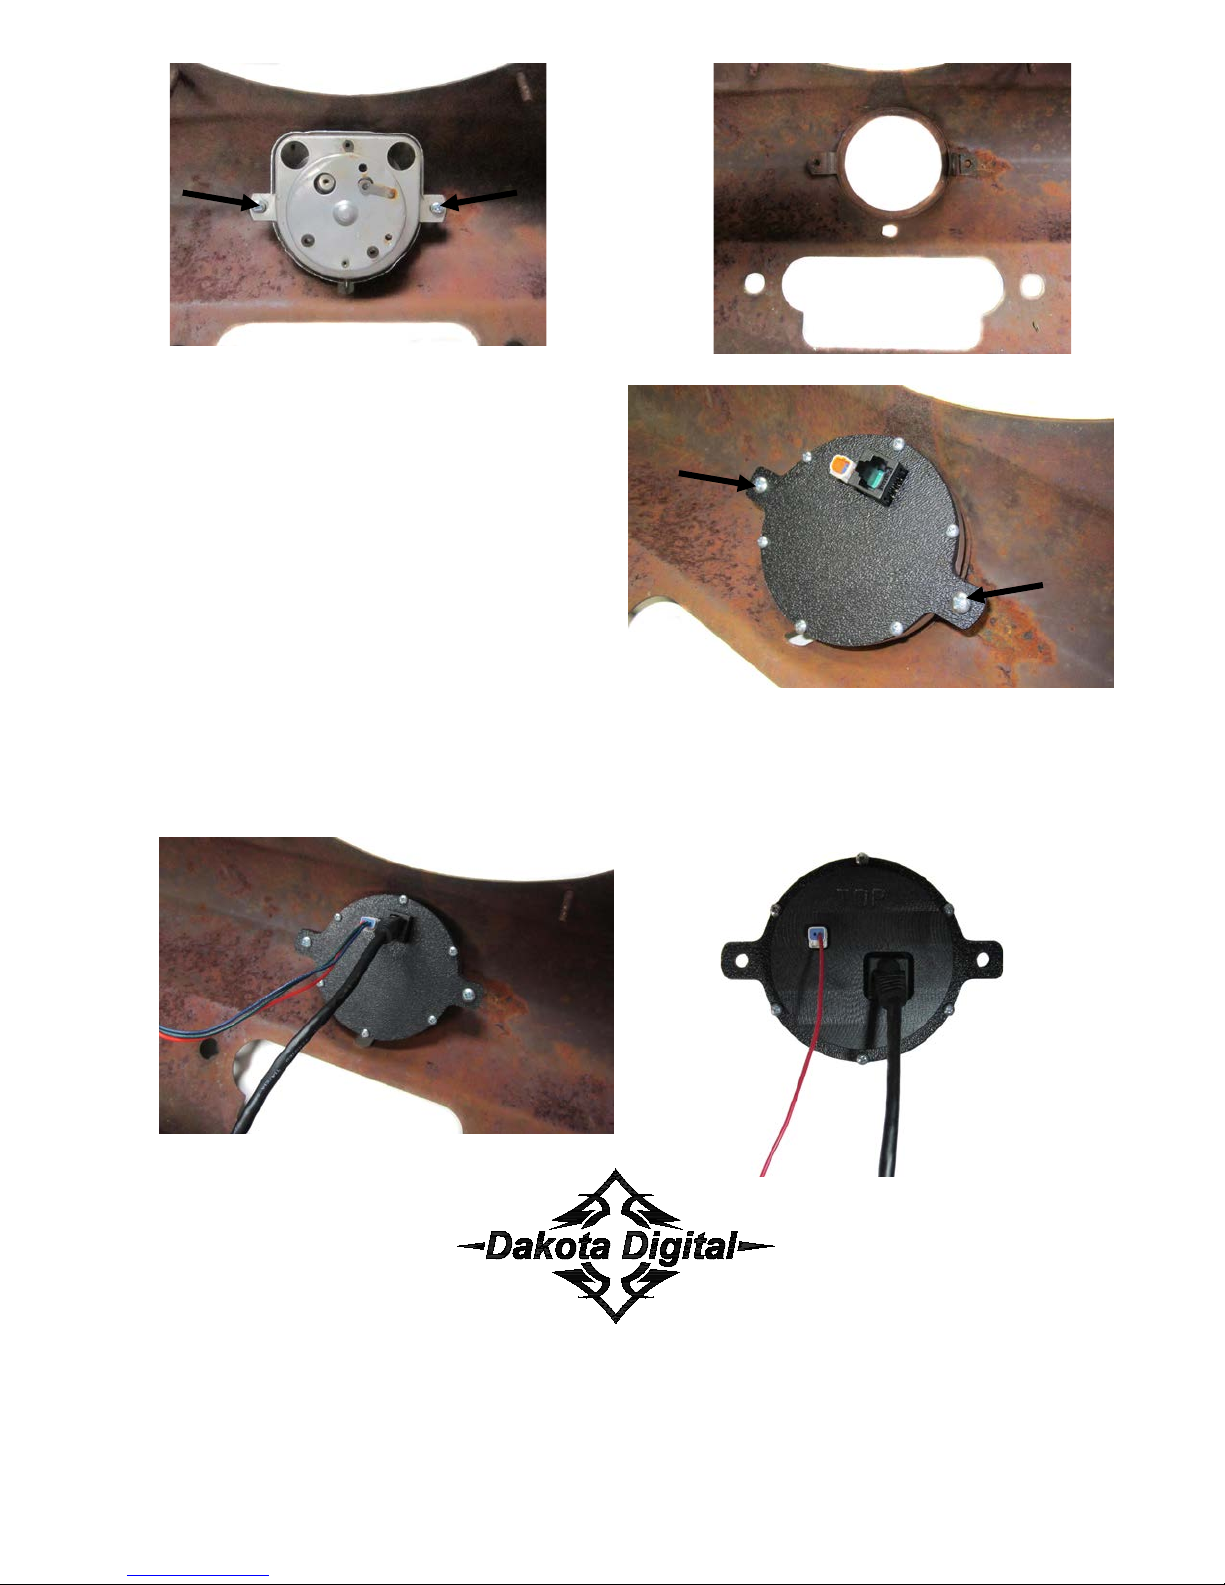
2. Orientate the VLK clock (as shown) with
3. Connect the CAT5 cable and switch harness or power harness to the clock and carefully
the CAT5 cable jack towards the top, or
the VLC clock with the hands at 12:00
facing upward. Secure the clock to the
dash using the two supplied screws.
route these back to the VHX control box and refer to the Operating Manual to complete the
clock setup.
st
4510 W. 61
St. N., Sioux Falls SD 57107
Phone: (605) 332-6513 Fax: (605) 339-4106
www.dakotadigital.com
dakotasupport@dakotadigital.com
Manual # 650420A
 Loading...