

Page 1
MAN#{650120}
MOUNTING INSTRUCTIONS
VFD3-55J-CJ
55-86 Jeep CJ Installation Guide
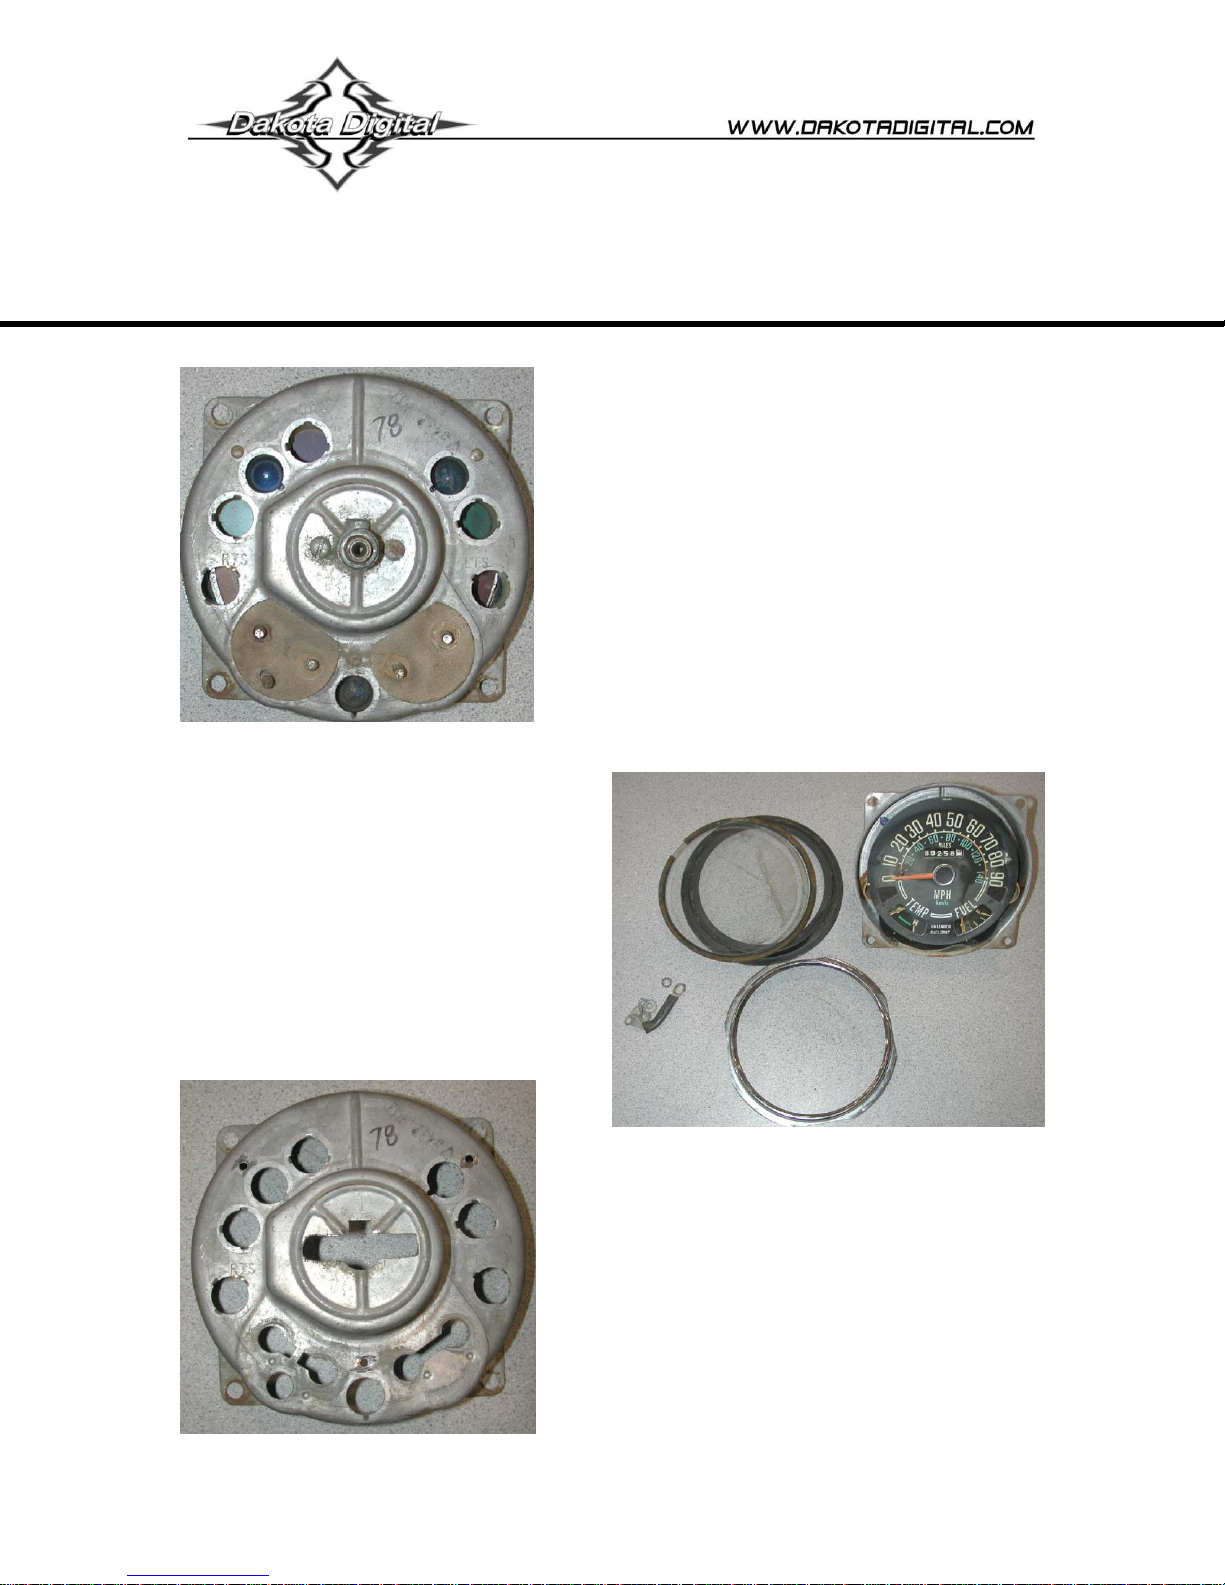
Before disassembly, mark the 12 O’clock position
on the bezel for lens alignment.
With the housing removed from the vehicle,
uncrimp the bezel from the can. Remove the two
screws retaining the speedometer. Remove the
nuts retaining the Temp and Fuel gauges.
Remove the bezel from the can, remove
the separator plate, clear glass lens and oring from the bezel. The speedometer will
be loose and pull out easily. The Temp
and Fuel gauges will be held in by the
cardboard insulators, they will need to be
pushed out.
Remove any protective tape from the lens
and install it into the bezel. Use a small
bead of silicone/RTV to hold the lens in
place. You can use a straight edge across
the
mo
unti
ng ear cutouts on the bezel or align the slot in the
top of the lens to the mark made on the bezel
earlier to ensure level installation of the lens.
Page 2
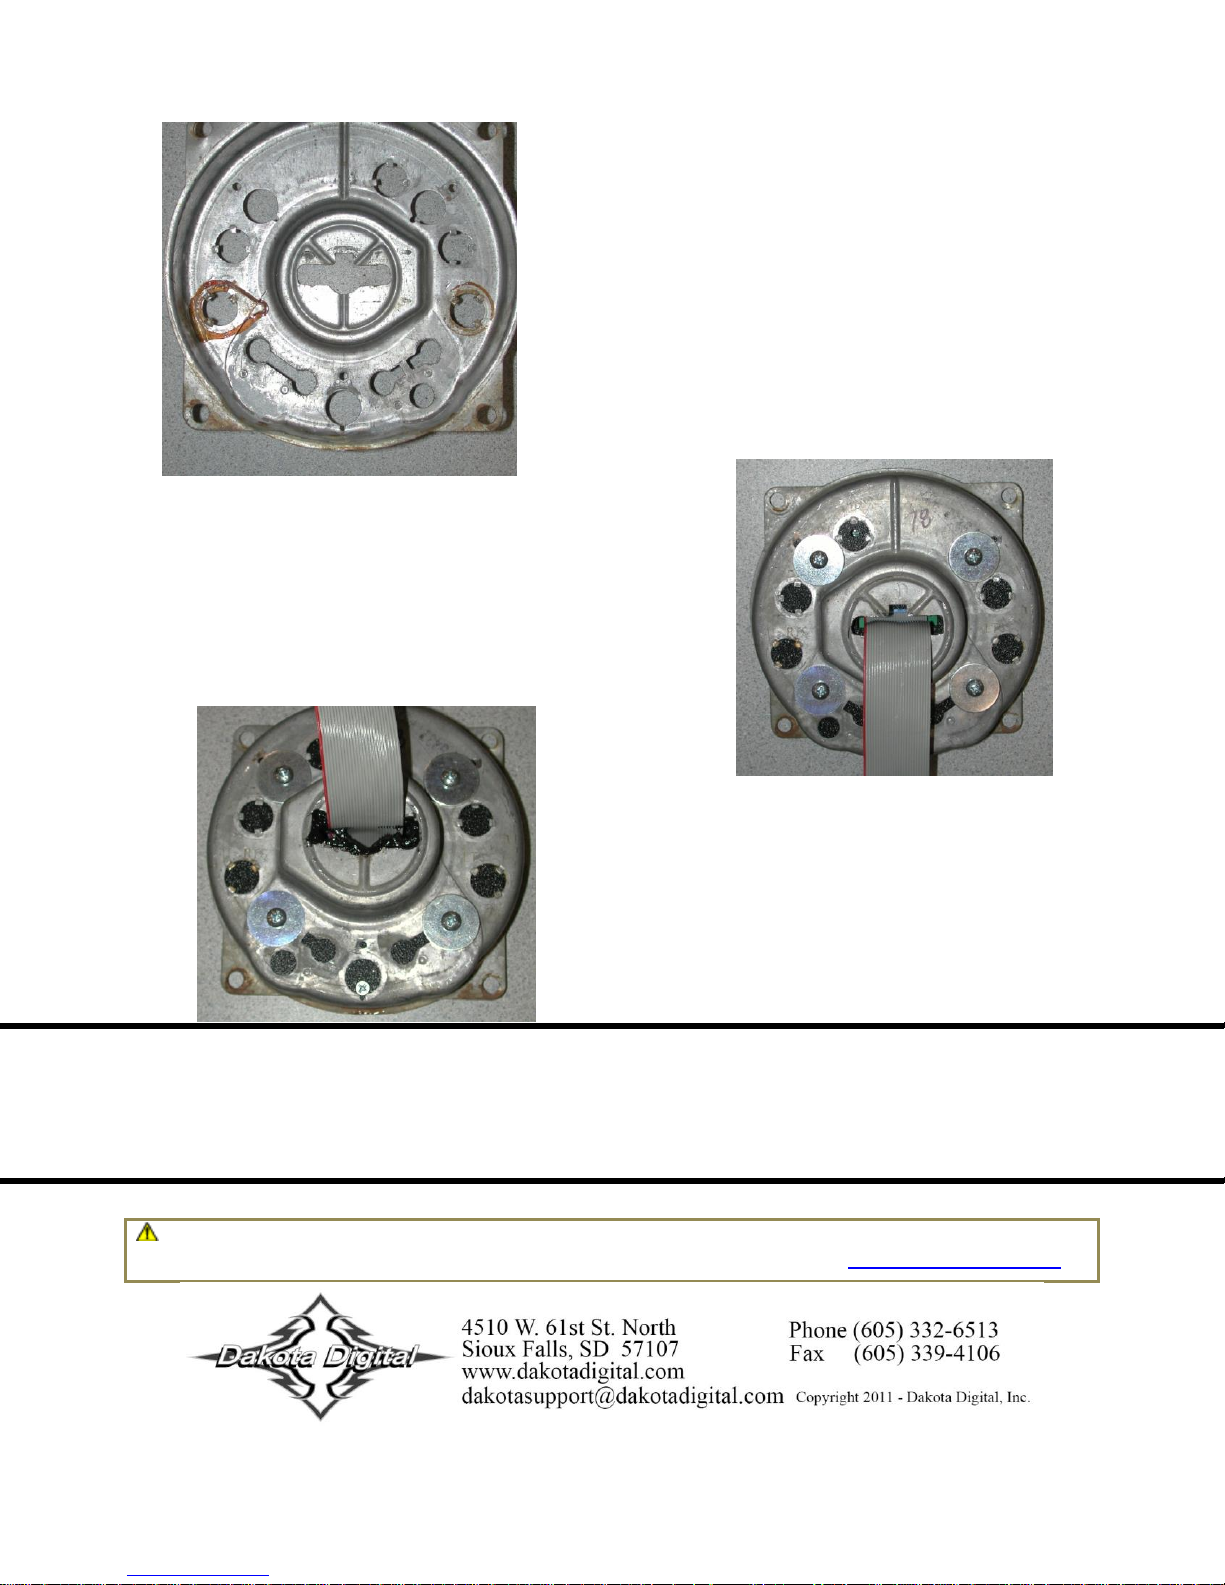
Remove the cardboard and/or plastic light tubes. Remove the rivets holding in the blue light
WARNING: This product can expose you to chemicals including lead, which is known to the State of California to
cause cancer and birth defects or other reproductive harm. For more information go to www.P65Warnings.ca.gov
covers. Cut a slot in the rear of the can for the ribbon cable to pass through.
Flatten the tabs that hold the light tubes, bending them
into the light holes. There are four dimples on the bottom
near the Temp and Fuel gauge mounting holes that need
to be flattened also.
Pass the ribbon cable through the slot and attach the system
to the can using the supplied hardware. Start all of the
supplied screws in available holes. Use the holes on the
mounting ears to align the system. When straight, tighten
the screws, being careful not to over tighten.
Reattach the bezel
and lens assembly
by recrimping the bezel to the can. You can slightly
rotate the bezel to insure proper alignment. To protect
the ribbon cable from abrasion, you can use the
supplied grommet edging material or apply silicone
around the slot that was cut.
Depending on the year of the vehicle, you may be able
to install the pulse generator to the speedometer end of
the original cable.
DAKOTA DIGITAL offers complete service and repair of its product lines. In addition, technical consultation is available to help you work through any
questions or problems you may be having installing one of our units.
Should you ever need to send the unit back for repairs, please package the product in a good quality box along with plenty of packing material. Ship
the product by UPS or insured Parcel Post. Be sure to include a complete description of the problem, your full name and address (street address
preferred), and a telephone number where you can be reached during the day. An authorization number for products being returned for repair is
needed. We will contact you if any repair charges exist. Any returns for warranty work must include a copy of the dated invoice or bill of sale.
SERVICE AND REPAIR
 Loading...