

Page 1

INSTRUCTIONS AND PARTS LIST
POWER HAMMER
10/09/07
Dake Power Hammer
DAKE (Division of JSJ)
724 Robbins Road
Grand Haven, Michigan 49417
616.842.7110 Phone 800-937-3253
616.842.0859 Fax 800-846-3253
Web: www.dakecorp.com
E-mail : customerservice@dakecorp.com
technicalsupport@dakecorp.com
1
Page 2
A
Set up and Operation of the Dake Power Hammer
Once you remove the power hammer from the packaging you will need to install the shaping dies to be
used and the wheels.
WARNING !!!
Unplug the power hammer from the electrical source before changing the dies.
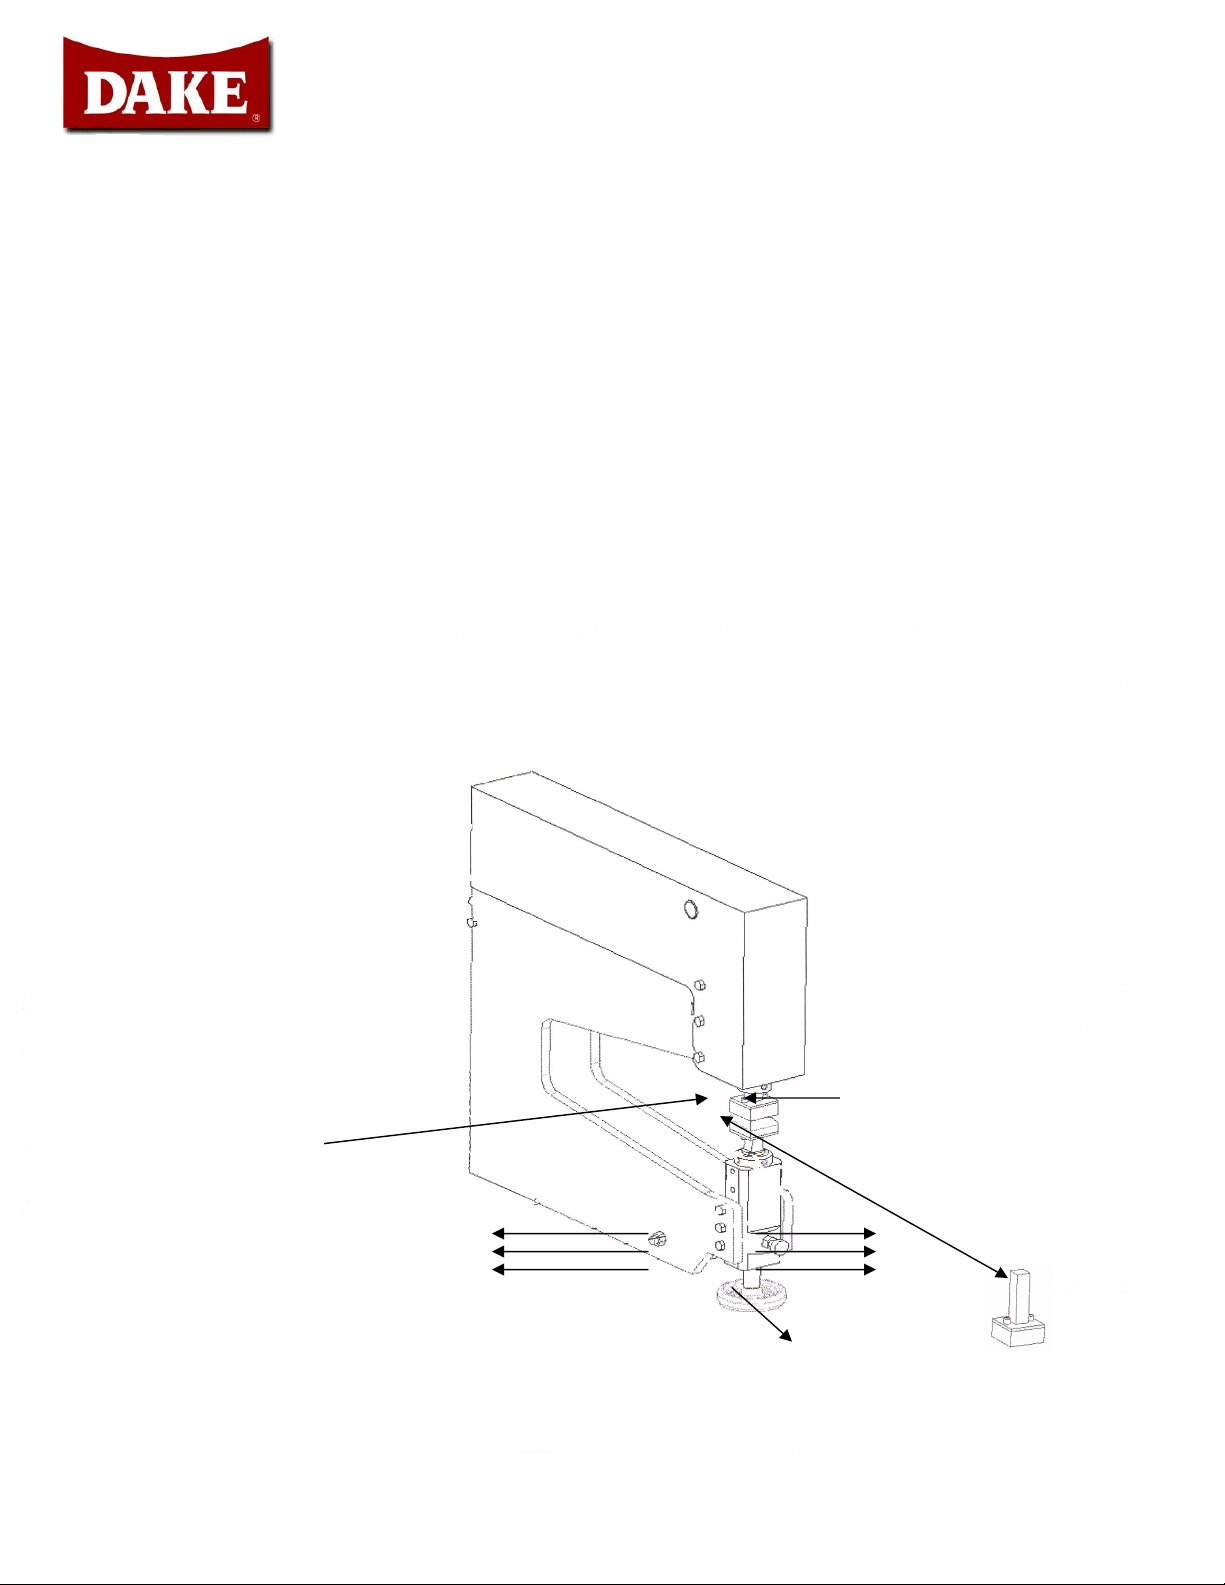
A. Remove the 6 bolts from the adjustable bottom sleeve.
B. Remove the adjustable bottom sleeve from the side plates.
C. Insert die holder with the desired die attached into the slider. Make sure the die holder is
bottomed into the slider.
D. Tighten the two hex socket set screws to secure the upper die holder.
D
A
D
C
B
10/09/07
Dake Power Hammer
2
Page 3
Set up and Operation of the Dake Power Hammer
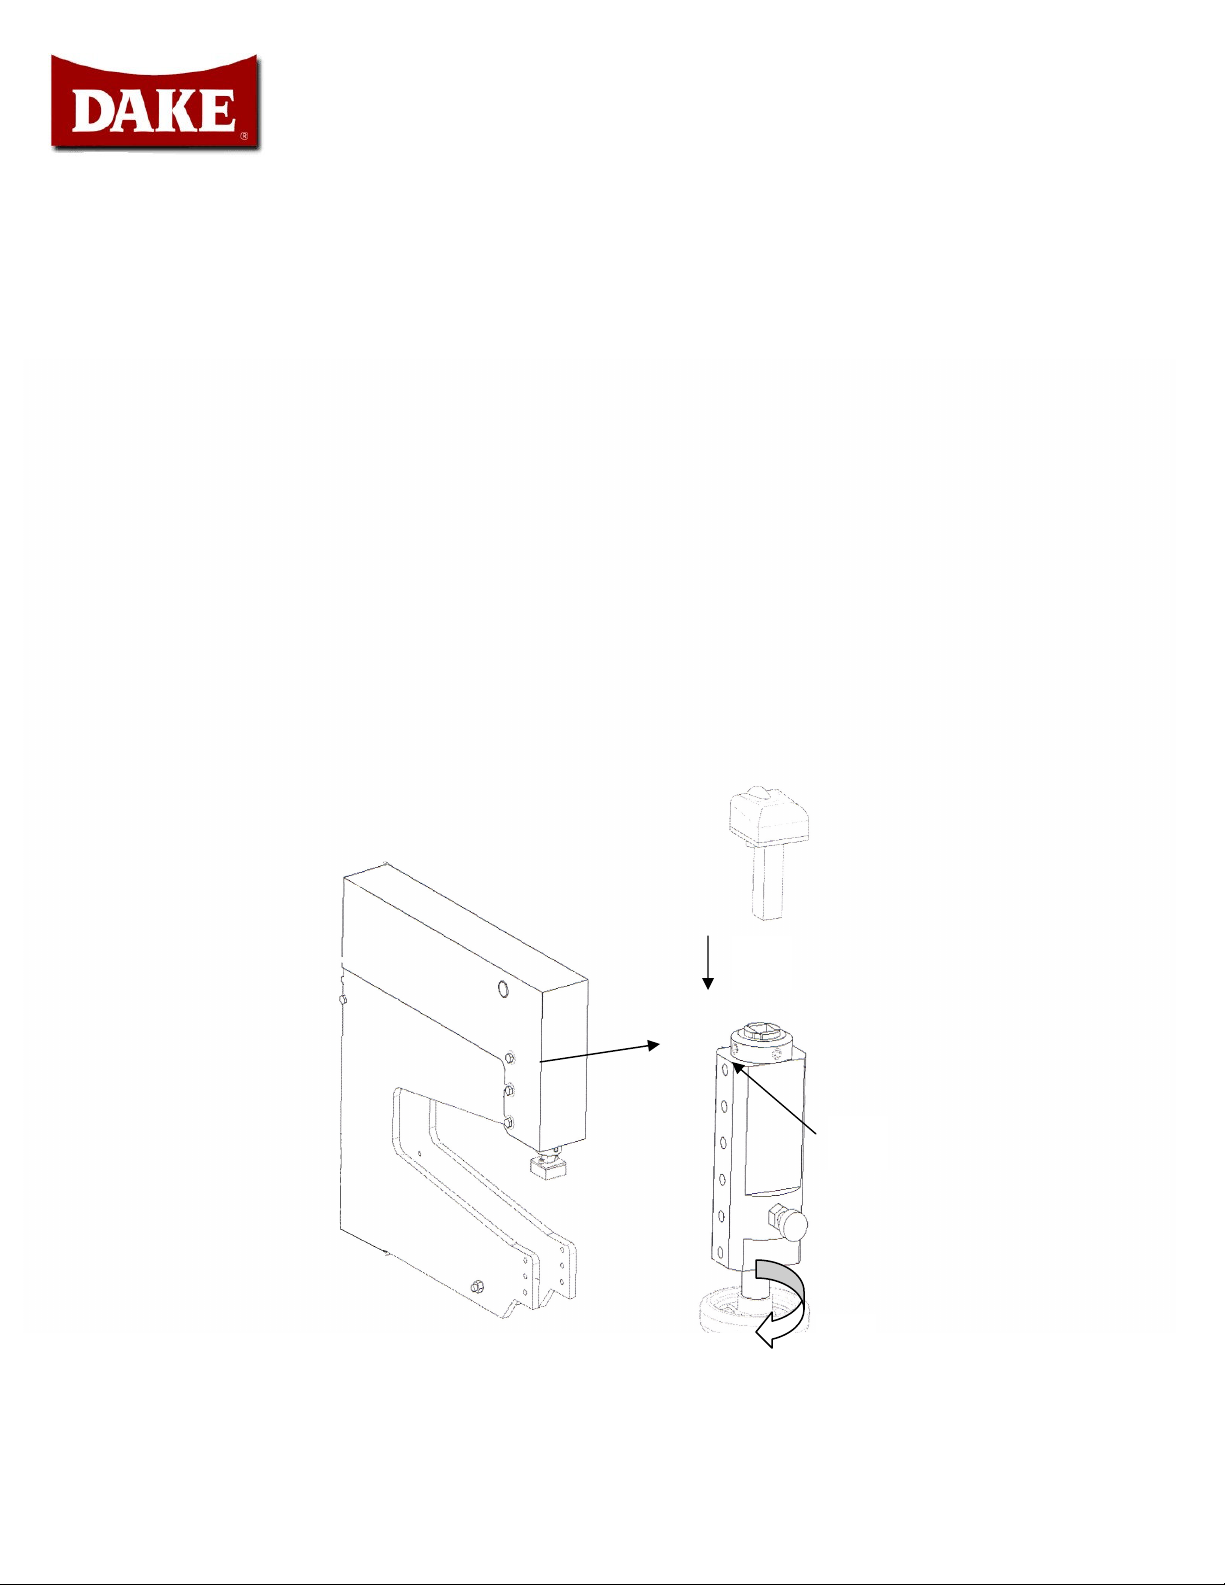
E. Rotate the adjusting screw handle to move the bottom adjustment rod down.
F. Insert the die holder with the desired die attached into the adjustable bottom sleeve. Make
sure the die holder is bottomed into the adjustable bottom sleeve.
G. Snug up the two hex socket set screws on the adjustable bottom sleeve to hold the die holder
firmly but still allow it to move up by turning the adjusting screw handle.
F
G
E
10/09/07
Dake Power Hammer
3
Page 4
I
Set up and Operation of the Dake Power Hammer
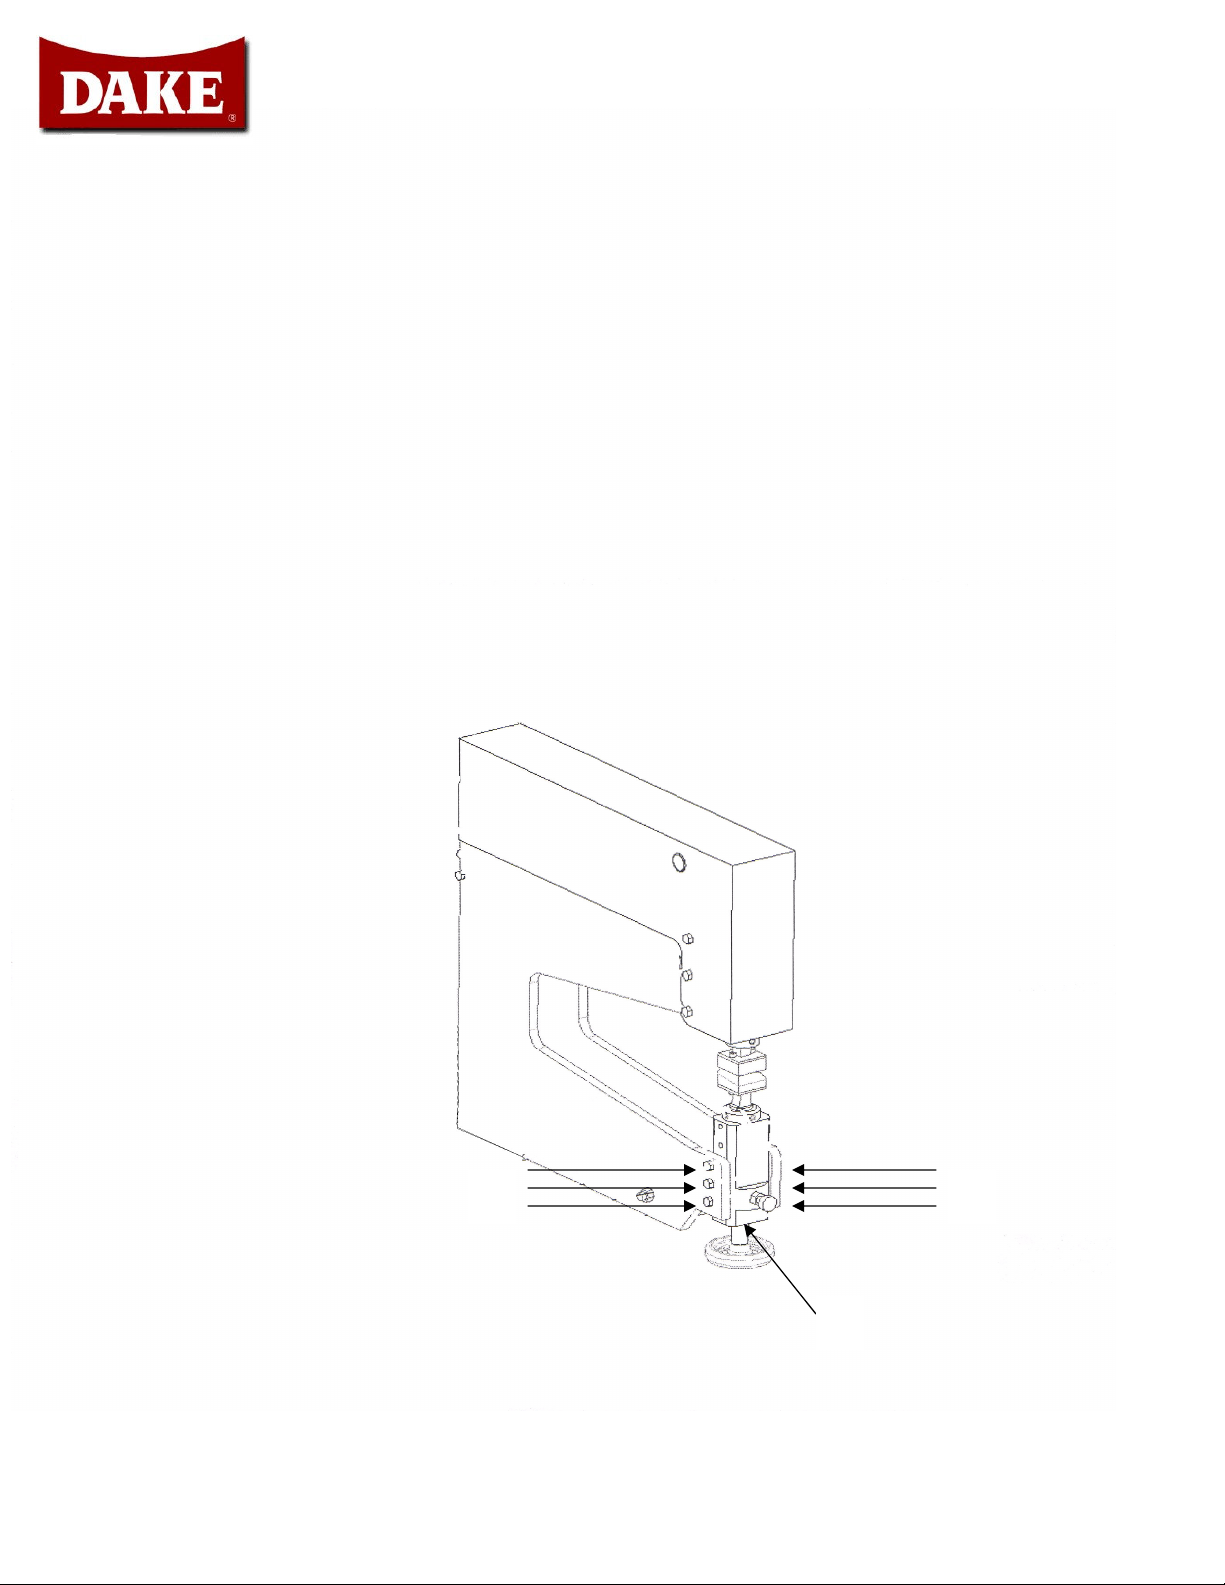
I. Insert adjustable bottom sleeve (B) and attach six bolts through the side plates and into the
adjustable bottom sleeve.
I
B
10/09/07
Dake Power Hammer
4
Page 5
J
Set up and Operation of the Dake Power Hammer
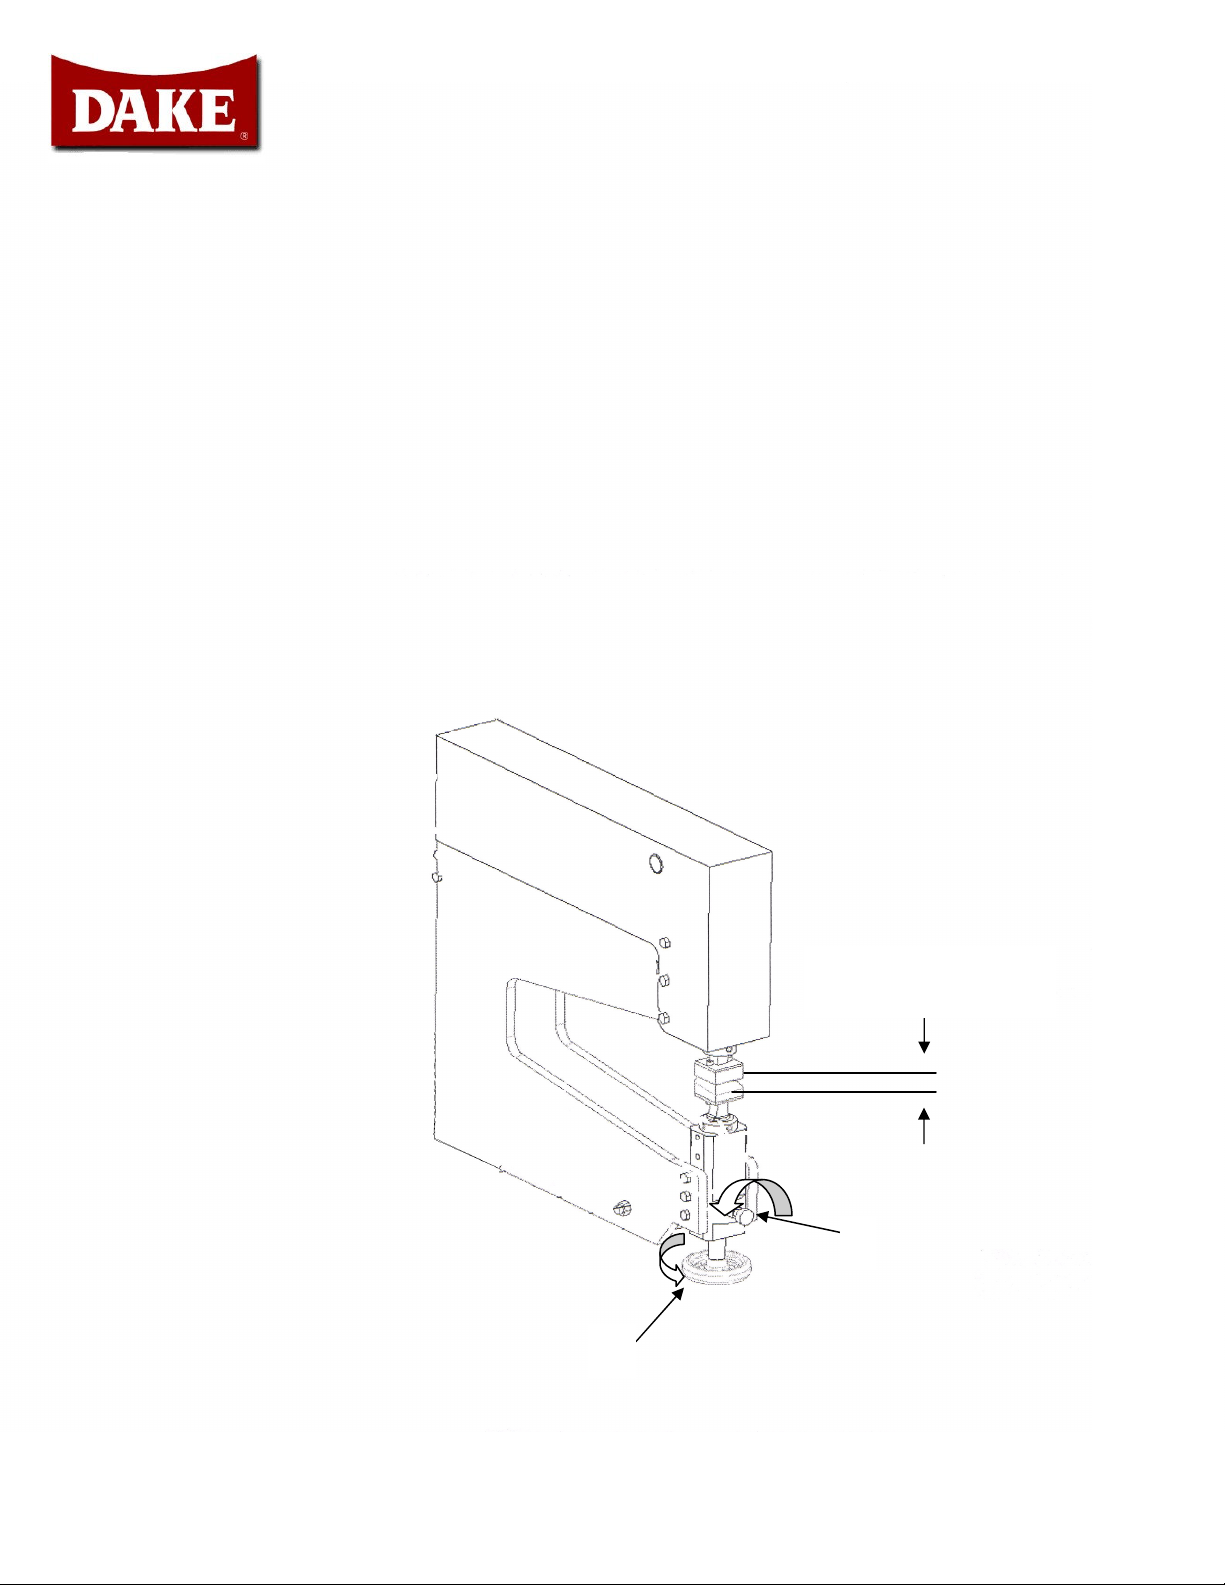
J. Make sure the lock screw on the adjustment bottom sleeve is loose.
K. Rotate adjusting screw handle to move the lower die to the upper die.
WARNING !!!!
For safe operation and possible die damage always adjust the gap between the upper die half and the
work piece to a minimum of ¼” before starting motor.
K
¼” minimum gap
before starting motor
10/09/07
Dake Power Hammer
5
Page 6

M
Set up and Operation of the Dake Power Hammer
L. Check the two set screws on the die holder to see if they are tight. These hold the lower die firmly
in place.
M. The upper and lower dies need to be lined up. If they do not line up, loosen the bolts holding the
dies to the die holders and align the dies. Don’t forget to retighten these bolts.
L
10/09/07
Dake Power Hammer
6
Page 7

Set up and Operation of the Dake Power Hammer
WARNING !!!
Before turning on power to your Dake power hammer be sure to review all safety stickers and
warnings.
N. With the motor turned on, the upper die holder will begin to oscillate. Rotate the adjusting screw
handle to move the lower die up until just before it touches the upper die. This is a good initial
setting to try shaping with.
O. With the die gap set to your desired setting, tighten the lock screw on the adjustable bottom sleeve
to lock in the gap setting. Repeat steps N and O for any future gap adjustments, up or down.
N
O
10/09/07
Dake Power Hammer
7
Page 8

10/09/07
Dake Power Hammer
8
Page 9

Item # Part description Qty Part #
1 Side Plate 2 87160
2 Rear spacer Plate 1 87153
3 Front Mount Plate 1 87155
5 2 Bolt Flange Bearing 2 301907
6 Offset Shaft (27”) 1 301908
7 Connecting Rod 1 87157
8 Cast Bronze Bushing 1 301943
9 Slider 1 87156
10 Top Collet 1 87150
12 Slide Gulide & Bushing 1 87158
13 Shoulder Bolt 1 301909
14 Bearing 1 301939
15 Washer (center hole 5/16 bolt) 1 301910
16
Socket head cap screw 5/16-18UNC X 1
1 43434
17 Bottom Collet 1 87159
19 Bottom Adjustment Rod 1 87149
20 Hand Wheel 1 87173
21 Die Holder 2 87152
22 Upper Die 1
23 Lower Die 1
24
25 Knurled Head Screw 1-1/2” 1 301946
26 Alignment Key 1 87151
27 Support Key 1 87148
28 Top Cover (Red) 1 301891
29 Belt Cover Inner (Red) 1 301890
30 Cover Belt (Red) 1 301892
31 Top Pulley 1 301953
32 Bottom Pulley 1 301947
33 Belt 1
34 Electric Motor 1 10079-
07
35 Grease Zerk (1/4 x 28 straight) 1 301912
36
37
Nut 1/2-13 UNC
3 301913
38
39
40 Socket head Cap Screw 6-32 x ½ 2 301914
41 Half Dog Hex Socket Set Screw 3/8-16
6 301915
UNC x ½
42 Nut 5/8-11 UNC 1 301916
43 Socket Head Cap Screw 3/8-16 UNC x 1 2 43451
10/09/07
Dake Power Hammer
9
Page 10

½
44 Grade 8 Hex Cap Screw 3/8-16 UNC x 1
1-1/4
45 Grade 8 Hex Head Cap Screw 5/8-11
UNC X 1-1/4
46 Socket Head Cap Screw ¼-20 x 3/8 1 43411
47 Key Stock 3/16 x 3/16 1 386?
48 Socket Head Cap Screw ¼-20 x ¾ 10 43414
49
50 UHMW Poly Rod 1
51
52
53
54
55
56 Grade 8 Hex Bolt 5/16-18 x 1 4 301929
57 Bottom Sleeve 1 87147
58 Cross Brace 2 301893
59
60 RivNuts ¼-20 6
61 Grade 8 Washer 3/8 12 301933
62
63
64 Bottom Spacer, Base 1 87162
67
68
69
70 Grade 8 Nut 5/16 4 301934
71 Grade 8 Hex Bolt ½-13 x 8 2 301935
72 Belt 1 301936
73 Grade 9 Lock Washer 3/8 6 301937
74 Finishing Plug 3 301948
75
76 Washer 5/16 Grade 8 8 301938
Parts Not Shown Qty Part #
Stand 1 716552
Caster Standard 300lbs. Capacity 2 301931
Caster Swivel, Total Locking 300 lbs. 2 301932
20 301917
4 301918
10/09/07
Dake Power Hammer
10
Page 11

You are now ready to start shaping metal
Everyone has their own technique when it comes to shaping and you will need to find your own. So,
practice, think , practice and think some more before practicing again. We have found that like
forming by hand, it is easier to get the desired shape using the Dake power hammer by using several
steps to “sneak up” on the final shape, versus trying to get the shape in one step.
A good source of information on how to use a power hammer type machine like this , is reading any
of the several books on sheet metal shaping currently available.
Have fun and be safe!!!!!
Dake
Maintenance
You need to maintain your Dake power hammer as you would any other piece of shop equipment.
More use requires more maintenance. This should include, but not limited to checking and greasing
bearings and bushings regularly. Check for any loose components, lines and connections and replace
as needed.
10/09/07
Dake Power Hammer
11
Page 12

Safety stickers that are located on the Dake power Hammer
WARNING!!!!
Review all safety stickers before operating this machine.
Part number Part number Part number Part number
301889 85425 300168 84395
Part number
76462
10/09/07
Dake Power Hammer
12
Page 13

110 volt Machine
10/09/07
Dake Power Hammer
13
Page 14

220 volt single phase machine
10/09/07
Dake Power Hammer
14
 Loading...