

DAITEM SH630AX Installation Manual
2
The command and information keypad can be used to operate an intrusion protection system from outside or inside the
home.
The keypad commands can be accessed:
• using the master code,
• using the 8 user codes.
Each command is confirmed with an audible signal and a visual signal (LED) issued by the keypad. The keypad also
indicates the system status and any faults or open doors or windows.
The keypad is protected against:
• opening,
• removal,
• attempts to discover the access code.
1. Introduction
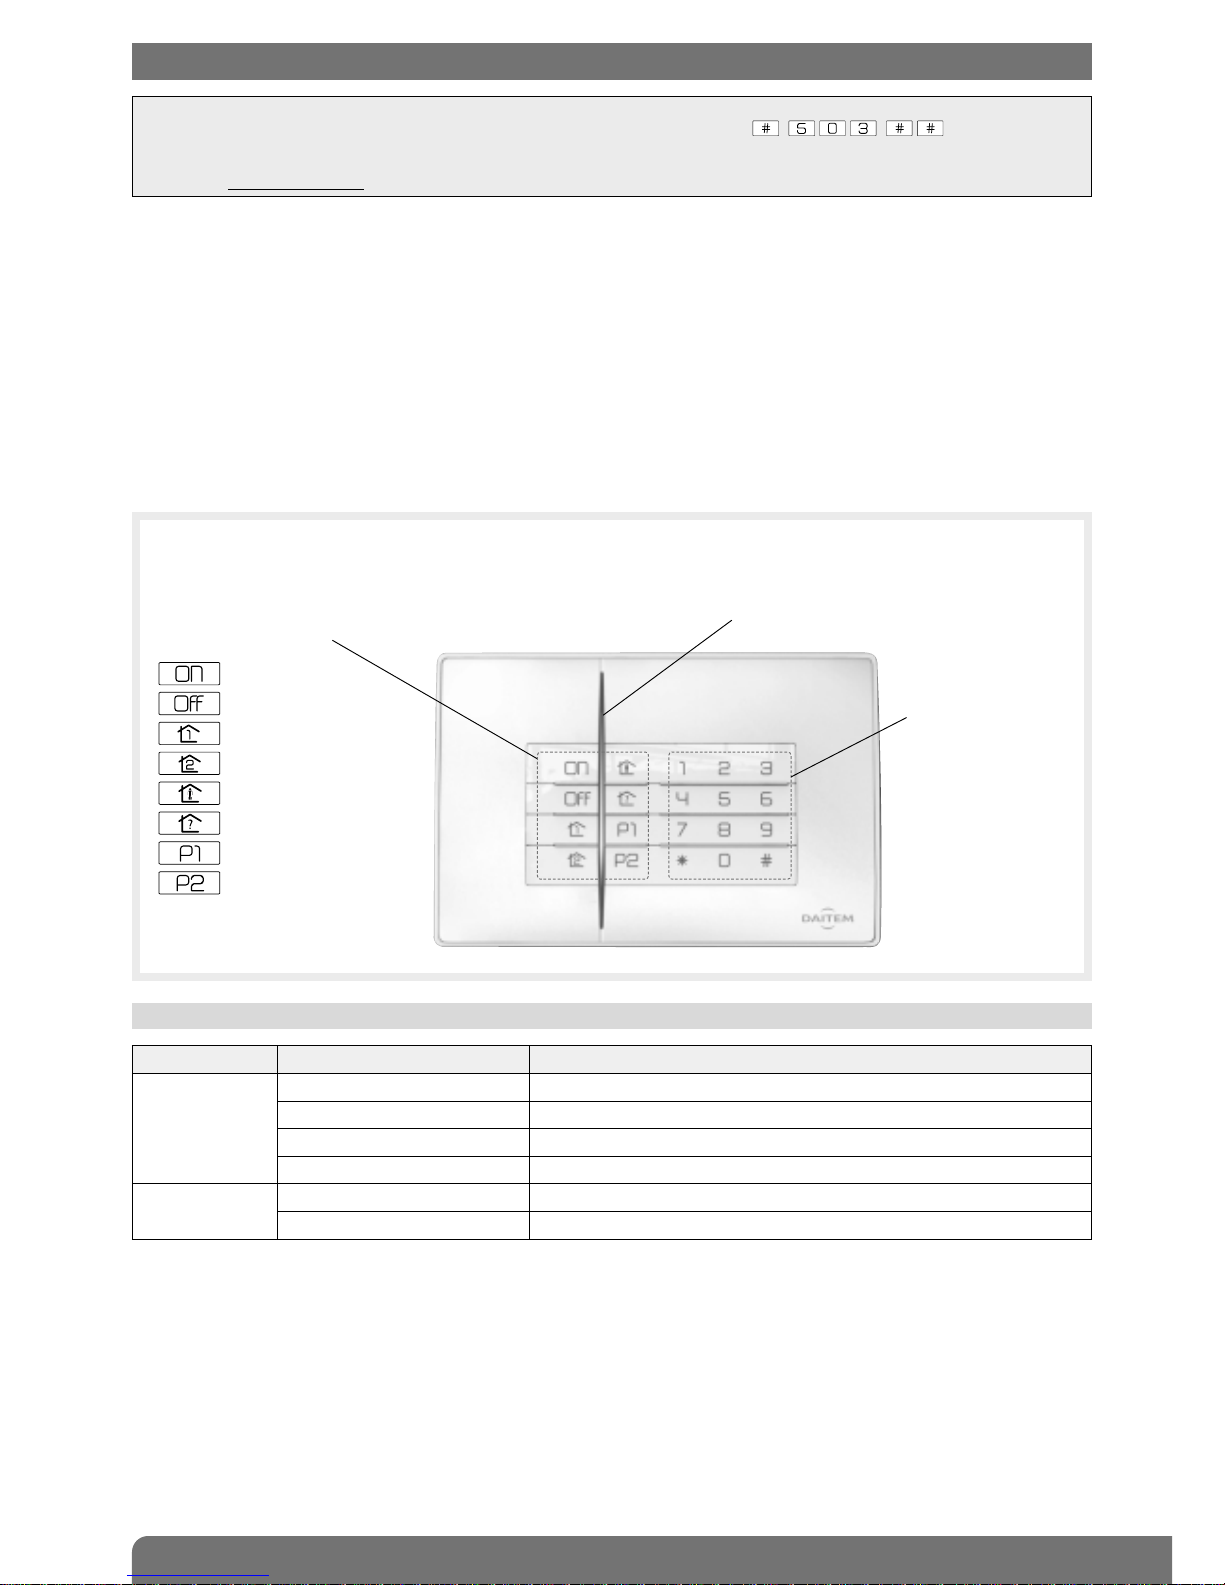
8 command buttons
can be personalised
Two-colour LED
Buttons
for access codes
and programming
Arm
If the level of lighting is low or a button is pressed, the buttons and keypad are back-lit for 10 s.
The back-lighting period is repeated for 10 s when the last key is pressed.
Disarm
Partial 1
Partial 2
Arm Presence
System status query
Not allocated
Not allocated
1.1 LED indications
LED LED status Meaning
Red steady button pressed correctly
1 flash every 5 s keypad in test mode
2 flashes every 10 s keypad in installation mode
3 quick flashes handling or programming error, access code invalid
Green steady for 2 s correct programming
steady for 10 s access code valid (the 10 s period is repeated after each command)
IMPORTANT
• Some functions are only available with control panel versions 2.0.0 or later (enter on the control
panel keypad to check the version).
• Operational differences in relation to former ranges are described in the compatibility booklet available in the Daitem Installers
section at www.daitem.co.uk.
3
1.2 Information feedback indications
IMPORTANT: only the commands sent from the keypad result in the following audible and visual responses. Orders issued by
another remote control unit do not lead to a keypad response.
Command sent to: LED status and colour Buzzer Meaning
An alarm control panel lights up steady GREEN
for 1.5 s
Long beep Total or group DISARMING
flashes GREEN 3 times 3 short beeps Total or group DISARMING
with alarm memory
lights up steady RED
for 1.5 s
Long beep Total, partial or group
ARMING
lights up steady RED
for 1.5 s
3 short beeps Total, partial or group
ARMING with a fault
or an open exit
flashes RED 3 times 3 short beeps ARMING blocked (1)
A command receiver
or remote-controlled socket
lights up steady GREEN
for 1.5 s
/ Transmission of home control
command (light, relay, etc.)
(1) ARMING blocked means that the intrusion system has been unable to arm owing to a system fault.
The user must check the control panel for more information.
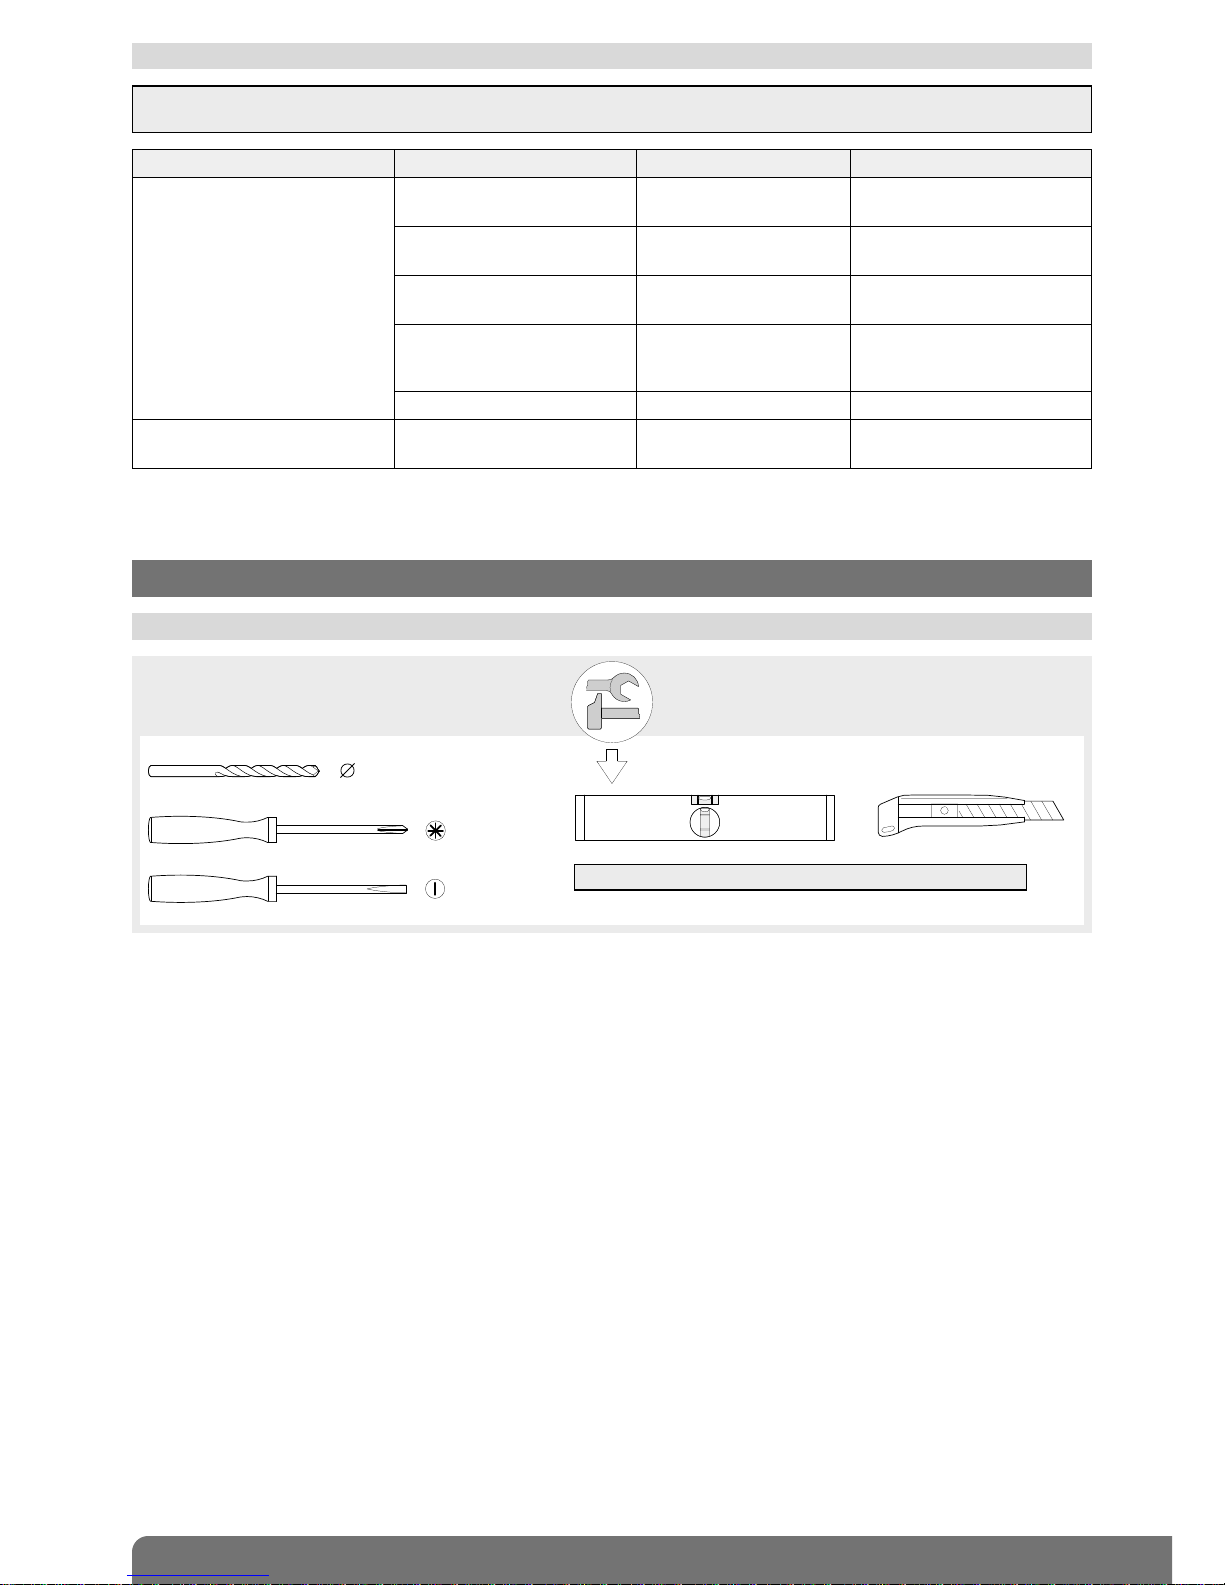
2.1 Tooling required
6 mm
2.5 mm
PH.1
2. Preparation
IMPORTANT: the fixing screws and plugs are not provided.
4
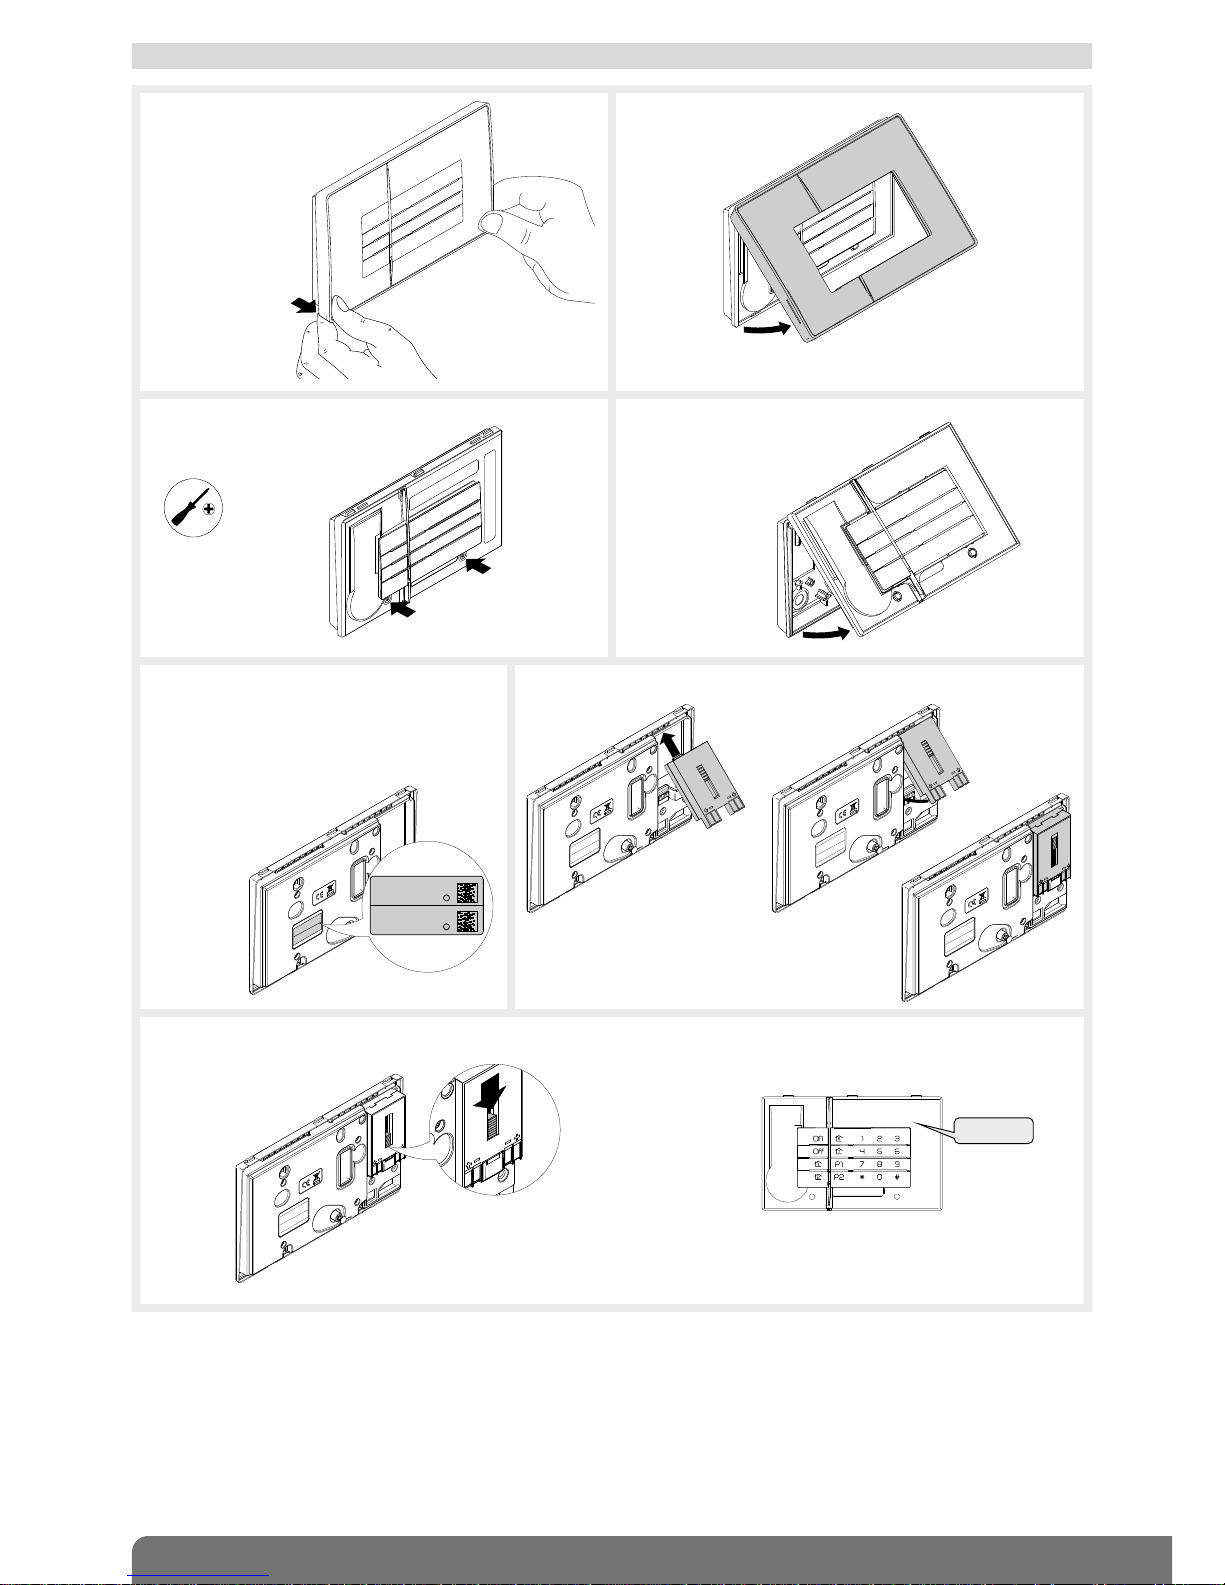
1. Unclip the front panel
from the bottom.
2. Remove the front panel.
3. Loosen the 2 screws. 4. Remove the electronic part
from the base.
5. Remove the pre-cut part of the sticker and
stick it to the guarantee certificate inside
the user manual supplied with the control
panel. If you are adding to an existing
system, use the guarantee certificate
supplied with this product.
6. Connect the lithium power pack to its support.
7. Push the lithium power pack lock downwards.
Philips PH.1
Coller sur certif
SH630AX
A1235A04824
SH630AX
A1235A04824
The keypad will issue a long beep and
the LED will light up RED for 2 s.
“Bip”
2.2 Power supply

5
3. Changing the operating mode
IMPORTANT
• When the keypad is powered it is in user mode.
• The keypad must be in installation mode for recognition programming and parameter-setting.
4. Recognition programming
IMPORTANT: the product does not need to be placed next to the control panel for recognition programming. In fact, it is
advisable to move it at least 2 metres away from the control panel.
Recognition programming allows the control panel to recognise the keypad.
1. Make sure the control panel is in
installation mode (see Control panel
installation manual) with its front cover
removed.
3. Perform the following recognition programming procedure:
IMPORTANT: the control panel issues 3 short beeps to indicate a programming error. If this happens, the recognition
programming procedure should be performed again from the start.
Press *then # on the
control panel keypad
Press and hold “Off” until
the control panel responds
The control panel issues a voice
message to confirm keypad recognition
The keypad issues a long beep
to confirm recognition.
)
)
)
)
)
10 s max.
“bip”
then
The mode can be changed by entering the factory master code “0000” then the factory installer code “1111” as shown
below:
IMPORTANT
• For security reasons, the keypad automatically switches back to user mode after 4 hours without a command being issued.
• If 5 wrong codes are entered in less than 5 minutes the keypad will be blocked for 5 minutes.
• If the keypad:
- is used without a control panel (e.g. command from external receiver),
- is not or no longer recognised by a control panel,
the operating mode cannot be changed if the tamper pin on the back is pressed in.
INSTALLATION
MODE
TEST MODE
USER MODE
installer code
master code
master code
installer code
installer code
Operating mode
on power-up
1 flash
every 5 s
2 flashes
every 10 s
2. Switch the keypad to installation mode by entering:
then
master code
(factory: 0000)
installer code
(factory: 1111)
“bip”
“bip”
“bip, remote control unit X”
 Loading...