

Dahua PVR210 User Manual
1
PVR210 User’s Manual
Version 1.3

2
Table of Contents
1 General Introduction ..............................................................................................................7
1.1 Features ....................................................................................................................7
1.2 Specifications............................................................................................................7
2 Framework ..............................................................................................................................9
2.1 General Structure.....................................................................................................9
2.2 Front Panel................................................................................................................9
2.3 Port...........................................................................................................................10
2.4 Cable Control Introduction....................................................................................10
3 PVR Interface and Operation.............................................................................................12
3.1 Boot up and Shutdown..........................................................................................12
3.2 Standby and Wake up...........................................................................................12
3.3 Lock/Unlock ............................................................................................................12
3.4 System Monitor and Management Interface......................................................13
3.5 Record Operation...................................................................................................15

3
3.6
Main Menu ..............................................................................................................16
3.6.1 Playback ...........................................................................................................16
3.6.2 Snapshot ..........................................................................................................19
3.6.3 Parameter Setup .............................................................................................20
3.6.4 Format...............................................................................................................32
3.6.5 Shut Down........................................................................................................33
Appendix Toxic or Hazardous Materials or Elements ...........................................................34

4
Welcome
Thank you for purchasing our PVR210 series product!
This user’s manual is designed to be a reference tool for the installation and operation of your
system.
Please read the following safeguard and warnings carefully before you use this series product!
Please keep this user’s manual well for future reference!

5
Safeguard and Warnings
1.Electrical safety
z All the installation and operations here should conform to your local electric safety rules.
z We assume no liability or responsibility for all the fires or electrical shock caused by
unauthorized handling or installation.
2. Environments
z Always transport, storage and install the device in the specified temperature and humidity
environments.
z Do not leave the PVR device in corrosive environment such as chemical factory.
3. Transportation and Installation
z Please handle PVR device carefully
z This device shall avoid strike or strong vibration. PVR device may be damaged if you use or
storage improperly.
4. Accessories
z Be sure to use all the accessories recommended by the manufacturer.
z Do not expose the camera to strong light for a long time. It may damage the sensitive
components such as the CMOS.
5. SD card
z Please pay attention to SD card installation direction. Otherwise it may result in SD card
damage or PVR damage!
z Do not remove the SD card when you implement the SD card operation such as record,
playback, format, delete, upgrade and etc. Otherwise it may result in SD card file damage!
z When system is upgrading, please make sure the battery power capacity is sufficient. Please
connect the device to the power charger if possible. During the whole upgrade process; do not

6
remove the SD card! Otherwise it may result in upgrade failure and system can not restore to
the proper running status!
z Please make sure PVR device connection is right before you begin recording.
Warning
z Do not dismantle PVR device without authorization!
z Improper battery use may result in fire, explosion, or personal injury!
z When replace the battery, please make sure you are using the same model!
Some functions listed in this user’s manual are optional. Please make sure you purchased
model supports current function before your operation!

7
1 General Introduction
1.1 Features
This portable video recorder (PVR) is law enforcement equipment for individual suitable for special
industries such as police force, army force. It can completely record the law enforcement process
and provide on-site audio record, video record, playback function. It is portable and is compatible
with semi-stational use. PVR is very convenient to carry and is easy to operate.
1.2 Specifications
Name PVR210
Record resolution Max 1024*768
Video
Compression algorithm H.264
Audio Compression mode AAC
Battery working period
(Main unit only)
For the general device, it is about 4.5 hours.
For the device of the network module, it is 2-3
hours.
Battery capacity
threshold alarm
When battery left power capacity is less than
10 minutes, the buzzer begins beeping
regularly to alert you to recharge.
LCD power management System can automatically shut down LCD
power after the PVR stopped operation for
specified time such as ten seconds
(adjustable).
Battery
Standby time About 40 hours
Mini USB port USB2.0 high-speed port
1394b port Connect the main unit to the cable control
module.
Recharge port To recharge the device.
SD card One SD card port
Unit Port
Key Nine keys (Including one on/off button and
eight special keys.)
Storage SD card Support SD1.0, SD1.1, and SD2.0 standard.

8
SD card alarm
When the card is about to full (about five-
minutes recording time left), you can hear
buzzer beeps to alert you to replace a SD card.
Status Indication
Light
Cable control light z Monitor status: Cable control light flashes
once in every three seconds.
z Record status:Cable control light is on.
z Pause status: Cable control light flashes
once per second.
z Standby or stop status: Cable control lights
all become off.
z Shut down mode: Cable control lights all
become off.
Working temperature
0℃-+55℃
Working humidity
10%-90%
Dimensions (L*W*H) 105mm×75mm×34mm
General
Parameter
Weight 0.14Kg(excluding battery and cable control )
9
2 Framework
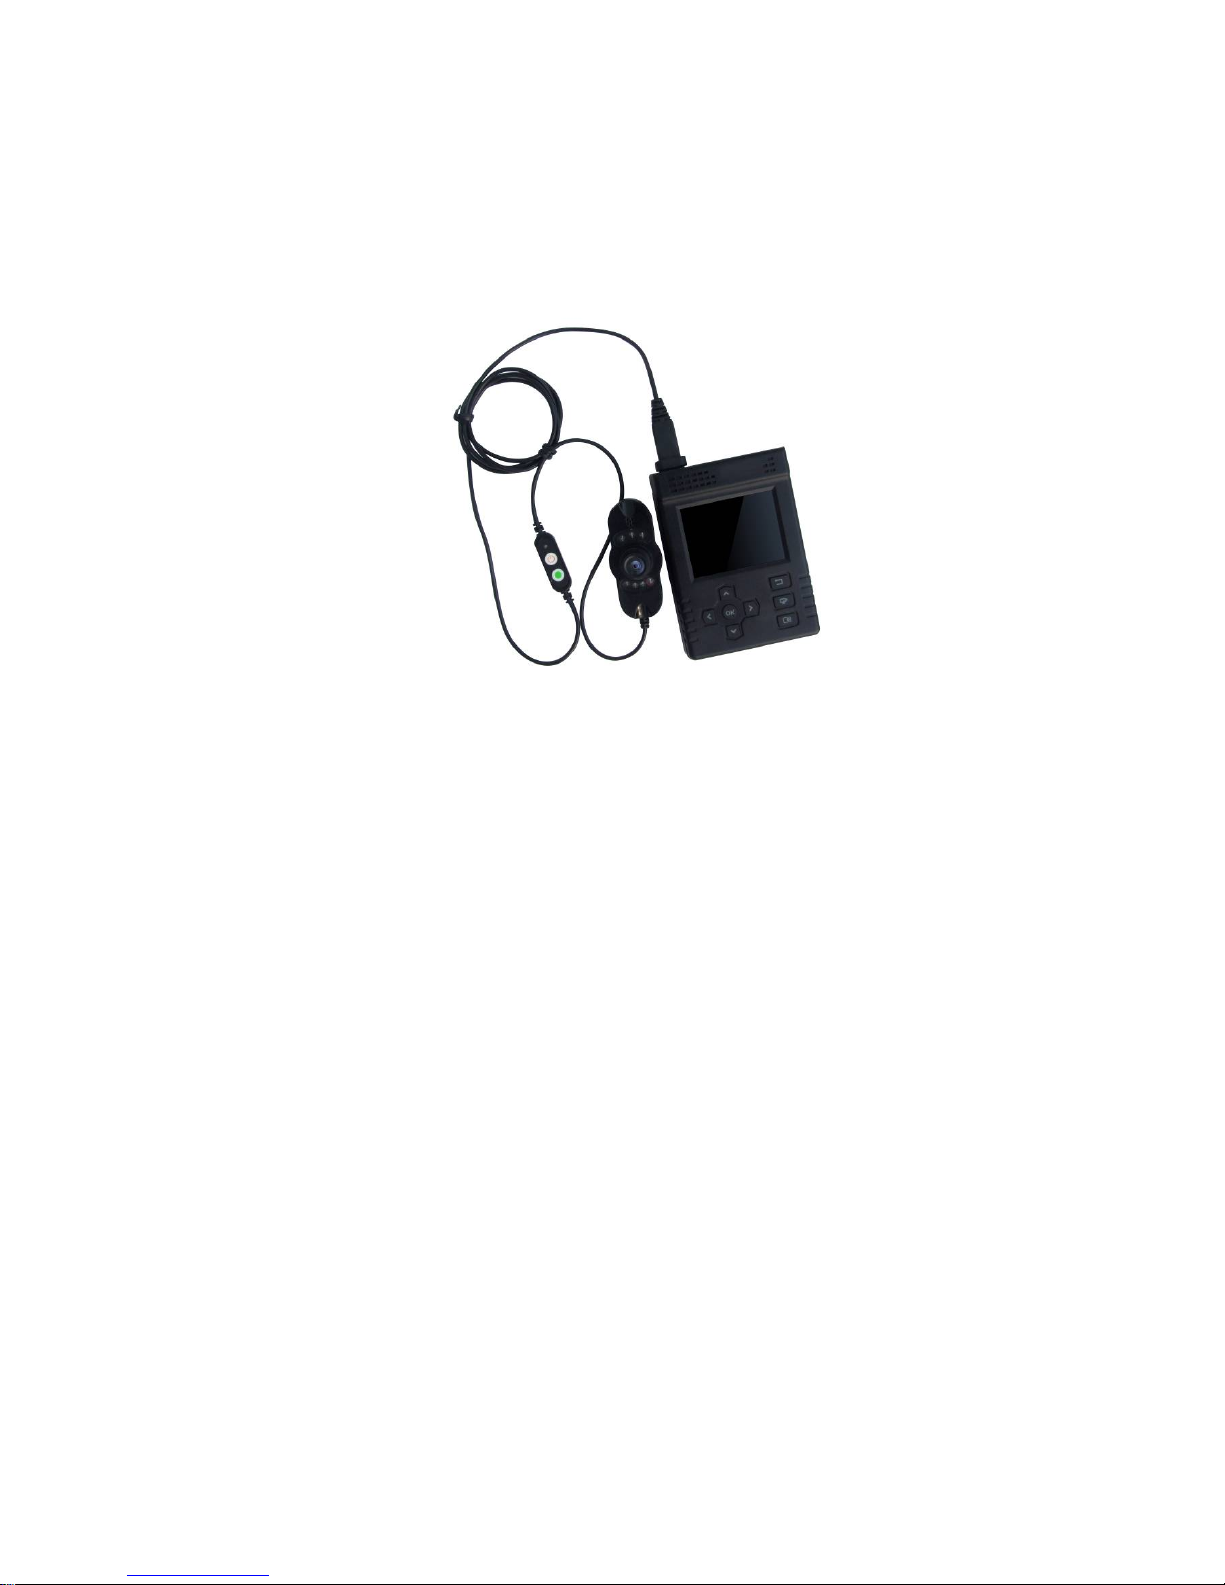
2.1 General Structure
Please refer to Figure 2-1 for general structure.
Figure 2-1
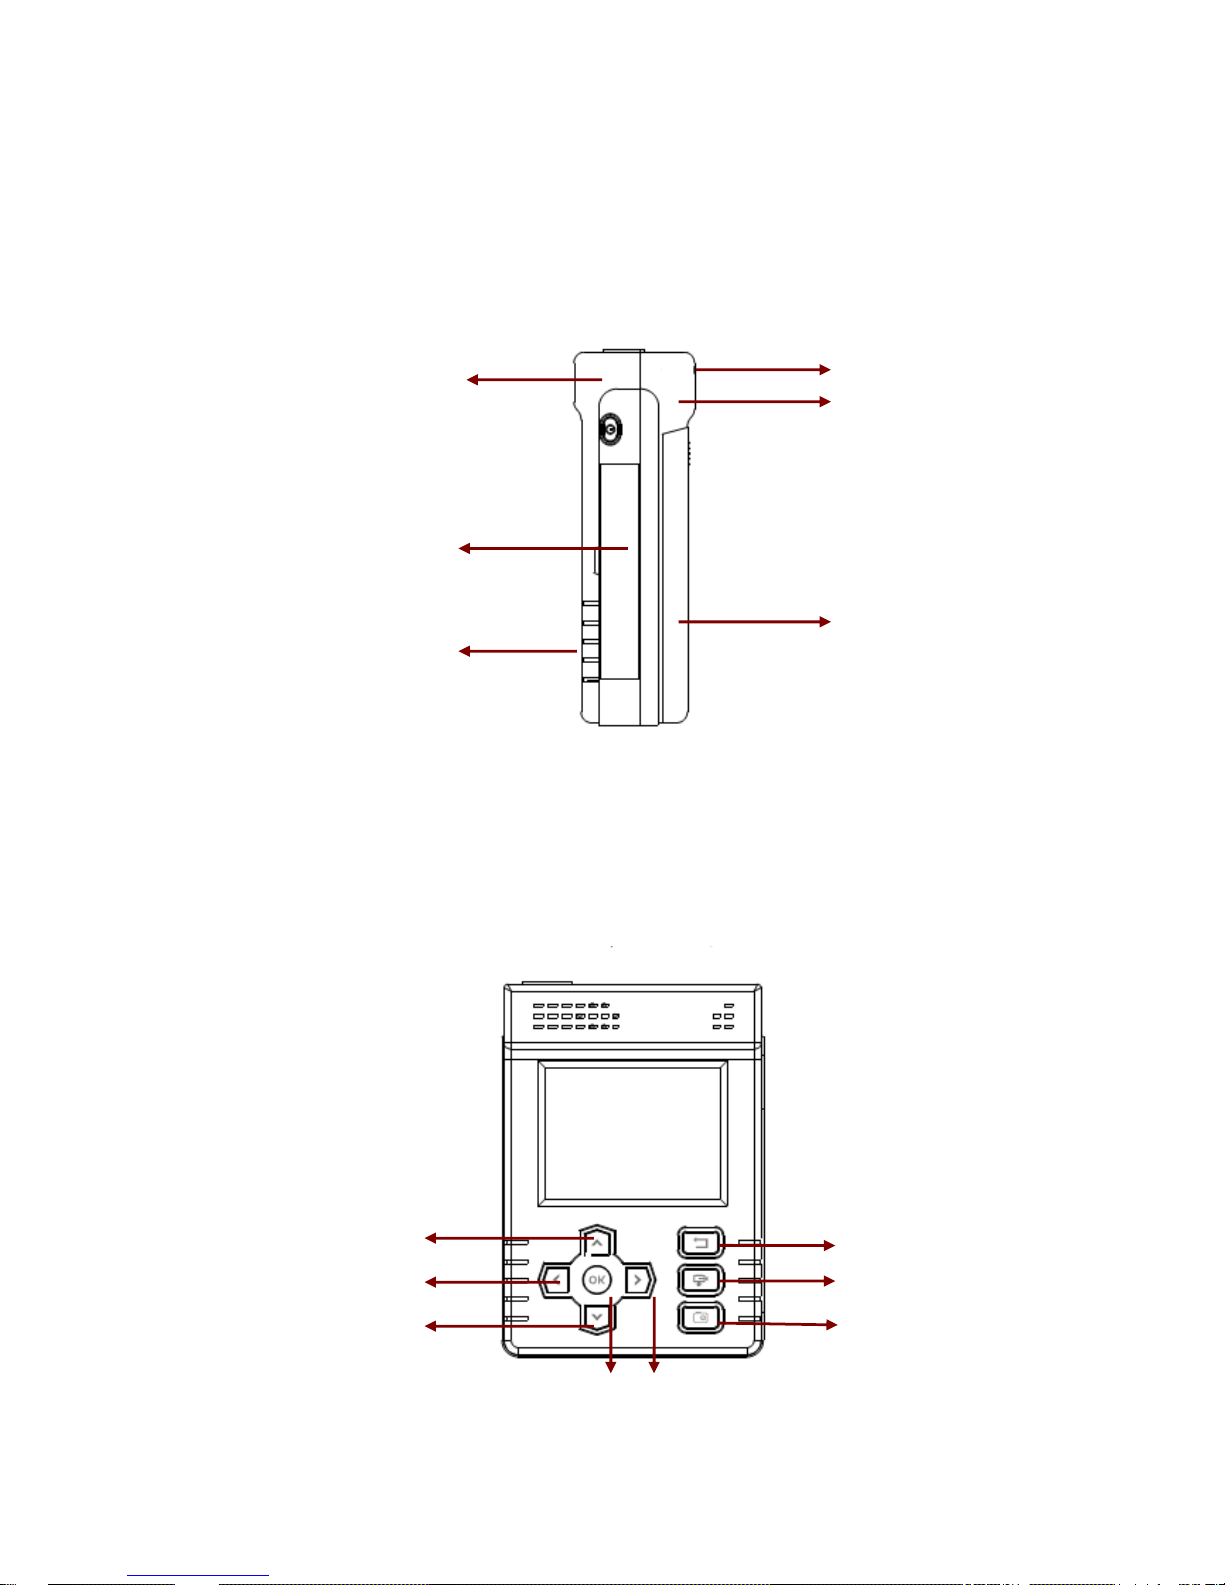
2.2 Front Panel
Please refer to Figure 2-2 for external keys.
There are nine keys. It includes one power button and eight special keys.
Figure 2-2
Cable control slot
Function key
接口侧盖
Port side cover
Chassis
bottom cover
Battery cover
Chassis up cover
Record
Snapshot
OK Right
Up
Left
Down
Cancel
10
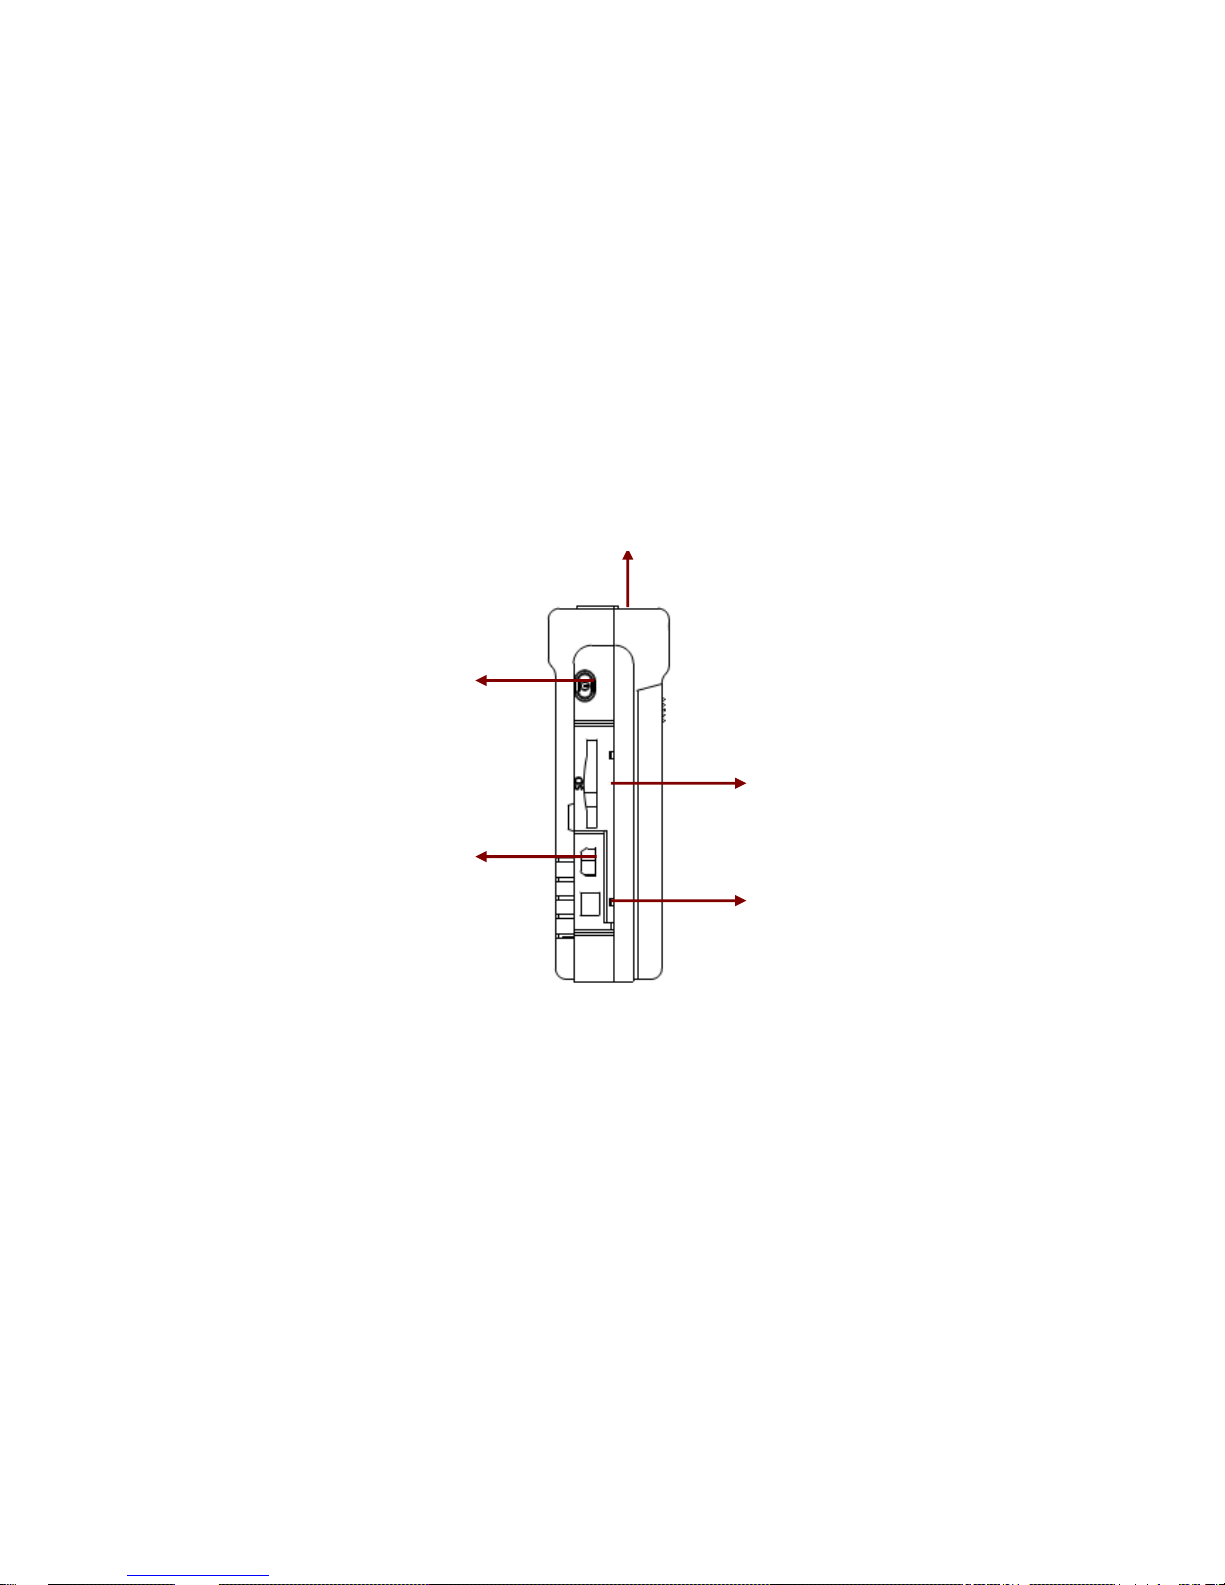
2.3 Port
Please refer to Figure 2-3 for external ports.
z Cable control port:Here you can input cable control to provide audio and video signal, the
key control signal input and status indication light.
z SD card port:Input ordinary SD card. Please pay attention to SD card installation direction.
It supports SD1.0, SD1.1 and SD 2.0 standard.
z External power port (it is round and has a socket in the middle.): It is to provide power to the
device.
z Mini USB port: You can connect the device to the PC via this port.
Figure 2-3
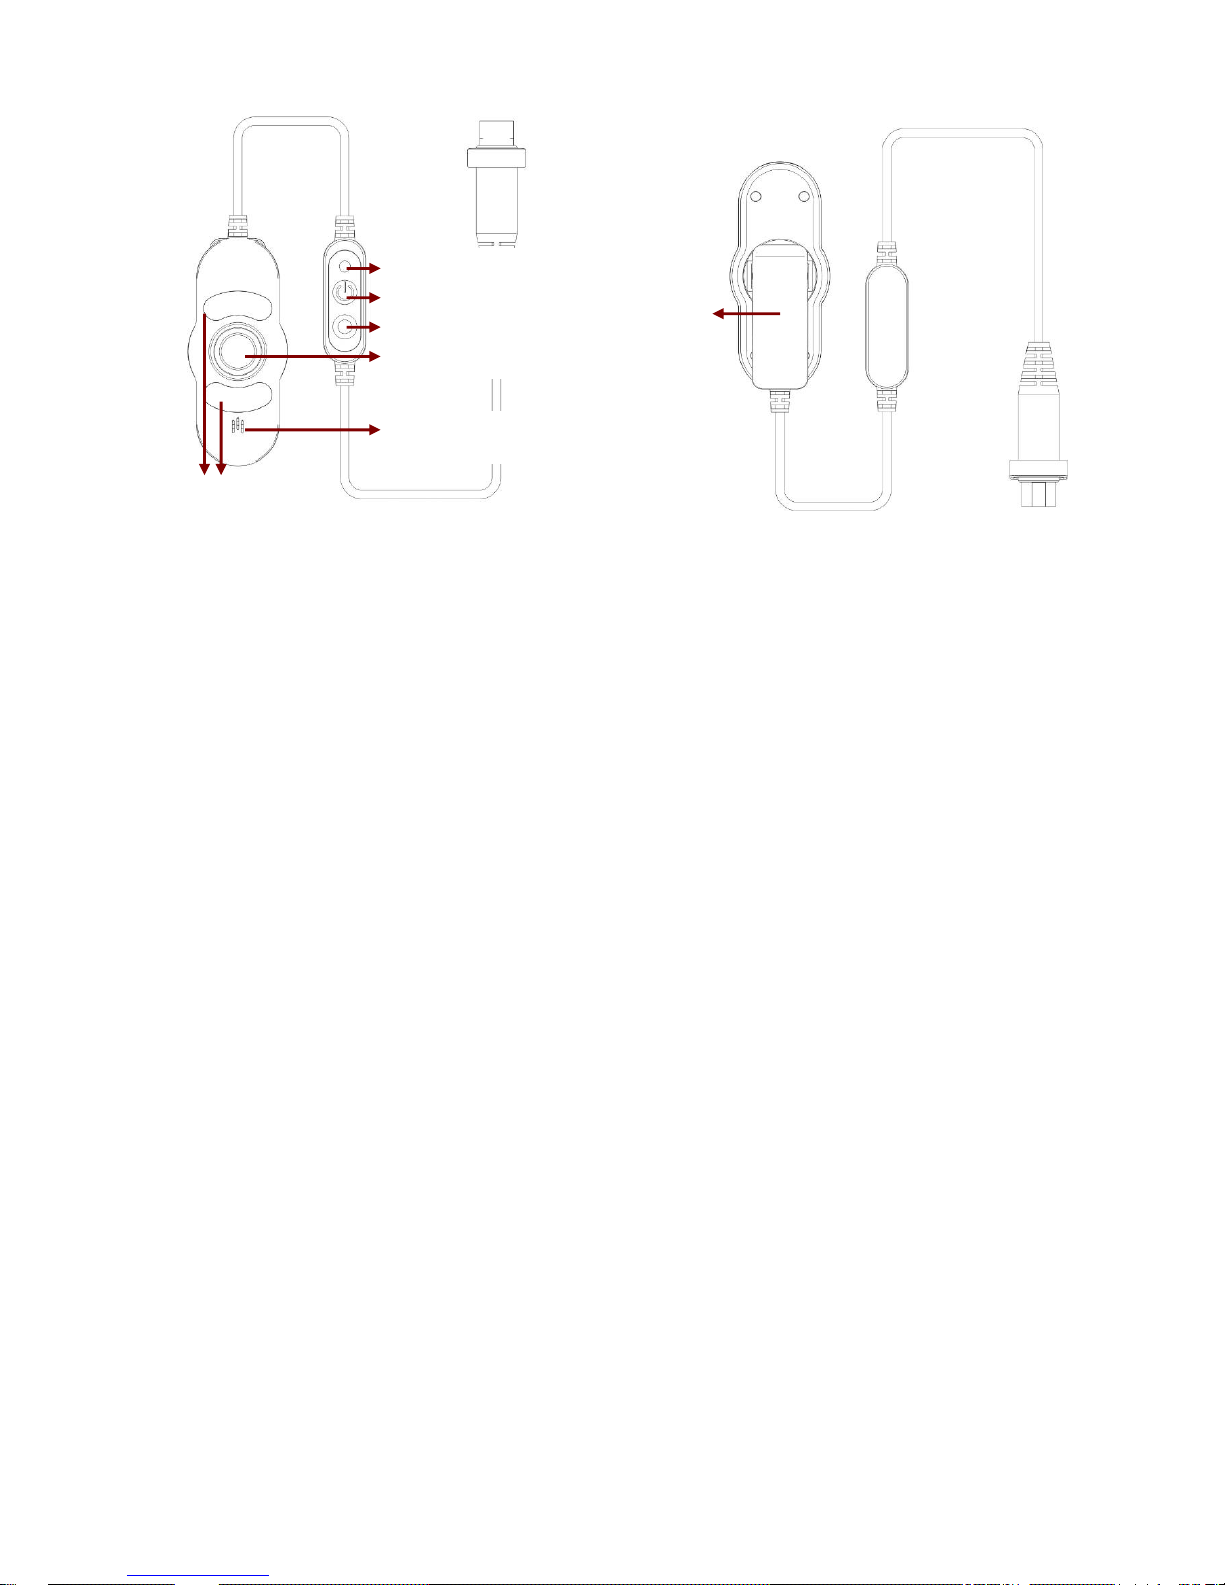
2.4 Cable Control Introduction
Please refer to Figure 2-4 for cable control information.
Cable control sub-system includes one camera, one microphone, two control keys and one
status indication light. System provides analog audio and video signal input and keystroke control
signal input. Status indication light can represent various statuses (On/Off/Flash. Please refer to
Chapter 1.2 Specifications for detailed information)
External power port
Mini USB port
SD port
Power button
Cable control port
11
Figure 2-4
About the cable control lens daily maintenance
z Do not touch the camera of the cable control; you can use the blower to clean the dust on
the surface of the lens. You can use the dry cloth with some alcohol or mild detergent to
clear if necessary.
z Do not use the volatility solvent such as the benzene or thinner, or detergent with strong
abradibility. It may result in lens damage or it may adversely affect the device performance.
Cable control
buckle
Microphone
Indication light
Off
On
Camera
IR light
 Loading...