

Page 1
Official UK distribution partner
tel: +44 (0)1457 874 999 | fax: +44 (0)1457 829 201 | email: sales@cop-eu.com | web: www.cop-eu.com
IP-KB1 Keyboard
Quick Installation Guide
Page 2
Official UK distribution partner
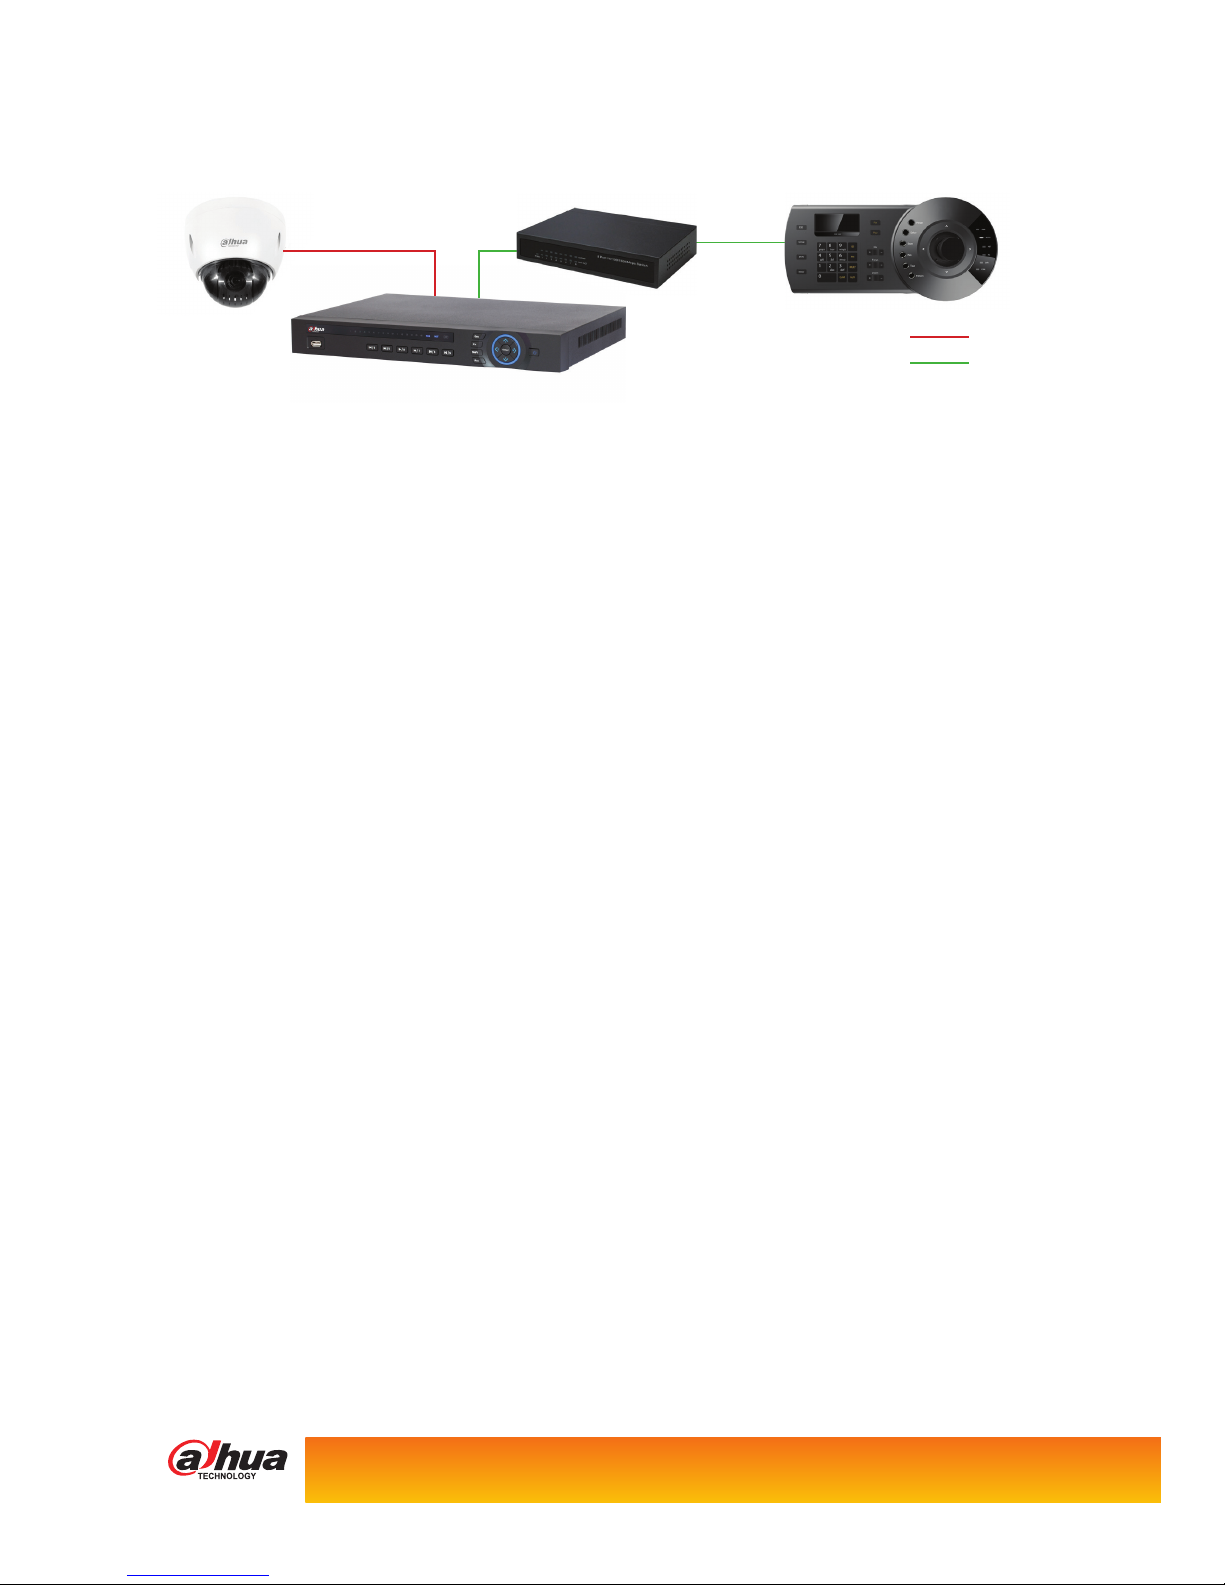
Controlling NVR & PTZ Camera
1. Connect the IP-KB1 keyboard to the same LAN as the NVR.
2. Enter the keyboard menu by pressing the Setup key.
3. Enter keyboard password 888888 (by default) and press Enter key.
4. Select Menu Settings > System > Network. Congure the IP details of the keyboard to the same range as the LAN.
Press Enter key to conrm.
5. Press Esc key to return to Menu Settings, select Zone and press Enter key. Congure the following settings:
ID This is the ID of the zone, usually ID 1.
Name This is the name of the zone, for example “NVR”.
Type When connecting to an NVR this should be set to “DVR”
Link This should be set to “Net”
IP Address Input the LAN IP address of the NVR.
Port Input the TCP port of the NVR (default is 37777)
Rule This should be set to DH-2
PW The password for the NVR (admin by default)
Press Enter key to conrm the settings.
6. Press Esc key until the date and time is shown on the LCD screen.
Before following the steps below, if you are currently logged into the NVR on the local monitor please enter the NVR menu
and go to shutdown > log out.
To connect to the NVR press the ID button, if prompted for the keyboard password, enter 888888 and press the Enter key. The
display should now ask for an ID, enter ID number then press Enter key.
The LCD should show connecting for a short period before displaying the ID, Device Type and IP address on the LCD screen.
You should now have control of the NVR using the keyboard.
Standard Keyboard Commands
Number key > Cam key Display channel full screen
Number key > PTZ key Control PTZ camera
Number key > Multi key Display desired multi screen (eg 4, 9, 16 etc)
Play key Access playback
Enter key Access menu
Controlling NVR & PTZ Camera
Camera Network
Internal Network
Page 3

Controlling PTZ Camera
1. Connect the IP-KB1 keyboard to the same LAN as the PTZ camera.
2. Enter the keyboard menu by pressing the Setup key.
3. Enter keyboard password 888888 (by default) and press Enter key.
4. Select Menu Settings > System > Network. Congure the IP details of the keyboard to the same range as the LAN. Press
Enter key to conrm.
5. Press Esc key to return to Menu Settings, select Zone and press Enter key. Congure the following settings:
ID This is the ID of the zone, usually ID 1.
Name This is the name of the zone, for example “PTZ”.
Type When connecting to a PTZ this should be set to “SD”
Link This should be set to “Net”
IP Address Input the LAN IP address of the PTZ camera.
Port Input the TCP port of the PTZ (default is 37777)
Rule This should be set to DH-2
PW The password for the PTZ (admin by default)
Press Enter key to conrm the settings.
6. Press Esc key until the date and time is shown on the LCD screen.
To connect to the PTZ camera press the ID button, if prompted for the keyboard password, enter 888888 and press the Enter
key. The display should now ask for an ID, enter ID number then press Enter key.
The LCD should show connecting for a short period before displaying the ID, Device Type and IP address on the LCD screen.
You should now have control of the PTZ camera using the keyboard.
Standard Keyboard Commands
Joystick Pan/Tilt camera
Zoom + - Zoom PTZ in or out
Number key > Enter key Adjust PTZ control speed
Iris + - Open or Close iris
Focus + - Adjust focus
Preset Save or Go to Preset
Controlling PTZ Camera
Camera Network
Page 4

COP Security, Delph New Road, Dobcross, OL3 5BG England
 Loading...