

Page 1
090323- 1
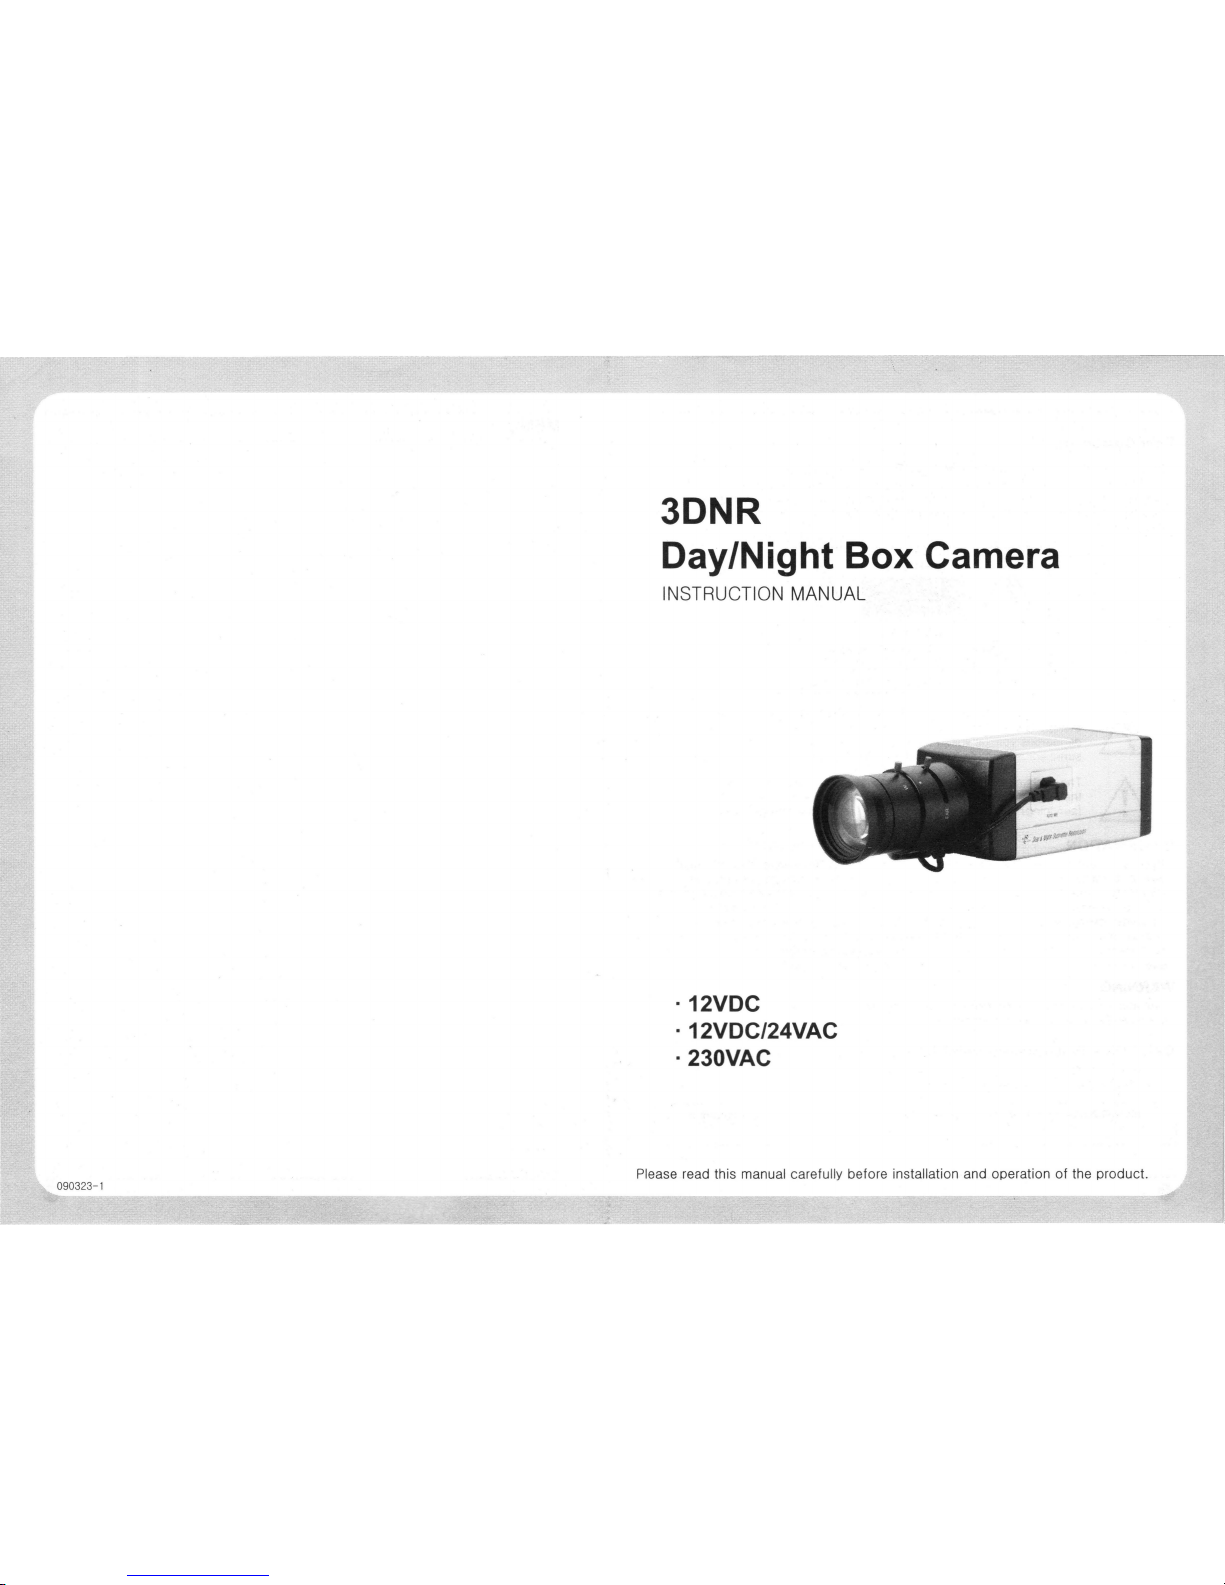
3DNR
Day/Night Box Camera
INSTRUCTION MANUAL
. 12VDC
. 12VDC/24VAC
·230VAC
Please read this manual carefully before installation and operation of the product.
Page 2
Dear Customers!
By
selecting this product, you have decided to use a professional device that
guarantees highest quality and reliability.
We
would like to thank you very much for your
confidence and kindly ask you to read the following instructions carefully before
Installation and operation
in
order to take full advantage of
all
quality features regarding
this product.
CAUTION
TO
REDUCE THE RISK
OF
ELE
CTR
IC SHOCK,
DO NOT REMOVE THE COVER (OR BACK
).
NO
USER
SERV
ICEAB
LE
PARTS INSIDE .
REFER SERVICING
TO
QUALIFIED PERSONNEL.
The lighting flash with
an
arrowhead symbol, within
an
equilateral
triangle
is
intended to alert the user to the presence of uninsulated
dangerous voltage within the product's enclosure that may
be
of
sufficient magnitude to constitute a risk of electric shock to persons.
The exclamation point within
an
equilateral triangle
is
intend
ed
to alert
the user to the presence of important operating and maintenance
(servicing) instructions
in
the literature accompanying the appliance.
INFORMATION
This equipment has been tested and found to comply with limits for a Class A
dogrtal
device. pursuant to part
15
of the
FCC
Rules. These limits are designed to provIde
reasonable protection against harmful interference when the equipme nt is operated
in
a
commercial environment. This equipment generates, uses, and can radiate radio
frequency energy and. if not installed and used
in
accordance with the instrucllon
manual. may cause harmful interference to radio communications. Operation of
thIS
equipment
in
a residential area
is
likely
to
cause harmful interference
in
which
case
the
user will
be
required to correct the interference at his own expen
se.
WARNING
Changes or modifications not expressly approved by the manufacturer coul d void the
user's authority to operate the equipment.
CAUTION -
To
prevent electric shock
and
risk of the fire hazards
•
Do
NOT
use power source other than that specified.
• Do NOT expose this appliance to
rain
or
moisture.
This installation should
be
made by a qualified service person
and
should confo
rm
to
all local co
des
.
(~
__
T_a_b_le
__
Of_c_o_n_t_e_n_ts
__
~)
1. Precautions -------------------------------------------------------------4
2. Limitation of
liability --------------------------------------------------- 5
3.
Disclaimer
of
warranty ----------------------------------------------- 5
4.
Package ----------------------------------------------------------------- 6
5.
Special Features
of
the model ------------------------------------- 7
6.
Name and function of each part ----------------------------------- 8
7.
I nstallation --------------------------------------------------------- 9-11
7-1. Lens
7-2. When using
an
auto iris lens (OC-drive)
7-3. When using a C-mount Lens
7-4. When using a CS-mount Lens
7-5. Video Monitor
7-6. Power
8.
Functions and operation --------------------------------------
12-22
8-1.
On
Screen Menu (OSO)
8-2. Setting up the menu
8-3. LENS (Selection)
8-4. EXPOSURE
8-5. White Balance(WHITE BAL)
8-6.
DAY
NIGHT
8-7. 3
0NR
(3
~
Noise Reduction)
8-8.
SPECIAL
8-9. ADJUST
8-10. RESET
8-11. EXIT
9.
Troubleshooting ------------------------------------------------
23-24
10.
Dimension (mm) --------------------------------------------------- 24
11.
Specification -------------------------------------------------------- 25
Page 3
1.
Precautions
• Please read the manual carefully before the installation
in
order
to
make use the
camera to be set up
correctly and to have
the
best picture
Quality.
• Please keep the manual
in
good condition
for
your future reference and service
application.
• Installation
and services should only be carried out
by
an
authorized personnel
according to local safety regulations.
• If
any liquid or solid matter gets into the housing. immediately disconnect the camera
from power
supply and
have
it checked
by
your authorized dealer before reusing.
• Avoid installing the camera at extremely hot or cold places.
• If
you
are
not a certified person, never try to dismantle the camera.
To
avoid electric
shock.
never
remove
the
screws
or
covers.
There
are
no
parts insi
de
that
need
maintenance
by
the user.
All
maintenance should
be
carried out
by
Qualified
personnel.
•
Avoid installing the camera
at
a place of high humidity.
• Avoid installing the camera
at
the place exposed
to g
as
or
oil.
•
Keep
the
top glass of the lens always clean in order
to
obtain
the
best picture Quality
all
the time.
Be
careful not to
be
stained
by
fingerprin
t.
• Don't face the camera directly toward s
unl
ight
or sunlight reflecting area.
CCD
may go defective at this condition.
• Please give a special attention to keep the unit from dangerous drop or
external shock during the process of transportation or handling.
•
Never
try
to
touch the camera
in
wet hand.
It
may cause an electric shock.
• Do not expose the camera
to
radioactivi
ty.
It
causes a serious damage on
the
CCD
.
.,
2. Limitation of liability
This publication
is
provided "AS IS" without warranty of any kind, either express or
implied. including but not limited to.
the
implied warranti
es
of
merchantability. fitness
for any
particular purpose, or non infringement
of
the third party's right. This publication
could include technical
inaccuracies
or
typographical errors. Changes
are
added
to
the
information herein, at
any
time. for the improvements of this publication and/or the
corresponding product(s).
3. Disclaimer of warranty
In
no
event shall seller
be
liable to any party
or
any person. except for replacement or
reasonable maintenance of
the
product, for
the
cases. including but not limited to
below:
(1)
Any
damage
and
loss. including without limitation. direct
or
indirect. special.
consequential
or exemplary , arising out of or relating to the product:
(2)
Personal injury or
any
damage caused
by
inappropriate use
or
negligent operation
of the user:
(3) unauthorized
disassemble, repair or modification of the product
by
the user:
(4)
Inconvenience
or
any
loss arising when images
are
not displayed, due
to
any reason
or
cause including any failure or problem of
the
product:
(5)
Any
problem, consequential inconvenience,
or
loss
or
damage, arising out of the
system combined
by
the devices of third party.
(6)
Any
claim
or
action for damages. brought
by
any person
or
organization being
photogenic subject. due
to
violation of privacy with the result of that surveillancecamera's picture, including saved data. for some reason, becomes public or is used
for
the
purpose other than surveillance.
Page 4
4.
Package
3DNR Day/Night
Box Came
ra
1 EA
Auto Iris Plug
1EA
Instruction manual
1EA
L-Wrench
0.
870
1EA
C-Mount Adaptor
1EA
5.
Special features of the model
* Ultra High Resolution
By
adopting a 410.000 pixel Sony CCD. the camera produces clear picture quality with a
horizontal reso luti
on
of
560
TV
lines for col
or.
and
600
TV
lines for B/W.
* Digital Wide Dynamic Range (D-WDR)
By
adopting a proprietary
DSP
chip. the camera delivers clear. high quality pictures
even
in
backlight.
by
increasing exposure
in
dark areas while decreasing it
in
bright
areas: a corrected image with
clear details results.
* SENS-UP
(0.2Lux-
0.0001 Lux at
2x-128x
Fields)
Sens-up helps maintain a bright. clear scr
een
image
by
automatical
ly
detecting
changes
in
the level of light
in
low light l
evel
conditions. Sensitivity can
be
dramatically
improved
UP
to 0.00001
Lux
by
adiusting t
he
filed
to
128
x
Imax.
*3DNR
On
3D
Noise Reduction technology used for this camera. the amount of low illumination
noise
has
been significantly reduced.
and
the
signal-to-noise
ratio (SIN ratio)
as
well
as
horizontal resolution
has
been dramatical
ly
improved. resulting
in
a clear and sharp
image
display even
in
the dark.
* True Day & Night
The image
is
automatically converted from Color to B/W at the nominated l
ux
level on
the
OSD.
This function maintains the picture quality
at
daytime true Color and noiseless clear B/W
image
at
nighttime enhancing
the
sensitivity and resolution
UP
to
600TVL.
* Privacy Function
The
privacy function enabl
es
you
to select up to 8 areas
and
not to show & record the
nominated area(s) on the screen.
* Additional functions
SYNC(INT/LL).
FREEZE.
V-FLIP.
ROTATE.
D-ZOOM.
SHARPNESS.
and
MOTION
DETECTION
are
provided.
* Easy to use OSD (On Screen Display) menu
A variety of beautiful functions built-in
are
all
easily controlled
by
selecting text
displayed on the monitor.
Page 5

6.
Name and function of each part
.d.
.nn_
w,i.*
®CD
®
12V
DC
or
12VDC124VAC
Type
230VAC Type
CD
Protective cover
®
C·Mount
lens adaptor
® Back Focus fixing screw
Use the L -
WRENCH
supplied
in
the
package for
locking.
@ DC Iris
Jack
® Mounting bracket holder
Mounting bracket holder can
be
separated and attached
on
the
bottom side
as
well.
Please
use the supplied clamp
screws only change the position
of the bracket.
USing
screws more
than 5mm depth can do a serious
damage
to
the inside this camera.
® Power indicator
Lamp
is
on when the power
is
being
supplied.
CD
Video output (BNC Female)
Connect coaxial cable for Video
signal
out.
® Power input terminal
Co
nnect to t
he
power sourc
e.
Polarity of the power is
self-
configured. (N
on-pol
arity).
® RS-485 Control port
You
can control
SETUP
menu
through this port
by
using external
controllers
li
ke a remote controller
that RS-4
85
Communication
is
supported. for details. s
ee
page
22-23.
7.
Installation
7-1. Lens
Lens
is
not supplied with the unit. C-Mount
or
CS-Mount type
of
lens
is
useable.
Please select
a lens that
has
a good F-Stop
in
order to get
the
best picture quality.
Use
of Auto
DC
iris
lens is
recommended
to
achieve the best results for operating this
product
effectively.
.,.,.
Caution
Please make sure
the
surface
of
the lens
be
always clear. Clean dirt or water
drops with soft
cloth
in
order to avoid the picture blooming
or
reflectio
n.
7-2. When using an auto iris lens (DC-drive)
CD
Please take off the sleeve outer cable of the lens
by
10mm.
~
~--" ~--,
/ " / "
r-,
{
~
"S"\
r-,
~
\
II
{~I
{
-..-
\ / - \ 10mm /
" / " /
'-
_ /
.....
__
......
Lens
Pin No.
DC
No.1 Pin
Damping
-
No.2
Pin
Damping
+
No.3
Pin
Drive
+
No.4
Pin
Orive-
® Please take off the sleeve inner cable of the lens
by
2mm.
""c."
.
~
co"."o,¥
~
::::~
~~in.
Pin2
® Solder the wires
on
the pin
-co
nnector (iris- jack) suppli
ed
with the lens according to
the pin configuration
as sho
wn
in
the drawing.
@ Assemble the lens .
® Connect the Auto
Iri
s jack.
Page 6

7.
Installation
7-3. When using a C-mount Lens
• Please 'assemble
C-Mo
unt adaptor.
• C- Mount adaptor
is
included
in
the package.
•
Fix
the lens by turning it clockwise.
C-MO
U"tAOAPTO
~
W
7-4. When using a CS-mount Lens
pmtbecti:~:~
~
":~"O"
~
• Take
off
the Protection cover.
~
• Take
off
the C-MOUNT adaptor if any .
• Assemble the CS-
MOUNT
lens by turning
it clockwise.
- When used with
an
Auto Iris lens.
please insert the iris jack into the
Iris
socket which
is
located on the right side
of the camera.
~
Caution
• Use the lens
as
shown
in
the picture here.
C-Mount Lens : Less than 11mm
CS-
Mount Leos : Less than 6mm
• When the lens is out of the spec. it could damage the camera inside or may not be
correctly fitted with the camera.
• Use the lens less than 450g. Heavier lens can damage the camera.
7.
Installation
7-5. Video Monitor
Connect Video cable with BNC-male connector to the monitor.
Camera
7-6. Power
• •
• •
Impedance alliance
in
the system
co
nnection
.
Make
sure to connect the cable with the
power off.
Please locate the impedance
switch of each equipment as instructed.
Locate the switch to
Hi-z
position for the
interim equipments. Locate the switch to
75Q
for the last equipment.
12VDC camera
Please make sure to use a UL/
CE
approved and
12VDC/500mA regulated power supply.
12VDC/24
VAC
Dual power camera
You can use either
12VDC
Power or 24VAC Power
source with non-polarity connection.
230VAC camera
Please make sure to use
an
AC230V power source.
Connector the power plug to the outlet directly .
Page 7

8. Functions and operation
8-1
. On Screen Menu
(050)
Setup
Men
u
LENS
DC
MANUAL
SHUTIER
BRIGHTNESS
EXPOSURE
SENS-UP
BLC
RETURN
ATW
MANUAL
WHITE
BALANCE
PUSH
DAY NIGHT
COLOR
B/W
3DNR
ON
OFF
SPECIAL
CAMTITLE
D-EFFECT
MOTION
PRIVACY
LANGUAGE
RETURN
ADJUST
SHARPNESS
BLUE
RETURN
RESET
FACTORY
RETURN
EX
IT
AGC
D-
WDR
AWC~SET
AUTO
RS485
SYNC
RED
8.
Functions and operation
8-2. Setting up the menu
Use the 5 buttons located on the
side of the camera.
•
1.
Press the
SETUP
button to access the SET
UP
mode.
The
SETUP
menu
is
displayed on the monitor.
•
2.
Please select any fun,ction you wish to activate by using the UP/
DOWN
buttons.
The
ar
row can be moved
UP
or down by using the UP/
DOWN
buttons. Positi
on
the
arrow to pOint to the function you wish to operate.
MA
IN
menu SUB
menu
.j. .j.
UP
LEFT
BRIGHT
DOWN
3.
Change the status of the selected feature using the
LEFT/RIGHT
buttons.
When the
LEFT
or
RIGHT
button
is
pressed, available values and modes
are
displayed
in
order. Please keep pressing the button until you get to the mode you
wish to operat
e.
4.
When completed, move the arrow indicator to 'EXIT' and press the
SETUP
button to
finish the setting,
G"
Note
• If
..
appears at the mode you wish to operate, it means that there
is
a sub-menu
which can
be selected by pressing the
SETUP
button .
• If
..
appears
at
the mode item, it means that there
is
no mode available to
be
selected.
Page 8

8.
Functions and operation
8-3. LENS (selection)
This function
is
used to select the lens and to adjust the
SETUP
suitable to the type of
lens.
• When
DC
lens
is used.
1.
Press the
SETUP
button.
2.
The
LENS
on the menu will automatically display <DC>
in
the sub-menu. If this sub-menu shows <MANUAL>,
please press the sUb-menu and it will be converted to
<DC>.
3.
DC
Level volume control
Brightness level of the screen at <DC> mode
is
adjustable.
- Select
SHUTTER
menu and move the cursor to
sub-menu <DC>.
SETUP
" I
LENS
J~
.J
2
>=xP:::JSUPE
oJ
:l
w'"lTE SRL
IFIJ
y
:R'j N GHT
RiJTD
oJ
S
:<:::JNI<'
ON
,J
b
::;PECRL
.J
~
RDwUS
T
.J
8
RESET
oJ
q
~:(
T .J
LENS
"
81<1
~JI
.
.,TNESS
I
SO
PET
uPN
PET
oJ
- Press
SETUP
button and then the BRIGHTNESS CONTROL menu
is
on.
- Adjust the level
by
using the LEFT/RIGHT buttons.
4. Press the
SETUP
button to finish the control.
....
Note
At
DC
mode, the
SHU
TTER
is
fixed at 1/60 sec (NTSC). 1/50 sec (PAL). and the
submenu
at
the
SHUTTER
mode will
be
in
<blank> .
• When MANUAL lens
is
used.
1.
When Manual lens
is
used. the menu
is
automatically
converted to <MANUAL>mode.
2.
Press the
SETUP
button and select <MANUAL> on the
LENS
mode.
3.
Then the
sub-menu
on the
SHUTTER
menu
is
converted
to
<ESC> mode.
4.
Brightness control
Brightness level of the screen at <ESC> mode
is
adjustabl
e.
- Select the
SHUTTER
menu and move the cursor to
sub-menu
<ESC>.
SETUP
• LeNS
"'RN~>1L
2 ~ ¥Pr'':JuPE
.J
~
.If.
TE
~I'<
f:T
_
'"i
JR"
.., ~ .... T Ru
T~
oJ
S
3C">?
L"'1
oJ
b
SPErR
oJ
,
RO
wu
':;'
oJ
8
RESt
T
q tX T
~
EXPOSURE
•
~,,~ • T~
r;:
H,-
Tr
Bl?uh·"r.,
t
c,
- Press the
SETUP
button and then the BRIGHTNESS CONTROL menu
is
on.
- Adjust the level by using the LEFT/RIGHT buttons.
5.
Press the
SETUP
button to finish the control.
....
Note
This unit
is
designed to use
DC
mode only.
Please
set to manual mode for the adiustment
of
fixed shutter control only.
8.
Functions and operation
8-4. EXPOSURE
(1)
SHUTTER
(Condition and
Speed
control)
A. FIXED : 1/60, 1/50
,,,
1/100000
This mode
is
activated when the
IRIS
is
set to <FIXED>
mode and when Manual iris lens
is
used only. Following
7 steps are adjustable according to scanning system.
EXPOSul2E
..
~f-.
T
TEl"
b::
802
....
"'EC:
- NTSC: 1/60,
FLK,
1/250, 1/500. 1/2000, 1/5000, 1/10000. 1/100000
-
PAL:
1/50,
FLK,
1/250. 1/500, 1/2000, 115000, 1/10000, 11100000
* Use this function only when the light level on the application
is
fixed all the time.
* Factory default
is
NTSC
1/60,
PAL
1/50
B. FLK
Please select
FLK
mode when flickering occurs
on
the
screen, due to
an
imbalance between illumination and
frequency.
In
most countries other than japan do not need
this set up.
C.AUTO
The shutter speed
is
controlled automatically according to
the brightness of the screen.
D.
SENS-UP:
x2/x3/x4/x8/x16/x32/x64/x128
This is
an
electronically activated function to improve the
sensitivity for viewing low light conditi
on
in addition to the
original sensitivity from CCD sensor itself.
Sh
utter level
is
adjustable from 2 to 128 times.
EXPC'JLIRE
..
...
q?
F
~
""' -"t
E
XPCSURE
. y.,
TO;"
•
8"C"" ",'0
- When SEN
S-UP level is
higer, the much brighter picture becomes white the more
ghosts are occurred.
- During SENS-UP function
in
operation, Noise, Spots and White blemish are
increased at the same rate of
SENS-UP level increasing.
Bu
t th
is is
not a malfunction.
(2)
AGC
(Auto Gain Control)
1. Please position the arrow to point to 'AGC'
on
the
SETUP
menu by using the
UP
and
DOWN
buttons.
2.
Please select the mode you wish to operate by pressing the
LEFT
and
RIGHT
buttons.
As
the level of gain increases, the screen gets brighter and the level of noise
increases.
Page 9

8.
Functions and operation
HI
GH :
The
gain increases from 6dB
UP
to 42dB
MIDDLE :
The
gain increases from 6dB
UP
to 30dB
LOW:
The
gain increases from 6dB
UP
to 18dB
OF
F:
The gain
is
fixed
at
6dB.
'"'" Note
•
AGC
levels can not
be
selected when the
Day
/Night mode
is
set
to
AUTO.
(3) SENS-UP
SENS
UP
helps maintain a bright. clear screen image
by
automatically detecting changes of the level of light
in
low
illumination.
1.
Please position
the
arrow
to
point to
'SENS
UP'
on
the
SETUP
menu
by
using the
UP
and
DOWN
buttons.
E
XPJ~uP~
~....
~"'"
h
::J"
~
~
1>
....
.....
,r
'
:j
~ ~
~
--""
~ ~
"'~
",'
.. ~ .J
EXPOSURE
,..
'de
~"'
~
"<-
"
'"
• ~~
-.
~
oJ
-c
~
-"
~ ~
",t:
~,,-.
,,~
.J
2.
Please select the mode you wish
to
operate
by
pressing the
LEFT
and
RIGHT
buttons.
AUTO:
Low light level auto mode.(x8)
OFF:
The
function does not operate.
'"'"
Note
SE
NS
UP
I>
l"
uP
'c
O?~
~
,-P"
PE'
oJ
• When the
SHUTTER
is
in
the
MANUAL
mode,
SENS
UP
does not operate.
• When the
AGC
is
turned off.
SENS
UP
does not operate.
(4) BLC (Backlight Compensation)
This function
is
useful when there
is
a strong backlight
behind the object.
1.
Please position the arrow
to
point to 'BACKLIGHT' on the
SETUP
menu
by
using the
UP
and
DOWN
buttons.
2.
Please select the mode you wish
to
operate
by
pressing
the
LEFT
and
RIGHT
buttons.
HI
GH:
The
gain increases from 0 dB
up
to
42dB
M
IDD
LE :
The
gain increases from 0 dB
up
to
30dB
LOW:
The
gain increases from 0 dB up to 18dB
OF
F:
BLC
function does not operate.
E
XPCSURE
-,
T T
~;;o
L
8;
,,'-'~
" "
, r
I>
t;
- .J
-
;;:
-
~
",..-"
" .J
B~C
I>
J-"
M H
<-rF'
.J
P .... I
.::"
I-
•
-c
JH
I
~
;;:E·uP"
OFF
lOW
MIDDLE
HIGH
8.
Functions and operation
(
4-1
) HSBLC (Highlight Suppression Backlight Comp ensation)
If there
is
a high light installed
in
a limited environment
such as an apartment parking garage or gas station
entrance, removing the high light makes it possible
to
view car license plates efficiently.
EXPJS--,PE
· "
~
HSBLC
MASKING
AREA
~
~ •
oJ
~58L
r
• v
r
I
00
~
~ ~
• - I
• I
" .
.... h ....
I
~
HSBLC
ON
HSBLC OFF
(5) D-WDR(Digital Wide Dynamic Range)
D-
WDR
Function scans both dark and bright areas clearly
and this model realized ils best set
UP
for the most of
different
levels of backlit or contrast lighting situations.
- INDO
OR
Select this when the level
is
low.
- O
UTDO
OR
Select
this when the level
is
high.
".. Note
" ,
E
XPC:SL)~)E
. '
, ,
,
~
I>
."
"
,,~
"
oJ
• D-
WDR
automatically turns off when the Day/Night mode
is
sel
to
AUTO.
• D-
WDR
needs
to
be
manually turned ON/
OFF
when the
Day
/Night mode is set
COLOR
or B/W.
(6) RETURN
Select this
to
save t
he chan
ge
in
the EXPOSURE menu
and return to
the
SETUP menu.
8-5. White
Balance
(WHITE BAL)
This
is
useful when the cameras
are
installed
in
different
artificial lighting conditions where a standard White Balance
condition
is
not suitable for all.
I.
Please position the arrow
to
point to 'WHITE BAL' on the
SETUP
menu
by
using the
UP
and
DOWN
selections.
Sf T
,-0
.
~
· '
.
~
-'
-'
, 0
~
~
~
2.
Please select the mode you wish to operate
by
using the
LEFT
or
RIGHT
selection.
3.
Please select one of the 5 modes below.
Page 10

8.
Functions and operation
-
ATW
(Auto Tracking White Balance)
This mode can
be
used within the color temperature range
2,OOO
·K-20,OOO·
K.
-
AWC ~ SET (Auto White Balance cont
rol
)
Please press the Tact
SW
while the camera
is
directed at a piece of white paper
to
obtain the optimum state under current illumination. If the environment including
the
light source
is
changed, you have to adjust the white balance again.
- MANUAL
Th
is manual adjustment mode makes finer adjustment
possible,
Please select
ATW
or
AWC
first.
Please change to manual adjustment mode and press
the Tact
SW.
wH
TE
BRL
nRNURL
,.
Q
~
I
c,'1
;:E::
I
c~
i2E
T 1('"
p~
T
.J
Please set the appropriate color temperature, and then increase or decrease the
red
and blue color values while monitoring the color changes
on
the
object.
-
PUSH
It
is suitable when the object's background
is
in
high color temperature.
(Ex.
Clear sky, Sunset)
8-6. DAY NIGHT
You
can display pictures
in
Color or B/W.
1.
Please position the arrow
to
point to 'DAY/NIGHT' on the
SETUP
menu
by
using the
UP
and
DOWN
selections.
2.
Please select the mode
you
wish to operate
by
using the
LEFT
and
RIGHT
selections.
-
COLOR:
The
picture
is
always displayed
in
color.
-
BIW : The
picture
is
always displayed
in
black and white.
Burst
ON/OFF selectable.
SE" JP
"l''f''w
H
~
'IP
':J
k?~
oJ
~
~...,
E
8i:<
'1T
w
,. -
,,-
"'....
~
oJ
:,
;IT'I>:?
J"
.J
M
;J~
H
oJ
~
H~
'-,.
oJ
;:;
Q'::"E·
oJ
-
EX
oJ
-
AUTO: The
mode
is
switched
to
'COLOR'
in
a normal environment. but switches to
'B/W' mode when ambient
illumination
is
low.
To
set
up
the switching time
or
speed for
AUTO
mode, press the Tact
SW.
• DELAY:
You
can select
the
duration time about changing the Day/Night
mode
0-63sec.
• S-LEVEL :
To
adjust
lux
level for switching
Day
to Night.
(Default:
65
(3Lux))
• E-LEVEL :
To
adjust
lux
level for switching Night to
Day.
(Default:
60
(6Lux))
8-7. 3DNR (3D Noise Reduction)
The
background noise
in
the low light level decreases automatically
as
the level of gain
changes.
8.
Functions and operation
1.
Please position
the
arrow to point
to
'3DNR' on the
SETUP
menu
by
using the
UP
and
DOWN
selections.
2.
Please select the mode you wish
to
operate
by
using
the
LEFT
and
RIGHT
button.
OFF: Deactivates
3DNR,
Noise
in
not reduced.
ON
: Activates
3DNR
so
that noise
is
reduced.
3.
Set the
3DNR
mode to 'ON' and press the Tact
SW.
Then you can adjust the noise reduction level.
8-8. SPECIAL
1.
Please
pOSition
the arrow to point to 'SPECIAL' on the
SETUP
menu
by
using the
UP
and
DOWN
selections.
2.
Please select the mode you wish to operate
by
using the
LEFT
or
RIGHT
selection.
(1) CAM TITLE
If
you enter a title,
the
title will appear
on
the monitor.
1.
Please position the arrow
to
point to 'CAM
TITLE'
by
using
the
UP
or
DOWN
Aselection.
2.
Please select 'ON'
by
using the
LEFT
and
RIGHT
selection.
Please press the Tact
SW
to complete ·ON'.
Gi"
Note
SE"cP
.tNS
"'R"L:~
~ t X;J~':JwPE
oJ
]
",yT~
aRL
R
T
",
4 ...JH. '<
.>1"
....
T=
.J
..
~J"P
="
oJ
~
::,PE
H
.J
"w
we
oJ
~
i2~
~t
q
::X'
lDNR
,.
E.-EL
I
';J~
RE T uP"
RE
-
.J
SPEC
Rc
..
-1=4"'"
L
~
['>-
>-
2 ~ Er:r['
oJ
'3
p"Loge:
.J
_
~"T
"
,,"-
'-,
'"'''"'
H
'1
-~
~
....
,'1"
,,"
F"'L
He.
L
t"
"'w
~H
8 '2E'
L'2
iO?l'
oJ
SPEC
Rc
.. R'" ,
'-
.J
- t
~"'
.J
~
"c
<~
oJ
'-<
,"
>-
';J
;>p",r:
b
~,-,,,
i:I",-, R E
>-" " ....
Ij
F~
.<:
O?E'
oJ
• If 'OFF' is selected, the
CAM
TITLE
does not appear
on
the monitor even if it has been
input.
3.
Up
to
15
letters
are
offered for the
CAM
TITLE.
CD
Please move the cursor
to
the letter to choose
by
using
the
UP
and
DOWN
selections.
® Set
an
ID
from
A,
B,-Y,Z,
0,1,-
8,9
by
using the
UP,
DOWN,
LEFT
and
RIGHT
selections.
@ Lock
in
the letters
by
using the tact
SW.
When
the letter
is
locked in,
the
cursor moves
to
the
next space.
@ Please repeat
the
above
to
input
CAM
TITLE.
CR'"
T T
..
E
-
tl
.......
....
-.'
- . ,
Page 11

8.
Functions and operation
.... Note
• If a wrong name
has
been input··
- If you press the Tact
SW
after moving the cursor
to
CLR.
all
the letters will
be
cleared.
- If you want
to
correct a letter. please move the cursor to the arrow at the bottom left
of
the screen and press the Tact
SW.
- Please position the cursor
on
the
letter you wish
to
correct, and then move the
cursor onto the
letter
you
wish to choose and press the Tact
SW.
4.
When
a name
has
been chosen, please select a position for the name to display.
CD
Please move the cursor onto 'POS' and then press the Tact
SW.
®
The
name will appear at the top left hand corner.
@ Please find the position you wish to display
the
name
by
using the 4 directional
selections,
and then press the Tact
SW.
5.
Please select 'END' and then press the Tact
SW
to complete
CAM
TITLE
input,
(2) O-EFFECT
t. Please position the arrow
to
point to 'D-EFFECT.'
on
the
SETUP
menu
by
using the
UP
and
DOWN
selections.
2. Plea
se
select
the
mode you wish
to
operate
by
using
the
Tact
SW.
- FREEZE :
You
can view still
or
moving pictures.
-
V-
FLIP :
You
can flip the picture vertically on the screen.
-
MIRROR :
You
can flip the picture horizontally on
the
screen.
-
ROTATE: You
can flip the picture rotate on the screen.
-
D-ZOOM :
You
can
use
a digital zoom of
xl
- x32.
.
PAN: -100 -100
.
TILT: -100 -100
- GAMMA :
USER
1 0.05 - 1.00
-
NEG
. IMAGE :
ON 1 OFF
O'EFFECT
• •
fe"
~.
~
<!;;;::"
c=·
~
ZC~'"
:"-
r
~-~
I'l -
~.
"'"11=:"
- .. ,
",.,."
"'t
..I
- RETURN : Select this to save the D-EFFECT menu setting and return to the
SPECIAL
menu.
8.
Functions and operation
(3)
RS485
This function sets
up
the camera communication status when controlling the camera
through
an
external control device.
1.
When the
SPECIAL
menu screen
is
displayed, press the
Tact
SW
so that the arrow indicates 'RS485'.
2.
Set
up
the mode using the Tact
SW.
-
CAM
10
: Determines the camera's identification
number. (between
0 and 255).
-
10
DISPLAY: Displays camera title on top left
the
screen.
p~Y8S
- : - -
~
..I
:::_
:;;:1=:
~
>('
","
"'t ..I
- BAUDRATE :
You
can select
2400/4800/9600/19200/38400/57600 bps.
- RETURN:
Select this to save the
RS485
menu setting
and
return
to
the
SPECIAL
menu.
(4) MOTION
1.
When
the
SPECIAL
menu screen
is
displayed, press the
Tact
SW
so that
the
arrow indicates 'MOTION'.
2.
Set
up
the mode using the Function Setup button.
- AREA SELECT:
You
can select up
to 4 MD
areas.
- AREA
DISPLAY: Determines whether
to
use
the
MD
area
selected
in
AREA
SELECT.
- LEFT/RIGHT: Determines the coordinate of the
horizontal axis.
-
WIDTH: Determines the coordina
te
of the horizontal size.
"'C;T
2'"
.
-.,
~
..
-p.-
~-
. ,
- ,
•
-'"
t -
_.
- i
. ' .
.,.~.
~..
;, •
..1
-
TOP
/BOTTOM : Determines
the
coordinate of the vertical axis.
-
HEIGHT : Determines the coordinate of
the
vertical size.
-
SENSITIVITY: Oetermines the coordinate of the sensitivity
-
RETURN
: Select this to save the
MOTION
menu setting and return to the
SPECIAL
menu.
(5)
PRIVACY
1.
When
the
SPECIAL
menu screen
is
displayed, press the
Tact
SW
so
that the arrow indicates 'PRIVACY'.
2.
Set
up the mode using the Function Setup button.
- AREA SELECT :
You
can select
up
to 8
PRIVACY
areas.
- AREA
DISPLAY : Determines whether to use the
selected
in
AREA
SELECT.
PR
vR:'::!
.
-.
_.
-~
-
. ,
._"-
t
~
- t
,
• I
i?,-"
r
.J
- LEFT/RIGHT: Determines
the
coordinate of the horizontal axis.
-
WIDTH: Determines the coordinate of the horizontal size.
-
TOP/BOTTOM : Determines the coordinate of
the
vertical axis.
-
HEIGHT : Determines the coordinate of the vertical size.
Page 12

8.
Functions and operation
-
COLOR:
You can select up to
16
PRIVACY
color.
- RETURN : Select this to save the
PRIVACY
menu setting and return to the SPECIAL
menu.
(6) SYNC
In
areas where the supply is at 60Hz, you can synchronize
the output phase
of
multiple cameras using the power
synchronization function (Line-Lock) without using a
synchronization signal generator.
.... Note
5PE
r
R~
~-
+.
r
~;
~
~ r ~"~
E
.J
~
,,~"!3:::
.J
-~ L'"
:1'.
"
He
~
~
,.
r
~,.
...
-
"'''-,,-~
.
.Jf:
>-"
~
t'
~r·
~'2'" ~.J
• When using
AC
power at 60Hz frequency, you c
an
use the L/L type synchronization.
• When the power is
DC
12V,
the SYNC. menu is fixed to the 'INT' mode.
(7) LANGUAGE
You can sele
ct
the menu language according to you
requirements.
- ENGLISH /
KOREAN
/ JAPANESE / CHINESE1,2
(8) RETURN
SPEC
RL
~
•••
E r
~ F ~
.J
~
«';'-<6;
.J
- -,::;"
:-,
~
""2
~
H~
':l
>-
r
C _
-"[
-.
,.
~
~-"'[L.""JE
~" ~ ~H
:<
>2E
T
",I<'''
p~'
.J
Select this to save the SPECIAL menu settings and return to the
SETUP
menu.
8-9, ADJUST
(1) SHARPNESS
As
you increase this value, the picture ou tline becomes
stronger and clearer. Adjust this value appropriately
depending on the sharpness of the picture.
(2) BLUE
Bl
ue
color gain adjustable.
(3) RED
Red color gain adjustable.
8-10. RESET
Resets the camera settings to the factory defaults.
8-11. EXIT
i1DuuS
T
..
~-,,~I'~
t
o t '
",-:::'
.
....
"t
T
<'"
P
.J
Press the
SET
button
in
the
EXIT
menu to save the current settings and exit the
SETUP
menu.
9.
Troubleshooting
If
there are problems
in
operating, please refer to the checkl ist below. If the problem
persists, please contact the agent where this product is purchased.
Problems
Troubleshooting
Nothing appears on the screen.
• Please check that the power cord
and line
connection between the camera and monitor are
fixed properly.
• Please check that you have properly connected
VIDEO cable to the came
ra
VIDEO output jack .
The
image
on
the screen
is
dim. •
Is
lens stained with dirt? Clean your lens with soft.
clean cloth .
• Set the monitor to proper condition .
•
If
the camera is exposed to too strong light. change
the
camera
position.
The image on the screen is
• Adjust the contrast feature of the monitor.
dark.
• If you have
an
intermediate device, set the
75Q
/ Hi-z
properly.
The
camera
is
not
working
• Please check that you have properly connected the
properly, and the surface of the
camera
to
an
appropriate power sour
ce.
camera
is
hot.
The
DAY
/NIGHT menu does • Please check that AGC of
EXPOSURE
SETUP
menu
not work.
is
'OFF'.
The SENS-UP function does • Please check that
AGC
of
EXPOSURE
SETUP
menu
not work.
is 'OFF'.
• Ple ase
check that S
HUTTER
of
EXPOSURE
SETUP
menu is 'FLK' or 'MANUAL' .
The
MOTION DETECTION • Please check if MOTION DETECTION function is
function
is
not
working.
turned on.
• Please check if
MD
LEVEL
is to o low.
• Please check the setting of the
MD
area.
Color is not correct. • Please check the setting of WHITE BAL
SETUP
menu.
The screen flickers continually.
• Please check that direction of camera turns toward
the
Sun.
Page 13

9.
Troubleshooting
11.
Specification
Problems Troubleshooting
Item
30NR
OayJNight Box Camera
Power
Source
DC12V I DC12V/AC24V Dual Power
RS-485 communi
cation
fails
.
•
Please
check
the
polarity
between
RS-485
Control
140mA I
DC12V(230mA
YAC2
4V(110mA)
Port
and
RS-485
cab
le.
CCO Size 1/3" Sony Super HAD
II
CCD
485 Control Board Connection Port I
RS-485
Control
Port
Total
Pix
...
NTSC : 811(H) x 508(V),
PAL
: 795(H) x 595(V)
(+)CONNECTION TERMINAL(TRX+) I
485+
EtrectlvePlxels
NTSC : 768(H) x 494(V), PAL : 752(H) x 582(V)
(-)CONNECTION
TERMINAL(TRX-ll
485-
Sync
Scanning
aysIIIm
2:1 Interlace
•
Please
check
the
RS-485 Communication
establishment
initial
value.
Synchron_
Internal Internal I Line Lock
Fntquency
NTSC Horizontal : 15.743KHz Vertical: 59.94Hz
*
RS-485
Communicat
ion establi
shment
initial
value
PAL: Horizontal : 15.625KHz Vertical: 50Hz
Item I Camera
ID
IBAUD
RATE I UART
MDDE
I RET PKT
Initial value I
1
I
9600
18-NONE-11
ENABLE
•
We
recommend
that
you
make
ground
connect
between
came
ra
and
contro
ller
in
order
to
maintain
safety
communication
cont
rol.
O.S.O
English, Korean, Japanese, Chinese1 ,2
Electrical
DWDR
INDOOR I OUTDOOR
BaIIghI~
ON I OFF I HSBLC
R
.....
utIon
Color:
560
TV
Linesf, BIW : 600
TV
Lines
S/N(Y
signal)
52 dB (AGC Off, Weight ON)
Min. 1_
0.00001 Lux (DSS), 0.2 Lux (DSS OFF)
at
F1.2
_&.hInce
ATW/PUSH/AWC/Manual (2,0000K
-20,000
OK)
--Spood
AUTO/MANUAL
(1
/60
-1/100,000
NTSC
, 1
/50
-1/100,000
PAL
)
10.
Dimension
(mm)
~p
AUTO I OFF (Selectable limit x2 - x128)
GaIn
Control LOW I MIDDLE I HIGH I OFF
127.0
oNR
ON I OFF
(0-100
Level)
22.0
15
.0
..
MoUonDelection
ON I OFF (4 Zones)
PRIVACY
ON I OFF
(8
Zones)
[[]
b
~
-c..""
...
___
V-REV
(Mirror)
ON/OFF
H-REV(Fllp)
ON/OFF
FREEZE
ON/OFF
SHARPNESS
Level
Adjustable
IRIS
Control
DC
Day & Night
COLOR I Black & White I AUTO
OIglial
Zoom
ON I OFF (x32)
Operotion
T~umIdIIy
-1 C'C to + 50·C I
30%
to
80%
RH
Storage
TemperaturelHumldity
·20
·C to + 60'C I 20% to 90%
RH
DImension
62(W) x 56(V) x 127(L)
WeIght
(Approx
.)
220g
I
250g
Specifications
are
subject
to
change
without
prior
notice
for
improvement.
Page 14

MEMO
MEMO
Page 15

MEMO
MEMO
Page 16

MEMO
MEMO
 Loading...