

Page 1
21
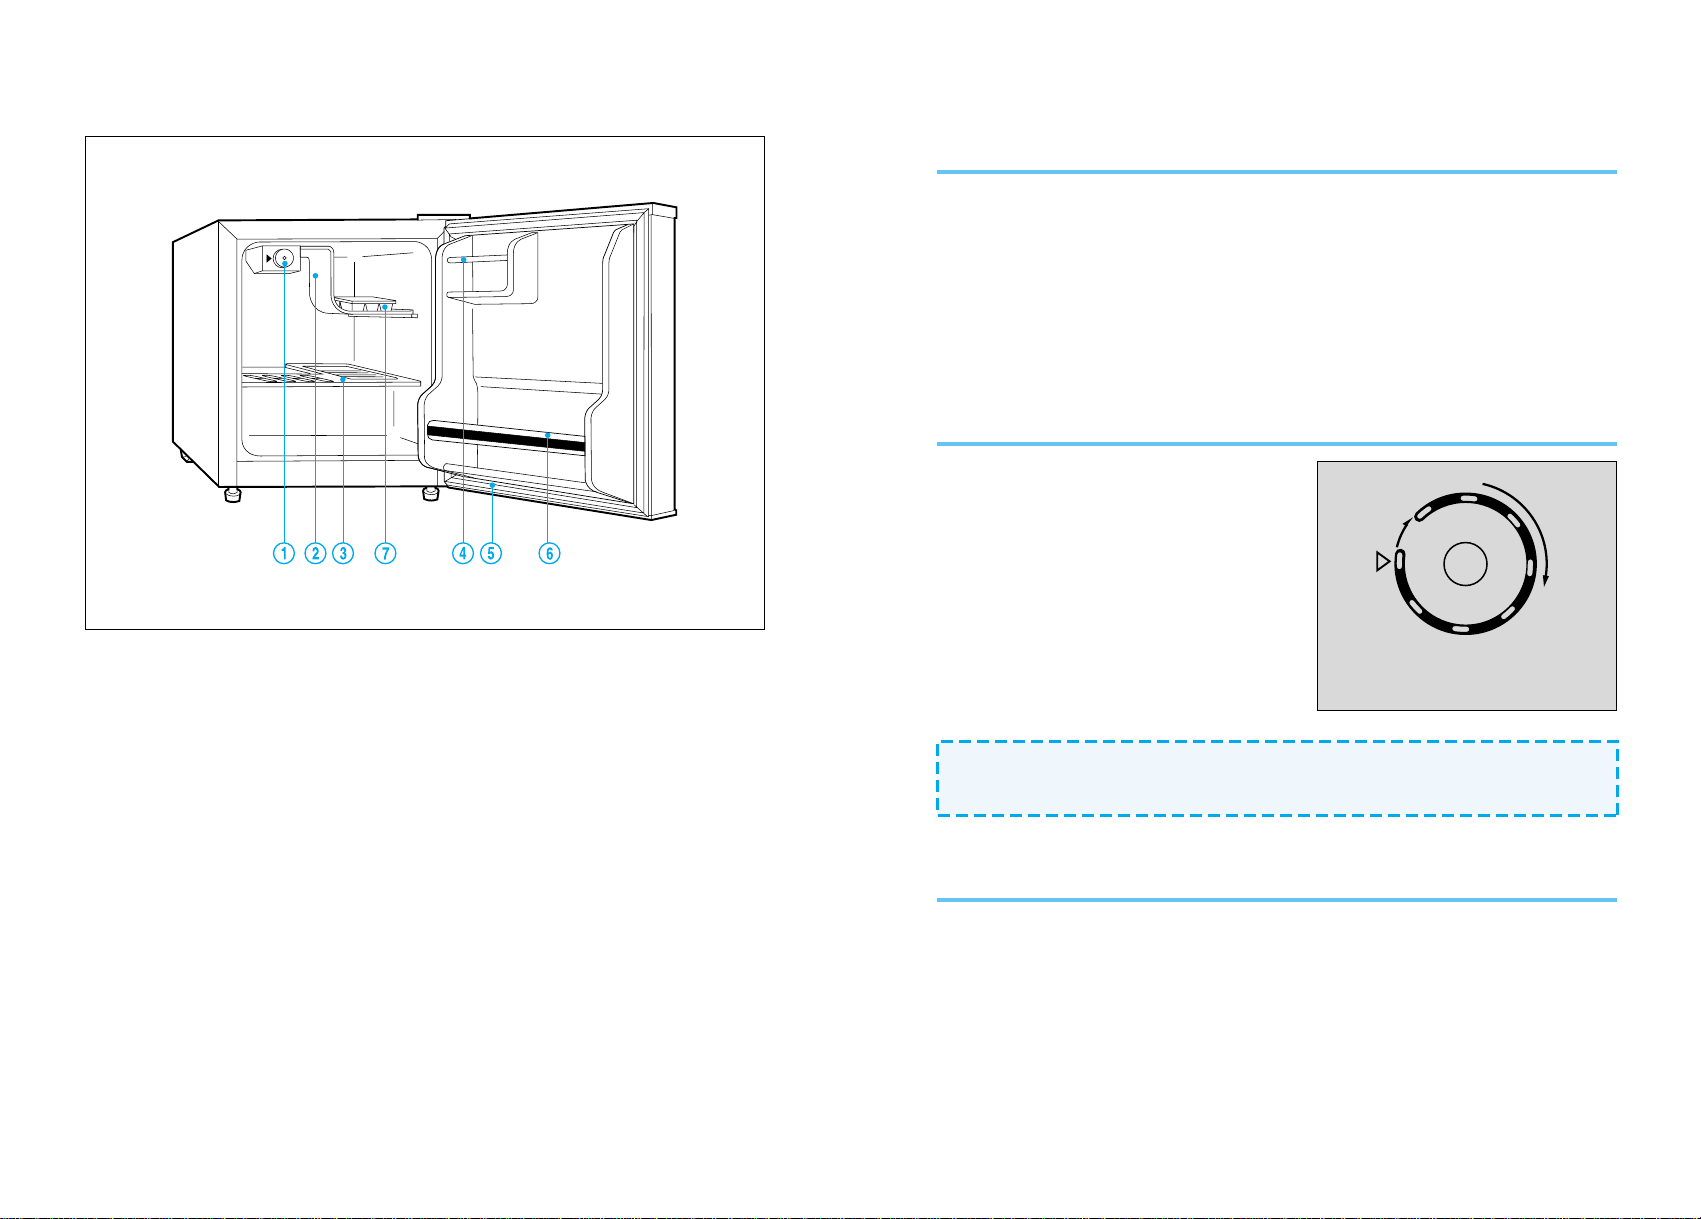
NAMES OF THE PARTS
! CONTROL BOX regulates the operation of the motor and controls the
inside temperature of the refrigerator.
@ EV APORATOR The heart of the refrigerator.
It evaporates the refrigerant fluid and therby absorbs
heat from the surrounding. Made of pure aluminum.
# SHELF has full width and can slide out.
$ USABLE P ACK for butter, jars or eggs.
% MAGNETIC DOOR SEALS Keep the refrigerator virtually air-tight all
along the edge, but is nevertheless easy to open.
^ BOTTLE RACK for bottles, cans or jars.
& ICE CUBE TRAY Ice cubes are easy to remove from the tray.
HOW TO OPERATE
Starting your new Refrigerator
1. Clean the refrigerator thoroughly . Wipe the outside with a soft dry cloth, the
inside with a damp cloth.
2. Keep the door open and insert the power supply cord into the socket.
3. Turn the thermostat dial to “7”. Close the door and let the refrigerator
operate for 15-20 minutes.
The freezer should then show some traces of frost.
T emperature control
Y ou can control the inside temperature by
turning the thermostat dial. Higher numbers
mean greater cooling power, smaller
numbers mean less cooling power. To make
ice cubes in the freezer compartment, set
the dial to “7”. The dial does not have to be
set exactly on the numbers, but can be any
place in between.
How to defrost
Defrost the refrigerator when the frost accumulated on the evaporator is about
5mm (1/5inch) thick.
Set the thermostat dial to “OFF”. Remove frozen or perishable foods.
Keep drip tray in place. Defrosting usually takes a few hours. T o defrost quickly
remove all foods from the refrigerator and leave the door open.
Never use a knife or other metal instrument to remove ice/frost from the
evaporator. After defrosting, empty water from drip tray, return the thermostat
dial to the desired position to start refrigerating again.
NOTE: Wait 3 to 5 minutes before restarting if you unplug the machine.
Unit may fail to operate properly if restarted too quickly .
7
OFF
1
TEMPERATURE
CONTROL
C
O
L
6
2
D
E
5
R
4
3
Page 2
43
HOW TO CLEAN
Cleaners: The cleaners noted below are available. Never use harsh, abrasive
cleaners, heavy-duty cleaners, or solvents on any surface.
Exterior: Wipe with damp, sudsy cloth, rinse and dry. For stubborn stains and
for periodic waxing, use silicon wax.
Evaporator: When refrigerator needs defrosting turn thermostat dial to “OFF”.
Do not use sharp instruments.
Refrigeration Section: Wash shelves and other removable parts in warm sudsy
water, rinse and dry. Wash interior with baking soda solution (3 Table spoons to
one quart of water) or warm sudsy water, rinse and dry .
Magnetic Door Seals: Wash with warm sudsy water.
The Finishing Touch: Replace all parts and return thermostat dial to desired
setting.
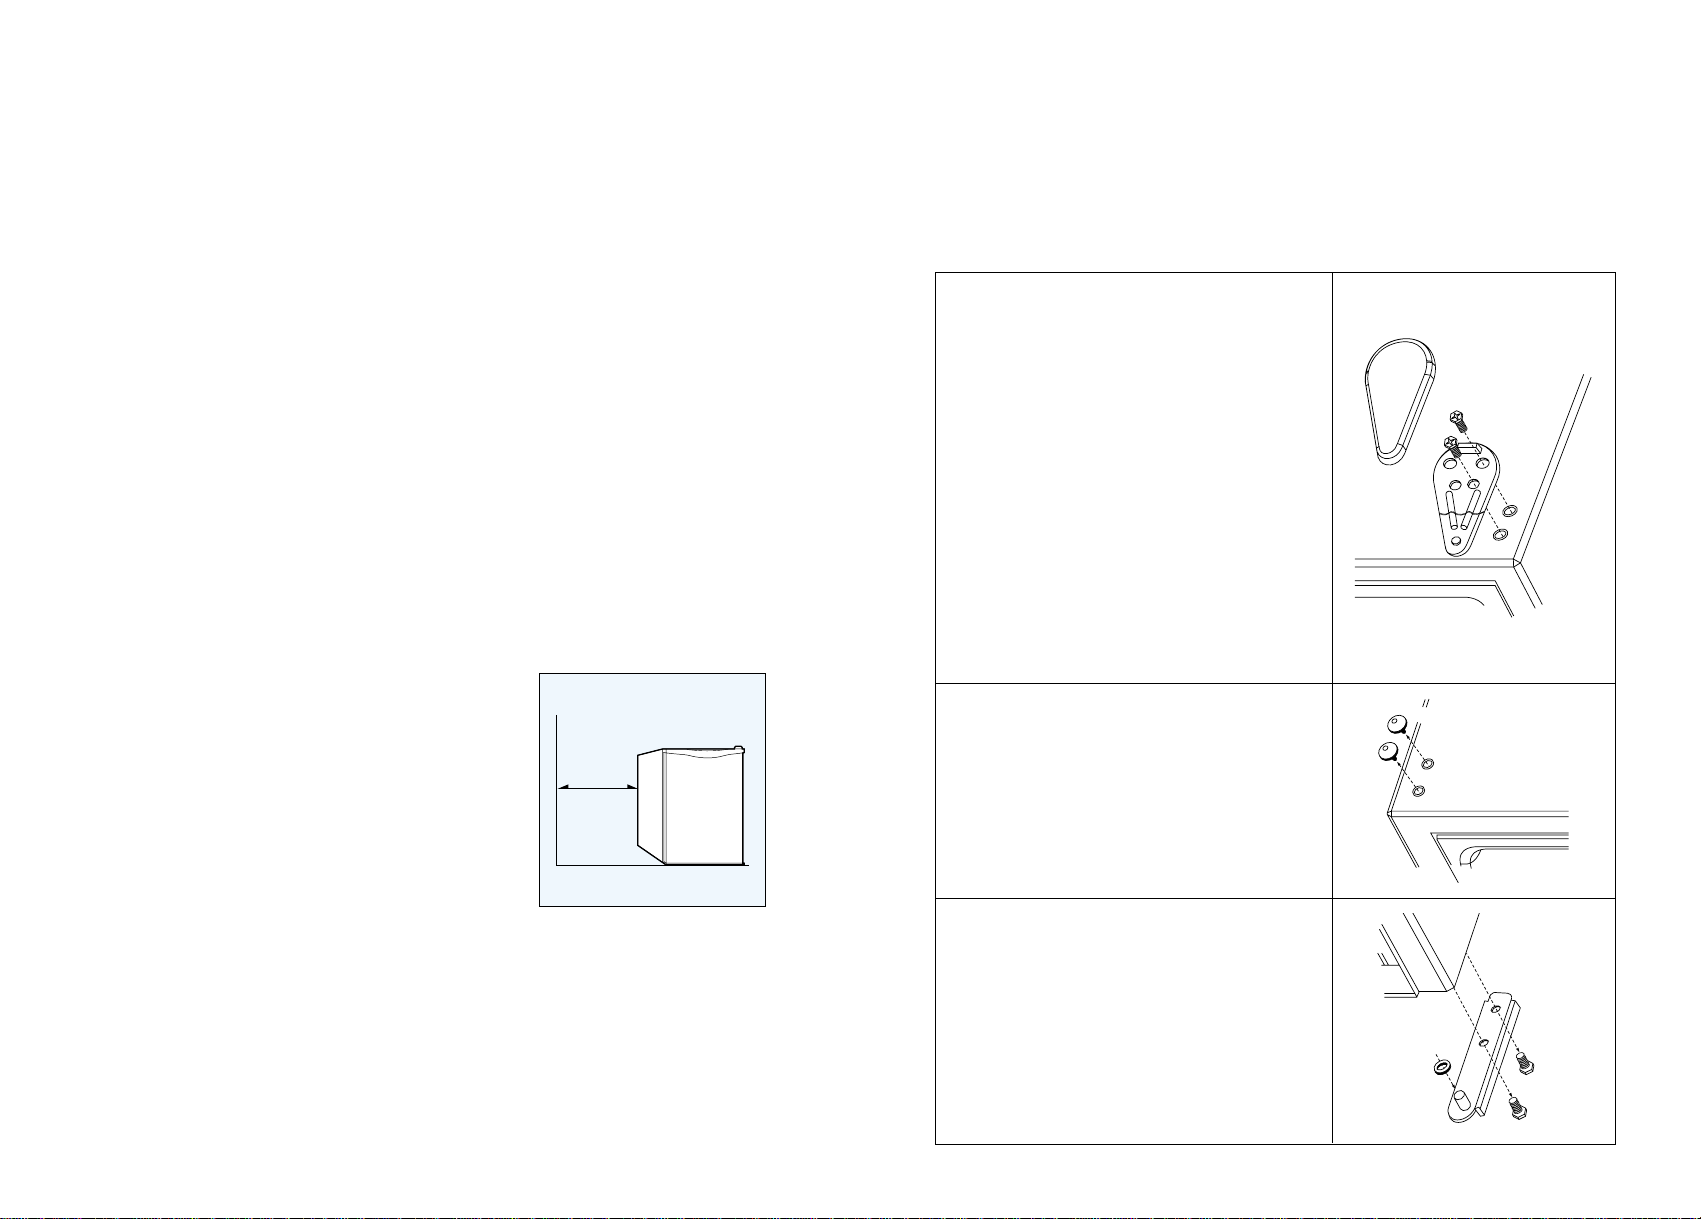
HOW TO INSTALL
Install refrigerator in a convenient location away from extreme heat and cold.
Allow sufficient clearance between the refrigerator and side wall so the door
will open for a fully usable interior. Refrigerator is not designed for recessed
installation.
Select a space with strong level floor.
Allow 5 inches of space between the
refrigerator’s side and the wall.
CHANGING THE REVERSIBLE DOOR
This refrigerator has been built with the door hinges on the right.
If you wish to change the opening direction, follow the instruction below:
• Unplug the refrigerator from its electrical outlet.
• Empty everything in the refrigerator , including shelves, food, etc.
1. Remove the hinge cover on the right top
of the cabinet.
2. Remove the two screws (using a ratchet
tool with a 8MM socket) that hold the top
hinge to the cabinet. Keep these screws
for later use.
3. Lift the top hinge straight up to free the pin
from the socket on the top of the door.
4. Lift the door and place it on a padded
surface to prevent scratching it.
5. Remove the plug buttons from the upper
left holes as illustrated and transfer them
to the uncovered holes at the right side.
Be sure to press the plug buttons firmly
into the holes.
6. Lay the cabinet on its side down on the
floor. Remove the two screws that hold
the bottom hinge to the cabinet using a
10MM socket. Keep these screws and
washers for later use.
Top hinge
Hinge cover
Plug button
Bottom hinge
5
inches
Page 3

5 6
WHAT TO DO...
When out of operating for a long time:
• Remove the power supply cord.
• Dry your refrigerator opening the door for 2-3 days.
When you get ready to move:
• Securely fasten removable interior parts (or move and package them
separately)
• Do not lay your refrigerator horizontally, or compressor may be damaged.
When you need service: Before you call for service make sure you
need it, check a few things noted below for yourself first.
If refrigerator is not operating:
• Is the power supply cord unplugged?
• Is home fuse blown or circuit breaker off?
If refrigerator is warmer than usual:
• Has the door been open frequently or for a long period?
• Is refrigerator overcrowded-preventing good air circulation?
• Is the hot thing stored without cooling?
• Is the clearance between refrigerator’s side and the wall allowed
sufficiently?
If there are unusual sounds:
• Is refrigerator placed on the level?
• Are foreign objects behind the refrigerator?
• Are dishes on refrigerator shelves vibrating?
If so, rearrange the dishes.
7. Insert the bottom hinge at the left side
using the two screws previously removed
in step 6.
NOTE: Do not tighten screws.
8. Stand the cabinet.
9. Replace the door making sure the bottom
socket enters the bottom hinge pin.
Be sure washers are in place.
10. While holding the door in the closed
position, secure the top hinge at the left
side using the two screws previously
removed at the beginning in step 2.
Do not tighten the screws until the top of
the door is leveled with the top cabinet.
1 1. Replace the hinge cover .
12. Tools required:
-8MM & 10MM socket-ratchet.
-Putty knife or thin-blade screwdriver.
If the supply cord is damaged, it must be replaced by the manufacturer or its
service agent or a simmilary qualified person in order to avoid a hazard.
Page 4

Model No.: FR-062R-DS
Thank you for selecting this refrigerator.
Before use, please read this manual carefully.
REFRIGERATOR
INSTRUCTION MANUAL
=
 Loading...